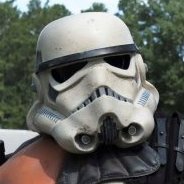
Cricket Posted November 9, 2020 Share Posted November 9, 2020 TD-10401 Requesting Deployment Name: Christine Lee 501st TD ID with a link to 501st profile: TD-10401 https://www.501st.com/members/displaymemberdetails.php?userID=23755 MEPD forum name: Cricket Garrison: Georgia Garrison Armor and Helmet: RS Props Stunt. -Helmet off photo. -One full armor, helmet on, front photo. -One full armor, helmet on, right side photo. -One full armor, helmet on, left side photo. Showing the pouches mounted on sides if you have them and the gap closed. -One full armor, helmet on, back photo. Please note that additional weathering was applied to backpack. See detail backpack pics below. -One full armor, helmet on, back photo without backpack. -Canvas or elastic shoulder straps detail photo. -Canvas belt detail photo with pouches. -Abs details close up photo. Showing the 3 buttons an TD abdominal plate. Neck seal: Geeky Pink Pauldron: Trooper1 -Detail photos of the rubber gloves and latex handguards - Detail photos of all snaps, screws and buttons on the armor. Bucket: -A close up photo clearly showing the flat green lenses. Please note that the frown mesh has been removed! I forgot to take it off when taking initial photos. And I know that my brow is on the low side. I prefer a lower brow. -Detail photo showing no stripes on all grey traps and tears. -Detail photo of hovi-mix mic tips (or replica) mounted on helmet. -Detail photos of blue tube stripes. Backpack: Self-build from assorted vintage, found, and 3D printed parts. - Detail photos from all sides, separately. Weapon: Praetorian DLT-19. -At least one picture showing the whole weapon. -Detail pictures of mods required for the specific weapons. Finally: -One (or several) full body action (or attitude poses) good quality picture. And these last few just for fun. This is me and my son. He's trying out the kit I 3D printed for him for the first time, so this was an awesome outing for both of us. Please let me know if you need additional photos! Thank you for your time and consideration to the MEPD Police Officer Program. -- Cricket TD-10401 4 Quote Link to comment Share on other sites More sharing options...
Hausi Posted November 10, 2020 Share Posted November 10, 2020 Hi Christine, welcome and thanks for your interest in becoming a deployed Police Officer of the MEPD. You have done an overall amazing job: -very tidy application – thanks for that -great quality build, both, armor and backpack. I assume the fitting wasn´t easy, we also have a lady in our squad and I know how much time and effort has gone into making her armor fit. Your gear suits you very well, it looks really cool and – what is most important - you look really happy. -the backpack is gorgeous too, kudos to you for building it yourself. -your sons armor is awesome! And you have 3D printed, built and painted all of that yourself? You´ve got some serious skills and my greatest respect,great paintjob too. I really like those pics, thanks for sharing. At first glance everything looks good and I really dig your weathering but let´s get into those details with the review. Application Review: Part 1 Name: Christine Lee Legion ID: TD-10401 Forum Name: Cricket Garrison: Georgia Garrison Helmet a. Green lenses: check b. Paint color of traps / tears: check c. Correct number of teeth: check d. Mic tips: check e. Vocoder color: check f. Tube stripes: check g. Rank bar on ears: check h. Brow: check i. Side screws (ears): check j. Weathering: check k. no mesh behind teeth: check *additional comments* It seems people already know me and my preference for the higher brow. However, I am getting used to seeing the lower brows and have to admit that I actually have grown more fond of it. One thing to mention though: did you paint the helmet or did the guys and gals at RS do that? Here´s the reason why I am asking: you have clearly used a stencil which is absolutely okay but the direction of the brush strokes is wrong, it should be painted vertically. But do not worry, this isn´t going to hinder your approval. RESULT ON HELMET Checked & Cleared Armor details a. elastic straps shoulders: check b. neck seal: check c. black undersuit: check d. shoulder bells: check e. biceps: check f. forearms: check g. pauldron: check h. chest / back plate: check i. kidney / butt plate: check j. ab plate / side rivets / cod: check k. strapping system: check l. thighs: check m. shins / calves: check n. sniper plate: check o. boots: check p. gloves: check q. hand plates / guards: check r. ammo belt (waist): check s. ammo belt (right knee): check t. canvas belt: check u. pouches: check v. weathering: check *additional comments* Nice armor, great job in making it fit. RESULT ON ARMOR Checked & Cleared Backpack a. details: see comments b. weathering: check *additional comments* Your pack looks great with all those original vintage parts. I really dig it that you even took the time and made the effort of adding the red support straps, good eye for the details. There are some things to address though: 1 the mortar tube detail is too long, you will have to trim it a little further to match screen references as no pack had such a long detail. 2 The grey bottles have the right colour but they are way too shiny (while the this isn´t as obvious with the seedtrays, which is quite interesting). Also they are too thin which makes them look too long as well, so please get some new bottles which are larger in diameter (this will make it look much more screen accurate, trust me) and give them a final satin matte clear coat. RESULT ON BACKPACK PENDING Weapon a. details: check b. weathering: check *additional comments* Nice DLT, great details. Is that a Hyperfirm or an RS? Still…I always encourage people to go “full Bapty”… and there is a Bapty variant of the DLT-19 too…would also be much more in line with those red back support straps. RESULT ON WEAPON Checked & Cleared Christine, this was your first review! There´s not much to do, those small changes will be a walk in the park, especially knowing that you´ve built that pack yourself, so you know how it comes apart and goes back together again. I expect to hear from you soon, keep up the great work. Cheers Hausi - MEPD Deployment Officer 2 Quote Link to comment Share on other sites More sharing options...
Airborne Trooper Posted November 10, 2020 Share Posted November 10, 2020 Impressive so far! Just a few corrections which should be easy! 1 Quote Link to comment Share on other sites More sharing options...
Cricket Posted November 10, 2020 Author Share Posted November 10, 2020 Thank you so much for taking the time to review my application! I will definitely get on those pack fixes immediately. "One thing to mention though: did you paint the helmet or did the guys and gals at RS do that? Here´s the reason why I am asking: you have clearly used a stencil which is absolutely okay but the direction of the brush strokes is wrong, it should be painted vertically. But do not worry, this isn´t going to hinder your approval." I assembled and painted the lid myself, so whatever issues are there are all me. The only stencils I used for the helmet were for the blue tube stripes and for the black stripes inside the gray areas (which are no longer there because I painted over them with gray). I'm not sure what you mean by stenciling any other areas. I'm guessing the gray areas to cover the black stripes? Again, all that was done free hand. So if there are gray brush strokes, I was just slapping the paint on to cover the black stripes. I didn't know there was a preferred direction for that. Interesting stuff! "1 the mortar tube detail is too long, you will have to trim it a little further to match screen references as no pack had such a long detail." Yeah, I kind of figured that as such. This was a 3D printed part, and it will not be any issue at all to easily trim it down. "2 The grey bottles have the right colour but they are way too shiny (while the this isn´t as obvious with the seedtrays, which is quite interesting). Also they are too thin which makes them look too long as well, so please get some new bottles which are larger in diameter (this will make it look much more screen accurate, trust me) and give them a final satin matte clear coat." My search is on! Will do. Would you have any particular recommendations? I used Wet Wipes bottles, but it would help a lot to have an actual size reference. I saw a 9.4cm width measurement from Strider's pack reference for the bottles. Would this be better? My current bottles are 7.5cm wide at the bottom. I agree that shorter bottles would look better on the pack. "Nice DLT, great details. Is that a Hyperfirm or an RS?" Thank you! It's a Praetorian Blaster. Very happy with the detail work they put into it. "-great quality build, both, armor and backpack. I assume the fitting wasn´t easy, " Thank you! I'm just 5'4", and this was my very first armor build. It took me about a year to shrink it down properly to fit. My second TK was much easier to build because I had learned what to do to make it fit. Since then, I've become the "go-to" person for sizing down armor in my garrison. haha... I've even sized down a garrison friend's TK to fit her 4'11" frame. Never too short to troop! "-your sons armor is awesome! And you have 3D printed, built and painted all of that yourself? You´ve got some serious skills and my greatest respect,great paintjob too." Thanks! Yes, I did it all myself. Lots of sanding, Bondo, sanding, priming, sanding, painting... Very glad I did it though. I learned a lot. It was my very first 3d armor build that I've totally completed, and much more work than building an RS Props TK, that's for sure! Reprinting armor parts as he grows is easy and relatively inexpensive. Oh, one last question! Will you need just new pics of just the corrected backpack, or will you need pics of me wearing the corrected backpack? Thanks again for all your feedback!!! Much appreciated! 1 Quote Link to comment Share on other sites More sharing options...
Hausi Posted November 10, 2020 Share Posted November 10, 2020 Hi Christine, thanks for taking the time to answer my questions. Your son's armor you have built is simply great. I just realized that I didn't make myself clear about what I meant with the brush stroke direction, I meant the tube stripes as these were also freehanded on the original helmets but it's completely okay to use a stencil. It's okay if you just post some new pics of your improved pack. No need to put on all your gear again... unless you would like to do that. 1 Quote Link to comment Share on other sites More sharing options...
Hausi Posted November 10, 2020 Share Posted November 10, 2020 Have a look at this thread, here you can find the diameter of the lower bottle I have used. The upper bottle is slightly smaller in diameter. 1 Quote Link to comment Share on other sites More sharing options...
Cricket Posted November 11, 2020 Author Share Posted November 11, 2020 "I just realized that I didn't make myself clear about what I meant with the brush stroke direction, I meant the tube stripes as these were also freehanded on the original helmets but it's completely okay to use a stencil. " Ah, I think I get you now. I actually sponged my tube stripes on with stencils, so there are no brush strokes to speak of on those tube stripes. haha... Either way, no biggie, just thought you'd like to see how I applied mine. "It's okay if you just post some new pics of your improved pack. No need to put on all your gear again... unless you would like to do that. " Roger that! I don't know when I'll be able to wrangle my hubby to take full armor shots of me again, so it'll just be the backpack. Thanks for the info about the bottles. I dug up an old bottle of shampoo and would like to know if it should be larger or if it's good for the upper bottle. Diameter of the white shampoo bottle is 8.2cm. I've got a slightly larger bottle arriving today that should work for the lower bottle (yay, Amazon one-day delivery!). The slightly larger bottles have a diameter of 9.1cm. For comparison, diameter of the gray bottles that were previously on my pack are 7.4cm (widest part). Any feedback on the new bottle sizes would be much appreciated! And about the thermal detonator plate... it was completely stuck on the tube. No matter how gently I tried to remove it, I ended up destroying it while trying to pry it off- even though it was stuck on with e6000! Ah well. At least my removal efforts were rewarded with some bonus 'weathering' to the top end cap! I reprinted a shorter one last night, and will be painting it once the rain clears out tomorrow. Does this one look better? Would be good to get feedback on this as well before I go about finishing the piece. Thanks! 1 Quote Link to comment Share on other sites More sharing options...
Hausi Posted November 11, 2020 Share Posted November 11, 2020 That white shampoo bottle is perfect. I also didn't like the tapered look at the bottom of your old bottles. The other bottle sounds good too. The mortartube detail looks good as well. Strange that you couldn't remove the old one, E6000 is normally quite easy to remove, I use a heatgun to warm it up and if it still doesn't want to come off, you can use dental floss, just slide it in behind the part you want to remove and pull it down gently. Quote Link to comment Share on other sites More sharing options...
Cricket Posted November 11, 2020 Author Share Posted November 11, 2020 Okay, feedback on these bottles, please. The top bottle is sitting a little lower than it will be attached (it's just dry fit on there). My gut is saying that the top bottle could be shortened even more, though. The bottom bottle is fit how it will be attached after painting. Would like to make sure they look right before painting tomorrow. Thanks! 1 Quote Link to comment Share on other sites More sharing options...
bigwam Posted November 11, 2020 Share Posted November 11, 2020 Much better! 1 Quote Link to comment Share on other sites More sharing options...
Hausi Posted November 11, 2020 Share Posted November 11, 2020 That's looking great now, you are good to start painting. 1 Quote Link to comment Share on other sites More sharing options...
Cricket Posted November 11, 2020 Author Share Posted November 11, 2020 Awesome! Thanks! Quote Link to comment Share on other sites More sharing options...
OnkelPaschulke Posted November 12, 2020 Share Posted November 12, 2020 Awesome work Christine! Quote Link to comment Share on other sites More sharing options...
Cricket Posted November 13, 2020 Author Share Posted November 13, 2020 Both bottles replaced/painted and new thermal detonator panel created/installed. Fingers crossed that I got it right!!! Let me know if you need additional photos. Thanks! Quote Link to comment Share on other sites More sharing options...
Hausi Posted November 14, 2020 Share Posted November 14, 2020 Hi Christine, welcome back. You completed those adjustments very quickly and did a great job. Your pack looks even better now than it did before, don´t you think as well? So here comes you new review: Application Review: Part 2 Name: Christine Lee Legion ID: TD-10401 Forum Name: Cricket Garrison: Georgia Garrison Helmet a. Green lenses: check b. Paint color of traps / tears: check c. Correct number of teeth: check d. Mic tips: check e. Vocoder color: check f. Tube stripes: check g. Rank bar on ears: check h. Brow: check i. Side screws (ears): check j. Weathering: check k. no mesh behind teeth: check *additional comments*RESULT ON HELMET Checked & Cleared Armor details a. elastic straps shoulders: check b. neck seal: check c. black undersuit: check d. shoulder bells: check e. biceps: check f. forearms: check g. pauldron: check h. chest / back plate: check i. kidney / butt plate: check j. ab plate / side rivets / cod: check k. strapping system: check l. thighs: check m. shins / calves: check n. sniper plate: check o. boots: check p. gloves: check q. hand plates / guards: check r. ammo belt (waist): check s. ammo belt (right knee): check t. canvas belt: check u. pouches: check v. weathering: check *additional comments*RESULT ON ARMOR Checked & Cleared Backpack a. details: check b. weathering: check *additional comments* Great-looking pack! RESULT ON BACKPACK Checked & Cleared Weapon a. details: check b. weathering: check *additional comments* RESULT ON WEAPON Checked & Cleared Christine, this was your second and final review! Your gear looks great and you are a worthy addition to the ranks of the MEPD´s finest. Be proud of yourself, you have truly earned it! You have successfully followed the guidelines in regards to the MEPD CRL and have met all requirements. Please send the pic you want to use to Luis (Sandman Tigui) and we'll get you squared away. I will have your updated information uploaded into the MEPD system asap. Congratulations on becoming a Deployed Officer of the MEPD! Cheers! Hausi - MEPD Deployment Officer 1 Quote Link to comment Share on other sites More sharing options...
bigwam Posted November 14, 2020 Share Posted November 14, 2020 Congratulation ! 1 Quote Link to comment Share on other sites More sharing options...
OnkelPaschulke Posted November 14, 2020 Share Posted November 14, 2020 Congratulations Christine! Gesendet von iPhone mit Tapatalk 1 Quote Link to comment Share on other sites More sharing options...
Cricket Posted November 14, 2020 Author Share Posted November 14, 2020 Thank you soooo much!!! This approval seemed more challenging to me than when I applied for Centurion over at the FISD. I'm so excited to have finally accomplished this and thrilled to join you all in the sandpits! 2 Quote Link to comment Share on other sites More sharing options...
Lukris Posted November 14, 2020 Share Posted November 14, 2020 Well done Christine Sent from my SM-G975F using Tapatalk 1 Quote Link to comment Share on other sites More sharing options...
TheSwede Posted November 21, 2020 Share Posted November 21, 2020 Congratulations and welcome to P.O 1 Quote Link to comment Share on other sites More sharing options...
DarthStevius Posted November 22, 2020 Share Posted November 22, 2020 Awesome work Christine. Congrats and welcome to PO 1 Quote Link to comment Share on other sites More sharing options...
mikelbrierly Posted December 30, 2020 Share Posted December 30, 2020 Congratulations Christine!! This pack looks freakin awesome!! Also you are the Bondo QUEEN. I can't get over your thermal detonator cleanup AND that mini FO TK. I know tons of folks would love a thread on how you get such perfect results smoothing out tight places on a piece like this - Quote Link to comment Share on other sites More sharing options...
Cricket Posted December 30, 2020 Author Share Posted December 30, 2020 28 minutes ago, mikelbrierly said: Congratulations Christine!! This pack looks freakin awesome!! Also you are the Bondo QUEEN. I can't get over your thermal detonator cleanup AND that mini FO TK. I know tons of folks would love a thread on how you get such perfect results smoothing out tight places on a piece like this - Hey Mikel, Thanks for those kind words! I still feel like a noob around Bondo, but not as much as before. That thermal detonator was accomplished by sanding first; it's ABS, so sanding was quick and easy to get rid of the larger print lines. Next, I slapped on some Bondo spot putty on the large flat areas and wet sanded them smooth to ensure a uniform surface. After that, I applied several heavy layers of filler primer. I didn't care about drip lines or imperfections because ultimately it was going to get sanded anyhow. So I went crazy with the stuff. After letting it cure for a few days, I hit it with a quick wet sand with 400 grit, then applied three coats of gloss white- going heavy on the last coat. This seems to do the trick with filling in any ridges/imperfections in the print. Then a few layers of matte clear, and DONE. TLDR; I didn't sand any of those tight areas at all. (too lazy!) Quote Link to comment Share on other sites More sharing options...
mikelbrierly Posted December 30, 2020 Share Posted December 30, 2020 Thanks for replying and for the info!! Since I posted my question I followed your FOTK build thread link and realized you had already VERY thoroughly laid out all the steps you took! Sorry for making you repeat yourself. Also the story and video of you, Jimmy, and your son was fantastically well written and the absolute embodiment of the 501st. Thanks for being awesome! (I rarely brave FISD since MEPD is my safe space , but you guys should go check out Christine's thread for that if you have time. Totally brilliant.) 1 Quote Link to comment Share on other sites More sharing options...
519 Trooper Posted February 13, 2021 Share Posted February 13, 2021 Congratulations on the deployment trooper. Quote Link to comment Share on other sites More sharing options...

Recommended Posts
Join the conversation
You can post now and register later. If you have an account, sign in now to post with your account.