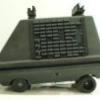
MonCal Posted April 10, 2013 Share Posted April 10, 2013 To go along with the landspeeder project we have been doing a lot of research on the sandtroopers in the famous "roadblock" scene in Mos Eisley from ANH. I have slowly done research on the backpacks here and there over the years but I had no idea how much research was needed. These silly props / costume pieces are kind of intense. They are not all the same, of course. Each trooper is slightly changed for each scene in the movie to make it seem like there are more than 7 sandtroopers (total) with 5 backpacks (total). Lucas (presumably) had pauldrons flipped over, pouch arrangement, and blasters changed per each scene. Well, I'm focusing on the roadblock scene. Going off of the awesome reference and research that has already been done here on the MEPD I have delved a little further in designing this scene. The 501st folks here have already given the packs a number, for reference so I will continue to follow suit. Here is the arrangement of the packs in this scene: I will borrow the awesome reference / research that has already been done here on the MEPD and add a few more notes of interest, for this particular scene: Pack #1: Pack #2: Pack #3: Pack #4: Pack #5: Now, here are just a few reference shots for each of those packs: Pack #1: Pack #2: Pack #3: Pack #4: To show the MG34 (based on this particular photo): Pack #5: For each of the sandtroopers in the "roadblock scene", this is each of their pack, pauldron, pouch, and weapon configurations, using the backpack number for reference: Pack #1: * Black pauldron (white underneath) * "roadblock" pouch * Smooth MP40 pouch on left shoulder * MG-15 * Cheese grater hand plate (the one with the bumps) Pack #2: * White pauldron * no pouches on the hips * MP40 pouch (with the tool pouch) on left shoulder * MG15 Pack #3 (Move along trooper): * Orange pauldron * Leather MP40 pouch on right hip * Leather MP40 pouch on left hip * MP40 pouch (with the tool pouch) on left shoulder * E-11 blaster Pack #4: * Black pauldron (not sure what color underneath) * Leather MP40 pouch on left shoulder * Possibly MP40 pouches on both hips, depending on the reference shot * MG34 (based on one reference shot) Pack #5: * White pauldron * Small spanish pouch on left hip * Leather MP40 pouch on left shoulder * E-11 blaster Guy with no pack (standing behind speeder on right side, as you're looking at the scene) * Orange pauldron * Large spanish pouch on left hip * no sniper knee * white ears (don't paint them gray) * MG-34 Now, on to our progress pics All 5 kits organized and ready for attention: Soaking the faucet covers in water so the labels will come off easier: 5 aluminum pack frames built and ready for paint: I've been making the "seed trays" for years but with recent events I decided to revisit the design and make our vacuum forming tools more accurate: Pulled in .090 virgin grade black ABS plastic so durability is not a question: The "bee stinger" / faucet cover needed a cap / cover to be more accurate than just using the faucet cover off the shelf so I sculpted a cap for it: The "bee stinger" kit with the vacuum formed cap: Our "lab pipe" kit: The "radar dish" kit: Now, 2" PVC isn't the "correct" size but I've bolted it to a piece, just to show the profile shot: And a reference shot: I designed a kit for the cistern: A few shots from the tutorial for the cistern kit: Pack #1 in the roadblock scene has the threads cut off of the cistern so ... cutting that puppy off with the bandsaw : With a coat of primer: On to the most difficult part of the kit... the radio. Aaron (garbz) found a model of the radio that has some parts that are "almost" correct so he purchased a radio and is helping us reference and design the radio for the TD pack. Thanks Aaron! This is the faceplate and main dial: The main dial isn't 100% correct on this model of radio but it's a good reference piece to work from. A few of our reference shots and design notes: We are getting the faceplate and knobs 3d printed, using the state of the art technology (SLA) so the parts come out perfect, with no cleanup, ready to be molded: I currently don't have my costs worked out for all the individual "kit" pieces yet but eventually we will so just keep an eye out. We are also crazy busy so I don't know how soon we'll get these all finished up. I just wanted to share what we have so far.... actually there is more... I just need to edit a bunch of photos Enjoy! Who remembers this from Saturday morning cartoons? ..."After these messages..... we'll be riighht back!" Quote Link to comment Share on other sites More sharing options...
Rolf Posted April 10, 2013 Share Posted April 10, 2013 Great work, i will follow your project Quote Link to comment Share on other sites More sharing options...
inglorious trooper Posted April 10, 2013 Share Posted April 10, 2013 ohhhhh yeah cal, you have been a busy guy dude,your attention to detail is awsome and its great to see your foot rather than your big toe into the amazing but can be very confusing world of the sandy backpack!!!!!!! looking forward to more photos of your build as its done,i will be keeping a special eye out!!! p.s. let your wife know i havent forgot about my snowy,funds have just hit a bit of a bump but will be on there way real soon,all the best mate!!!! Quote Link to comment Share on other sites More sharing options...
SCRIBBLER Posted April 10, 2013 Share Posted April 10, 2013 Awesome! We'll all be following this thread for sure! Oh, our fearless MEPD Detachment Leader (Dirty Boy) likes to build and sell all the pack versions too. Quote Link to comment Share on other sites More sharing options...
Smally Posted April 10, 2013 Share Posted April 10, 2013 Now that's how you do revision! Nice work going on here. Watching this for progress! Quote Link to comment Share on other sites More sharing options...
sir david Posted April 10, 2013 Share Posted April 10, 2013 awesome stuff buddy! Quote Link to comment Share on other sites More sharing options...
SCRIBBLER Posted April 10, 2013 Share Posted April 10, 2013 @ Mon Cal -- in reference to "..."After these messages..... we'll be riighht back!" " Man...memories, Brother! ABC Saturday mornings! Quote Link to comment Share on other sites More sharing options...
inglorious trooper Posted April 10, 2013 Share Posted April 10, 2013 forgot to say cal, once youve done all the finding you need it would be great if you could catch a plane over the pond and come to live!! we are without a pack supplier here ,so if you could consider please! the payment will be nothing,but our love and respect from the britannia patrol ozzes a thousand words, ohh,that goes for rick and john too,were really not fussy! all the best,pack makers of the world,sorry U.S. unite Quote Link to comment Share on other sites More sharing options...
P3laton3 Posted April 10, 2013 Share Posted April 10, 2013 for the Pack #4 follow my tread here http://forum.mepd.net/index.php?showtopic=11458&hl= the frame should be slightly different from the others, with rounded corners and the lab pipe should be lower. Hopefully it helps somehow Quote Link to comment Share on other sites More sharing options...
Robster Posted April 11, 2013 Share Posted April 11, 2013 very nice work my friend:) Quote Link to comment Share on other sites More sharing options...
THE TROOPER Posted April 11, 2013 Share Posted April 11, 2013 Awesome work. Got any prices yet? Quote Link to comment Share on other sites More sharing options...
rottie Posted April 11, 2013 Share Posted April 11, 2013 Very nice work.....i say from a dark hole in the wall Quote Link to comment Share on other sites More sharing options...
trooper1 Posted April 11, 2013 Share Posted April 11, 2013 Very nice indeed!! Cant wait to see everything completed. With the Landspeeder. Quote Link to comment Share on other sites More sharing options...
RETNUHHA Posted April 11, 2013 Share Posted April 11, 2013 awesomeness!!! great eye on pack 1!! wish we could get a better pic of that. cant wait to see them done. Quote Link to comment Share on other sites More sharing options...
MonCal Posted May 10, 2013 Author Share Posted May 10, 2013 Thank you all for the kudos. I really do enjoy these forums. I swear I can feel a tiny bit of the excitement I used to feel when I started in this hobby ... oh... 14 years ago or so, on these forums. It's a lot of fun. Unfortunately I don't have very much time... but... My buddy / helper Andrew is working on these packs again (starting yesterday). Not only is he making new progress, I have some progress photos from late March that I still need to edit and upload. Maybe later next week I'll be able to post some more info and progress. Take care all Oh.. I think I've discovered an actual part used on the "move along pack"...but I need to confirm first and it might take some time before I can get the part...but it's exciting nonetheless. Quote Link to comment Share on other sites More sharing options...
Smally Posted May 10, 2013 Share Posted May 10, 2013 Good stuff mate. Be sure to share the news with us on here. Quote Link to comment Share on other sites More sharing options...
ex507 Posted May 10, 2013 Share Posted May 10, 2013 Love your project! I could NEVER do anything like this... You are pretty talented in this stuff. I will follow the progress... Cant wait to see it when its done!!! Quote Link to comment Share on other sites More sharing options...
Felice Posted June 18, 2013 Share Posted June 18, 2013 Great project!!!! i love the pack building...any progress??? Quote Link to comment Share on other sites More sharing options...
MonCal Posted December 13, 2013 Author Share Posted December 13, 2013 Thanks again everyone! Ruggero, I will definitely keep that in mind. Thanks for the heads up Oh my...it's been a while since I updated this project It's a big one, so it's gonna take a while.Anyway, here are some old pics from a few months back.Gluing the lab pipe "kit" together:Putting the rivet nuts in the tops of the mushroom caps:Preparing our "exhaust port kit" (or whatever it's called for pack #3 );I mentioned this earlier but in my research and scaling, I don't believe the typical 2 1/4" pipe that most troopers use for the mortar tube is the correct size. We are going with this slightly larger, lightweight aluminum tubing.Putting primer on all the parts:More paint:For the "filter" on pack #5 we went with a piece of pvc tubing for the core and glued a chunk of exercise mat to it. Then we squished it to make it more egg shaped instead of being round.For the "bee-stingers" we made some shims with wood blocks:This made gluing on the vac-formed bottoms much easier.For the "tool boxes" we made vacuum forming bucks to make the boxes and I had these square picture frame pieces cut for the kit:Masking so we can paint the "stinger" portion:Getting the bottles and "shotgun shells" ready:Lab pipe, strapping, and mortar tube attached to the frame:Radar dish attached to the mortar tube:To put the two halves of the seed trays together, we came up with this method. We glued in some alignment tabs and drill holes in the back seed tray (against the frame) for zip ties to go through:For the outer half of the tray we glued in these brackets for the zip ties to loop around:It's tough to see but here you can see, when looking at the back of the pack (against your body), the zip ties are pulled through. This way we can clip them if we need to take the pack apart:I have a bunch more photos to add. I will have to get to those later ...until the next post ... Quote Link to comment Share on other sites More sharing options...
MonCal Posted December 13, 2013 Author Share Posted December 13, 2013 Here are some more pics.To get ready to mount the cistern, we drilled holes in the seed tray and the cistern so the cistern can just be screwed on with drywall screws (drill a smaller hole in the cistern for the threads to bite).You can see the holes in the cistern in this photo:Since we went with the larger tubing for the mortar tube, the detonator part is a little "springy" but not too bad. It was still easy to glue on with goop glue. We used some velcro cable ties to hold it while it cured:Two of the packs have this "filter" piece. I made this from our Dengar backpack filter part by cutting one down, re-building, making a new mold and casting up this smaller "filter" box:We drilled some holes in the seed tray and the back of the filter box. Then we attached it with drywall screws:Next we attached the bottle and used the same process as the filter and the cistern by drilling a hole in the seed tray that allows the drywall screw to pass through and a smaller hole in the bottle so the screw bites.Voila:Next we worked on the "bee stinger". First we bent some aluminum brackets:On most packs the brackets appear to be painted black. I believe pack #3 has unpainted aluminum brackets. Here we are making pack #2.We were able to pop rivet it to the seed tray as shown here. Notice we decided to flip the brackets around so they are hidden:Since we are making pack #2 at this time, we are making the box that the hose attaches to. Notice the hose on top of the pack here:The beginnings of that little box:We drilled a hole in the "front" of the box for the hose (here we are using our tie pilot hose):we drilled some 1/8" holes in the back of the box and in the seed tray so we could pop rivet it to the seed tray:See the pop rivets:Next we drilled a hole in the top of the seed tray for the other end of the hose:Voila:I had to make custom caps for the mortar tube since our normal detonator caps are too small. We toyed with ideas on how to attach the caps so that we could still get to the attachment bolts inside the tube. This was our first idea for a solution:Chicago screws (aka: binding screws, binding posts, sex bolts)Bungee cord:Voila:This method works nicely. Another method that works is by putting small round adhesive velcro tabs on the end (side) of the tube and inside the cap. This holds well too.Next we attached our "tool box" by pop riveting it to the seed tray:Shazam... pack #2 ... sans weathering:The pack weighs 9 lbs. I don't think it is possible to make it lighter and this durable at the same time. It's not too bad at all actually! We did add some leather pads on the shoulder straps that go under the shoulder armor so it doesn't dig into the shoulders.Next we started on pack #3 (the "move along pack")Ignore the temporary / what I call the "fake" radio from pack #2 that's sitting on it:In starting on the next pack we needed to work out how to attach the tupperware stow n' go box:We gooped in these pvc standoffs:That held the backer plate in the right spot. Next we zip tied the backer plate to the stow n go by drilling into the storage divider walls inside the box and then bolted it to the seed tray.I need to take a picture of that.. as I cannot find one We are still waiting on our 3d printer guy to finish up with the radio face and then we will be able to finish up all the packs.... until next time ... Quote Link to comment Share on other sites More sharing options...
THE TROOPER Posted December 18, 2013 Share Posted December 18, 2013 Lookin great man.. Quote Link to comment Share on other sites More sharing options...
Rolf Posted December 18, 2013 Share Posted December 18, 2013 Keep up the good work, looking great!!! Quote Link to comment Share on other sites More sharing options...
SCRIBBLER Posted December 18, 2013 Share Posted December 18, 2013 Quote Link to comment Share on other sites More sharing options...
Bulldog44 Posted December 19, 2013 Share Posted December 19, 2013 Looks awesome. I was wondering what materials did you use for the exhaust pipe, specifically the black coil part? I tried to find things like electrical wire casings and vacuum hoses that looked the part but they just don't look accurate enough. Is it black shrink wrap or black tape wrapped over some coils? The original part for this looks something like a flexible tube of some sort. Can't wait to see more progress pics especially of the radio when it is finished! Quote Link to comment Share on other sites More sharing options...
Gladius Posted January 29, 2014 Share Posted January 29, 2014 Exciting! I'm actually on #3 Quote Link to comment Share on other sites More sharing options...

Recommended Posts
Join the conversation
You can post now and register later. If you have an account, sign in now to post with your account.