


Hausi
-
Posts
1,509 -
Joined
-
Last visited
-
Days Won
120
Content Type
Events
Profiles
Forums
Everything posted by Hausi
-

*ACTIVATED* TD-82112 Requesting SWAT Deployment #56
Hausi replied to doubledx's topic in MEPD S.W.A.T. Program
Hey Björn, as far as the boots are concerned, your plan sounds good. The lower screw on the helmet's ear looks good too. I'm completely with bigwam about the tape. That's an easy fix. Thank you for providing that pic showing the strap from the shoulder straps curving down above the pouch. I completely agree with you on that and consequently you will have to try to emulate that with your pack as well. Cheers mate, looking forward to seeing your improvements. -
Oh no worries mate, I've got no problem getting rid of my beard, have done it sveral times before.
-
Dengar´s one of my favourite bounty hunters. Looks badass, has a cool (and romantic) backstory going on, wears a pack... and you might have noticed that in some of the behind-the-scenes pics, he is armed with a DLT, but have you realized that it´s actually the Tunisisan Bapty variant carried by us Sandtroopers in ANH? Many of you probably have noticed but I found it worhtwhile sharing anyway. For ESB they have obviously added some greeblies to make it look more interesting, I think one can identify the same greeblie as on Boba´s EE-3. Enjoy your weekend, cheers!
-
*DONE* TD-10404 Requesting Deployment
Hausi replied to Cricket's topic in MEPD Police Officer Program
Hi Christine, welcome back. You completed those adjustments very quickly and did a great job. Your pack looks even better now than it did before, don´t you think as well? So here comes you new review: Application Review: Part 2 Name: Christine Lee Legion ID: TD-10401 Forum Name: Cricket Garrison: Georgia Garrison Helmet a. Green lenses: check b. Paint color of traps / tears: check c. Correct number of teeth: check d. Mic tips: check e. Vocoder color: check f. Tube stripes: check g. Rank bar on ears: check h. Brow: check i. Side screws (ears): check j. Weathering: check k. no mesh behind teeth: check *additional comments* RESULT ON HELMET Checked & Cleared Armor details a. elastic straps shoulders: check b. neck seal: check c. black undersuit: check d. shoulder bells: check e. biceps: check f. forearms: check g. pauldron: check h. chest / back plate: check i. kidney / butt plate: check j. ab plate / side rivets / cod: check k. strapping system: check l. thighs: check m. shins / calves: check n. sniper plate: check o. boots: check p. gloves: check q. hand plates / guards: check r. ammo belt (waist): check s. ammo belt (right knee): check t. canvas belt: check u. pouches: check v. weathering: check *additional comments* RESULT ON ARMOR Checked & Cleared Backpack a. details: check b. weathering: check *additional comments* Great-looking pack! RESULT ON BACKPACK Checked & Cleared Weapon a. details: check b. weathering: check *additional comments* RESULT ON WEAPON Checked & Cleared Christine, this was your second and final review! Your gear looks great and you are a worthy addition to the ranks of the MEPD´s finest. Be proud of yourself, you have truly earned it! You have successfully followed the guidelines in regards to the MEPD CRL and have met all requirements. Please send the pic you want to use to Luis (Sandman Tigui) and we'll get you squared away. I will have your updated information uploaded into the MEPD system asap. Congratulations on becoming a Deployed Officer of the MEPD! Cheers! Hausi - MEPD Deployment Officer -
*ACTIVATED* TD-82112 Requesting SWAT Deployment #56
Hausi replied to doubledx's topic in MEPD S.W.A.T. Program
Hi Björn, I´ve told you that I would be revisiting the 4K version of ANH to check some details and so here I am again with some additions to my first initial review. Looking at that very high quality version of the movie, I realized how many of those amazing details you were able to capture as for example that little spot of dirt on the backpack´s radardish. Of course I was also able to see a few more things that could be improved. So I have just added those points to the existing review. Please have a look at them. MEPD SWAT OFFICER: application review part 1 Name: Björn Dapper Legion ID#0: TD-82112 Forum Name: Doubledx Garrison: German Garrison ANH Sandtrooper selected: Alley Check Enlisted/private (black pauldron) Helmet: Green lenses: check Paint color on traps / tears: check Paint color and number of teeth: check Mic Tips: check Vocoder color: check Rank bar: check Brow: check Side Screws (ears): check Weathering: check **Additional Comments** Björn, nice helmet, excellent paintjob and it would be good to go but I think that it is sitting just a little too high on your head, it should sit lower. If possible, remove some of the padding inside the helmet to make it look more like what we see on screen. New and additional points: The bottom left ear screw seems to be unpainted or at least the paint has chipped, so please remove the paint on yours. **Result on Helmet** Pending Armor / Suit Details: Canvas straps shoulder: check Neck Seal: check Black Undersuit: check Shoulder Bells: see comments Biceps: check Forearms: check Pauldron: see comments Chest / Back Plate: check Kidney / Butt plate: check Ab plate / Side Rivets / Cod: check Strapping: check Tighs: check Shins / Calves: check Sniper Plate: check Boots: check Gloves: check Hand plates / Guards: check Ammo Belt (waist) w/ correct angled edge: check Ammo Belt (right knee): check Canvas Belt: check Pouches: check Weathering: The weathering looks really good and matches the emulated trooper quite closely. However, there are certain details that are missing and others will have to be changed. **Additional Comments** 1. Shoulder bell: pull up your right shoulder bell a little so it matches the screen reference 2. Pauldron: there should be more creases in your pauldron and it should be positioned differently, this is probably due to the fact that the original worn on screen might have not been completely closed. 3. Weathering: - There is too much dirt on the right upper thigh. - The dirt in those crevices where the shins close at the back seems too much/too prominent to me. - The inside of the right boot seen on screen looks black as if there are paint chips or at least the white paint has cracked and is showing some black underneath. - You will have to reposition that spot of dirt on your chest as shown in these pictures: New and additional points: Your special pouch on the left side looks great as I think but I see some kind of lace coming down behind it, this could be from the backpack´s shoulder straps, however, I rather think that´s unlikely and suppose it´s something that was used to attach the pouch to the belt: Also have a look at the overhang of the two halves of the right thigh at the top, there should be this little pointy edge (actually that should be easy to do, I did the same thing on my last build and just added some scrap ABS piece and used sludge to connect the pieces). You shold also rework your weathering on that right thigh as yours doesn´t match the screen reference. Same goes for the weathering on your right shin, you will have to slightly move the spots as yours are positioned too low and different in shape, please also add some earth wash or weathering in general to the duct tape (I would suggest doing that on all of the tape on both shins) and also do not forget to add the little spot of dirt below the tape very close to the lower end of the shin next to the boot. There are also three quite characteristic spots of dirt at the back of the left shoulderbell which are there on yours but I think they look very different, you will have to adjust them in size, shape and position: **Result on Armor** PENDING BACKPACK Pack#2 Details: see comments Weathering: check **Additional Comments** You also did an amazing job on that backpack of yours, I just love backpacks. However, there are some minor details to be addressed: 1 It looks like your radio has slipped down, in the reference the radio looks to be positioned higher. 2 I do not see the duct tape in the screen references, but removing that will be the easiest fix. 3 The cap at the top of the mortartube should have a wider ridge. New and added points: The box on the screen-used pack has two small indentations: So please add these as well **Result on Backpack** PENDING WEAPON: Bapty E-11 Details: check Weathering: check **Additional Comments** Great job on that Doopy conversion. **Result on Weapon** CHECKED & CLEARED Hausi – MEPD Deployment officer -
*DONE* TD-10404 Requesting Deployment
Hausi replied to Cricket's topic in MEPD Police Officer Program
That's looking great now, you are good to start painting. -
*DONE* TD-10404 Requesting Deployment
Hausi replied to Cricket's topic in MEPD Police Officer Program
That white shampoo bottle is perfect. I also didn't like the tapered look at the bottom of your old bottles. The other bottle sounds good too. The mortartube detail looks good as well. Strange that you couldn't remove the old one, E6000 is normally quite easy to remove, I use a heatgun to warm it up and if it still doesn't want to come off, you can use dental floss, just slide it in behind the part you want to remove and pull it down gently. -
*DONE* TD-10404 Requesting Deployment
Hausi replied to Cricket's topic in MEPD Police Officer Program
Have a look at this thread, here you can find the diameter of the lower bottle I have used. The upper bottle is slightly smaller in diameter. -
*DONE* TD-10404 Requesting Deployment
Hausi replied to Cricket's topic in MEPD Police Officer Program
Hi Christine, thanks for taking the time to answer my questions. Your son's armor you have built is simply great. I just realized that I didn't make myself clear about what I meant with the brush stroke direction, I meant the tube stripes as these were also freehanded on the original helmets but it's completely okay to use a stencil. It's okay if you just post some new pics of your improved pack. No need to put on all your gear again... unless you would like to do that. -
*DONE* TD-10404 Requesting Deployment
Hausi replied to Cricket's topic in MEPD Police Officer Program
Hi Christine, welcome and thanks for your interest in becoming a deployed Police Officer of the MEPD. You have done an overall amazing job: -very tidy application – thanks for that -great quality build, both, armor and backpack. I assume the fitting wasn´t easy, we also have a lady in our squad and I know how much time and effort has gone into making her armor fit. Your gear suits you very well, it looks really cool and – what is most important - you look really happy. -the backpack is gorgeous too, kudos to you for building it yourself. -your sons armor is awesome! And you have 3D printed, built and painted all of that yourself? You´ve got some serious skills and my greatest respect,great paintjob too. I really like those pics, thanks for sharing. At first glance everything looks good and I really dig your weathering but let´s get into those details with the review. Application Review: Part 1 Name: Christine Lee Legion ID: TD-10401 Forum Name: Cricket Garrison: Georgia Garrison Helmet a. Green lenses: check b. Paint color of traps / tears: check c. Correct number of teeth: check d. Mic tips: check e. Vocoder color: check f. Tube stripes: check g. Rank bar on ears: check h. Brow: check i. Side screws (ears): check j. Weathering: check k. no mesh behind teeth: check *additional comments* It seems people already know me and my preference for the higher brow. However, I am getting used to seeing the lower brows and have to admit that I actually have grown more fond of it. One thing to mention though: did you paint the helmet or did the guys and gals at RS do that? Here´s the reason why I am asking: you have clearly used a stencil which is absolutely okay but the direction of the brush strokes is wrong, it should be painted vertically. But do not worry, this isn´t going to hinder your approval. RESULT ON HELMET Checked & Cleared Armor details a. elastic straps shoulders: check b. neck seal: check c. black undersuit: check d. shoulder bells: check e. biceps: check f. forearms: check g. pauldron: check h. chest / back plate: check i. kidney / butt plate: check j. ab plate / side rivets / cod: check k. strapping system: check l. thighs: check m. shins / calves: check n. sniper plate: check o. boots: check p. gloves: check q. hand plates / guards: check r. ammo belt (waist): check s. ammo belt (right knee): check t. canvas belt: check u. pouches: check v. weathering: check *additional comments* Nice armor, great job in making it fit. RESULT ON ARMOR Checked & Cleared Backpack a. details: see comments b. weathering: check *additional comments* Your pack looks great with all those original vintage parts. I really dig it that you even took the time and made the effort of adding the red support straps, good eye for the details. There are some things to address though: 1 the mortar tube detail is too long, you will have to trim it a little further to match screen references as no pack had such a long detail. 2 The grey bottles have the right colour but they are way too shiny (while the this isn´t as obvious with the seedtrays, which is quite interesting). Also they are too thin which makes them look too long as well, so please get some new bottles which are larger in diameter (this will make it look much more screen accurate, trust me) and give them a final satin matte clear coat. RESULT ON BACKPACK PENDING Weapon a. details: check b. weathering: check *additional comments* Nice DLT, great details. Is that a Hyperfirm or an RS? Still…I always encourage people to go “full Bapty”… and there is a Bapty variant of the DLT-19 too…would also be much more in line with those red back support straps. RESULT ON WEAPON Checked & Cleared Christine, this was your first review! There´s not much to do, those small changes will be a walk in the park, especially knowing that you´ve built that pack yourself, so you know how it comes apart and goes back together again. I expect to hear from you soon, keep up the great work. Cheers Hausi - MEPD Deployment Officer -
@4RunnerAccess granted, welcome Peter.
-
*ACTIVATED* TD-82112 Requesting SWAT Deployment #56
Hausi replied to doubledx's topic in MEPD S.W.A.T. Program
Okay Björn, let´s get this started… MEPD SWAT OFFICER: application review part 1 Name: Björn Dapper Legion ID#0: TD-82112 Forum Name: Doubledx Garrison: German Garrison ANH Sandtrooper selected: Alley Check Enlisted/private (black pauldron) Helmet: Green lenses: check Paint color on traps / tears: check Paint color and number of teeth: check Mic Tips: check Vocoder color: check Rank bar: check Brow: check Side Screws (ears): check Weathering: check **Additional Comments** Björn, nice helmet, excellent paintjob and it would be good to go but I think that it is sitting just a little too high on your head, it should sit lower. If possible, remove some of the padding inside the helmet to make it look more like what we see on screen. **Result on Helmet** Pending Armor / Suit Details: Canvas straps shoulder: check Neck Seal: check Black Undersuit: check Shoulder Bells: see comments Biceps: check Forearms: check Pauldron: see comments Chest / Back Plate: check Kidney / Butt plate: check Ab plate / Side Rivets / Cod: check Strapping: check Tighs: check Shins / Calves: check Sniper Plate: check Boots: check Gloves: check Hand plates / Guards: check Ammo Belt (waist) w/ correct angled edge: check Ammo Belt (right knee): check Canvas Belt: check Pouches: check Weathering: The weathering looks really good and matches the emulated trooper quite closely. However, there are certain details that are missing and others will have to be changed. **Additional Comments** 1. Shoulder bell: pull up your right shoulder bell a little so it matches the screen reference 2. Pauldron: there should be more creases in your pauldron and it should be positioned differently, this is probably due to the fact that the original worn on screen might have not been completely closed. 3. Weathering: - There is too much dirt on the right upper thigh. - The dirt in those crevices where the shins close at the back seems too much/too prominent to me. - The inside of the right boot seen on screen looks black as if there are paint chips or at least the white paint has cracked and is showing some black underneath. - You will have to reposition that spot of dirt on your chest as shown in these pictures: **Result on Armor** PENDING BACKPACK Pack#2 Details: see comments Weathering: check **Additional Comments** You also did an amazing job on that backpack of yours, I just love backpacks. However, there are some minor details to be addressed: 1 It looks like your radio has slipped down, in the reference the radio looks to be positioned higher. 2 I do not see the duct tape in the screen references, but removing that will be the easiest fix. 3 The cap at the top of the mortartube should have a wider ridge. **Result on Backpack** PENDING WEAPON: Bapty E-11 Details: check Weathering: check **Additional Comments** Great job on that Doopy conversion. **Result on Weapon** CHECKED & CLEARED So this was your first review Björn, there are quite some changes as SWAT is a challenging but finally rewarding process and I am absolutely certain that you will successfully overcome these challenges. Some of these changes … well actually most, will be just peanuts to you. As I know you, you will have done these changes in no time. It would make my job a little easier if you could upload some higher resolution pics next time as they look very pixelated as soon as I enlarge them in size to point out the important aspects. Please be aware that there might be other points to consider as soon as I´ve found the time to rewatch “A new Hope” in 4K. Cheers mate! Hausi – MEPD Deployment officer -
*ACTIVATED* TD-82112 Requesting SWAT Deployment #56
Hausi replied to doubledx's topic in MEPD S.W.A.T. Program
Hi Björn Thank you for your interest in joining the elite and submitting your request for SWAT OFFICER activation. It really looks like you have put a lot of time and effort into getting your chosen trooper as screenaccurate as possible and I really like your attention to detail, especially how you tried to recreate the screen caps, very well done my friend. Your gear is on spot and your emulated trooper is immediately recognizable. But each new SWAT candidate gets looked at even more so from the previous trooper and the bar gets raised even higher. You are definitely on the right track. Still we always emphasize patience during this process as we pay more and more attention to fine tuning with each new SWAT applicant. Both DOs as well as the MEPD´s senior staff will give your armor a full inspection and review. Some details may definitely be missed and re-checked, but we will try to catch them on every pass given until you are cleared and ready to join the Special Weapons & Tactics Team, mate! I´ve been very busy lately but I have started the review process, so hang in there! -
*done* TD-30729 requesting deployment
Hausi replied to OnkelPaschulke's topic in MEPD Police Officer Program
Congrats -
If it looks this funky, it has to be right.
-
I think this is the way to go with that box. I have gone for a different solution but yours seems to make more sense, now that I think of it. Well done mate. ...and who are you calling "dudes" here?
-
Spraypainted the barrel pipes gunmetal added chocolate brown for the rust effect and then I have used masking fluid to emulate wear and tear and paintchips, sprayed over it with VHT wrinkle paint. The wrinkles really start to stand out when you hit it with the heat gun... but be careful. I then painted the buttstock with black wood stain and sanded it with 400 grit sandpaper... and repeated that several times. Finally painted it with some extrastrong black pu acrylic paint and freehanded the name in Aurebesh. The charging lever is also made from a wooden rod and can easily be removed for transport as I drilled a hole into the guns wooden body and added a threaded insert. Used E6000 to keep the T-tracks in place, cut out a circle from EVA foam to keep the inner barrel centred and assembled the whole thing and here it is: This little bugger is like a bastard/crossbreed between the Bapty E-11 and DLT. I named it "Stubby". I think it has that Tunisian vibe and I am very happy with it. Cheers mates
-
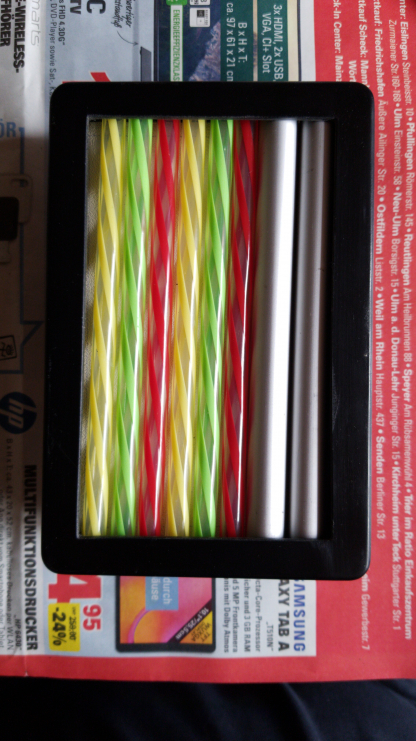
I then had to get the wood into the right shape and drilled holes into the pipes to resemble the look of the other Bapty blasters. I also came up with the idea to make the inner barrel poking out at the front look like a Sterling front end. Used some wood to recreate that look. Bondo and filler used to get a smooth surface prior to painting. I also created the shortest scoperail I have ever built. As mentioned before, I had an old scope which I wasn´t happy with as the paintjob was not satisfying (it was the very first scope I had painted) so I stripped down the old paint. There was no question that the real Sterling mag had to have the wooden insert. I also cut out some grips from a thinner sheet of wood and glued them onto the handle (the screws were just there to keep it from slipping around before the glue cures. I prepared the T-tracks using a heat gun. Looking at pics of the screen-used Bapty DLT, I decided to give this rubber floormat a try as the pattern looked about right. very easy to cut out the shape.
-
I have just recently sold my Bapty DLT-19 with a resin front end as I want to replace it with a new version my fellow German Garrison mates Björn and Lars are just developing (resin parts and aluminium outer barrel). So I was quite keen to get the build started and have already finished my new wooden buttstock when I realized that it would still take some time for the new replica MG 34 front end to be ready. ...and I suddenly had an idea. I have always loved the look of short cqc rifles as for example the Colt M4 or similar guns, so why not do something similar but with a Star Wars/Bapty vibe? So I took the scrap wood I had still lying around and built a shorter buttstock. I had already developed an idea in my head how to do the rest. Most of it would be done with some other scrap parts I still had, some different diameter pvc pipes, some left-over parts of a Doopydoos E-11 kit (scope and counter) and a real sterling mag. So I modified the front of the buttstock to accept the pipes. It´s a very sturdy build.
-
Hey Alex, looks like you've seen quite a bit of the world already, cool stuff mate. Unfortunately we can't see the pics, something must have gone wrong. I personally am using directupload.net, after having had some bad experiences with other picture hosting websites. You just upload the picture and copy and paste the large photo link into your thread. Hope it works out for you.
-
This looks somehow familiar. Looking forward to seeing your pack come together.
-
Great picture! Congrats on your very first troop, way to go mate.
-
Congrats mate
-
You can find it at the end of this build thread:
-
Yeah, I know what you are talking about, stuff like that has happened to me as well. Sometimes one is just too much into a project and doesn't realize that there might me a simple solution to a problem. Your pack looks great. I am a little confused about the way RS has attached the plate holding the shotgun shells. One piece of advice: consider using EVA foam as a padding to protect the butt piece of your armor. I have done this with my packs and it worked very well.
