

bigwam
-
Posts
1,598 -
Joined
-
Last visited
-
Days Won
212
Content Type
Events
Profiles
Forums
Everything posted by bigwam
-
*DONE* TD-82112 requesting deployment
bigwam replied to doubledx's topic in MEPD Police Officer Program
Good Job, Trooper! -
Looks good! I wish you luck!
-
Not separately? OK, i don´t know them. Hmmm, on Facebook is a member from the UK-Garrison, Trevor Mckenna. He builds backpacks, you could maybe ask him.
-
I know RS-Props from UK.
-
No problem, level 2 is also a standard that not everyone has. You don't have to emulate a specific trooper to do this. The only goal is, as you say: a good-looking Sandie
-
Hi Cesar, I am happy to hear that you are aiming for PO and SWAT. Improving one's armor is always desirable. If you are aiming for level 3 (SWAT), you are emulating a specific trooper. That means, you have to weather your armor exactly as in the film model. You also have to build your blaster and backpack exactly as your dream trooper carries them. Ready-made backpacks that are suitable for level 3 are not sold anywhere. The finished packs mostly correspond to level 2 (PO) and look quite good, but you have to consider: There are many special features of the packs from the fil that you have to copy for level 3: damage, certain paintwork, the position of the components. Have a look at the build threads here in the forum, browse the SWAT forum. If you have a particular trooper in mind, study them. Pay attention to the specifics. How is the weathering, does the armor or helmet have any special features (number of tube stripes, flaking, ...), how is the backpack constructed ... It's not always easy, but it is an exciting challenge. And when you have level 3 then you deserve it and wear the patch with pride. Even if you aim for level 2, it is an improvement on the basic level. The armor, the appearance - everything is closer to the film model. And that's what we want. And here, too, your efforts will be awarded a certificate and a special coin. I would be happy to read more from you in the near future. Don't hesitate to start a WIP. Best regards, bigwam
-
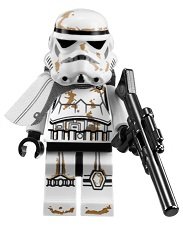
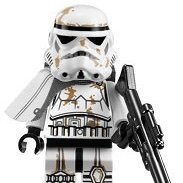
Hello Cesar, welcome here to MEPD, the sandiest place in the galaxy. Your Sandie looks good , a nice example of a dirty Trooper, i love the weathering. But you should remove the two ammo drop boxes, they only have stormtrooper. Feel at home here, look around. And do not hesitate to ask if you have any questions. Best Regards, bigwam
-
I like, what i see. I would only try to dye the belt and the shoulder straps. They still look very white. But shouldn't be an exclusion criterion, just something visual for the eye. I wish you luck.
-
It depends on which trooper you want to emulate. Then it may be that some work is needed. Example: for the "Move along" Trooper, you must shorten a T-Track. Some Paintjob is also to do. And you can always work on the details on every kit. So, why not?
-
Sure, you can use velcro. You mean, to use velcro to attach the straps? It is only important that the screws and rivets that you need are visible. But: velcro could be a bit rigid. Snap fasteners make strapping more flexible.
-
Looks good! Bzw, the two snaps are on the butt!
-
Looks good, but the belt must be higher, up to the lower edge of the square . Also the forearms a little bitte higher. I would fill the cut-outs on the thighs at the back. Or cut out a curve like in the Film.
-
Looks good already. If possible, trim the screws a little. You then have a little more space and the risk of injury is smaller.
-
Usually you don't need a shoulder pouch for basic. But clarify this with the GMO of your Garrison. If you still want to wear one, attach a strap to the pouch that goes over your shoulder. You can then attach this to the back plate with Velcro.
-
As Urs says. Either insert pieces, which means you have to modify the thighs quite a bit or buy new thighs, which would probably be the better method. RWA in particular offers kits and individual parts for "bigger" people. I know some troopers who got bigger thighs or kidney plates there.
-
Is it possible, to show a pic of the gaps? Regards bigwam
-
Yes, the shoulder bell is attached to the biceps. You can attach the forearms to the strapping with a snap. That makes it easier to get dressed.
-
.
-
nice pics
-
And i miss the loading lever. It usually looks good in the pictures, but in reality? that doesn't convince me.
-
*in progress* TD-22151 requesting deployment
bigwam replied to Trooper_Boy's topic in MEPD Police Officer Program
Hallo Georg, selbstverständlich. Hau rein ! Hi Georg, sure! Let's go! Regards bigwam -
I'm sorry I can't help you with that. I use the Vallejo colors myself
-
A little hint. The cover stripes on the shins are also very wide at the back. I had the same problem with my calves. I had made the stripes a little wider at the front and not quite brought the two halves of the shins together at the front. So I didn't have to make the cover strip so wide at the back.
-
*in progress* TD-22151 requesting deployment
bigwam replied to Trooper_Boy's topic in MEPD Police Officer Program
Hello Georg, Welcome, to become a Police Officer in the MEPD. I have looked at your pics and now, we can start your Review: Application Review: Part 1 Name: Georg Wartbichler Legion ID: TD-22151 Forum Name: Trooper_Boy Garrison: Österreichische Garnison Helmet a. Green lenses: check b. Paint color of traps / tears: check c. Correct number of teeth: check d. Mic tips: check e. Vocoder color: check f. Tube stripes: check g. Rank bar on ears: check h. Brow: check i. Side screws (ears): check j. Weathering: check k. no mesh behind teeth: check *additional comments* RESULT ON HELMET Checked & Cleared Armor details a. elastic straps shoulders: check b. neck seal: check c. black undersuit: check d. shoulder bells: check e. biceps: check f. forearms: check g. pauldron: check h. chest / back plate: check i. kidney / butt plate: see comments j. ab plate / side rivets / cod: see comments k. strapping system: check l. thighs: check m. shins / calves: check n. sniper plate: check o. boots: check p. gloves: check q. hand plates / guards: check r. ammo belt (waist): check s. ammo belt (right knee): check t. canvas belt: check u. pouches: check v. weathering: check RESULT ON ARMOR - pending - Comments: Please use filler vor the shims and sand it down. This area should not be visible. Please remove the colour from the snaps: Backpack a. details: see comments b. weathering: check *additional comments* RESULT ON BACKPACK - pending - comments: - the two bottles are to long and thin, please rework this. - the colour of the seedtrays and bottles is not right. Please Use batlleship grey or RAL 7031 - What is happened with the radio? Where is the dial? A second button for the dial? - Please change the screw on the Radardish against a carriage bolt or a cap nut - the UP-Syphon is not up to date. There are good alternatives. For example from RWA. If it is possible, change it. - The same for the Gio-Style, not the best for PO. Weapon a. details: see comments b. weathering: check *additional comments* RESULT ON WEAPON pending comments: i miss the wire on the T-Tracks. OK Georg, not in the first attempt but on the right way. It's not a lot but a few small things to do. No problem for you. I hope, i will se you soon for the final review. Best Regards, bigwam -
Actually the first, not the last. The helmet was already built when i got it. With a few modifications it was converted to the "look sir droids". Thanks to Urs! Here is the last of the six, Mr. Davin Felth:
