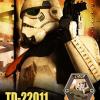
Daelma Posted March 7, 2015 Share Posted March 7, 2015 TD-22011 Requesting SWAT Deployment Name: Manfred ( Manny ) MueLLer Legion ID #: TD-22011 Forum Name: DaeLMa Garrison: German Garrision Applying for “Desert Captain” * someone was in the pod...* Police Officer : http://forum.mepd.net/index.php?showtopic=13251 Armor: TrooperMaster Helmet: TrooperMaster Pauldron: Trooper1 Boots: Jodhpurs Gloves + Handguards: TrooperMaster Blaster: DoopyDoes - Bapty Pouches: Blaster 8266 Backpack: Dirtyboy + some self made items so after making some updates on my Armor... more weathering on the paltron, decals for the radio removing the d-ring from the bapty, reverse the handguards after uploading the pictures i ve saw the belt was displaced :-/ here a pic where the belt is on the right position.... grml greeetz Manny Quote Link to comment Share on other sites More sharing options...
opi wan Posted March 7, 2015 Share Posted March 7, 2015 Yes Manny! Good look! Quote Link to comment Share on other sites More sharing options...
Gordonator Posted March 8, 2015 Share Posted March 8, 2015 good luck Quote Link to comment Share on other sites More sharing options...
Robster Posted March 8, 2015 Share Posted March 8, 2015 looks awesome, good luck bro:) Quote Link to comment Share on other sites More sharing options...
SCRIBBLER Posted March 8, 2015 Share Posted March 8, 2015 @ Manny - Your review has begun and first comments will be posted within the next day or so. Good luck! Quote Link to comment Share on other sites More sharing options...
ghoulcinder@hotmail.co.uk Posted March 8, 2015 Share Posted March 8, 2015 Now the fun starts, viel erfolg, Manny! Quote Link to comment Share on other sites More sharing options...
Beren Posted March 8, 2015 Share Posted March 8, 2015 Looks really nice Manny. I especially like the weathering. I've attached a screen shot of the "filter pack" for your reference. You may want to alter the position of your radio and filter just a bit... Quote Link to comment Share on other sites More sharing options...
Felice Posted March 9, 2015 Share Posted March 9, 2015 Great Job! Just check the faucet cover on the references....you have a little bee stinger but the reference is without that. And the filter seems to be weathered.... Good luck bro! Quote Link to comment Share on other sites More sharing options...
ukswrath Posted March 9, 2015 Share Posted March 9, 2015 Looks awesome Manny. Excellent job! Quote Link to comment Share on other sites More sharing options...
Smally Posted March 10, 2015 Share Posted March 10, 2015 Hi Manny, Thank you for your interest in joining the Elite and submitting your request for SWAT OFFICER Activation. *Please note* - During this process, there may be some modifications that will need to be made to your gear. Details that need to be even more fine tuned in comparison to past SWAT members. The bar is always being set higher! Therefore, we always stress PATIENCE during this process as we pay more and more attention to fine tuning and detailing with each new SWAT applicant. The MEPD Senior Commanders and myself will give your armour / gear a full inspection and review. Some details may be missed and re-checked, but we will try to catch them on every pass given until you are cleared and ready to join the Special Weapons & Tactics Team, Trooper! Let's begin... MEPD SWAT OFFICER: APPLICATION REVIEW (PART 1) Name: Manny MuellerLegion ID #: TD-22011Forum Name: DaeLMaGarrison: German Garrison** ANH SANDTROOPER SELECTED **: Desert Captain "Someone was in the pod.."I.) HELMET:a.) Green Lenses -- CHECK b.) Paint Color on Traps / Tears -- CHECKc.) Number Of Teeth -- CHECKd.) Mic Tips -- CHECKe.) Vocoder Color (Black) -- CHECKf.) Tube Stripes -- CHECKg.) Rank Bar -- CHECKh.) Brow -- SEE COMMENTSi.) Side Screws (Ears): CHECKj.) Weathering: CHECK** Additional Comments -- A.) DEPLOYMENT OFFICER:A fantastic start to your application! One thing Ive noticed on your helmet compared to the Desert Capt. is that you need to lift the centre of the brow VERY slightly. You can see on the movie version there is a small lift between the eyes: I'll also need to see photo's of the sides of your helmet please.B.) EXECUTIVE OFFICER: (Comments Pending)C.) COMMANDING OFFICER: (Comments Pending)II.) Armor / Suit Details:a.) Straps -- CHECKb.) Neck Seal -- CHECKc.) Black Undersuit -- CHECKd.) Shoulder Bells -- SEE COMMENTSe.) Biceps -- SEE COMMENTSf.) Forearms -- CHECKg.) Pauldron -- h.) Chest / Back Plate -- CHECKI.) Kidney / Butt Plate -- CHECKj.) Ab Plate / Side Rivets / Cod -- CHECKk.) Thighs -- CHECKl.) Shins / Calves -- CHECKm.) Sniper Plate -- CHECKn.) Boots -- CHECKo.) Gloves -- CHECKp.) Hand Plates / Guards -- CHECK q.) Ammo Belt (Waist) w/ correct Angled Edge -- CHECKr.) Ammo Belt (Right Knee) -- CHECKs.) Canvas Belt -- CHECKt.) Pouches -- CHECK u.) Weathering -- CHECKv.) Crotch Snaps -- CHECK** Additional Comments -- A.) DEPLOYMENT OFFICER: With regards to your biceps, they need to be pulled more up/under the shoulder bells (very similar to the MOVE ALONG trooper. This will be a very easy fix. Check this pic again to see what I mean: Everything from the top of the thighs down is cleared at this stage simply because it is not seen on film III.) BACKPACK: VERSION # a.) Details -- (SEE COMMENTS)b..) Weathering -- CHECKA.) DEPLOYMENT OFFICER: Great pack build, Trooper! Just a few requests...1.) On the outside of your seed trays (top and bottom) you have some small ridges - all of these will need to be removed. Either file them down or cut and sand them off. 2.) You will need to move the Filter, Canister and tool box up slightly (see below) **Review still in progress** Quote Link to comment Share on other sites More sharing options...
Felice Posted March 11, 2015 Share Posted March 11, 2015 and no bee stinger Quote Link to comment Share on other sites More sharing options...
Daelma Posted March 12, 2015 Author Share Posted March 12, 2015 Pics from the Helmet Left side 15 blue stripes.... and right side 13 ( first it was 15 too i have change to 13 after seen to one OFF-set picture from here ) and liftet the eyebrown a little bit greetz Manny Quote Link to comment Share on other sites More sharing options...
Daelma Posted March 12, 2015 Author Share Posted March 12, 2015 now to the Backpack removed the Bee-stinger removed on both sides the tracks liften up the 3 boxes and weathered a little bit the filter Quote Link to comment Share on other sites More sharing options...
SID Posted March 12, 2015 Share Posted March 12, 2015 Good work. Good luck. Quote Link to comment Share on other sites More sharing options...
ukswrath Posted March 12, 2015 Share Posted March 12, 2015 Great job Manny Quote Link to comment Share on other sites More sharing options...
Vf2112 Posted March 13, 2015 Share Posted March 13, 2015 Looking good manny nice ref pic beren Didn't look to hard yet but can only add weathering to pack n weapon Got a feeling this will be quick Quote Link to comment Share on other sites More sharing options...
Beren Posted March 13, 2015 Share Posted March 13, 2015 Nice improvements on the pack... my only suggestion would be to move the radio up now so that the top comes level with the bottom edge of the black seed tray. Good luck! Quote Link to comment Share on other sites More sharing options...
opi wan Posted March 15, 2015 Share Posted March 15, 2015 I would move down the blue tin again a bit and lift up the box. Originali , as you can see in the black and white photo, the bottom of the tupper box and the blue tin was in line. Now it is to high! Quote Link to comment Share on other sites More sharing options...
Smally Posted March 16, 2015 Share Posted March 16, 2015 This review will continue shortly Manny, thanks for you patience. Quote Link to comment Share on other sites More sharing options...
DarthChridan Posted March 16, 2015 Share Posted March 16, 2015 Cool....now we get soon our 4th brother for the 'band of brothers' Your updates at the pack looks good...I think you nail it soon as possible Stay strong and be patience...the SWAT way is a bit harder than the PO status....but you have an awesome set up. I can smell the next photo shooting is coming soon in our local sand dunes Cheers my friend Quote Link to comment Share on other sites More sharing options...
Smally Posted March 19, 2015 Share Posted March 19, 2015 Hi Manny, Thanks for your patience. Let's continue your review...APPLICATION REVIEW (PART 2)HELMET:a.) Green Lenses -- CHECKb.) Paint Color on Traps / Tears -- CHECKc.) Correct Number Of Teeth -- CHECKd.) Mic Tips -- CHECKe.) Vocoder Color (Black) -- CHECKf.) Tube Stripes -- CHECKg.) Rank Bar (Ears)-- CHECKh.) Brow -- CHECKi.) Side Screws (Ears): CHECK j.) Weathering: CHECK ** Additional comments** Great to see you made the changes to your brow. Although subtle, it now looks more accurate. *RESULT ON HELMET* ** CHECKED & CLEARED ** II.) Armor / Suit Details:a.) Canvas / Elastic Straps -- CHECKb.) Neck Seal -- CHECKc.) Black Undersuit -- CHECKd.) Shoulder Bells -- See commentse.) Biceps -- See commentsf.) Forearms -- CHECK g.) Pauldron -- CHECK h.) Chest / Back Plate -- CHECKI.) Kidney / Butt Plate -- CHECKj.) Ab Plate / Side Rivets / Cod -- CHECK k.) Thighs -- CHECKl.) Shins / Calves -- CHECKm.) Sniper Plate -- CHECKn.) Boots -- CHECKo.) Gloves -- CHECKp.) Hand Plates / Guards -- CHECKq.) Ammo Belt (Waist) w/ correct Angled Edges -- CHECKr.) Ammo Belt (Right Knee) -- CHECKs.) Canvas Belt -- CHECKt.) Pouches -- CHECKu.) Weathering -- CHECK ** Additional Comments ** With regards to your biceps, they need to be pulled more up/under the shoulder bells (very similar to the MOVE ALONG trooper. This will be a very easy fix. *RESULT ON ARMOUR* *Awaiting final pictures* III.) BACKPACK: a.) Details -- See commentsb..) Weathering -- See comments ** Additional Comments ** Great job on those request mods, Manny As some of the guys have already stated, since moving the details up on the top box this has left a bit of a gap where the radio sits. Use this image to gauge where you need to resit your pack parts And on yours Once youve moved the parts into place I think you'll benefit from giving the pack a bit more weathering. Dont add too much though as this will look inaccurate. Just go over it lightly at first and we'll see how it turns out. *RESULT ON BACKPACK* *awaiting mods* IV.) WEAPON(S): E-11 (Bapty)a.) Details -- See commentsb..) Weathering -- See comments** Additional Comments ** Great to see that you have gone with a Bapty variant for you TD. Could you please supply us with further pictures of it from several different angles? *RESULT ON WEAPON* ** awaiting pictures ** Quote Link to comment Share on other sites More sharing options...
ukswrath Posted March 19, 2015 Share Posted March 19, 2015 Almost there Manny Quote Link to comment Share on other sites More sharing options...
Vf2112 Posted March 19, 2015 Share Posted March 19, 2015 Watching anticipating Quote Link to comment Share on other sites More sharing options...
Daelma Posted March 22, 2015 Author Share Posted March 22, 2015 All good things are three ^_^ here we go ... But here i must say... im not SO short like the guy.... Chridan !! need you to jump in my suit Cheeers Daelma ! Quote Link to comment Share on other sites More sharing options...
SCRIBBLER Posted March 22, 2015 Share Posted March 22, 2015 @ Manny - Coming along very nicely, Troop! Great work! Quote Link to comment Share on other sites More sharing options...

Recommended Posts
Join the conversation
You can post now and register later. If you have an account, sign in now to post with your account.