

trooper1
-
Posts
3,086 -
Joined
-
Last visited
-
Days Won
17
Content Type
Events
Profiles
Forums
Everything posted by trooper1
-
Ok, here are the three pics. It does look much better and is dead on I think. Great find, and much easier to fit on the gun as well. Hey also these things on Sportsmans Guide are original WWII slings, not reproductions. They are used though. Which even adds to the product. I can get them for $9.00 plus minimal shipping. If anyone would want some who cant get them let me know. I will help you out. Jay
-
As for looks, they are great. They also came one darker olive, and one lighter. Almost like one had been washed or something. The one is a little olive/brown color. I am putting them together with the lighter of the two on top, and the darker on bottom. I will post pics hopefully tommorrow. TD 252 I think after looking at the pics closely, it does appear to be a rivet,button, or snap of some sorts,at the barrel end, but also looks like a couple of pieces crimped around the sling also which would be the brass parts of these slings. Jay
-
Hey, I recieved two of the slings from Sportsmans guide, and they look great. One question. Are these light brown, or olive drab green? Looking at the screen caps, it appears the lower sling is much more olive drab, and the top is a little more washed out and brown. Any comments or other views. I am wondering what to do with these before installing them, and now am not sure whether to do anything... I could bleach maybe, and then use tea to color, but then again, the pics are ehhhh??? Still look a little olive drab?? Let me know what anyone else sees.
-
Hey, This is easy but takes a little work. You can go to a welding shop, or on line, and purchase a #3,(I think) cutting/grinding, replacement shield for a full face head piece. You then trace, make larger, and cut out the lenses you need from the face shield. Takes a little practice, but works great? Hot glue then works to install the lenses. I have made quite a few sets of these, and they are UV protective, and very durable. Jay
-
Just to add to dutchy's info. Here are pics of my Pauldrons, shoulder straps,and BFG Hope this helps. Jay
-
My thoughts exactly, just wasnt sure on the Pauldron if I was seeing it correctly.
-
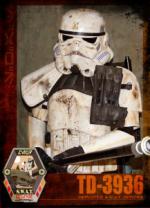
Nice job.. A question? Are those shoulder straps that I see in pic #3? Also a Pauldron question but not sure of how to ask it just yet. Other than a few tweeks, I think looks good. TD3936
-
Great INVESTIGATIVE Work!!! I have been a club member of Sportsmans Guide for years, and never had a clue that these were there. I already placed order, and they are on the way. In STOCK.. THanks again. Jay TD3936
-
Cant wait to see everything completed bro, and glad to have been of service. Just like the rest of the brothers. I think things will be awsome when your finished, and you'll even be ready for Halloween 2008, it appears. Best of Luck Jay TD3936
-
My First Detail Built Pauldron
trooper1 replied to trooper1's topic in Pouches, Pauldrons, and other Accessories
I am able to do a FEW, but am limited to color till I find an accurate orange. -
After speaking with many here, and really studying Star Wars sites. I have duplicated Pauldrons, to the best of my ability and just wanted to let everyone see them. At a most recent troop, Anthony Forrest was on hand and signed my orange one for me... It was great. I was in luck though and made another to troop with. I have since found an accurate orange and begin making Pauldrons. Price is $75 plus shipping which in the states is $10 priority mail. Oversees is $27 insured mail TD3936 Jay
-
Very COOL Pics!!!! :o :o What I would have given to have been there to. All the way across the country would have been an expensive trip, but wow!! Will have to plan some day. TD3936
-
Thanks for the help Mike, everything works great now. Jay
-
Someone in the command staff.... I mentioned the other day about the avatar, but didnt get any resolve. I still have the same message of error, contact command staff. Now I went to check my personal profile, and it is gone. I tried to resubmit info, and the same errror message was displayed. This all happend after the change. Please help. TD3936 Jay
-
Strange, Very Strange. I have the one I use on other sites, and previously worked here. Correct size, and pixels, but am told there is an errror with loading. Any answers from Command??
-
I have the same issue. My avatar doesnt show either, and when I go to try to put it back on. It comes up error, and says to contact a member of command to resolve issue. Please advise. Jay
-
Is My Hardware Dlt-19 Good Enough For Mepd?
trooper1 replied to missingpieces's topic in T-21, DLT-19, RT-97c Heavy Blasters
As I said before, this is a great piece, and I can tell, took a great deal of time. If you want the other items to be totally canon, go to this site. http://www.looksirdroids.com/replica_weapons2.html braksbuddys pics are here and show the details parts I listed. The wire (mechanix wire), box, and so on. The box I made myself from ABS plastic, and plastic welder. I have made a couple for some others here also. -
Is My Hardware Dlt-19 Good Enough For Mepd?
trooper1 replied to missingpieces's topic in T-21, DLT-19, RT-97c Heavy Blasters
I have to concur. This is a remarkable piece. You said this is from wood??? If so, you have some amazing skills in the craft. As for details? Lets see more after the weathering, but so far cannot find alot missing. I do notice that the conical disk is missing? Yes/No Maybe just cannot see in the pics. Then you will want your wire around your barrel (so it looks like it holding the heat sinks on) The last thing would be maybe, your action handle, to cycle loads. Still cant say enough. Wonderful piece. -
New T-21 Lewis gun / Cushman build
trooper1 replied to trooper1's topic in T-21, DLT-19, RT-97c Heavy Blasters
Hey the metal piece at the stock end for the sling, is actually a sling mount for a real gun. Purchased from Walmart here. Uncle Mikes brand quick detachable Super swivel 1", and screw mount. They come in a set of two. I have an extra set if you need them. PM me for details if you are interested. -
Yeah, on both the tears part, the snaps and the velcro . I have used both, and do have both on these straps that I use. I have switched most of my velcro over though to the industrial type snaps used on tonneau covers. Purchased from Home Depot. I have found my snaps are a little easier on and off, and doesnt ever have a tendency to stick to my black under garment. I also know that the snaps will attach in the same place everytime. This way if someone is helping me get something on, they dont have a piece or part out of line with the other side or sticking out somewhere it doesnt need to be. Also if I flex any, I used to get a crackling noise every once in a while, and now dont get any movement. Oh, I do use small pieces of industrial velcro as well to just enhance and strengthen the connection points, and have had no problems even running. Jay
-
Hey just to throw in an idea, I used snaps and small bit of velcro. The snaps seemed to hold up better, and didnt have the tendency to stick or gradually wear out. I have pics to show how I did mine. I also added a snap in between the canvas, for the shoulder bell. This one is hidden and reinforced with strapping material. I used plastic welder to attach the other half of the snap to the back and front chest piece.
-
New T-21 Lewis gun / Cushman build
trooper1 replied to trooper1's topic in T-21, DLT-19, RT-97c Heavy Blasters
Ok, here is the pics of the stock. What I used was a aquafina water bottle cap for the top and a Coke 16oz pop cap for the bottom. I used different ones because I had to cut more from the coke cap than the water cap. To get the cap to not sit so angled on the bottom I grooved it more toward the back and less at the front. Then the top was slightly grooved on front and back. I then used stainlesse sheet metal screws to attach, and then weathered. -
New T-21 Lewis gun / Cushman build
trooper1 replied to trooper1's topic in T-21, DLT-19, RT-97c Heavy Blasters
Hey pics on the bottle caps, not yet, should have some up by Monday if not sooner. Will advise how I cut them down as well, using a dremel drum sander. Thanks for the Plasma idea again, it really does make an eye catcher. -
New T-21 Lewis gun / Cushman build
trooper1 replied to trooper1's topic in T-21, DLT-19, RT-97c Heavy Blasters
Oh forgot, The center cap looking thing, is a WD-40 lid, and the Wire on the side with the brass nuts, is a plastic whistle holder, like goes on a teachers wrist, with the whistle... Jay I used 2 16oz pop caps, cut down to fit the stock. -
New T-21 Lewis gun / Cushman build
trooper1 replied to trooper1's topic in T-21, DLT-19, RT-97c Heavy Blasters
Ok, first of all the halves were put tother, and glued with Poly-weld. The best glue I have ever worked with. Then the process of sanding and filling the seams and cracks. (used plastic welder and dremel sander) I did then go ahead and add some foam to the stock portion of the gun to take away the hollow sound and for support. I then cut out the needed places, and like in the trigger, used plastic welder to fill in then smoothed with dremel. I made the sites from a sheet of ABS I had, then glued on. Ordered the slings from the post here, and then ordered the plasma gadget. Now the plasma gadget I did a little different as seen in the pics. I first of all purchased some thin wall PVC 2.5" drain pipe, white. I cut the length I needed to fit into the end tube of the gun. I then cut the pipe end ways. I squeezed the pipe piece together to get the exact dimension of the inside of the gun tip, marked it, then cut it again length ways. (After the cut the two sides should fit together) I then rough fit into the tube again. After making sure the pipe fits into the gun tube, I warmed with a heat gun to flex pipe back to the shape of round, and where the sides nearly butt up to each other. I then glued with plastic welder, carefully. After drying, I test fit again before proceeding. (I now paint the inside of the pipe with Gloss black paint) I then used a piece of flat ABS and first of all cut a round circle to the OD size of the gun pipe that the tip fits onto. Centered, cut out to fit over the square portion of the light controls,(Be sure light is centered on the plastic circle. After centering and checking fit, glued with plastic welder, the circle, to the backside of the light. I then glued the plastic made tube to the front of the lens with plastic welder. (very thin amount as to not get much on the glass. Thats it, Now slide the light and tube into the tip, turn on, and mount with screws to the main gun pipe. Oh and yes I still have the little greeblies to put on the stock, just forgot them before taking pics. Jay