Leaderboard


Popular Content
Showing content with the highest reputation on 10/12/2020 in Posts
-
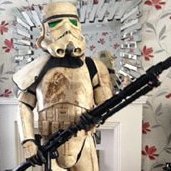
Bought this raw cast from Doopydoos 5 or 6 years back and finally got around to working on it. Its been sleeping on the shelf way to long. Planning to add lights and sounds once I get the pint job finished. Here is my progress so far. It came fullly assembled/glued together so I cut off the viewfinder end at the seam. Black primer coat Painted another coat with grey and then some metallic dark iron paint for the weathering effect. (Sorry I did't document this step) The painted it white using the toothpaste method to help the paint chip off. After removing the toothpaste I am not particularly happy with my first attempt at weathering with the chip off effect so I might sand it down smoothly and repaint it white again. Once I get the chipping areas better balanced and more natural I will apply the dirt weathering. Any thoughts? Advice? Would like to get some feedback so I can make this look better.1 point
-
I think it already looks pretty good. Why aren't you happy with it? Did the chipping turn out to be too uniform for your taste? That's what always tends to happen when I do this. You can also use some very fine grit sandpaper to add some scuffs or what I have done lately when wheathering a Scout lid, I have painted a plastic dowel black and used that to add scuffs.1 point
-
It looks,.interesting, maybe the chipping should be just in the areas where it would normally chip off first, like the areas of mayor contact with other surfaces Sent from my GM1900 using Tapatalk1 point
-
The plastic ammo belt should be 90mm tall and go 40mm past the end blocks. Those measurements were taken from an original ANH belt. The canvas belt is 70mm tall.1 point
-
All of our gear is wonky as hell and it's good! I think you can sand down the top and bottom edge just a tiny bit more until you're almost where the block begins. For the left and right side, have a look at screencaps: They weren't all the same, so don't worry too much about measurements.
 1 point
 -
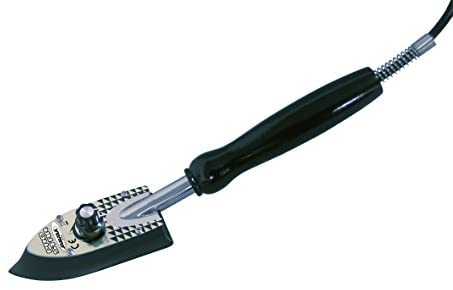
@Cricket, great work. This is what we need, troopers helping troopers. I appreciate that you took the time to give such extensive and detailed advice. Just in case you should decide to recreate those returnedges at the top of the thighs: this gets the job done, an iron which is used for model airplanes. This will allow you to create a new Returnedge. As I am also not the tallest and trimmed down my thighs as the top, then I recreated those returnedges and it worked brilliantly, pretty easy to use too.
 1 point
 -
Thanks Christine, I really appreciate the feedback. I rushed to put the armour on without thinking of aligning the pieces. As for being short, I think other parts will need trimmed (such as arm pieces), not just the legs. I think that I will have to gear up and get some new photos from more angles, in order to see what is needed. Thanks again,Glen.1 point
-
Hey Glen, Yes, much better photo there! Thanks! Dremel will take longer for bigger areas. It will be faster to cut larger areas first, followed by Dremel to finish and sand the areas smooth. Dremel is good for tight or curved areas. I end up with more white ABS "dust" than anything else when using my Dremel. It melts, but not as much as you think it will. Test on some scrap plastic first, and you'll see what I mean. I'm seeing a few fitting adjustments that you might want to take a look at. I've highlighted the areas in the photo below. 1. Your belt is off center. The center button should line up roughly where the middle of the ab is (green vertical line). A little rotation of that should do the trick! 2. Your thighs are rotating out. The fronts of the shins should line up with the fronts of the thighs, and currently, the thighs don't line up. This is because the thighs need to be trimmed down. Once they've been trimmed to fit correctly for length, this issue should resolve itself. (tips to do this below) 3. Your bicep looks like it's kind of jammed into your armpit, but this might be the angle of the photo. You can always trim the bicep parts from the top to allow for comfort. 4. The top backs of your shins can be trimmed for mobility and comfort. As they look now, you might end up with some fairly decent armor bites back there! The photo below shows the kind of trimming that is typically acceptable for TKs. I've trimmed the backs of all of my TK builds. Don't trim beyond the ridge of the parts. You can trim in a more square cut or a curved cut- your choice. I used a pencil to trace initial cut lines, Lexan scissors to cut the bulk of the areas out, then finished with the Dremel. Here's a pic of what mine look like: Now about thigh trimming. Here's how I do mine: Put on one thigh with your torso. Using a pencil, you're going to mark along the areas of the thighs where they hit the cod. You'll be essentially tracing the cod where it overlaps on the thigh. You will be removing more material from the inside areas of the thighs than anywhere else. Remove the thigh and trim conservatively at the pencil line. Try the thigh on again, mark where the cod hits the thigh as you move around (you may hear it or feel it as you walk), remove the thigh, trim, repeat until you notice very minimal clicking of the cod/thigh. Repeat with the other thigh. This is a tedious process, but it really works nicely to shorten the thigh and also maintain some of the original lines of the tops of the thighs. Below is a pic of my RS Props TD (converted from TK). Remember, I'm 5'4", so I had to remove quite a bit from the tops of those thighs. I even recreated the left thigh notch. That being said, I removed very, very little from the outer thighs. Bottom line: use the cod as your guide for trimming. Once the thighs are trimmed to move a little more freely around the cod/butt plate area, the thighs will have less of a tendency to rotate outwards (that cod is currently pushing on them). Hope this helps!1 point
-
Hey Glen, I'm on the short side at 5'4", and I've built 4 TKs (and assisted sizing down several more), so I know a little about trimming for height. I might be able to give some guidance. Your photo is showing as an itty bitty image though, even when enlarged. Any chance on sharing a larger pic? The Dremel is your friend when it comes to trimming. But for cutting off a larger amount, you might want to trim off the bulk first, then finish with the Dremel. Tin snips can behave aggressively with the ABS sometimes when you cut on a curve and can leave you with extra sanding work to do. A better alternative would be to use a curved pair of Lexan scissors. I own many pairs of Lexan scissors in both straight and curved shapes, and they do an amazing job of cutting plastic.1 point
-
Heres my left handplate....notice the heavier weathering1 point
-
1 point
-
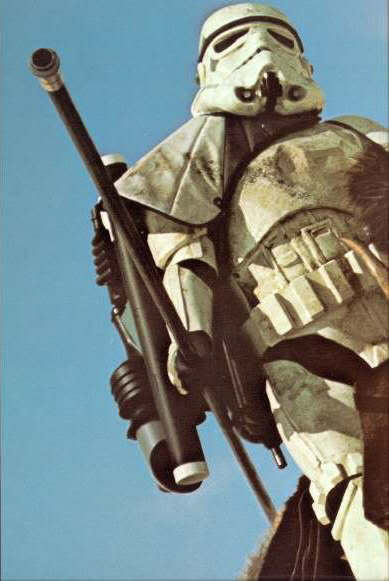
Decided to go with just the one "more accurate" end to the dewback prod its about 8.5 ft long1 point
-
heres a couple more shots1 point