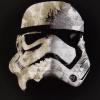
Pappy Posted April 9, 2010 Share Posted April 9, 2010 Hihihi i know but....but..... I got extra AP helmet kit that i originally want to offering it here in indonesia,but...well... anyways i decided to make a hero helmet,since it is from abs too,not intended to mimicking any particular hero (i'm poor on replicating anything and of course lack of refference lol) I also made similar thread on the FISD too,but the more the merrier here goes Day 1 it doesnt look wide like the hero does,so.. Day 2 yeah <_< but its wider now though,i also managed to make the faceplate follow the cap more again,by making the screw holes loose on the faceplate then press it from the inside with the bolt and ears attached Day 4 Still wondering if theres anything wrong with it before i go further screw the bottom of the ears and paint the ears white Need suggestions Quote Link to comment Share on other sites More sharing options...
FIVE Posted April 9, 2010 Share Posted April 9, 2010 I don't know much about the hero look, but this is looking good to me. I think the main thing that will make it look different is how you paint the frown. Quote Link to comment Share on other sites More sharing options...
Pappy Posted April 9, 2010 Author Share Posted April 9, 2010 Thanks boss! now bubble lenses,look for Smitty over FISD? Quote Link to comment Share on other sites More sharing options...
dutchy Posted April 14, 2010 Share Posted April 14, 2010 Looking fine there broertje.. seems like the virus called "I want as many helmets as possible" has taken you as well.. Quote Link to comment Share on other sites More sharing options...
theGreatSot Posted April 14, 2010 Share Posted April 14, 2010 Looking great Erik! Quote Link to comment Share on other sites More sharing options...
Pappy Posted April 16, 2010 Author Share Posted April 16, 2010 LOL grote broer so true I originally want to have all known variants of sandtrooper helmets replicas but Thanks a lot Zac! Oh,sorry I had to change your old bucket to an esb(waiting for the decals) because I screwed up when I want to 'reform' the eye sockets(on the right) so to make it 'right' again I must cut out a little bit more...and the story goes i still haven't paint it,instead kept adjusting,and found out things about the hero. I replaced the bottom ear screws a little bit higher,tighten the right 'brow' to the faceplate,cut out the bottom helmet opening more,and......voilà I made some gaps on the ears.......oh well...but I like it There are soo many holes that I need to covered up behind these ears Here's the worst part,I just realized that the hero ears were only had 3 'bumps' instead of the 'normal' stunts with 4 no wonder no one ever build a hero helmet from this kit....bummer,totally my fault though Quote Link to comment Share on other sites More sharing options...
iconoclasta_88 Posted April 17, 2010 Share Posted April 17, 2010 Here's the worst part,I just realized that the hero ears were only had 3 'bumps' instead of the 'normal' stunts with 4 no wonder no one ever build a hero helmet from this kit....bummer,totally my fault though I dont know much about hero look... but it is already looking good bro. Good job! One thing that just hit me is all that about the bumps. What is that. Have never read anything about that neither for hero or stunt buckets... Could you write a bit more about that. Or can anybody point me into the light here? Thx... Saludos. Quote Link to comment Share on other sites More sharing options...
Pappy Posted April 18, 2010 Author Share Posted April 18, 2010 Thanks Man! I also just realized about that too!! It's the bump on the ears that we handpainted it spot,on that picture it is certain that there are only 3 bumps,and boy that's quite sharp pulled too Forgive me about the yellow arrow,I just saved any reff I could find on the other side it's not meant for the bumps mentioned,but it's the cap that trimmed too much if I'm not mistaken lol Quote Link to comment Share on other sites More sharing options...
iconoclasta_88 Posted April 19, 2010 Share Posted April 19, 2010 Thanks Man! I also just realized about that too!! It's the bump on the ears that we handpainted it spot,on that picture it is certain that there are only 3 bumps,and boy that's quite sharp pulled too Forgive me about the yellow arrow,I just saved any reff I could find on the other side it's not meant for the bumps mentioned,but it's the cap that trimmed too much if I'm not mistaken lol Oh! I can see that now. I was confused by the yellow arrows! Thx bro! 3 bumps for Hero bucket, noted. Saludos. Quote Link to comment Share on other sites More sharing options...
theGreatSot Posted April 19, 2010 Share Posted April 19, 2010 Another thing to think about with the hero lids is that it was actually a different face plate mould when they were pulled. That mould had the extra tooth filled in, so for true screen accuracy, you might want to think about filling in the extra tooth on each side. This would also require you to repaint the faceplate if not the whole helmet, so I don't know if you want to actually take it that far, but just food for thought. Oh, and if you're going to go filling things in, you'd also want to fill in the dimple in the ear where the second screw would go, but then you might as well try and find ear pieces with three bumps instead of four. I'd say that helmet is looking killer though! I'd love to see pictures of my old AP as you have it now, too! Quote Link to comment Share on other sites More sharing options...
Pappy Posted April 19, 2010 Author Share Posted April 19, 2010 @Juan,copy that bro,I'm also learning as well @Zac,thanks a lot man!! And copy,I'll take pics of my helmet from you when the decals arrived shoot,I forgot the ear dimples,got it,would it be possible to Hot ironing those? That's also what I come up with for the teeth's slope,but,affraid to messed up. I'm affraid to fill it and paint it affraid if the paint will looked different with the abs's color Here's what I tought and found out about this helmet,just in case if there's other my sandy brothers want to make attempt on this helmet,and don't have to deal with hole's mess like I do . AP's quite good since it was from abs,but it was originated from stunt helmets,had to work on it harder to get the 'look'. Or instead,get a TM hero,since he's making this helmet and added nuances and details in particular,or find someone that sells GF's hero kit/helmet - the bottom ear screws should be positioned higher than usual,because - the neck is also cutted wider than the usual stunts(I think,check out the pic/screencap bellow and compare the way the neck trim goes against the tube). But first make sure that the faceplate's forehead were positioned backwards and the make the 'jaw' more pronounced,it's not just because the cap weren't cutted. Hard to explain,but I hope this pic can do the trick,compare the angle of the faceplate with the back cap. It should be more pronounced,but I'm affraid to do that because - I think the eyes doesn't have to be like that,I mean,too close to the cap,altough some hero were like that on screen. What also sets the hero apart from their counterpart is how the eyes were trimmed,not just because it was close to the cap,see the top eye socket for this one(just got these yummy yummy hi res paradise ) CORRECT WRONG - the right eye 'bump' weren't too pronounced,even if was trimmed evenly against the outer eye socket angle(forgive my explanation ). I don't know if this because they modified the mold back then for this helmets,but on mine,I trimmed away this bump just like the 'set for stun' style......or something,but what I saw on the SW Helmets it was also like that,again I don't know if it's because of the angle of it or not - on the ear bottom it should be trimmed very slim against the tube,I was wrong on mine and trimmed the middle way too much on the right ear mmm I think that's all I can remember for now,a lot that I can't explain lol,if there's any I'll add to this post cherrio how's the 'bubble lens' Quote Link to comment Share on other sites More sharing options...
Pappy Posted April 26, 2010 Author Share Posted April 26, 2010 Hi guys nothing new except the teeths and beard painted,but that's all I can do till next month or so hope you guys like him Quote Link to comment Share on other sites More sharing options...
iconoclasta_88 Posted April 26, 2010 Share Posted April 26, 2010 Cool! Saludos Quote Link to comment Share on other sites More sharing options...
Pappy Posted May 12, 2010 Author Share Posted May 12, 2010 Hey guys im done!! well not really but everything else is EDIT : hehe sorry for crappy pics earlier,I've posted new ones 8 hours paid off hope you like it MEPD! Quote Link to comment Share on other sites More sharing options...
FIVE Posted May 12, 2010 Share Posted May 12, 2010 That's TIGHT dude! Very Hero for sure... looks like the one Luke wears. Great job! Quote Link to comment Share on other sites More sharing options...
Pappy Posted May 25, 2010 Author Share Posted May 25, 2010 Thank you sir!! Glad you happy with him changed my previous dark-ish pics hehe sorry for those Quote Link to comment Share on other sites More sharing options...
Rolf Posted May 25, 2010 Share Posted May 25, 2010 Top helmet Erik,he´s a beauty!!! Did you paint all the helmet details, tube stripes etc. The out line work on the grey areas are 100%, love the TK tear drop stripes. Looks spot on accurate nice bro. Congrats Quote Link to comment Share on other sites More sharing options...
iconoclasta_88 Posted May 26, 2010 Share Posted May 26, 2010 Really Cool bucket bro!! Great job! And yes... Are those tube stripes painted? How did you get them so good? Congrats Saludos. Quote Link to comment Share on other sites More sharing options...
Pappy Posted May 26, 2010 Author Share Posted May 26, 2010 Top helmet Erik,he´s a beauty!!! Did you paint all the helmet details, tube stripes etc. The out line work on the grey areas are 100%, love the TK tear drop stripes. Looks spot on accurate nice bro. Congrats Thank you so much sir!! Yes sir,they were all handpainted by yours truly for the traps i paint using Stukas's way by doing the black lines first,make sure the outer line is perfect,and messy on the inside but managed the inside not too messy though so its not affecting the grey too much the TK 'tear' is painted freehand at first on,then fix any odd-ness with the grey,its the same method i will use for the back tear,as you can see theres no tears yet,only a block in black Really Cool bucket bro!! Great job! And yes... Are those tube stripes painted? How did you get them so good? Congrats Saludos. Thank you Brother!! Yes its handpainted,using the very same way like you did and Rolf and then freehand on the curves The result,as you can see i'm such a bad painter Luckily i'm working on ABS surface,so i can trick it by using.......TOOTHPICK! and added occasionally some body polish paste,a bit. For better working wait till the paint is quite dry(thats approx 1.5 days or more for humbrol in my environment),i'm also fixing some outer black lines on the traps like this too Not reckomended for painted surface though,on painted surface,i'm using also.....toothpick but at the tip i put some tissue with some polish paste on it work it gently Glad you guys like him!! Quote Link to comment Share on other sites More sharing options...

Recommended Posts
Join the conversation
You can post now and register later. If you have an account, sign in now to post with your account.