

Strider
-
Posts
811 -
Joined
-
Last visited
-
Days Won
1
Content Type
Events
Profiles
Forums
Everything posted by Strider
-

Strider's Cantina Captain Project (TM Armor)
Strider replied to Strider's topic in Sandtrooper Armor
Thanks, man. Maybe just a little bit on the arms. In reality it's much more dirty than the pictures show -
Strider's Cantina Captain Project (TM Armor)
Strider replied to Strider's topic in Sandtrooper Armor
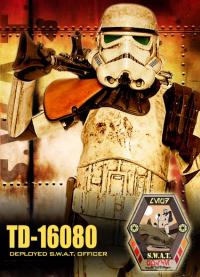
Thanks, Ricky Okay, TD-16080 is ready for some action - let's go and hunt some Tuskens! -
TD-Sharp's TD build - Docking Bay 94 Sergeant V1
Strider replied to TD-Sharp's topic in Sandtrooper Armor
Off to a great start - welcome to the dirty side ;-) -
Strider's Cantina Captain Project (TM Armor)
Strider replied to Strider's topic in Sandtrooper Armor
Some more impressions... And almost there (weathering just half finished and arms to be glued)... -
Strider's Cantina Captain Project (TM Armor)
Strider replied to Strider's topic in Sandtrooper Armor
Many thanks, Paul. And btw congrats on your latest project - the ROTJ armour looks faboulous! And while the postman is busy delivering the replacement arms I've started the weathering process. I have to say: Getting dirty is fun It's kinda interesting to see how the picture comes off; in reality there's also a lighter base layer on the armor which is hardly visible on the pic. Also I'd like to give a shout out to Daelma, Opi Wan and Felice for their hints&tipps: The Vallejo colors are awesome and give exactly (IMO) that sandy, dirty look. For the base layer I've used diluted Vallejo Game color Earth (72062) and for the main layer a mix of leather an chocolate brown (70871 and 70872). -
Old version wasn't too far off....new much better
Strider replied to DirtyBoy's topic in Field Backpack
Hehe, I thought you might notice ;-) Just got that for a bargain in the bay. Not the real thing of course but for the time being I enjoy a look-a-like on my workbench. I already got the Karrimor frame if that was what you were referring to. Planning to do a WIP similar to Ghosts sometime soon (yawn, yet another boring screen accurate build ;-) ) -
Old version wasn't too far off....new much better
Strider replied to DirtyBoy's topic in Field Backpack
Well, I drink to that ;-) -
Did you use the grey primer for the lower seed tray? Just wondering because from the picture there seems to be a blueish hue to it...
-
Awesome, Nick! I'll be watching this with great interest
-
Btw, which brand are you using for the grey primer for the backpack parts?
-
Strider's Cantina Captain Project (TM Armor)
Strider replied to Strider's topic in Sandtrooper Armor
Okay, here we go. I haven't glued the shoulder straps and the shoulder bells yet but so far I'm quite happy with the result. Not sure if the helmet sits a tad bit too high, I have used 3cm foam inside. So, now I just need the arms to cross the goal line. Paul, ready when you are ;-)) -
Ah, allright. I wasn't quite sure particularly as Scott and yourself are usually super accurate in these things. Looking at your reference pictures above it looks as accurate as can be. Good job, Scott!
-
Shouldn't it be a leather Wien Stolla type for the Move Along Trooper as well? Also, I think the dimensions are not quite right. Other than that I really love your backpack project, actually going the same route at the moment. Never thought I'd say this but I'm really envious about your toilet cistern find, lol ;-)
-
Ghoulcinder's Docking Boy 94 V2 Sergeant Build
Strider replied to ghoulcinder@hotmail.co.uk's topic in Sandtrooper Armor
It looks a little too wide on the forearm, but it would help if you would post some better pictures to see the relations. As a general rule trim all of the return edge away from your wrist and and inner half of your forearms and only leave a minimal amount of return edge on the outer elbow. Other than that I found that fitting was a slow process (at least for me). I fitted it several times slowly trimmed my way forward -
Strider's Cantina Captain Project (TM Armor)
Strider replied to Strider's topic in Sandtrooper Armor
Thanks for your comments and support guys, much appreciated! Did some more finetuning and test-fitting today and as you guys said it look as everything will turn out allright. I'm just waiting for my neigbours wife to be finished with the black elastics (I didn't have a sewing machine) and then: Rock'n Roll In the meantime I've completely finished the legs and the boots. Hopefully by tonight I'll have some pictures ready with the whole thing put on I admit I had some help with the shins ;-) -
*DONE* TD 81913 Requesting Deployment
Strider replied to Moley77's topic in MEPD Police Officer Program
Congrats, looking Ace! -
Rick, I can forward you the email he sent me. You will see he doesn't leave much doubt about his intentions of selling it
-
Hey Juan, I think we're actually speaking about the same guy, "Bob", right? He told me he would get a couple of inquiries each year from some crazy star wars fans ;-) I kinda anticipated that and told him I'm just an enthusiast for vintage radios...but well, the result was the same. should the MEPD put up a bounty for whoever finds a Sonix first? Bob is not eligible😜
-
Yeah, they seem to be distant cousins as well. It's really curious that although there are so many similiar animals out there no one has ever laid his hand on the real thing. I've been in touch with a guy in Niagra Falls who actually owns a Sonix Victory 75 but he has no interest in selling it because it was a gift from his late grandmother...bummer. Well, the empire will not halt or falter until it has been discovered. Some say it contains the plans of an even more powerful death star ;-)
-
I've been doing a little research on the sonix Radio lately and while I haven't found it yet I came across a few interesting look-a-likes. It seems some parts could even been have used for the real Sonix, eg. the brackets of the vintage westminster or the leather around the Electrobrand... Vintage Electrobrand Model 2144: VINTAGE RADIO CAVALIER NTR-1000 Japan Vintage sanyo 4 band radio model rp8251 VINTAGE WESTMINSTER AMFM SOLID STATE POCKET RADIO Model 1356 Victory (smaller version)
-
Strider's Cantina Captain Project (TM Armor)
Strider replied to Strider's topic in Sandtrooper Armor
I just pressed the chest plate to the Ab section. The brackets from the original strapping wouldn't allow to attach it so low. -
Strider's Cantina Captain Project (TM Armor)
Strider replied to Strider's topic in Sandtrooper Armor
Today when I was test fitting the thighs and the armor I noticed that the ab/cod piece together with the chest is too large for my upper body (sorry for the crappy pic): I fear I have to take the Pandatrooper route and cut out a piece between the ab section and the cod >>> http://forum.mepd.net/index.php?showtopic=6775&hl= but I'm not too keen on making any cuts to the armor. Any other ideas? -
Strider's Cantina Captain Project (TM Armor)
Strider replied to Strider's topic in Sandtrooper Armor
In Germany we have a saying: "The first house you're building for your enemy, the second for your friend and the third one for yourself". I can see the same logic applying to the assembly of a stormtrooper armor ;-) Today I started with the left shin. Other than with the right one I did not measure 10mm from the inner front ridge from top to bottom but took 14mm at the top and the bottom and 10mm in the middle to account for the curved shape. This will lead to perfectly matched up shin halfes but leaves a little bit of excess ridge on the top and bottom: -
Strider's Cantina Captain Project (TM Armor)
Strider replied to Strider's topic in Sandtrooper Armor
So, this has been quite a productive day. First I've sewn the hooks to the straps. I know you will find this hard to believe but I've never had a sewin lesson in my life, lol. The correct hooks were not too easy to find; I found those pretty close (in German they're called "Joppenhaken"): Next stop were the brackets. There's nothing like the original Also, many thanks to Opi Wan (Alex) for making the brackets for me! -
Strider's Cantina Captain Project (TM Armor)
Strider replied to Strider's topic in Sandtrooper Armor
Right, didn't pick that up. But since I'm not emulating Davin Felth but just used him as reference for the height it's okay for me. There isn't really a reference shot of the belt of the cantina captain and there was probably a bit of variation anyway.