


RoCKo
-
Posts
2,339 -
Joined
-
Last visited
-
Days Won
41
Content Type
Events
Profiles
Forums
Posts posted by RoCKo
-
-
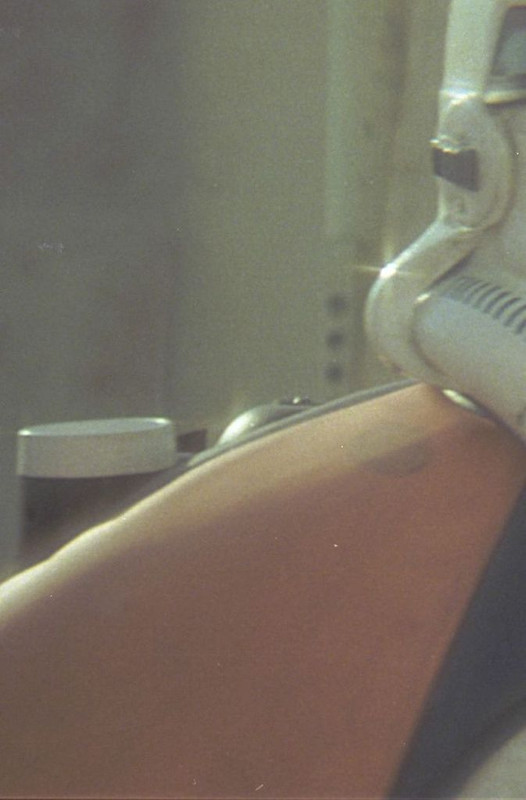
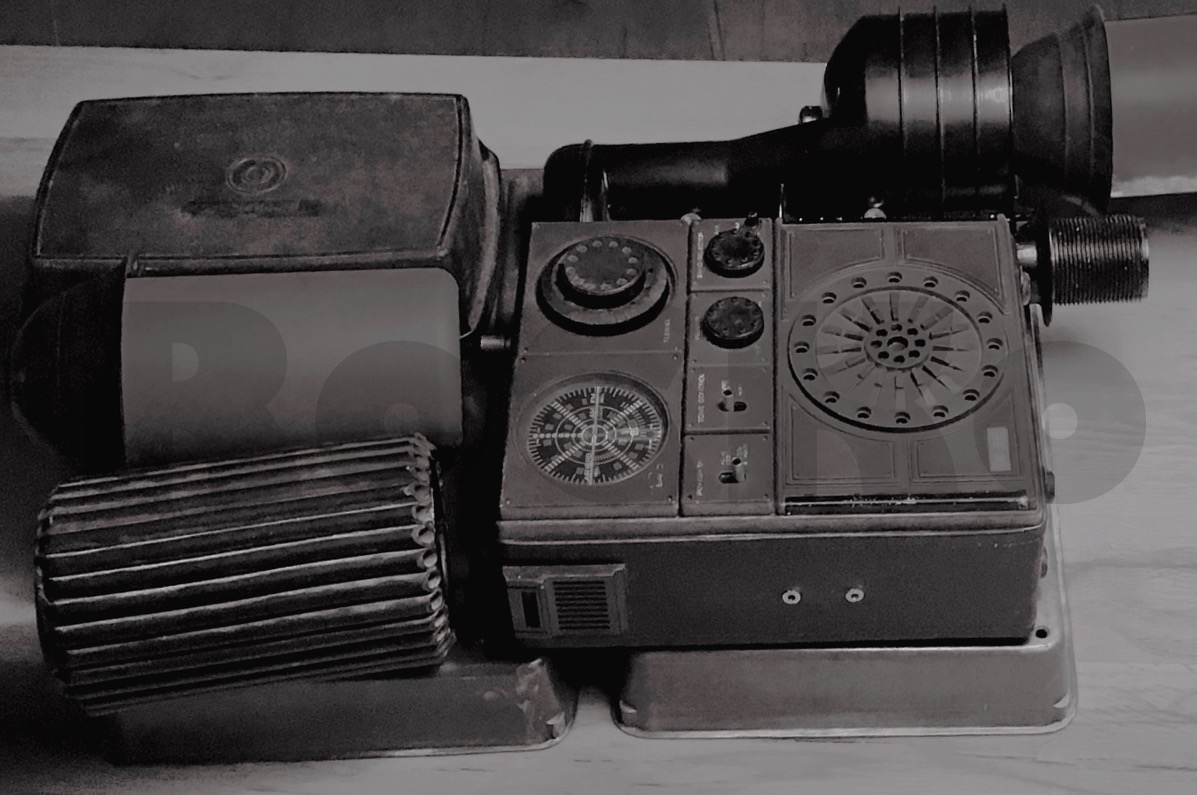
Here is the best picture I have showing the visible head of the bolt on top of the upper bottle...
Hope this helps...
")
-
21 hours ago, Hausi said:
It's always good to cut out less in the first go, you can still work on the details using some model maker files, that's the way I always do it.
Same here! You can always sand, file or even cut a little more...
-
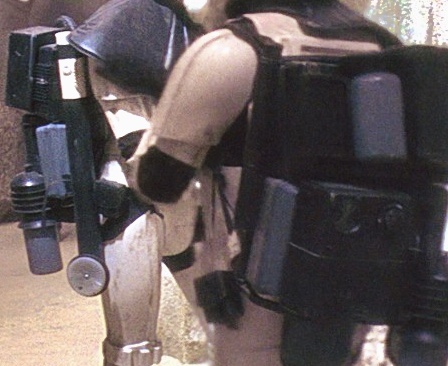
This is my interpretation of the “filter” seen on this specific pack.

I build it from scratch taking measurements from the available reference pictures.
I used flexible rubber hose around a cylindrical card bord box.
Since this picture I adjusted the size to a slightly bigger diameter and a few cm heights.
-
 1
1
-
-
I also used a domed coach bolt on my radar dish, I think it’s screenaccurate!

-
2
-
-
At least the siphon part looks to be reused for other scenes in ANH...

-
2
-
-
Shouldn’t be too hard to find something close enough and unless a lot of other vintage parts used for props in Star Wars, I guess the 100% correct screenused bottles will never be found since no backpack survived filming in Tunisia...
-
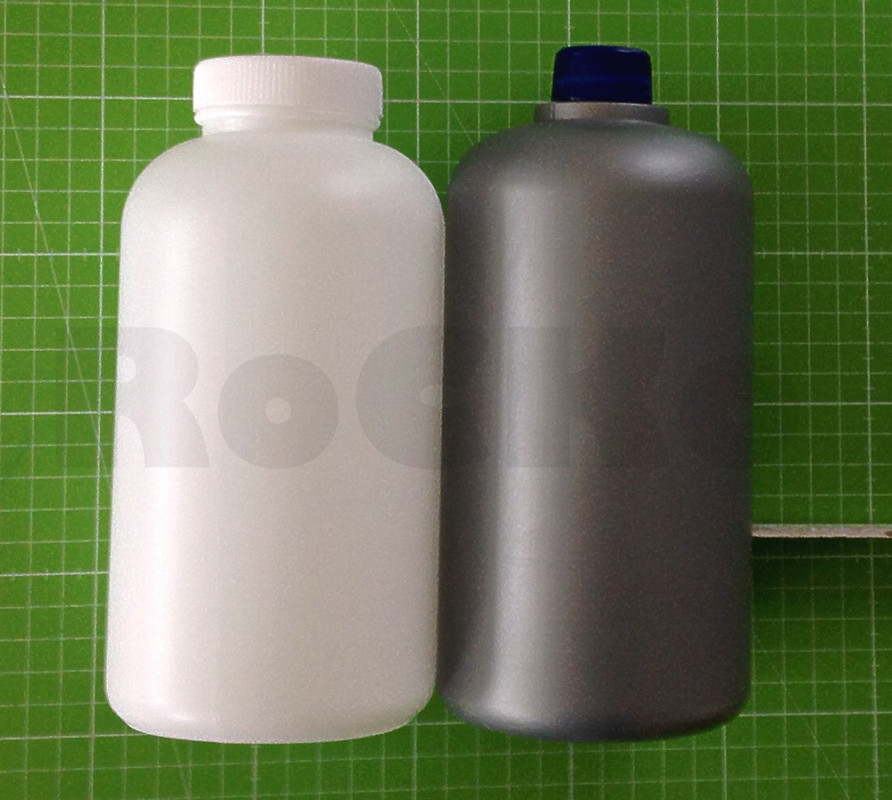
This is my order on amazon.de but at least here in Germany the site/item isn’t available atm.
But it definitely is a 1000ml bottle and the neck form is called “Boston neck” or “Boston round”
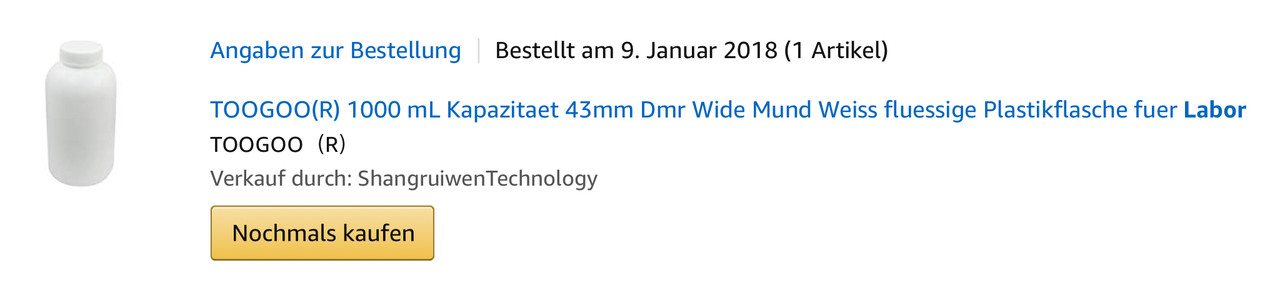
and here are both bottles with plungers on...
I decide to go with the Bosch bottle as I didn’t like the bottom of the lab bottle iirc, but that’s just my monkish attitude again...

-
1
-
-
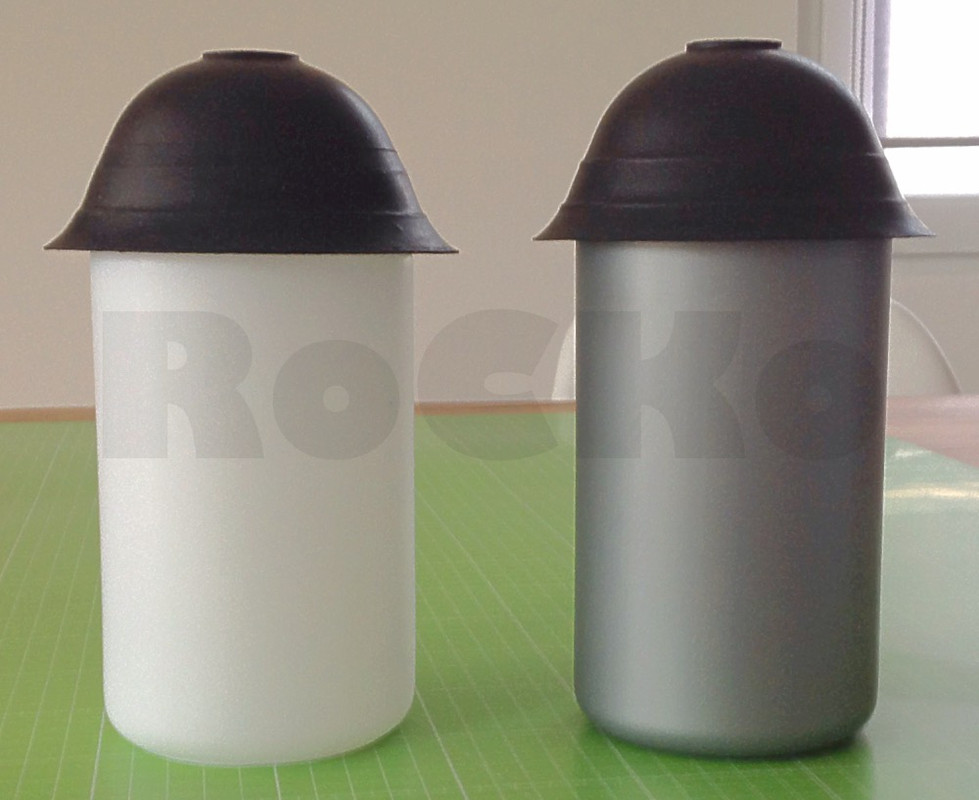
Here is picture of how the screenused bottle probably all looked like without the plunger but with, what I believe to be a sanding disk backing like on the Tupperware dish...

-
1
-
-
Thanks, I’m getting there but still hunting for original vintage parts!
I have little hope finding the Sonix for a reasonable price but all other parts I can get!
All my projects are always a long-time odyssey...
My Bosch bottle is 9,2 cm diameter and around 20 height
I tried measuring the bottle in Photoshop when I got my plungers and knew the correct diameter.
I came out between minimum 9 cm and maximum 10 cm diameter, depending on picture, shadowing and visibility.
It took me ages to find a bottle which also has the correct “Boston neck” ( which can be barely seen when plunger attached) but I’m a accuracy nut!

Laboratory chemical bottles are also a really nice substitute imho...
( on the left, Bosch bottle on the right)
-
1
-
-
This is what I used on mine...

which looks on my upcoming backpack like this...
(Still a WIP, Most parts were updated lately... I will post a thread sooner or more probably later!)
-
As I’m building another pack I don’t have that much reference at hand right now but on this pack the bottle looks slightly smaller in diameter than the first ridge on the plunger...
Sorry, I turned this picture sideways to fit better on my IPad screen...

-
Great progress, Chris!
Your bottle might be a little bit too slim compared to the original bottle...

And I’d go for the M8 for the radar dish...
-
1
-
-
Good work, Paul! I’ll keep watching with interest!

-
Hey Robert,
i remember this very auction from back then...unfortunately I missed out on this because I didn’t make it home in time for it.
I was angry and frustrated for days... (and I am now again...just a little bit!)
-
Btw. I just read that Markus also was able to score him self a second one!!!
Yeah, I know, a second one...! The world is such a unfair place!

But his previous scope will be for sale! I’d jump on it but can’t afford 2000€...
-
Nah...who need extras?!?
I will take it off your hands, so you can completely concentrate on the one and only!
-
1
-
-
That’s a great bunch of old plastic junk you have there, mate!

I will watch this closely...
I still envy you for the siphons...you know I’m always right behind you to jump on one of them, right?
-
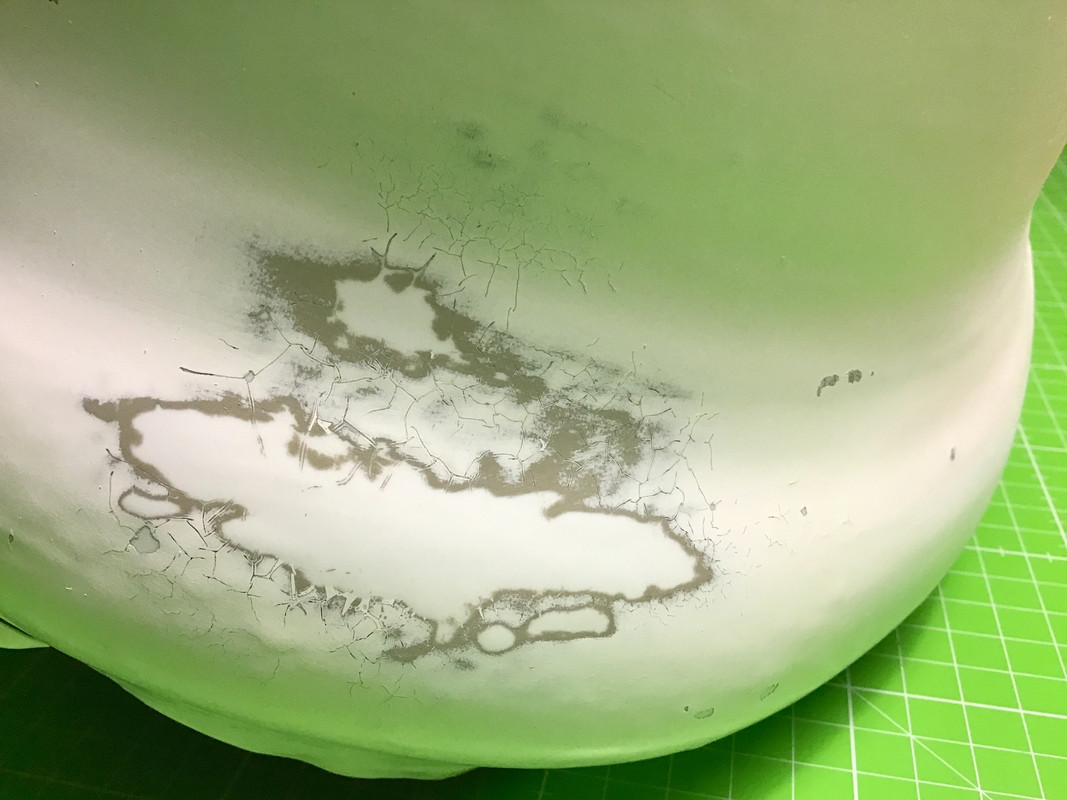
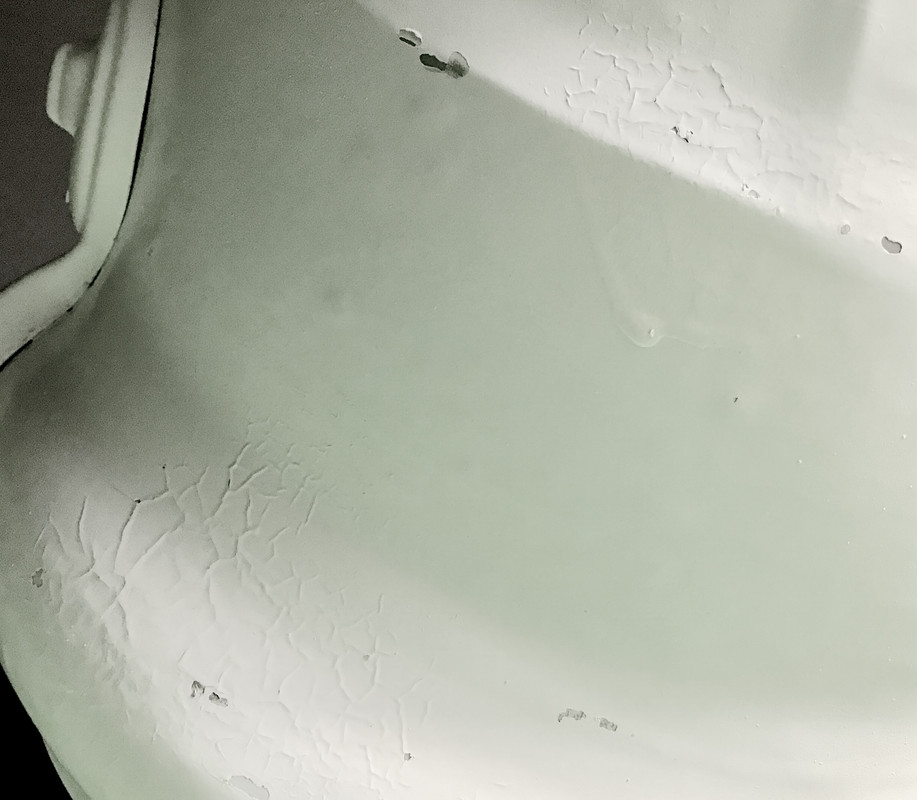
Btw.
I did a little research on those wrinkles.
Beside weather being a problem, too hot/cold and moisture, residue like wax can cause such problems.
In my case I assume I was the problem...
I tried to simulate the thick paint job with some minor drips and might have done it too fast.
I found a how-to site saying;
The most common – is applying the paint too thickly – which makes the surface of the paint dry too fast and not the underside. When you re-coat the solvents in the paint shrink and this causes the wrinkling.
-
After I gave it a little sanding, carefully to not take away too much of the dimples and warts...brings tears to my eyes!


For now I’m going to give it another try when the weather is ok again, I’d rather stay with a few wrinkles than loosing too much of the warts and dimples...
-
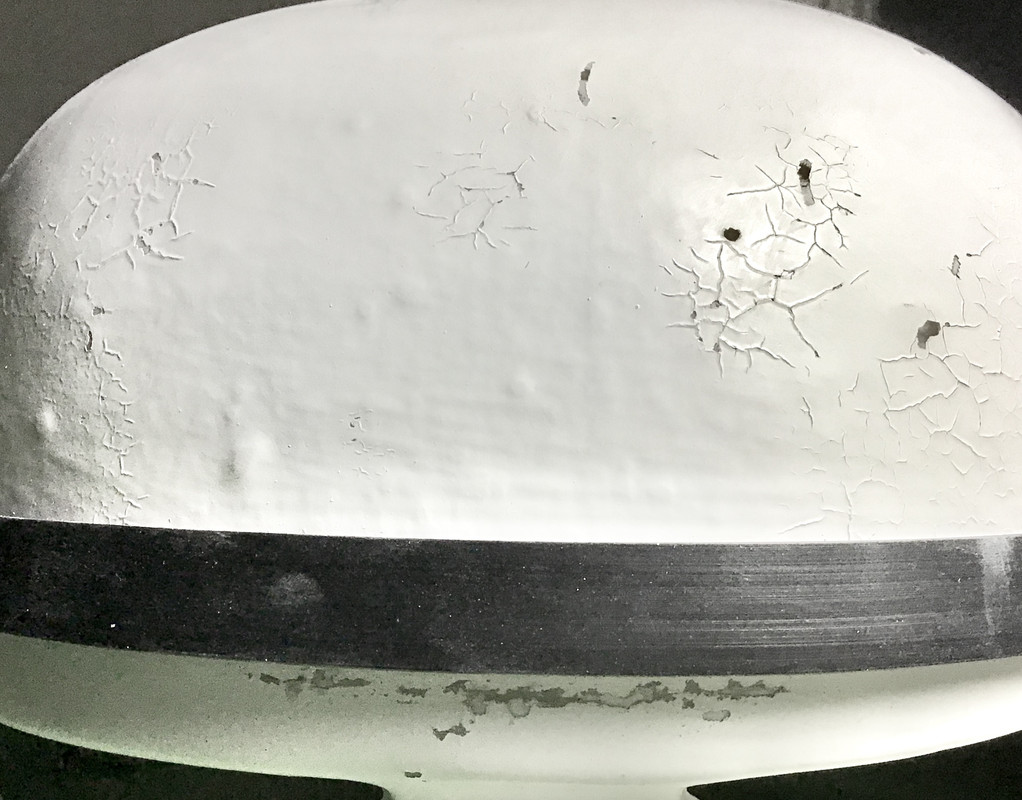
That’s what I thought too for a while but have sanded most areas since...
The crinkles are still visible at some minor areas but imho it was too much to keep it, even for a Sandtrooper helmet which will be weathered anyway!
-
Yeah, it might have been the paint itself but I bought it only a few days ago through amazon.
Nice try on the RS helmet but I hope to gain expertise out of this build to finish the RS perfectly one fine day...

-
For the HDPE/PP base coat I used Rust-oleum Painters Touch Fossil.
For the white top coat I used Dupli Color Aerosol Art 9010.
As far as i could find out both are acrylic spray paints, so I have no idea what actually happened.
I did a few strokes before this final coat and it already had these results, so I sanded these areas down and gave it another try with the results
Weather was good, around 25‘ C, humidity ok...
I’m kinda lost here...???
Like I wrote I really like how the rest turned out, it just those frakking crinkles...
-
Ok, like I said this is a longtime project but I managed to spend some hours working on it.
Since my first post I slightly sanded the helmet, spray painted it first with a HDPE/PP coloured paint as base color.

Since the original helmets were primed with a red primer before white paint I at least gave it a few strokes with a red primer at places it can be seen later on like the inside of the helmet...

After covering some more exposed places (where I assume paint chips would have been likely) with liquid latex i then spray painted the full helmet with white paint. I did it quite rough on purpose to provoke some minor paint drips.
This time i want the helmet to look like the original helmet, but unlike most of my other replicas, I didn’t want it to look like original helmets nowadays but with just some minor paint chips and yellowing like I assume this helmet might have looked while filming.

I really like how the liquid latex covered places turned out, it looks very close to what we see on the remaining original helmets imho......
BUT
unfortunatly the white spray paint somehow reacted with the HDPE/PP coloured paint.
This turned out to make the paint look like crinkled with very small cracks which first made me crazy but I might keep it that way since it is going to be weathered TD helmet anyway...
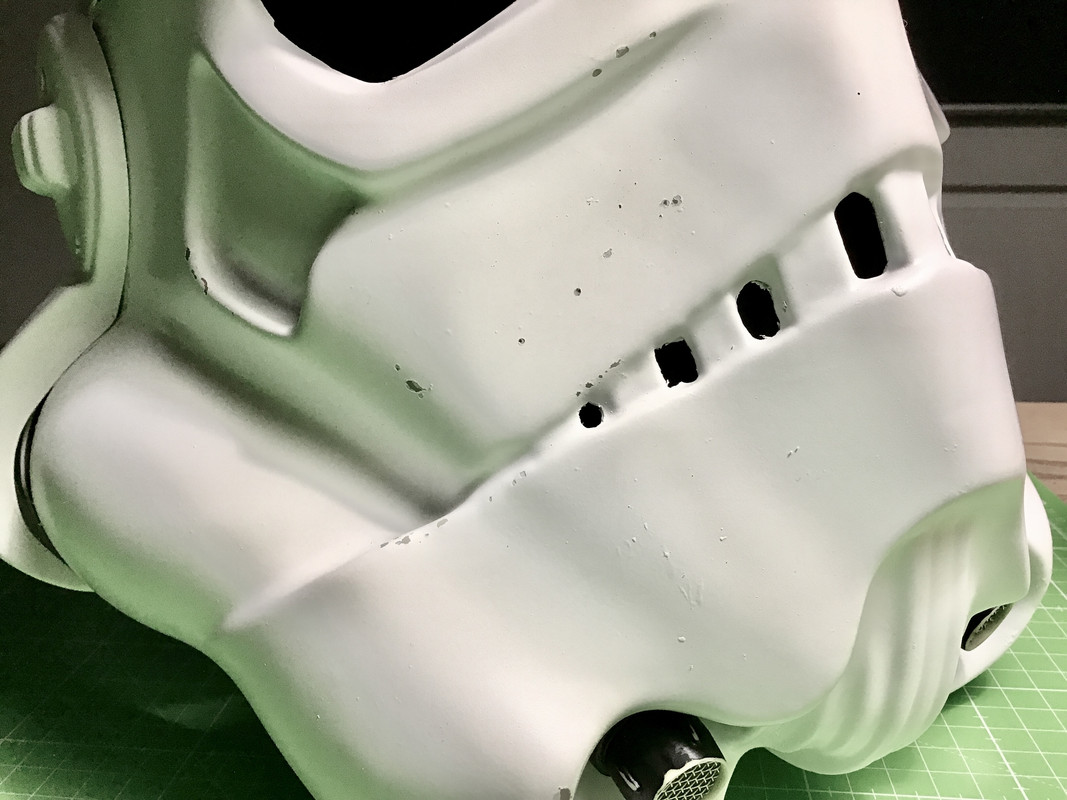

That’s it for now but what do you think? Keep it with these crinkled spots or redo the painting and hope for better results? Let me know!
-
2
-
-
Wow, really great craftsmanship, I wish I had skills enough to build things like that!
Kudos to all the talented people out there!
(Thomas, that goes out to you too, bro!)
Christian's Pack #3 build thread
in Field Backpack
Posted
Great progress!
Just some suggestions:
It might be due to the camera perspective but the lower bottle looks too long imho.
And the upper part of the exhaust ports could also be a tad smaller looking at your picture.