

trooper1
-
Posts
3,080 -
Joined
-
Last visited
-
Days Won
13
Content Type
Events
Profiles
Forums
Everything posted by trooper1
-
Hey, On mine I used a piece of half inch metal pipe, cut at an angle with a dremel. Used piece of aluminum, for inset, and drilled a hole for the handle. Used a long sheet metal screw, put in part way, then covered in plastic welder. Put handle piece on and then filled with epoxy resin, (plastic welder), made it solid as rock. Screw and pipe became one. Jay
-
*DONE* - TD3936 Requesting deployment
trooper1 replied to trooper1's topic in MEPD Police Officer Program
Hey I am understanding you, but where do I find the correct model?? Jay Hey ehhhh, what is the chance of someone being able to point me in the direction of a quest for the correct pouches. Hey also the dot? If I cut the one off it will throw the look off because then they will be high or low depending on which dot I cut off. I will try and find someone who has a set of three, and just replace them. They are glued on so should not be a problem. Oh, Very nice pics as well. Thanks -
*DONE* - TD3936 Requesting deployment
trooper1 replied to trooper1's topic in MEPD Police Officer Program
Change the hip pouch?? To what? I am not sure what else to use. -
*DONE* - TD3936 Requesting deployment
trooper1 replied to trooper1's topic in MEPD Police Officer Program
Hey my MG is is a SciFire Hyperfirm. As for the buttons, yes, this is the way AP ships armor. I am wanting to in the future find or make a set of buttons to make those correct. As for now, I am just waiting for approval. Jay -
*DONE* - TD3936 Requesting deployment
trooper1 replied to trooper1's topic in MEPD Police Officer Program
Thanks guys, I spent many hours of research, and countless hours reading these forums and I think I finally got it. I will always be weathering more to. I have some more ideas for this summer. I had my first troop at Steel City Con in PA, and I found some mods I had to complete. It fits great now. One item missing though. I have a Pauldron coming from Seth, White, and it will be complete, well as soon as I weather it to look like Davins as well. Jay I am now working on my TE2 set of armor, going TK with it. Wish me luck. -
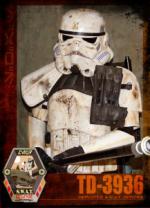
501st TD ID 3936 Log in Name Trooper1 Garrison Carida email fireweasel@hughes.net Web none
-
Hey the Gammorean Guard was just at the Steele City Toy Con in Pittsburg, this weekend and I got to meet him back in the rest area. He is from Bloodfin and is out of Indiana, and travels to all of these Cons you guys have mentioned. He said his costume came from Europe and it was one of five made. He thought this was the only one of this kind in the states. His wife plays the emporer, and does a good job at it also. He showed some pics of some other costumes hes got and they are just as impressive.
-
Hey for the Ttrax I did use 6 rows. I went to the www.looksirdroids.com site and they had a placement diagram on there. I did have to cut the bottom of the back rows because of the folding bipod.
-
Hey for sticking the ammo box to the gun, and the rubber washer. I used Plastic Welder The T trax came from Blastech
-
Thanks Guys, I am going to be taking pics today to get accepted into the 501st and local garrison and then will be posting pics here to.
-
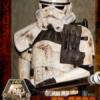
Ok guys here it is, completed, and soots me. I have used Braksbuddys pics to the fullest. Let me know what you think. Jay
-
Thanks for the info. I have since your info. corrected that, so any and all ideas are greatly appreciated. Thanks again Jay
-
Thanks Groz, I have almost completed, and ready for pics end of next week. Will update asap
-
Ok pack complete with holes drilled. I have just mounted the straps, and after reading many threads and watching Starwars 4 again and again. I have mounted my pouch to my straps and it works great. I determined that the sandtrooper never has a shoulder pouch on without the backpack and so I found it easier to mount. See pics I used a sitharmor pouch and cut the leather loop from the back and relocated it to mount to the strap. works great. Now to paint the rivets with black and put hot glue on to them to smooth up the rough end, then done.
-
Thanks guys. I have just the action part I am working on, headed to the machine shop. Hey Seth dude.... Anything on the Pauldrons?? Everything is in, except that, then I am ready to get deployed, and then a troop March 29-30 in PA. Cant wait, I hope... Jay
-
Well good news and bad. I stopped at Lowes and got a package of 10 beveled washers, as they didnt sell individual. I also got them is 1/32" larger than 3/4". As for the security back part from a clothing store. No luck finding, I went to 5 different places and the have all quit using these, and didnt have any. So I dont have one to show. I have attached pics of what I have so far again. I have painted the stock, and it looks old, and beat up, sort of like my real Winchester 1873 rifle. Added the brown with a brush and the black highlights with an airbrush. Will hit a little more here and there, as I am not 100% satisfied. As for the rest, I have to make the slide, action portion out of something??? then waiting on t trax. Weathering is 95% still have some suiting to do.
-
TD-1536 Mike, Hey I think what he is talking about is that they come made, riding to low on the belt. To high of a belt loop. I had the same problem with mine, so I just drilled out the rivets on the belt pouches only, and stretched the leather flap down, and re installed rivets at the bottom. This way the holster, rode higher like the originals. It worked better. I did see what he was saying, he just installed the pouch upside down, then flipped it over, did the same thing. Jay
-
Well???? I will stop at Lowes first, the Kohls. Will get one of both to show pics. Then decide. Probably will go with rubber because of how well it will attach to a rubber gun...
-
I am going to Kohls tommorrow to see if I can get the piece you are talking about. I have completed alot of the weathering. I still have the action portion to add to the gun, and the t-trax. The stock is turning out to be a bear. I have tried the almond first, then the darker wood stain type idea that Sci-fire says but doesnt seem to be working. I used an airbrush, with silver, and a little rust color to weather. I also used the rag, and a piece of scotchbrite pad to ruff it up a little.
-
Ok, box painted along with stripes by stock. I tried the weathering part, but dont like the paint I got. I am now headed to Lowes, be back later. Also going to stop at an airbrush artist friend to get some ideas. Have to order some T-trax for it. Had some plastic but doesnt look just right for this setup.
-
Ok, Here are pics so far, of the box made from .96 abs cut then glued with Plastic Welder. Then painted over satin black with gun kote.
-
Ok, I will be posting pics as I go along. I am going to try and follow Sci-fires techniques other than using an airbrush for the tedious stuff. As for the paint, yes the fusion seems to have held up ver well for now. I painted the entire gun Satin Fusion,( for plastic) and then I have used actual gunkote paint to give it the real look of a firearm. This is an off flat black/gray tone that I use to coat my firearms when I am working one that has been damaged. Seems to work very well. Will post a pic soon
-
Well, news. I took a dremel with small sanding wheel and just smoothed up the off points of the seams. It worked well. I have then built my box for the DLT conversion out of ABS sheeting and have glued it in place. Coming along well so far. I used Rustoleum Satin black Fusion paint and painted the entire thing to start with.
-
Ok questions. How, and if so do I remove the mold seams shown in the pics. Not bad but wasnt sure if they were removeable. Then paints, any ideas on colors that best work. Also once weathered, and DLT-19 items added. Do you spray the entire thing with any type of sealer, or clear coat? Hey also what do I use for the handle for the action. The little nub. any ideas Thanks Jay I am nearly complete I have my stomper speakers coming, a troopercom coming, my Pauldron coming from Seth and everything else is complete. I should be ready by next week I hope and will take tons of pics. Have my first troop coming up at the end of the month so I hope I am prepared.
-
Yahhooo, my hyperfirm has just arrived. It was lighter in weight than I expected, but looks great. I have many questions for you guys though. I will ask after my picture show.