
Leaderboard

Popular Content
Showing content with the highest reputation on 05/12/2021 in all areas
-
Congratulations Raymond! Great work. Verzonden vanaf mijn iPhone met Tapatalk1 point
-
@Soutran @Rafa Wolfstar access granted, welcome!1 point
-
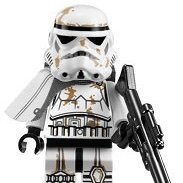
Application Review: Part 2 Name: Raymond Ubachs Legion ID: TD-72977 Forum Name: Soutran Garrison: Belgian Garrison, Flanders Dragon Squad Helmet a. Green lenses: check b. Paint color of traps / tears: check c. Correct number of teeth: check d. Mic tips: check e. Vocoder color: check f. Tube stripes: check g. Rank bar on ears: check h. Brow: check i. Side screws (ears): check j. Weathering: check: check k. no mesh behind teeth: check *additional comments* RESULT ON HELMET Checked & Cleared Armor details a. elastic straps shoulders: check b. neck seal: check c. black undersuit: check d. shoulder bells: check e. biceps: check f. forearms: check g. pauldron: check h. chest / back plate: check i. kidney / butt plate: check j. ab plate / side rivets / cod: check k. strapping system: check l. thighs: check m. shins / calves: check n. sniper plate: check o. boots: check p. gloves: check q. hand plates / guards: check r. ammo belt (waist): check s. ammo belt (right knee): check t. canvas belt: check u. pouches: check v. weathering: check: check RESULT ON ARMOR Checked & Cleared Backpack a. details: check b. weathering: check *additional comments* RESULT ON BACKPACK Checked & Cleared Weapon a. details: check b. weathering: check *additional comments* RESULT ON WEAPON Checked & Cleared Raymond, this was you’re second and final review, great work, congrats brother! You have successfully followed the guidelines in regards to the MEPD CRL and have met the requirements, be proud of yourself. Now, you are a member of the Police Officers, the Elite Troopers of Tatooine! Please send the pic you want to use to Luis (Sandman Tigui) and we'll get you squared away. We will have your updated information uploaded into the MEPD system very soon. Congratulations on becoming a Deployed Officer of the MEPD! Now please report to the Mos Eisley Mess hall where you'll serve the troopers until the next newbie gets cleared. Bigwam - MEPD Deployment Officer1 point
-
Exactly1 point
-
Hey mate, that syphon looks immaculate, great work! Have a look at my pack#1 build thread to see how I used a long threaded bolt to attach the bottle (don't mind that my Syphon doesn't look as nice as yours) In my pack#3 build you can see pics of the bottle and how I have used wood and a threaded insert to attach the bottle: Hope this helps, keep up the great work.1 point
-
Hey Raymond, this is a neat and tidy application and your gear looks great and fits you very well, I am sure you will be PO in no time.1 point
-
Alright, on we go. Next up was the mortartube, it´s attached to the frame using two M5 bolts. For easier assembly and disassembly when needed, I have drilled some holes and slots on the backside where they aren´t visible. For the disc behind the original Tupperware radardish I use a CD as a template and cut it out from a sheet of black ABS. The radio is a Sandiecomms kit but I used the supplied pieces of white ABS to create templates and recreate them of black ABS. Some might say that this is unneccessary as it´s painted black anyway but with my very first radio, I just hate it when I bump into something and I have to repaint it because the white ABS is showing underneath. I´ll see how this works out for me. To keep it ligthweight, there are no electronics added. So this is the Sandiecomms kit on the right next to a Sonixworld faceplate which is cast from an original Sonix Victory 75. part recreated from black ABS construction of the box: weight: trial and error finding the right canister to support the radio as seen on screen: the one seen on the right was the best match, also didn´t want to paint it but finally had to cut it apart on the right side at the back and reshape it with my trusty heatgun, on the finished pack this isn´t visible anymore. fabrication of the pleather surround: I use paperboard and then wrap the pleather around it using double sided tape, make sure not to use the tape at the edges as you will need to add the stitching later on. For this, I punch holes into the surround and then just take a needle and finish the stitching, quite easy. After painting, this is what the radio looked like before weathering. I even took the time to add the MIC letters. You can´t see it on the finished pack as it´s covered with gaffer tape but I just love these little details anyway. The feet as well as the antenna and the sockets aren´t supplied with the kit, so this was all ordered via amazon, the feet were actually doorstoppers made of brown rubber, I added the part of a rivet in the middle to make it look right. As a sidenote, they will also be hidden behind the lower end of the canister. Lol. backside (bolts already in place, I finally added a third one)1 point
-
The Syphon is an RWA kit but as that was molded and vacformed of an original Shires UP100 Syphon, it had to be shortened as the screen-used syphon is a shorter UP90 as it is also seen on pack#3. Ross Walmsley´s syphon´s are great but shortening them is a pain in the ... I´ve used E6000 and zip ties to assemble this one, first one half and the next day the other to keep it from shifting around. I closed the gaps with HIPS sludge made from the leftovers from trimming. this works very well and keeps it uniform as I am afraid of using putty as it might crack or even if it gets hit, showing a different color underneath. so this is what it looked like before painting, I even took the time to file out the square hole for the bolt that is needed to attach the plunger cap to the syphon so it stays securely in place, I then used epoxy glue to attach it. after painting it satin black, note that the plunger cap has already been attached as well as the bolts need to attach it to the seed tray: So this is what the pack looked like at that moment:1 point
-
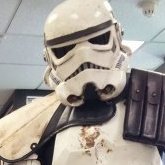
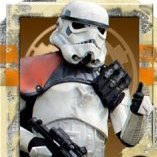
I´ve just finished completely overhauling my good old pack. At the time when I was deployed as a Police Officer, it looked like this: I successfully went for SWAT afterwards emulating the Docking Bay 94 "Tuck´n Roll" Captain... but I always trooped on events wearing my pack, I just didn´t feel like a real Sandtrooper without it. As time passed, I upgraded the Syphon and changed Gordon´s Syphon for a more accurate RWA one but that was about it. But I always felt that my pack was lacking in accuracy. Now I have changed that. The frame was a Karrimor from the beginning but it was missing the bend, so the parts weren´t alligned perfectly, consequently I bent the hell out of it. The seedtrays came from ToscheTrader and were originally held together with tiny screws, which wouldn´t work for a SWAT level build. I orderes some of Ross´s Seedtrays which are slightly more accurate in size but the Tosche trays had some different details which I actually liked, so I kept them, filled up the holes with sludge and repainted them. The upper trays are now glued together using E6000. For the lower ones I wanted to have the gap and the tape, so I had to come up with a solution. I used aluminum, bent it to the right shape to be able to fix the lower trays to this frame. It is actually very sturdy. Took the idea from my buddy Knopi, thanks mate! I didn´t like the shape of my original exhaust port, so I scratchbuilt a new one from wood and tubes found at my local DIY store and gave it that curve in the tube. Here´s a nice reference pic of the exhaust port: I also reworked my radio as the pleather surround originally had a gap at the bottom and the feet weren´t correct as well, so took doorstoppers from the DIY store and a made a new pleather surround without the the gap to make it look seamless. I also messed up the position of the large plug on the right side in my first attempt, so I fixed that too. Also painted my Brexton Box to match the paint overspray seen on screen and redid the mounting brackets for my original vintage Gio´Style canteen. I also added a bottle with a larger diameter at the bottom: At the time more and more people were adding the red canvas strips to their packs and thanks to another friend who is also working on his pack, I could get these (just love them): So here are some more reference pictures of the pack as seen on and off screen: After getting everything alligned correctly, assembly, adding the tape some paint details on the mortartube to emulate the glueresidue and some more subtle weathering, my "new old" pack looks like this: As I have my new helmet and blaster ready and also almost finished reworking my armor and weathering, I will probably soon be applying for SWAT... again.1 point