SCRIBBLER Posted September 12, 2016 Share Posted September 12, 2016 Hi, MIke! Nice work so far, Troop! Welcome to the sand as well! In case you haven't done it yet, don't forget to change the ab buttons from the TK amount and size to the TD version. Quote Link to comment Share on other sites More sharing options...
TriumphTrooper8 Posted September 13, 2016 Author Share Posted September 13, 2016 I have a set of the 3 buttons from ATA. Once I do the gray and tan over the brown I will swap them out. Home stretch for the Pack! I measured 2.25" and made the capacitors and used a rubber grommet for the front and a plastic plug for the rear and shaved the lip off the plastic plug so it would site recessed. Threw some CA glue and then used a piece of 3/16 wood dowel for the tip. For mounting until I get some stand-offs I went and used wall anchor sleeves which I used on the Thermal Detonator and the Lab Tube. Mounted them to the top seed tray in a disorganized fashion! Painted and ready to go back on the seed tray! Put some decals on the radio which I may take off and use the official language of the empire set of decals..... I used magnets to mount the radio face and then Velcro for the tool box cover. Both work very well. The optional Lab Tube was mounted and painted so when it dries I can put everything together and all that is left are the shoulder straps! Quote Link to comment Share on other sites More sharing options...
TriumphTrooper8 Posted September 13, 2016 Author Share Posted September 13, 2016 Ok so let the opinions fly! 1-the control panel on the mortar tube/thermal detonator......too long? 2-lab tube does it mount more so level versus the gram when sitting face up flat? Like half way down each have of the side bent part of the pack frame? 3-for move along so I have the lab tube? 4-is it preferred to have the bottom tray cover drooped down and taped for the move along or tapped up back in place? 5-someone change the CRL for swat on the move along pack! The bell on the top cannister/bottle is not gold! It's driving me nuts! Be gentle Here are the pictures before weathering and shoulder straps..... Quote Link to comment Share on other sites More sharing options...
SCRIBBLER Posted September 13, 2016 Share Posted September 13, 2016 So far, so good! Final call on details will be made by our Deployment Officer (Felix). Keep at it and we look forward to seeing your whole rig completed! Good luck and nice work! =) Quote Link to comment Share on other sites More sharing options...
iconoclasta_88 Posted September 14, 2016 Share Posted September 14, 2016 Really cool looking pack!! Saludos Quote Link to comment Share on other sites More sharing options...
TriumphTrooper8 Posted September 15, 2016 Author Share Posted September 15, 2016 I got some very helpful info on what really needed to be moved, trimmed, etc. Took 2.5" off the stinger........ Moved the TD Control Panel and shortened it per the movie still! All back together! Quote Link to comment Share on other sites More sharing options...
LoveMonkey Posted September 15, 2016 Share Posted September 15, 2016 All in all it looks really good. The stinger tube still looks a bit long, but maybe that's just the angle of the picture. I'm curious as to what others would have to say on it. Quote Link to comment Share on other sites More sharing options...
Airborne Trooper Posted September 15, 2016 Share Posted September 15, 2016 Fantastic build thread and pack. I think the stinger is still a bit too long too. Check against references. Now add a bit of weathering and post your submission for PO! Quote Link to comment Share on other sites More sharing options...
TriumphTrooper8 Posted September 16, 2016 Author Share Posted September 16, 2016 Took another 1" off. Put on the 2" wide and 3/4" wide electrical tape. Quote Link to comment Share on other sites More sharing options...
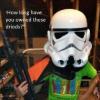
TriumphTrooper8 Posted September 17, 2016 Author Share Posted September 17, 2016 I put the three button strip on the ab. Removed the screen from the frown on the helmet. Adding gray and tan to the weathering on the armor.........lighting is not that great! Quote Link to comment Share on other sites More sharing options...
Airborne Trooper Posted September 19, 2016 Share Posted September 19, 2016 Nice! Layers really make it pop. Quote Link to comment Share on other sites More sharing options...
TriumphTrooper8 Posted September 21, 2016 Author Share Posted September 21, 2016 Ok so the ab and butt plates are done with the switch to the 3 button plate and it loos good! Put the personal mark of the all mighty move along trooper....beside the electrical tape and duck tape on the shoulder bell. Yeah I did the duck tape.... Weathered the back pack too.......brown and gray no tan. Then attached the 1" black poly webbing using rivets on the frame and wrapped the aluminum straps for the botton seed tray and used abs plates. Put some fuzzy loop side of industrial Velcro over the top straps to keep the chaffing down. Fits nicely! Not as heavy as I thought it would be.... Quote Link to comment Share on other sites More sharing options...
TriumphTrooper8 Posted September 22, 2016 Author Share Posted September 22, 2016 Suited up and the pack will need to get used to for walking around! Inside: Outside: Quote Link to comment Share on other sites More sharing options...
Airborne Trooper Posted September 23, 2016 Share Posted September 23, 2016 Looking good! You'll start to forget you even have the pack on..... until you bump into something Quote Link to comment Share on other sites More sharing options...

Recommended Posts
Join the conversation
You can post now and register later. If you have an account, sign in now to post with your account.