Havoc6538 Posted February 6, 2013 Share Posted February 6, 2013 Finally got around to starting this topic, although I have a general work-in-progress thread elsewhere. Apart from the weathering, building this pack and researching the parts has probably been the most fun. I started off making a frame from PVC pipe, but it seemed very flimsy and the walls were not thick enough to heat and bend without creasing or folding. I made a replacement from copper pipe, soldering the corners. This has made a very light, but very rigid metal frame. In the foreground are the aluminium strips I riveted to the frame to support the trays. I got a set of trays from Rick, but a mate in the UKG made me a set of 5 rib trays with accurate ribs, so I've used ricks for the black set, and the customs for the blue - being painted here with the correct Humbrol 47 enamel paint. I also bought a parts kit from another UKG member, which included a vac-formed radio box and fascia, tool box, bowls and the exhaust. Here is the radio: I have now discarded all but the tool box, instead using one of Rick's excellent resin faceplates. I made the box for it out of some scrap ply I had lying about. Next, I painted the box black, made a pleather surround, fitted jack sockets and finished the fascia. I've also modded the syphon I bought from Gordonator, fitting cable ties around the cylinder part to copy the burger stackers. I altered the dome to match what we see on screen too. The rectangular parts I did with car body filler - I masked off the shape, spread a thin, even layer of filler over the gap and removed the tape while the filler was wet. Once dried, I sanded it smooth and gave another skim coat to fill any minor holes. One more sand and all done. Note in one of the pics there is a lot of paint missing - I forgot to key in the surface of the syphon before priming, so the masking tape took a lot of the paint off with it. I gave it all a good rub down and re paint between pics. I used a couple of wet-wipe containers for the bottles (they were actually sugar soap wipes from Homebase). the bowls I originally had looked way too big, but the guy that made my blue trays had a couple of his own bowls lying around in his garage, and they did the job - the one on the left is the type I ended up using. One of the larger bowl came in handy for fitting the bottle to the bottom of the syphon/inlet manifold. I trimmed it and glued it in place inside the syphon so I could fit the bottle to it. It's not glued in this pic before I fitted it permanently, I glued a bolt in place through that hole, for the bottle to hang from. The exhaust I got was totally wrong I've back-filled the box with body filler and sanded the corners over, to make it more rounded like the actual prop. The pipe part is work in progress, I'm looking out for the right parts for this. The "wasp sting" (or whatever you want to call it is also work in progress. I bought a 1.5 litre fridge jug from Morrisons and cut the bottom off: The paint is drying on this as I type. I used a couple of padded straps cut off an old backpack, which I've sewn to the frame. So apart from the sting and the exhaust, I've just got to fit the radar dish and the wire around the radio and then I'll be finished. Here's how it's looking at the moment: And on..(the black tray slipped in this pic - it's not permanently fitted yet, as I still have the exhaust to finish). Quote Link to comment Share on other sites More sharing options...
SID Posted February 6, 2013 Share Posted February 6, 2013 Great your job. Quote Link to comment Share on other sites More sharing options...
Dazauto Posted February 6, 2013 Share Posted February 6, 2013 Your packs looking great Simon, top job mate Im not too far behind you getting mine finished . Quote Link to comment Share on other sites More sharing options...
Vf2112 Posted February 6, 2013 Share Posted February 6, 2013 Nice use of the Tupperware jug bro ha ha Looking good Quote Link to comment Share on other sites More sharing options...
Smally Posted February 6, 2013 Share Posted February 6, 2013 Coming along great, Simon! What method did you use to attach the wipe bottles to the mushroom caps? Quote Link to comment Share on other sites More sharing options...
Havoc6538 Posted February 6, 2013 Author Share Posted February 6, 2013 Hot glue. Lots of it. The mushroom caps are pretty thick ABS and took the heat.I did the glue equivalent of spot-welding them in place, then I ran a bead of glue around under the rim of the caps. Not as pretty as I'd have liked, but it does the job well enough. Quote Link to comment Share on other sites More sharing options...
DirtyBoy Posted February 6, 2013 Share Posted February 6, 2013 Looking great man!!!! Quote Link to comment Share on other sites More sharing options...
Smally Posted February 6, 2013 Share Posted February 6, 2013 What are you going to use for the backing of the radar dish? If you haven't already built one, I'd suggest an old CD painted black. It's the perfect size. Quote Link to comment Share on other sites More sharing options...
DirtyBoy Posted February 6, 2013 Share Posted February 6, 2013 Lol...yes it is Quote Link to comment Share on other sites More sharing options...
Havoc6538 Posted February 7, 2013 Author Share Posted February 7, 2013 Yep, probably going to go with the CD. Otherwise, I was going to cut a circle from the same ply I used for the radio box. Quote Link to comment Share on other sites More sharing options...
DirtyBoy Posted February 7, 2013 Share Posted February 7, 2013 Your friend making any more of the trays? Quote Link to comment Share on other sites More sharing options...
Havoc6538 Posted February 7, 2013 Author Share Posted February 7, 2013 No. He got given a couple of pretty shoddy formers. He cleaned up the 5 rib former and pulled me this set, but never got around to finishing the 3 rib former. He was taking on a lot of other prop building work for people too and has since said he's going to stop doing it as it's taking up all his spare time. Quote Link to comment Share on other sites More sharing options...
DirtyBoy Posted February 7, 2013 Share Posted February 7, 2013 Ya I know how he feels. Between work, kids, a couple of girlfriends and building, I have very little time Quote Link to comment Share on other sites More sharing options...
inglorious trooper Posted February 7, 2013 Share Posted February 7, 2013 i might be able to help you out with a guy that supplies 5 rib seed trays rick,but hes u.k.! Quote Link to comment Share on other sites More sharing options...
Vf2112 Posted February 8, 2013 Share Posted February 8, 2013 Wat color blue is that? Quote Link to comment Share on other sites More sharing options...
Havoc6538 Posted February 8, 2013 Author Share Posted February 8, 2013 Humbrol 47. Quote Link to comment Share on other sites More sharing options...
Vf2112 Posted February 8, 2013 Share Posted February 8, 2013 For the backpack? Looks good Cheers bud Quote Link to comment Share on other sites More sharing options...
Havoc6538 Posted February 16, 2013 Author Share Posted February 16, 2013 I've painted the bee stinger part, just on the lookout for the parts to use for the actual sting. At the start of the build, I bought a load of bits from a UKG member (radio faceplate, mushroom caps, exhaust, and toolbox), but have now discarded all but the toolbox and the reshaped exhaust box. This is how the exhaust came: Not very accurate. I chucked the pipe - can't use it. Then I made some mounting brackets from some scrap ABS: I backfilled the box on the inside and sanded the corners over, giving it a more gentle curve, as on the originals, and I fitted the brackets. This is how it looked after a coat of paint: For the pipe, I couldn't find what I needed, so I made it. I took a short length of plumbing pipe, cut the same length again so I had 2 identical pieces. Then I made a cut down the length of one piece and wrapped it around the outside of the other after applying a generous coating of polyweld . This created a piece the right thickness, but I had to fill the gap on the outer piece (hope this makes sense). Once that was done, I cut the end at an angle, tidied it all up and primed it, to get this: I glued it onto a narrower guage pipe and added an o ring: Added the ribbed pipe around the lower piece (I couldn't find one with the reinforcing ribbing at the correct angle) and the hose clip: And here it is finished on the pack: I think maybe the actual exhaust box could have done with being a little longer as the top of the exhaust sits slightly lower than it should, compared to the bottle next to it, but I have to work with what I've got. I've also now fitted the radar dish, pics to follow. Quote Link to comment Share on other sites More sharing options...
Havoc6538 Posted February 20, 2013 Author Share Posted February 20, 2013 For the radar dish backing, I went with the CD in the end. Then bolted it through the mortar tube with a cap nut painted the same shade of off-white as the dish. I went through my garage this morning, figuring there's GOT to be something I can use for the stinger. Going by this pic and the alley check footage, it had to be something cone shaped: Luckily, I found a funnel I didn't even know I had. I cut a slice out of it the right size, cut a length of tube and cut a hole the diameter of the tube in the bottom of the jug I'm using as the main piece. I flipped the funnel piece over, embedded it in a piece of plasticene and positiioned a bit of pipe through it, then filled it with fibre-glass resin. I'd put a film of vaseline on the pipe so the resin didn't stick to it. Once hardened, with the pipe removed, I could clean it up: Tidied, the final bit of pipe glued in place and primed: And finally, the finished stinger, screwed through the jug base in to the resin, and glued around the pipe on the inside where it enters the jug base. Quote Link to comment Share on other sites More sharing options...
Smally Posted February 20, 2013 Share Posted February 20, 2013 This build really is amazing. You've got serious skills, Si. Are you sure you don't secretly make these professionally? Quote Link to comment Share on other sites More sharing options...
inglorious trooper Posted February 20, 2013 Share Posted February 20, 2013 WELL DONE simon buddy!! youve really looked into the bee stinger and taken some time to get it right bro. got to say it looks spot on,il be looking to doing something similar with mine, thanks for a bit of inspiration mate,never goes amiss!!! Quote Link to comment Share on other sites More sharing options...
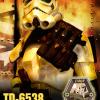
Havoc6538 Posted February 24, 2013 Author Share Posted February 24, 2013 Tonight marks the end of an era. Backpack is done and costume pics submitted to GML for clearance. So here she is, all finished. Such a relief to get it done, but now wondering what I'm going to do with my spare time... Quote Link to comment Share on other sites More sharing options...
Vf2112 Posted February 25, 2013 Share Posted February 25, 2013 Outstanding bro very good job indeed u should be proud Quote Link to comment Share on other sites More sharing options...
Robster Posted March 8, 2013 Share Posted March 8, 2013 awesome work bro!well done! Quote Link to comment Share on other sites More sharing options...
sir david Posted March 8, 2013 Share Posted March 8, 2013 nice work Simon Quote Link to comment Share on other sites More sharing options...

Recommended Posts
Join the conversation
You can post now and register later. If you have an account, sign in now to post with your account.