Search the Community
Showing results for tags 't21'.
Found 8 results
-
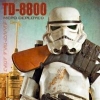
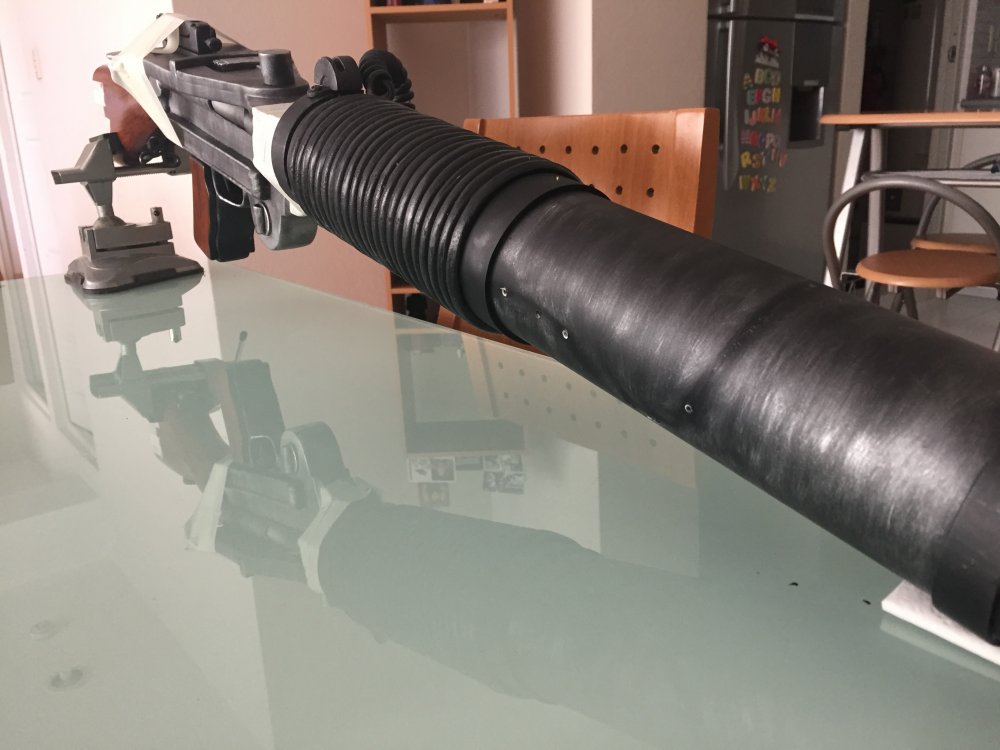
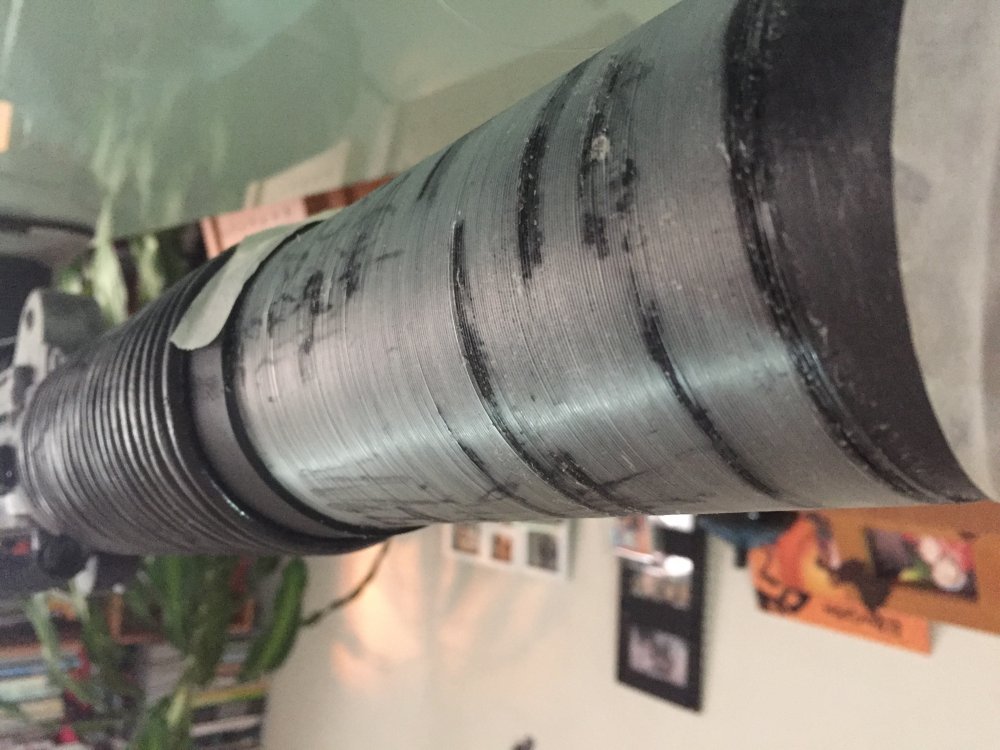
Hey Everybody! So... a new cycle has started for the MEPD under a new DL and a new energy is flowing among the detachment. This sounds to me like a great opportunity to start working again in my delayed projects awaiting on the work bench. I will be building, upgrading and finishing various projects, including new weathering and adding my real hegnstler counter to my E11, finishing building my ANOVOS armor, finishing my TK replica armor, building my Gino and TM buckets, and... upgrading my T21 BFG! For that, I will be adding the ribbing engraving to the barrel using nylon thread, adding greeblies, upgrading some details, adding blue wire and finishing the weathering and ageing. So... this is where I started: This was a commission to a local artist/sculptor/prop builder... From there, I added the slings and into my first troop with it. But I was never really happy with it. The size, shape and diameter of the barrel, specially at the end, was not what I expected. So I modified it to make it more similar in shape to a real gun. I also added some parts inside the barrel and on other places... Unfortunately, I can't find a picture of the mods or the process. Then, I also added weathered it and added the elastic plastic cord, and proceded to make further upgrades. Now, I finally started the process to fully finish it. This is when I first took some parts off it: And this is how it is going atm. I do have one doubt, and if anyone has any idea, it will be more than welcome: How do you guys attached the greeblies over the nylon thread so that the screws do not cut it and ruin the whole work? Will try to work on this, even if slowly, to finish it soon. Progress will be shared and pictures posted. Saludos.


-
Hello all, time is right for me to post here. This will be my 2nd month coming into assembling this T21. The biggest handicap for me in doing any DIYs has always been location, location, location. I'm in this part of the world where things are not readily available. Trust me, we don't have screws, bolts, & nuts like on the outside. Thanks to template from @pandatrooper, greeblies & guidance from @spOOL68 (please don't hate me; but i still have lots of questions for you). First off the materials: I have the electronics from this EE-3. I believe has a decent sound for a T-21 blaster. Slings: 1944 Lee Enfield repro (need 2 of them) & Lee Enfield no.4 butt sling swivel. This is the proper way of attaching the two together. My base wood colored it Java: My base pipes: (ugly i know) coated it silver: Pre-installation, important stage here as i planned on installing the electronics in. Had to extend the cables as what came are definitely too short. Wood will need to be chiseled to properly embed the cables. Now the greeblies (awesome from Roger's btw): Just today, had to make the stock brush "playable". That's all i have for now, this is obviously a WIP. What i am most happy about so far: Thanks for watching. Appreciate any feedbacks.
-
Got started on my T21 build while I'm saving $$ up for a set of armor. Finally got a few pics to get a build thread started. I'm doing a scratch build using Pandatroopers templates and lots of inspiration from all the build threads I could find here and over on the FISD. While I’ve been at it I spent a lot of time looking at threads on builds and what was available out there as far parts and pieces. I noticed that it’s pretty much feast or famine when it comes to the T21s. Either you go all in and purchase an awesome Hyperfirm or ready built blaster from other members who do great work, or you’re left on your own to make all the parts from scratch. I love making stuff from scratch but I can see the advantage to having some things you can purchase if you like to save a lot of time. So with that in mind I started doing molds and resin casts of most of the time consuming detailed parts. We'll see as I go along, but my thought was that if it turns out like I imagine it will, I'll offer up for sale some of the parts I'm making to help people have a sort of "kit" for those parts. I think it'll save a lot of time and work for those who'll utilize it. Let me know your thoughts on this. Although I've got a ways to go before that. But I'll start my build thread here and go from that. Thanks for looking! -------------------------------------------------------------------------------------- Obligatory stock shot Starting the side details Working on the ammo tray Test fitting the rear sight Testing the tray on the stock Got some stock shaping done Test fitting most of the side pieces together with the tray on Getting set to make a mold Mold looks pretty good:) Time to try a cast Cast of the side detail panel Cast of the ammo tray That's all for now. I'll update more as I go along. Cheers! Roger
-
Brothers, After spending some time with a real 1914 Lewis, photographing, measuring every detail, understanding how the mechanisms work..... I realised within a few feet of it that my T21 was so far off it was going to drive me crazy ! So my advice is.... if you've made a T21 and you ever get a chance to handle a real Lewis... DON'T !!! You'll lose sleep So there was only 1 thing I could do... Make a new one from scratch Only this time, I wanted to make it millimetre perfect, reproduce all of the glorious details in the firing mechanism, have an open breach, a see through cocking mechanism, reproduce the barrel engraving, the hand engraving, the tiny makers symbols.... every scratch, every imperfection, every detail from the base of the stock to the tip of the barrel. Oh, and just to add some spice to an already spicy adventure.... It had to weigh under 2.5 kilos and it had to come in 2 parts for ease of transport !!! So here is my photo journey. A journey which took 4 solid weeks and is still going. Here's a picture showing the real Lewis (TOP) against my nearly finished T21 (BOTTOM). Bear in mind that the 2 are at slightly different angles. It's still not fully complete. there are a couple of bits missing and some changes to the greeblies, so i'll keep this thread going as I amend the bits. Now.... you guys know how to use a Dremel and basic tools, so I won't be boring you. But I'll show you a selection of the build photo's taken from the start.... The first thing you'll notice is that this is NOT a PandaTrooper build. It's not going to work for the level of accuracy I need. It's a pipe build which gives me a chamber for mounting the front barrel inside. To make absolutely sure that this build was exactly the right dimensions and shape, I took all the reference photographs and enlarged them to 100% scale using photoshop. Then I spent a long time tracing the outlines of all the parts to use as templates. The stock, receiver, top plate and even the barrel was done this way. By using the trace outlines, I was able to reproduce all of the parts with ultimate accuracy. It's worth mentioning that when I overlaid the tracings with the 'publicly available' shape and dimensions, it was quite different. But unless the existing drawings and templates were reproduced from a real Lewis, that's to be expected. To be fair, the available ones are a good representation of a Lewis, but they don't measure up correctly in many of the dimensions. Once you have all of the information, measurements and trace outlines, the actual process was not far off a conventional build. The difficulty was substituting materials from the original steel on the real Lewis. Plastic will never be as strong at steel in any thickness, and given that I wanted this to be as light as possible I needed to be smart with the materials used. The entire weapon was eventually made from light wooden stock, aluminium, ABS and lots of Milliput for shaping. The basic shape... Made from a light wood and using the traced outlines, I marked up the main body. The trigger guard has to be so thin, it needs to be made from aluminium. Wood won't be strong enough at this thickness. You can see the areas that I needed to cut out for realism. It doesn't leave a lot of wood left for strength. The pipe that will receive the barrel extension, making it a 2 piece weapon. The receiver is fully open from the feed plate to the ejection port. Once the barrel slides into the receiver, the holes close up. Both sides were faced with 2mm ABS sheet to give twisting strength. These we bonded to the wooden form and allowed me to shape the curves of the grip and underbody correctly. The Lewis doesn't have any square surfaces, which you only see on the actual gun on inspection. There are also many strange undercuts and shapes on the underside which need to be included. None of this is visible from any screen shot from the film. You only see these on the actual Lewis. It's a complicated design :/ Full Barrel made from 3 parts of TIG Welded Aluminium. The welds were ground off to make it smooth, then the reduction was gradually filled to mimic the reduction in the actual Lewis. It's a very gradual reduction as you'll see in the end photos. Lathing Guide and Receiver Outline. Initial mockup of Receiver assembly, made from ABS and Architect Craft Board. Internal Barrel Pipe with some 3D printed Spacers that are bonded to the inside of the larger front barrel housing. Lots of Filler Primer on the base form. At this point all of the subtle curves and shaping has been completed. I use filler primer to give me a thick base to sand from. This removes any tooling marks on the receiver, allowing me to get the shine needed on the body. Again, this is only seen on the real Lewis. 3D printed Front Sight. I used a bit of 3D printed parts for this, firstly to keep the weight down and secondly to save hours of painstaking part building. I print in PLA as ABS doesn't have the same strength for the size part. But it gives me another problem. Sanding PLA is almost impossible, so each part has been coated with resin and filler primer, then sanded. Once painted, it's close to any resin cast you can get. Hand engraved (By Me) symbols and lettering present on the original. There are many different symbols, including a 'Masonic' symbol on the receiver tray base. My TD ID is the Serial Number (33751) Laying down the base colours. There a many different colours here, from grey to silver to blue. And many different tones and blending. Front Barrel Vents for the inside of the hot end. Initial Weathering of the Receiver Mechanism. Notice the latching mechanism for the Ammunition Drum. This is the first of many layers of weathering, using the reference photos to try and accurately represent the colours and areas. Plastic is starting to look a lot like metal now One of the most difficult aspects of the real Lewis to replicate, the Barrel Engraving !!! So far we have discovered 2 types of Lewis barrel engraving and knurling. I'm not sure if that's a date driven thing or a use driven thing (Field use vs Aircraft use). Mine has the concentric barrel engraving from top to receiver. On the scales ... It's good A little over 2.3 kilos, which is 5 lbs. Comparison against my Old T21 and my new T21. At first, there doesn't look like much difference. But there are lots of subtle differences and once they all add up, it's like black and white. There's still a few bits to do and I'll update as we go, but so far it's a fairly realistic Lewis It also weighs in at only 2.3kg.
-
 Fellow Troopers, After a lot of research and negotiation, we (Me and Nick) managed to secure some hands on time with a real Lewis Gun in the UK. This was all down to the efforts of Nick Black (TD 5884) and he asked me to come along. Of course I can't miss an opportunity like that ! So we took the Canon 7D, tape measures, rulers and even the Vernier Callipers to get as many detailed reference photographs and measurements as we could. We were lucky with a break in the weather, so we took it outside to a bench for further inspection. The first thing I can tell you is that this bad boy is HEAVY ! It weighs in at 23lbs (Just over 10 1/2 kilos). It's not the sort of thing you'd want to drop. And that's without the magazine or ammunition.
 -
 Of late there has been a lot of interest in the T21 blaster, not least because if its recent appearance in the new Rogue One teaser trailer and for my part, for the past several weeks, if not months, I have been trying to design and build the most realistic and detailed T-21 blaster possible. Using my background as an architect and designer the end goal has been to arrive at the very next level in accuracy for our Sand Troopers. I have previously designed 3D parts for friends including a Dredd Lawgiver. Based on reference photos (thanks alsol to Machine for his excellent collection), blueprints, technical manuals, as well direct measurements from a real Lewis I have painstakingly recreated the details of the gun as a 3D CAD model from which a kit of prototype parts has been 3D printed from PLA plastic. This has not been a short process. This has been a tale of trial and error; of research and diligence, designing and redesigning each individual part sometimes several times in order to best represent the real deal with as few compromises as possible made whilst at the same time designing to facilitate the limitations of the materials and the 3D printing technology. And we are still not quite there I think. Each part is, I would like to say, currently around 95% accurate in terms of dimensions and details and an ongoing work in progress likely taking a few iterations to get it to the 99% level of accuracy I would like it to be. This has been a project with my buddy Johno who has been carrying out the initial base build of the mkI T21 Lewis and I thought I would share our progress to date for your enjoyment. Here we go: It starts with around 40 individual component parts… Detail of receiver section… Dry fit of the main sections: receiver and barrel built around 20mm aluminium tubing… Stock mkII: wood grain detail and prototype wood filament print… Blaster fitted, assembled, bonded, and primed… Some detail of top of receiver... Various other details… The overall weight of the blaster is a svelte and very troopable 2kg. The next build version will feature a smoother barrel without the visible faceting, and will be able to be disassembled for travel/storage. We are also developing a version which will feature a working bolt and cartridge feed action. I want to again thank Johno for assisting with the build. We have come a long way in a short time. More as it progresses...
 -
http://corsairs-kids.com/es/corsairs-kids/304-dlt-19-escala-11.html this seems to be the cheapest prop maker anyone know its reputation and quality? also what should i get dlt19 or a t21 what are the pro and cons?
-
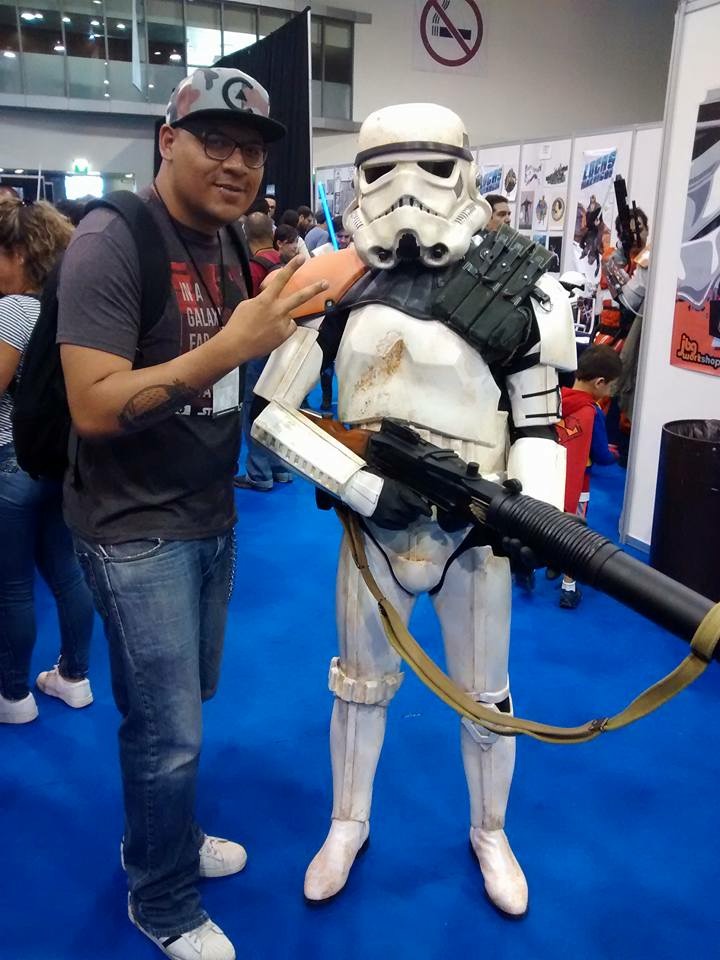
Hi guys not been around on the forums as much as I should but for the past month and a bit ive been having a go at scratch building a T21. After building my pack from all sorts of found items a while ago I thought it was about time I took another look round my shed at work and cupboards around the house to see what I could come up to build one of these BFG's I used Pandatroopers templates and took inspiration from others builds here on the Mepd as well as some great pics from Anthony Bailey (Blaster 8266) and a build thread one of my Facebook friends Danny from Peru had done. I thank each and every one of you for your help one way or the other and I hope the end result here gets your approval My intention with the build was to spend as little as possible and with the exception of the spray paint (5 cans) and the Lee Enfield straps everything else you see below would have all ended up in a skip (bin). So here you go guys here is my T21, let me know what you think good or bad. I started with these: Used an old cup for the barrel reducer: A quick test fit: Various bits of scrap plastic to get this: Stock and grips sanded and shaped: Cooling fins and receiver parts again scrap plastic: Top part of gun with sight : Used these for the oil cannister in the stock (cut them down quite a bit): Another test fit: Roughly draw and cut out barrel sight: Priming the parts: Stained the grips and stock: Various wiring and tubing for the barrel detailing: An old hinge reshaped and painted for the stock: Some old metal bits for the sling mount: Barrel sight painted: Painted Satin black: Details added: Lee Enfield straps: Took these before straps arrived So there you go guys one T21 completed bar some weathering and all for less then 40GBP and weighs in at at just under 3kgs or just over 6lbs, I hope ive done ok with my first ever scratch built blaster and you guys approve