

Omaha Joe
-
Posts
60 -
Joined
-
Last visited
-
Days Won
4
Content Type
Events
Profiles
Forums
Posts posted by Omaha Joe
-
-
I love that look with the paint chips exposing the dark green underneath. Authentic as ****!!

-
Thank you Jason!! I’m absolutely happy to share it..! Honestly there were a couple of times during the process, especially toward the end, where I cocked my head to the side looking at it and thought to myself, “holy s#!t, that worked..?!!”

-
 1
1
-
-
Thanks Arne!!!
-
Thank you very much, Gentlemen..! And Thomas thank you again for the review!! Definitely noting the suggestions on the knee armor, as well as the pack frame!!
Such a proud moment to be initiated among the best of Mos Eisley’s Police Department!! Thank you!!


-
Hahahaha! Only as magic as the chemical reaction between acetone and ABS, I suppose, but from what I researched, that’s the beauty of ABS slurry; it’s pliable to fill cracks and seams joining ABS together ‘melting’ the edges to be joined, and then as the acetone evaporates it leaves the two pieces as one weld... As far as sturdiness, I haven’t put any more stress on it than I would normally apply to see if the parts held, but time will tell... Like you said, at least it’s not in a location that bears much, if any, stress!
-
2
-
-
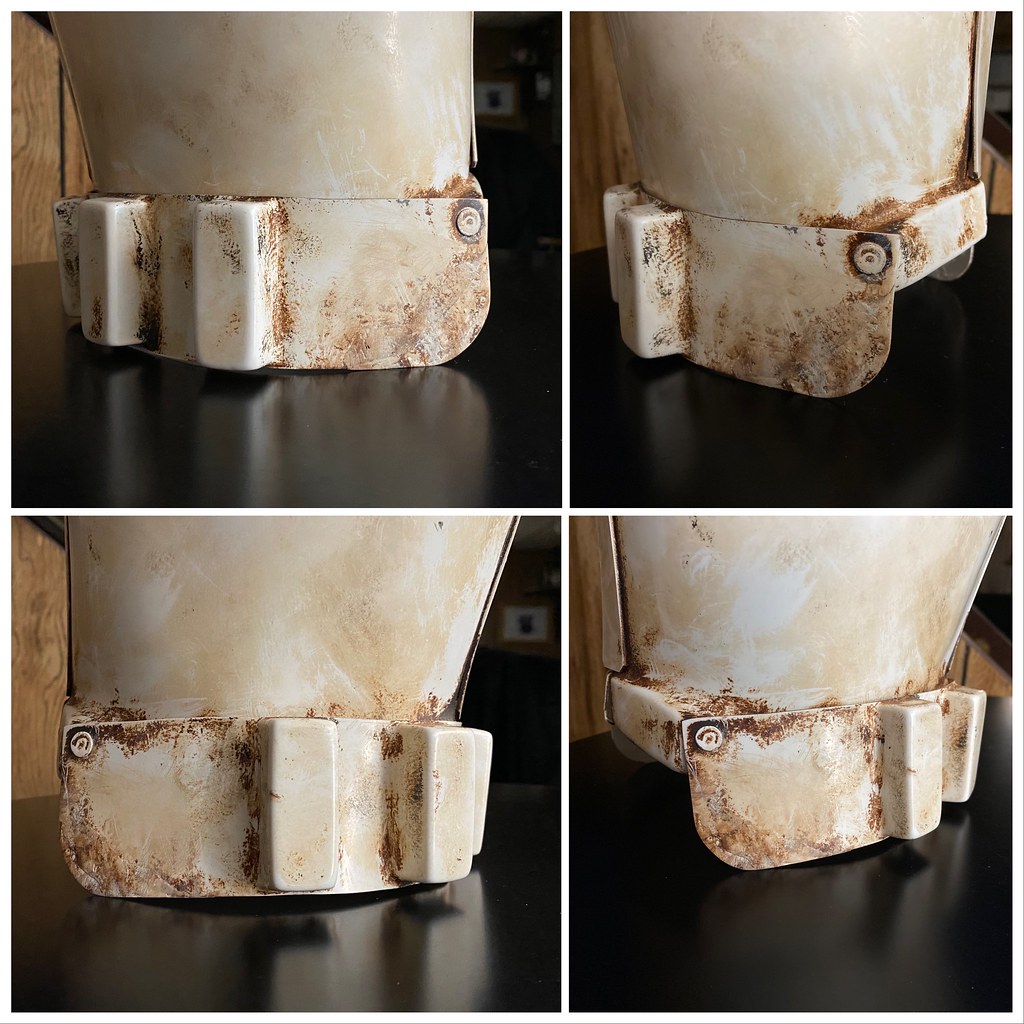
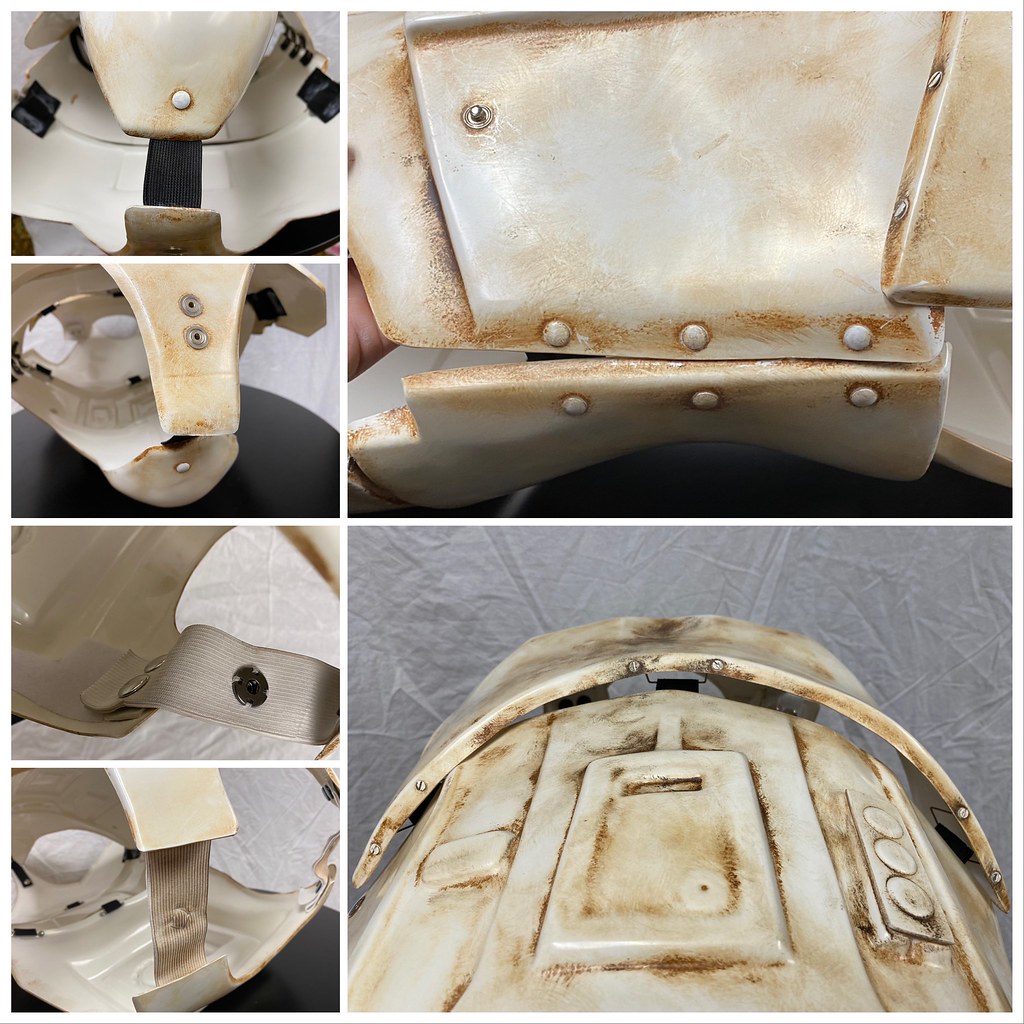
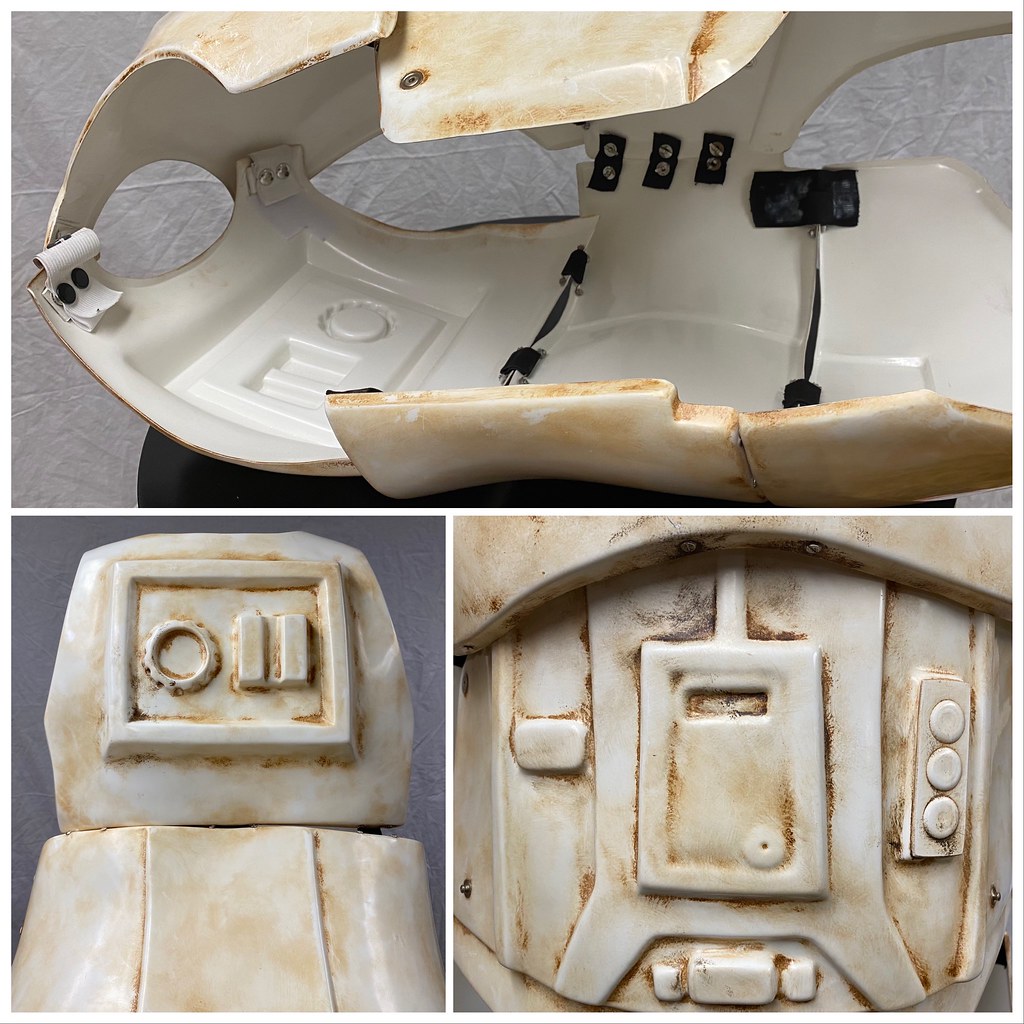
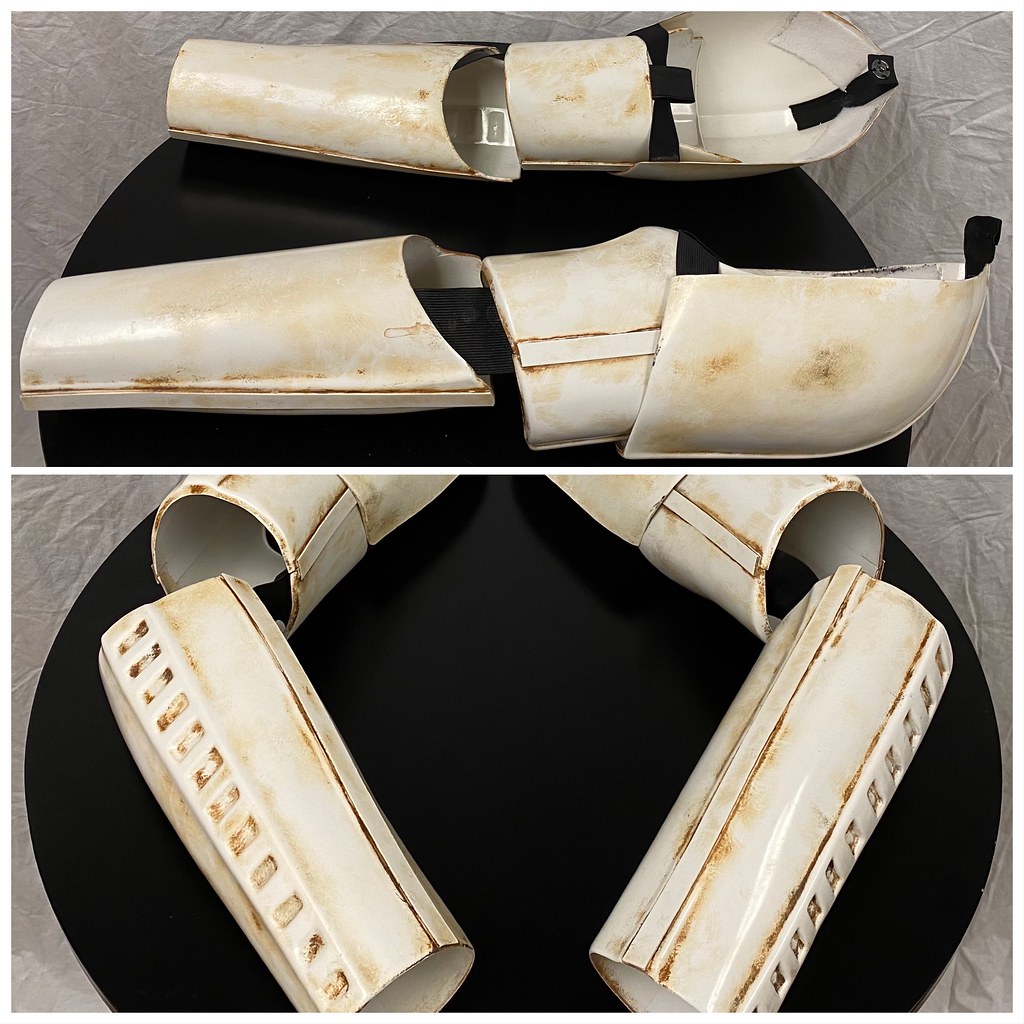
A few of you might have browsed through my PO Deployment Request, and many of you may very well have used this exact technique before, but this was first time I had ever tried using the ‘homemade ABS glue/paste trick’ to add plastic where it wasn’t before, so I figured I’d add it to my WIP.
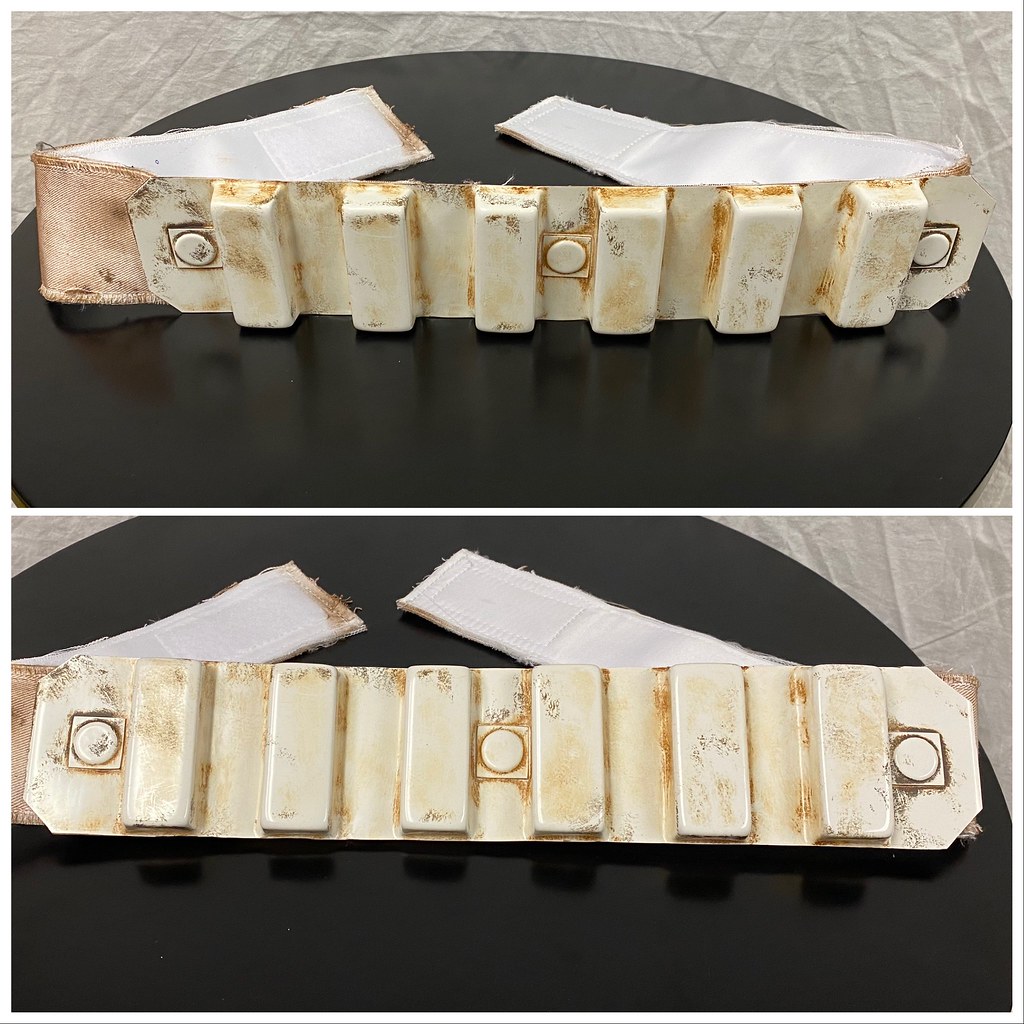
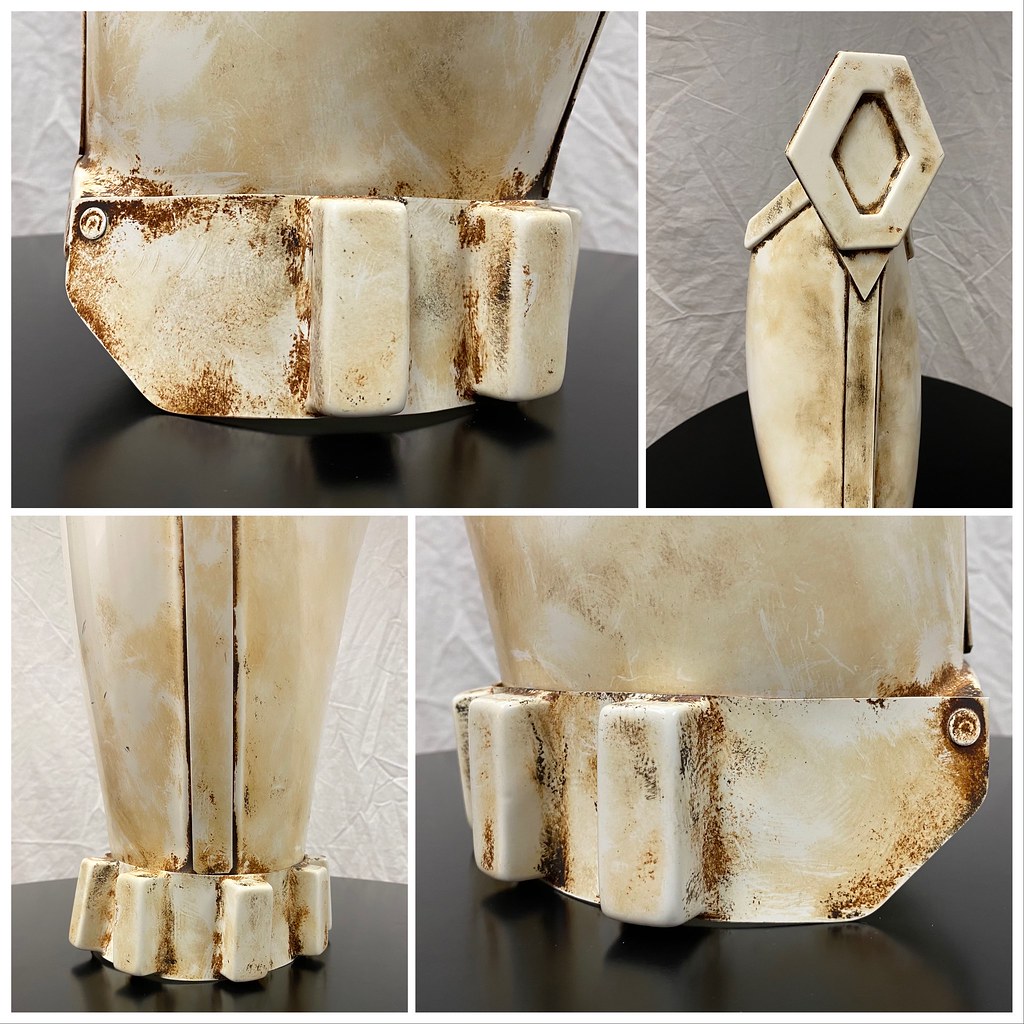
In the first review of my Request, I was made aware that the shape of the knee ammo belt on the right thigh piece was inaccurate - it needed a more rounded off edge than the slightly rounded 45° angle I had originally cut.
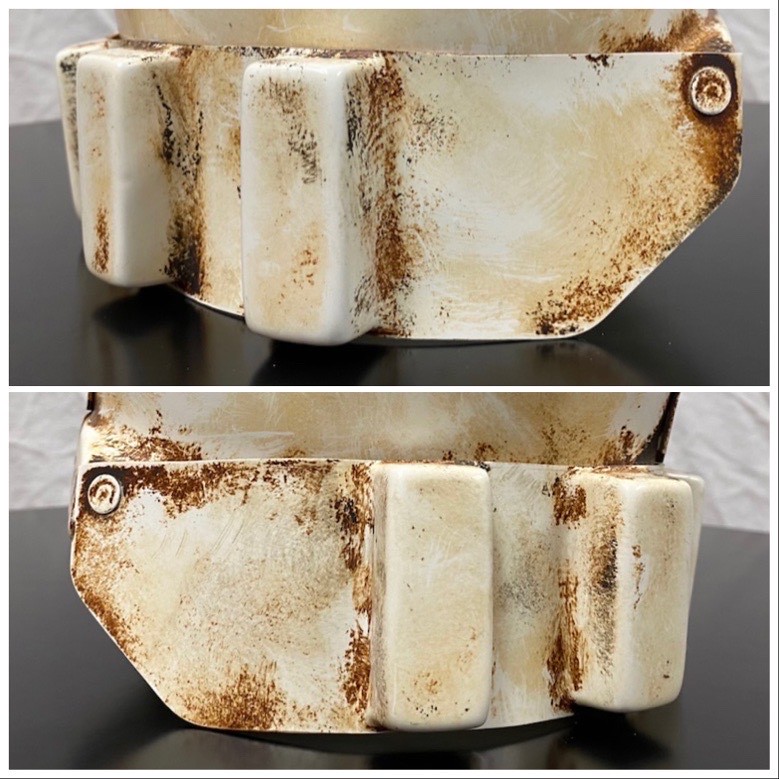
My first attempt to remedy the situation proved inaccurate as well as it caused too much of a swooping curve back toward the fastening rivet than the correct shape.
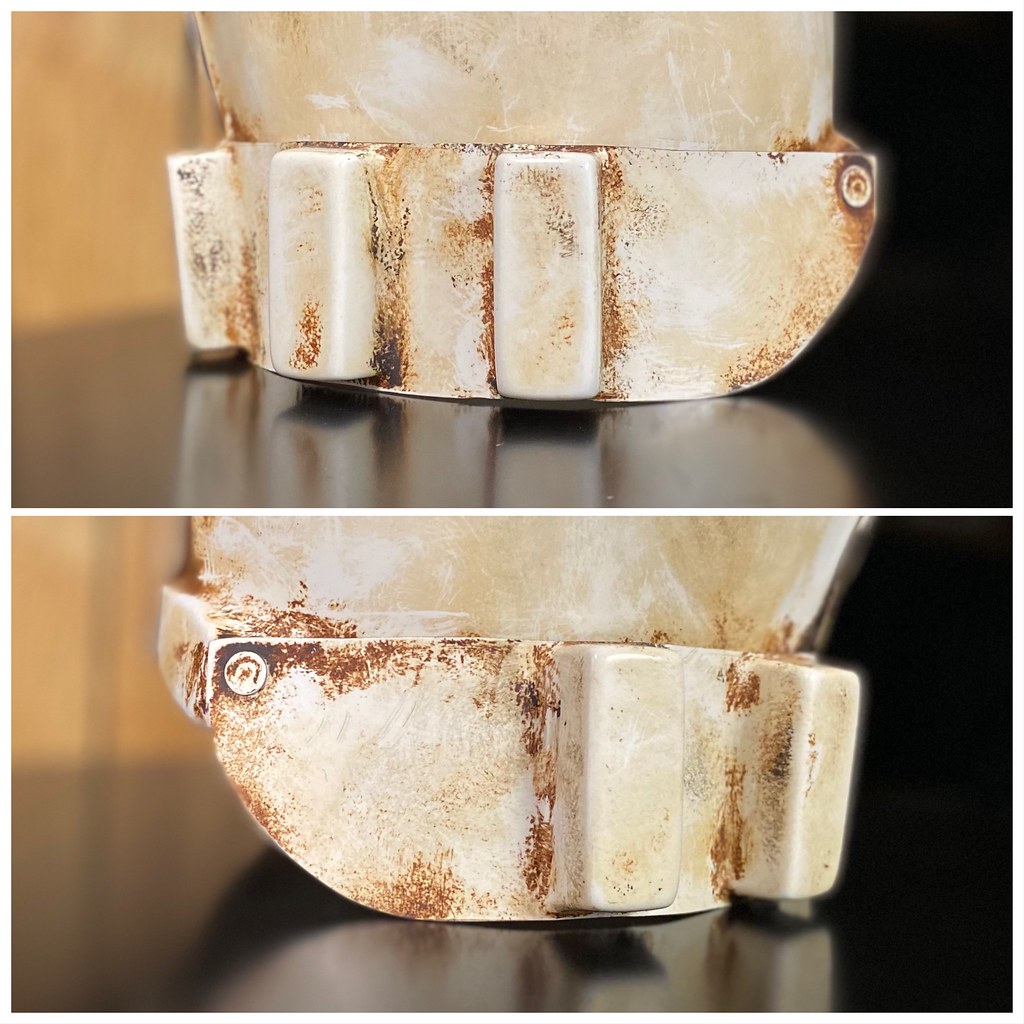
At this point I saw two options; one, I could order a whole new ammo belt, wait a week, or two, or three to receive it, only to have to cut it, shape it, drill out the old rivets, etc., or two, I could try my hand at attaching the necessary amount of ABS using leftover scraps to recreate the original squared-off edge which I could then shape to the correct curve. I went with the latter and opted for the more time-efficient solution; after all, I was in the middle of a Deployment Review!!
Using scrap ABS, I fashioned triangular-shaped pieces that would complete the original squared off edge and held them in place with tape, securing the tips of the triangle pieces to the existing curve with a little bit of superglue.

I then mixed up a little jar of ABS slurry from scraps of ABS and acetone and let it breakdown. When ready, I applied the glue to both sides (front and back) of the two ends of the ammo belt, knowing whatever excess would have to later be sanded.
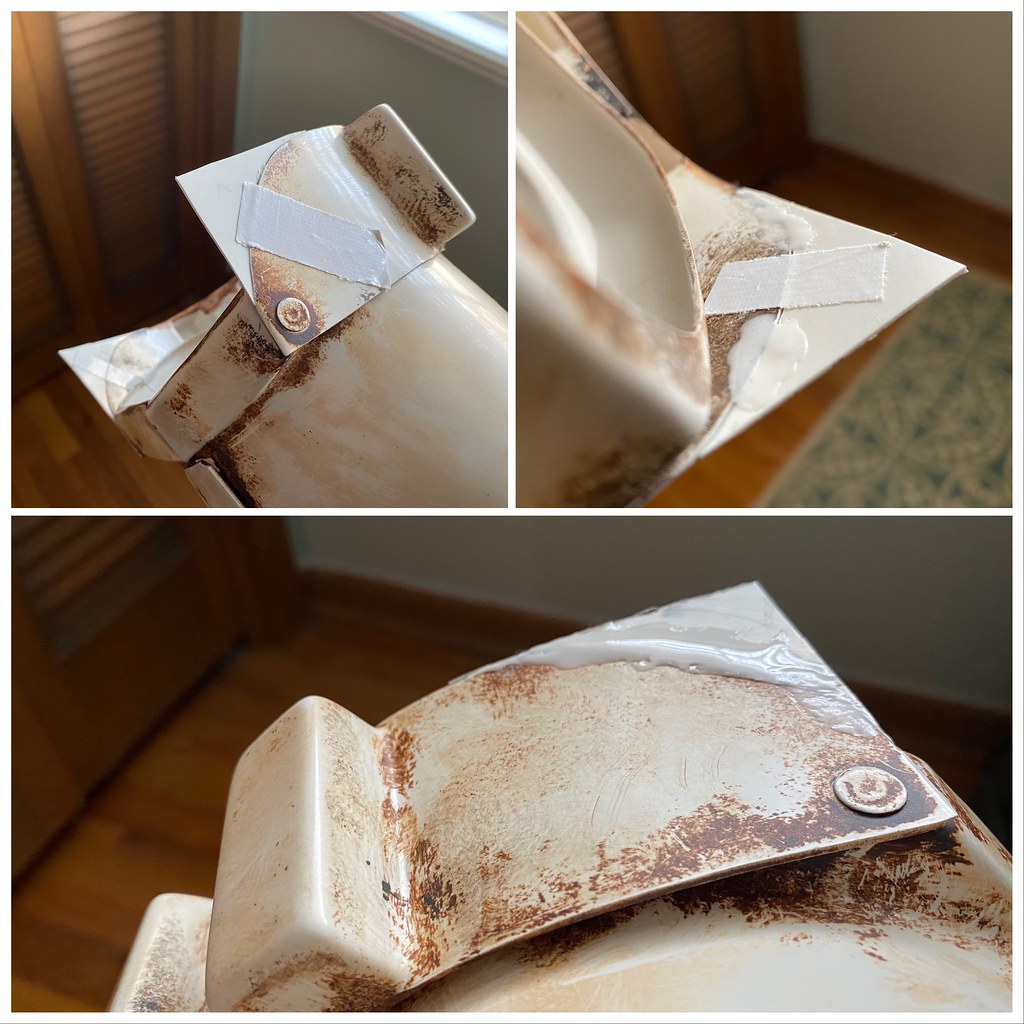
Letting that harden to the point I could no longer scratch a dent into the dried glue, I cut the new curve and began sanding down the excess.

All that was left to do now was weather the new pieces, and this is what I ended up with:

Here’s hoping I got it right this time
 , but even if it needs more work, I feel pretty darn accomplished with my first go ‘round with ABS paste..!
-
2
-
-
Hey guys..! Thank you for your patience, got to work right away adding back some missing ABS and I think I got the right shape with the knee ammo belt this time... Fingers crossed, but let me know if this works..? Thank you again
-
 1
1
-
-
No worries, I thought you just meant to knock down the harder angled look of what I previously had, but I’ll get on that and take care of it right away
-
Hahahahaha!! I do, but this is right up there with waiting to see what Santa brought!
-
Good morning, Gentlemen..! Thank you both so much!! And thank you Thomas for your review of my Deployment Request!!
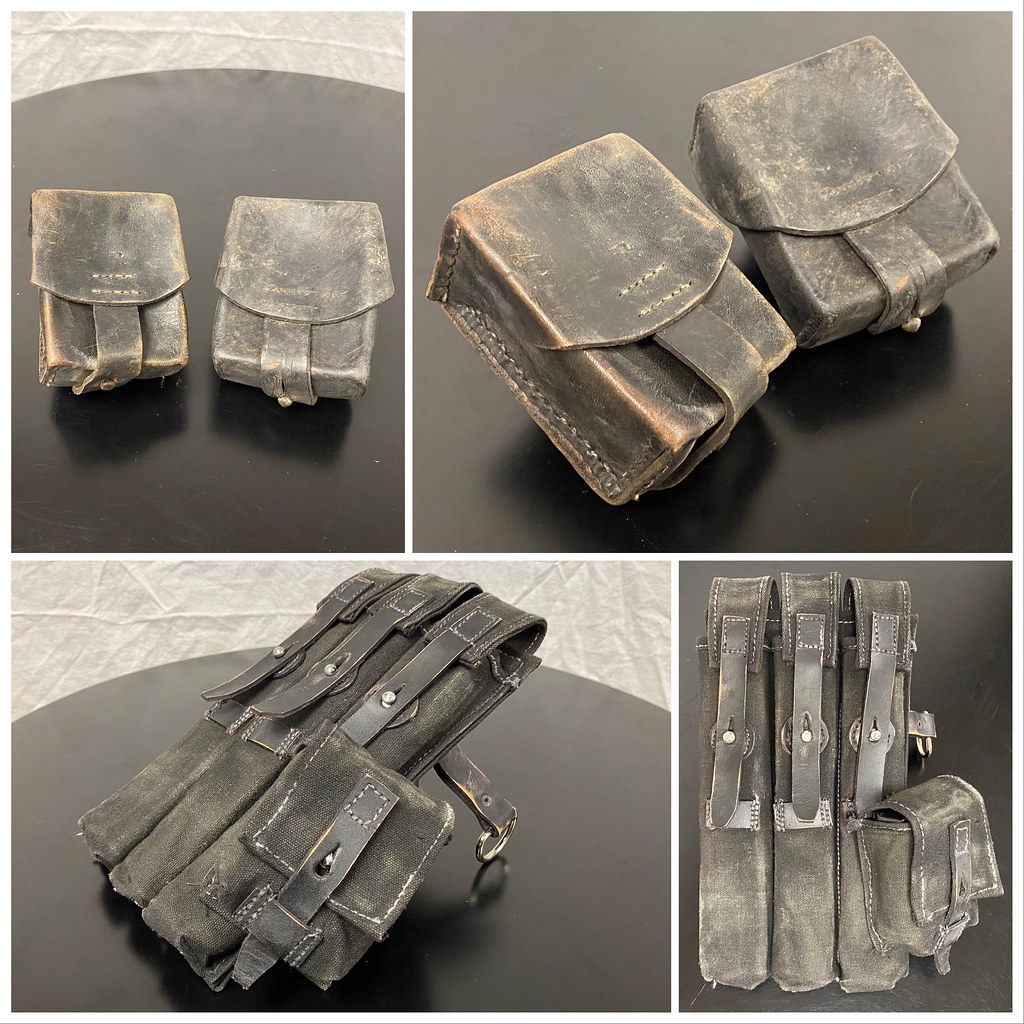
I’ve made the requested corrections to both the knee armor as well as blackening the seam threads of the shoulder pouch
Please let me know if any further modifications to those need to be addressed and I’ll take care of it as soon as I can... Thank you again!!

-
Name: Joe Connolley
TKID: 92576
Forum Name: Omaha Joe
Garrison: Central Garrison (Imperial 80th Squad)
501st: https://www.501st.com/members/displaymemberdetails.php?userID=32945
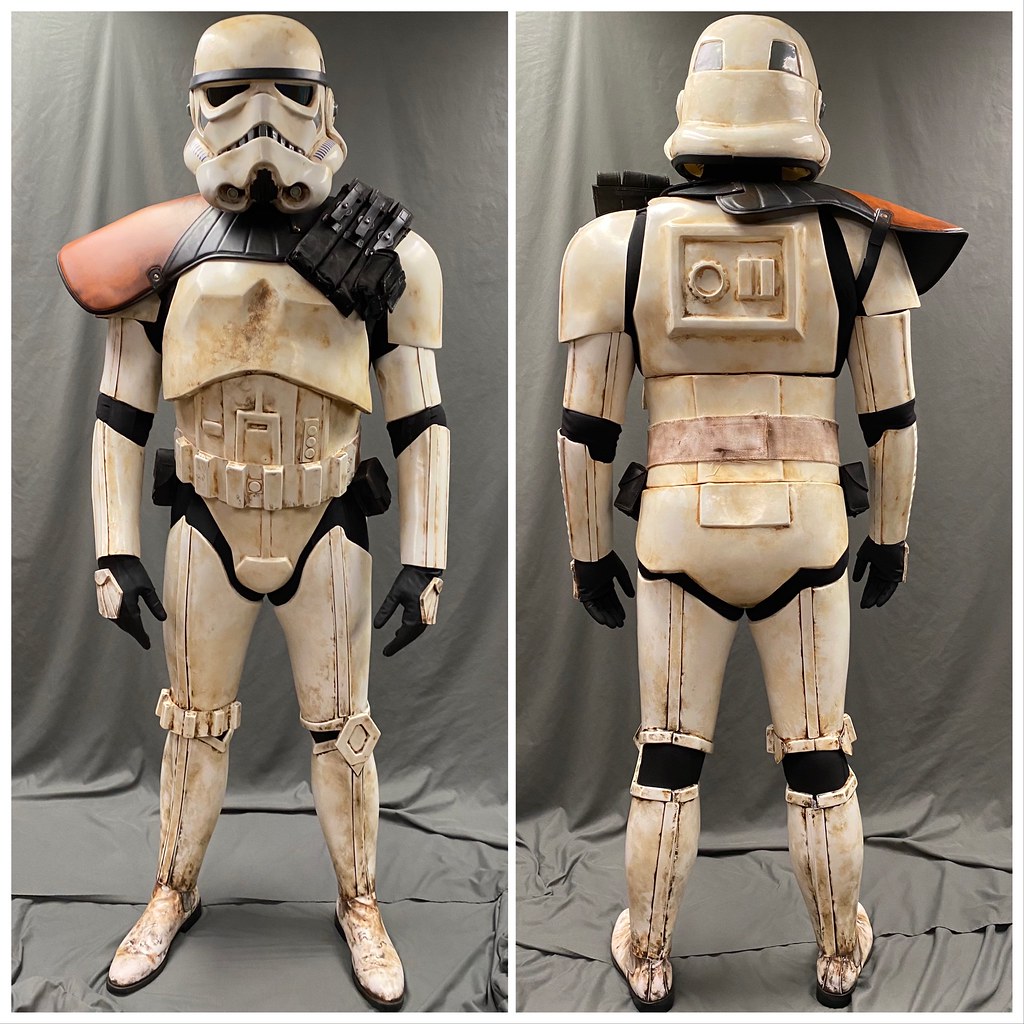


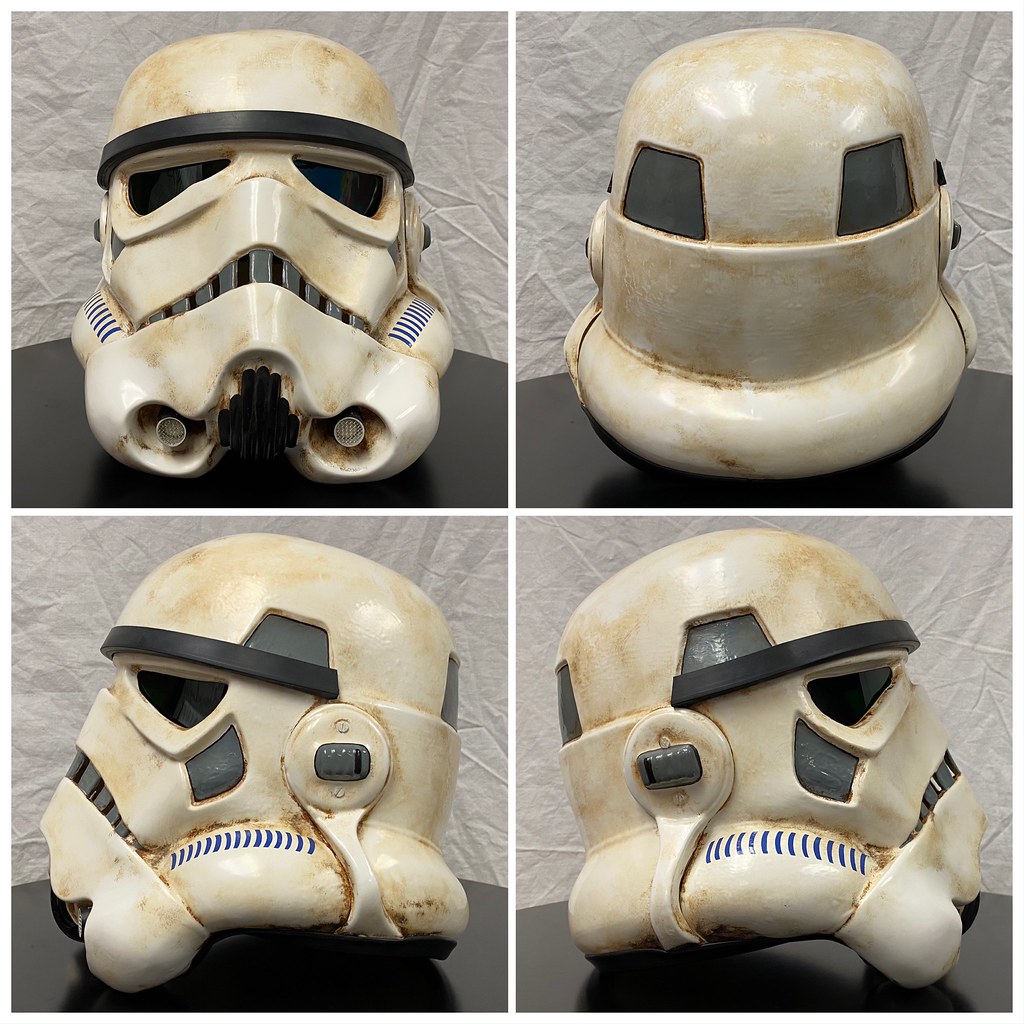


The images were compiled into collages in an attempt to avoid this request being too pic heavy. Each full-sized individual photo is available for submission if necessary. Thank you for your time and consideration!!
Joe “Omaha Joe” Connolley
TD-92576
-
1
-
-
That’s looks great, Arne!!

Ironically, I had to take mine down today so I could get pictures in it, but it’ll be back on display very soon..!
-
18 minutes ago, OnkelPaschulke said:
The pack looks nice! I guess the PO is just a step away!

Gesendet von iPhone mit TapatalkThank you Arne..! **fingers crossed**
-
just waitin’ for my pack to be GML-approved; suitin’ up and hope to be submitting my request for MEPD PO Deployment within the week, give or take...


-


...the shoulder straps come in tomorrow or Tuesday, but I’m thinkin’ this one’s just about finished
-
1
-
-
Hey Peter! Congrats on your basic approval!! I’m kinda in the same boat as you; already Basic, but now putting together my pack for a future PO submission... not sure what toggle switches you mean, but I ‘borrowed’ this idea for the input jacks on the side of the radio from a thread in the forums somewhere...


I have a radio from Ian as well and just put these in today in fact; just waiting on my vinyl for the surround, gotta attach the antenna yet as well as the wire that holds the radio to the pack, but then I should be done with the radio...
all of the toggles and switches on the radio’s face are included with his kit, the parts you’ll have to source are the input jacks, the antenna, leather/vinyl surround, feet (if ya wanna get really detailed) and the attachment wire
-
1
-
-
Excellent work, Luke!!
-
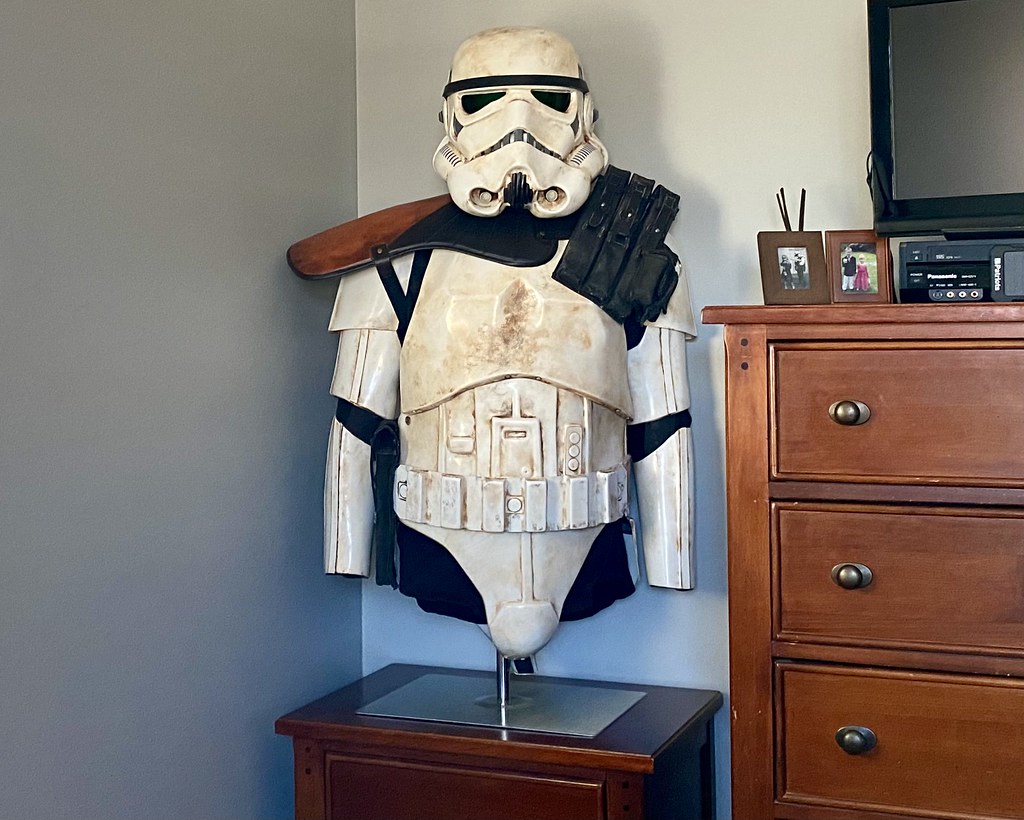
...antenna, ear phone and mic jacks are on their way and will be here shortly to finish the radio, but in the meantime I found a decent display mannequin
This will eventually display my TIE Pilot, but until that’s ready I figured this is better than keeping my Sandy all cooped up in a crate..!

-
1
-
-
Thank you!! yep, definitely going to add the leather surround to the radio as well as add the antenna and the mic and earphone jacks

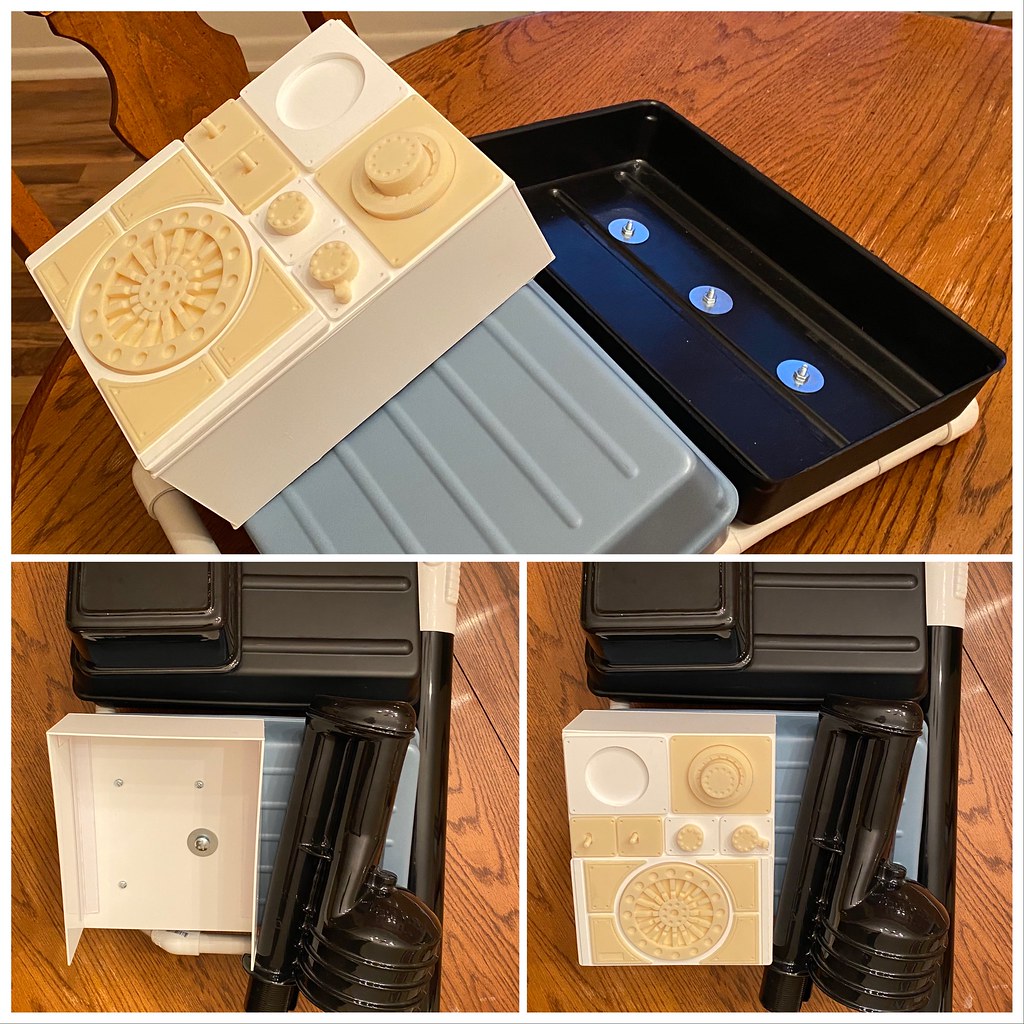
and my ‘canteen’ should be here any minute, too... literally out for delivery at the moment
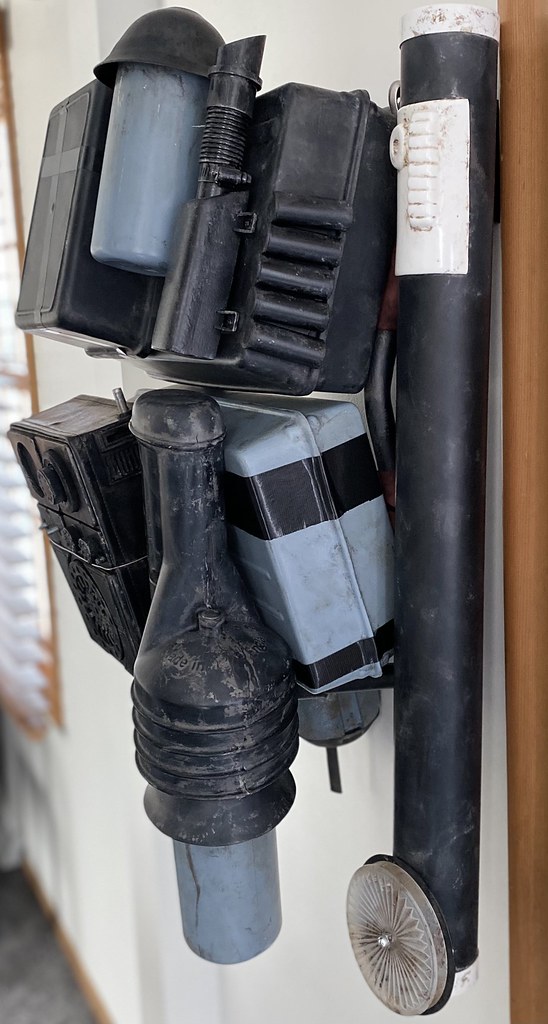
in the meantime I’ve already hit the radio face, the mortar tube, and frame with a little weathering...

I went back and forth with the color decision, but the blue I ended up using was Rustoleum Slate Blue... in certain light it’s more grey and in others more blue, but the weathering neutralizes it somewhat, again depending on the light source
-
1
-
-
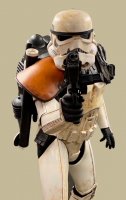
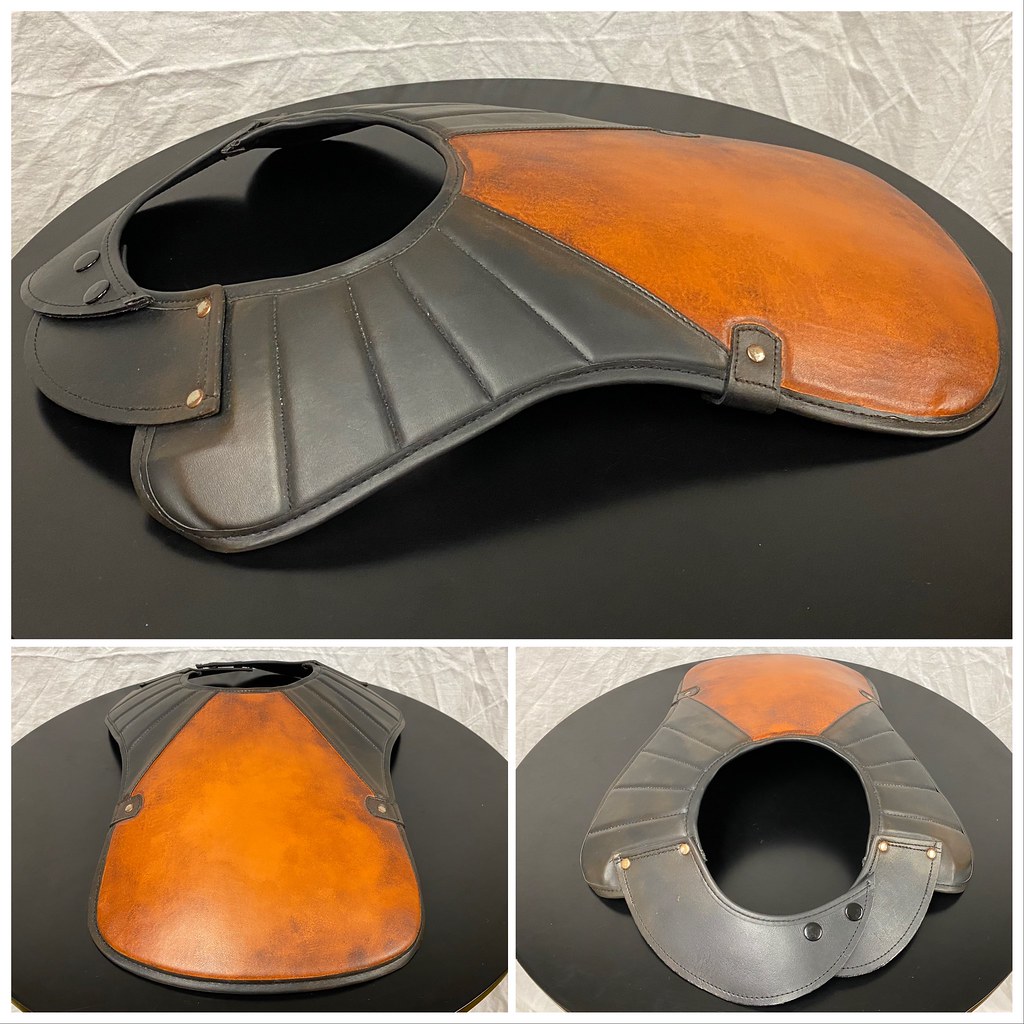
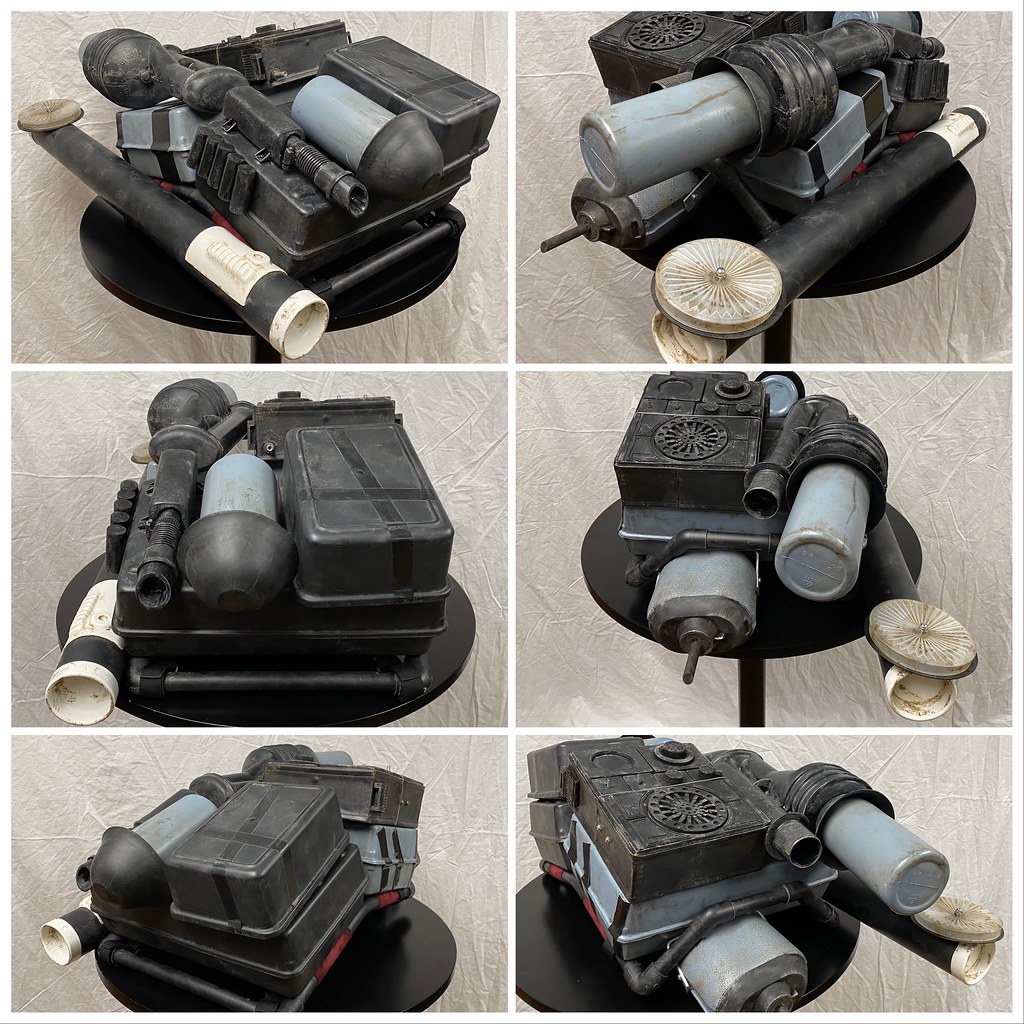
just a little bit of an Odds ‘n Ends update... setting my sights for MEPD Police Officer soon and still have plenty yet to do, but this piece has been my WIP focus over the last couple months...


-
1
-
-
Hahahahaha!! bang...ya got me Mikel..!
and that was the exact look he gave me when he noticed we were wearing similar sweaters, too!!

-
2
-
-
23 hours ago, Hausi said:
Nice sweater... but too clean. Pour some eggnogg over it.

Merry Christmas to you and all other dirty dudes!

-
1
-
-
just wanted to wish all the Sandies in the MEPD Happy Holidays, Merry Christmas and a Happy 2021!!
Cheers!!

-
2
-
-
TD-92576 reporting for Basic 501st duty

-
1
-
*DONE* TD-55519 Requesting Deployment
in MEPD Police Officer Program
Posted
Nice work, Helder, congratulations!!! It looked great before, but those updated photos of the added weathering look incredible..!! Top notch!!