

ikinaceous
-
Posts
29 -
Joined
-
Last visited
-
Days Won
3
Content Type
Events
Profiles
Forums
Everything posted by ikinaceous
-
TD2.3 Electrobinoculars
ikinaceous replied to Volksjager's topic in Pouches, Pauldrons, and other Accessories
Nice -
A few pics from my scratch built E10. Lots odds and ends that went into this. Resin E11 parts, pvc, an old walkie-talkie, an airsoft stock. A nice dirty build with plenty of weathering.
-
So just about ready to submit photos. Going to tweak a couple of minor fit issues. But I’m calling this guy done. Happy trooping everyone.
-
Pass 3. Mimban muck
-
Pass 2. Filth.
-
I’ve experimented a bunch with colours, textures and in addition got some cement powder too. I’ll layer up and rub back the acrylic colours as I go and finish with a light spattered cement texture. Like with the helmet I’m being mindful I don’t paint it too dark. I don’t want to loose the detail of the suit under the mud. Plus it looks really average in photos under normal light conditions. I’ll hit the plash and bandolier similarly. First grimey pass done.
-
Snaps and elastic are added and Velcro laid down. Ive checked the fit and the end is in sight. Quick test fit with my ESB bucket. Time for weathering. Jaaaaas. Pew pew
-
Here’s a few shots showing the ST style belt set-up. The belt attaches with a combination of rivets, Velcro and two bolts from the inside that secure the position of the little tabs against the ab. The front panel of the belt will stay there, it is removable if I need to repair anything. The back closure without the rear belt cover and canister. And the whole assembly..
-
Now everything is basically ready for final assembly. I’ve hit the entire armour with a primer and white gloss topcoat. Getting there..
-
I noticed some R1 TKs do and some don’t have a wedge shaped cut out under the front of the belt slightly overlapping the codpiece. I opted for it. I like the detail. The belt is fiddly but it’s getting there.
-
The belt is tricky to get right. The notches along the top have to sit into the ab details at a slight backward angle. Given the similarities between the R1 ST and TK belt set up, I got a Rob Kittell belt and will mount the plastic belt sections onto that with the cannister / rear section mounting on the back with velcro just like the ST. Kind of a shame that detail will just all be covered with the plash in the end. I’m using this pic for reference. Photo credit not mine.
-
The butt is attached to the kidney piece, and the cod hangs from the ab section. Using my ATA TK suit and reference shots to scale the proportions and get the look right.
-
For the ab and kidney sections I did a corsette type side closure system. The front ab and back kidney are separate, and Velcro side closure hidden near the black diagonal side strips. I prefer the snug wrap around approach to the suspended barrel type thing with the trauma/ backplate as the point of access. On mine the trauma plate will be permanently attached to the back. 850 have included plenty of additional parts to make sure the fit is good.
-
Gotten to the assembly stage finally... I suppose that’s a positive in all the CV19 drama. The decorative cover strips and resin details are attached following as much R1 reference as possible. It’s hard to replicate the injection moulded look of those R1 TKs but the detail pieces definitely sharpen the feel of the suit. 850 armour have come a long way since the first ST kit I got from them which needed a lot of work. Nice work guys. The ABS plastic is easy to work with to customise shape and size plus it’s really durable, that’s why I went with the 850 kit versus the Flexi fibreglass JT kit.
-
The one on the left is my other TK. Just as a comparison to the R1 kit on the right. From what I can see from reference pics the codpiece kind of floats. I’ll rig something similar I reckon.
-
I feel 850 have been very generous in the size of the codpiece. Gentlemen I’m flattered.
-
I’m still trimming it up but the overall quality is good. The vacforming is pretty sharp, and even thickness only thin in the flashing. The resin parts are crisp. I like working with it. So far so good.
-
Alrighty then. Finally time to start trimming and putting this guy together. This is an ABS 850 kit with resin details...
-
Well hello there.
-
Looking sharp n dirty trooper. I’m in Australia trying to source a bandolier and not having much luck. eBay source in the US won’t ship down under. Any tips?
-
I used layers of colours like I mentioned up in the thread; I applied some by brush and the opted for a spray gun. Each layer I rubbed back with a plastic scourer/scrubber, to reveal highlights and not let it get too dark. The top layer is splattered/flicked light grey with thickener in it.. like dirt and impasto etc in it. Sealed with an acrylic spray.
-
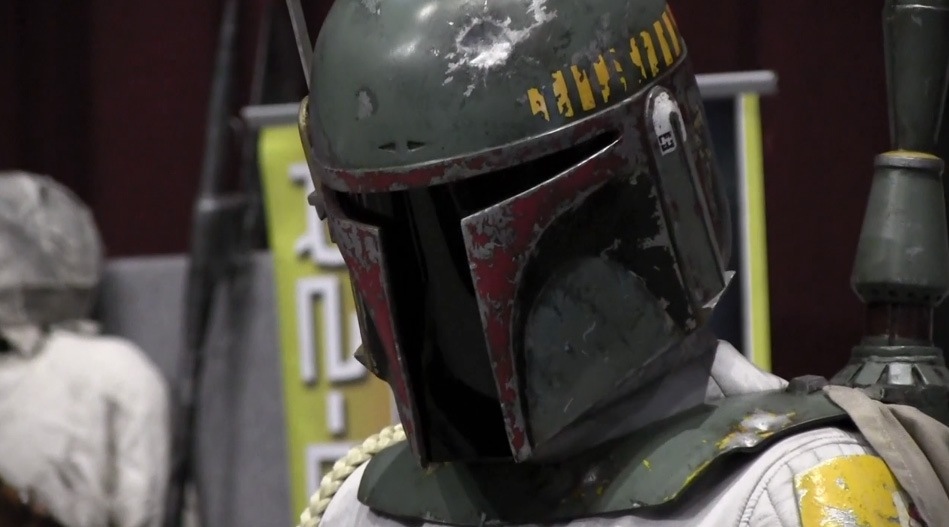
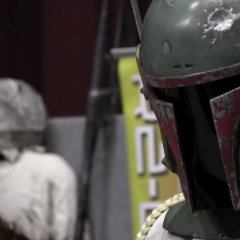
So after a bit of thought, I’m going for this guy in terms of weathering At this point that’s also roughly where my bucket is at too
-
I’m based down in Taswegia. Thylacine Outpost [emoji6]
-
The bucket is a black series lid, which seems to be the current standard, except Jim’s bucket which also looks great. The shield is an Empire 3D model and print (thanks Nic). The challenge being to get the mud looking right. The best reference under ‘normal’ lights I found is this.. photo credit not mine. From the lucasfilm bucket you can make out some of the composite colours that make up the overall mud effect. The issue I have with really dark weathering is that under most lighting conditions the costume will look dark, very contrasty and the details disappear especially in photographs. I noticed the anovos interpretation is much more monotone grey and lighter overall.
-
Under different lighting .. This pic has an additional layer of lighter ‘grey splatter mud’ with some thickener and actual dirt mixed in for effect... lens reinstalled as well

