


Hausi
-
Posts
1,509 -
Joined
-
Last visited
-
Days Won
120
Content Type
Events
Profiles
Forums
Posts posted by Hausi
-
-
Wohooo, so happy!!!

Thanks Felix, I'll have a bear to your health!
Thanks Ben!
This is great
")
-
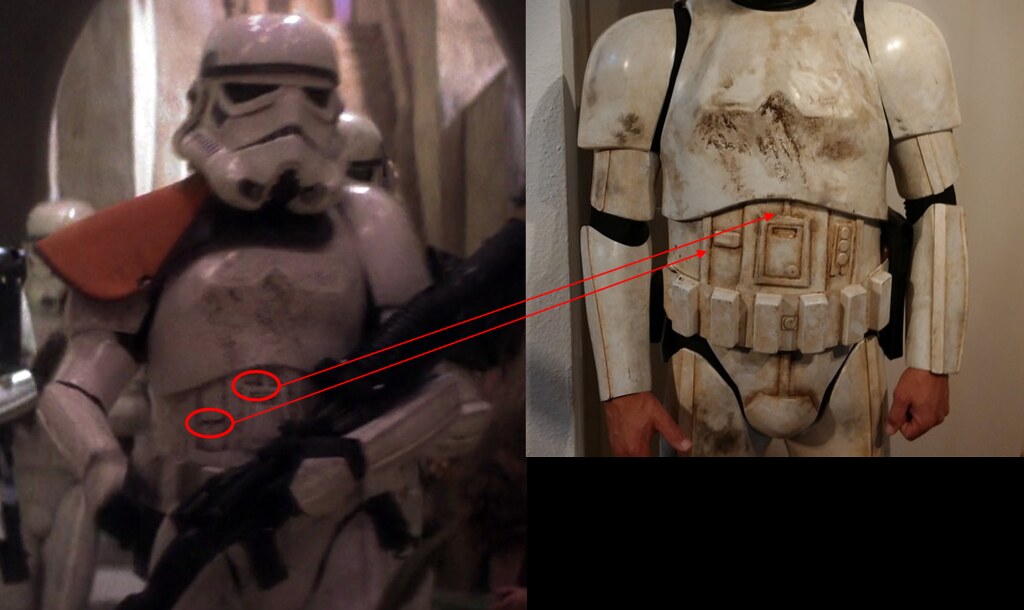
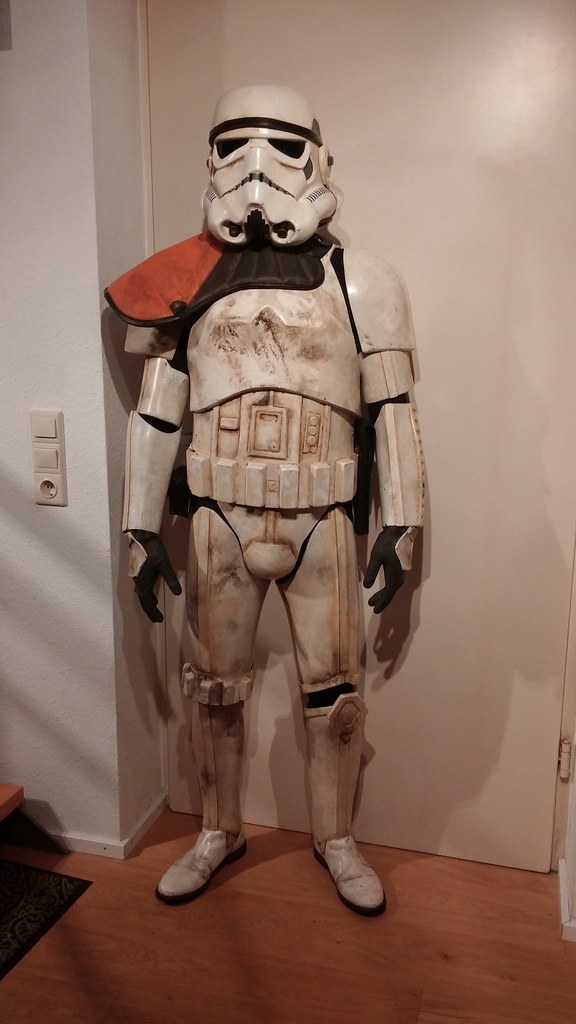
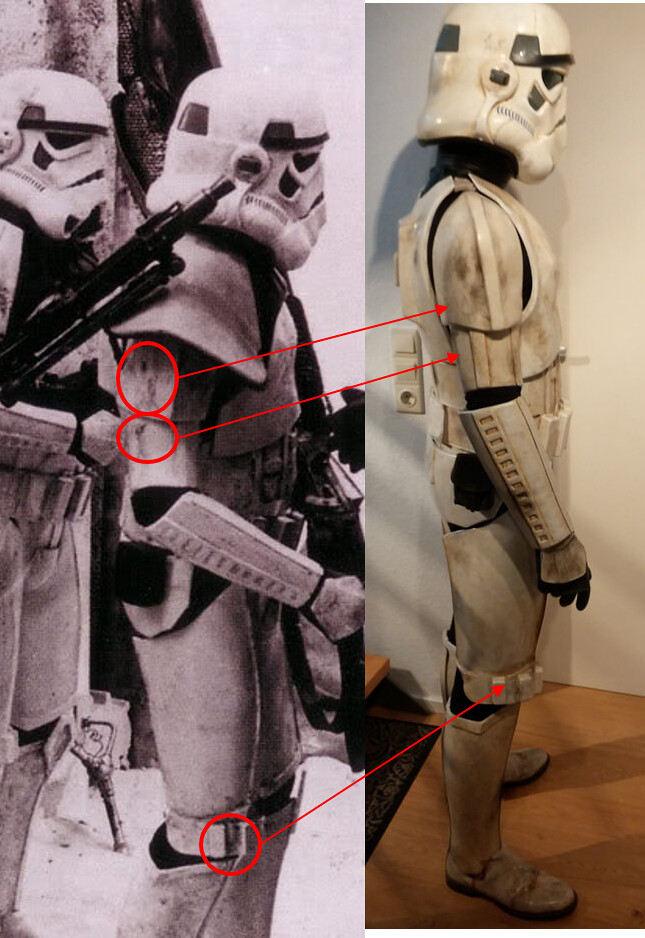
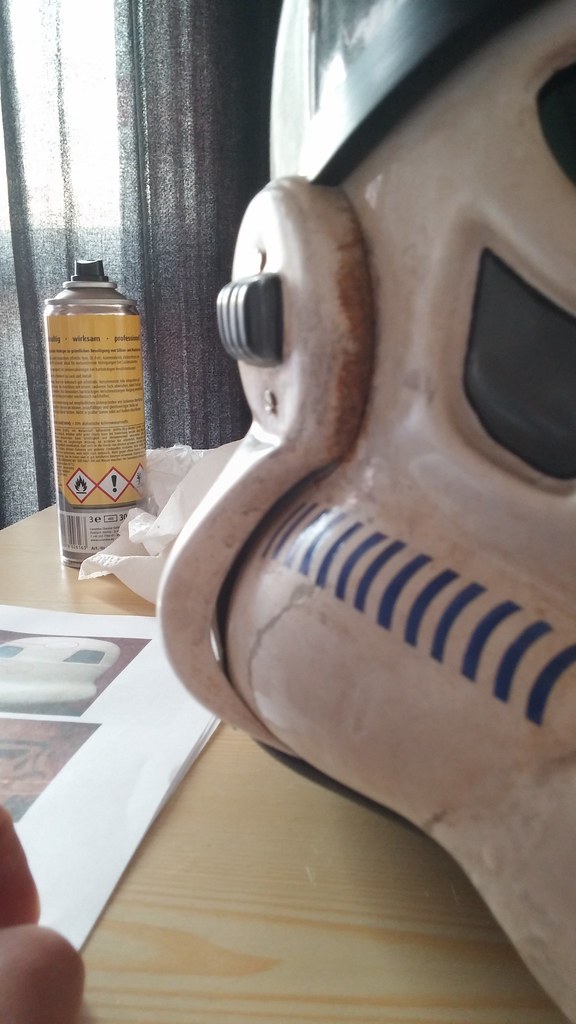
Only the split rivets (six on the left side and one in the codpiece/crotch) are painted white.
-
Thanks Jason and Chris!
-
Great pics, especially the ones on the roof!
-
 1
1
-
-
Wow, this is cool, you have to love a light blaster!
")
I think you nailed the brass look on the scopes.
-
Thank you Justus and Constantin for the kind words
-
1
-
-
Great picture!
Was it taken by a Deathtrooper? I can see the helmet at the bottom of the pic
-
Those are some really nice parts, pack is going to turn out great!

-
1
-
-
Great pics mate!
...but I somehow feel sorry for the Jawa, poor little guy didn't have a chance
-
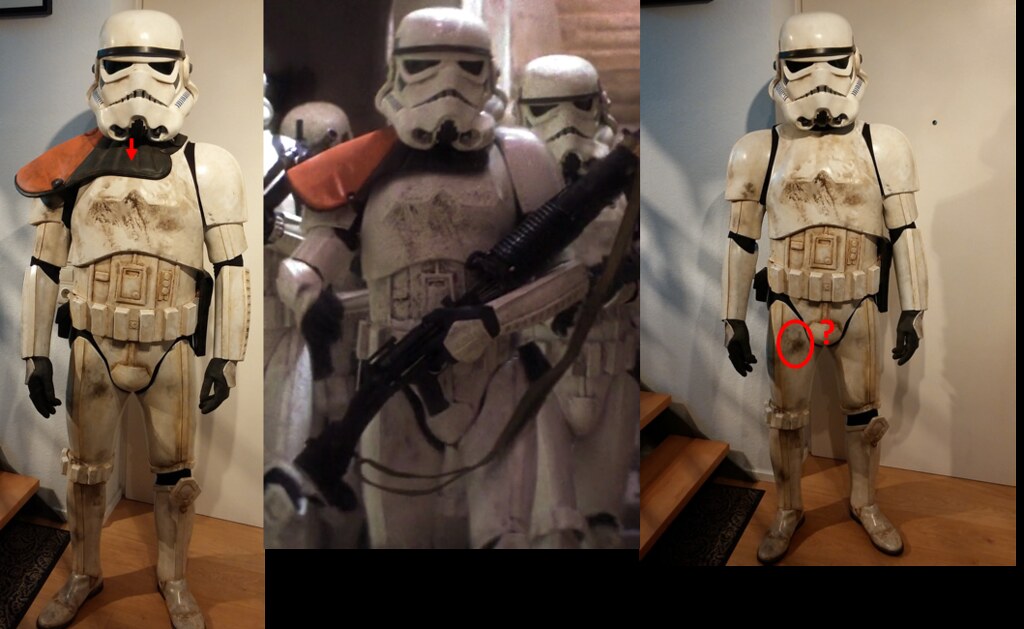
While looking at my pics again, I realised that the weathering isn´t solid enough in some places on my right shoulder bell, especially when compared to the reference pics, so I added a little more. The same goes for the underside of the little square on the abdomen.
shoulder bell before:
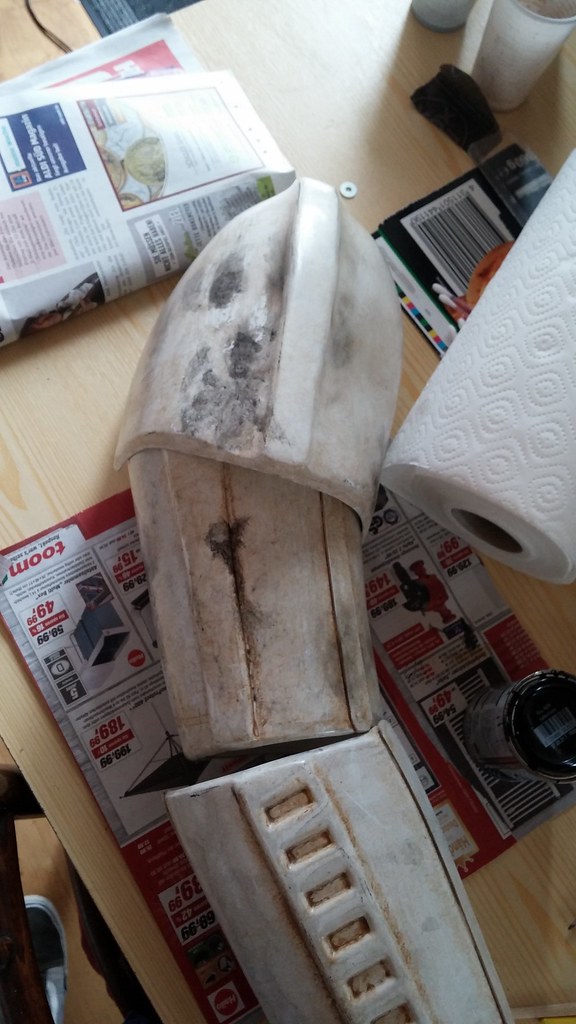
and after adding a little more:
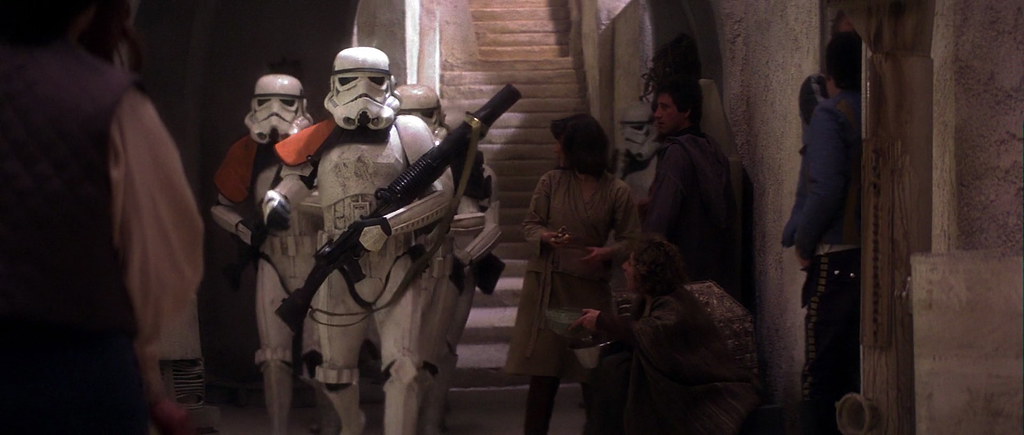
reference

abdomen with stronger weathering on the underside of the little square:
-
Why not show, I think you can already be proud of yourself, nice build!
-
1
-
-
Sounds great, looking forward to seeing some pics!
-
Hi, your gear is already looking good
For SWAT (level 3) the helmet and armor have to look exactly like they did on that specific trooper on screen in the movie. The screen used armor was hastily put together as the crew was on a tight schedule, that's why you can notice all these imperfections when you have a closer look. Your helmet looks about right as far as the gaps are concerned.
Keep up the good work and you will be in the sandpit in no time!
-
Well done, congrats mate!

-
1
-
-
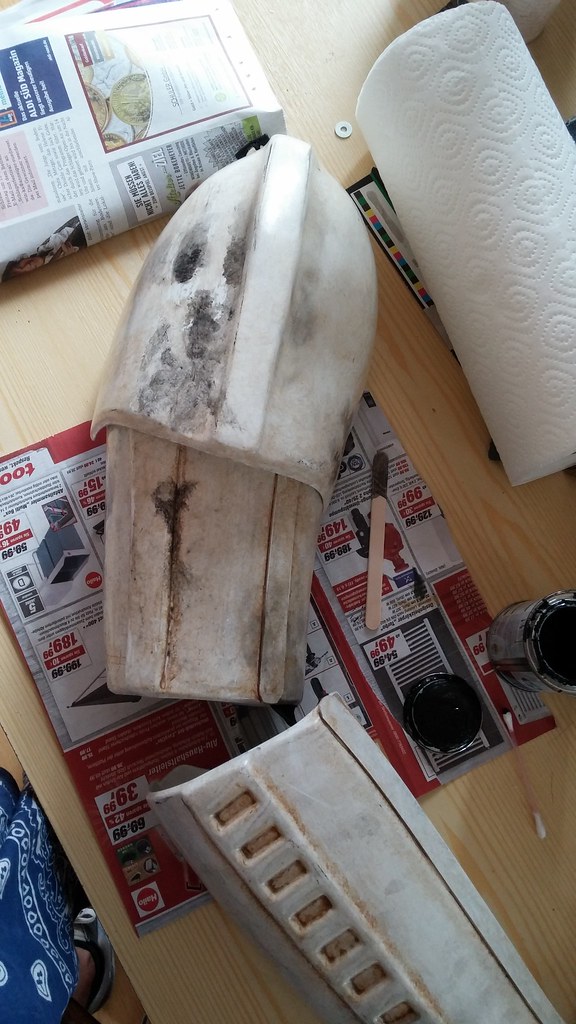
I have adjusted the weathering on the abdomen according to the references:
before:
new
btw I have also removed the padding from the lid so it sits lower and looks like the reference.
and the weathering on the inner right thigh is can also be seen in the above reference and some other screencaps, although it looks different in every shot, I don´t think that it just a shadow of the T-21. I have tried to adjust my initial try to make it look better:
my thigh
references/screencaps:
and finally me again posing:
I have also added a little to the weathering of the right shoulderbell and the biceps, while studying the references I realised that the biceps is really twisted, so mine is twisted as well
before:
after:
hope I have ticked all the right boxes and looking forward to reading my next review
Cheers mates!
-
Okay holidays were great, lots of hiking in the mountains and BBQ
but now back to business!
I have improved/changed/adjusted everything pointed out in Felix´review, here we go....
I have cleaned my boots (something a TD should actually never be forced to do
)
In the first pic the one on the left has been cleaned, the right one is still dirty as .....
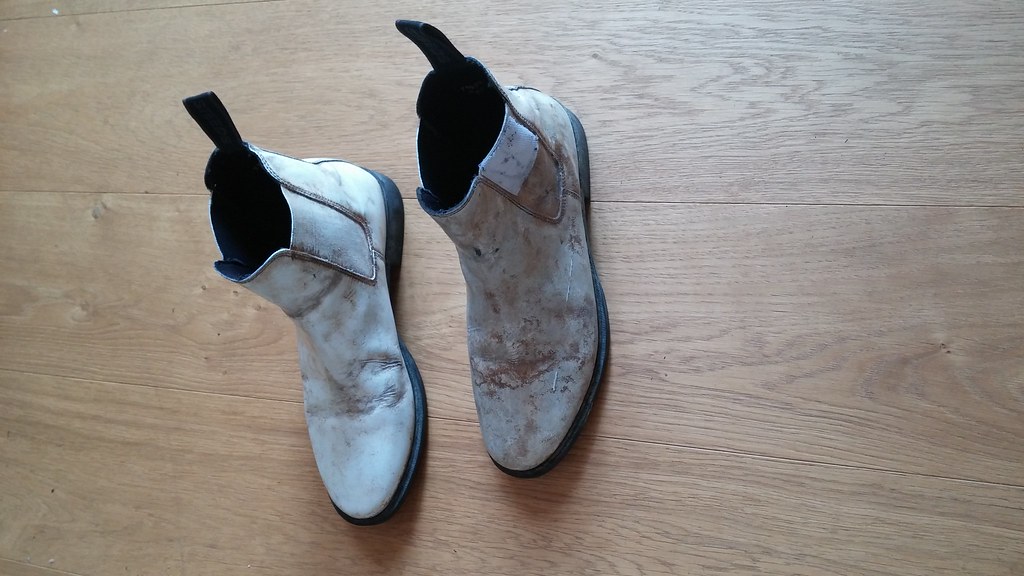
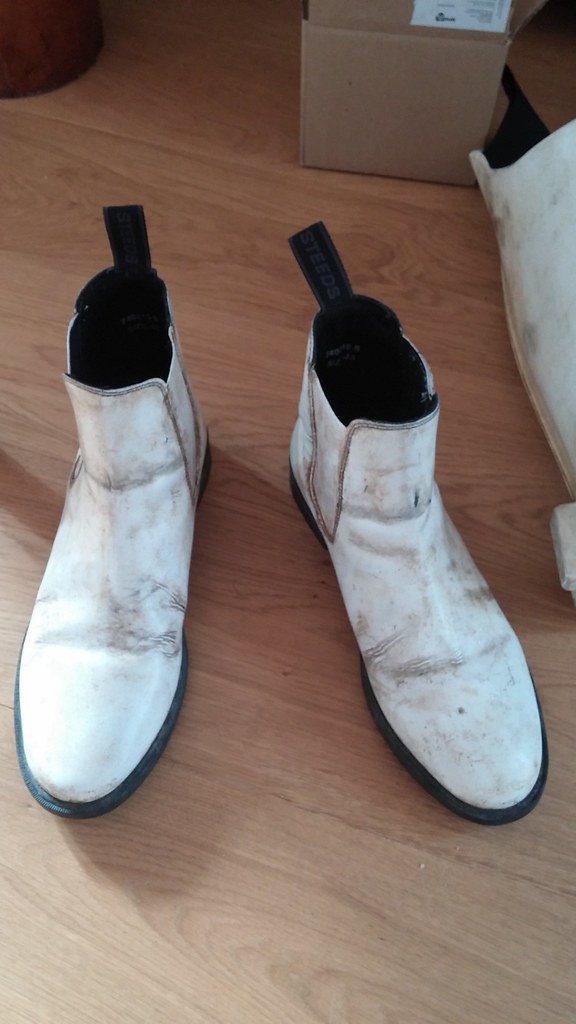
both of them clean:
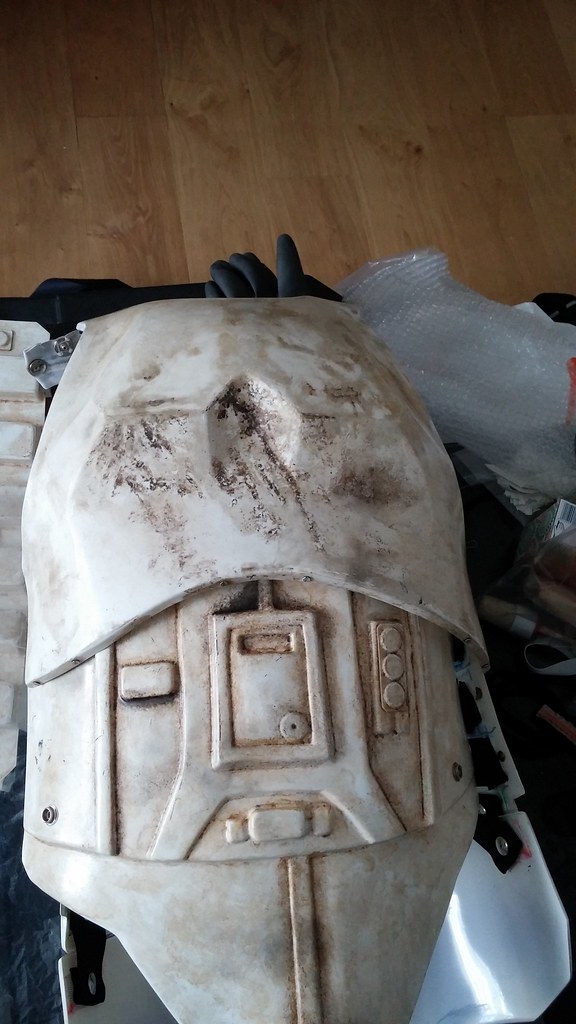
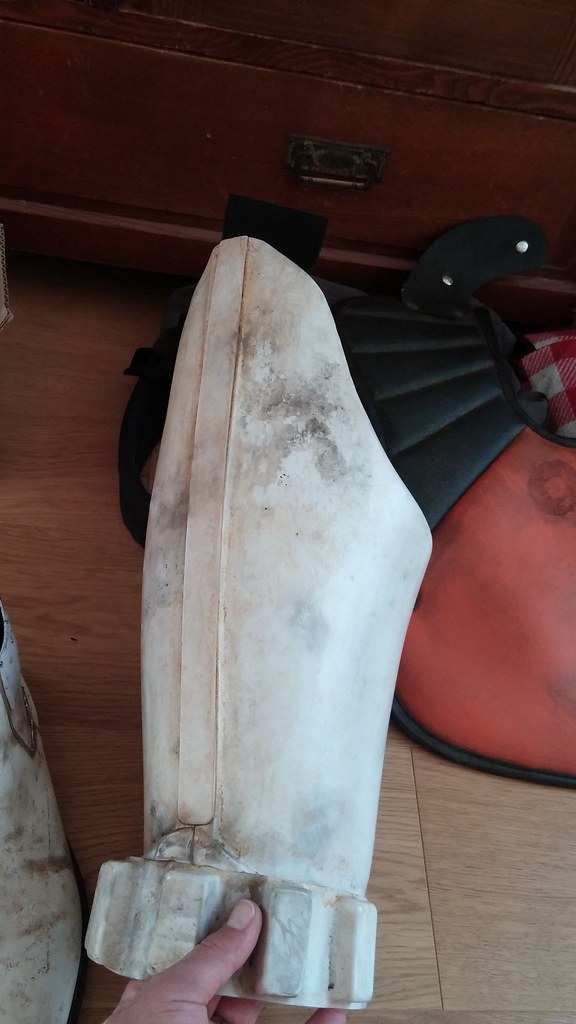
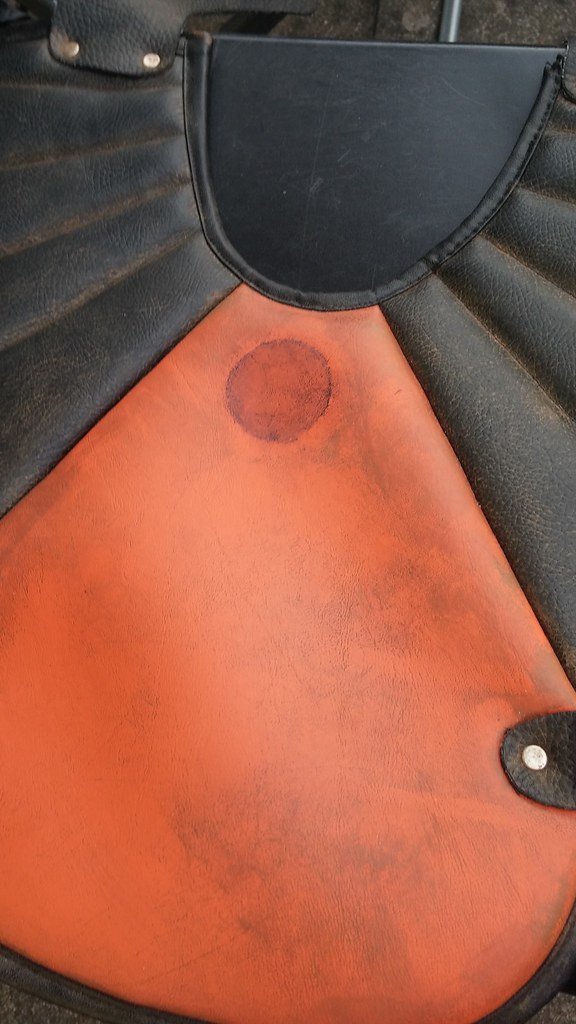
I have reworked the coffeespot on my pauldron (again) and finally I´m quite happy with it:
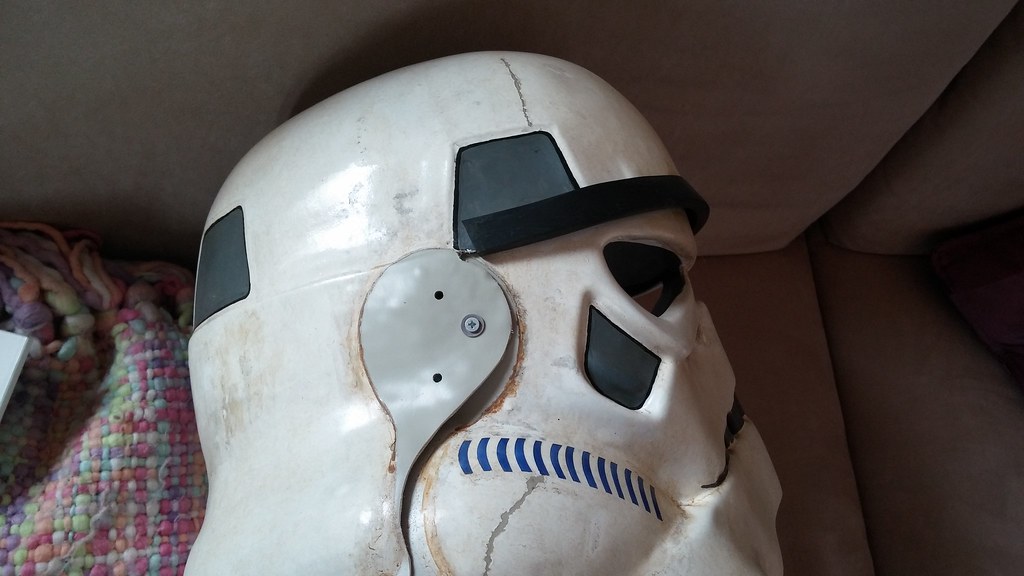
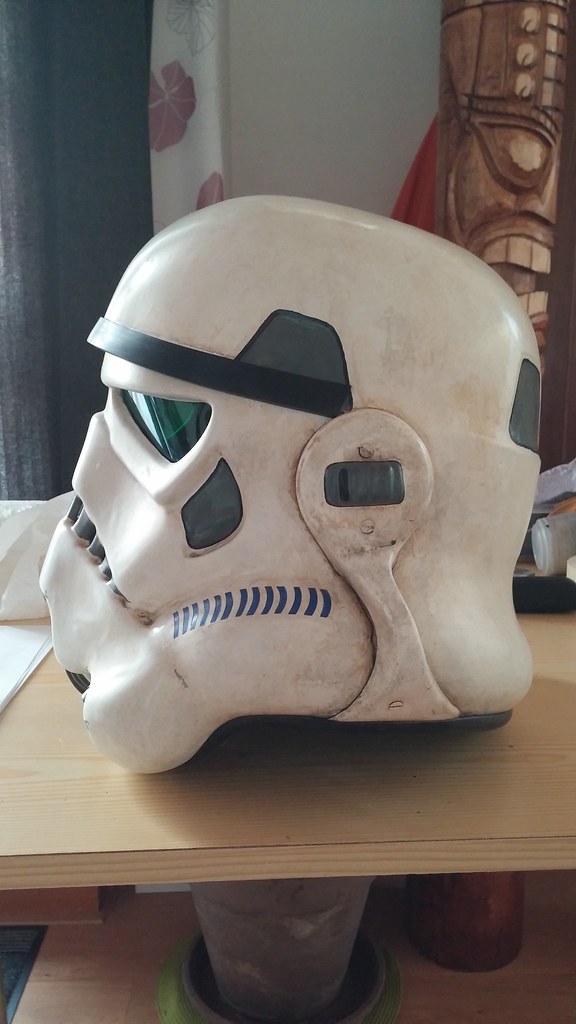
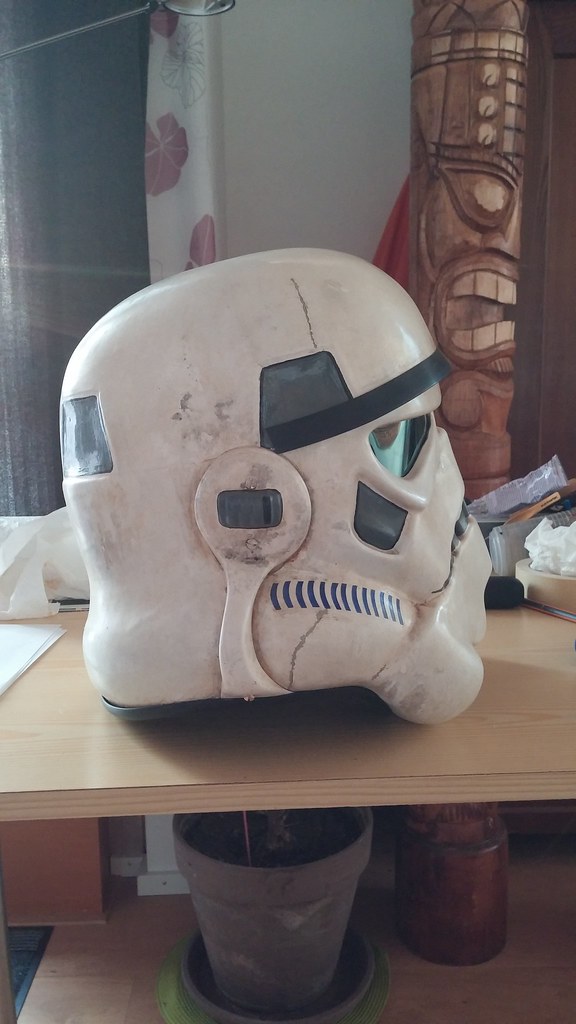
I have taken the right ear off my bucket and reshaped it on the frontside to achieve a larger gap, furthermore I have added the missing weatheringspots and the paintruns on the back of the helmet:
In addition to adding the two spots on the snout, I have also tried to emulate the thin line above the right eye and the dirt between the eyes
the original helmet has large gaps where the ears are attached, so I took out my dremel...
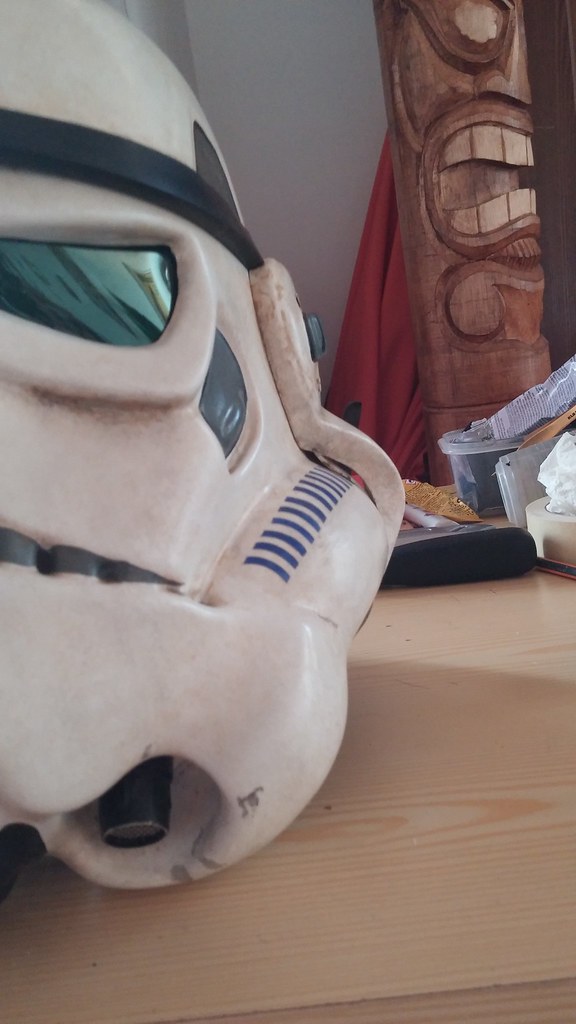
helmet without ear looked almost like the cleaned original on starwarshelmets.com
paintruns on back:
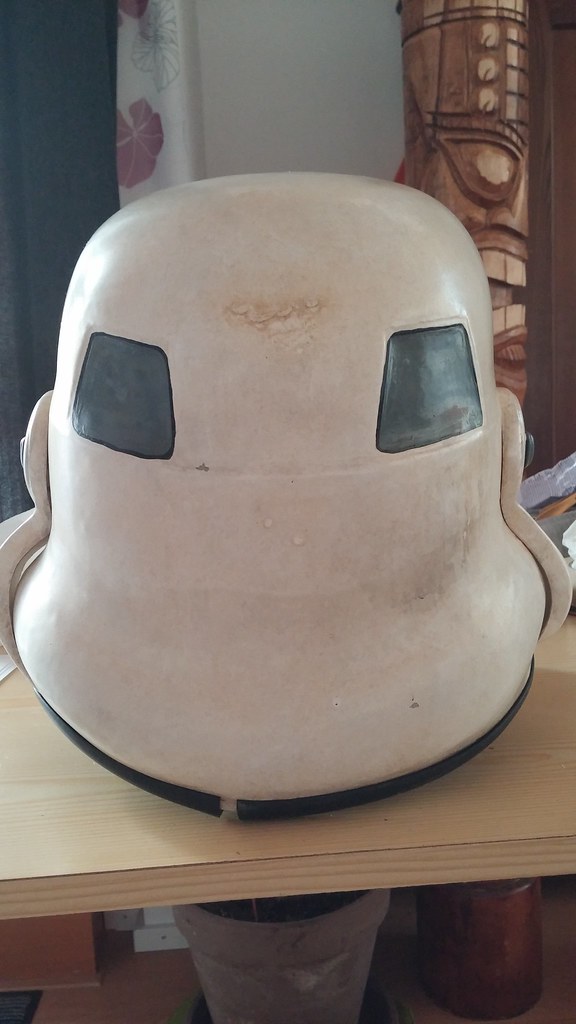
some more pics from the side
-
Yeah, good work on creating that return edge, changing those shoulder straps will be a piece of cake then!
This is what it says in the crls:
For level two certification (if applicable):
- No ribbed shoulder straps are present.
- Shoulder straps shall be white elastic waistband material.
Also have a look at the other PO applications.
-
1
-
Hi Steve and welcome to the sandpit!
I like your weathering and most things look on spot!
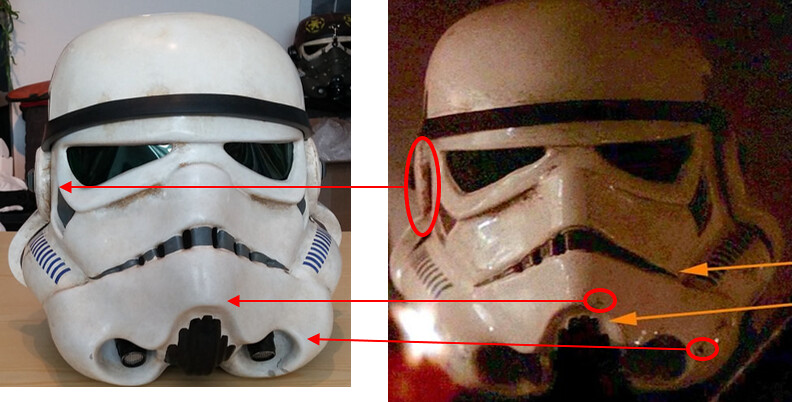
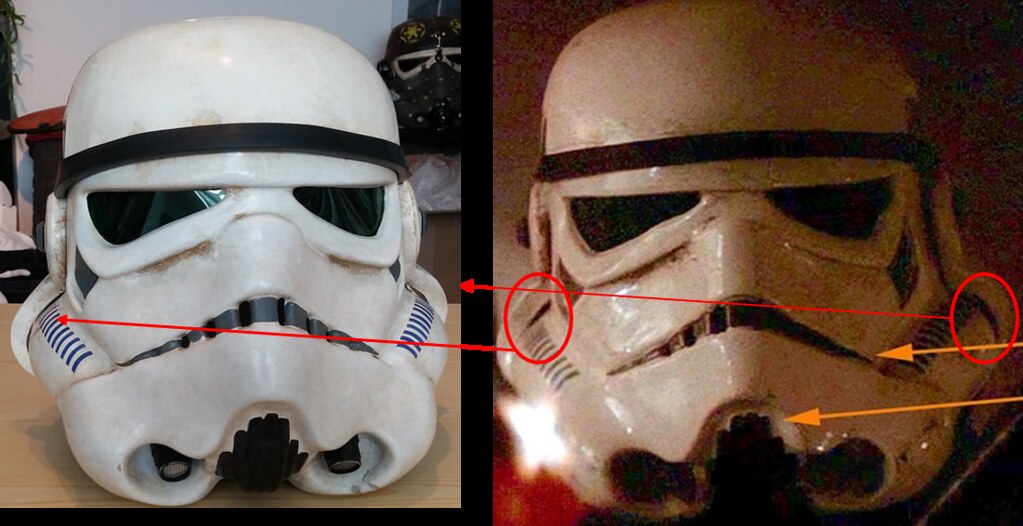
Don't forget to show some detail pics of the six side rivets on the left side, the backside of the male snap on the right side of your abdomen and the rivet in the codpiece as well as the two snaps in the butt area.
Did you notice that the little plate with the three buttons is almost falling off?
One thing that will be an issue though are the shoulder straps, they should be white elastic (weathered) with a sew-on snap at the bottom, also use some white thread to sew it on.
Your DLT-19 looks ace.
Way to go and good luck with your review!
-
1
-
-
Thanks Jon!
-
1
-
-
Hey, looking good already! How does it feel being a proper Sandtrooper?
The one thing I see room for improvement is the thighs:
try to pull them up by shortening the elastics so they are closer to the codpiece and I would also recommend trimming them a little more if still possible, as they seem too wide around the knees especially the right one with the small ammobelt, their shape should follow the natural shape of your leg.
Way to go mate
-
Thank you Felix for all the detailed pics containing all the information I need to improve my armor, I guess that was quite a bit of work!
I will start working and adjusting stuff on Friday when I get back from holidays. As far as the pauldron is concerned, I'd like to point out that the one picture you have chosen doesn't show the pauldron at its current state as I've toned down the coffee spot quite a lot since that pic was taken (you will also find the current pics of the pauldron in this thread)
Furthermore my head is quite strangely shaped
 , which might be the reason why it looks like the helmet is sitting quite high. I will try to find a thinner foam to create the flower for the helmet padding but the one which is currently in use is already quite thin.
So way to go!
-
Really cool!
-
I'm really jealous bro
Great pics!
-
1
-
-
Wow, really impressive presentation Thomas, nice work!
*APPROVED* TD-30571 Requesting SWAT Deployment #49
in MEPD S.W.A.T. Program
Posted
Congrats brother! We will have to celebrate this!