


Hausi
-
Posts
1,509 -
Joined
-
Last visited
-
Days Won
120
Content Type
Events
Profiles
Forums
Posts posted by Hausi
-
-
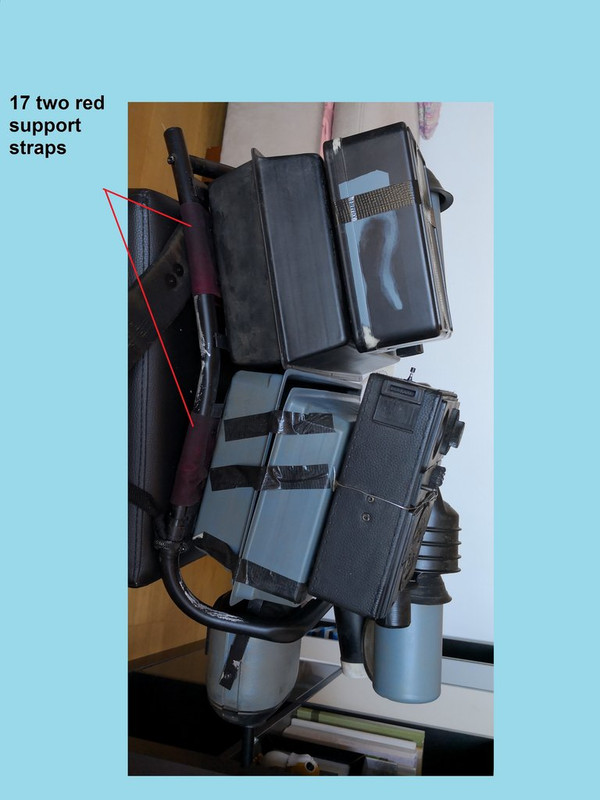
It's not necessary to add any weathering to your undersuit mate.
-
 2
2
-
-
Looks spot on, beautiful helmet and great work Thomas.

-
Spell it Sandie Comms and you will find it.
-
Spot on with all those details, amazing work Wayne!
I bet you can't wait to put on the armor and take that baby for a stroll.

-
1
-
-
This is going to be great, looking forward to seeing your progress.
-
1
-
-
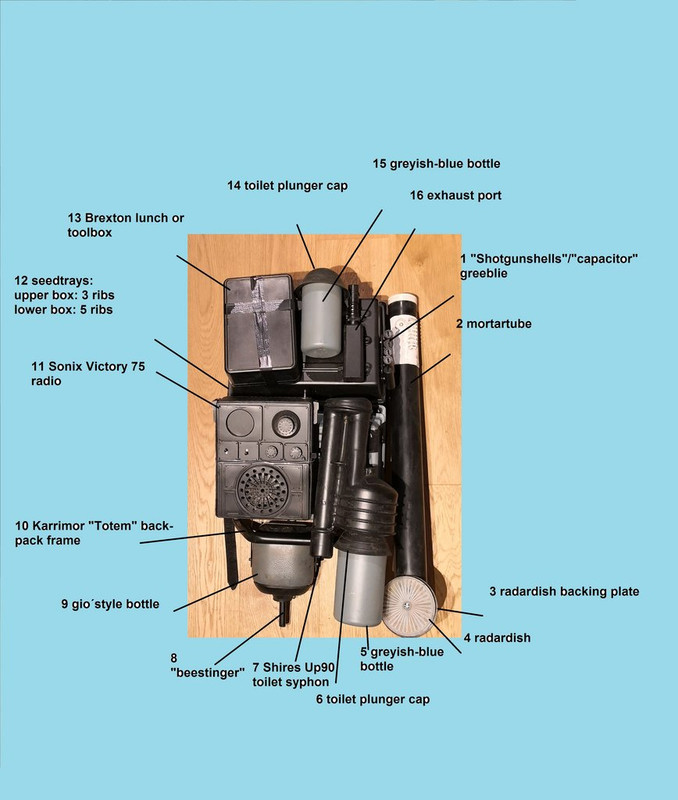
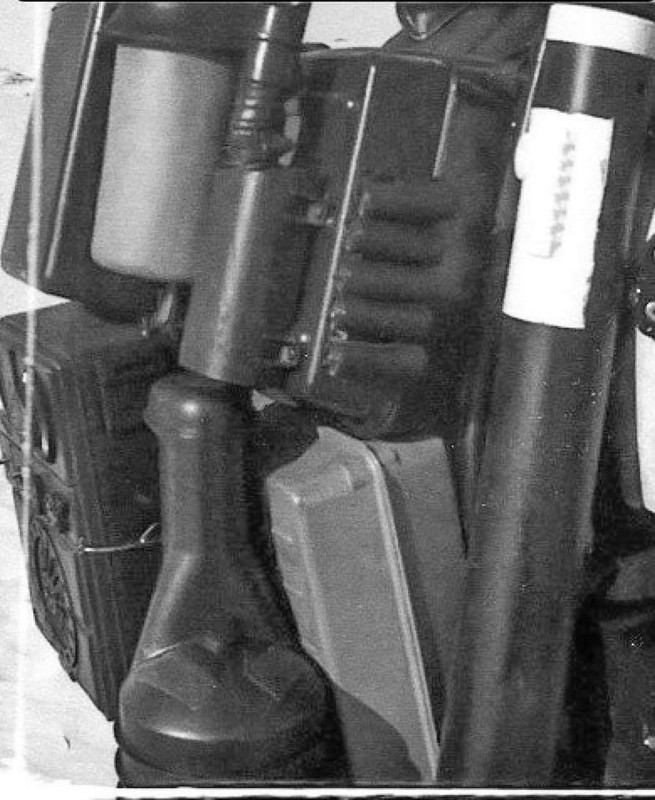
List of components:
- "shotgunshells"/"capacitors"
- mortartube
- radardish backing plate
- radardish
- greyish-blue bottle
-
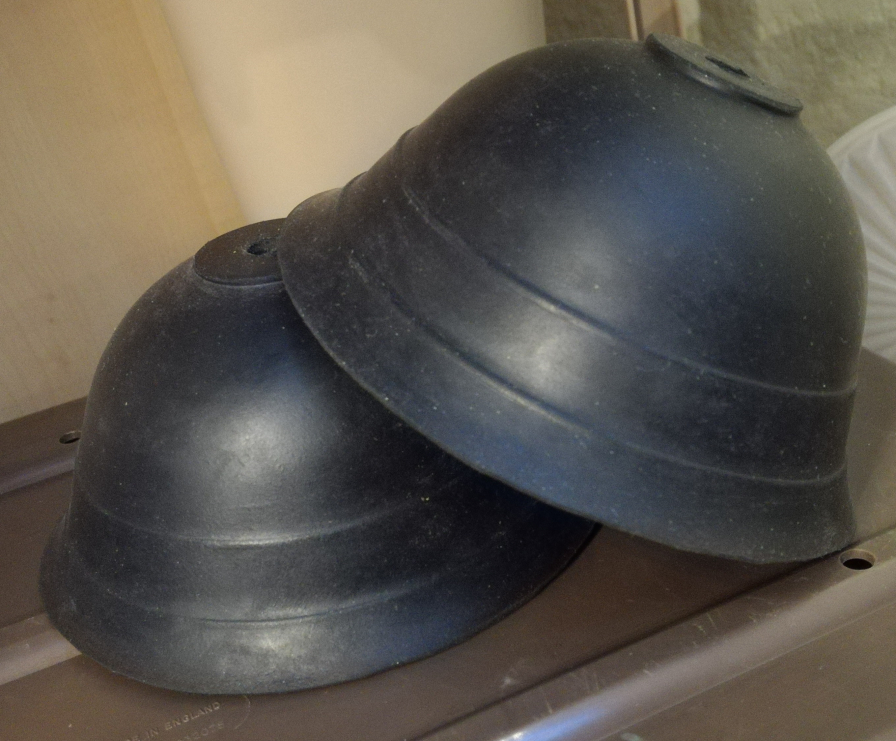
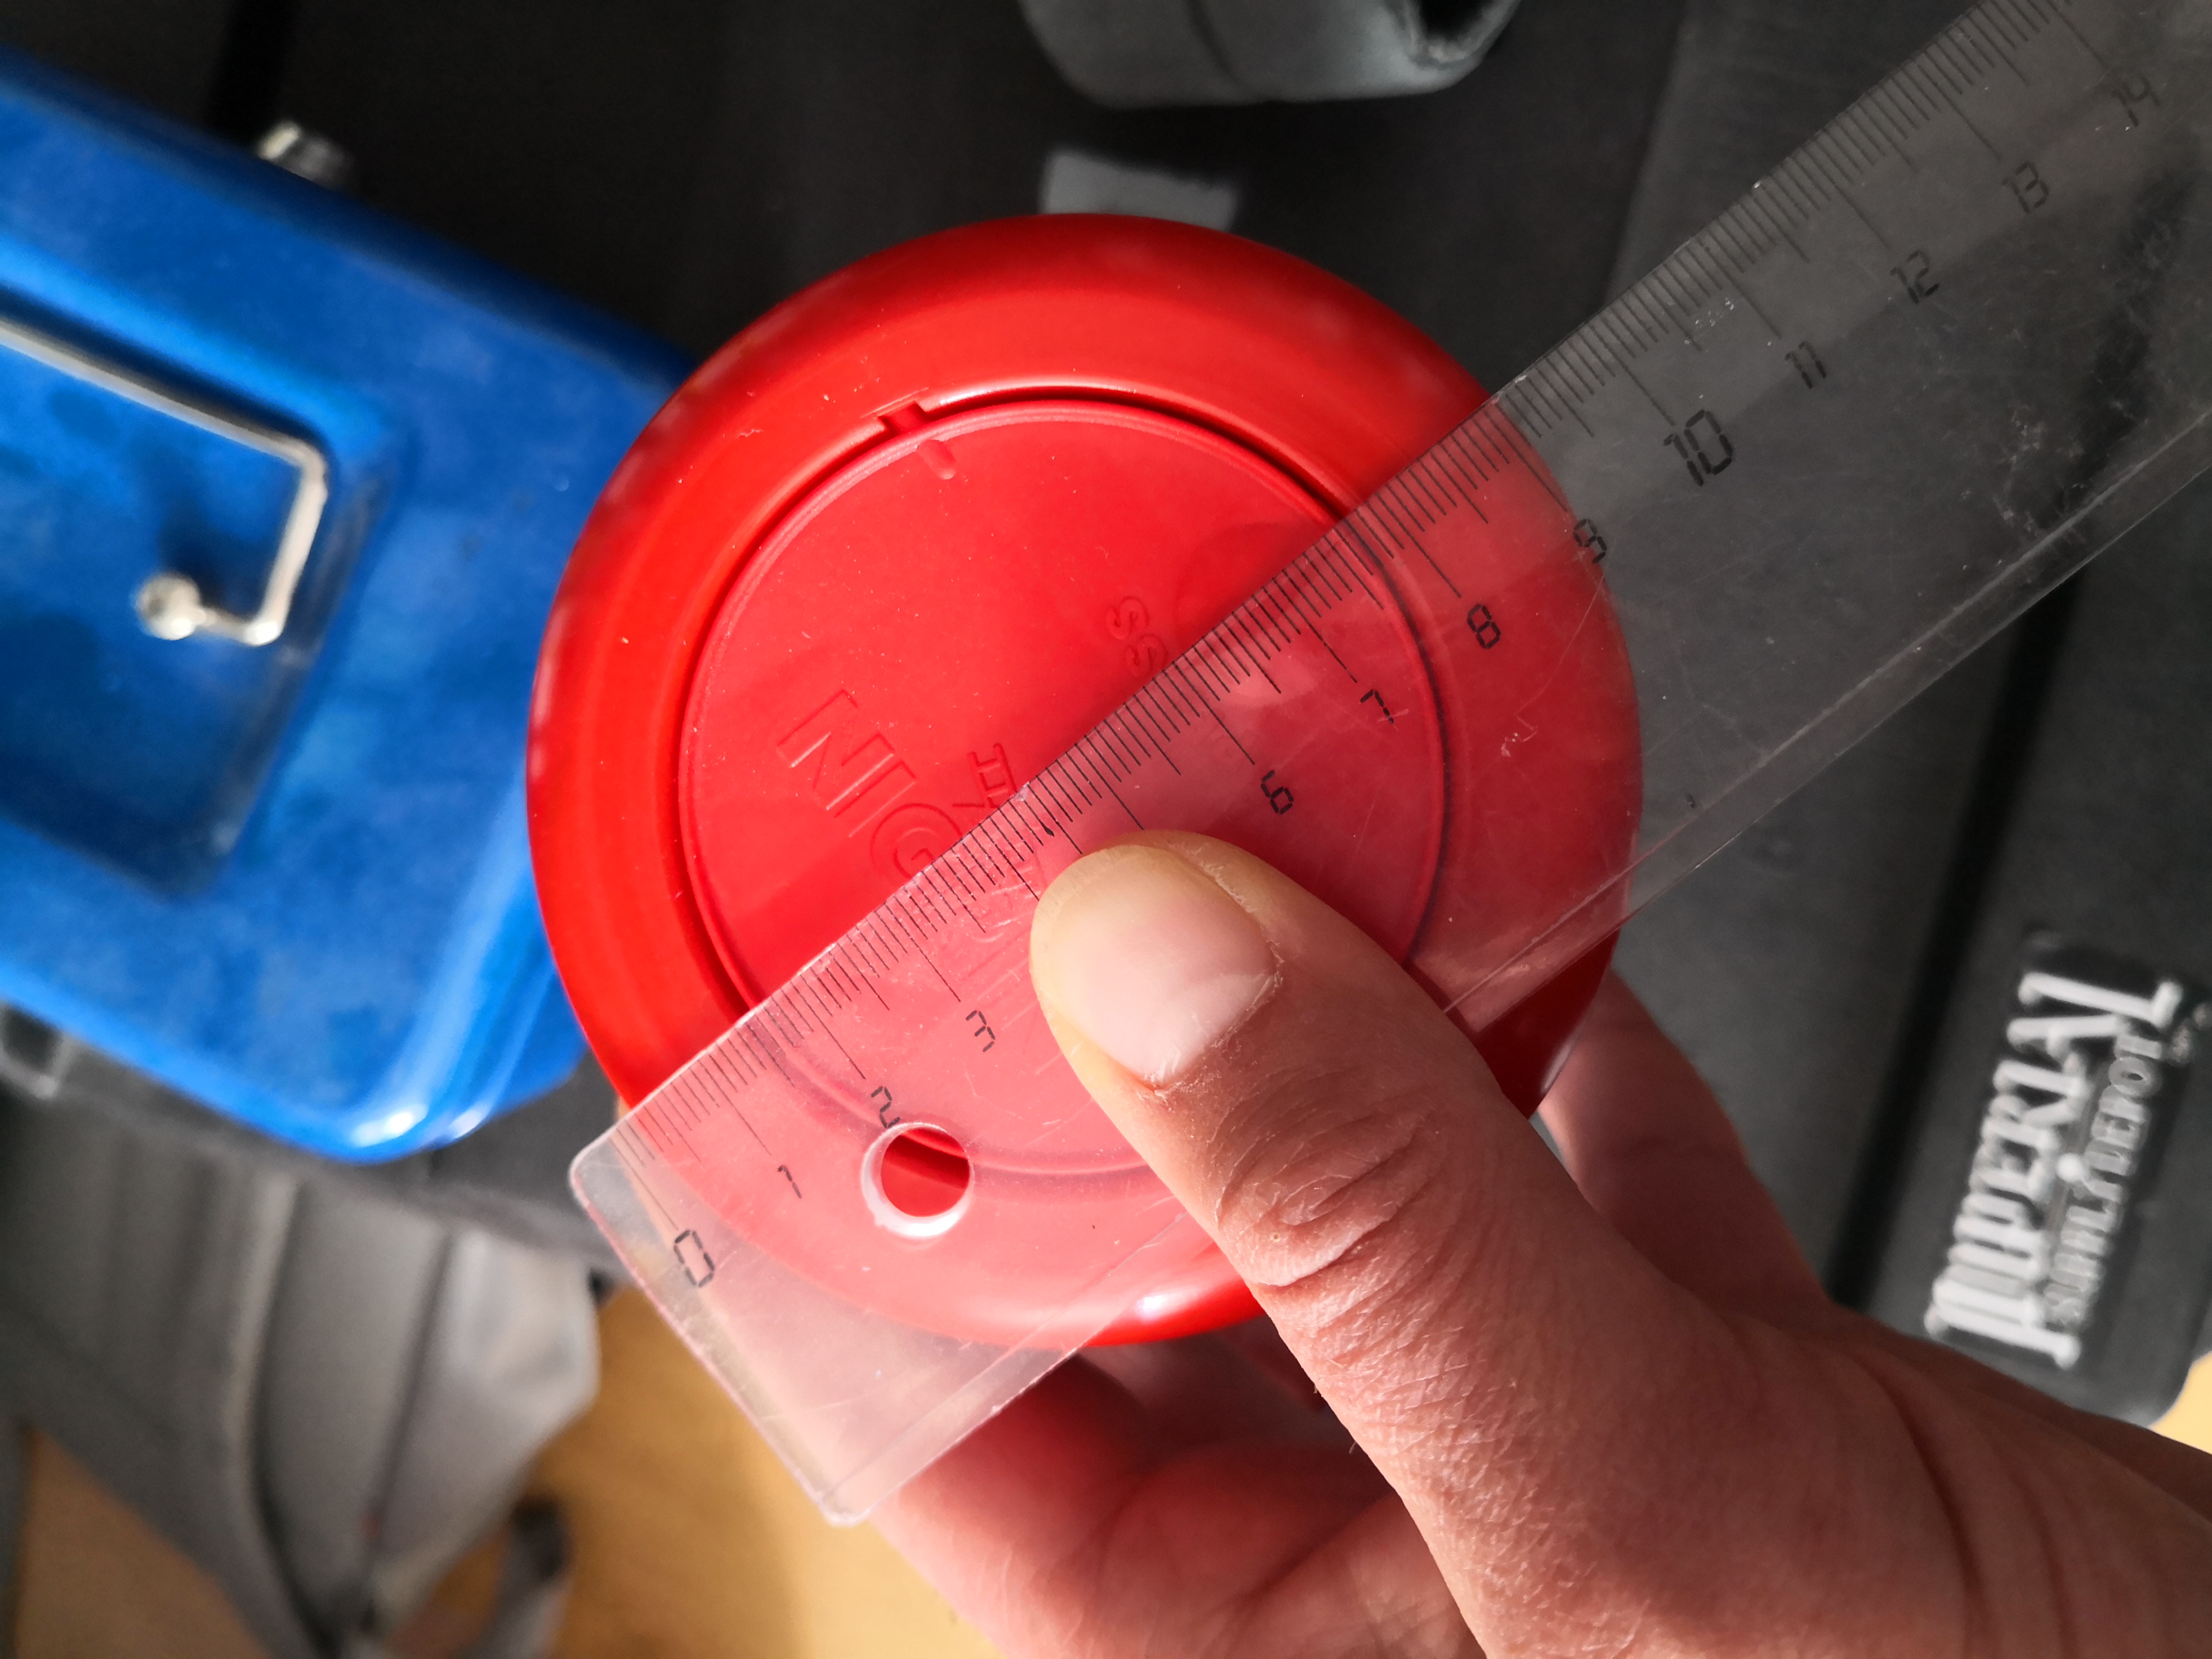
toilet plunger cap made of rubber (it´s also possible to use a vacformed cap, it just has to look the same and shouldn´t appear too shiny.
-
2
-
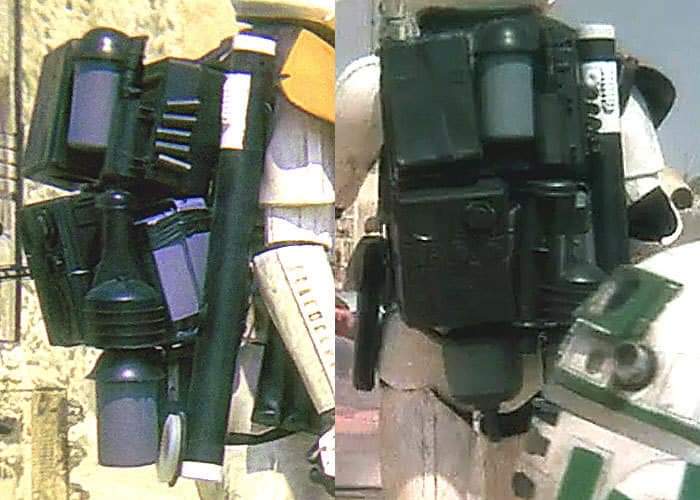
List of components:
- "shotgunshells"/"capacitors"
- mortartube
- radardish backing plate
- radardish
-
greyish-blue bottle
If you look at the screen references you may notice that the lower bottle looks slightly wider in diameter that the upper bottle. Such bottles are easy to find, I always source them from my local diy store in the car section, mine are bottles containing dashboard wipes.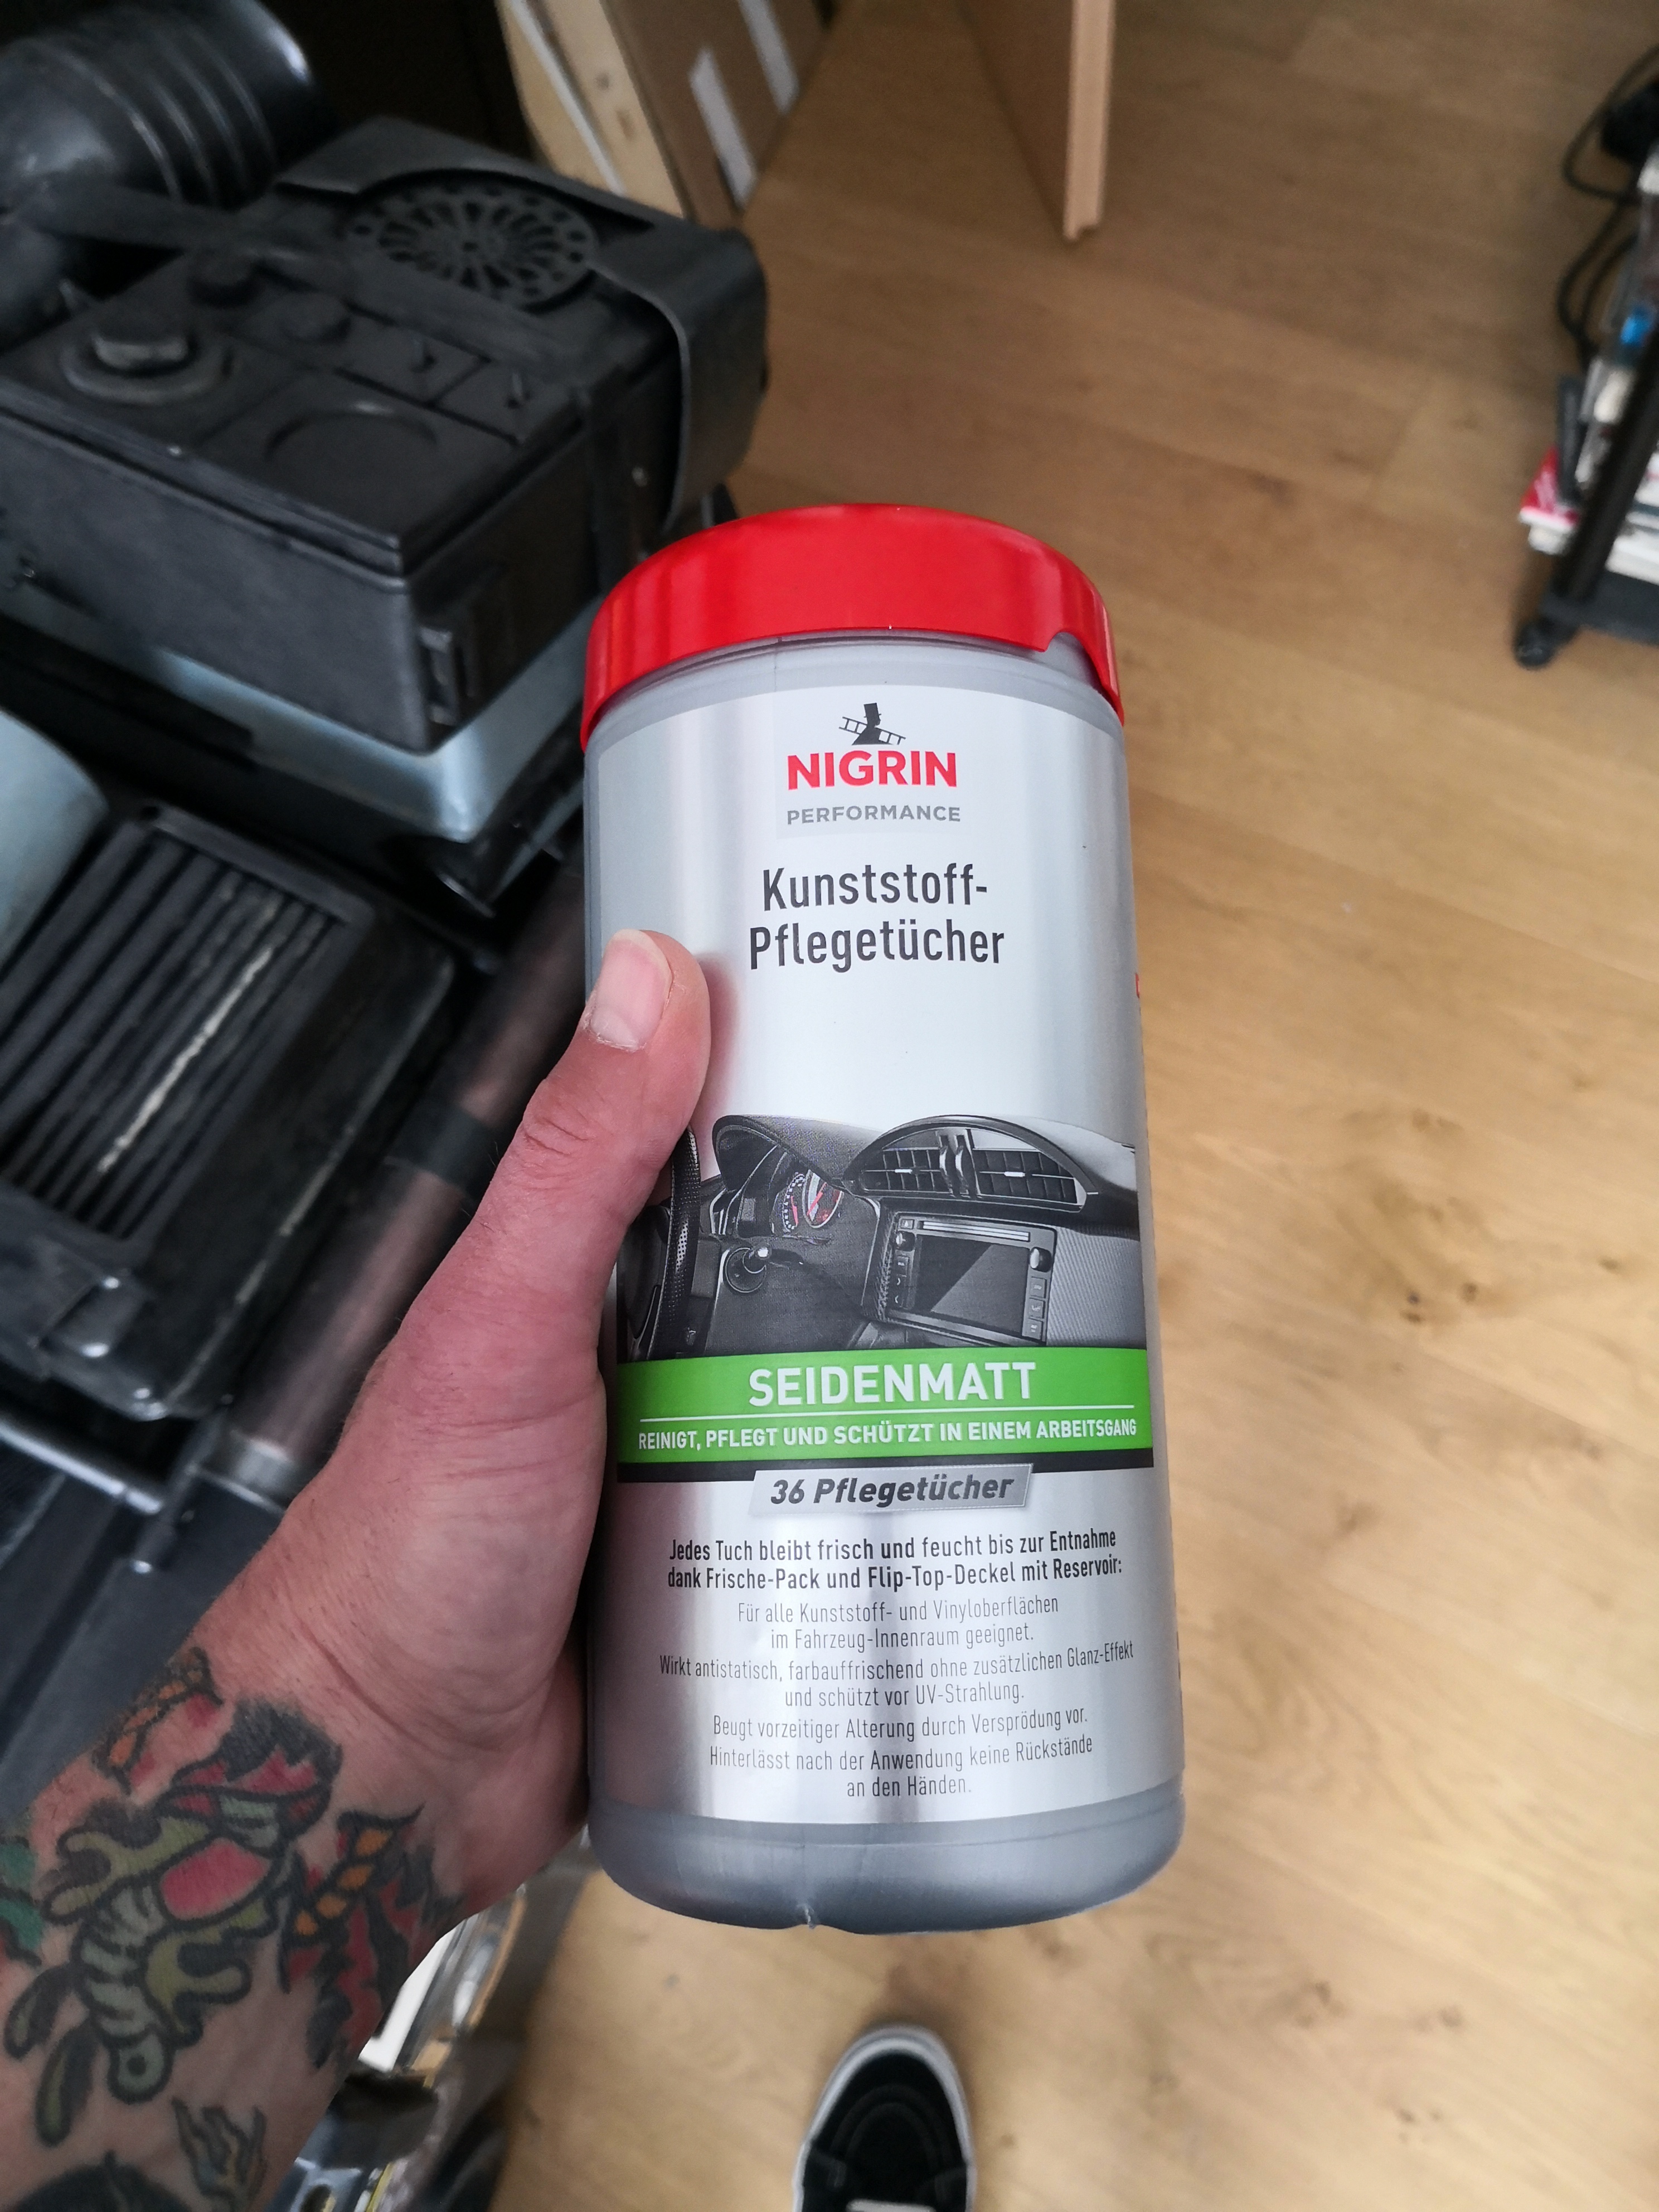
In the following picture you can see the lower bottle with the larger diameter on the left and the upper bottle on the right.
These bottles should look rather grey than blue, I recommend using RAL 7031 in a satin finish to paint them, in the states you should be able to find some battleship grey colour.
Note that the right one has already been weathered, thus the difference in colour.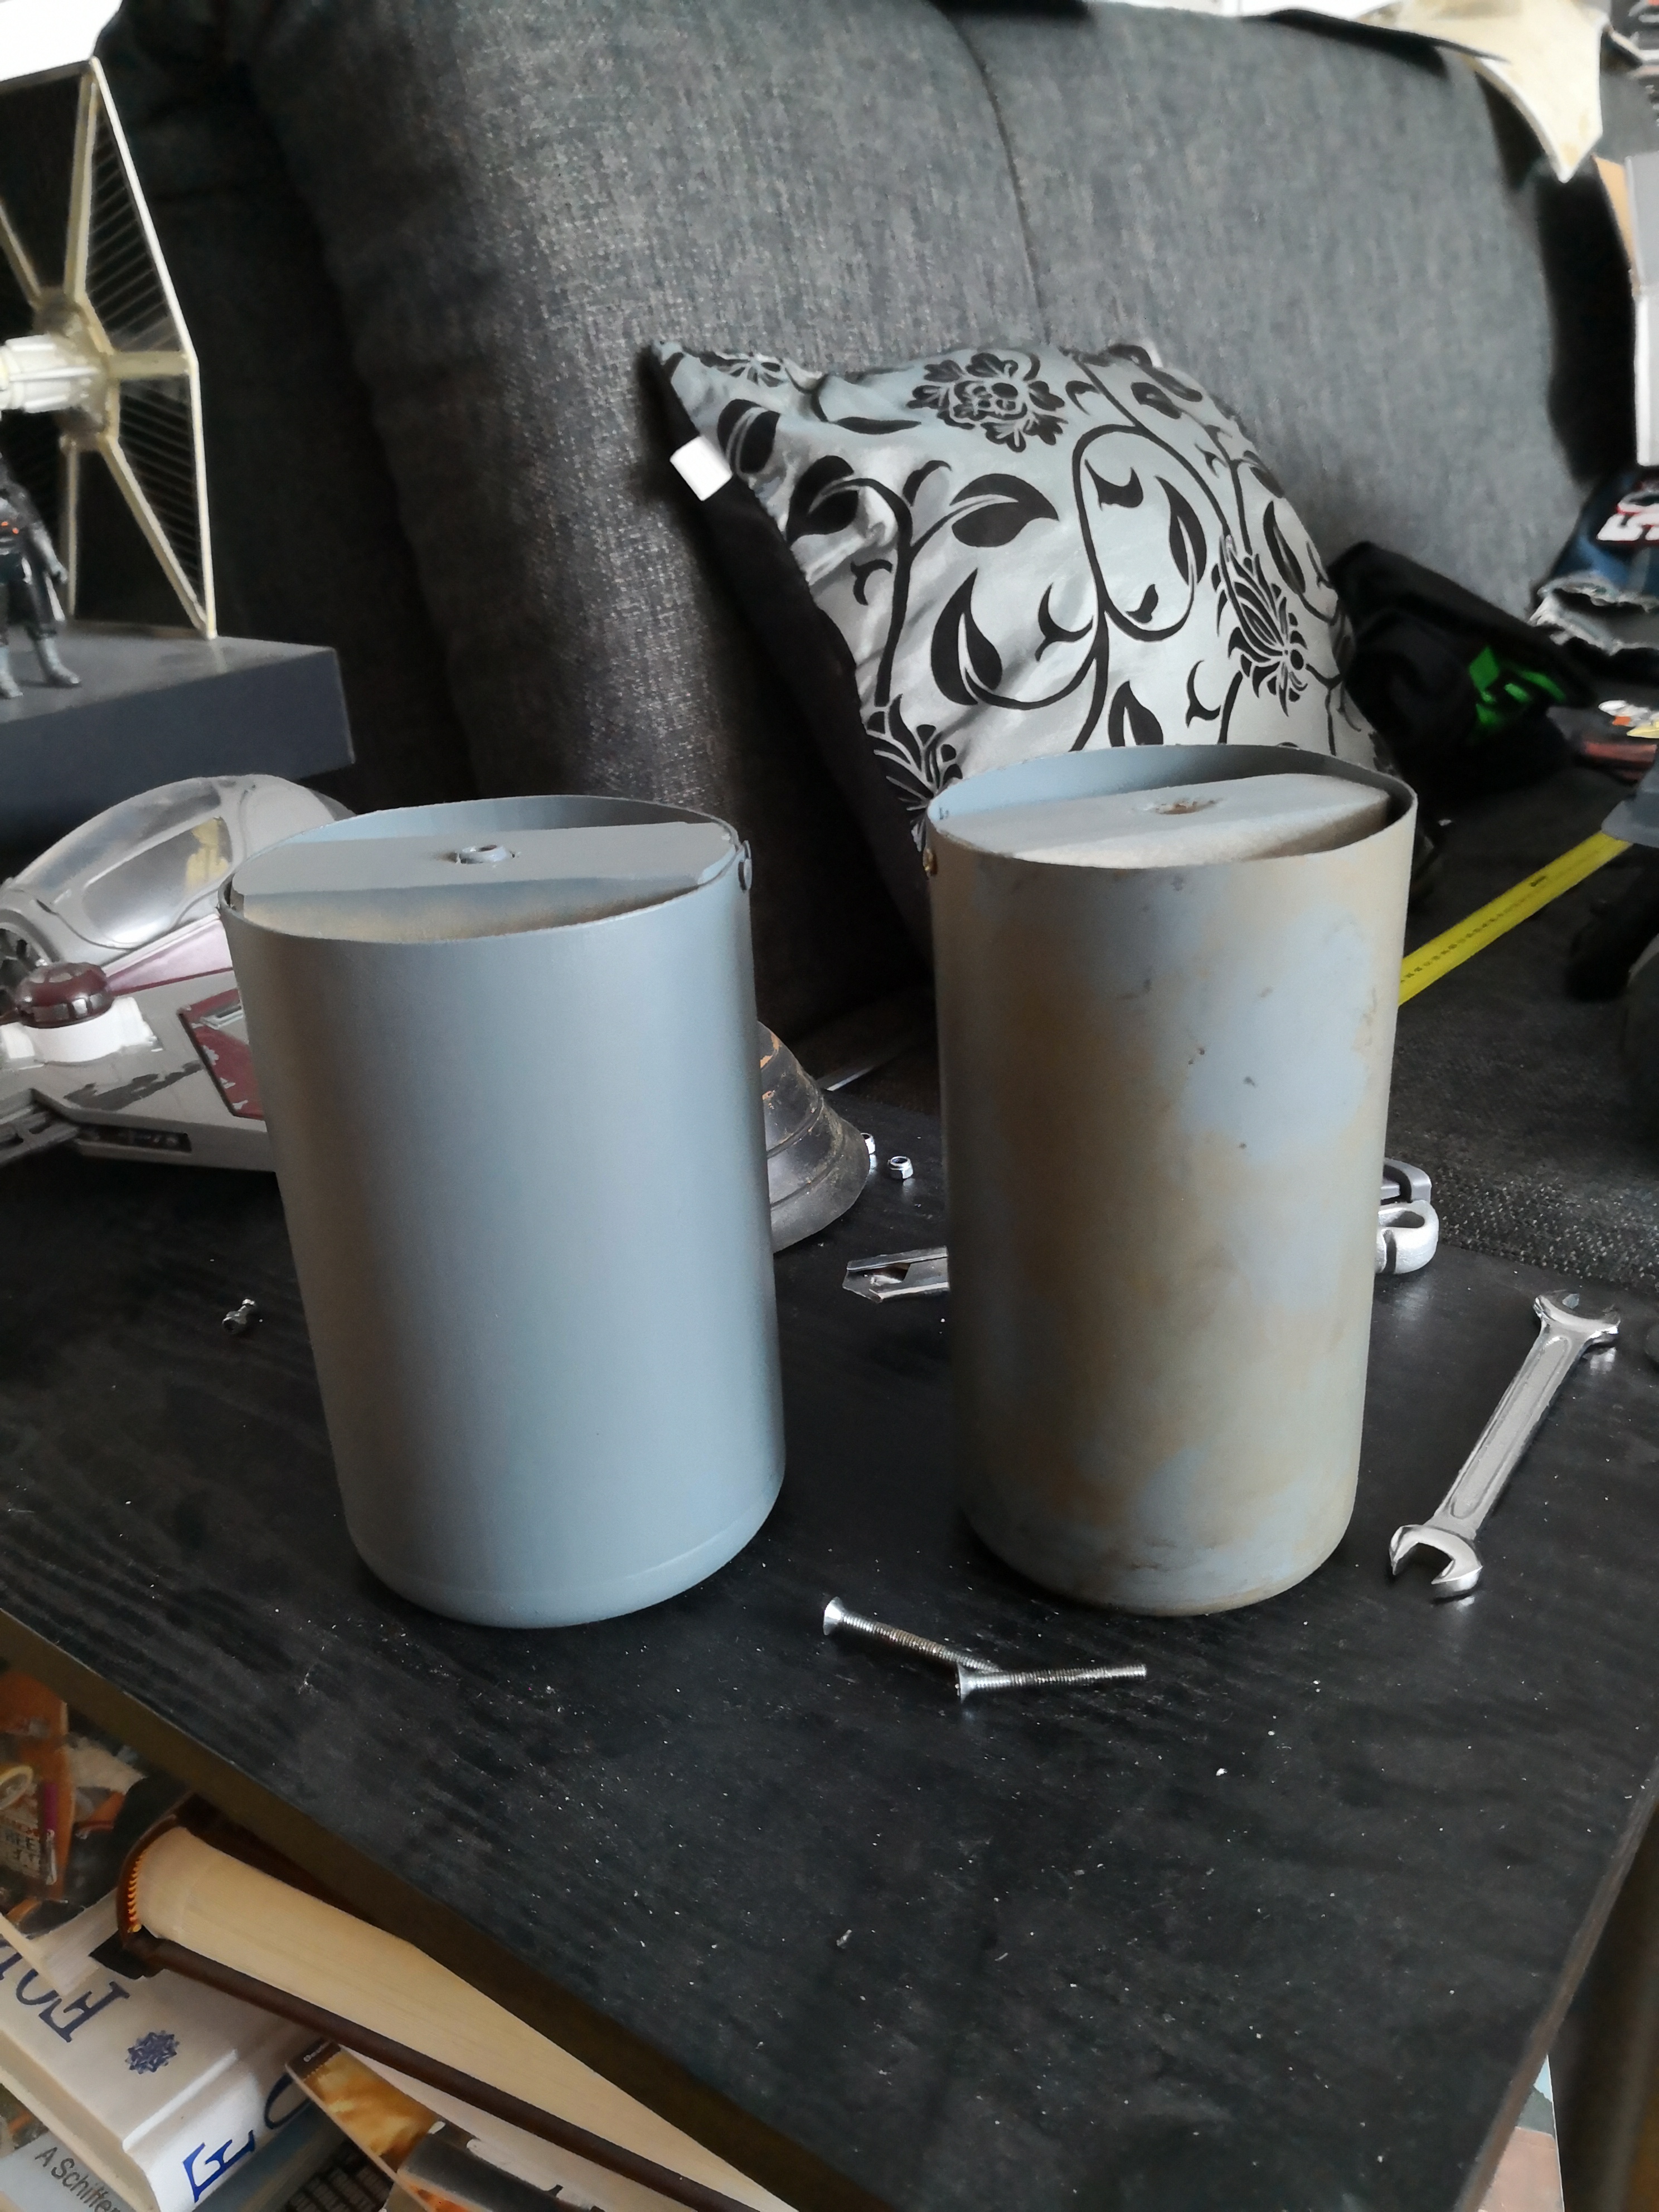
-
1
-
List of components:
- "shotgunshells"/"capacitors"
- mortartube
- radardish backing plate
-
radardish: Lid from Pitcher, Mod. 874 (Tupperware) - transparent
In the following picture, you can see the transparent one on the right and the white one on the left.
-
2
-
Wow, that looks amazing Wayne! Great eye for all the details.
-
1
-
-
Okay, thanks for replying so quickly. To post pics in this forum you will have to upload them to a picture hosting website of your choice, for example Flickr, Directupload or similar. As soon as the pic has been uploaded you copy the address into your thread here.
-
Hello Jack, it seems a little strange to me that I've heard from people sending you private messages and not getting any replies from you... If you really have these syphons, please open a new thread in the for sale section and post real pictures and prices as well.
-
1
-
 1
1
-
-
List of components:
- "shotgunshells"/"capacitors"
- mortartube
-
radardish backing plate: this part is easy to make yourself, I just took a 3mm sheet of black ABS, used a CD as my template and cut it out.

The bolt which is used to attach the whole assembly to the mortartube could look like the one I´ve used. It´s also possible that it was one without those ridges for the screwdriver but it´s very hard to tell from screen references.
-
List of components:
- "shotgunshells"/"capacitors"
-
mortartube: this part is originally a black plastic drain pipe for rainwater, the outside diameter is about 6,9 cm and the wall thickness is about 2mm. They are easy to source in the UK but hard to find in other countries, e.g. Germany.
On my personal pack#3 the mortartube has a length of 75 cm.
The white ABS details are the same as you find them on the thermal detonator of the regular stormtroopers, pack #3 has two endcaps and the detail. While the original plastic drain pipe is shiny, the ones on the screen-used packs seem to be painted black with a satin finish.
Details: there should be some glue residue or paint runs, the Thermal Detonator detail is cut very crudely and there is supposed to be a hole just underneath the top endcap, probably it was used to secure the mortartube to the frame in the same position were the horizontal bar is.
Also note that the endcaps are quite thick. -
-
List of components:
-
"shotgunshells"/"capacitors": the source of this particular greeblie isn´t completely clear yet,
however, as long as it looks right, it will work, this can easily be self-built, you just need some kind of plastic tube - with a diameter of around 2cm - and fill it with epoxy or putty adding a little "antenna" at the front, for this you can use wire. Here are some screen references.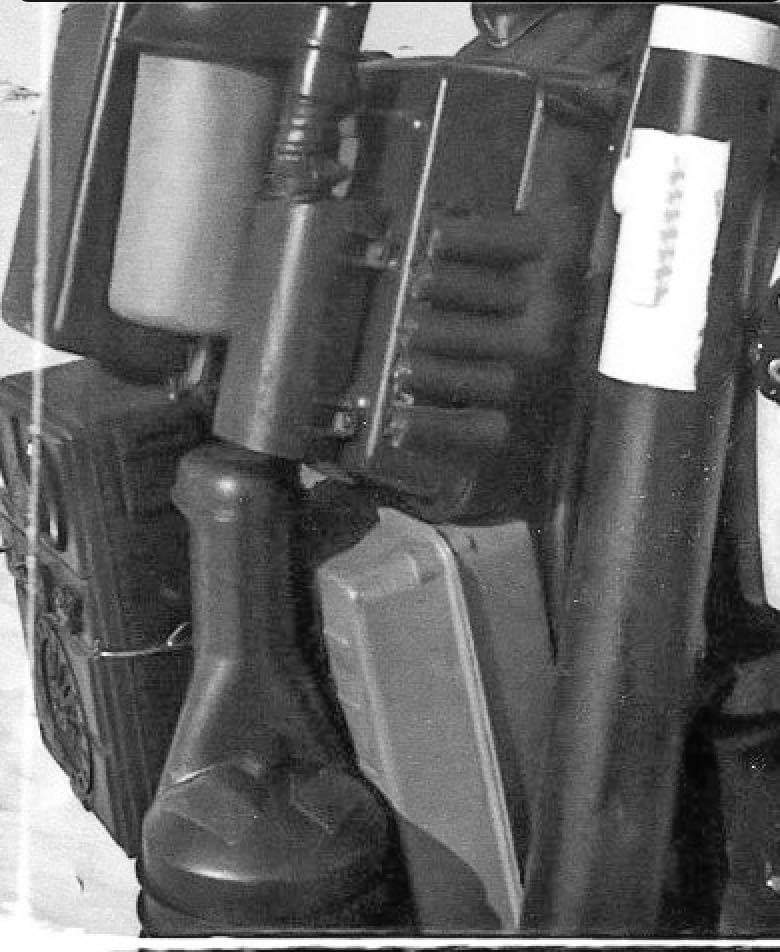
and this is what mine look like:
there´s obviously a black plastic plate between these shells and the seedtray, it was probably easier for the prop department to attach them this way.
-
2
-
"shotgunshells"/"capacitors": the source of this particular greeblie isn´t completely clear yet,
-
So here are two pictures showing the components of this pack:
In the next post you will find the list of components.
-
4
-
-
2 hours ago, 5573 said:
It was this reference that I think shows all the angles being 90 degrees:
At the bottom of each pack (admittedly you can only see one side on each), you can see that it is a right-angle.
These pictures are outdated and horribly wrong, I am trying to get them updated but so far we have started the informationthreads in the Fieldpack section on the forum, they are still under construction but already offer some great information:
http://forum.mepd.net/index.php?/forum/4-field-backpack/
The frames used for the packs were mainly Karrimor Totem Backpack frames as you can see in the threads.
So your black frame on the left is the one to choose.
-
What reference pictures are you referring to? Could you share?
I'm not quite sure if I understood you correctly about those angles but to me the shape at the bottom of your aluminium frame looks about right.
-
Allright, let´s get this started. By no means do I consider this to be complete nor without certain grey areas that can be lively discussed in this thread by you all as soon as I have finished this and it´s open to the public to be discussed.
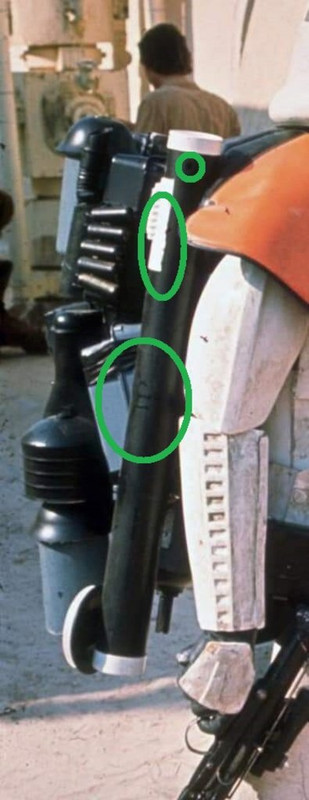
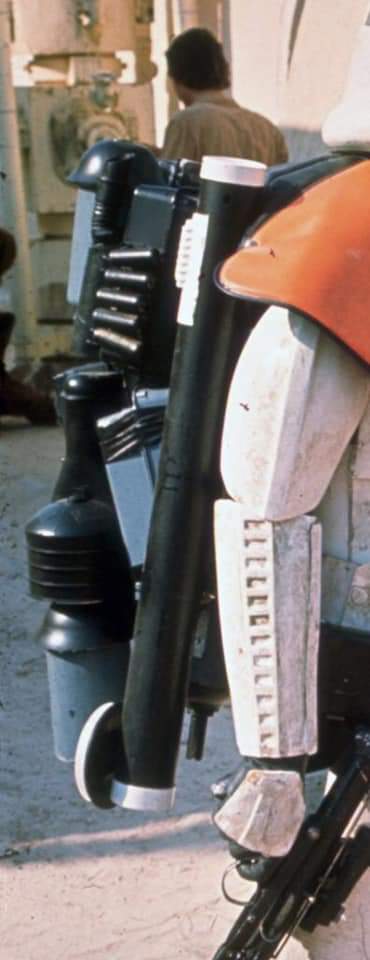
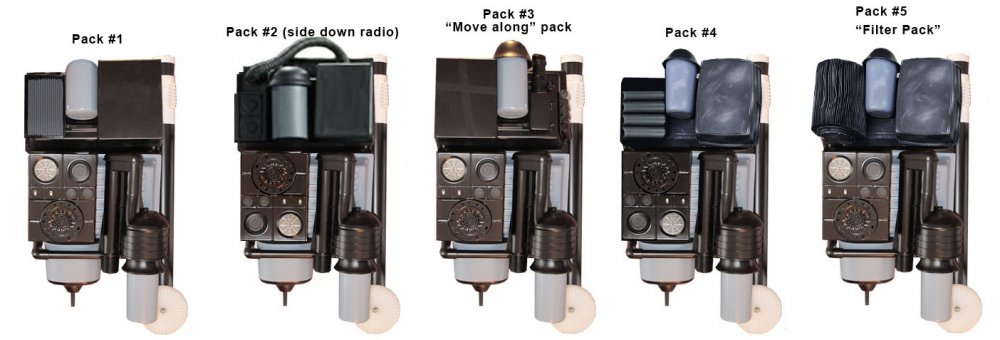
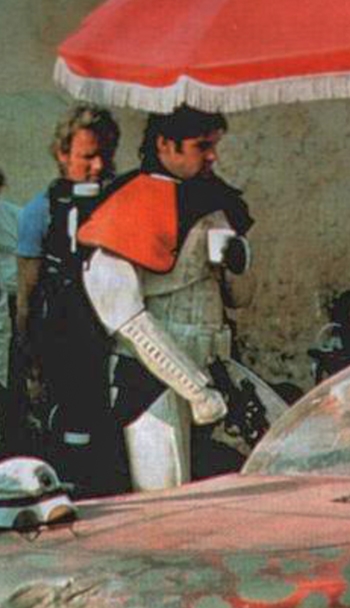
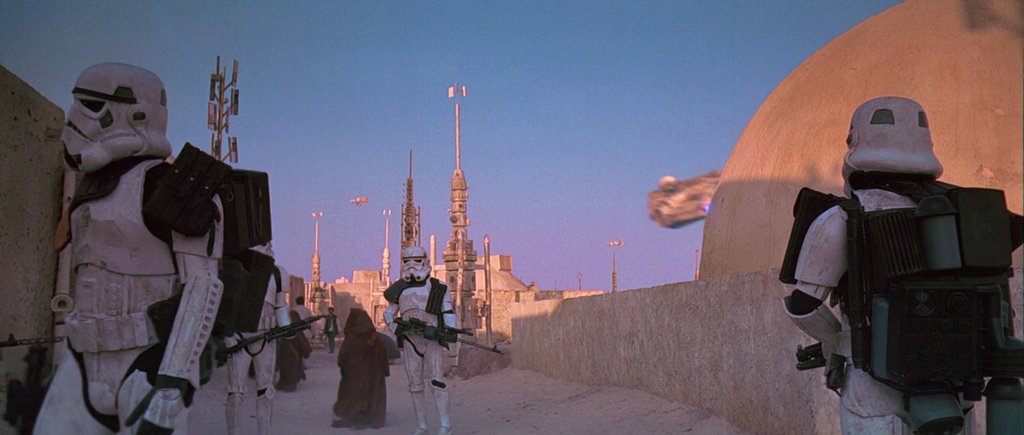
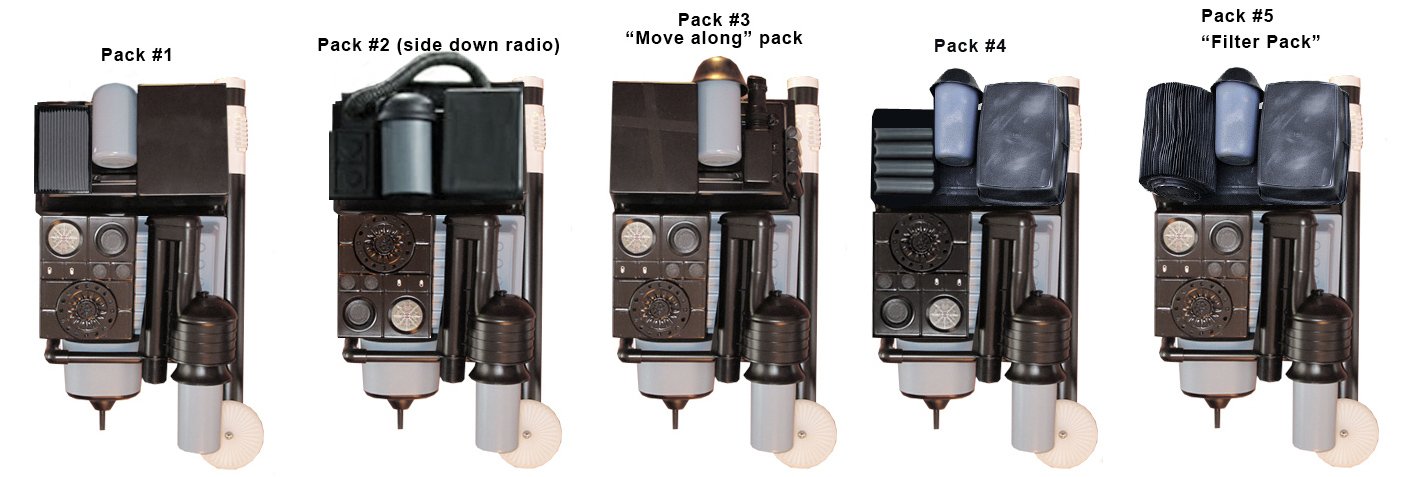
First of all it has to be noted that there are different versions of this pack. These are worn by the following troopers (in order as they appear in the movie), here come the screen references:1 Davin Felth in the "Look Sir, droids"-scene. Pack is still flawless in factory fresh shape/no tape/everything still holding together

2 The "Move along"-captain, portrayed by the great Anthony Forrest in the roadblock scene. The pack is already starting to come apart, tape is used to hold it together.
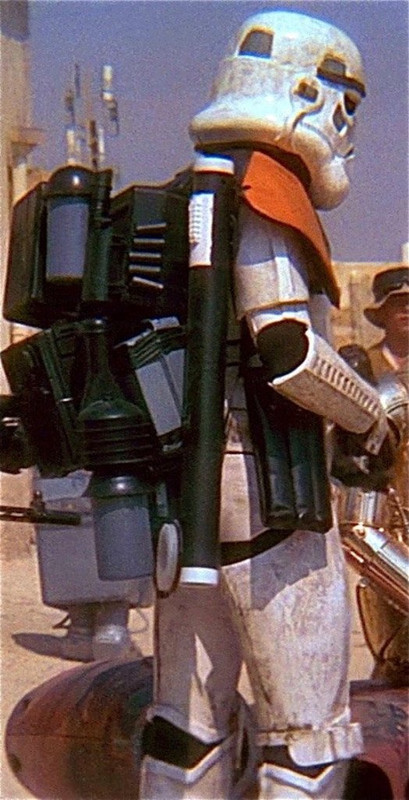

3 possibly also used by "Mr No-Brow"??? (he´s standing behind the trooper wearting pack#2) I think it´s possible because of the angle the radardish is mounted.
4 The Cantina Captain. Tape is used and a labpipe has been added.
5 The Captain in the Falcon-take-off-scene (spinning around). Looks like there´s even more tape used to hold the lower seed tray together, note that to me it seems that there is no more blue-grey visible on the right side of said tray.
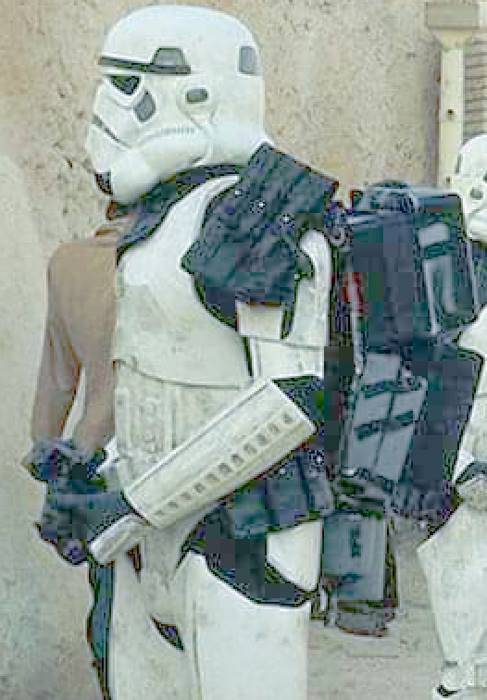
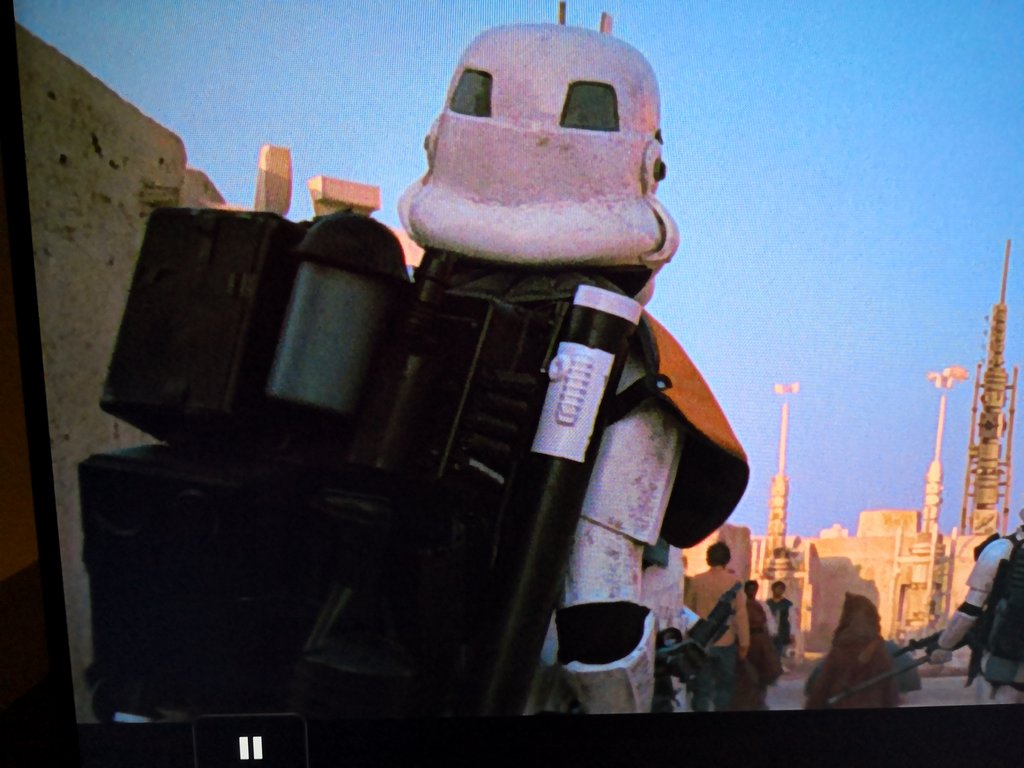

Next post will be a breakdown of the the components of this specific pack.
Cheers mates
-
3
-
-
Hey mate, you've put a lot of effort into building your own frame but the one you've bought doesn't look that wrong and to be hinest, it looks better than the pvc pipe frame. Okay it wouldn't be good for a SWAT build because of the diameter of the tubing but it looks pretty good for a PO build, although I would have to see a side profile pic to confirm that. With my pack#3 I haven't measured the angle, it just has to look like the screen reference for that pack you want to build and not all packs had a bend in the frame. Furthermore I assume you rather mean a 150 degree angle.
-
Oh yeah, seeing it at this angle, I think slightly repositioning the mortartube sounds like a good idea, just relocate the screw at the bottom, should get the job done.
-
1
-
-
Looks awesome Luke, great work! Let us know when you're approved, then on to the next level.
")
-
1
-
-
You will have to find a website which hosts pictures such as flickr or whatever you feel comfortable with. Then you upload it there and finally you can copy and paste the address into this thread.
-
Hey mate, I understand where you are having trouble, I encountered the same problem with my Lionstar bottle. I have used a heatgun to gently heat it up, but be very careful not to melt the plastic. The heat should help the top part to come undone from the glue. Keep in mind that the clear part is really strongly glued into the bottle, so it will stay inside while you take off the top cover. As soon as you have removed both covers, the real messy fun will beginn as the clear bottle is glued in with a layer of foam. I took a thin screwdriver to push it in between the outer hull and the clear bottle to slowly and steadily destroy the foam... be patient, it takes some time.
Hope this helps, good luck!
-
You will have to build it yourself, easy to do, take some cardboard and cut it into five pieces so it fits around the radio, then take some double sided sticky tape used for gluing carpet to the floor and stick it on those cardboard pieces and finally cover them with one piece of pleather. Next step is either using a good and sturdy sewing machine for the thread or do as I did and punch some holes into the pleather and with a needle, sew some black thread into the surround.
In these wip threads you can find some info and some pics:
Hope this helps, cheers mate
-
1
-
Scratch build DLT
in T-21, DLT-19, RT-97c Heavy Blasters
Posted
And again you are doing an amazing job Wayne. Building a DLT from scratch is a real challenge.