


Hausi
-
Posts
1,511 -
Joined
-
Last visited
-
Days Won
120
Content Type
Events
Profiles
Forums
Posts posted by Hausi
-
-
Well done, congrats

-
 1
1
-
-
-
Congrats David
-
That's really cool, fantastic idea!

-
1
-
-
Hey, those are some great pics, fist-bumping and high-fiving with the kids is always the best.
Thanks for sharing.
")
What about that fur pauldron, that looks cool, what's the story behind it?
-
1
-
-
Hi Sebastian,
first of all welcome and thank you for your interest in joining the MEPD´s finest and becoming a deployed officer.
Thank you for providing such a neat and tidy application, your armor fits and suits you well and I like the weathering which is not too subtle but still looks natural.Let´s get your review going.
Application Review: Part 1
Name: Sebastian Hilger
Legion ID: TD-6031
Forum Name: RedMorpheus
Garrison: German Garrison
Helmet
a. Green lenses: check
b. Paint color of traps / tears: check
c. Correct number of teeth: check
d. Mic tips: check
e. Vocoder color: check
f. Tube stripes: check
g. Rank bar on ears: check
h. Brow: check
i. Side screws (ears): check
j. Weathering: check
k. no mesh behind teeth: check
*additional comments*
Nice helmet!RESULT ON HELMET
Checked & Cleared
Armor details
a. elastic straps shoulders: check
b. neck seal: check
c. black undersuit: check
d. shoulder bells: check
e. biceps: check
f. forearms: check
g. pauldron: check
h. chest / back plate: check
i. kidney / butt plate: check
j. ab plate / side rivets / cod: check
k. strapping system: check
l. thighs: check
m. shins / calves: check
n. sniper plate: check
o. boots: check
p. gloves: check
q. hand plates / guards: check
r. ammo belt (waist): check
s. ammo belt (right knee): check
t. canvas belt: check
u. pouches: check
v. weathering: check
*additional comments*
RESULT ON ARMOR
Checked & Cleared
Backpack
a. details: see comments
b. weathering: check
*additional comments*
I think you have done a great job in adjusting your pack adding some nice details like all the sockets and even the little feet on the Sonix and I also love it that you have gone the extra bit of adding the red support straps but you will have to give them a dusting with some black spray paint as they look like this in the movie:
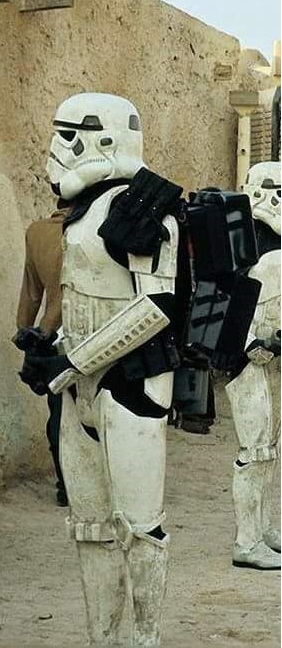
Either your pack came with that frame from Crashman or you have built it yourself from PVC pipe or similar and you have done quite a good job blending in those seems but here´s one problem: the top part of the frame doesn´t look like a real Karrimor frame but I think it should. Here´s a comparison:

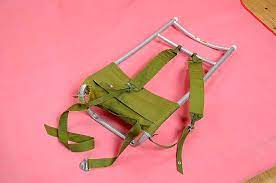
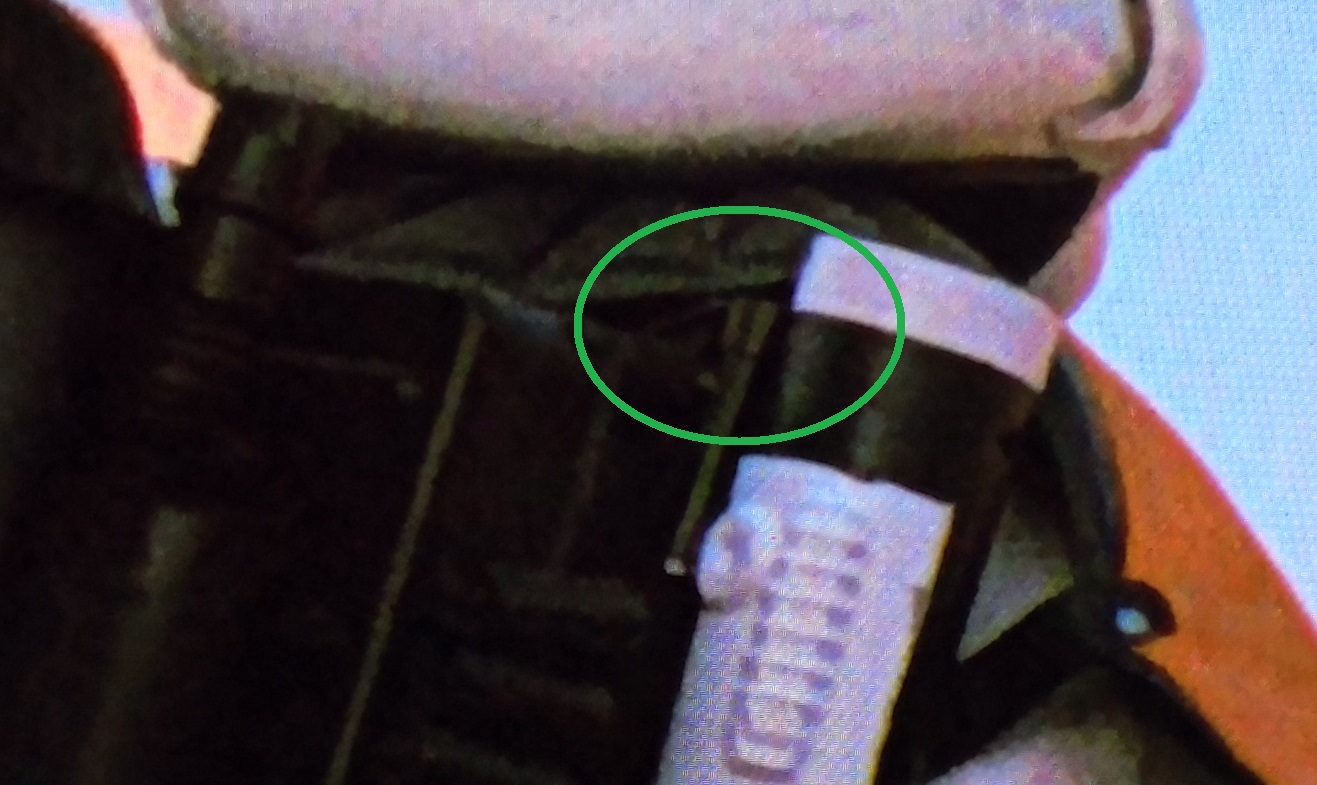
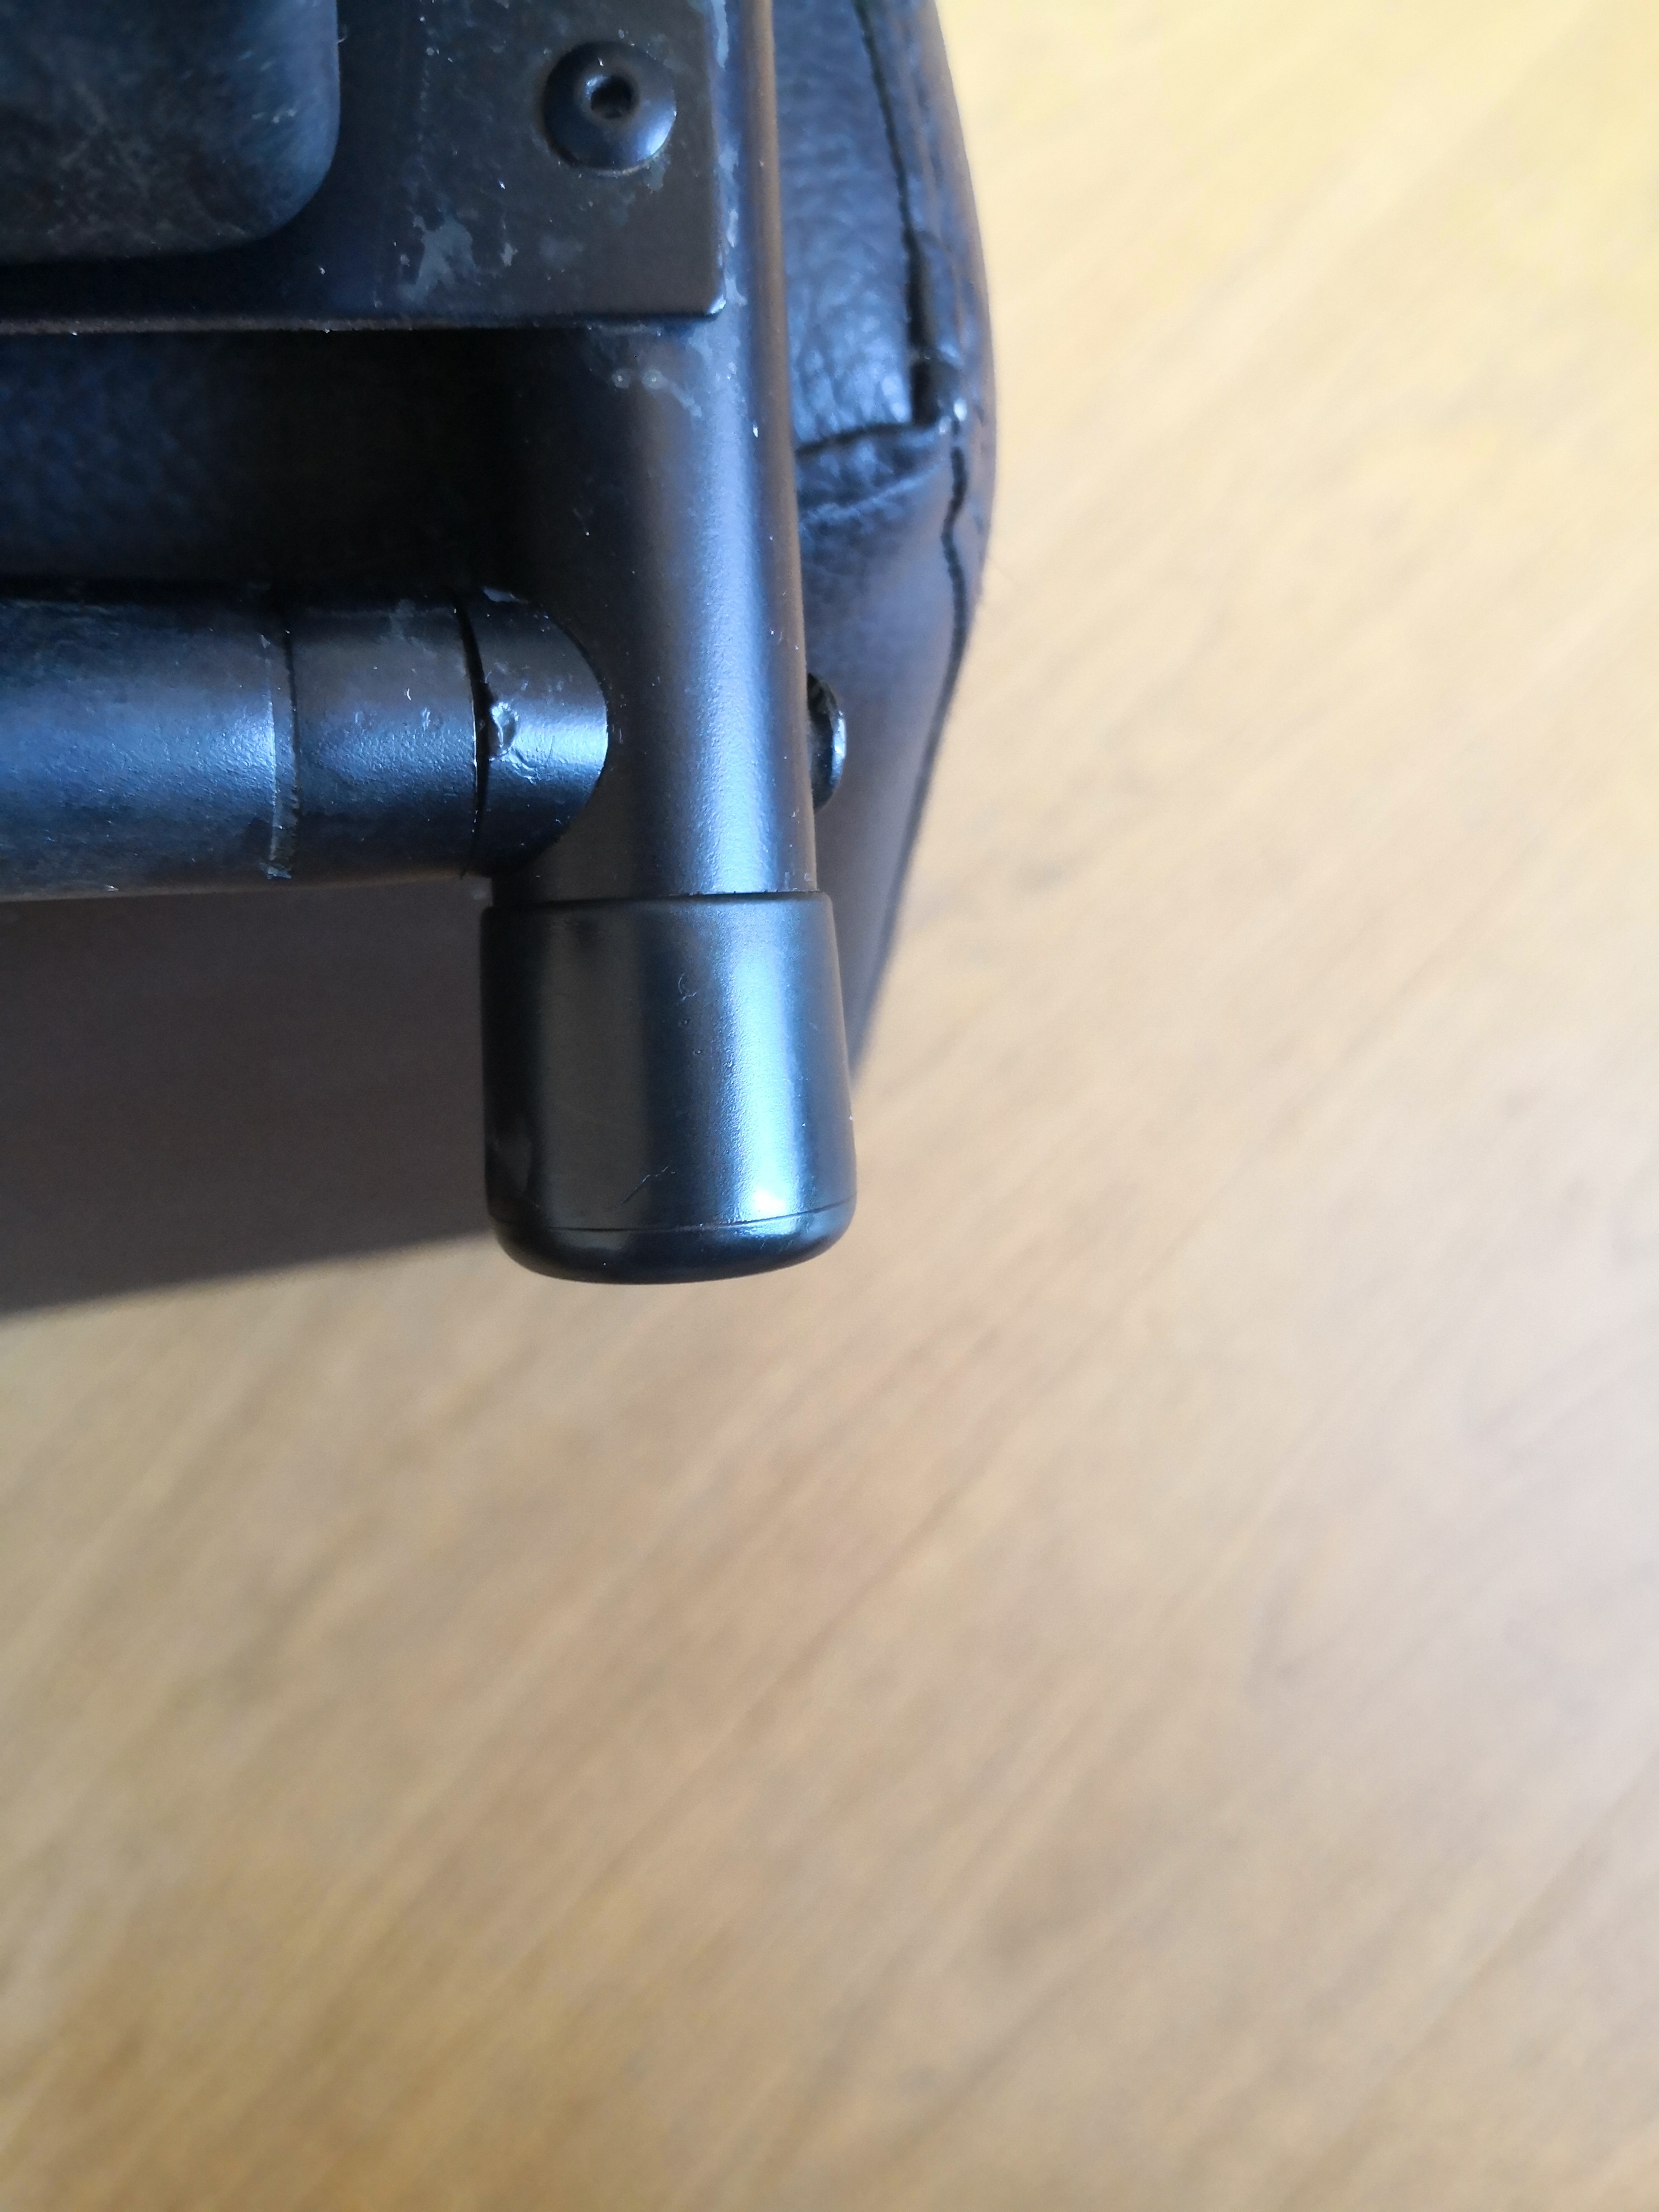
My suggestion looks like this: cut off the top bar and place it a little lower inside the frame, then add the little end caps that you can find at every hardware store like Toom or Obi (these are originally meant to protect the legs of your chairs):
I think that shouldn´t be too much of a hassle for you and quite quickly done.
RESULT ON BACKPACK
pending
Weapon: DLT
a. details: see comments
b. weathering: check
*additional comments*
Be careful with your 3D-printed DLT, it looks like there isn´t that much infill on the buttstock as it seems to be collapsing inwards already. I would anyway suggest building yourself the Bapty variant of this weapon with the simple, sturdy and best: screenaccurate wooden back.
However, if you want to use this regular variant, you will have to add a disc to the left side of the grip: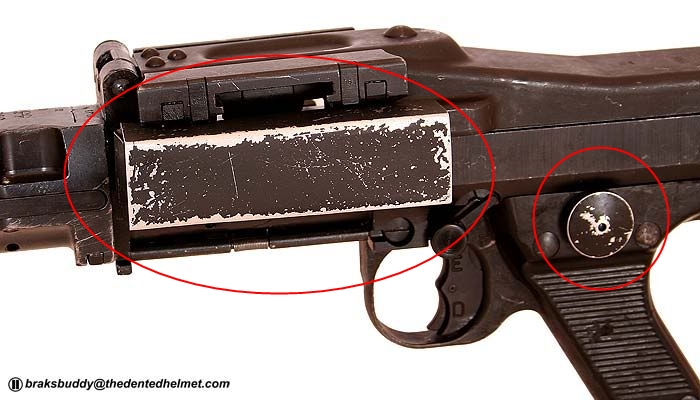
on your weapon, it´s just an indentation, that is not going to work.

RESULT ON WEAPON
pending
Sebastian, this was your first review.
Your gear looks great and you will be a worthy addition to the ranks of the MEPD´s finest.
These are only little and rather easy fixes and I am looking forward to seeing some new pics of your improved gear soon.Cheers mate!
Hausi - MEPD Deployment Officer
-
Hausi/TD 21027, Fantasy Basel Switzerland, 19 May 23
-
1
-
-
Nice, I especially like the pic of you troopers just hanging around and looking cool.

-
1
-
-
Looking awesome as always.
-
Hey, those are some great pics, looking sharp there, trooper! Thanks for sharing.
-
1
-
-
Hey mate, congrats and welcome to the MEPD.
To upload your photos, you will have to find a picture hosting website of your choice (I for one use abload.de, but that's a German site) upload the pics and then copy the provided link which allows you to copy those pics into forums, just embed them here and as soon as you submit the thread, they will appear.
Cheers
-
Hi Phil, welcome and thanks for your interest in becoming an MEPD deployed officer.
You look very happy on that final pic, that's awesome and that's also what it feels like to be a sandtrooper.

But have you read the requirements for level 2 approval?
Please have a look at them:
You will very quickly see that an essential part is missing: the backpack. Without it, you can't be deployed.
Refering to the above thread, you can also see that we will have to see many more pics showing the details of your armor.
Please also have a look at some ot the previous nice and tidy successful applicants' threads, e.g. this one here:
Looking at these threads, you can get an idea what it takes to become a deployed officer.
Looking at your armor, I can already point out some things that will need to be improved, for example the clamshell of the abdomen and kidney armor have to be completely closed, which means that you will have to add shims. Moreover, those pouches on your belt will not work out, canvas pouches aren't allowed for the hip belt, same goes for the French-style leather pouch, only "Stolla-Wien"-style pouches or Spanish pouches are allowed as they are the pouches used on screen.
As soon as you are ready, please apply again and I will be taking care of your approval request.
Cheers mate
-
Hey everyone, this is just for fun:
I can still remember seeing this picture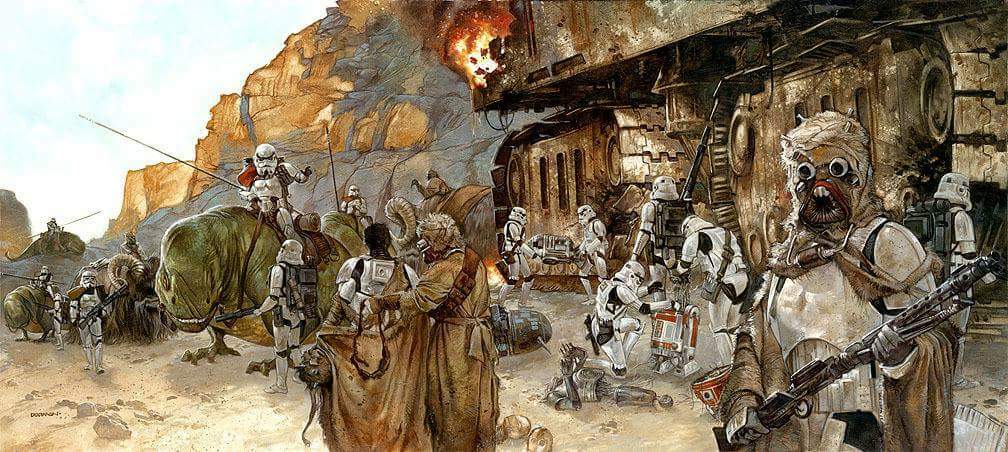
and I always loved it, although the Tusken Raider as a character was never that appealing to me, but when a friend of mine who is also a member of the MEPD and our little Rancor Hunters Squad, Markus Zeitvogel, started making his own kits, I wanted to try it... and man do I appreciate this character now. Building the helmet was so much fun. I am not going to do the full costume but now I have a helmet should I ever want to do the Sandtrooper in Tusken Raider disguise.
I have actually tried to build this helmet emulating the Hero Tusken portrayed by stunt coordinator Peter Diamond.
Here´s a pic of most parts of the kit: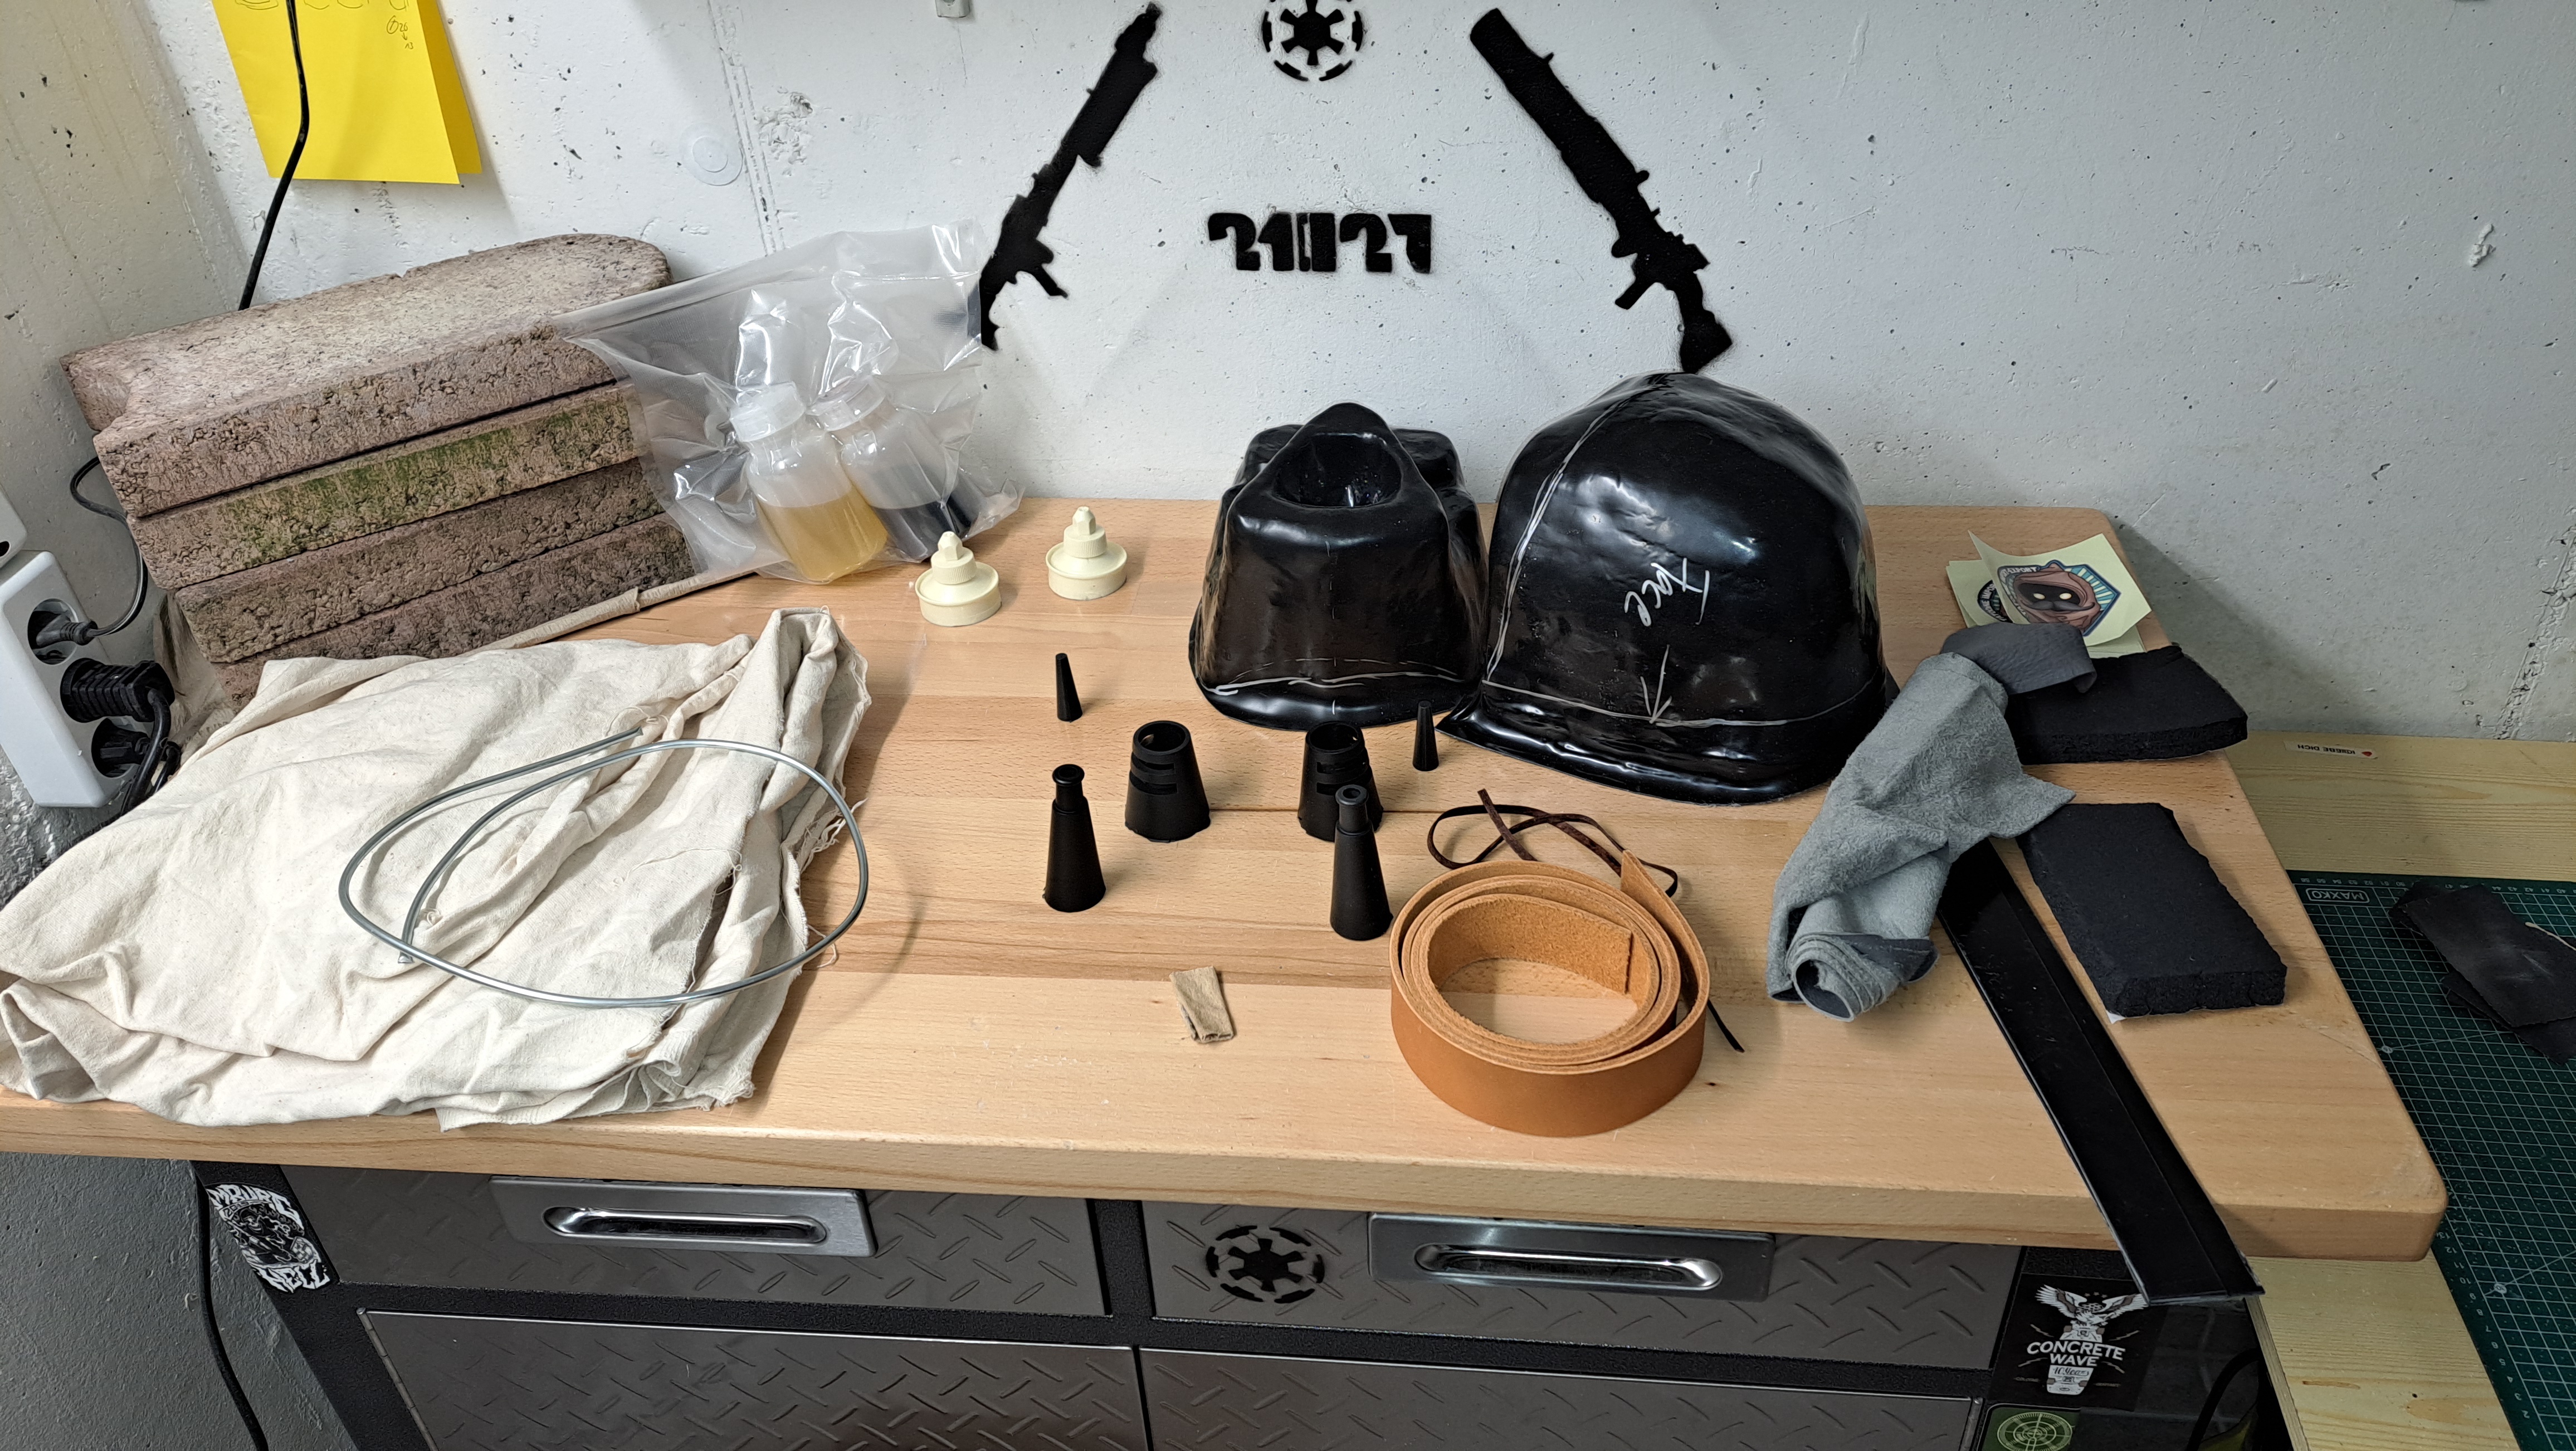
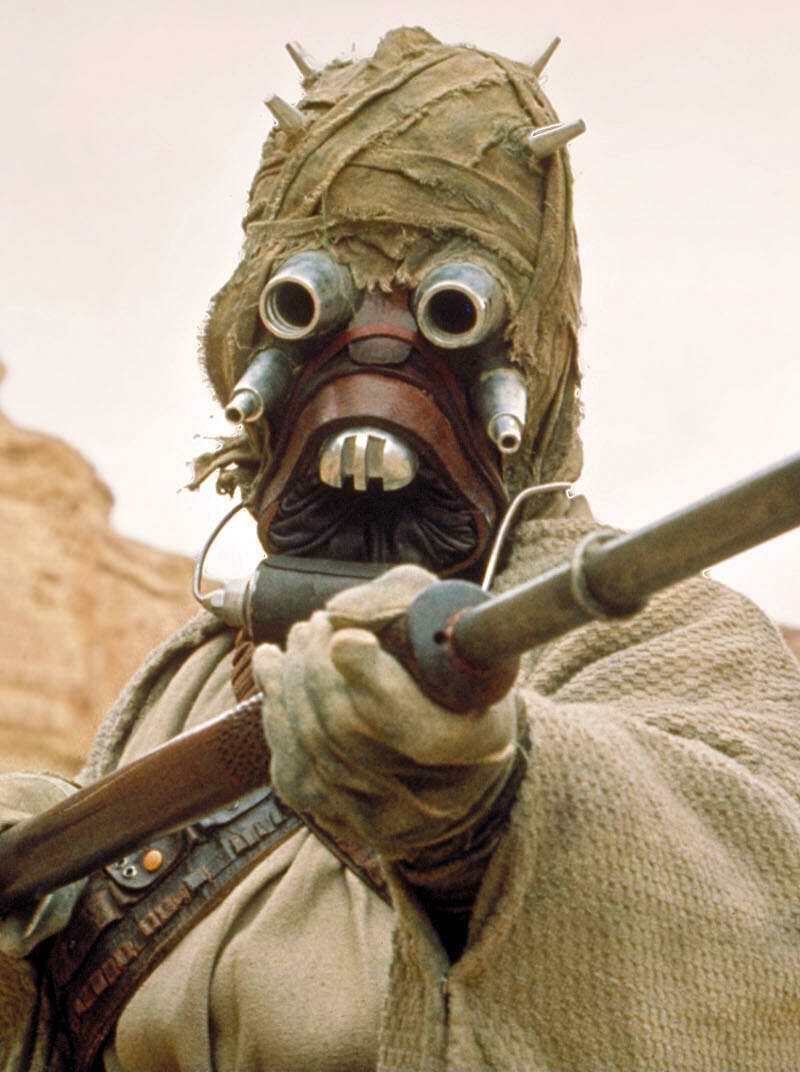
Here´s a screengrab:
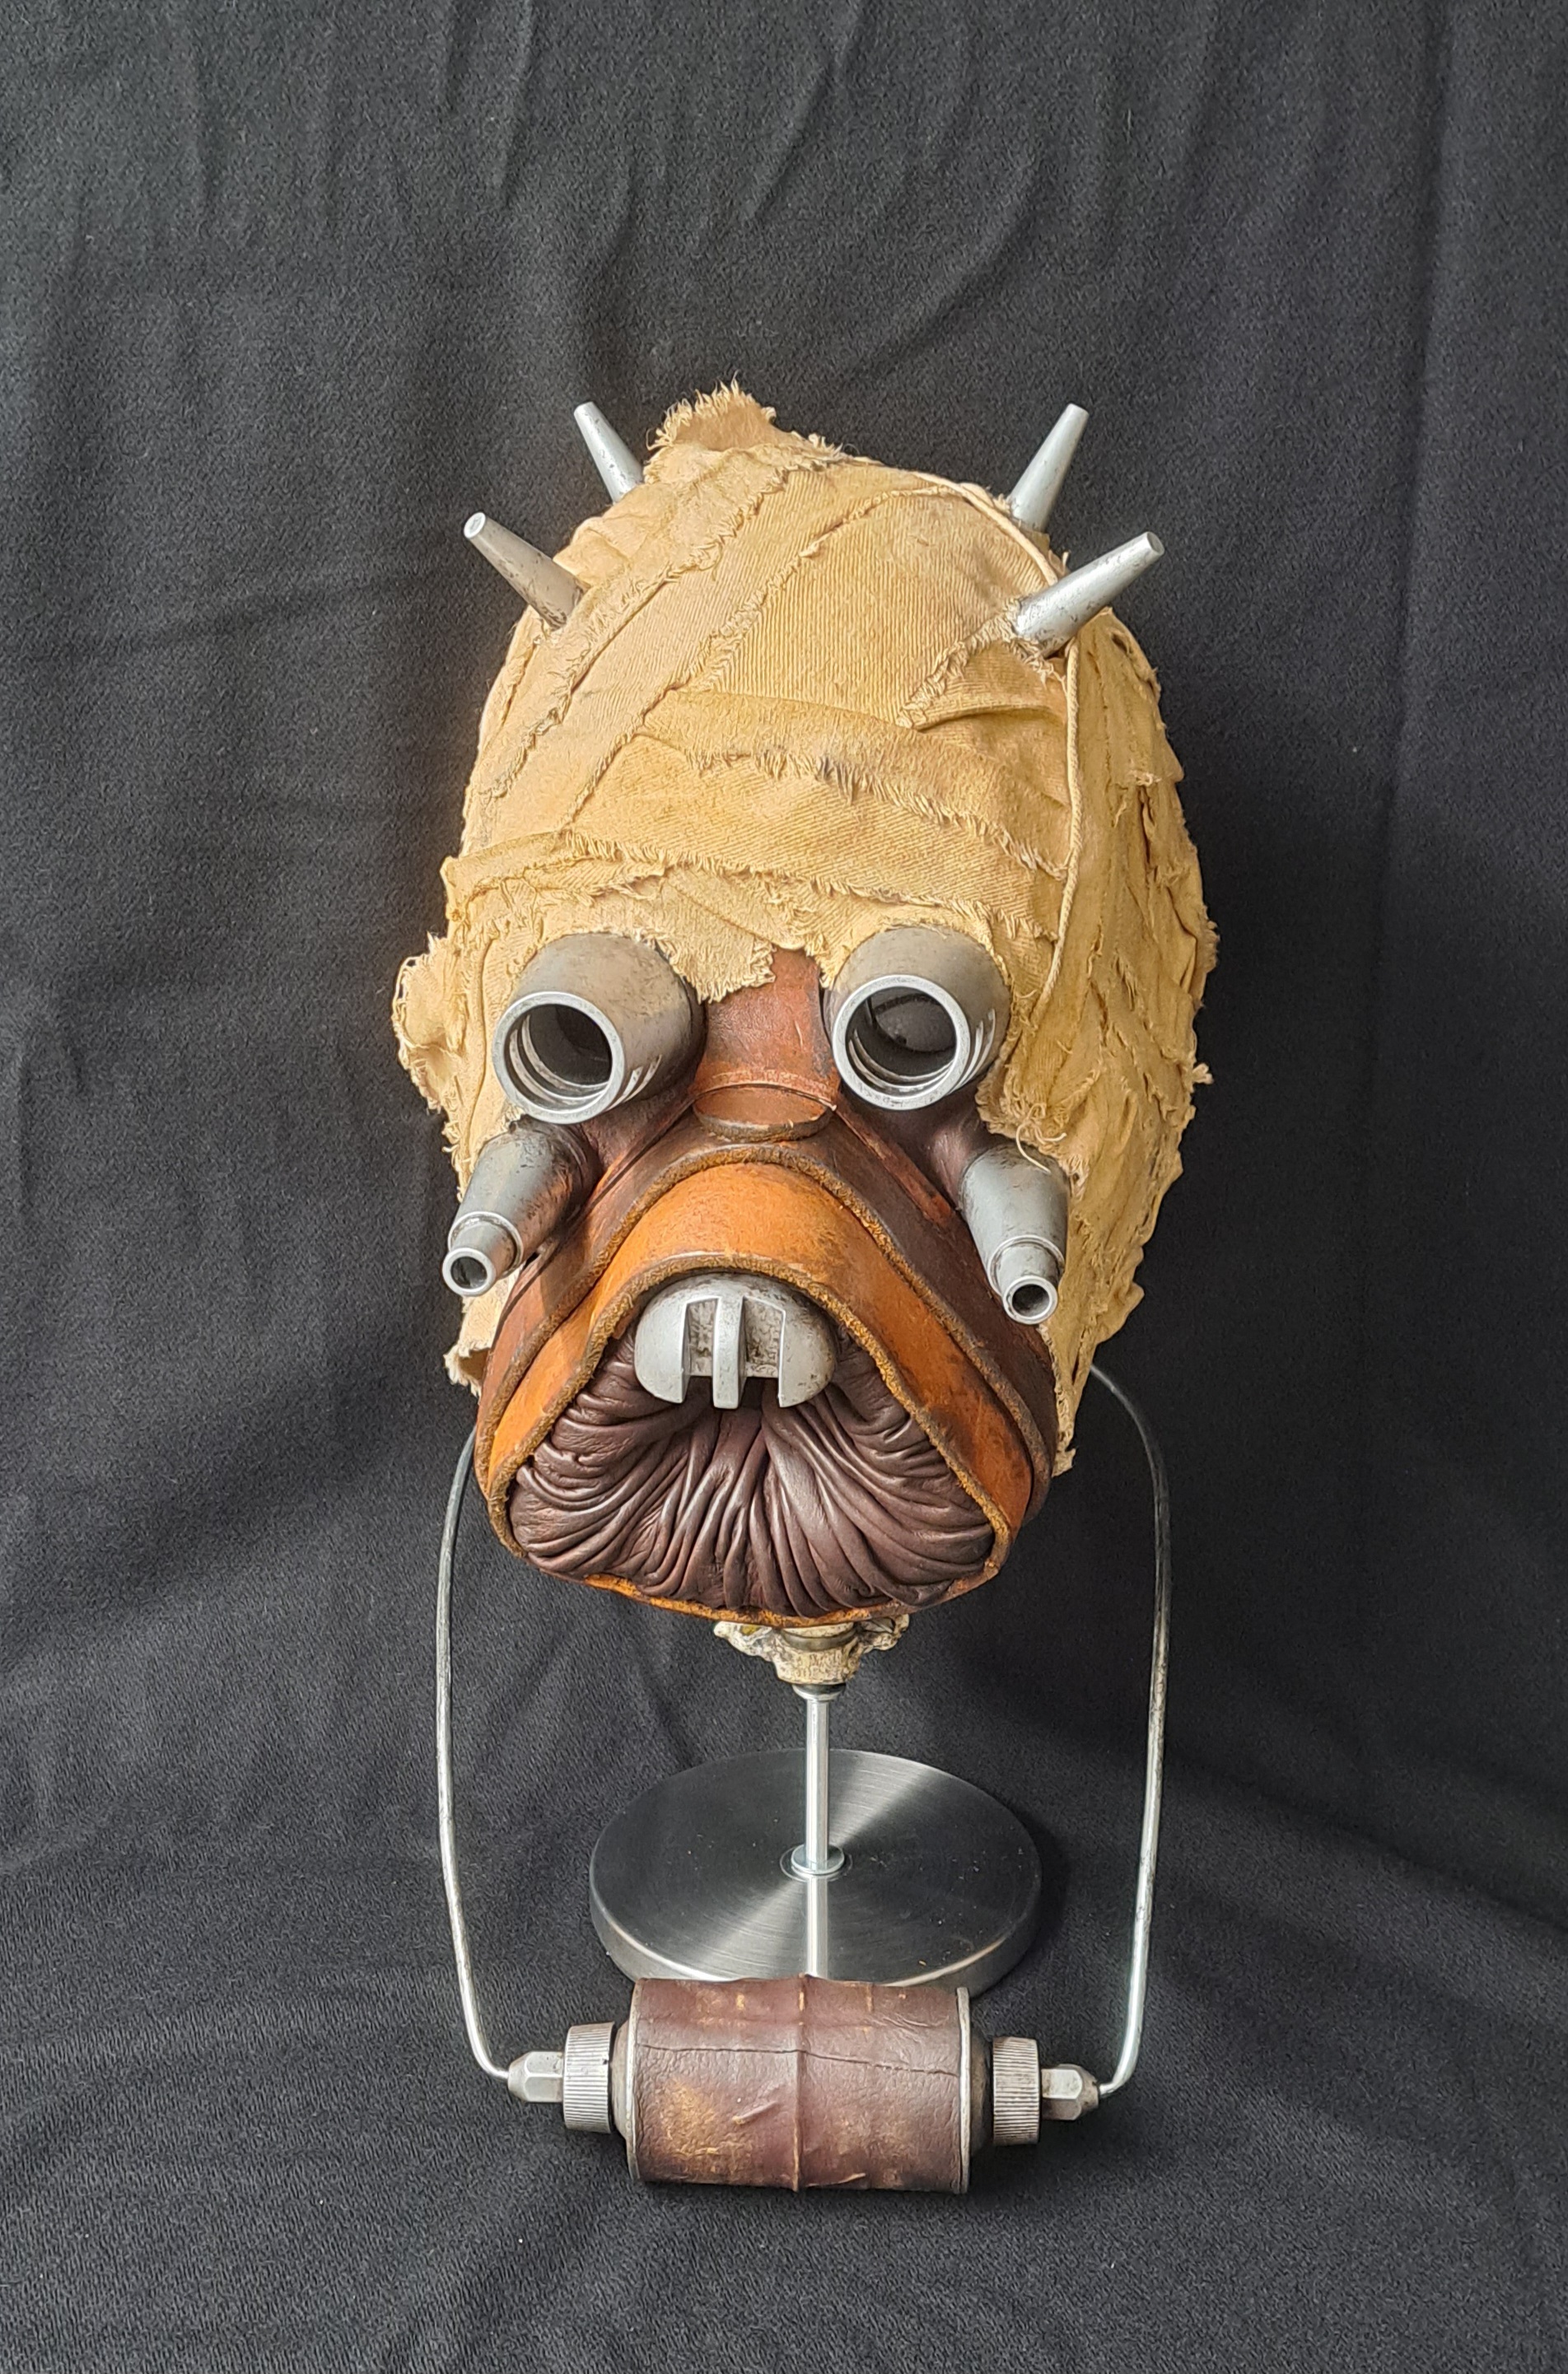
And here´s my finished helmet:
And here ist the Sandtrooper in disguise (I should have added some kind of robes too but I could still do that):
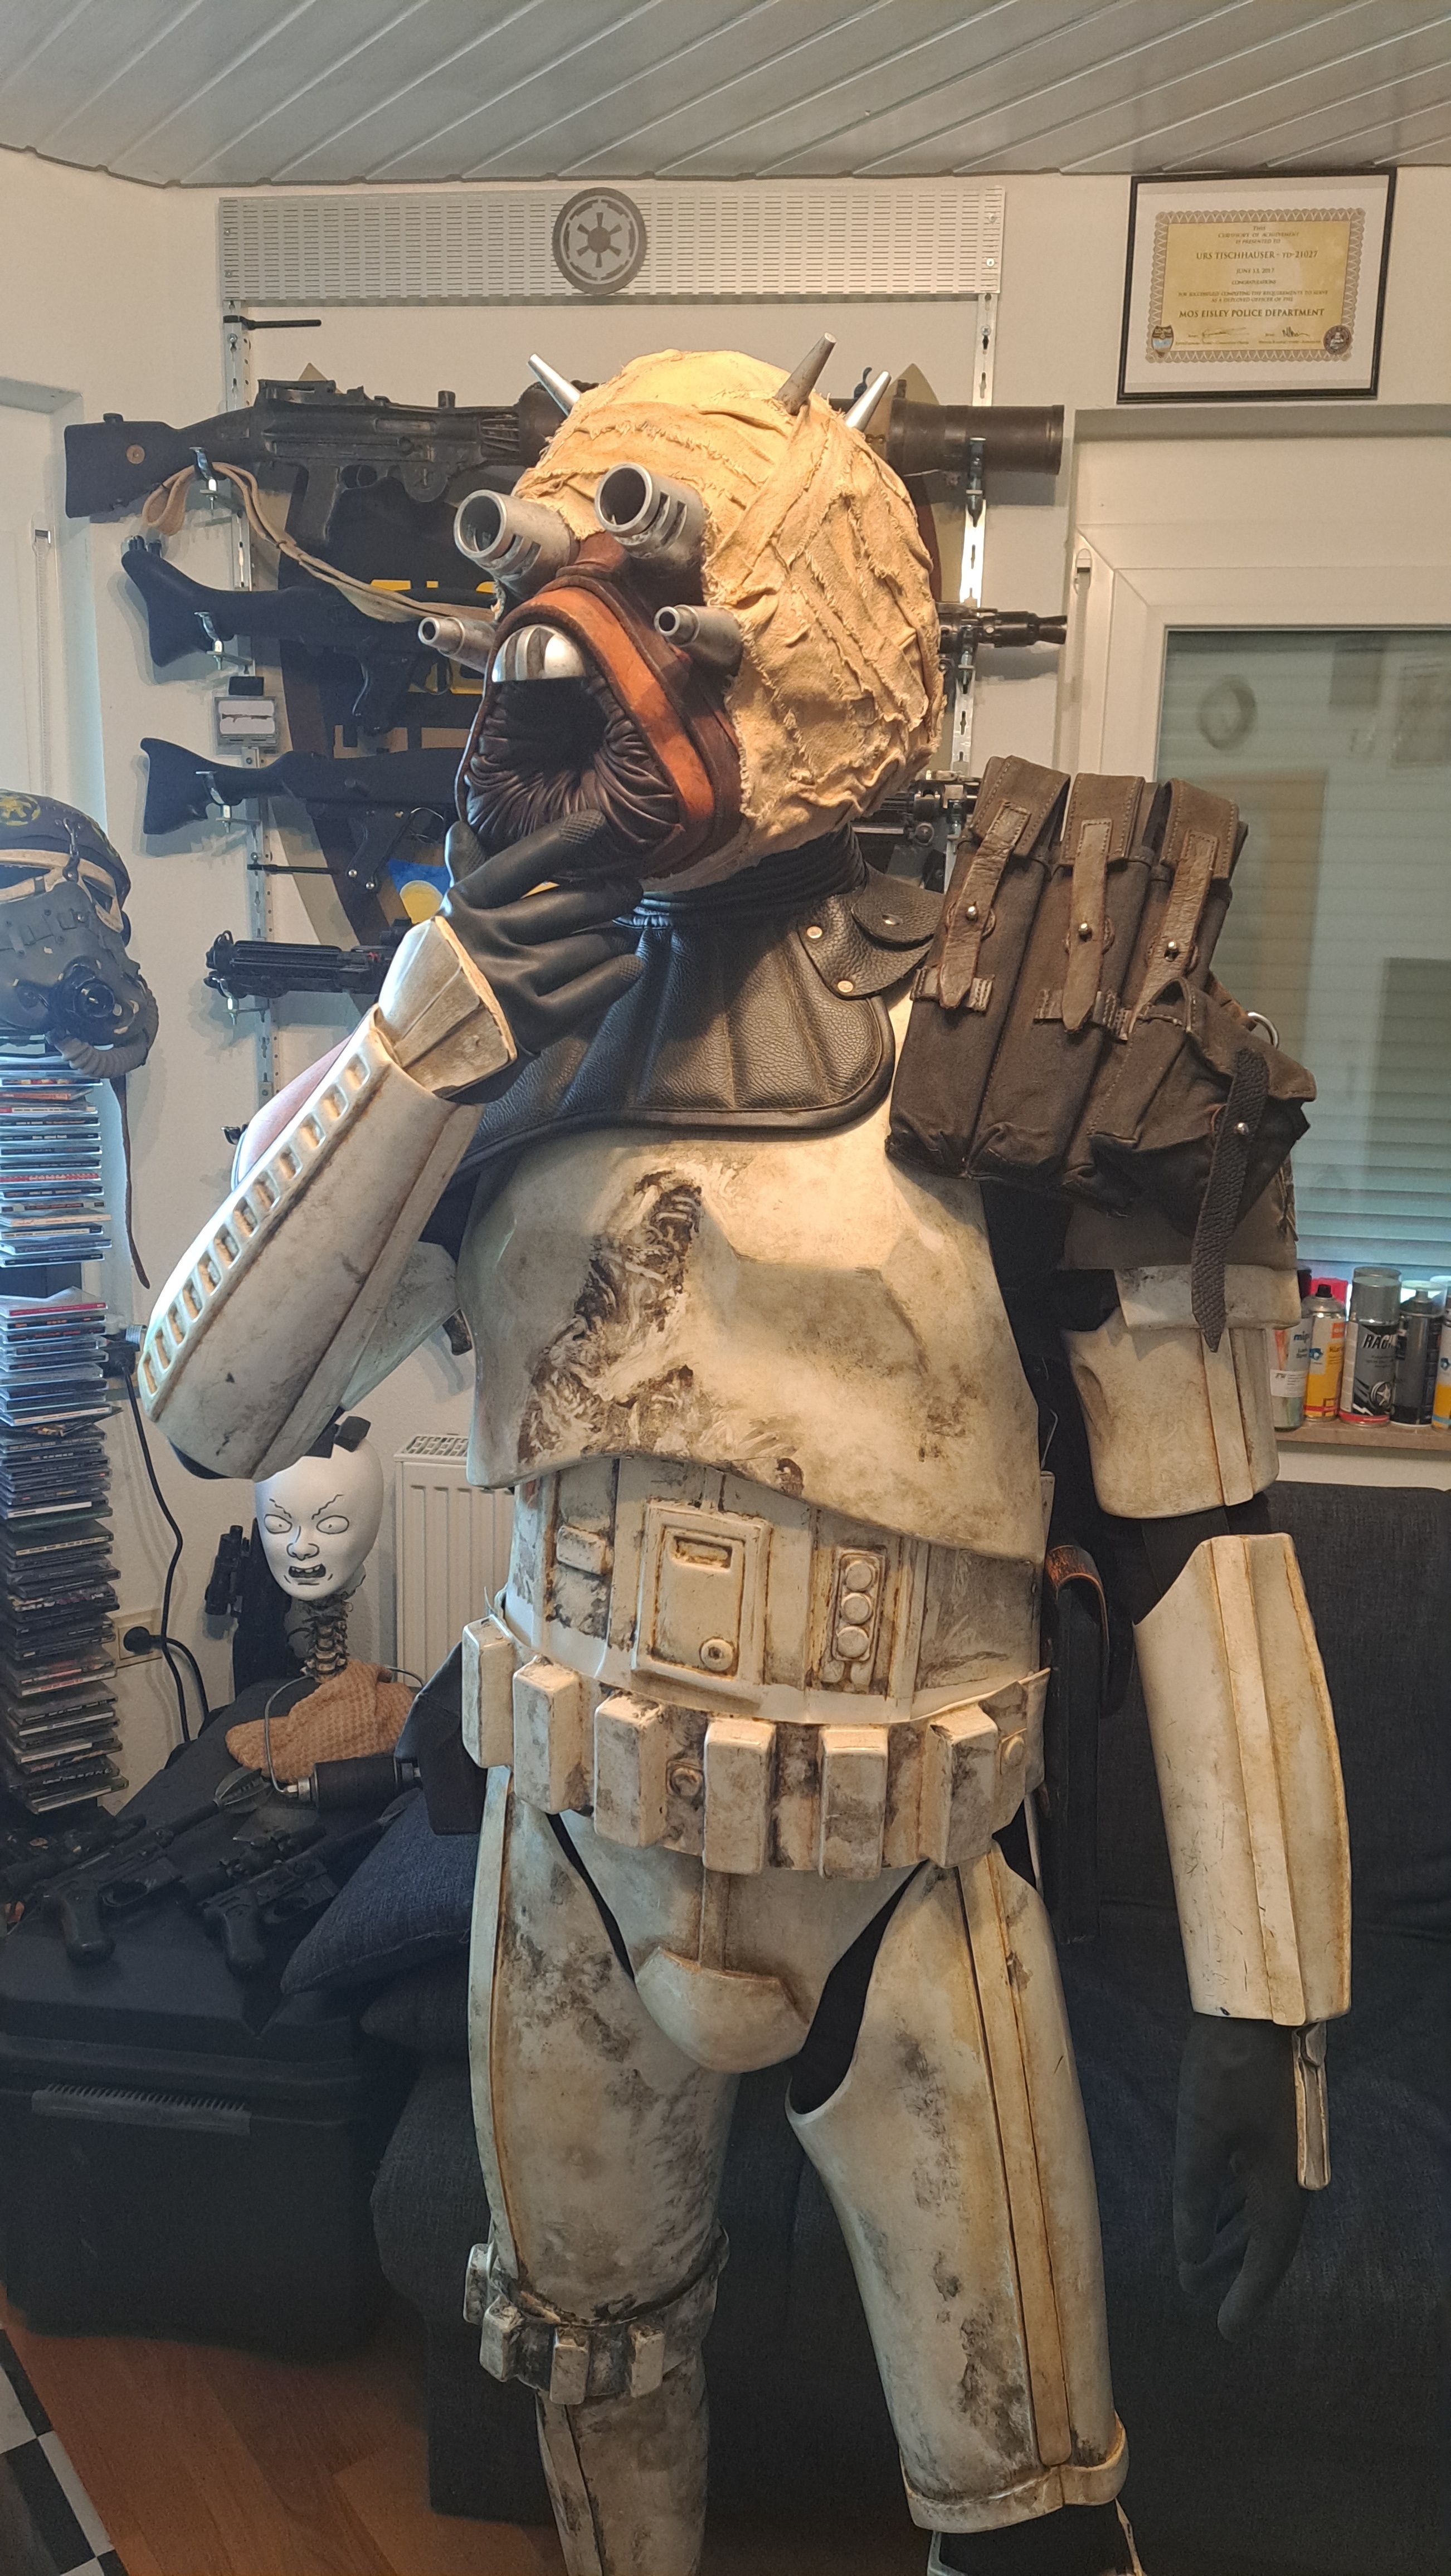
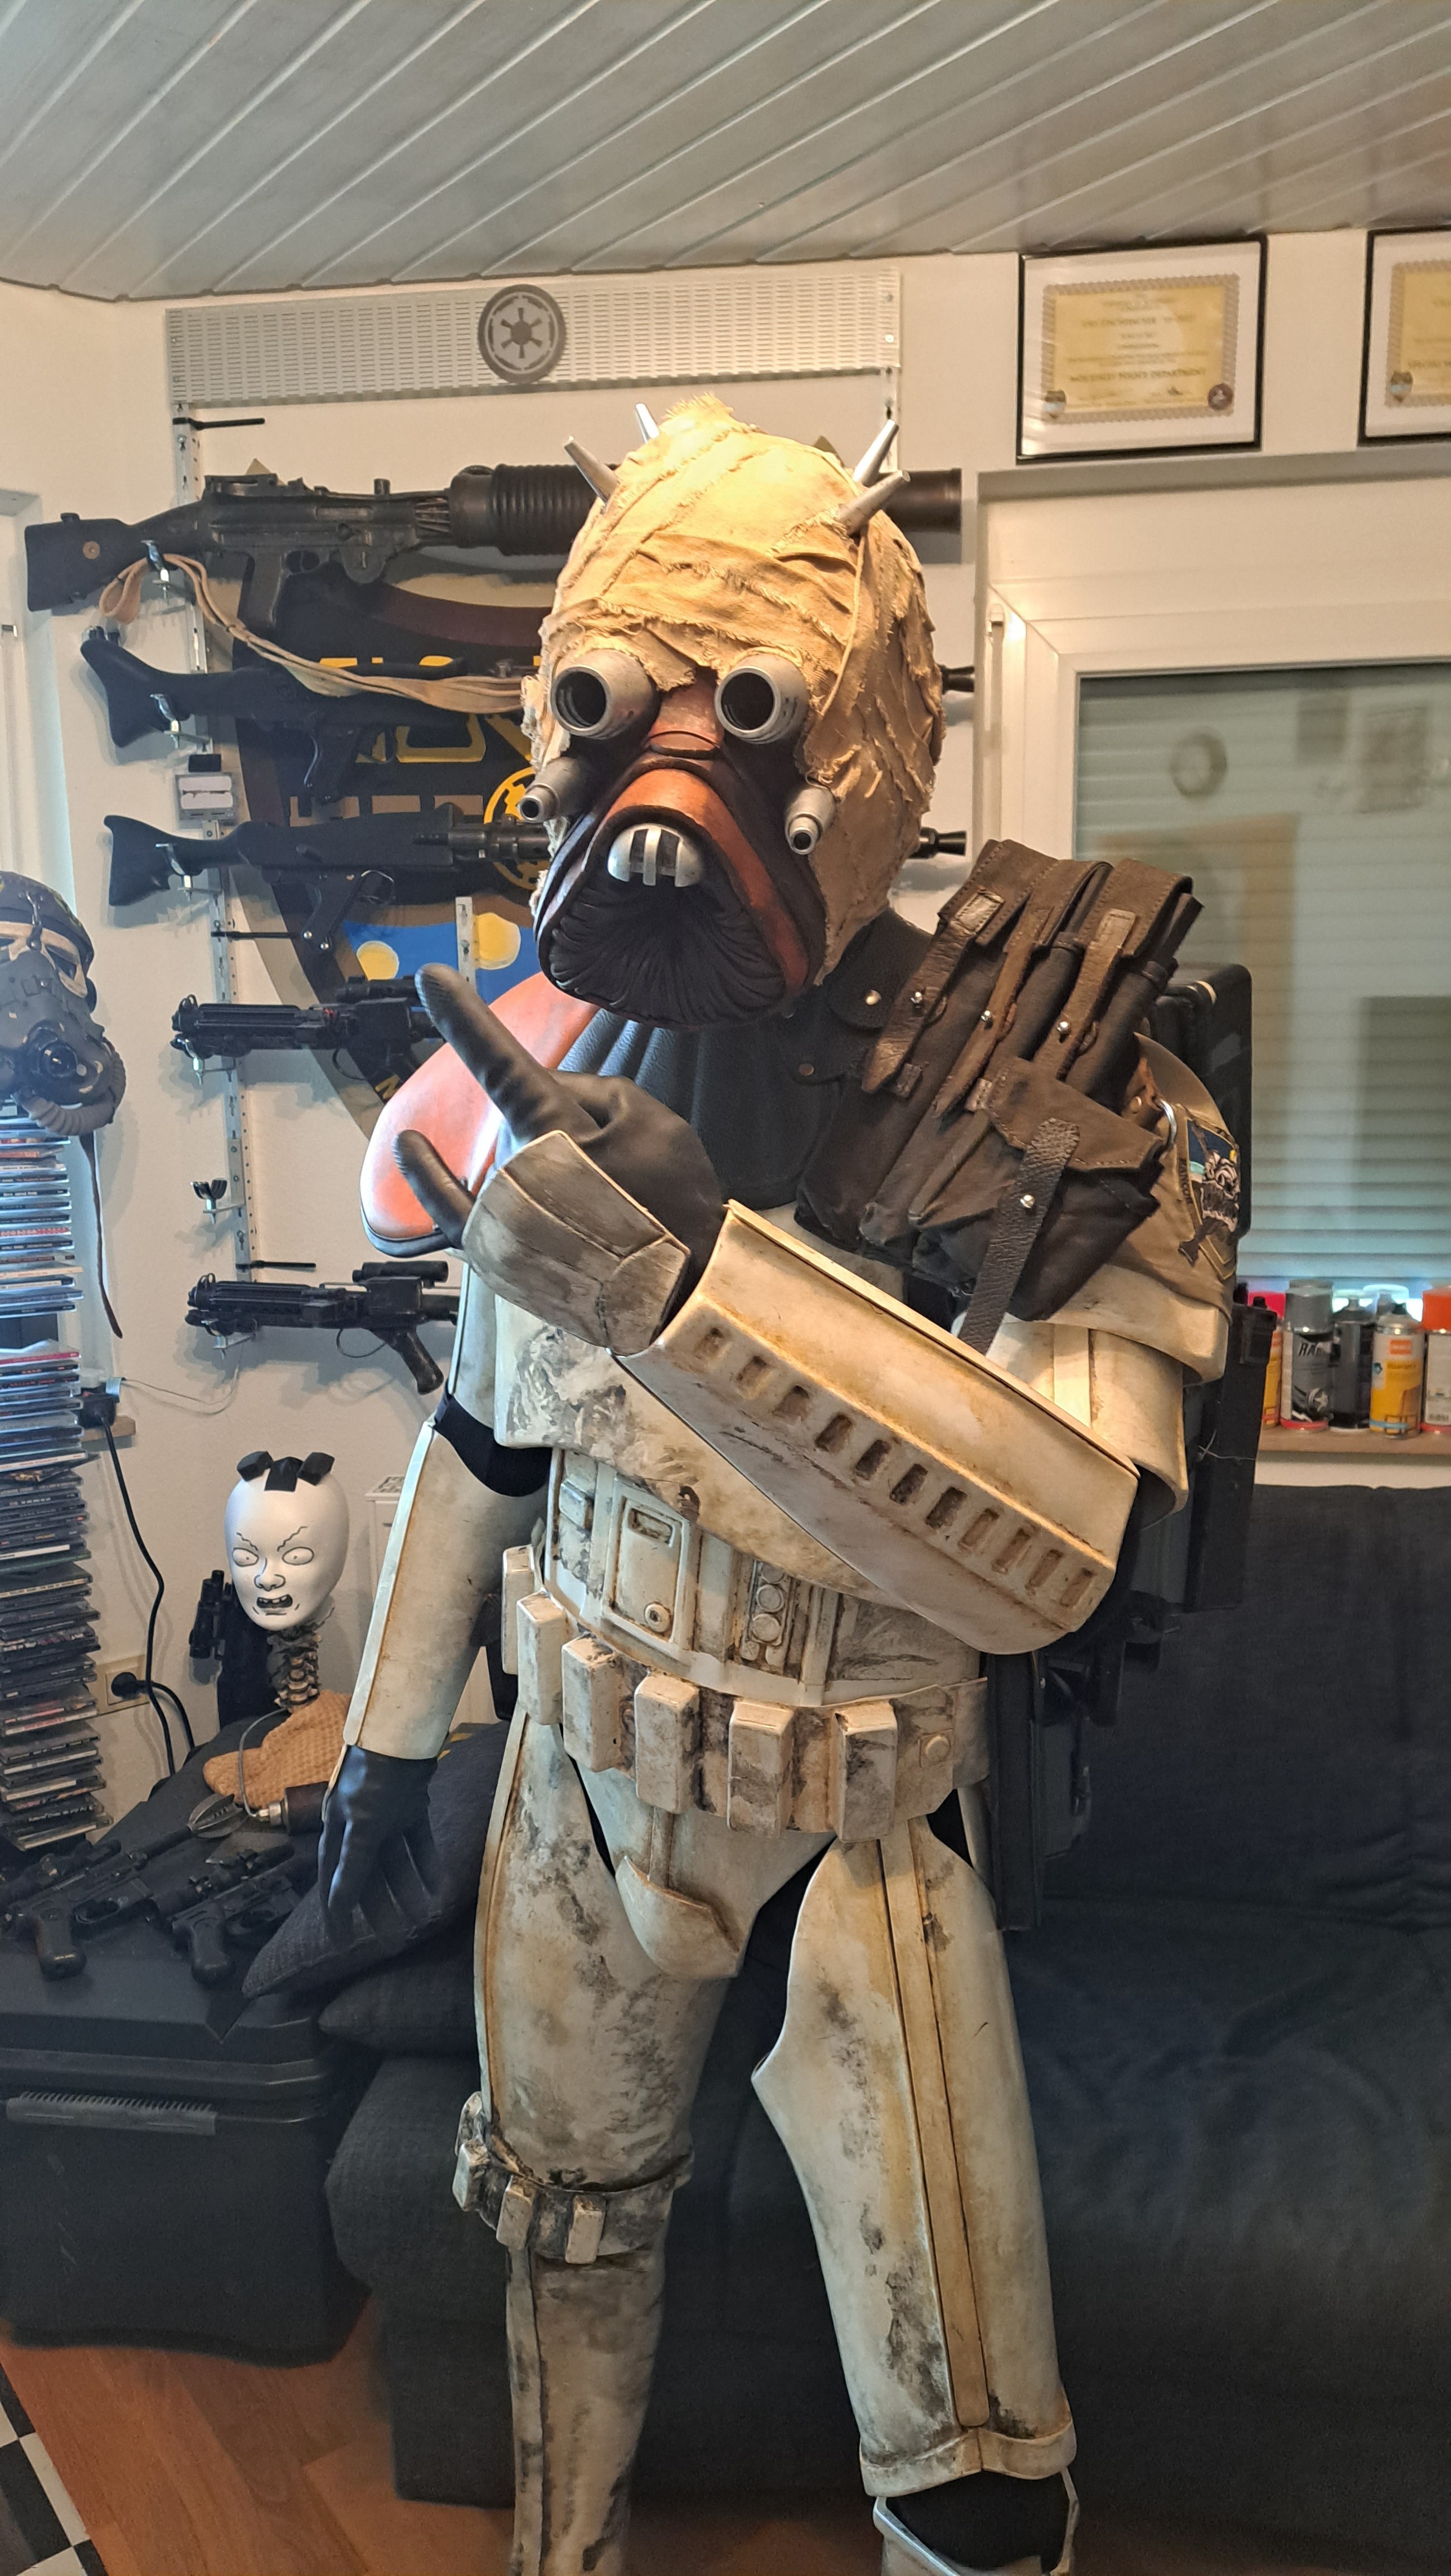
Cheers mates

-
1
-
-
Retro.active Con in the Black Forest yesterday 29 April 2023

-
Hi Alex and welcome to the dirty side.
I really like your weathering, looks great.
At a first glance I would recommend shortening the inside strapping from the chest to the abdomen, the abdomen should sit a little higher up inside the chest.
I think your armor suits you well but the thighs should be more tapered towards the knee to follow the natural shape of your leg.
Cheers mate and have fun browsing the MEPD forum, heaps of great info to be found here.
-
1
-
-
Hey Scott, I guess the picture is great (as your pics always are), however, you forgot to add it.
")
-
Hi Julien, welcome to the sandpit, good to have you here.
Don't worry about your English, it's great. Many of us here actually come from different countries, English not being our mother tongue.
You will find heaps of valuable info in the different threads here, so take your time to browse the forums and have fun.
The Sandtrooper also wasn't my first costume but I knew from the beginning that I wanted to be a Sandtrooper once.
Cheers mate!
-
1
-
-
Trying to submit a video but no idea if it works out. Keeping my fingers crossed..

-
1
-
-
Great idea and a really cool video!
-
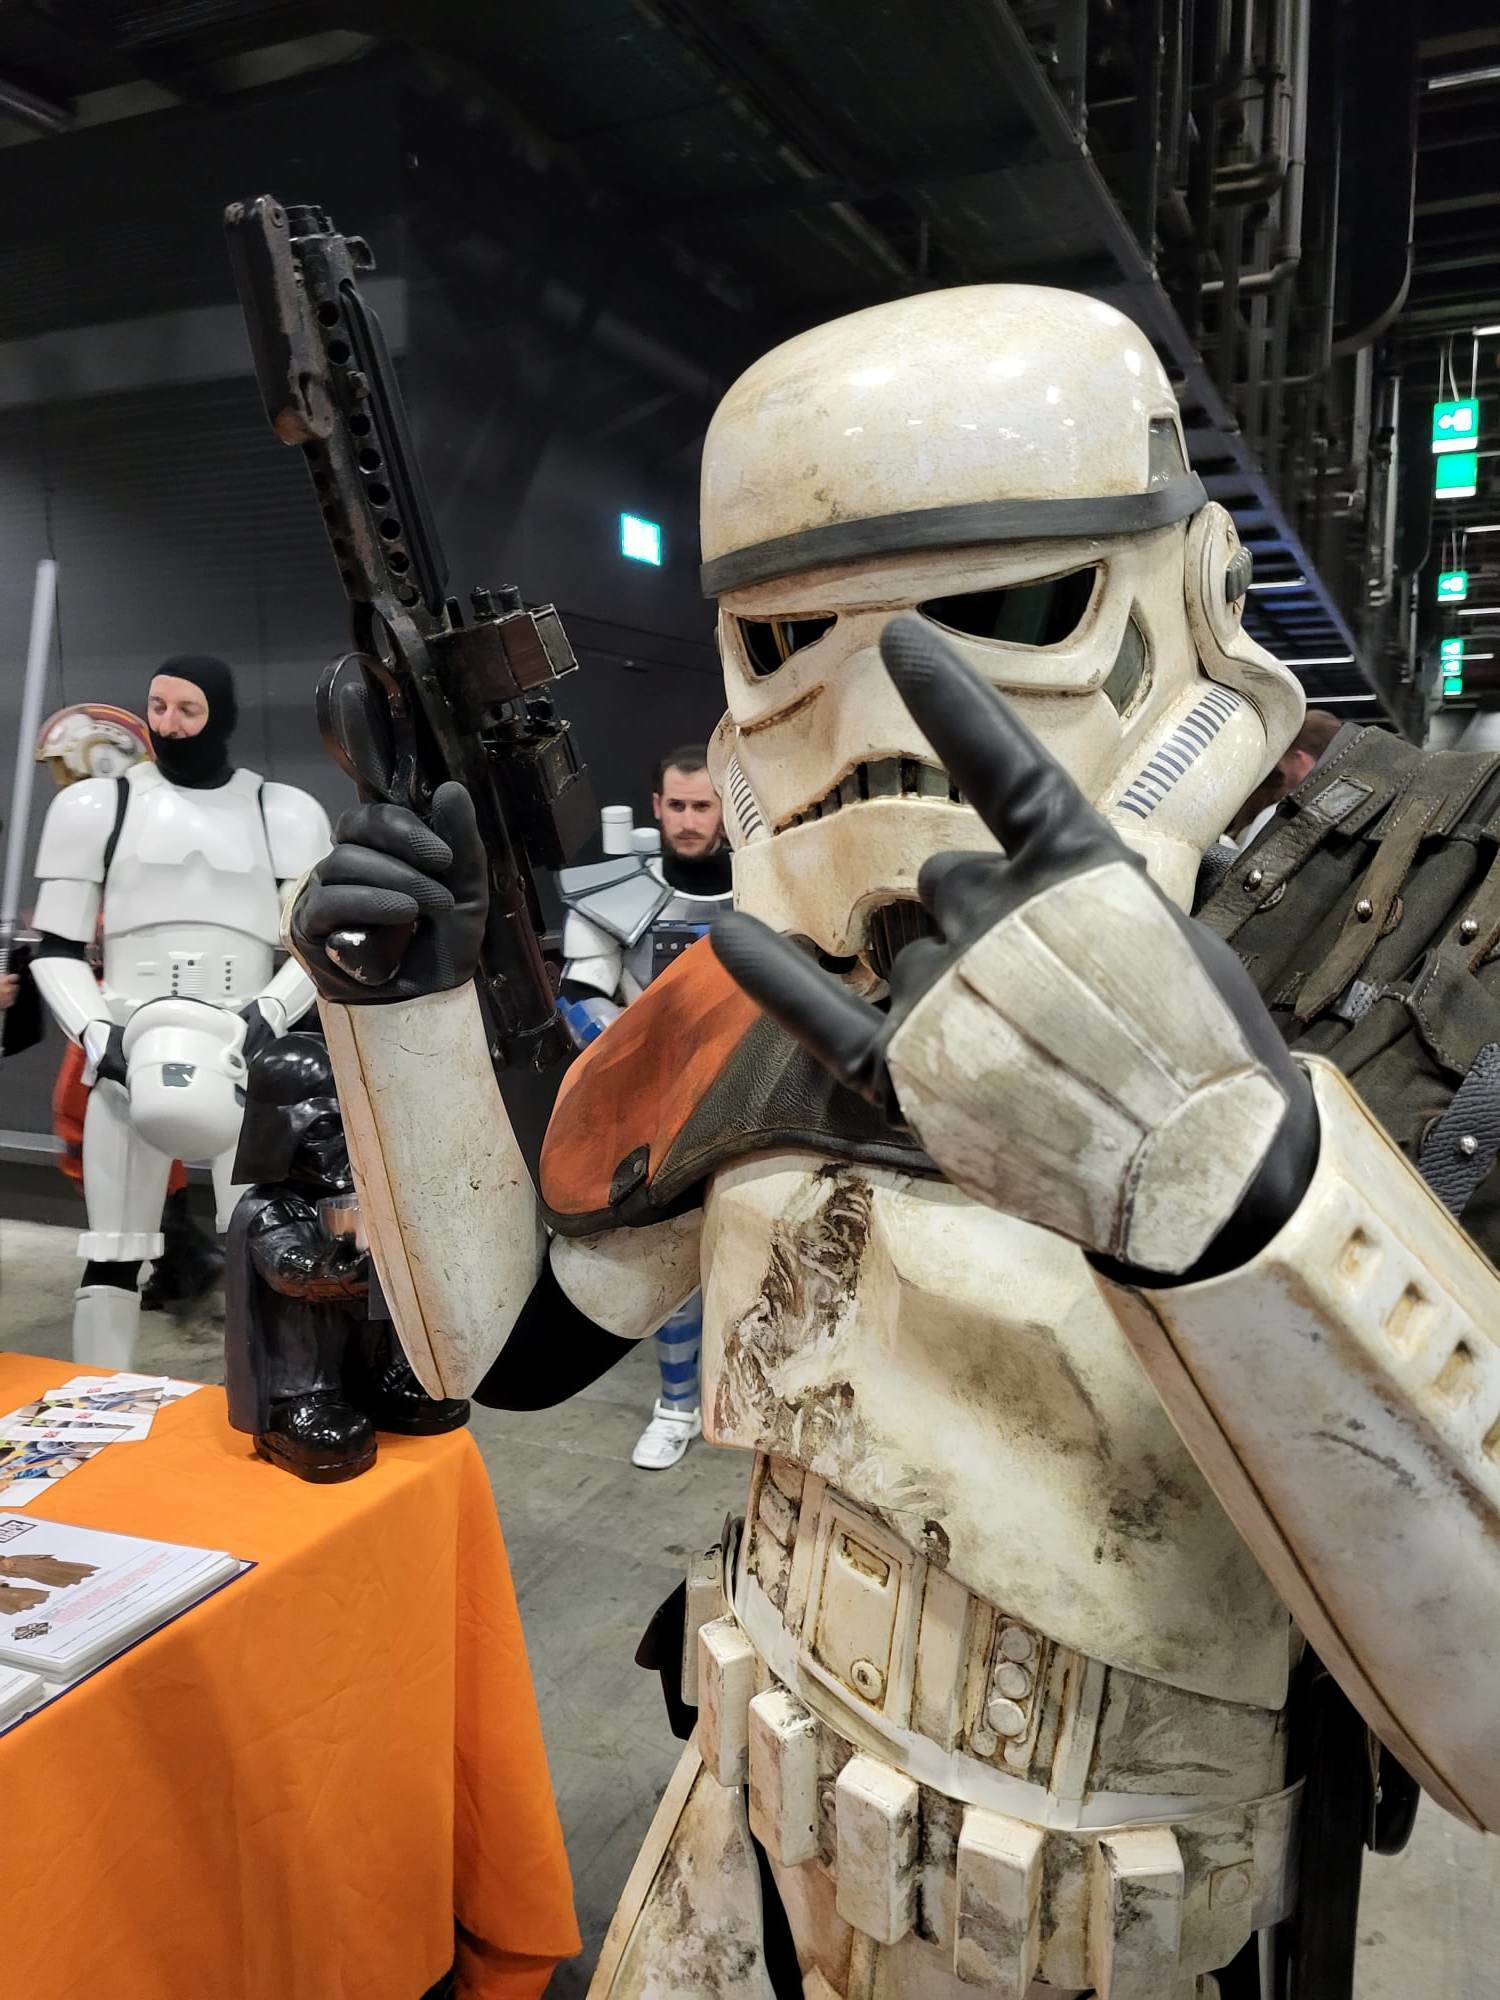
Hey you have found that sneaky squeaky spy, cool selfie.
-
1
-
-
Great work, congrats.
-
1
-
-
Hi Angela, welcome to the MEPD, your gear suits you well and you look great.
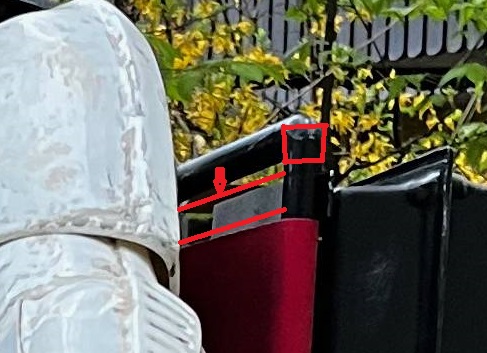
The wire is supposed to hold the T-tracks, so - as you see in bigwam's reference pic - it shold go around the tracks, to hold them in place, you will need to add some small notches on those tracks, in which the wire can fit. It's easiest to add those notches by using a drillbit with the same size of the wire. But be careful not to damage that awesome RS rubber foam DLT of yours.
You'll be approved in no time.
-
Hi Gabe, have a look the 501st crl here:
https://databank.501st.com/databank/Costuming:TD_sandtrooper
It is very detailed and you will probably find most information there.
You will also find a bunch of useful and higher quality reference pictures in the SWAT application section.
-
1
-
-
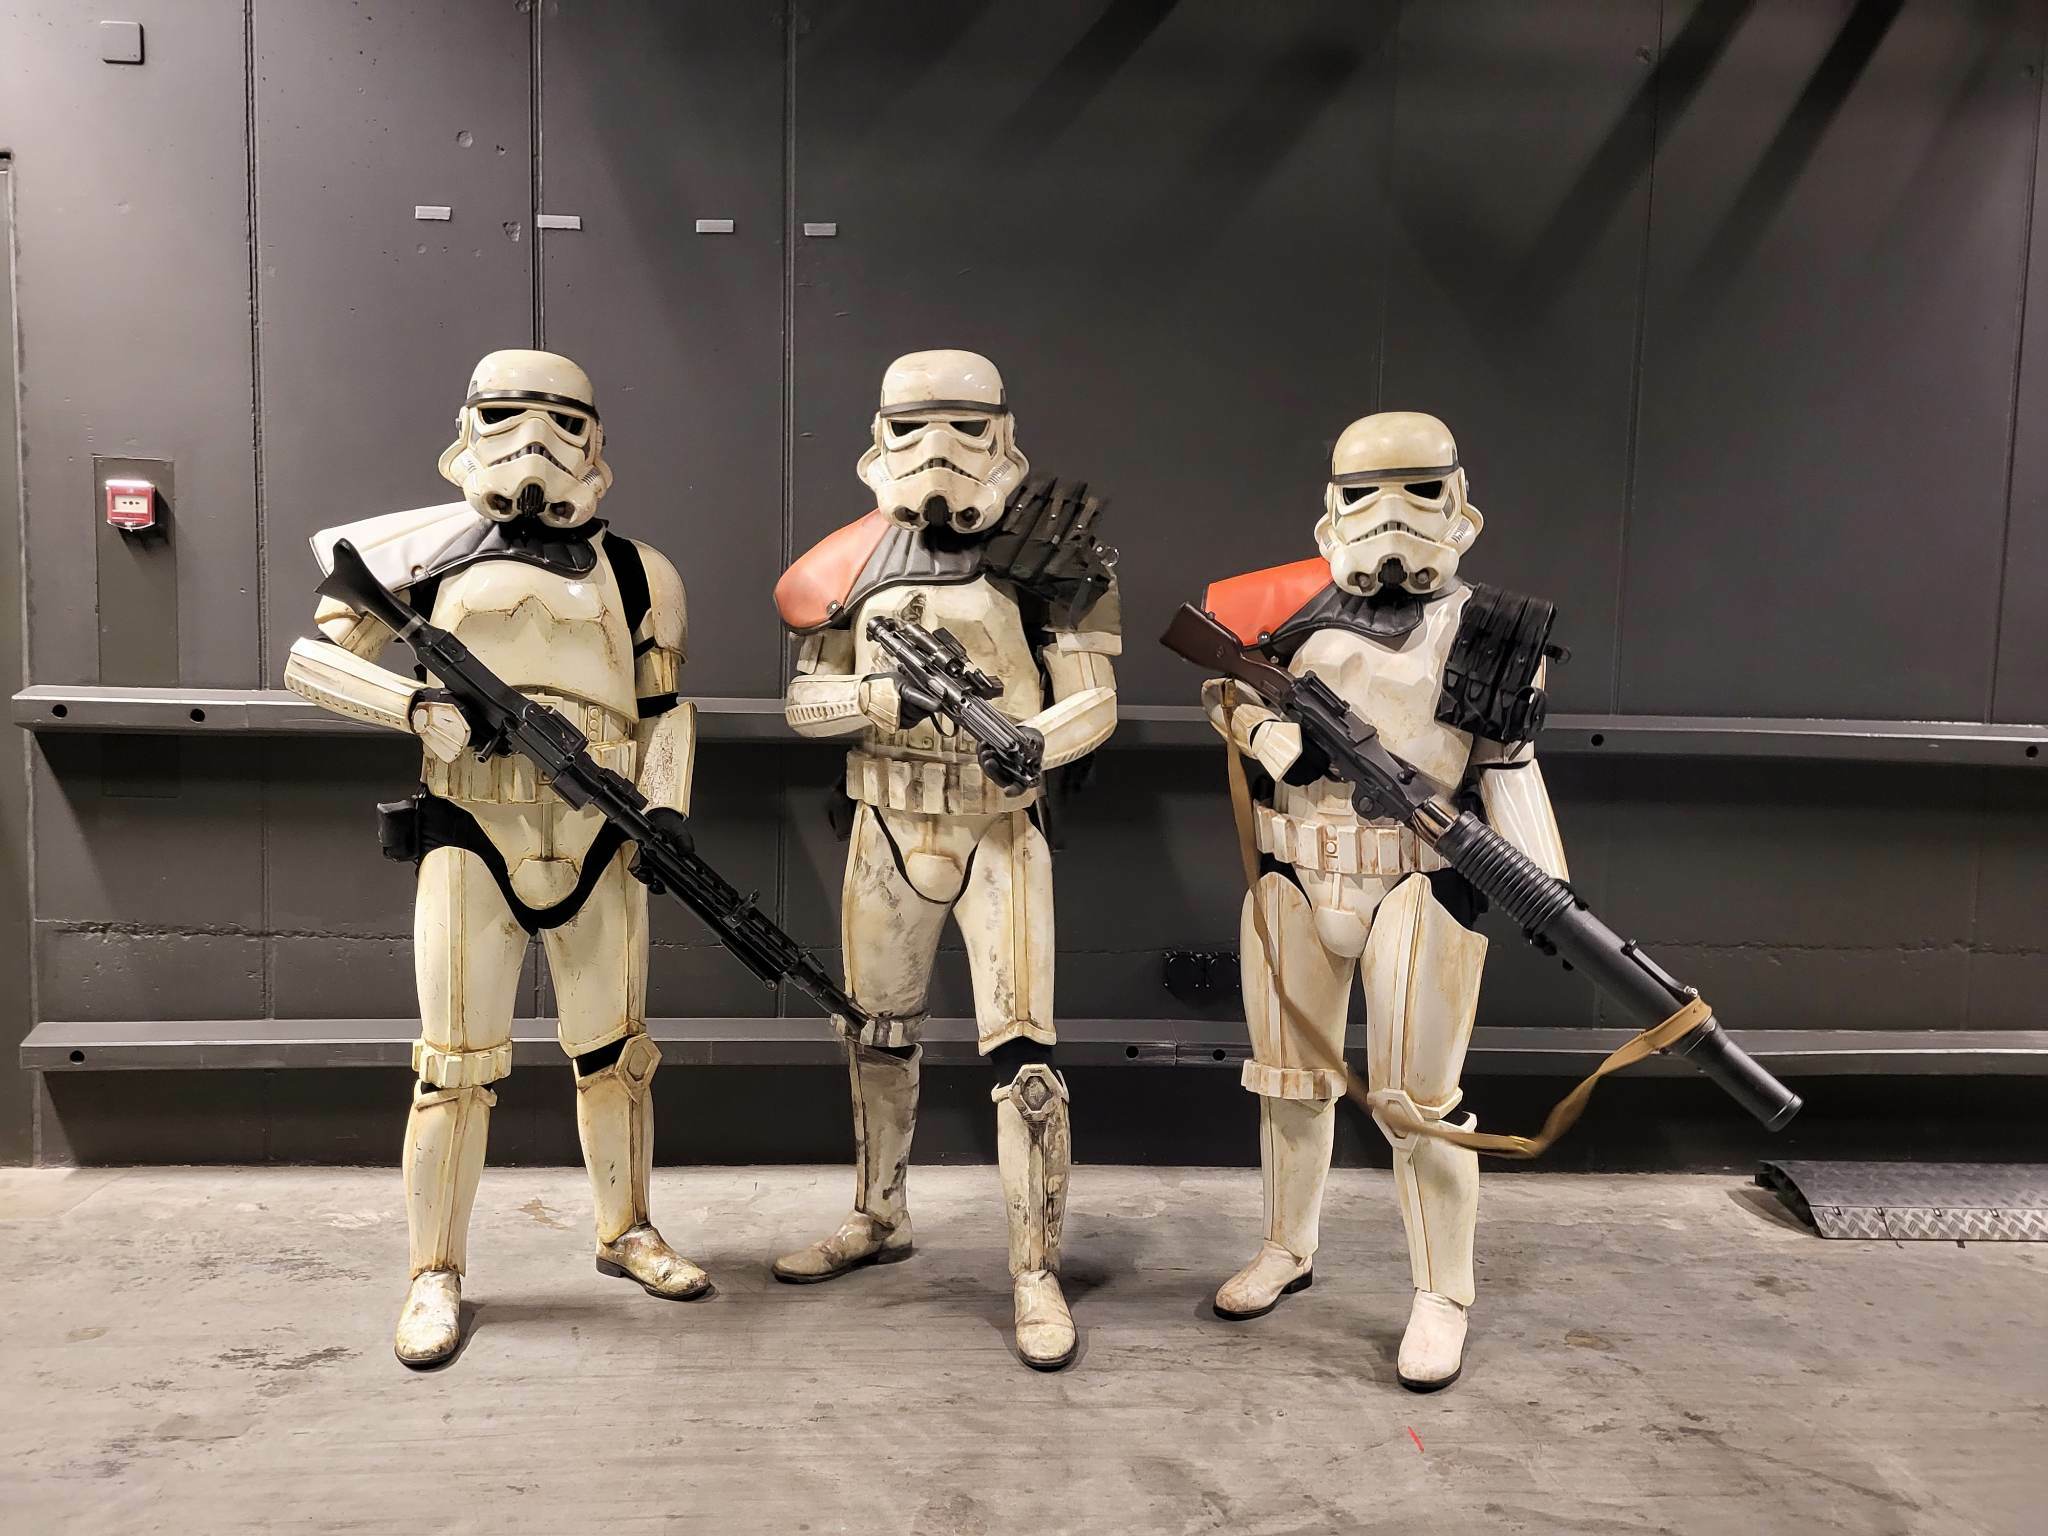
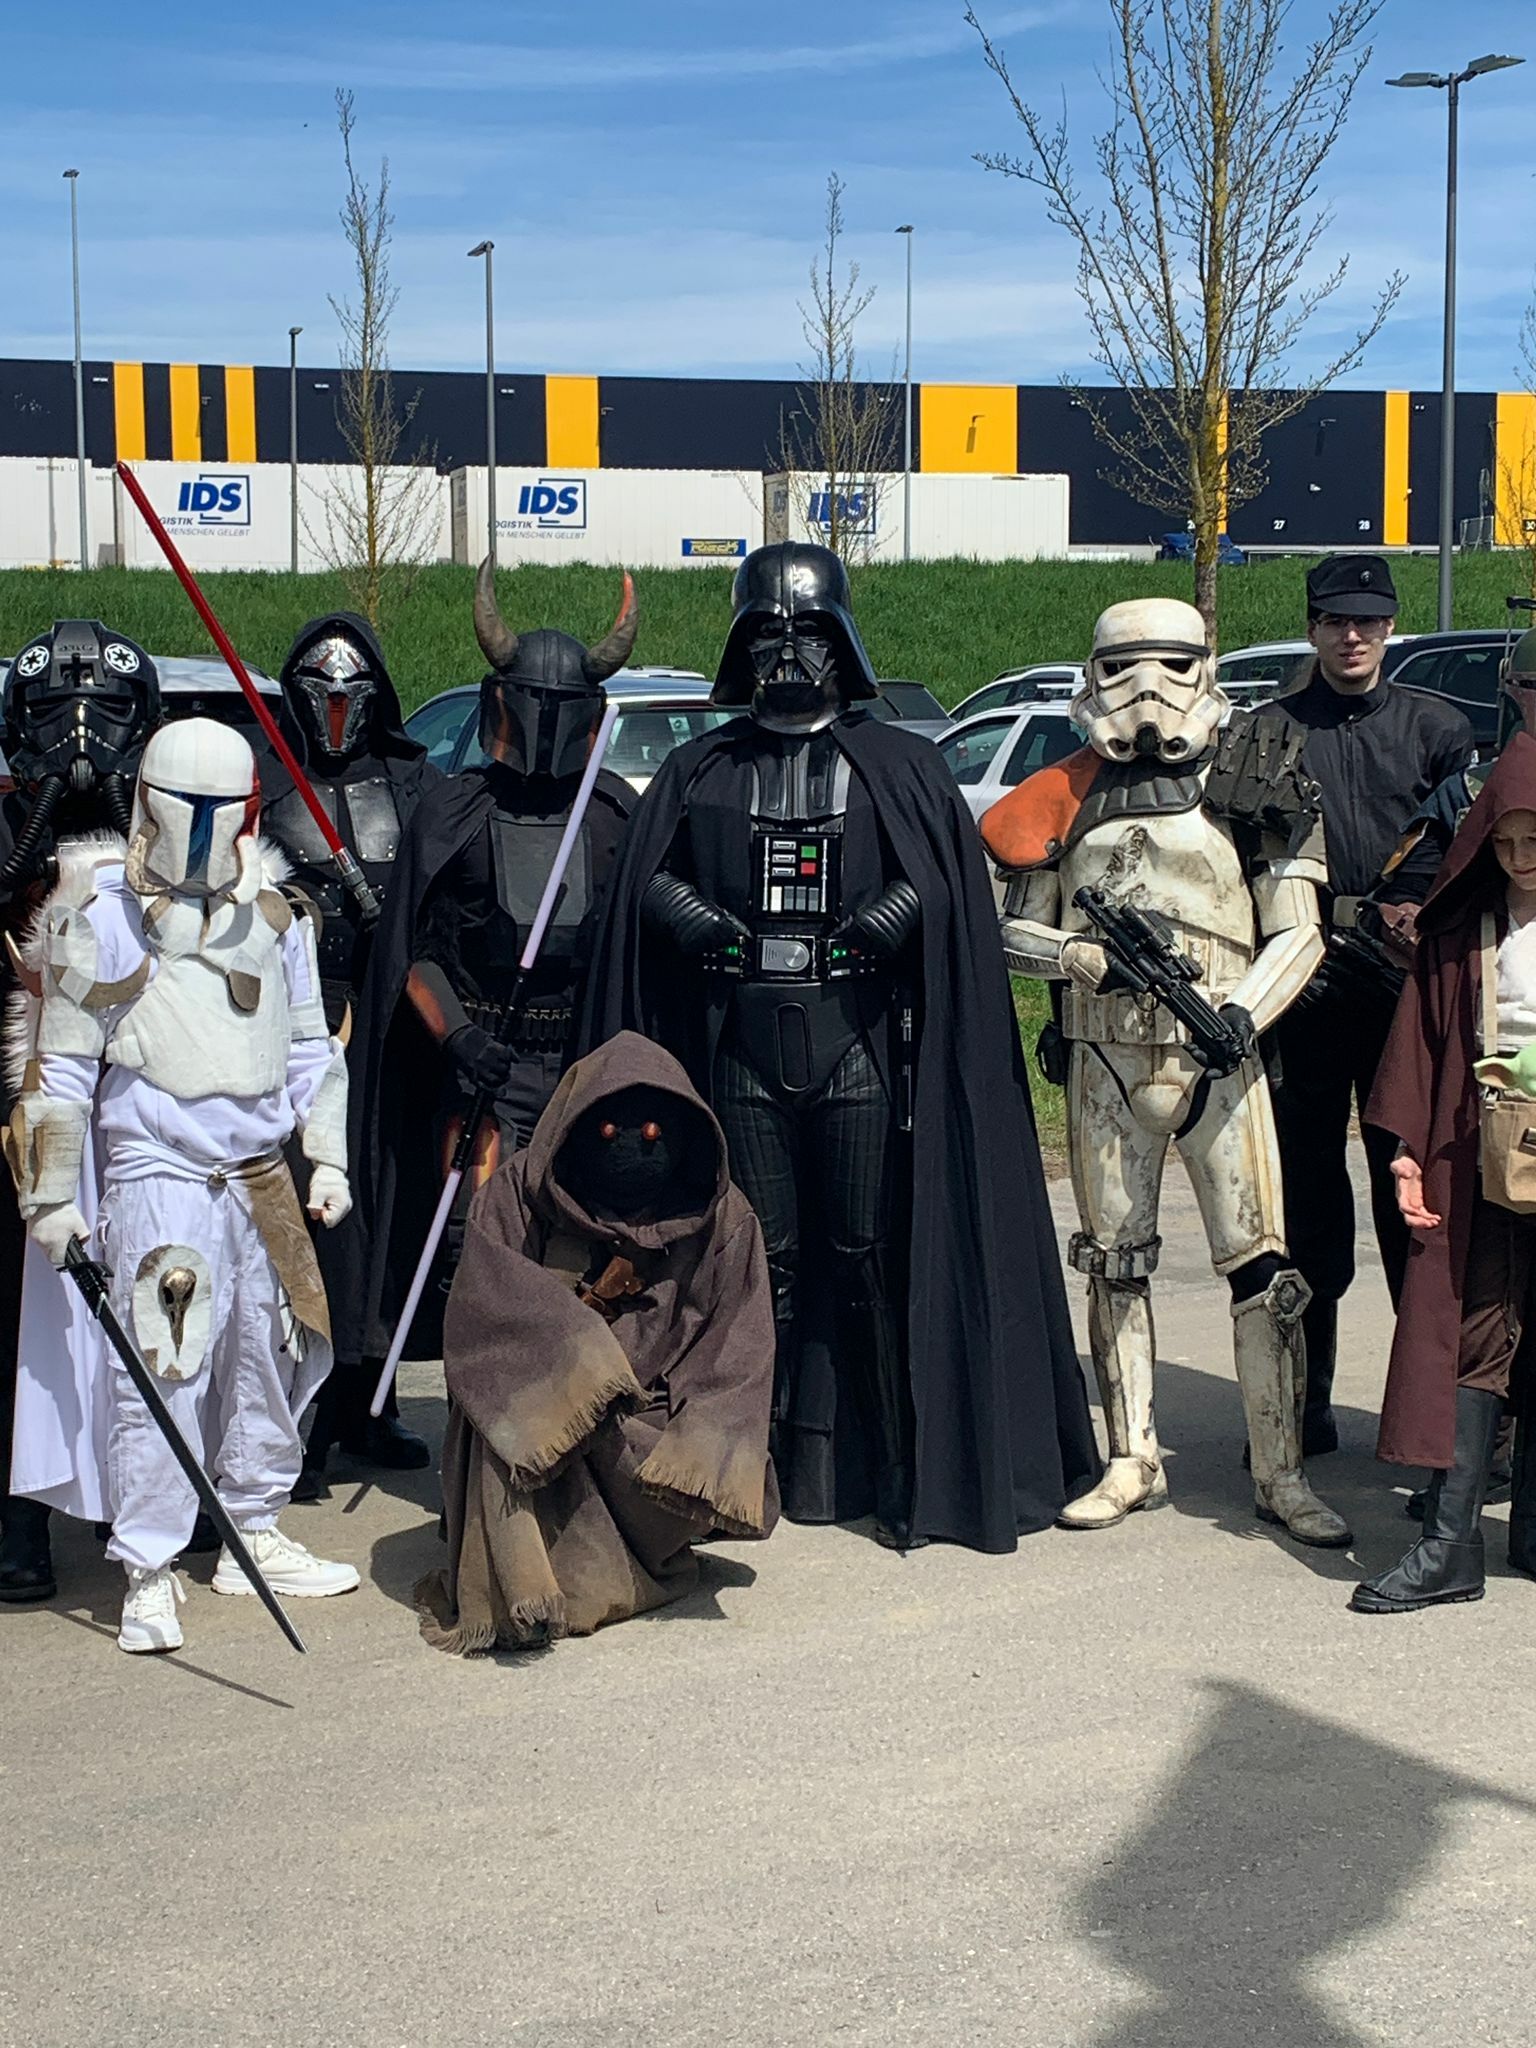
What a great picture and a nice array of troopers. Thanks for sharing.


Request 501st or Sandtrooper Section Access
in The Barracks
Posted
@TD46614, @Zeta 91, @Darin Ennis TD40258, @fransua, @crisos, @Jens31873
all done. Welcome.