

Strider
-
Posts
811 -
Joined
-
Last visited
-
Days Won
1
Content Type
Events
Profiles
Forums
Everything posted by Strider
-
Nice, really like your fix on the lower seed tray.
-
Off to a good start, bro! Are you going to bend the frame? Some of the packs seem to have a bit more bend to them than the original Karrimor frame.
-
I think they're from Ruggero although I didn't get them directly from him. He and Juan did some nice research on the topic and identified those as the correct ones. You can also source them from Ruggero he's got a sales thread open I believe.
-
Thanks for the kind words, bro. I'll draw inspiration from all the other awesome builds as well. Looking forward to seeing yours Cheers
-
A little bit of progress with the backpack; finished the radio today. It's not perfect, but it's acceptable for me keeping in mind that I'm not replicating the original Sonix 75 but the backpack versions of it (hence no decals).
-

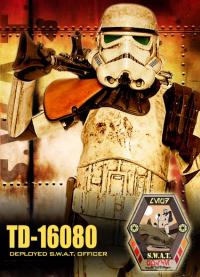
*DONE* TD-16080 requesting deployment
Strider replied to Strider's topic in MEPD Police Officer Program
-
Top job, bro - excellent attention to detail! I can so feel your pain about doing the ears, lol ;-)
-
Welcome, Lee - looking forward to seeing your projects progressing
-
*DONE* TD-16080 requesting deployment
Strider replied to Strider's topic in MEPD Police Officer Program
Thank you, gentlemen - much appreciated -
Congrats, bro! All the best also for the mother!
-
TD-16080 Requesting Deployment Call sign "Strider" German Garrisson For more detailed shots please also see my WIP: http://forum.mepd.net/index.php?showtopic=13649&page=1
-
TD-16080 requesting Sandtrooper Access. http://www.501st.com/members/displaymemberdetails.php?userID=19207
-
LoveMonkey's Alley Check Captain Build (AM 2.0 Armor)
Strider replied to LoveMonkey's topic in Sandtrooper Armor
It'll be allright once you've glued the outer strip, particularly as the gap is not huge. To get this right is a little tricky since the parts are not straight but rather curved and partly wobbly. I do it the following way: 1. Test-Fit, measure and mark the 2 parts 2.Cut one half of the arm/shin/thigh 3. Test-Fit again and now use the part that you've cut already to draw a line on the other part. Make sure they're tightly attached to each other. 4. Cut the other part. You will see that in most cases you don't get a straight line but rather a slight curve. This way you can make sure the parts fit together perfectly and you don't get gaps inbetween. But no worries, bro. Happended to me too the first time -
Many thanks for your comments! @Felix: Thx, bro, I'm good with the field pack yet I have a bunch of D-rings waiting to be picked up/dropped off Let's see if we find some time in September before Speyer, okay? @Nick: There's a saying "we all stand on the shoulders of giants" and in this case I'm actually standing on your's because this is inspired by your build So let's keep this a team effort!
-
After some severe criticism I decided to smooth out the surface of the canteen a bit more. I'm kidding of course; feedback from my fellow brothers is always highly appreciated and helps to push the limits of screen accuracy even further. I'm not yet convinced that the props team from back in the days really did sand the canteen flasks but since they appear to have a smooth surface that's what matters. So, here we go Also had a very pleasent event the other day when my new sandtrooper handguards from you know who arrived. They are a bit thinner an much more flexible than the stormtrooper ones and I have to say the look and feel great
-
Strider's Cantina Captain Project (TM Armor)
Strider replied to Strider's topic in Sandtrooper Armor
For the build of the accompanying screen accurate backpack please see this thread: http://forum.mepd.net/index.php?showtopic=13820 -
My next project after the Cantina Captain is to build the backpack that goes with it. The first step was to identify the exact backpack and its components which can be found here >>> http://forum.mepd.net/index.php?showtopic=13795&hl= The second step for me was to dwell in the old but neverending question of the right color of the backpack parts. Since we know that the in Special Edition, which most people used as a reference, some heavy color filters were used I compared screenshots from the original version (1977) to the Special version (2011). As you can see, the blueish hue is completely absent in the original version without the filters. After using some photoshop tools to identify the color and compare it to RAL standard colors I found that the color RAL 7031 resembles the screen used one best. Moreover (hint hint ;-) ), the name of that color is blue-grey and/or battleship gray. This makes a lot of sense to me since it may well be possilble that the new filter brought out more of the blue color of that tone and also it would also make sense that the prop departement used a military color. Color Example of RAL 7031: But since all theory is grey (no pun intended) let's start off. I decided not to do a tutorial but show the parts needed and the final product. By way of an executive summary here are two pics that show all the parts that go into the pack (mounting materials not included) and the final product: But let's start from the beginning: First stop, the exhaust port: Sonix Victory Radio (WIP): Screen Accurate Karrimor Frame (WIP): The GioSyle canteen flask (in the lower picture with the RAL 7031 battleship color):
-
TD-Sharp's TD build - Docking Bay 94 Sergeant V1
Strider replied to TD-Sharp's topic in Sandtrooper Armor
Ah, that solves the mistery about the 4th teeth... Excellent, Paul! Never knew that one has been discovered, too. Probably hidden in your vault all these years ;-) -
Machine's T21 - An Alternate Build
Strider replied to Lozzer86's topic in T-21, DLT-19, RT-97c Heavy Blasters
Great job, bro - sounds amazing. Btw, are you the guy with the ISD shop on FB? -
Which approach did you use to hollow the scope out? Drilling first and then dremeling (is that a word ;-) ) ?
-
What I did with mine was to paint it in glossy black and then used a satin clear coat to dull it down which gives it this semi-shiny look which you often find with used bakelite butts.
-
:popcorn:
-
Good going, bro! You've just put this image in my head where you go wandering the streets of London searching for toilet syphons, lol
-
Strider's Cantina Captain Project (TM Armor)
Strider replied to Strider's topic in Sandtrooper Armor
I'll make some nice pics for my PO application, bro ;-) -
LoveMonkey's Alley Check Captain Build (AM 2.0 Armor)
Strider replied to LoveMonkey's topic in Sandtrooper Armor
E6000 is what you want to use for your first build. I had to learn that lesson the hard way ;-)