

Strider
-
Posts
811 -
Joined
-
Last visited
-
Days Won
1
Content Type
Events
Profiles
Forums
Everything posted by Strider
-

Pouches for SWAT
Strider replied to Carbonoideo's topic in Pouches, Pauldrons, and other Accessories
The right pouch could be made eligible for SWAT as a shoulder pouch. You would have to dye it all black though and add a strap to the smaller pouch. The ring is fine. The left pouch would not be admitted. -
Welcome Troops, you've come to the right place @Damon:You can apply straight as TD no need to dust off first ;-)
-
Hi Jason, unfortunately I haven't taken pictures while putting the exhaust port together but once you have all the different parts lined up it's really straightforward. I roughly followed these steps: 1. Pull the ribbed section over the larger pipe. If it's too tight you can also cut it and glue it on. 2. Attach the larger pipe to the body. You can see I've glued a smaller piece inside on the bottom of the body where I stick the larger pipe on. 3. Attach the clamp 4. Hot glue the top section of the exhaust port (with the diagonal cut) to the pipe. 5. Glue on the base of the body using hot glue and superglue 6. Glue the rectangles on the "feet" 7. Prime and Paint the whole port 8. Attach the binder to the top section of the exhaust port Hope that helps!
-
Laboratory Pipe Depending on the type of backpack this pipe on left side either goes down about 2/3 of the pack or all the way. I used a pipe with a diameter of about 3cm and cut it to the appropriate lenght. After that I cut to pieces from the same pipe and made another cut, just enough so I could squeeze them in the longer pipe. Some glueing and painting did the rest: Seed Trays There are two different types of seed trays used for the backpacks; the upper ones have 3 diagonal stripes and no indention on the sides while the lower ones have 5 diagonal stripes and indentions. Both have slighty trapezoidal shapes: The dimensions are roughly as follows: Top: 32,5cm Bottom (incl. edges): 37,5 Height per single seed tray: ~7cm One trick I've used (Thanks, Lee!) to obtain the curved shape of the backpack was to fix the aluminum stripe on the bottom of the frame not on the top but on the other side. This way I could avoid to bend the aluminum frame which is not easy to do, particularly if you don't have the adequate tools. Sonix Victory 75 radio Last but not least: The holy grail for sandtroopers - the legendary Sonix Victory 75 radio. Only a very limited number of those radios came out of Hong Kong in the 70's. Up to date there are only a couple of known sources. Requests to take 3D scans or take moulds were so far without avail. At one time Art Andrews offered a price of 1.000,- USD for whoever brings him that radio but nothing ever came of it (his offer still stands!). The dimensions of the Sonix are: 24cm (height), 19cm (width) and 9cm (depth). Depending on the pack there are two different kinds of displays that were used however this only becomes relevant for SWAT. No matter how long the search one day we will find it
-
It's a garden hose, bro. Alternatively you could use some wire and a larger sized shrink wrap.
-
Thanks, guys Next stop... Exhaust Port Generally, there are two different options for the exhaust port but they only differ in a tiny detail. The one the 'move along' pack differs in the way that the ribbed section does not seem to extend all the way to the exhaust pipe while the other one (as seen on a behind the screens shot below) does. Although it's not a large part there are quite a few things that go into it. I've found it incredibly difficult to find a piece which even roughly matches the proportions and its shape so I've made one myself. If you can't find an appropriate body for the port you might as well just cut a piece of wood into proportions and use a longer nail to attach the pipe.
-
Ah, this is fantastic - thx for putting down all the information on the dimensions of each part. This is going to be extremely helpful for all the guys working on their T-21s. Pinned
-
Just looked it up and you are absolutely correct of course. Always sounded like a brand to me so I didn't give it that much thought Cheers
-
Nice finds! The first one is a Solid State radio (as written on the top). Funnily I have the exact same model in my basement ;-) Solid States were produced in Hong Kong and are still available frequently on ebay. On a side note, there were no radio producers in Hong Kong in the 70s just lots of manufacturers for different parts which is why some parts of the Sonix can be found on other radios as well. Maybe we'll be able to construct a 'Frankenstein' Sonix from all the different radio parts one day, lol. Cheers
-
Put them on and show some pictures, bro. I'd rather not cut them there are other ways to adjust them.
-
Gio'Style canteen flask Also one of the newer discoveries is the Gio'Style canteen flask. Before this faucet covers were frequently used. Original canteen flask can frequently be found on ebay or in the trade forum All you have to do is some sanding to achieve an even surface, cut off the opening and paint it. After that add the bee stinger and you're done. There's really lots of stuff you can use as bee stinger; pencil shells, smaller hoses, whatever does the job ;-) Mortar tube The dimension of the mortar tube is roughly 6,5 x 75cm. Depending on where you're located this item may either be easily available or not at all. For example in Germany there are only standard sizes for pvc pipes and unfortunately 65mm is not one of them. In the UK on the other hand you can easily get them. Only thing you have to watch out for really is that the walls are not too thick unless you like carrying a really heavy backpack ;-) The intake manifold / syphon Never before the arrival of sandtrooper backpacks has part of a toilet been more adored and desired, lol. Seriously, next to the infamous Sonix radio this was one of the harder finds of your backpack before a pretty good substitute was found that just needs a little adjustment (it's offered in the trade forum). Some of us have found joy in bringing their backpacks to the next level by using mostly vintage parts. These are VERY rare finds and are usually gone as soon as they surface. So keep an eye out or bribe your local plumber The "shotgun shells" You can simply use a small pipe to replicate them or real (empty) shells from a shotgun. However, if you take a real close look it appears that there are little "thingies" sticking out of the shells which casts some doubt that they were indeed shotgun shells. Some have speculated on capacitors but this maybe one more thing we might never know for sure. The thermal detonator plate Simply a piece from the regular TK thermal detonator. The types differ between ANH, ESB and RotJ so make sure you get an ANH version with 7 stripes. I've found it a little tricky to find a real accurate piece so I decided to make one myself. If you don't have a vacuum forming device you can also just cut out a pice of styrene/ABS and bend it to shape using a heat gun and a tube. Then you can just use a small piece of wood and use cables or wires as digonal stripes. Lastly you attach an appropriate size washer next to it and paint it all white - ét vóila
-
Thanks, glad you like it so far By all means, if you have any additional information that might be helpful please do share. I will keep adding the different parts until everything is covered.
-
Hi all, Building and perfecting my backpack has come close to an obsession for me and I thought I'd share some findings and observations I've made during my journey The discoveries that have been made lately on the individual parts are really an achievement of the entire sandtrooper brotherhood, however the Britannia Patrol has contributed more than their fair share to it (credit where credit is due!). So without further ado lets see what treasures the prop builders from back in 76 utilized for the high-tech assault sandtrooper backpacks Every good build should start with references so here we go: These are the items you will need in order to assemble your backpack (parts may differ by backpack) Radar Dish (Tupperware pitcher lid): The Tupperware pitchers are available in various sizes and come either with a 4 or 5 inch lid (radar dish). The 4 inch lids are used with pitchers from 1 to 1,5L so thats what you should aim for as the 5 inch ones are too large. A CD has the perfect size for a backing disc however it is a tad bit thin. What I did was use the CD as a template on a 2-3mm styrene or ABS sheet to cut out the backing plate (you can either use a black styrene sheet or in my case a white one that gets painted black). Wet Wipe Bottle and mushroom cups Pretty much as the name says ;-) This is what were shooting for: Unfortunately, I have not been able to find a Tupperware dessert or ice cream cone with those specifications. These two who were closest but they both lack the widening lip at the bottom: The black one was used on the old packs a lot and was quite a good fit but the emergence of the Karrimor backpack frame was a real game changer as everything on the pack had to grow in proportion. The correct diameter of the wet wipe bottle should be around 7,5-8,5cm. Here you can see the actual size difference between the old and the new packs: Vacuum forming of parts ---------------------------------- As I couldnt find a correct mushroom cap I decided to do one myself using the vacuum forming technique: Its actually not as hard as it sounds. Ive spent about 15,- EUR on the parts for a DIN A4 Vac machine (utilizing my good old vacuum cleaner) and 30,- EUR for a small oven on ebay. For those who want to give it a try I can highly recommend this video by Bill Doran >>> And this is what it looks like including some self made moulds for the mushroom cap, thermal detonator plate and exhaust port. ---------------------------------- Karrimor backpack frame The Karrimor backpacks where popular with boy scouts back in the 70s. Occasionally they do pop up on ebay (best chances are on ebay UK). When you were lucky enough to snag one, some cutting is in order to get it to the appropriate length. After cutting off the top the frame measures roughly 60x37cm. After adding some aluminum stripes and a paint job this is what it looks like: Next parts: http://forum.mepd.net/index.php?showtopic=14413#entry181420http://forum.mepd.net/index.php?showtopic=14413#entry181491 http://forum.mepd.net/index.php?showtopic=14413&page=2#entry181520
-
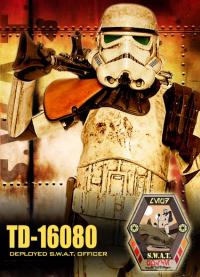
*ACTIVATED* TD-16080 requesting SWAT Deployment #39
Strider replied to Strider's topic in MEPD S.W.A.T. Program
A troopers work is ne'er done...just to share some updates I've done on my pack and a final pic of my armor. Changes to backpack: Original vintage Syphon, new exhaust port, new wet wipe bottles and caps, new (original) radar dish. Still missing: original Sonix radio ;-) Cheers -
-
If we had a badge for innovative inventions here at the MEPD you'd be for sure a top contender - great job!
-
More Accurate than SWAT.... is it possible?
Strider replied to iconoclasta_88's topic in The Barracks
I like that idea! And extra points if he or she has an afro, lol ;-) -
Nice, Rolf - looking forward to your build!
-
More Accurate than SWAT.... is it possible?
Strider replied to iconoclasta_88's topic in The Barracks
Love this discussion already - '76 all the way But to be honest, I think a few compromises are necessary if you aim to wear your armor for longer than a few shots. With my armor I tried to emulate the trimming and strapping as original as I could. However, I tried to avoid cracks (by reinforcing certain areas) and also didn't use Stelmax but E6000, again to avoid unpredictable warps in the armor. But that's just a practical decision, I think it's great when somebody goes all the way! No argument about the backpack though. Apart from some items that need to be cast (eg thermal det, lids, trays) finding original parts such as the canteen flask, tupperware, syphon etc. is part of the hunt that keeps the game alive - for me anyway Regarding SWAT however this can be a little bit of a two edged sword. On the one hand it is precisely this program that has led to many advances and discoveries and set a standard for the whole legion in terms of accuracy. On the other hand the program keeps getting harder with each approval and we have to look out that it doesn't become unachievable. Cheers -
Great job, like it a lot! Have you thought about maybe adding a Sandie or two to the picture? Seems just a bit empty without it ;-)
-
-
Here's my updated one; now all that's missing is a Sonix with the accurate dimensions:
-
This thread is an update to the original backpack color topic >>> http://forum.mepd.net/index.php?showtopic=4987&page=1 The question of which color to use for the backpack parts was probably among the first points discussed back when the MEPD was founded. To add to the confusion of a changing color due to different lighting some heavy color filters were used in the Special Edition which came out later in 2011. A comparison of screenshots from the original version (1977) to the Special version (2011) highlights these differences: As you can see, the blueish hue is completely absent in the original version without the filters. After using some photoshop tools to identify the color and compare it to RAL standard colors I found that the color RAL 7031 resembles the screen used one best and is also named blue-grey and/or battleship gray. This makes a lot of sense to me since it may well be possible that the new filter brought out more of the blue color of that tone and also it would also make sense that the prop departement used a military color. Color Example of RAL 7031: However, to show that lighting can still play tricks, here is a comparison of that same color in different lighting: Indirect lighting: Direct lighting (which brings out more of the blueish hue): However, since we have not discovered an original screen used backback yet (and probably never will) this is the current best "educated" guess. Also there are quite a few other colors out there that are very similar to the RAL 7031 color (which is a European standard) so by no means this color should be understood as exclusive. If you're from a part of the galaxy where RAL colors are not available let's hear which colors you have used! Cheers
-
Nice job, buddy - getting closer and closer Next round of refinements, here we go: - The large radio knob: The outher part with a slope (when you look from the front) is a bit too wide and the inner part should have and an inward slope - The two rectangulars where the 2 smaller knobs sit on have a lower level than the 2 rectangulars on the left of them - Looking at the speaker part on the bottom. On the lower left tile there is an indention for the Sonix Victory plaque. It's not on the other pics I've showed you for reference because they are from a clone from "North Star" which differs in some details. - The upper and middle tiles do not seem to extend to the very end of the ground plate, I would give them about 1mm of space - Lastly I would also try to emulate the "covers" on the sides of the speaker, maybe raise them up by 0,5mm Here, this reference may help to illustrate the points above: Really excited about your build - happy to place the first order Cheers
-
Off to a great start, bro! However, there are a couple of areas that would need further refinement: - The overall dimensions are not quite right - The levels of the different areas are of different height. The lower part where the speaker sits definitively needs to come up but there are also level differences in the upper parts - The larger knob is a littel bit off - The little round things in each corner do not stick out Here are some pics for illustration: Keep up the good work, bro! Cheers