

Baron
-
Posts
294 -
Joined
-
Last visited
-
Days Won
1
Content Type
Events
Profiles
Forums
Posts posted by Baron
-
-
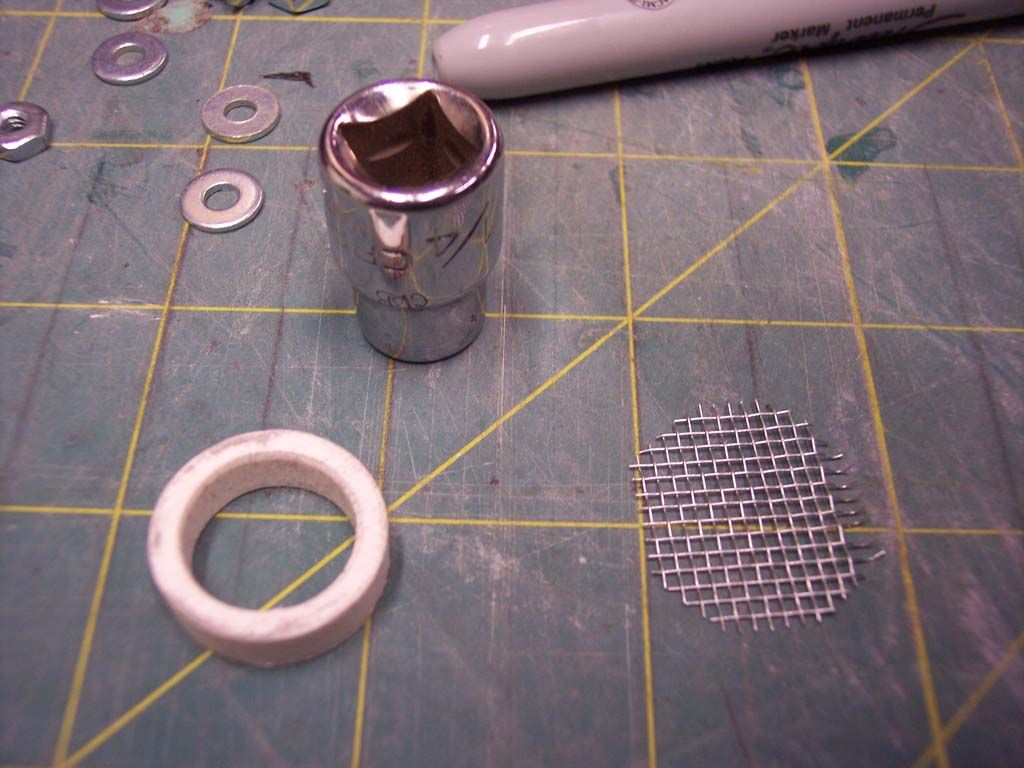
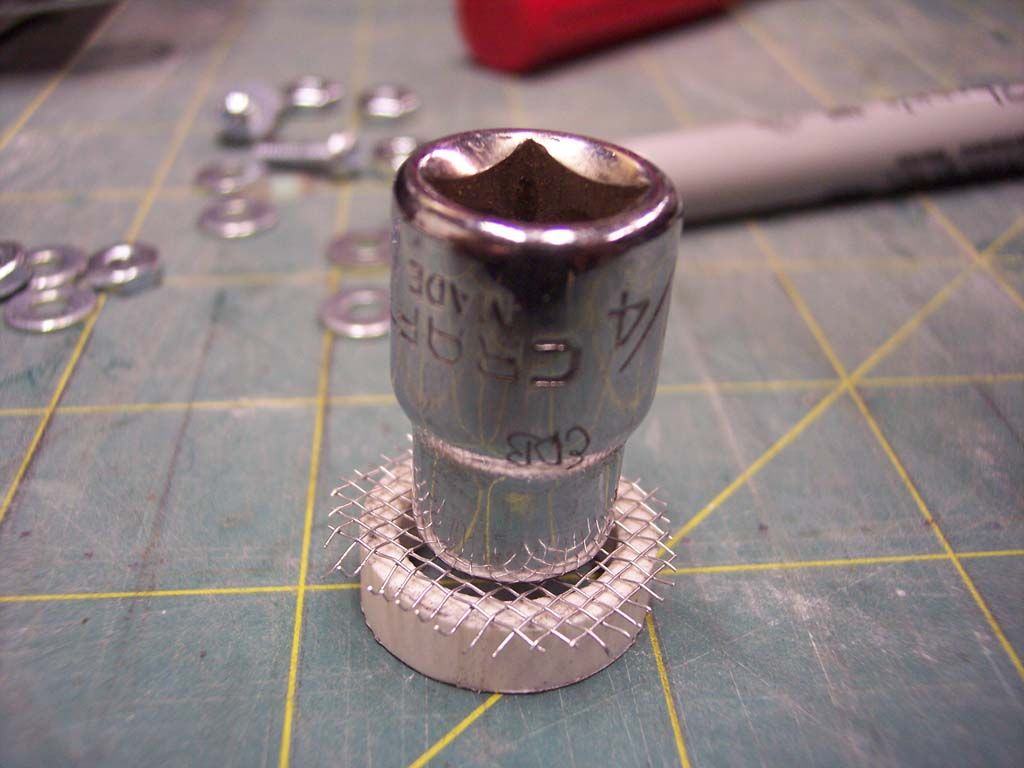
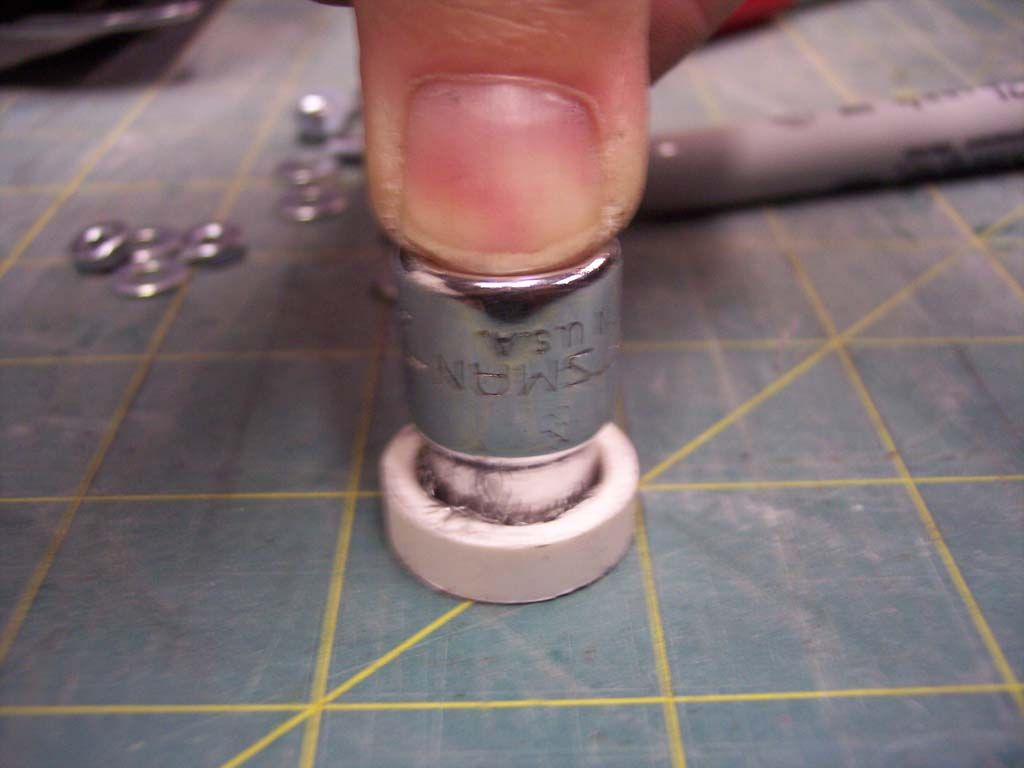
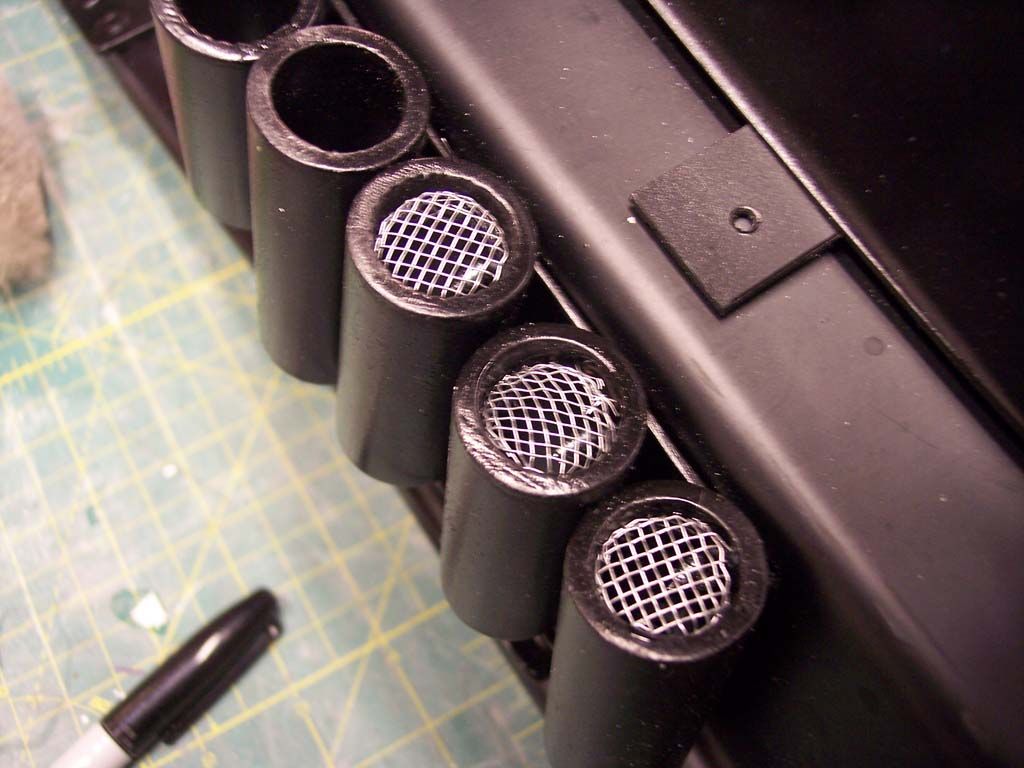
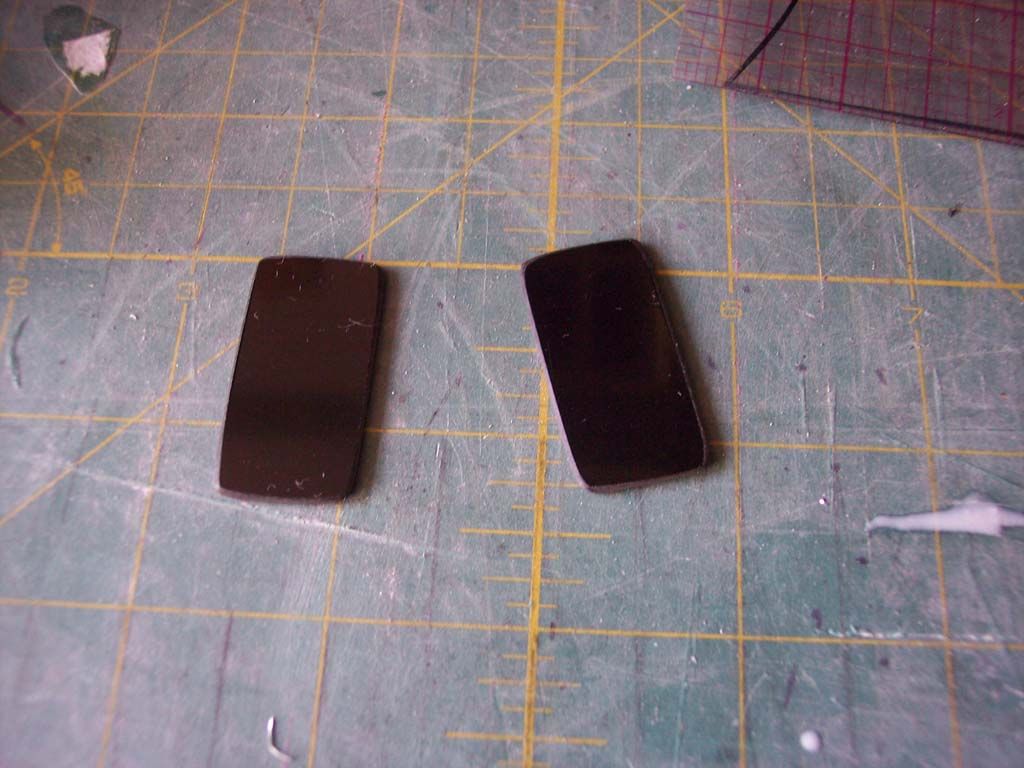
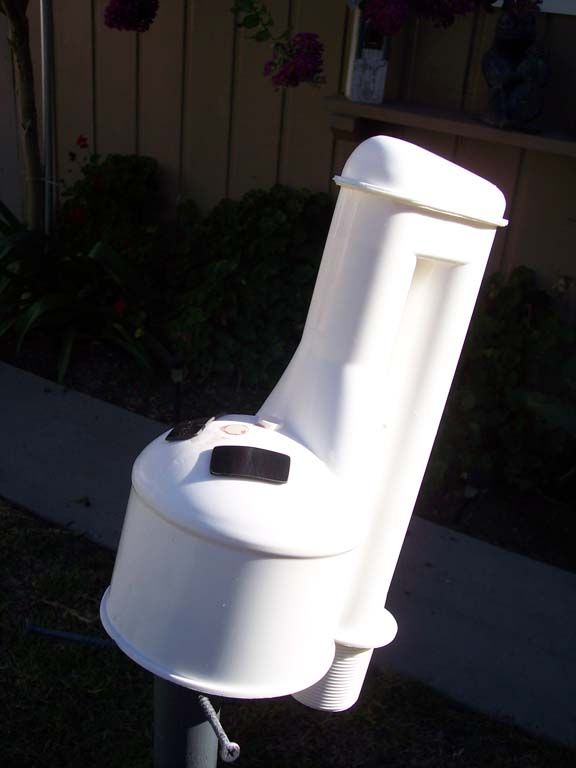
For the "shotgun shells", I used the same 1" PVC I already had, cut them to length by looking at the Move Along guy and "eye balling" it. Painted them black and bought some aluminum screen repair kit. I forgot to snap a pic, but there are 6 2x2 sheets in it, I think it was about 3 bux. I cut them in squares then rounded them off. I used an idea from someone here for bending the screen for the aerators. I sed a socket and the little shim for my Tupperware lid before I glued it in. I gently pushed it in then twisted it a bit.
Then just pulling them out and working them in the shells. I Have since painted it all flat black. Looks the part to me. I have arranged the shells to closely mimic the Move Along pack already to.
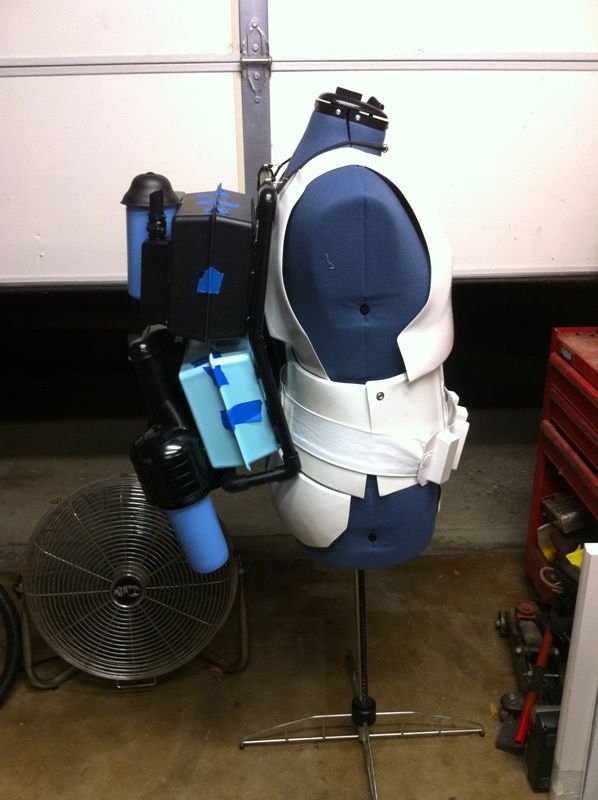
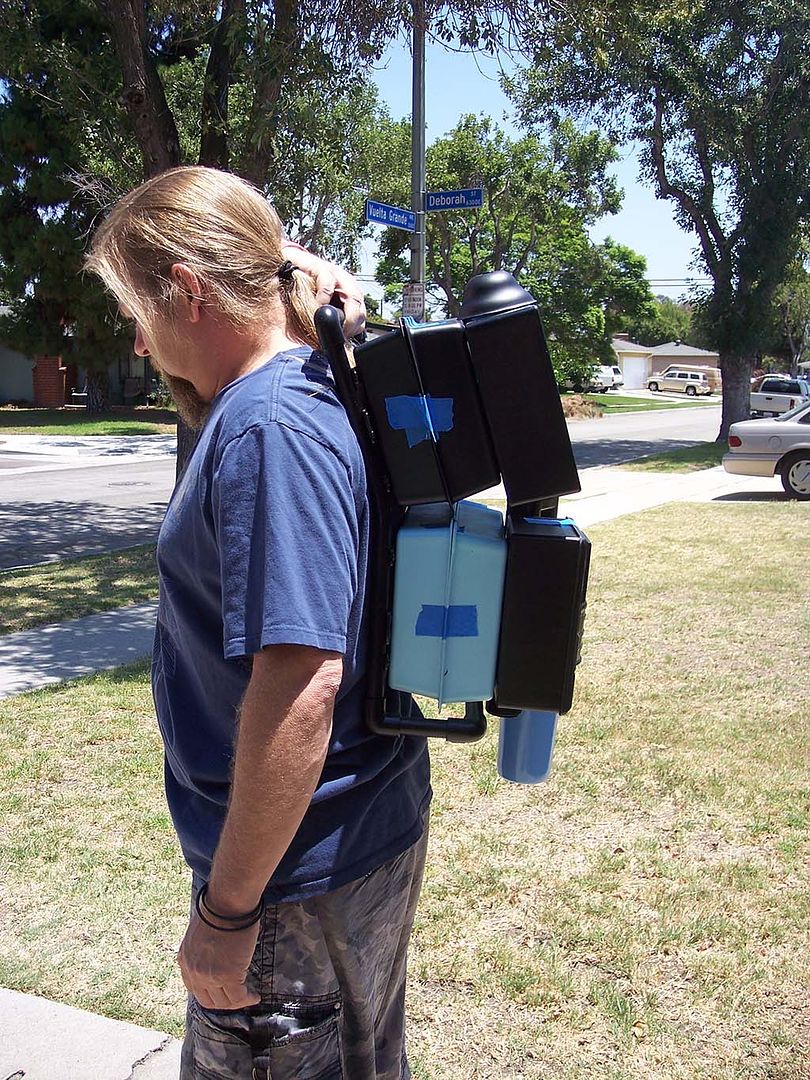
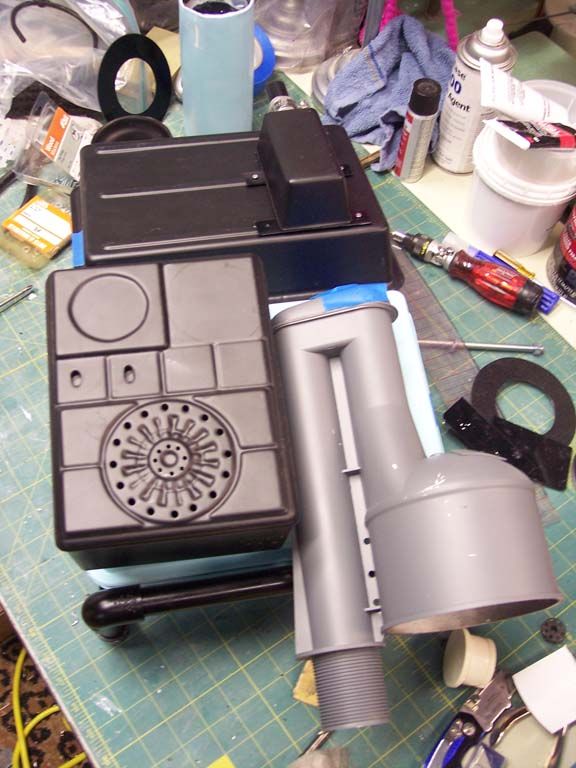
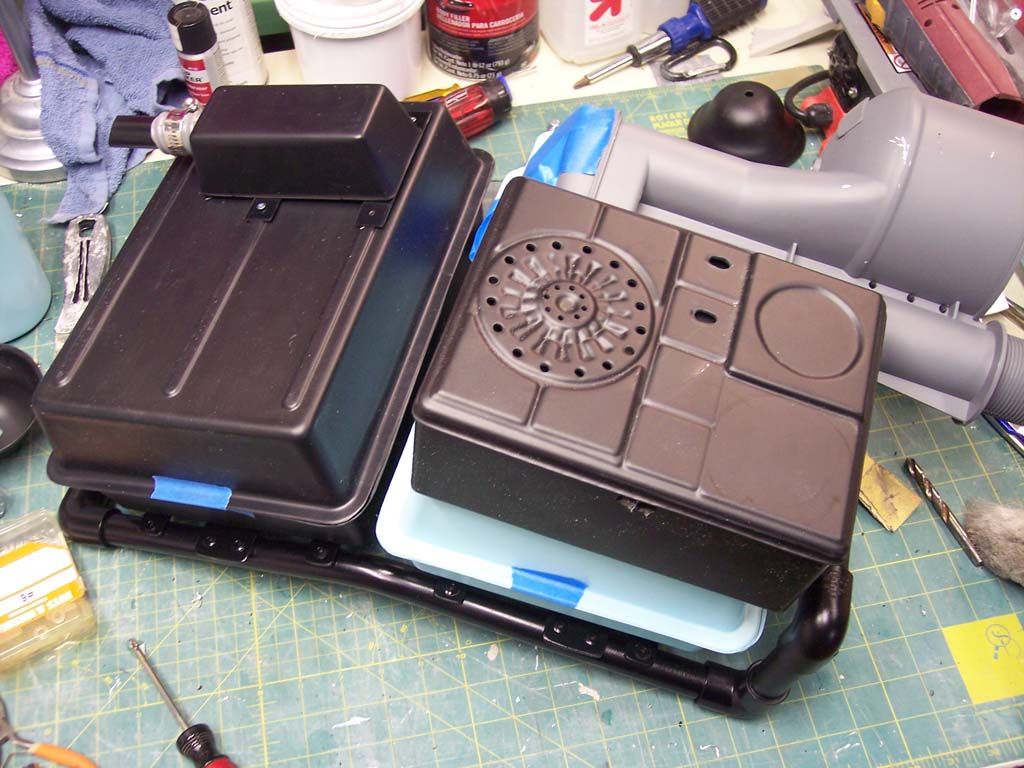
Here is the pack mostly done and still clean. I need to work on the radio, I need dials and I am considering putting in sound. Also need the two flip or slide switches. And I still have not located a Bee Stinger....
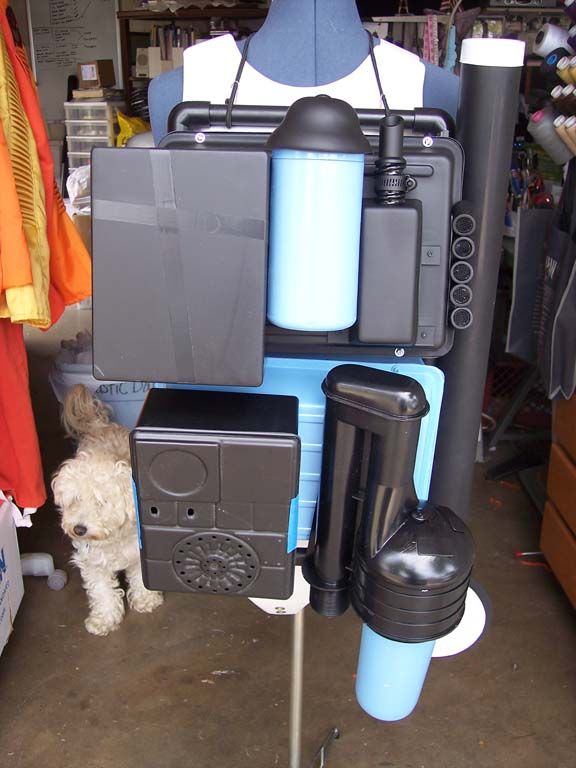
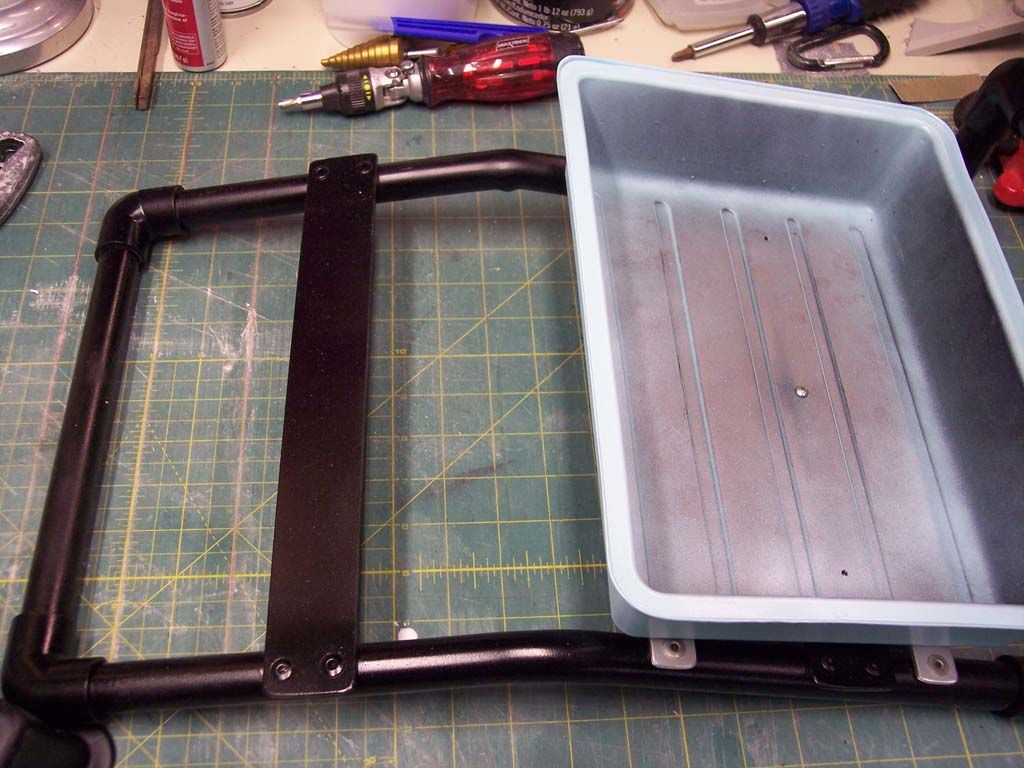
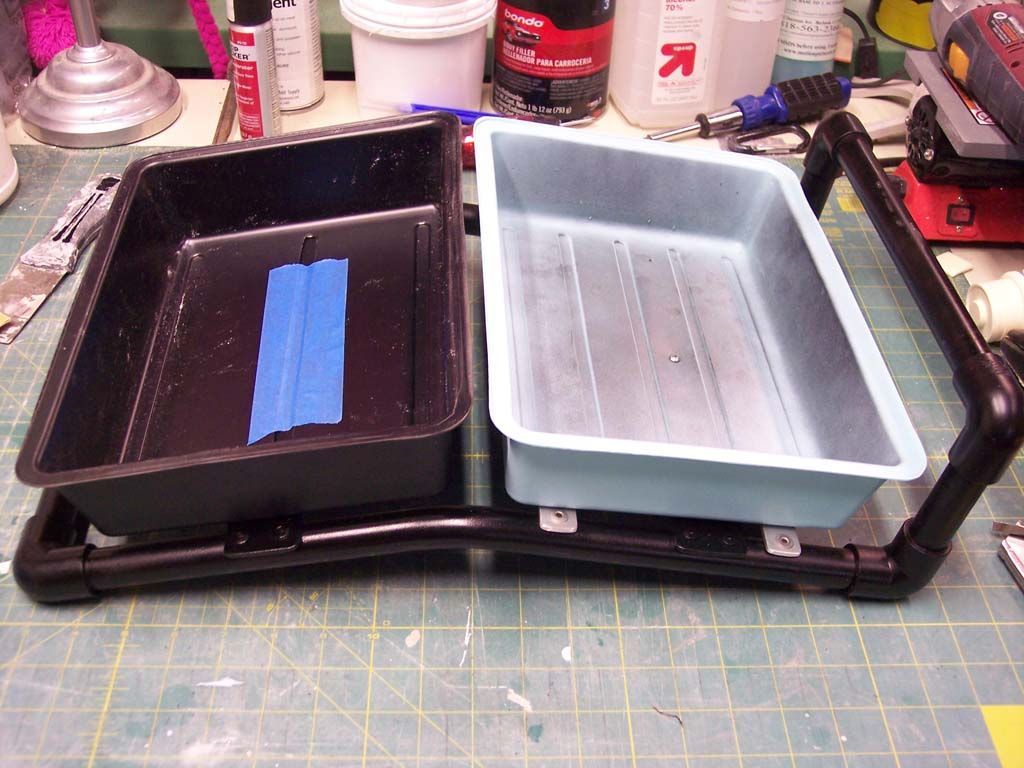
Everything is attached with nuts, bolts and washers. I have attached the trays with nut and bolts, pics to follow.
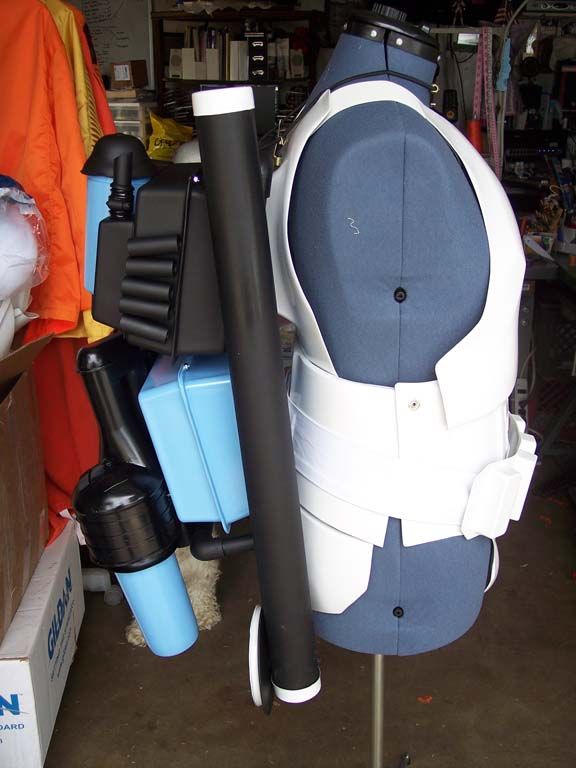
Anyway, worked on armor tonight and am getting closer. Man, this is a lot of work!!!!!!
-
OK, more updates...
I have been working with the Trooperbay pack kit. I picked up some black 2" ABS at Lowes, luckily they stock it there. I cut it right around 29.5", laid it up next to the pack frame and gave it about 1.5" above it
I didn't take any pics of this for some reason, but here is it with the holes drilled and wall anchors like Scootch did. I had some laying around and long enough screws and it is a good idea

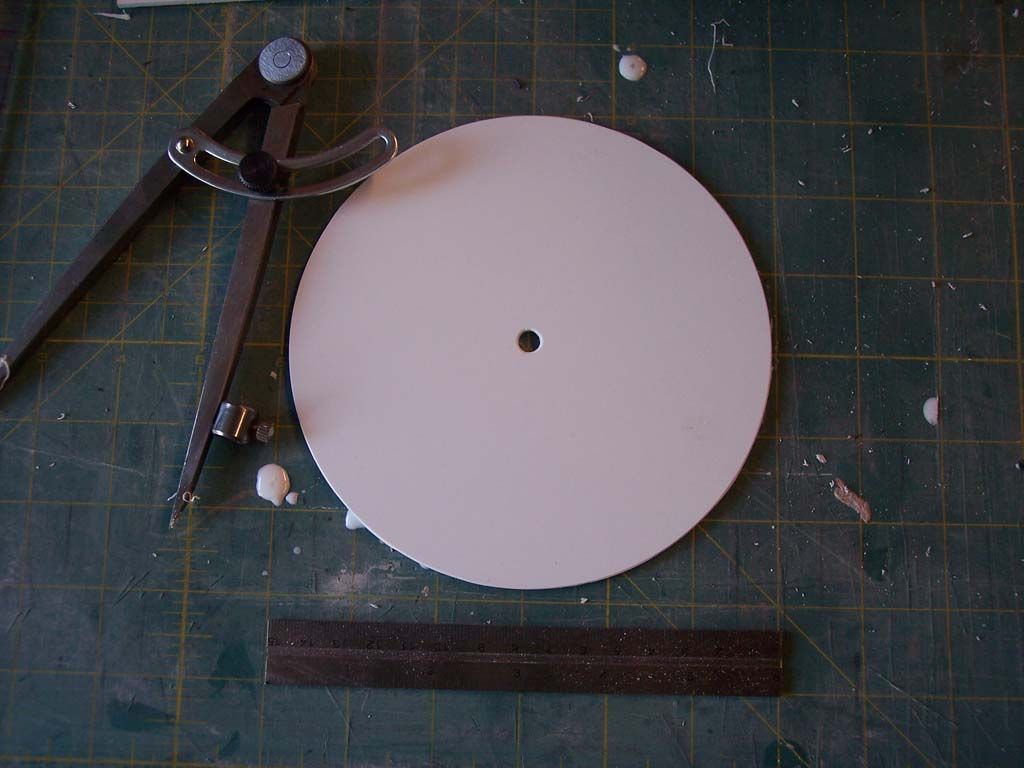
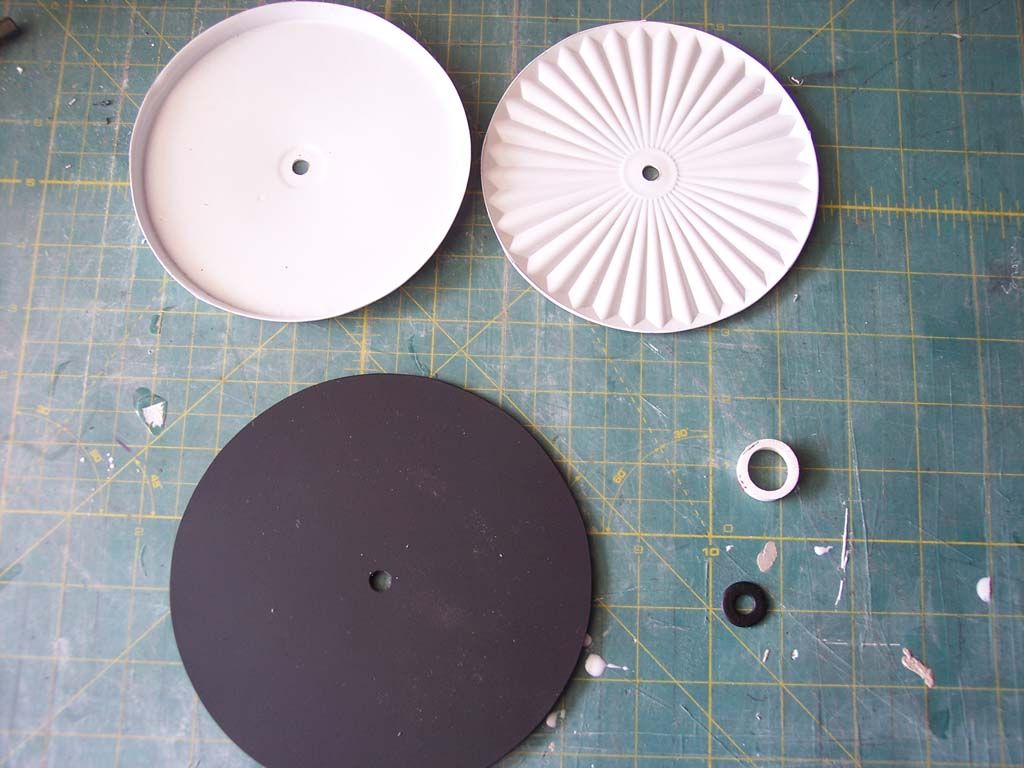
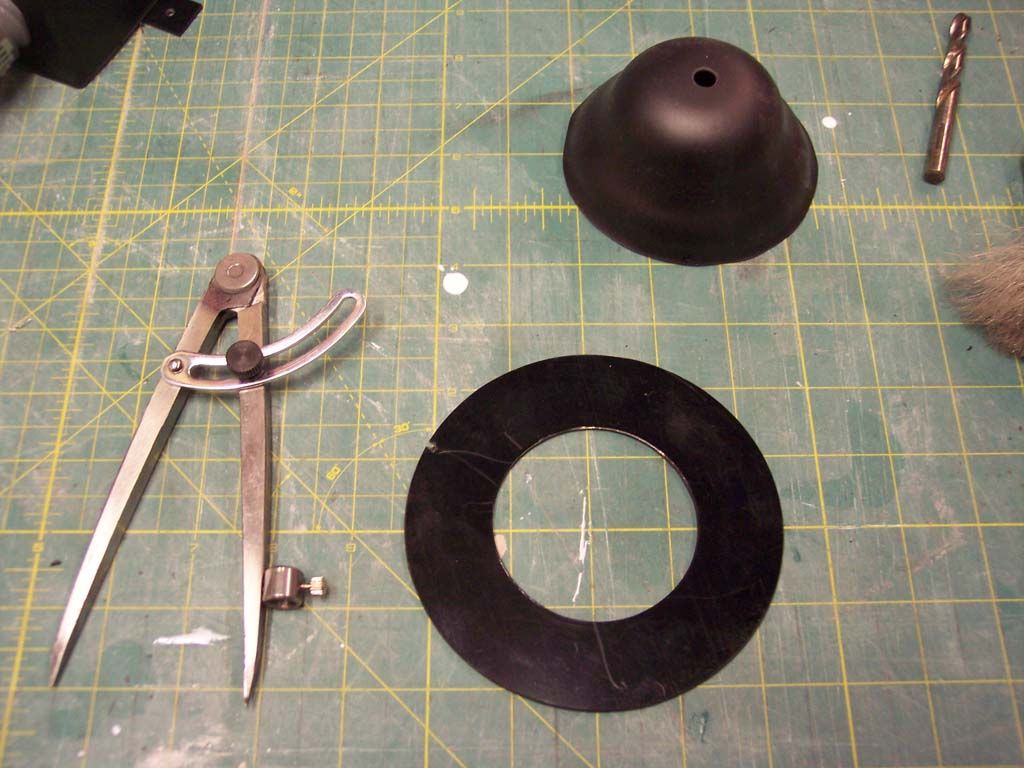
The Trooperbay kit comes with a vac-formed Tupperware lid and a backing to give it some depth. I added a little spacer in the middle to give it some support in the middle where the carriage bolt goes through. I also made a Slightly larger backing plate made out of HIPS then painted black to closer match the "Move Along" pack, which I am kinda preparing for as I go. Again, using my trusty scribing compass, I etched out a circle of about 6"
-
Here is a small update. I have been working on armor the past few nights. But here it is:


-
That sounds like a great idea! I know someone found a similar item being the canteen. Although it does look like a close match, I have to admit I don't really see it. But then again, I have not been looking at these packs as long as a lot of the guys here
-
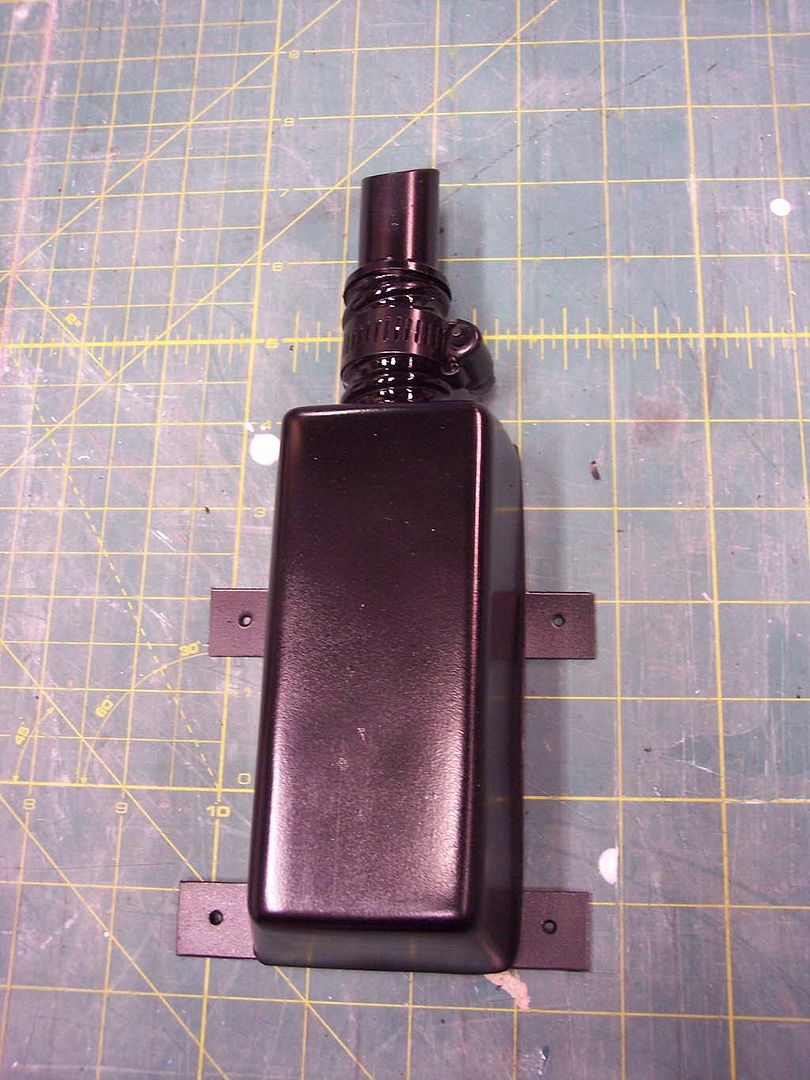
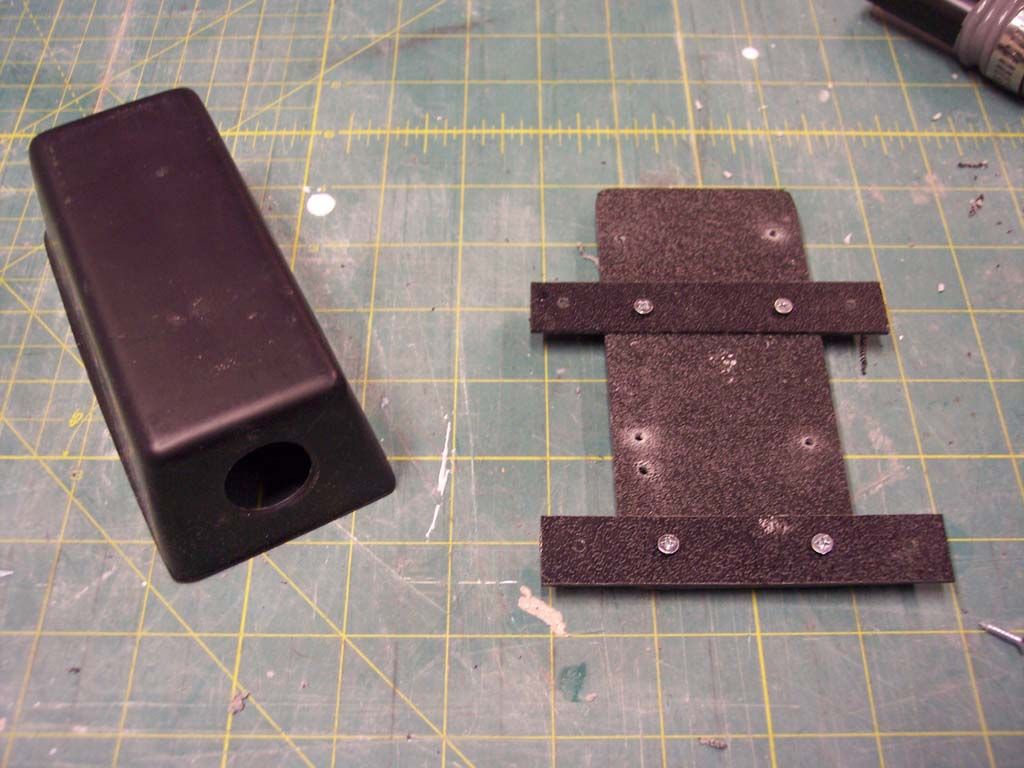
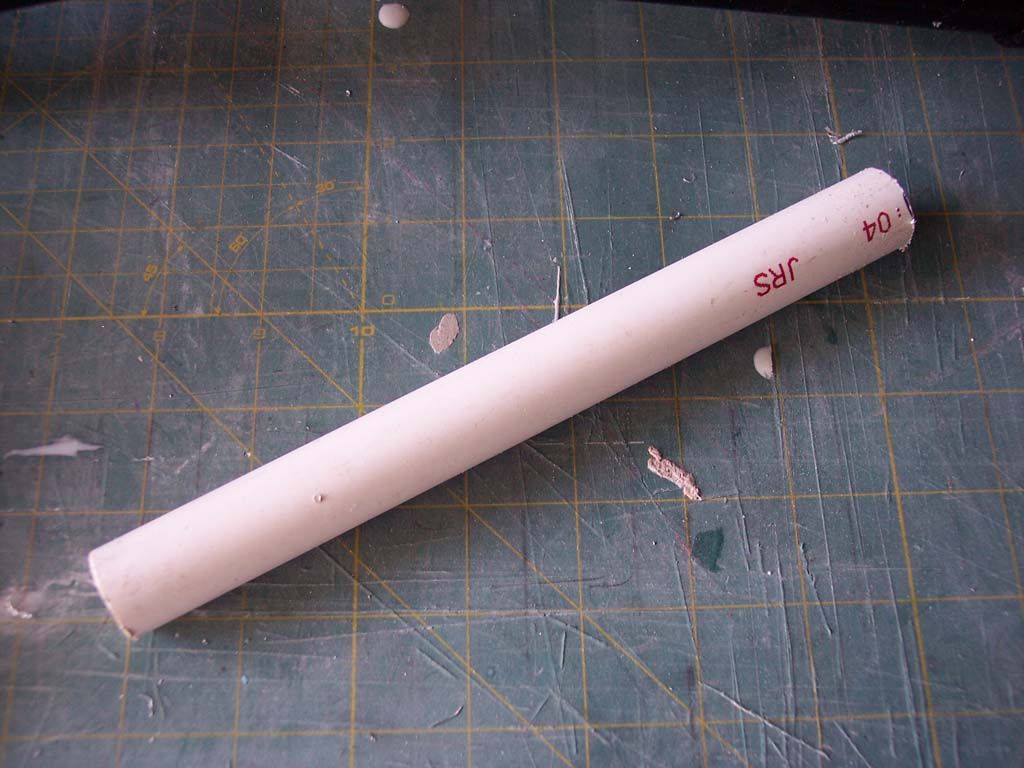
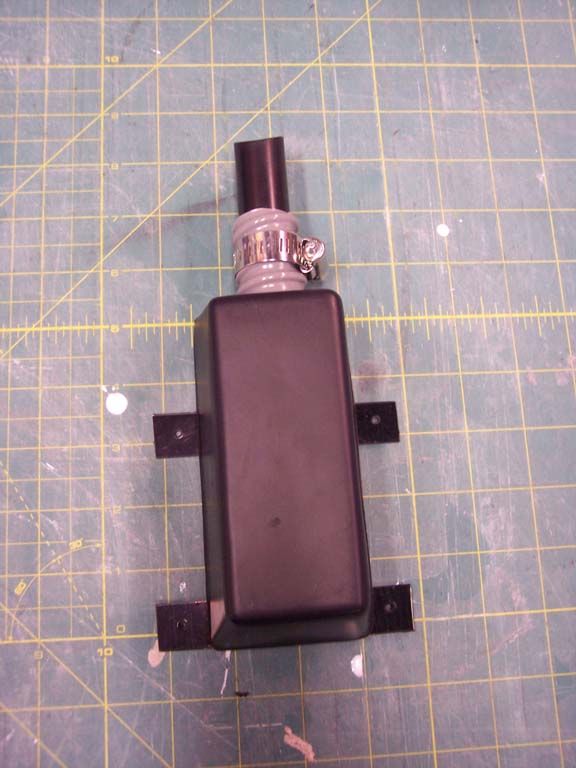
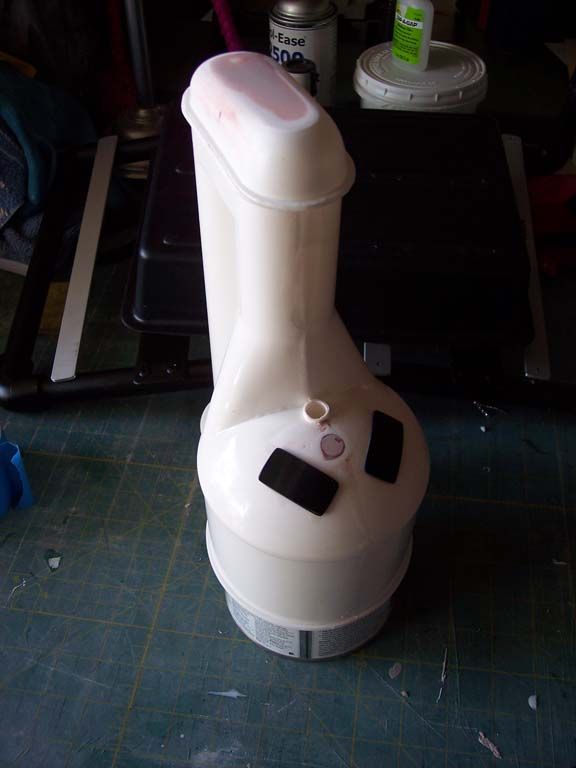
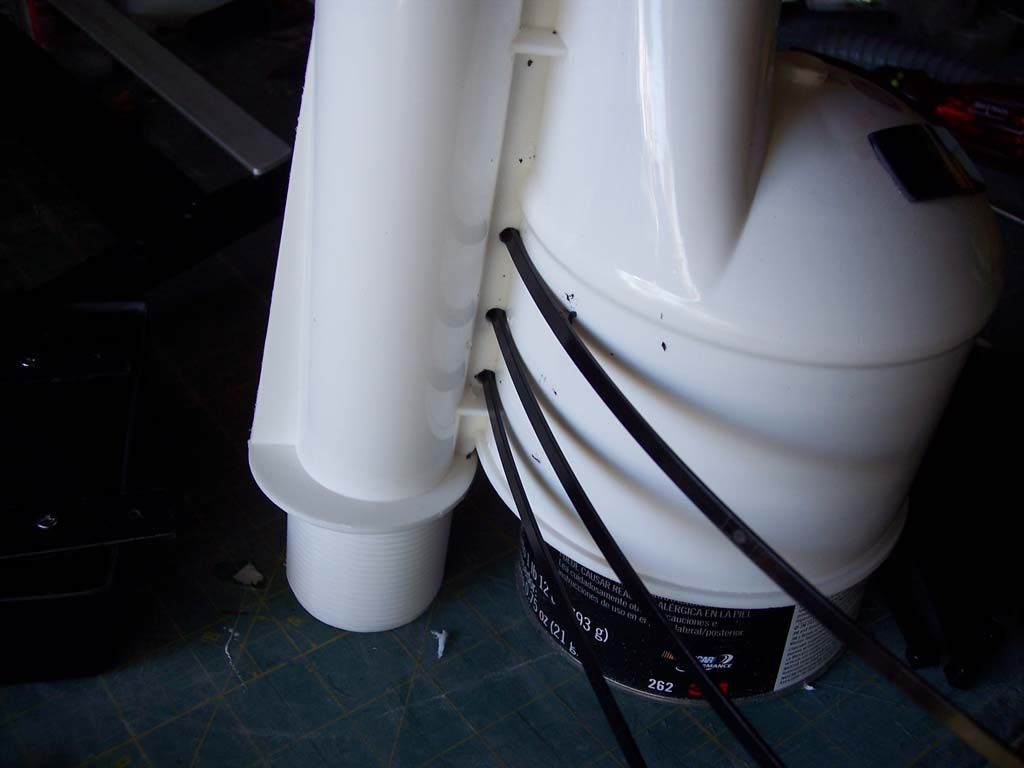
The pipe is 1" PVC that I had already. The length is about 7", not sure since I just eye balled it. The box itself is part of the Trooperbay pack kit. I would say it is about 2.5 x 6" and it is not square, more trapiziodial. I used black HIPS for the bottom and the "feet". The little hose type piece on the pipe is a drain hose for dish washers. This is the same hose I use for my X-Wing chest boxes so I had some pieces laying around.
I can give you actual dimensions later tonight when I get home if you want/need.
-
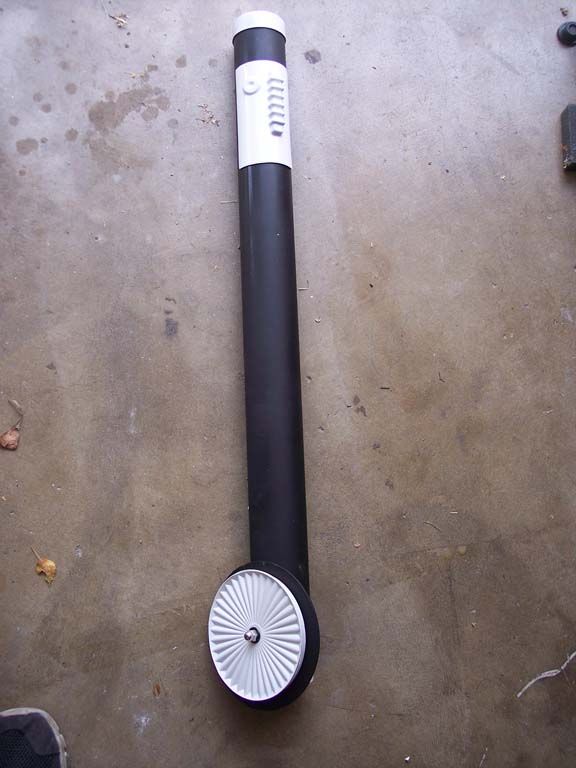
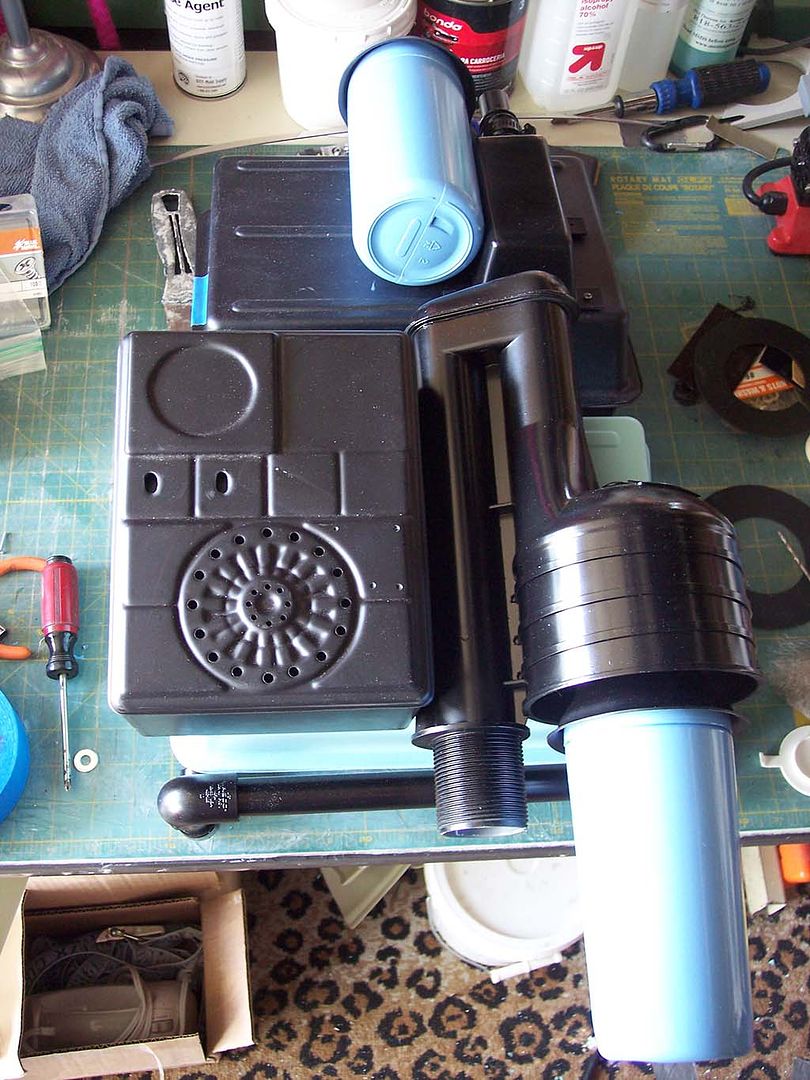
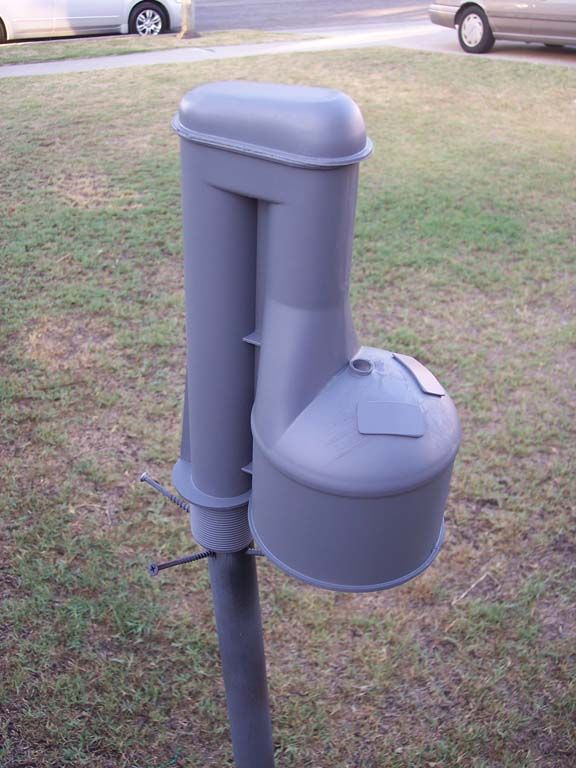
Just a quick little update. I have been working on armor the past few nights, but here are a few pics. The finished (mostly I think) Exhaust port....
And A few shots of it on my back just holding it. Looks to be sized right I think...
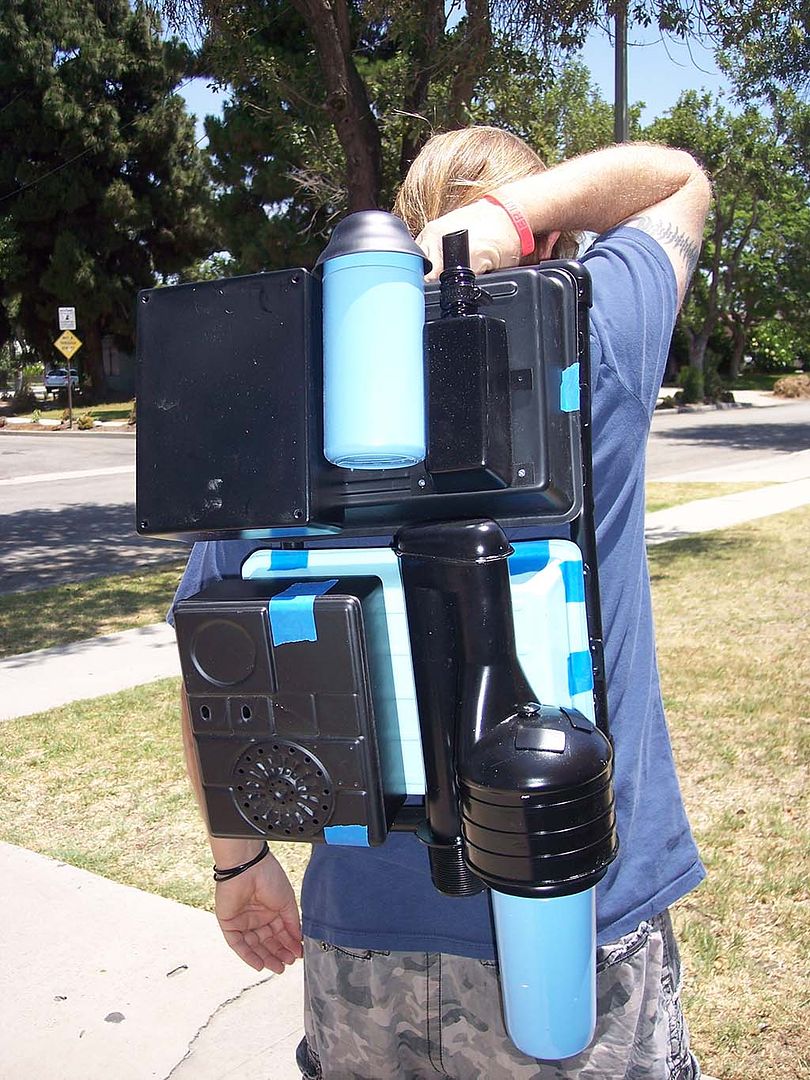

Incidentally, I used wood Hanger bolts to attach the Cistern. I thought I had pictures, but I will snap some when I take it off. I also have made the "shot gun shells" and painted them, just have not mounted them yet.
I clearly have two different colors of blue to. Have not really decided which "blue" to go with yet. I suppose whichever one is a closer match for S.W.A.T......
These are the hanger bolts....
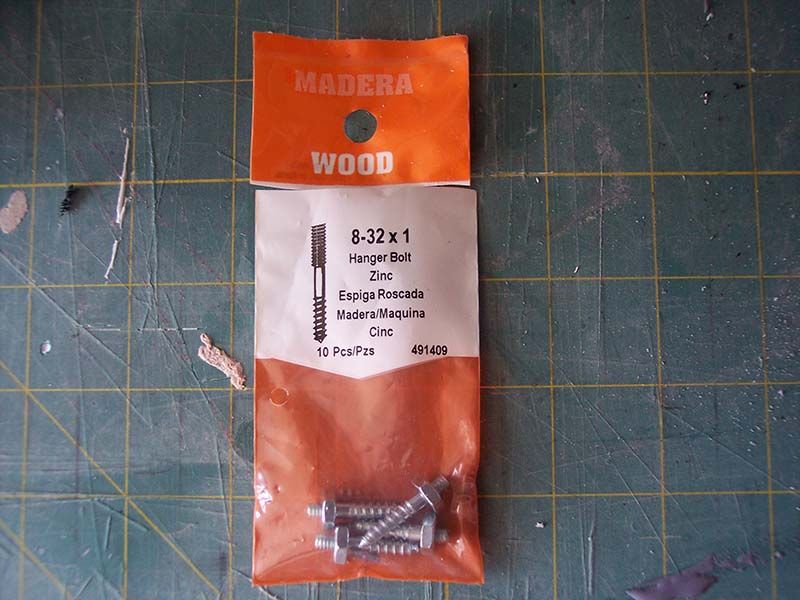
They don't come with the bolts, I had to buy them separately, I just put them in the same bag.
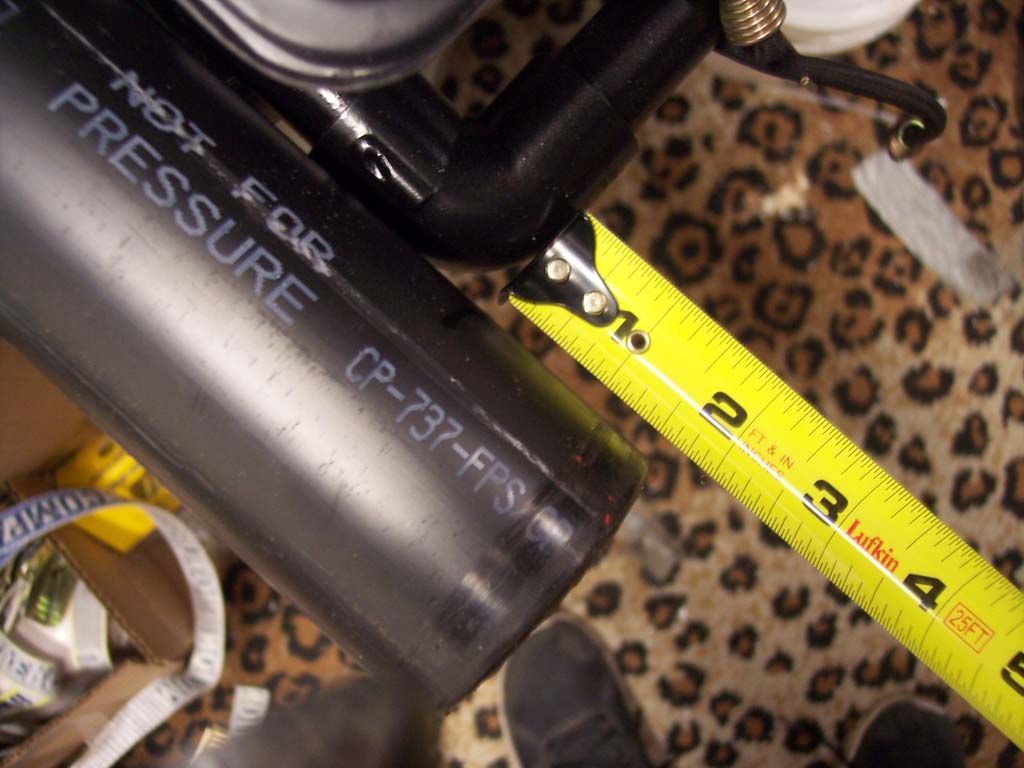
I bought a 10' x 2.5" PVC stick, but I gotta be honest, it's heavy, even cut to length. I like Panda's solution and may go with that.
I will likely be starting a build thread soon to since I am doing both at the same time more or less. I didn't really take any trimming pics, but I have been taking progress pics.
More updates coming soon....
-
Even though that sounds like a possible solution, it would be a fair amount of work. A slush cast would probably work. Does anyone have actual dimensions that they can post with pictures? It looks fairly easy to model and I can print one and go from there. I still do not have one of these. I am reluctant to order online from Home Depot since I have heard here that people order them and get the triangle ones instead....
Anyway.....
-
Now that Jury Duty is over, I can continue.....
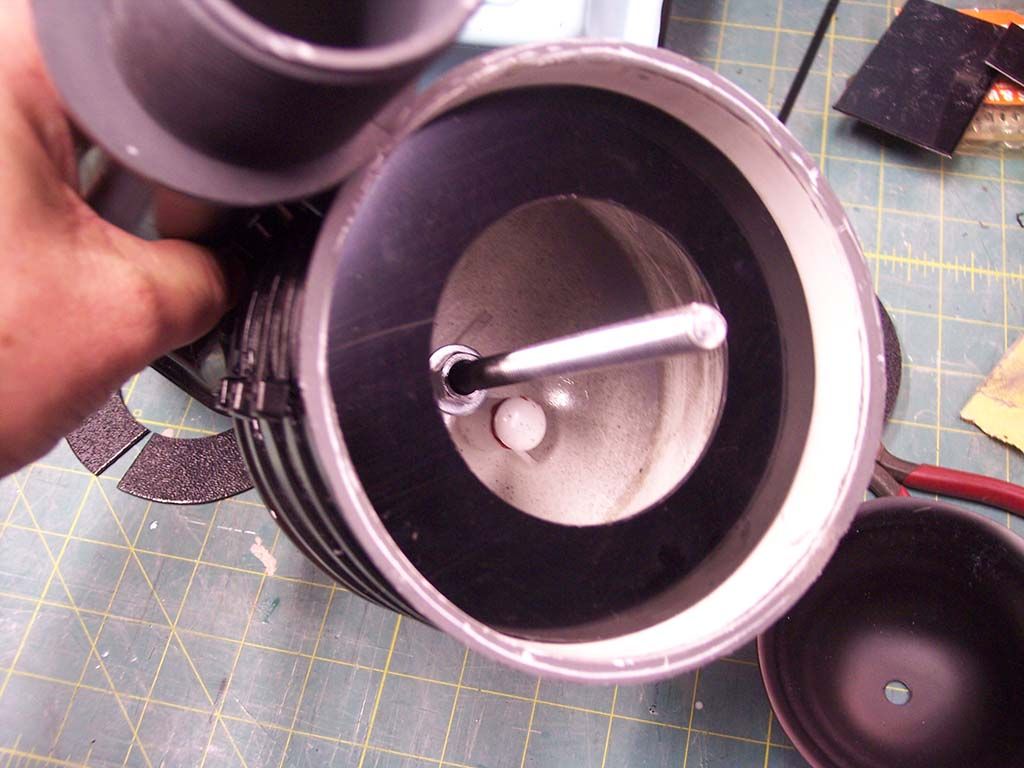
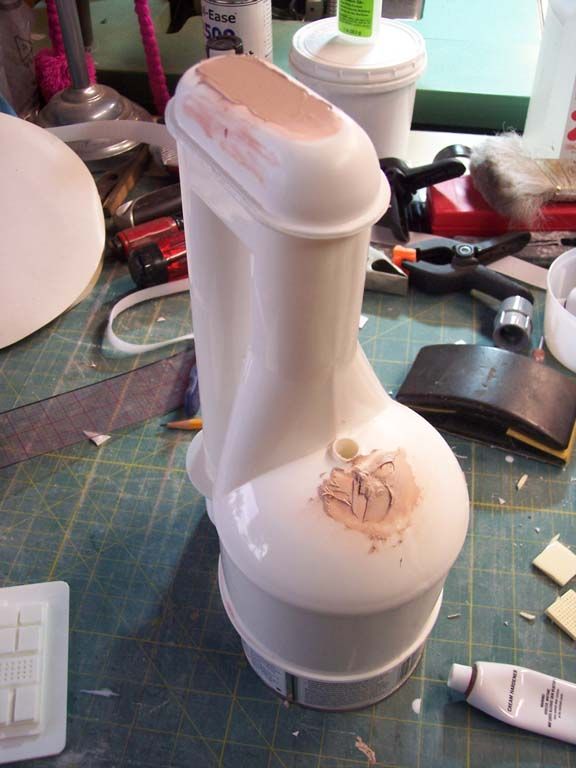
To finish up with the cistern, I bought an extra bolt and washer to snug up the carriage bolt and it keeps it pretty centered. I Also cut some strips to put inside to give my spacer somewhere to rest on. I try really hard not to glue anything! I want to be able to take whatever part it is apart without destroying it or having to drill out rivets....
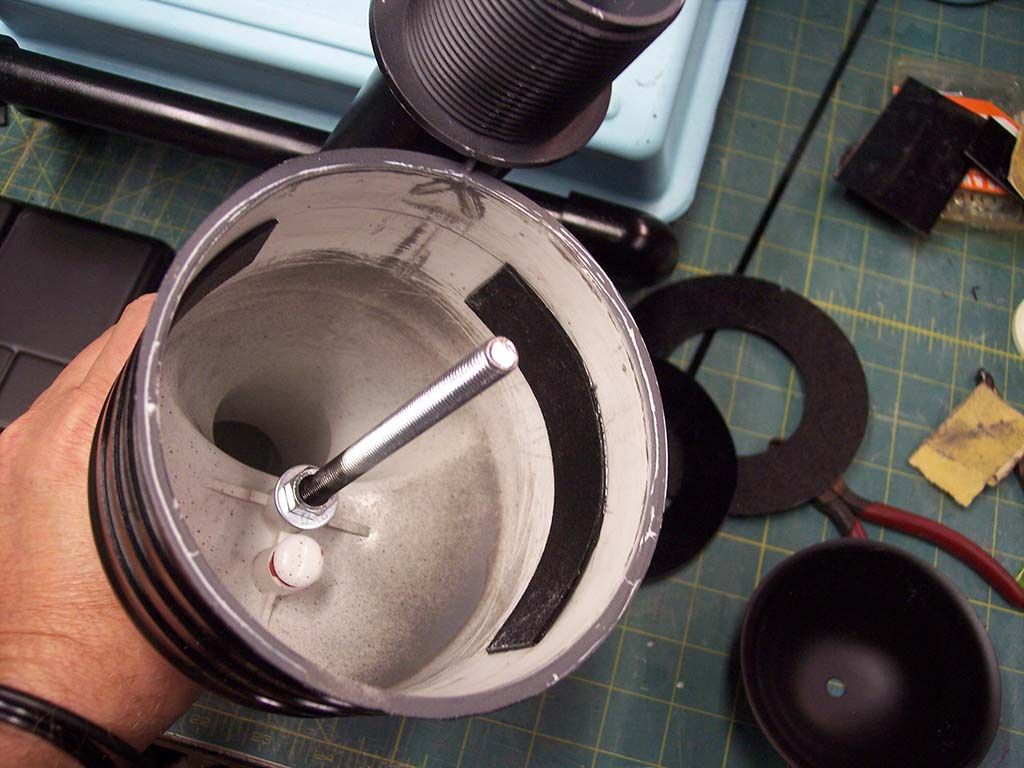
I also bought one of these that helps make round circles actually round. Measure, set, score and snap apart. For the middle of the hole I used a hole saw.
And it fits nicely
And here it is mostly done....
And here it is sitting in place...
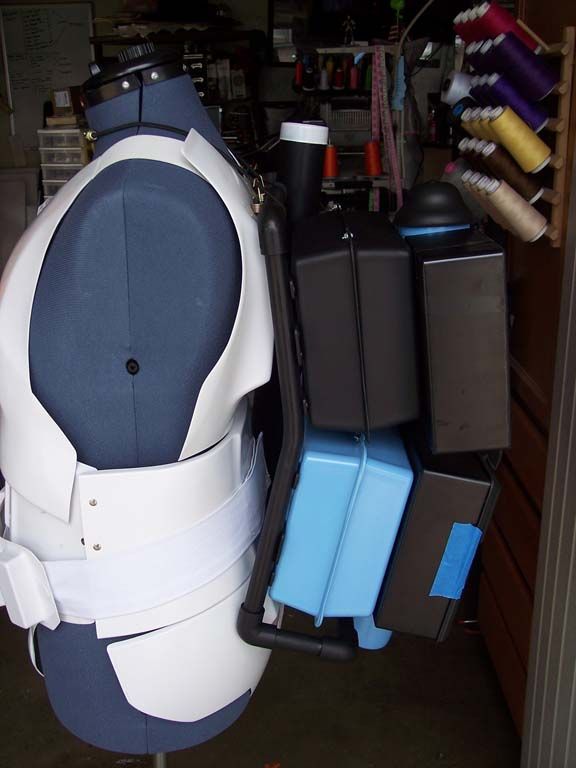
I took a bunch of pictures yesterday cause I bought another utility box for the upper left box. It's not as big as the actual boxes used and I am considering going S.W.A.T. with it doing "Move Along" so not sure how much that will hurt me, if at all. I have the little "shotgun shells" made and painted just not mounted yet. I'll post a few more cistern pictures on how I chose to mount it to the box. Again, always looking to mount with the easiest removal if necessary.
-
Then perhaps a slush cast mold? These are hard to find now, I still don't have one. I have been considering modeling it and printing it out to cast. Does anyone have an extra? Or better yet, has anyone modeled one I can print?
-
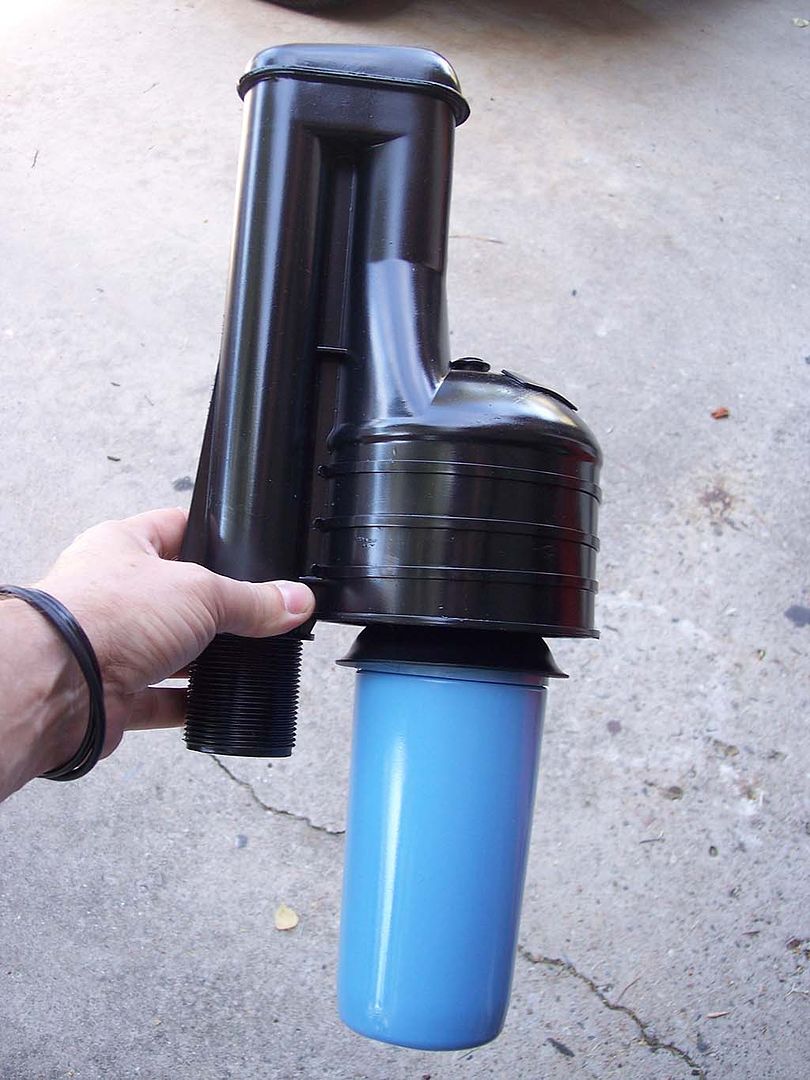
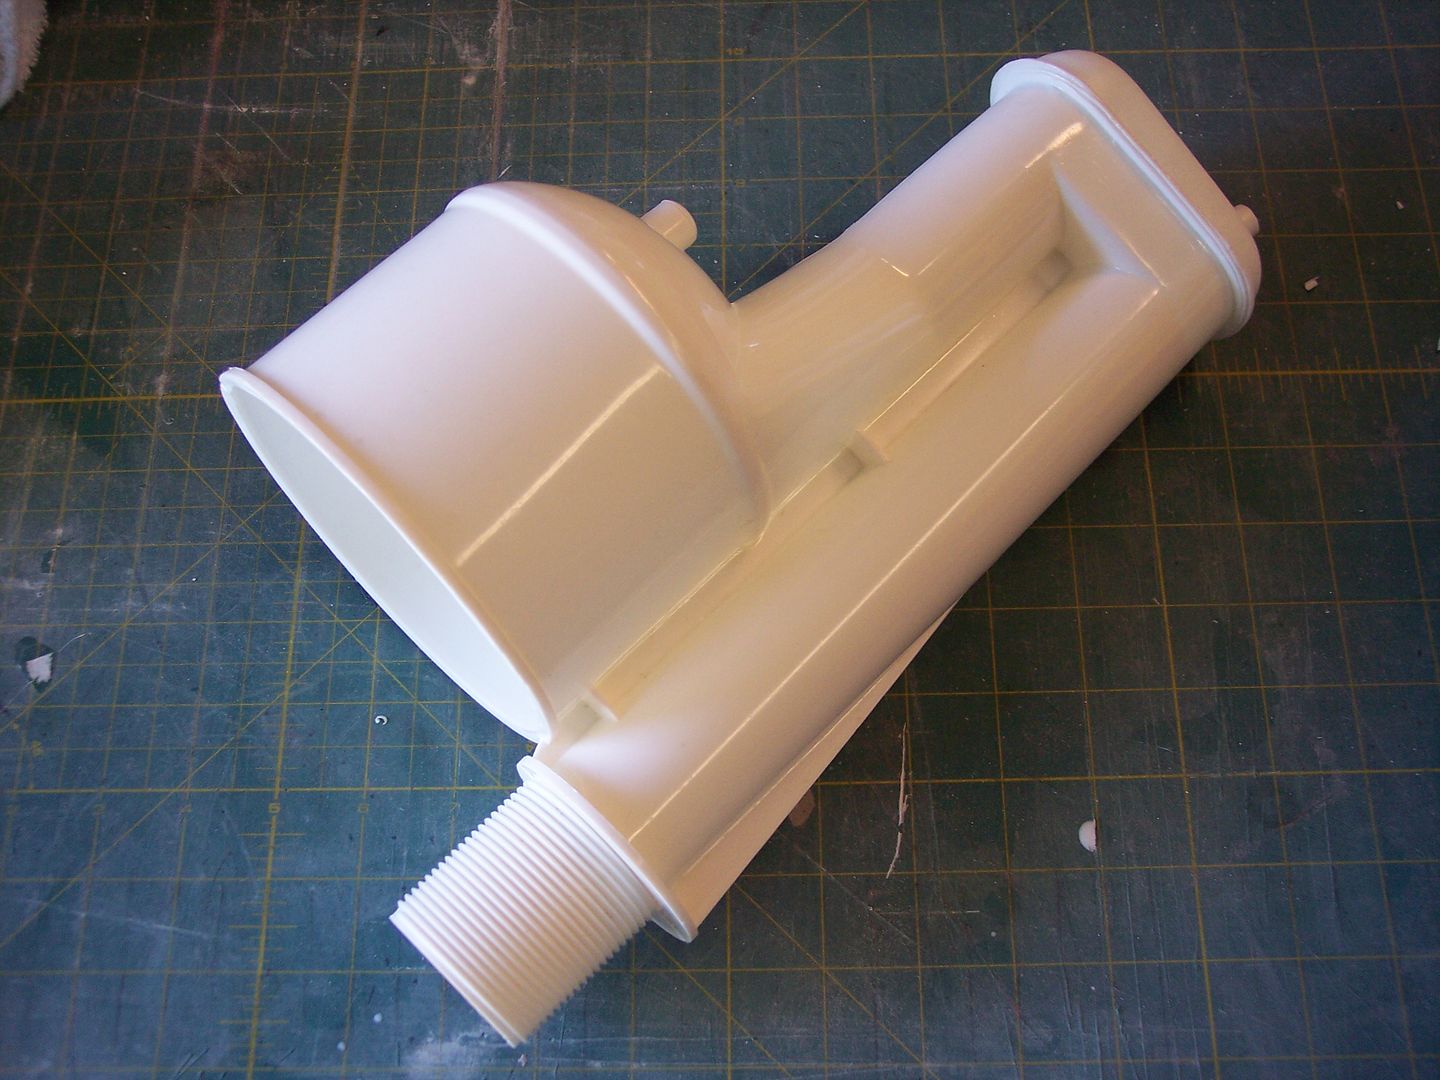
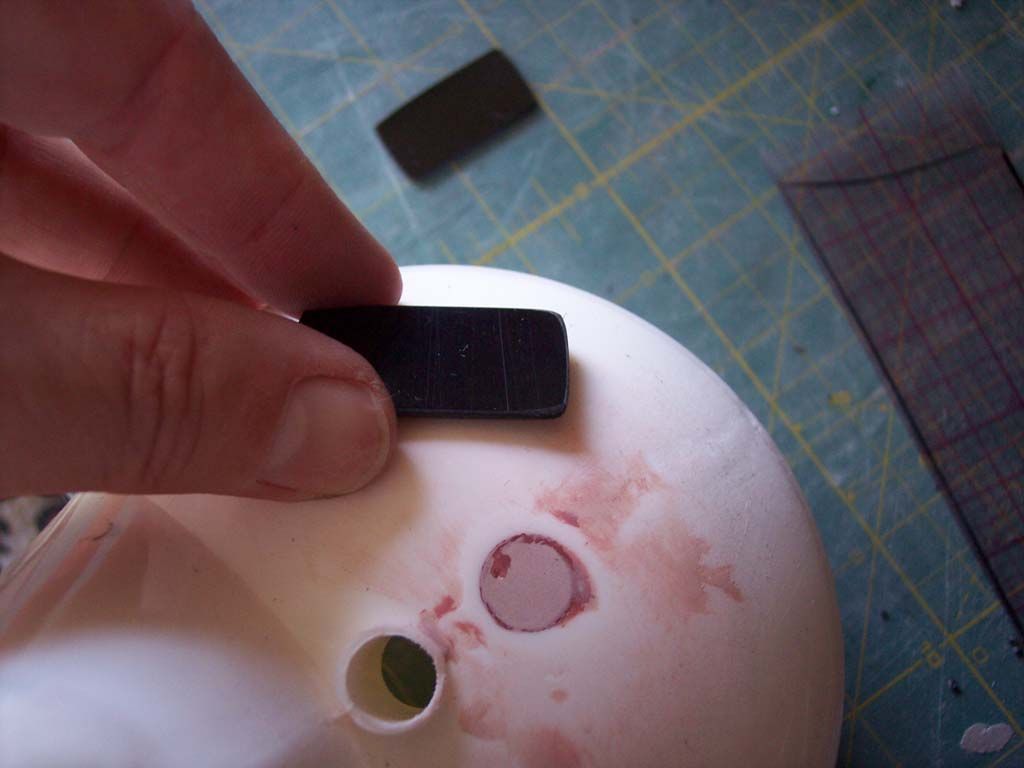
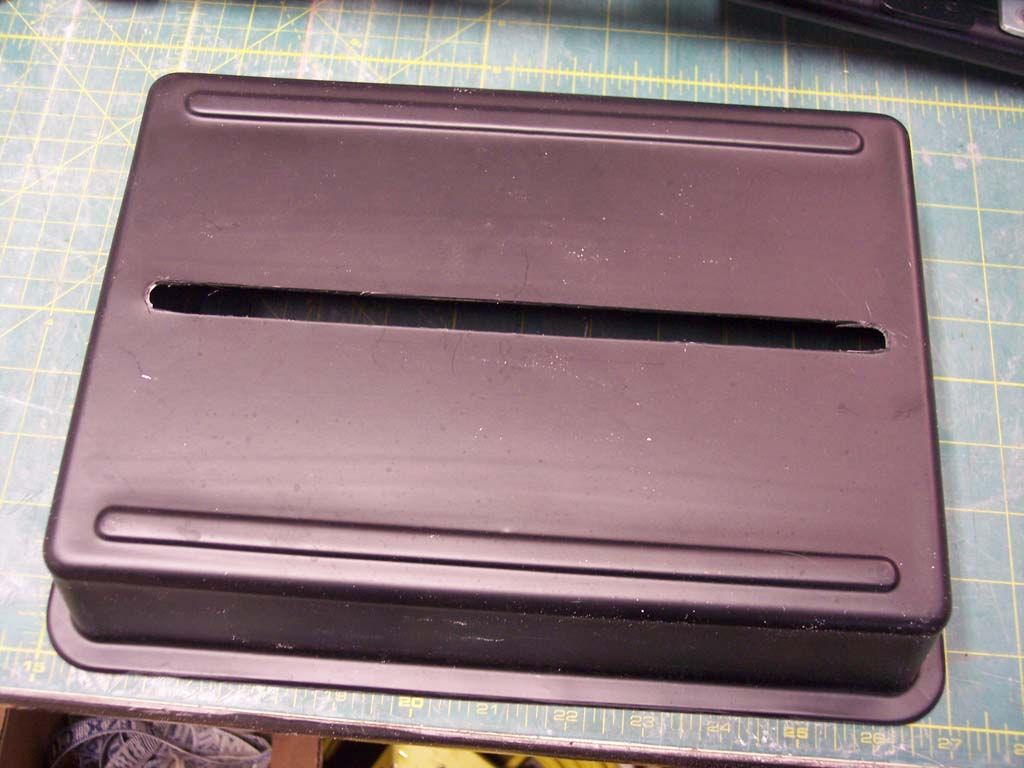
So next up is the exhaust port. This thing seemed to just take the longest to make! The Trooperbay kit comes with a little vac formed box with no bottom. I cut a bottom for it and began building it.
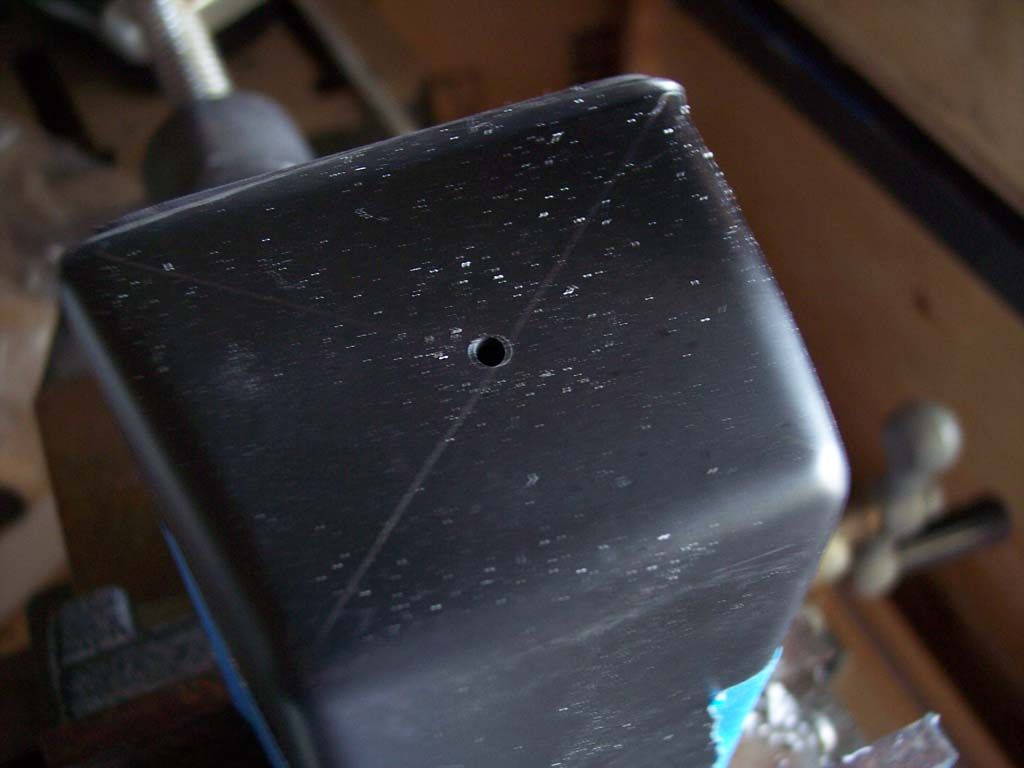
I put it in my vice, drew an "X" to find the "relative" center and drilled a pilot hole
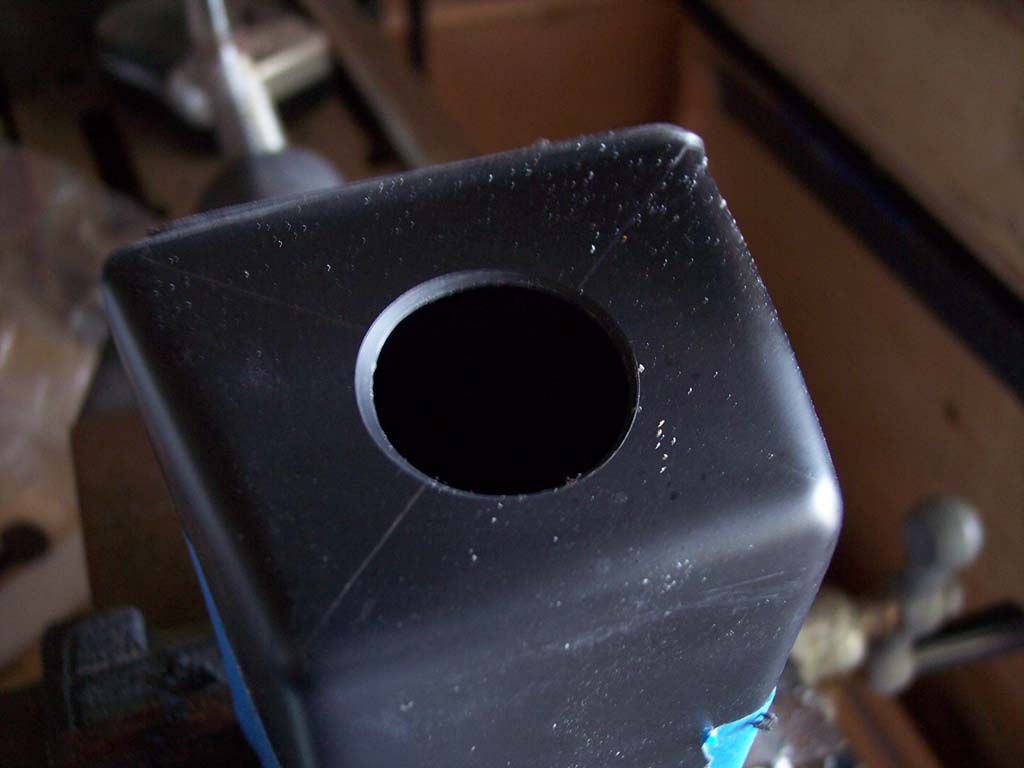
Then drilled the hole out to size.
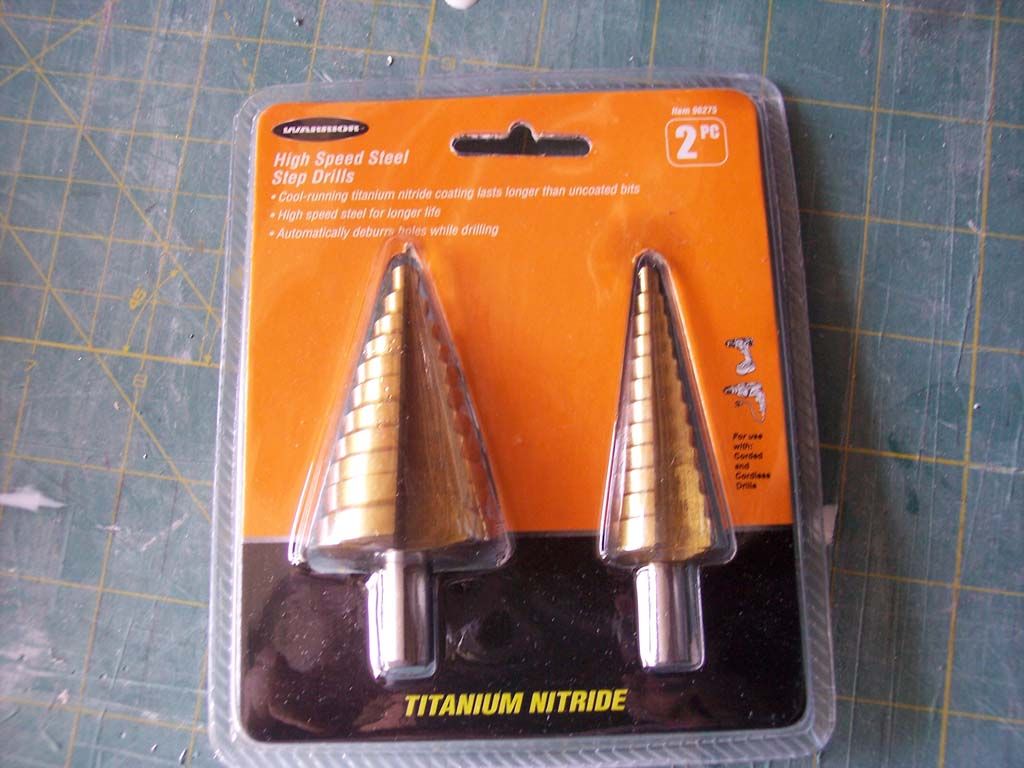
I bought one of these, not sure how I have been able to do much without stepper bits....
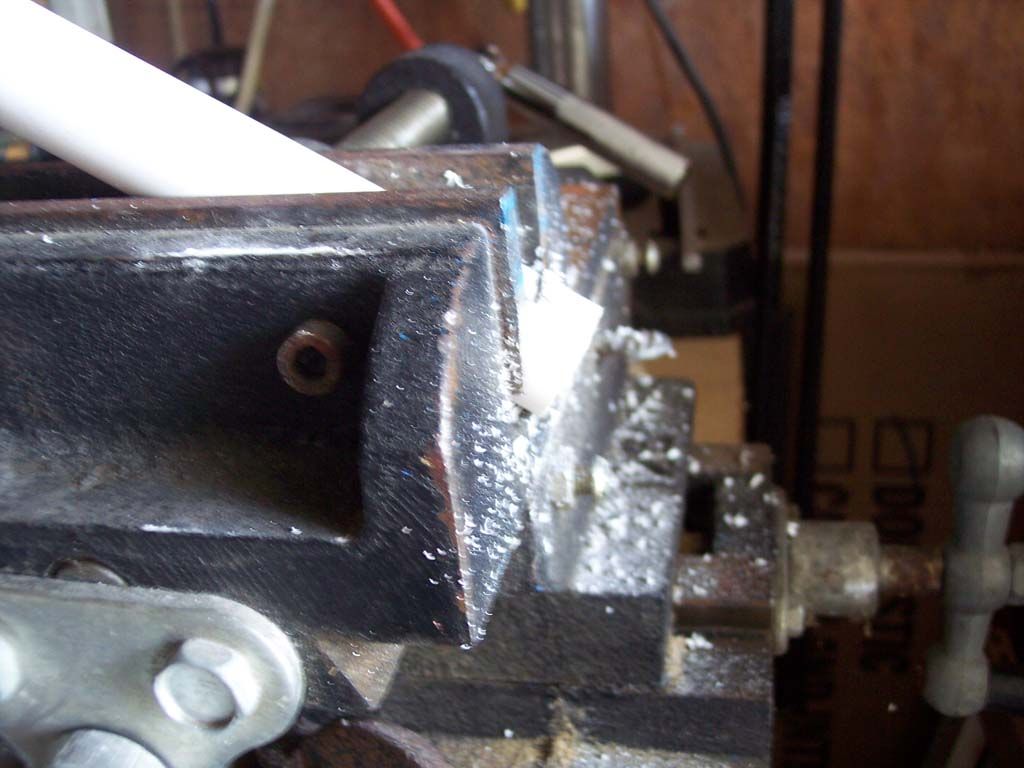
So I cut a piece of 1" PVC I had laying around, made an guesstimation on the length and cut it.
Then put it in my vice and "eye balled" a angle and cut it with a hack saw.
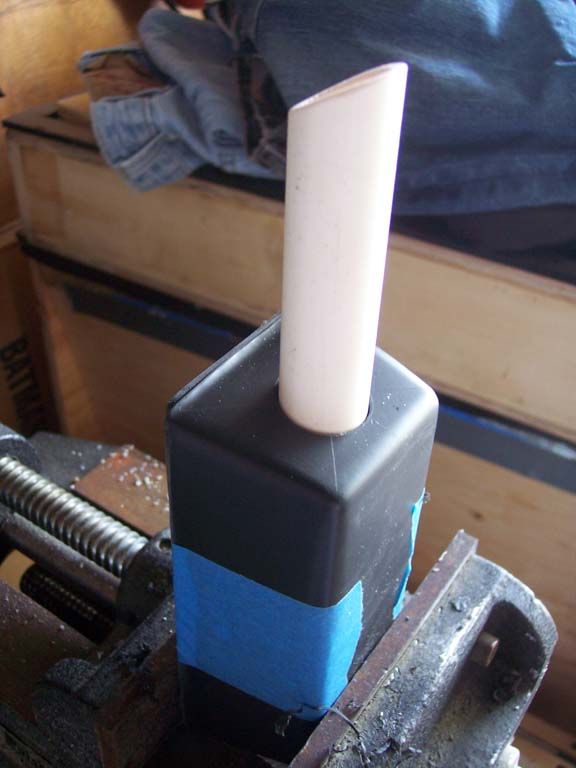
Then gave it a little test fit...
So in order to attqach my back, I make these little step blocks I use for my X-Wing chest boxes. Glued them in with Zap a Gap and they don't move. I then just went ahead and hot glued the 1" PVC I cut in there, and closed it up.
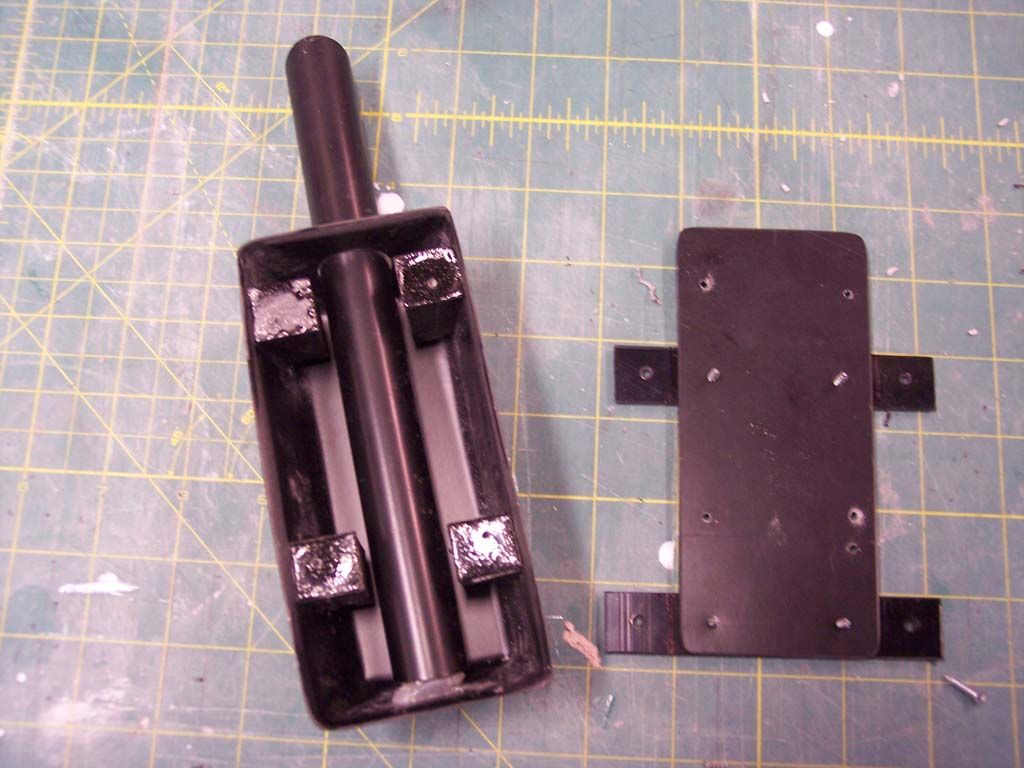

I have since painted it all black to match everything else, but my picture upload failed last for some reason. The only thing I have left to do with it is cut the little triangle pieces. Not sure if they are a requirement for PO, but I would guess they are for S.W.A.T.???
If I am putting up too many pics and being too wordy, let me know. I am a rambler as you can see, but it is all in the details
Next up: Gordon's Cistern updates....
-
If someone could get one or a few, I could cast it. I have two vac tables and am building a real one that will hopefully be done later this year. But this would be relatively easy to do. And if anyone has seen my pack build thread, I still don't have this item yet.
Anyway,
-
Yea, I know there's some guys who make the radio faces and they look great, just a bit pricey for me at the moment. We make X-Wing costumes so I have extra plastic laying around all the time. I downloaded the radio templates someone made, sorry whoever you are, but they are awesome! I was thinking about making my own from scratch. Just depends on how I feel once I finish most of it. Pretty much the only thing I don't have right now is the bee stinger. I have a 3D printer and also considered printing one and slush casting it. Plus, printing the dials that I don't have for the radio and doing the same.
On top of all that, I am building two sets of armor. this MTK is for me for my sandy, but I am also building an ATA shiny for my wife. I do all this in between doing the X-Wing stuff so when I get to the point where I "need" something, my thoughts on scratch building may change
This site is awesome. Hopefully I too can contribute something useful here as far as my build that will help others as I have been helped.
-
So to follow up, and I do bounce around a bit, I picked up one of Gordon's cisterns and did the usual mods on it...
I cut some little plastic pieces from scrap that I have and added those details...
And drilled some holes for the black zip ties.
Ready for primer...
And here is a pic of it just laying in place. It needs to move up a little higher..
-
Hey everybody!
I have been lurking here for quite some time and reading like crazy. I picked up a MTK kit last month and have begun trimming it and I am going Sandy with it. While I am looking for some split rivets and stuff, I decided to build the pack at the same time. I got the Trooperbay back pack kit and have been working with that.
I originally started with Scootch's awesome pack build and bent my bars and blah, blah...

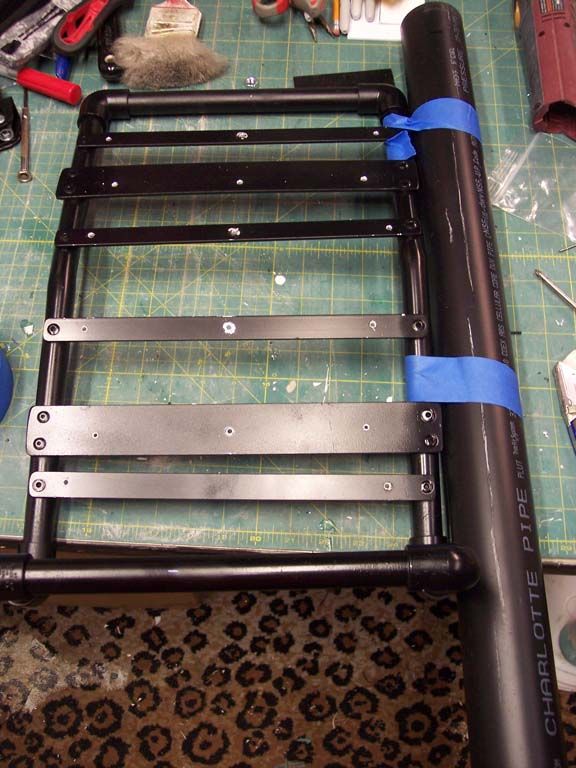
But, after working with the tray's I wanted to have a little more support so I added some additional bars...
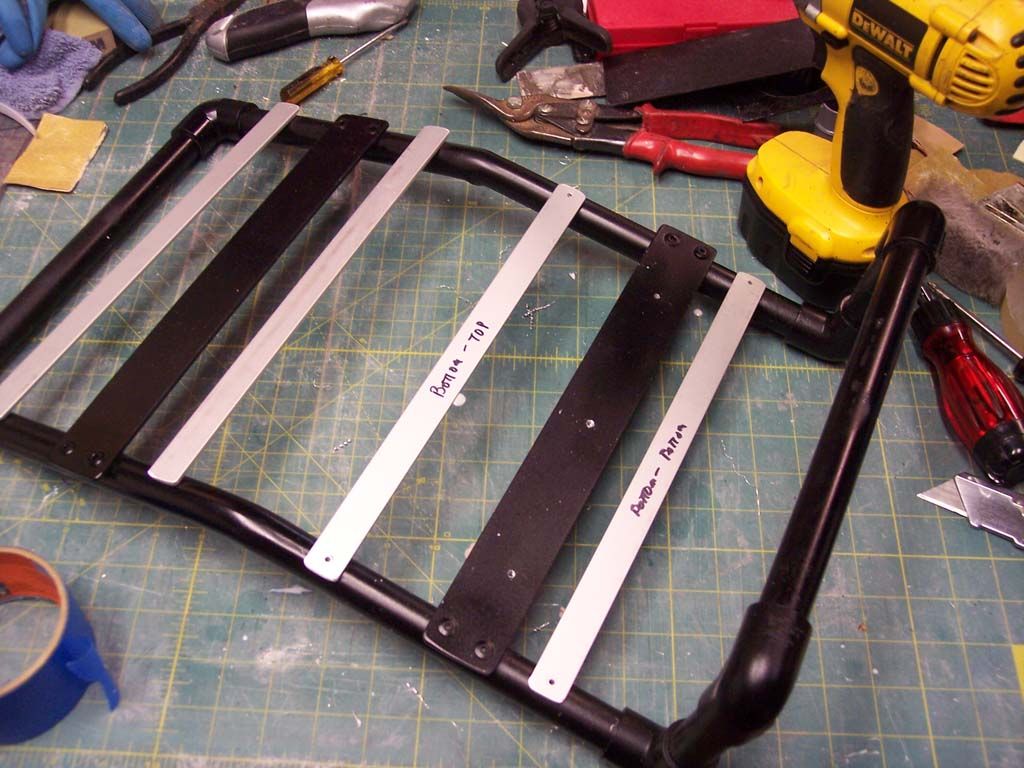
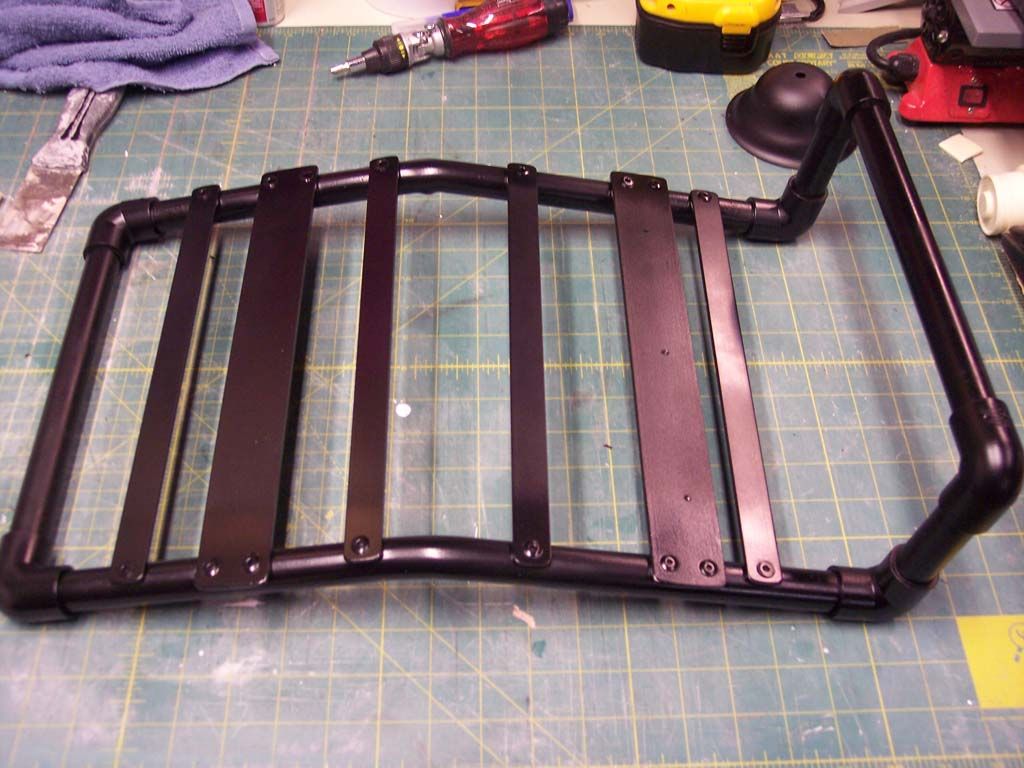
I arranged them so they would fit in between the slots in the bottom of the tray, although I had to cut the middle one out in the top tray. I riveted the bars on, but I prefer nuts and bolts for everything else so if I ever have to, or want to, change anything out, I don't have to drill out the rivets. So I am using nuts and bolts to secure the bottom trays to the frame. Have not decided how to secure the top trays yet, gotta look at the Move Along pack as I am seriously considering going S.W.A.T. with this build
More pics to follow.
-
Hey Everybody!
I have been lurking here for some time now and now finally I am introducing myself! My name is Gary and I am in Long Beach CA. I am a long time 501st member and SCG from back in 2000, but have been in-active for sometime. I picked up some ATA armor back in April and have begun the process of trimming. I also scored some MTK armor and I am going to make that my sandy
and leave the ATA a shiny TK for my wife.Anyway, I plan on starting a build thread. I have already started my backpack build and am planning on going for SWAT with "Move Along" I will start posting build pictures soon.
Thanks!!!!
TD369


TD369 Pack Build
in Field Backpack
Posted
Sweet, thanks Jeff. I got your message with those the other day, sorry I have not responded.
I have started to model this in 123D Design. I will post some pics of it when I am getting close. Feedback from everyone would be great After watching the original Laser Disc rip to DVD, you can see it pretty well in the opening Move Along scene since the stupid Ronto is not blocking it. They do appear to have a taper very similar to the canteen. Once I get mine shaped, I will add that taper and see how close I can get it to look like this one: