Leaderboard

Popular Content
Showing content with the highest reputation on 09/29/2020 in all areas
-
This one's from RS.1 point
-
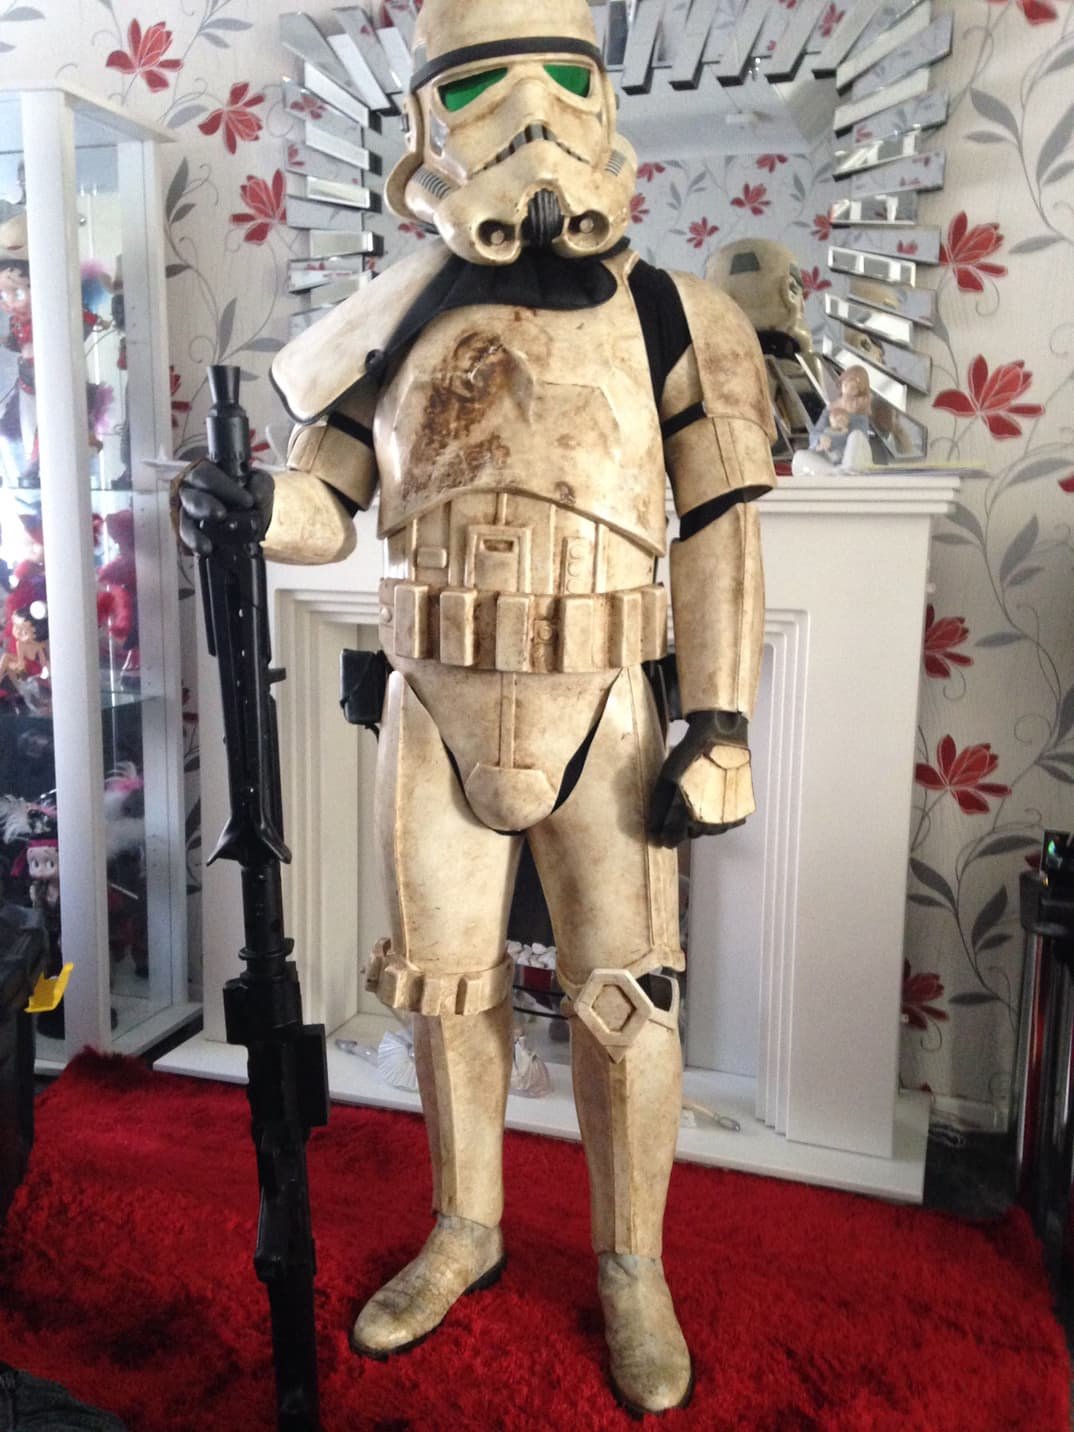
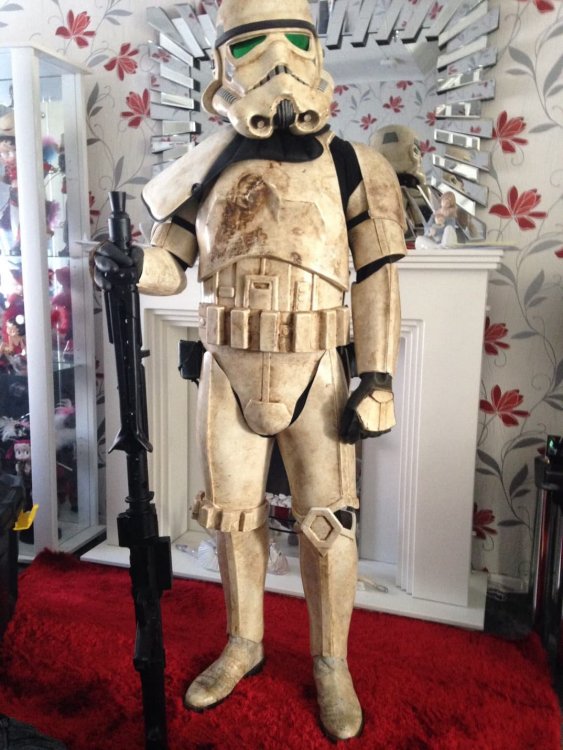
Hey Glen, Yes, much better photo there! Thanks! Dremel will take longer for bigger areas. It will be faster to cut larger areas first, followed by Dremel to finish and sand the areas smooth. Dremel is good for tight or curved areas. I end up with more white ABS "dust" than anything else when using my Dremel. It melts, but not as much as you think it will. Test on some scrap plastic first, and you'll see what I mean. I'm seeing a few fitting adjustments that you might want to take a look at. I've highlighted the areas in the photo below. 1. Your belt is off center. The center button should line up roughly where the middle of the ab is (green vertical line). A little rotation of that should do the trick! 2. Your thighs are rotating out. The fronts of the shins should line up with the fronts of the thighs, and currently, the thighs don't line up. This is because the thighs need to be trimmed down. Once they've been trimmed to fit correctly for length, this issue should resolve itself. (tips to do this below) 3. Your bicep looks like it's kind of jammed into your armpit, but this might be the angle of the photo. You can always trim the bicep parts from the top to allow for comfort. 4. The top backs of your shins can be trimmed for mobility and comfort. As they look now, you might end up with some fairly decent armor bites back there! The photo below shows the kind of trimming that is typically acceptable for TKs. I've trimmed the backs of all of my TK builds. Don't trim beyond the ridge of the parts. You can trim in a more square cut or a curved cut- your choice. I used a pencil to trace initial cut lines, Lexan scissors to cut the bulk of the areas out, then finished with the Dremel. Here's a pic of what mine look like: Now about thigh trimming. Here's how I do mine: Put on one thigh with your torso. Using a pencil, you're going to mark along the areas of the thighs where they hit the cod. You'll be essentially tracing the cod where it overlaps on the thigh. You will be removing more material from the inside areas of the thighs than anywhere else. Remove the thigh and trim conservatively at the pencil line. Try the thigh on again, mark where the cod hits the thigh as you move around (you may hear it or feel it as you walk), remove the thigh, trim, repeat until you notice very minimal clicking of the cod/thigh. Repeat with the other thigh. This is a tedious process, but it really works nicely to shorten the thigh and also maintain some of the original lines of the tops of the thighs. Below is a pic of my RS Props TD (converted from TK). Remember, I'm 5'4", so I had to remove quite a bit from the tops of those thighs. I even recreated the left thigh notch. That being said, I removed very, very little from the outer thighs. Bottom line: use the cod as your guide for trimming. Once the thighs are trimmed to move a little more freely around the cod/butt plate area, the thighs will have less of a tendency to rotate outwards (that cod is currently pushing on them). Hope this helps!1 point
-
218 Officers have now received their requested Certificates. *** Take care and Stay Safe out there, Troops! ***1 point
-
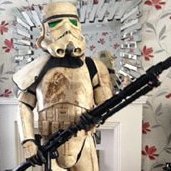
Hi Christine, thanks for the input. I have attached another photo, hopefully a better quality one. I do have curved and straight snips, but if dremmel is faster without melting I would be happy. Although a little sanding would be fine to pass time. Thanks again, Glen
 1 point
 -
Hey Cesar reporting! It has been awhile since I posted my “Sandie on the Works” Still weathering, looking and digging for info, of how to do things “The right way” specially since I am shooting to go as Move Along Cap, and why? I guess he is a total challenge!!! Here are some of my picture progress, Please don’t mind my pet! I found him lonely, thirsty, and hungry! Now he is part of me!!!


 1 point
 -
Sockets, feet, and an antenna were located this week (Amazon FTW!). Planning to install them before taking pics for PO.1 point