Search the Community
Showing results for tags 'bfg'.
Found 4 results
-
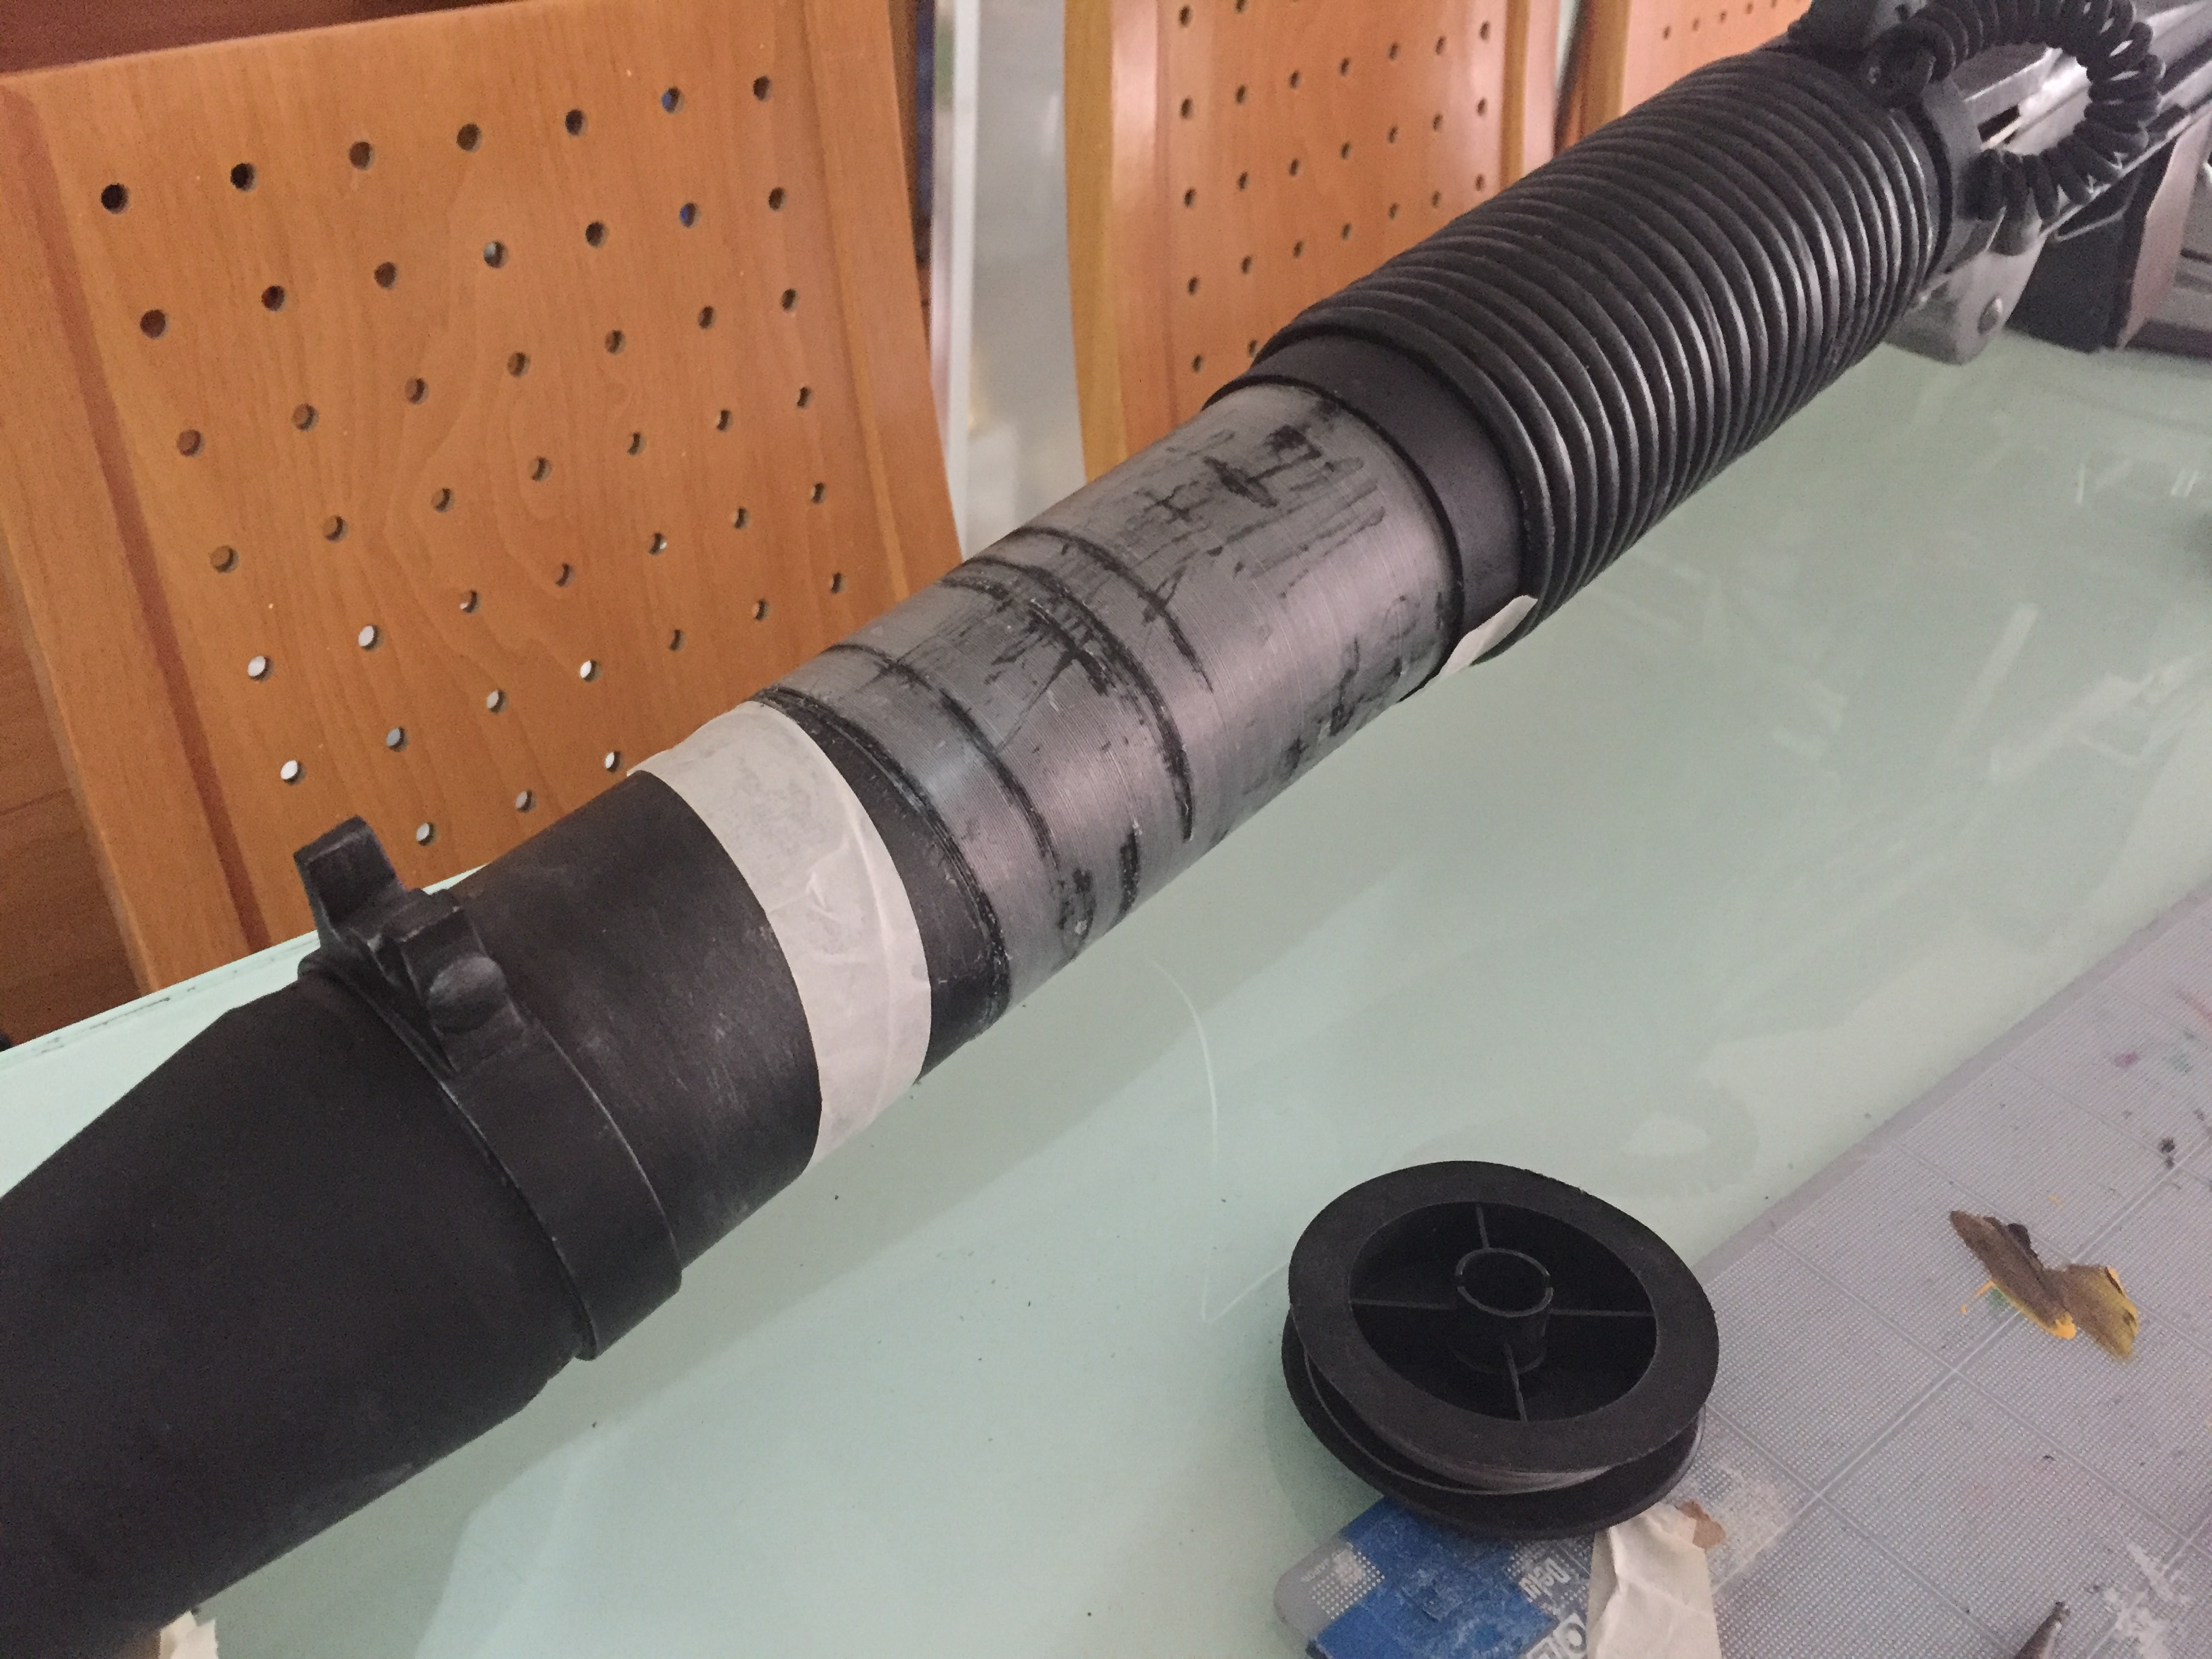
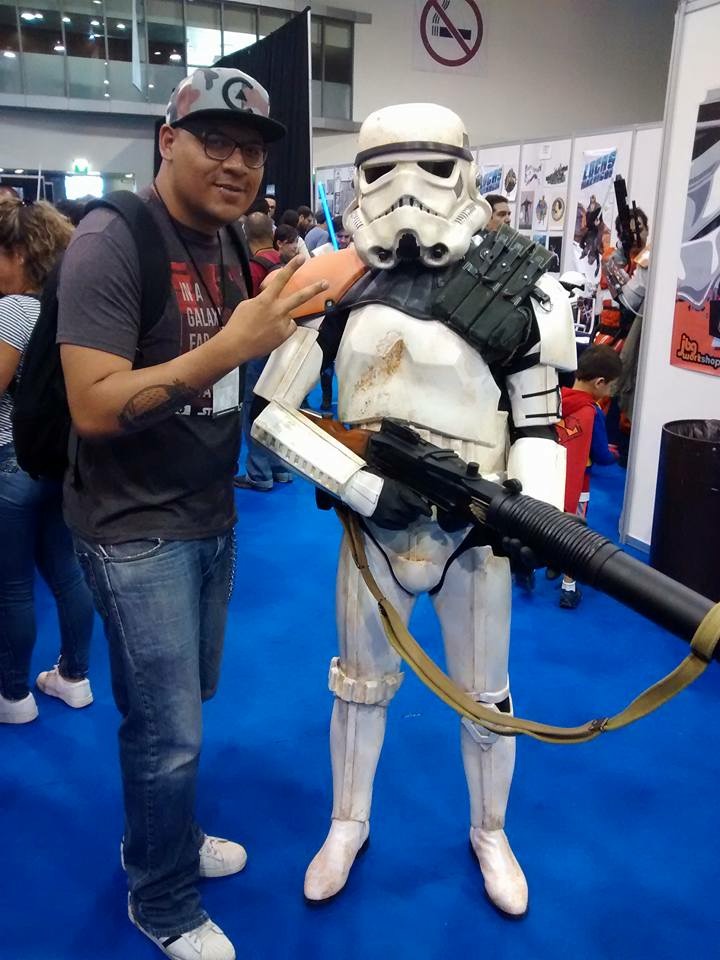
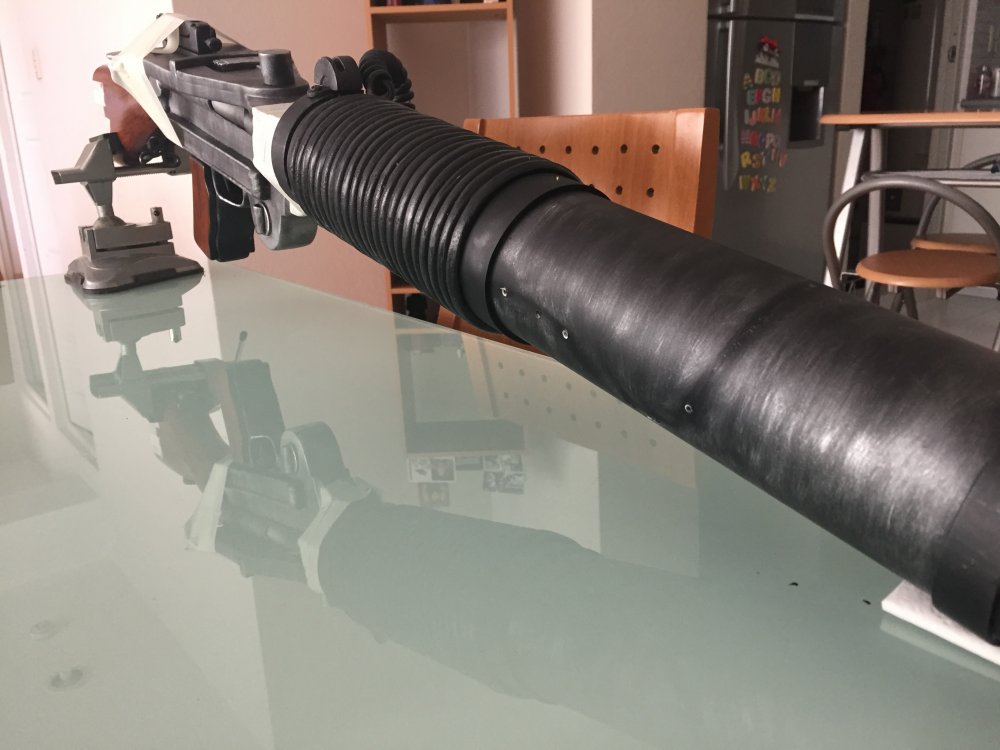
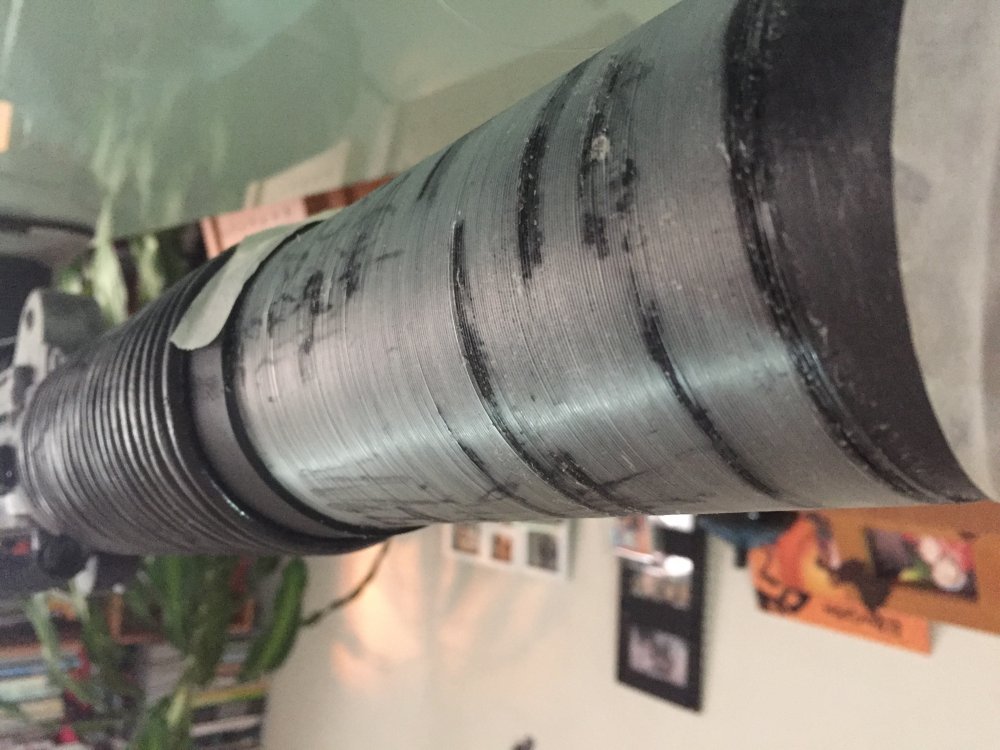
Hey Everybody! So... a new cycle has started for the MEPD under a new DL and a new energy is flowing among the detachment. This sounds to me like a great opportunity to start working again in my delayed projects awaiting on the work bench. I will be building, upgrading and finishing various projects, including new weathering and adding my real hegnstler counter to my E11, finishing building my ANOVOS armor, finishing my TK replica armor, building my Gino and TM buckets, and... upgrading my T21 BFG! For that, I will be adding the ribbing engraving to the barrel using nylon thread, adding greeblies, upgrading some details, adding blue wire and finishing the weathering and ageing. So... this is where I started: This was a commission to a local artist/sculptor/prop builder... From there, I added the slings and into my first troop with it. But I was never really happy with it. The size, shape and diameter of the barrel, specially at the end, was not what I expected. So I modified it to make it more similar in shape to a real gun. I also added some parts inside the barrel and on other places... Unfortunately, I can't find a picture of the mods or the process. Then, I also added weathered it and added the elastic plastic cord, and proceded to make further upgrades. Now, I finally started the process to fully finish it. This is when I first took some parts off it: And this is how it is going atm. I do have one doubt, and if anyone has any idea, it will be more than welcome: How do you guys attached the greeblies over the nylon thread so that the screws do not cut it and ruin the whole work? Will try to work on this, even if slowly, to finish it soon. Progress will be shared and pictures posted. Saludos.


-
Got started on my T21 build while I'm saving $$ up for a set of armor. Finally got a few pics to get a build thread started. I'm doing a scratch build using Pandatroopers templates and lots of inspiration from all the build threads I could find here and over on the FISD. While I’ve been at it I spent a lot of time looking at threads on builds and what was available out there as far parts and pieces. I noticed that it’s pretty much feast or famine when it comes to the T21s. Either you go all in and purchase an awesome Hyperfirm or ready built blaster from other members who do great work, or you’re left on your own to make all the parts from scratch. I love making stuff from scratch but I can see the advantage to having some things you can purchase if you like to save a lot of time. So with that in mind I started doing molds and resin casts of most of the time consuming detailed parts. We'll see as I go along, but my thought was that if it turns out like I imagine it will, I'll offer up for sale some of the parts I'm making to help people have a sort of "kit" for those parts. I think it'll save a lot of time and work for those who'll utilize it. Let me know your thoughts on this. Although I've got a ways to go before that. But I'll start my build thread here and go from that. Thanks for looking! -------------------------------------------------------------------------------------- Obligatory stock shot Starting the side details Working on the ammo tray Test fitting the rear sight Testing the tray on the stock Got some stock shaping done Test fitting most of the side pieces together with the tray on Getting set to make a mold Mold looks pretty good:) Time to try a cast Cast of the side detail panel Cast of the ammo tray That's all for now. I'll update more as I go along. Cheers! Roger
-
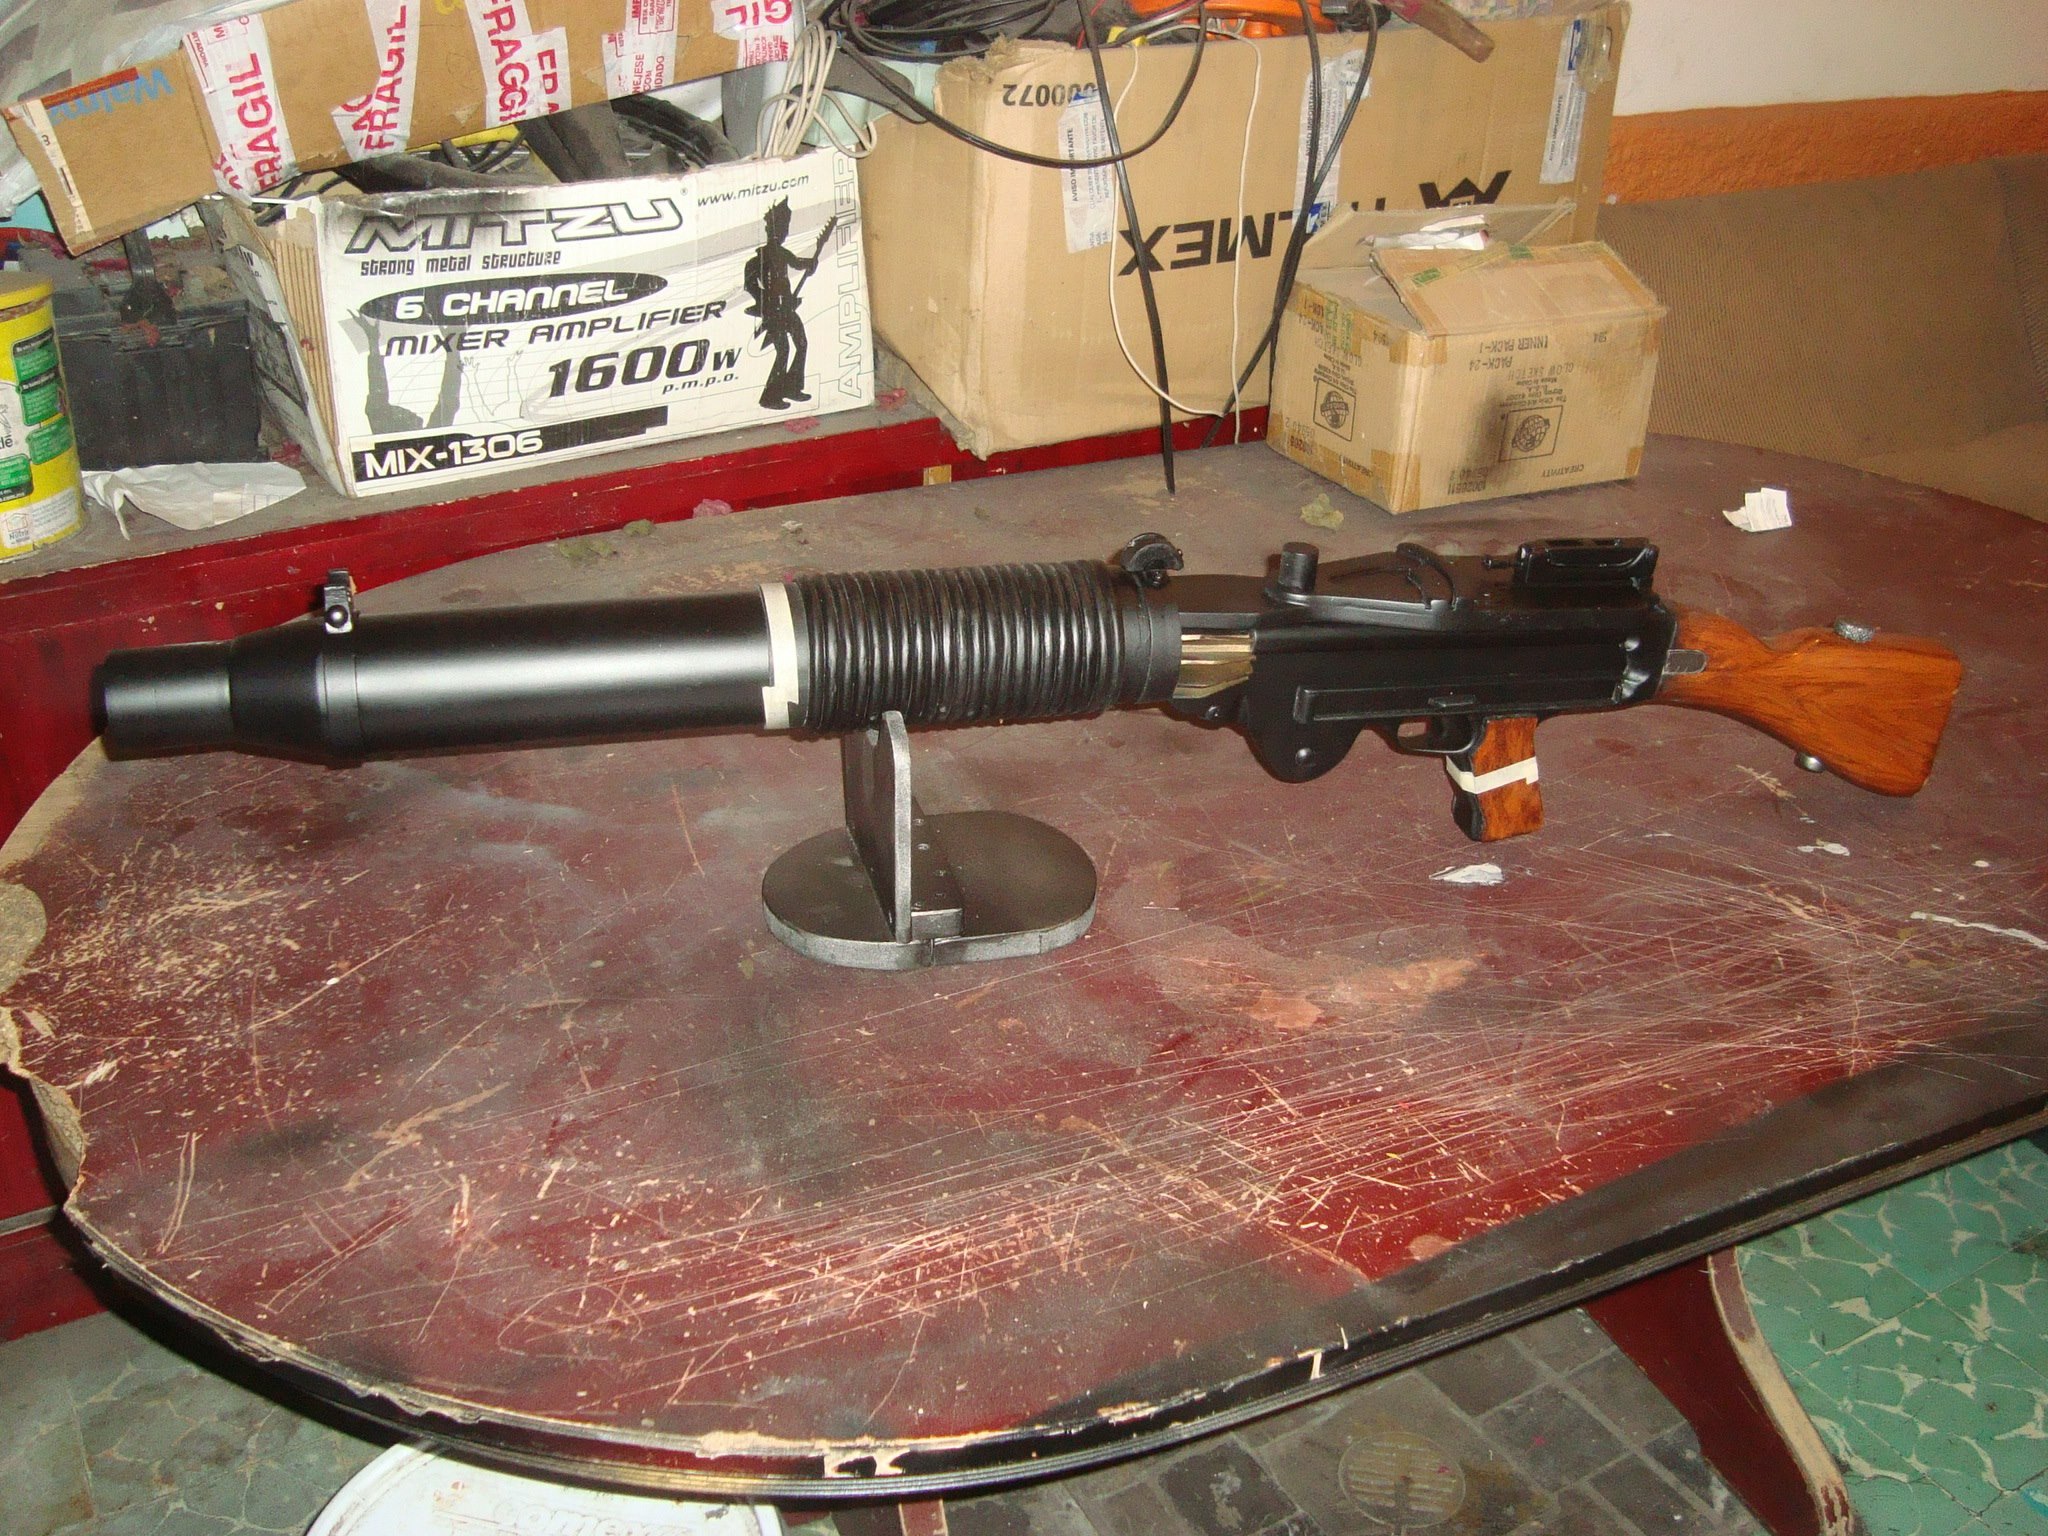
Fellow Sandies, After many hours spent in Home Depot and my garage, I have finally completed my BFG. I followed the basic construction using PandaTrooper’s tutorial and template, however, I did make a few minor modifications to personalize mine. Because PandaTrooper’s tutorial was so good, I will not repeat the steps, instead, I will focus on the minor changes I made to personalize my T-21. I wasn't going for screen accuracy, just wanted to personalize it a bit. The first place I deviated from the plans was with the grips. 1/4″ wood was used for the receiver parts and the stock. I tried cutting the grips using the 1/4″ wood, but they felt a bit “chunky” when I test fit them on the handle. I went to Michael’s craft store and picked up some 1/8″ wood. While the 1/4″ stock was being glued to the body, I worked on the cooling fins. Didn’t do anything different here, just providing the link for the cooling fins template, as it is located in a different part of PandaTrooper’s tutorial on MEPD.net I also changed out a few of the screws. I really liked PandaTrooper’s idea of using a Chicago bolt for the rear flip-up sight, so I put another Chicago bolt at the bottom of the blaster (as seen in the image below). Instead of using pop rivets at the bottom, I elected to use very short Metric Button Head Cap screws. They are only used for decoration, I drilled out holes, put some E6000 adhesive in the hole, and then inserted the screws. Like PandaTrooper, I used 2 Pan Head Square Drive screws at the top of the receiver, for looks, and for securing the receiver. Test fit of the barrel: PandaTrooper painted his stock & grips with brown paint, applied some scratches, and some weathering. I wanted a natural wood grain finish, so I masked off the stock before I spray painted the main body flat black. After the spray dried, I applied some Varathane wood stain in “American Walnut” to the stock and grips. The directions on the stain can were spot on. I applied the stain with a foam brush, waited about 2 1/2 minutes, then wiped it off with a paper towel. It left a deep, rich color, I only needed one coat. After waiting about 2 hours, I applied the first coat of satin polyurethane. I followed up with a 2nd coat a few hours later. I let all of that dry for 24 hours. Came back to the garage, lightly sanded the stock and grips with 800 grit sandpaper, and then applied the last coat of satin polyurethane. For finishing the blaster, I tried a faux gunmetal technique that I was reading about on therpf.com. For the areas that I wanted to simulate gunmetal, I gently went over the body with very fine 0000 steel wool. This apparently creates small crevices while minimizing damage to the finish. I then generously brushed on powdered graphite, and kept rubbing it in with the brush. To seal it, I applied some Krylon clear in a satin finish. I am very pleased with the results. In a nutshell, the body and barrel were primed with flat gray spray paint (not shown), followed by 2 coats of flat black. After the black had ample time to cure, I rubbed it down with 0000 steel wool. Powdered graphite was then brushed on and rubbed in. The graphite was sealed with clear satin. To make those edges pop, I dry-brushed Testors silver enamel with a stiff bristled brush. Wrapping things up, for the ribbing, I used 2 different types of vinyl tubing. For the outside, I used 1/2″ outer diameter (with 3/8″ inner diameter). To join the 2 ends of a ring, I cut about 2″ of 3/8″ outer diameter (1/4″ inner diameter) to use as an insert/connector. I needed about 14 feet of the 1/2″ OD tubing. A single role of the 3/8″ OD tubing was more than enough. Not my idea, another tidbit I picked up on a forum. Once the rings were cut, I roughed them up a little with 400 grit sandpaper. I then applied Dupli-color vinyl spray paint in black. I tried some Plasti-Dip spray as a test on one of the rings since I had some left over from coating the inside of my Sandtrooper bucket. Even with the surface roughed up on the vinyl tubing, the Plasti-Dip would not bite at all. The Dupli-color was awesome, it cured rather quickly, and seems to have a strong finish. The Dupli-color was available at my local auto-parts store. For the sling, I picked up 2 Lee Einfeld canvas slings to join together, and a sling swivel that could take a 1 1/4″ sling (the width of the Einfeld). I found both of these items on eBay. I’ve seen other T-21 builds, and I really like the look of the cabling that is wrapped around the barrel. I used some old coaxial cable that I had sitting around, stripped it, and used the innards to wrap around the barrel. The cable was dusted with black spray paint. I drilled out 2 holes in the barrel, placed the ends of the cable in the holes, and secured the remaining cable with 1/4″ cable clamps and some oval phillips machine screws. Can’t wait to go trooping with this bad boy! As you can see, I did not put any sights on the barrel. I want to troop with this blaster, and I was afraid those parts would snap off. The only "sight" that I used on the barrel was a hose clamp, dusted with black spray paint. A big Empire salute to PandaTrooper for sharing his T-21 plans and building instructions!
-
Per suggestion from the 501st, I’ve copied this question here to the MEPD forums. I've started a T-21 build with long-term aspirations of getting my first suit, a TD. But the T-21 is easier to do short term and doesn't require as many funds For those interested, my album is here. I have 2 questions: 1) Looking at Lewis gun reference pictures, I know there were versions both with and without the "cleaning kit" tube in the butt stock. Is there a generally accepted opinion on whether or not this was present in ANH? I've tried staring at screen caps and paused video but I can't make it out and haven't seen any photoshopped pics definitely showing if it's present or not. I did check the CRL and it's not called out as being required for any level of certification. 2) Can anyone provide a (preferably US) link to where they purchased their barrel ribs? I know a lot of people have used corrugated drain pipe and I saw a suggestion of using D-form weather stripping. I had tried purchasing some corrugated pipe from one big-box supply store and it didn't look quite right so I returned it. I'd welcome any suggestions