Lou210
-
Posts
47 -
Joined
-
Last visited
-
Days Won
1
Content Type
Events
Profiles
Forums
Everything posted by Lou210
-
Alight while I waited for my radar dish to show up i went ahead and did an initial weathering of the pack using acrylic paints, unbleached titanium and a little burnt umber mixed with water.
-

3D printed T21 Blaster build
Lou210 replied to Lou210's topic in T-21, DLT-19, RT-97c Heavy Blasters
I made two changes to the kit, The first one is didn't use the supplied sling mount instead i drilled a hole in the stock where it goes and threaded this metal harness mount and then added some glue to really lock it in. The second change I made was I used the resin oil brush lid from the previous resin kit I had because the this kit had just a regular cylinder peg Other than that the kit is assembled and next is to sand and fill most the layer lines by using a mix off 2 parts plastic wood filler and 1 part acetone, brush the mix onto the areas that i dont want layer lines. After that then sand with 220 grit and spray with ultra high build sandable primer. -
3D printed T21 Blaster build
Lou210 replied to Lou210's topic in T-21, DLT-19, RT-97c Heavy Blasters
So here is the progress so far, I picked up the two wooden dowel rods at home depot and then got to work on putting it together, some parts did need to be sanded a little with 220 grit to have the fit together cause they were to tight of a fit. I will say a quick tip would be to run the sand paper down the wooden dowels to smooth them out so they can slide through the holes in the parts easier otherwise you'll end up like me having to use a rubber mallet. For assembly i used some CA glue with zip kicker. -
3D printed T21 Blaster build
Lou210 replied to Lou210's topic in T-21, DLT-19, RT-97c Heavy Blasters
its not listed on his page right now cause he doesn't have it already printed so you have to message him and request it, he also makes the other sand trooper weapons https://www.etsy.com/shop/Galactic3DEmpire?ref=yr_purchases -
3D printed T21 Blaster build
Lou210 replied to Lou210's topic in T-21, DLT-19, RT-97c Heavy Blasters
Heres a closer looks at the pieces one good thing is the print lines on the barrel will give the barrel that machined look some people replicate with nylon string. heres a pic of two of the pages of the instructions As you can see this kit utilizes some 3d printed dowel/pigs, but you will need to still buy 2 wood dowels. -
capacitors done and everything assembled just need to weather everything, I'm also waiting for the radar dish to show up. Keep in mind this isnt very accurate and built it more for trooping rather than to be movie prop accurate
-
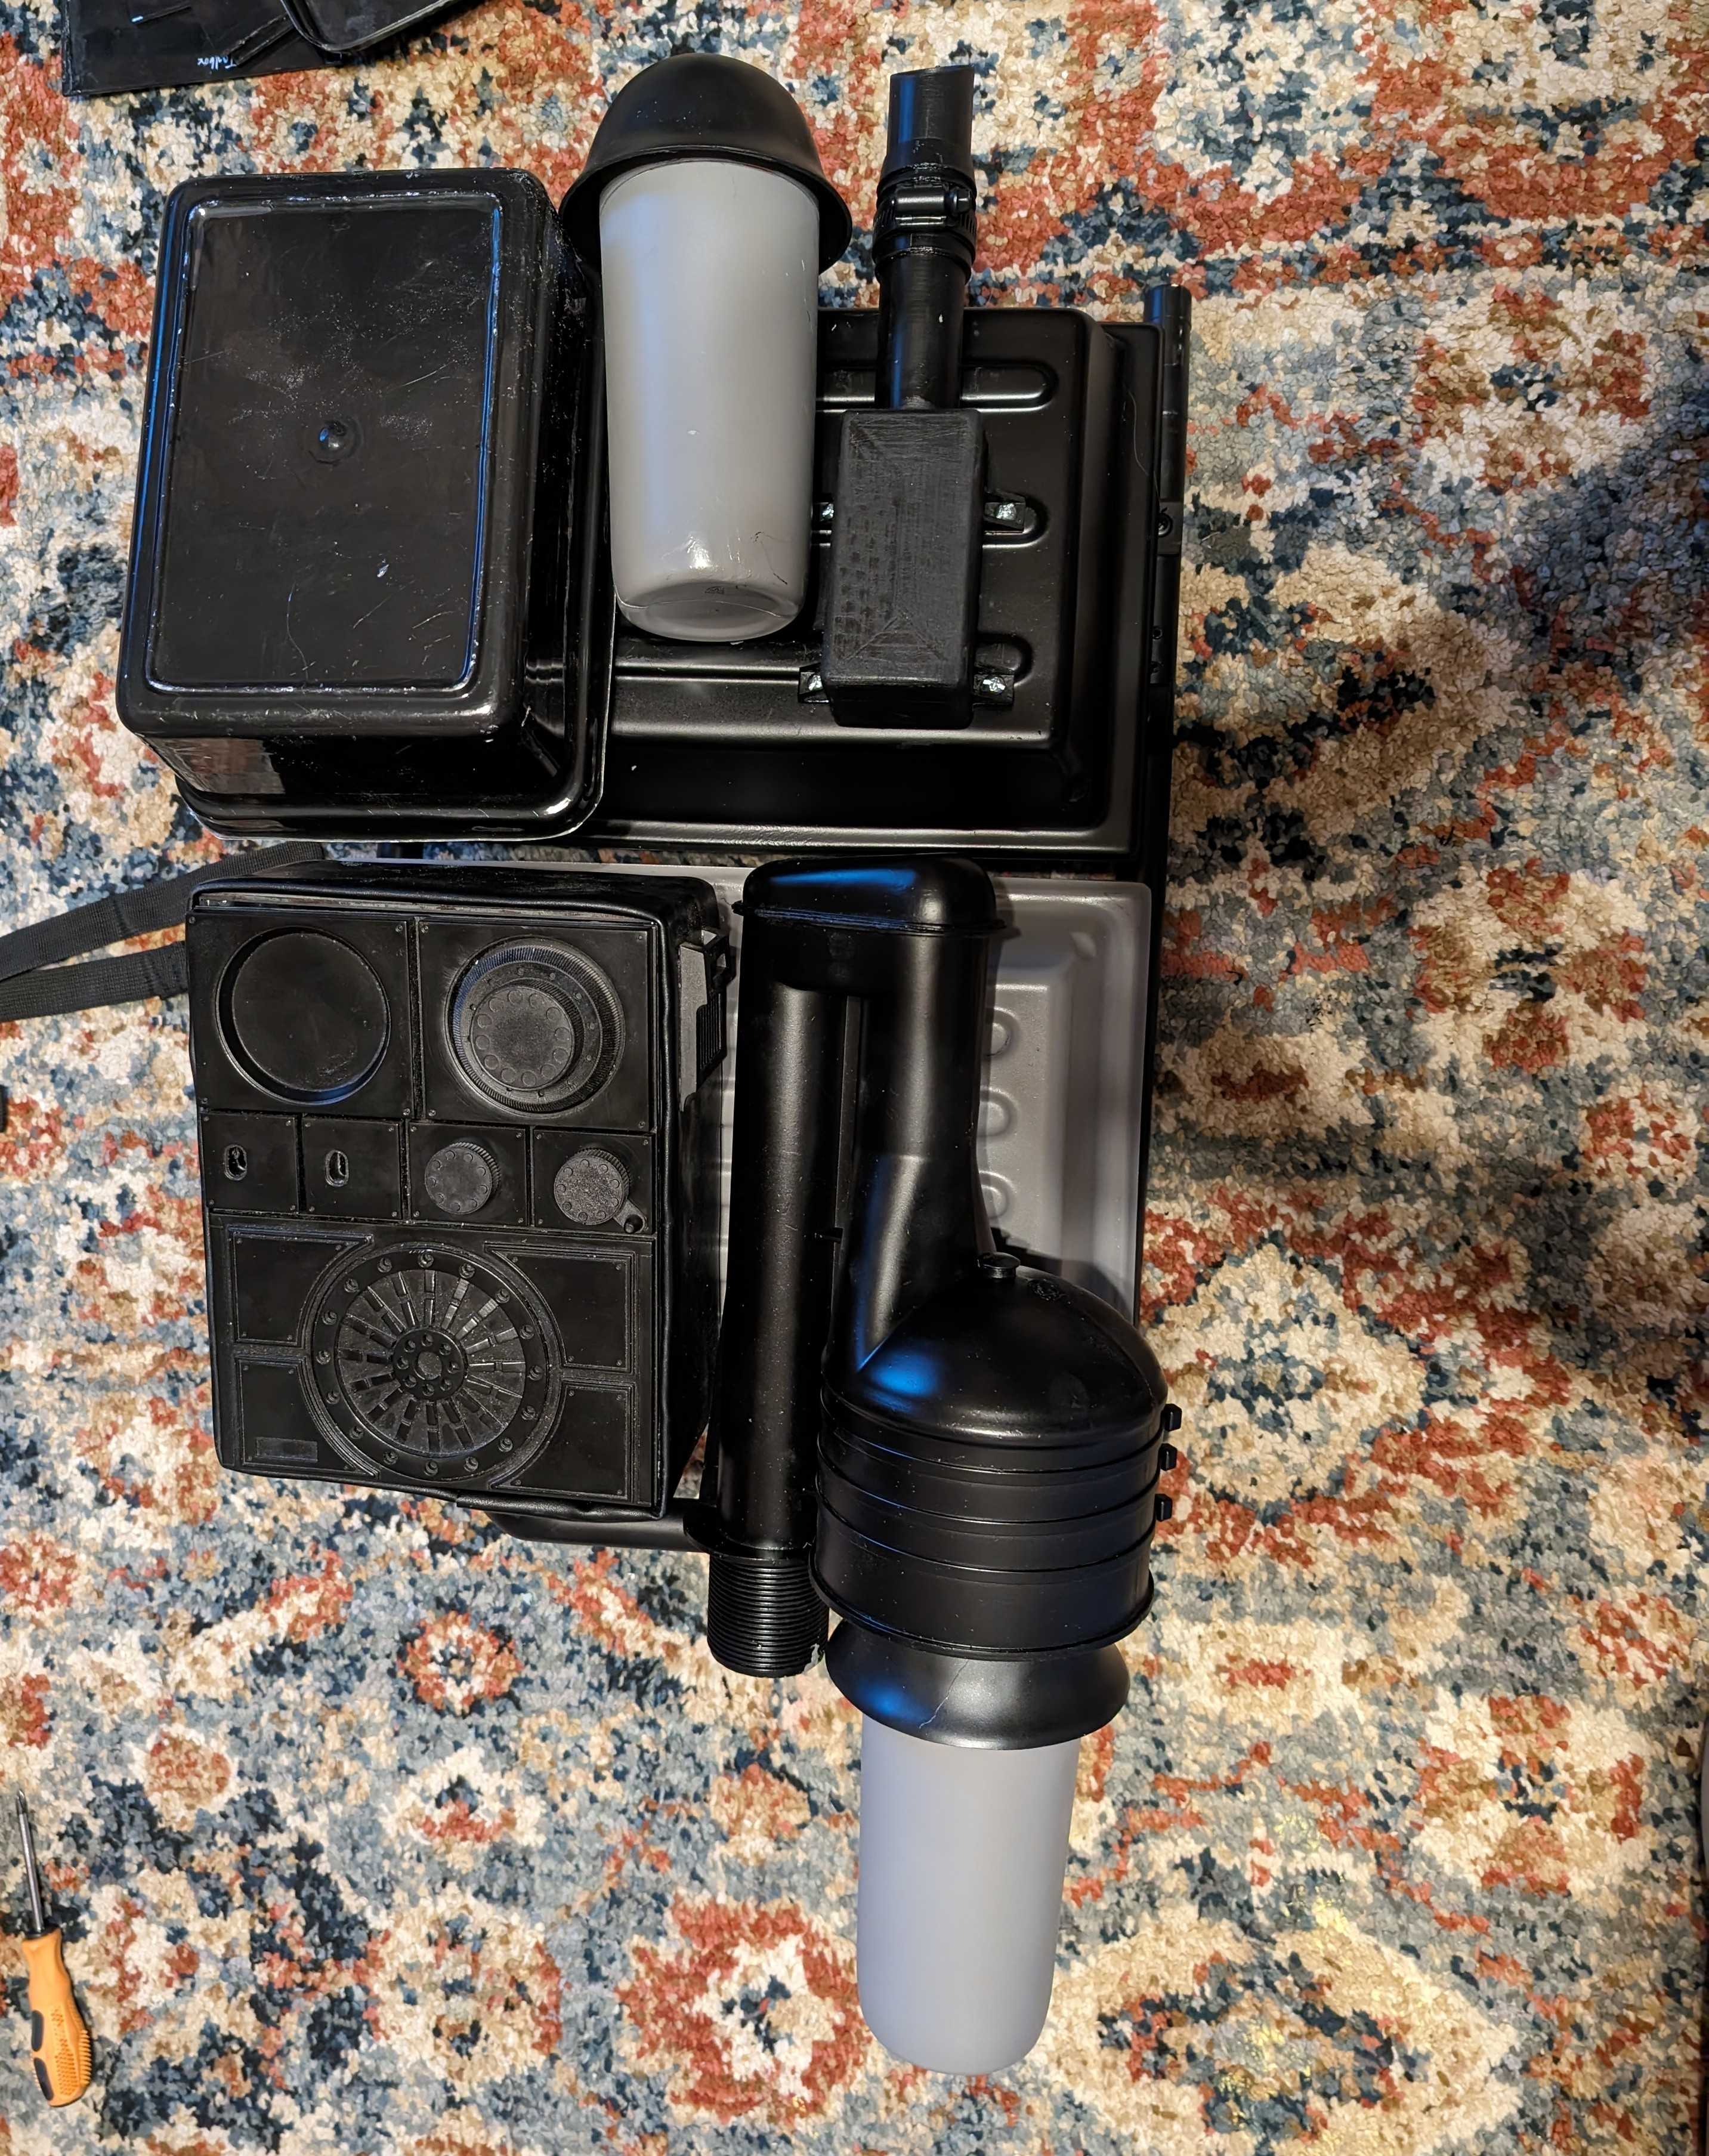
I replaced the abs back pack horizontal supports with aluminum since the weight was making the seed boxes jiggle and sag. also replaced the black hose i was using for the stinger for a pvc one since I had extra from making the capacitors, i will be using Octoarm's idea of filling the pvc capacitors (1/2inch pvc cut into 5 2inch pieces) with tin foil and then hot glue. Also keep in mind I'm not going for complete movie prop accuracy
-
So originally 5 years ago I was working on a kit from spOOL68 here on the forum that consisted of resin parts, I downloaded a T21 template and began building the wooden stock /main body and barrel made of a PVC pipe and a plastic cup, well I never fully finished it and put the kit away, fast forward to now and I noticed how hefty or cumbersome this weapon can be not bad if you want something that feels substantial, but with the advances in 3d printing I figured I'd give it a shot and have a lighter rifle I wouldn't mind trooping with. So I order a kit from a shop on Etsy called Galactic3DEmpire, Gaven does some amazing work and does various weapons from Starwars or any other series you can think of , he shipped my order out quickly since this was the last one he had in stock (if its not in stock you can always message him and request it, but may take a little bit longer) he also does commissions. https://www.etsy.com/shop/Galactic3DEmpire?ref=yr_purchases attached is the previous kit which is awesome if you want something with alittle more weight to it and the last set of photos are the new 3d kit from Gaven Here is the 3D printed kit, it has a sturdy feel and doesn't feel frail like some 3d printing stuff.
-
So I was originally a TK then switched to a TD and was approved at the basic level that was years ago but since I'm in the military I've been out of it for awhile and now that i have my time back I want to get back to trooping but I moved and am no longer in Colorado (Mountain Garrison) and now live in Oklahoma, I've tried contacting both to see about a transfer or reactivation cause my TD profile on the 501st website is no longer listed under members but nobody has gotten back to me.
-
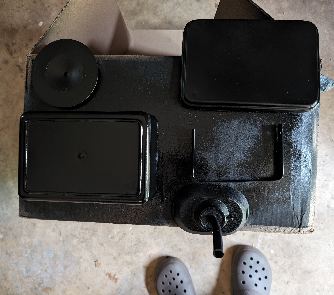
Some more painting of the black parts, also this is a Crashman kit and I'm using a different Braxton box but it hands off the seed tray and don't know if maybe the seed trays are too small or if the Braxton box is off.
-
Having this issue in 2024 trying to access it through tapatalk
-
Alright it's been years and finally with more free time opened up as well as inspiration, I started working on my pack again. I started with repainting the seed trays+bottles, it was mentioned by someone on here that they were too blue and glossy, these are now matte gray and black parts are matte black( need to paint Braxton box still) The gray kinda looks glossy cause the light (weathering will knock it down more)

-
So I noticed I haven't updated this thread on the last progress I made...so I got some resin parts from a maker on this page for the T-21 blaster (BFG) lol and so far this is what it looks like as well as I made some progress on my pack Sent from my Pixel 2 using Tapatalk
-
My crashmann pack #3 kit arrived! Sent from my Pixel 2 using Tapatalk
-
My TD was recently approved so I'm requesting sand trooper MEPD access. Randie Gray TD 11006 http://www.501st.com/members/displaymemberdetails.php?userID=23569 Sent from my Pixel 2 using Tapatalk
-
Created a new T-21 blaster template
Lou210 replied to pandatrooper's topic in T-21, DLT-19, RT-97c Heavy Blasters
Hey I'm having problems trying to find a place to print these do you have these already cropped and saved that you could send me that may work on a regular printer and just tape together? Sent from my Pixel 2 using Tapatalk -
Old troopers T-21 Build
Lou210 replied to Old Trooper's topic in T-21, DLT-19, RT-97c Heavy Blasters
How did you print the templates? I can't find a place that can print them Sent from my Pixel 2 using Tapatalk -
Hey guys I recieved my basic TD approval and now I am TD-11006 and no longer a shiney!!! Now I will be trying to find a decently priced T-21 or DLT-19 and I should be getting a pack soon from Crashman Sent from my Pixel 2 using Tapatalk
-
Today I removed my decals on the helmet and hand painted all the gray areas on the helmet and after that was complete I weathered the helmet:) The only parts I am waiting on is my diamond knee plate and ab buttons from ata and then I will submit my pictures to my GML for basic approval since I don't have a weapon or pack yet:( Sent from my Pixel 2 using Tapatalk
-
Thanks alot I took your idea of using the zip ties and it worked out great! I used black elastic strips and sewed a loop for the zip tie to go thru and tie to the leather loop on the pouch, then I super glued the other end of the elastic to the inside of the belt Sent from my Pixel 2 using Tapatalk
-
What's a good way to attach them? Sent from my Pixel 2 using Tapatalk
-
Hey thanks I was thinking the same. The good thing about acrylics is I can remove it at any time so I've been removing little by little but I did finish the legs today so let me know what you think. Sent from my Pixel 2 using Tapatalk
-
Today I started weathering the abdomen, belt, and small spainish pouches.. here how it looks Sent from my Pixel 2 using Tapatalk
-
So heres some pics of the burnt umber on the shin piece compared to the just sand like mix I made for the chest and arms piece Sent from my Pixel 2 using Tapatalk
-
Added alittle more to part of the chest and some on the pauldron.. just taking my time but I also don't want the weathering to extreme. idk if it's me but when I initially used the burnt umber it's came out too dark and reminded me of mud so I haven't gone back to that color quite yet I've been sticking with a mix of primarily unbleached titanium(sand like color), yellow ocre, and a little bit of burnt umber and I feel the color is close to desert looking grime and caked up sand Sent from my Pixel 2 using Tapatalk