

Volksjager
-
Posts
137 -
Joined
-
Last visited
-
Days Won
11
Content Type
Events
Profiles
Forums
Posts posted by Volksjager
-
-
Now I am approved I am looking to build my pack so I can apply for Police Officer.
As I have a black pauldron I am looking to build pack #4 and have approached a garrison member, and fellow Sandy, to 3D print some of the harder parts like the radio and cistern.
I am really keen to build this myself but the problem I am having at the moment is measurements. I have been following and reading some builds have seen measurements for the frame and have been converting everything to metric but I am having trouble getting a proper size for the seed trays, bottles and the radar dish etc. Is there anywhere where I can find some of these measurements?
Also while I am thinking about it Is there a required size for Say the frame or the seed trays for Police Officer?
-
Thanks everyone, really happy to be a Sandtrooper and part of the MEPD.
I am talking to a garrison member about 3D printing some of the parts for the pack (syphon, radio faceplate etc) and I will build the rest. I am going though build threads and trying to get sizes.
-
Great news, got approved overnight! TD-86557 reporting in
")
Now the next job is to start to build pack #4 for PO status.
-
 1
1
-
-
Approved as a TD overnight, requesting Sandtrooper access
Jason Brash
TD-86557
https://www.501st.com/members/displaymember.php?userID=24574&costumeID=2
-
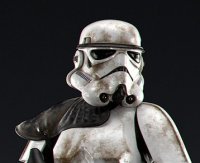
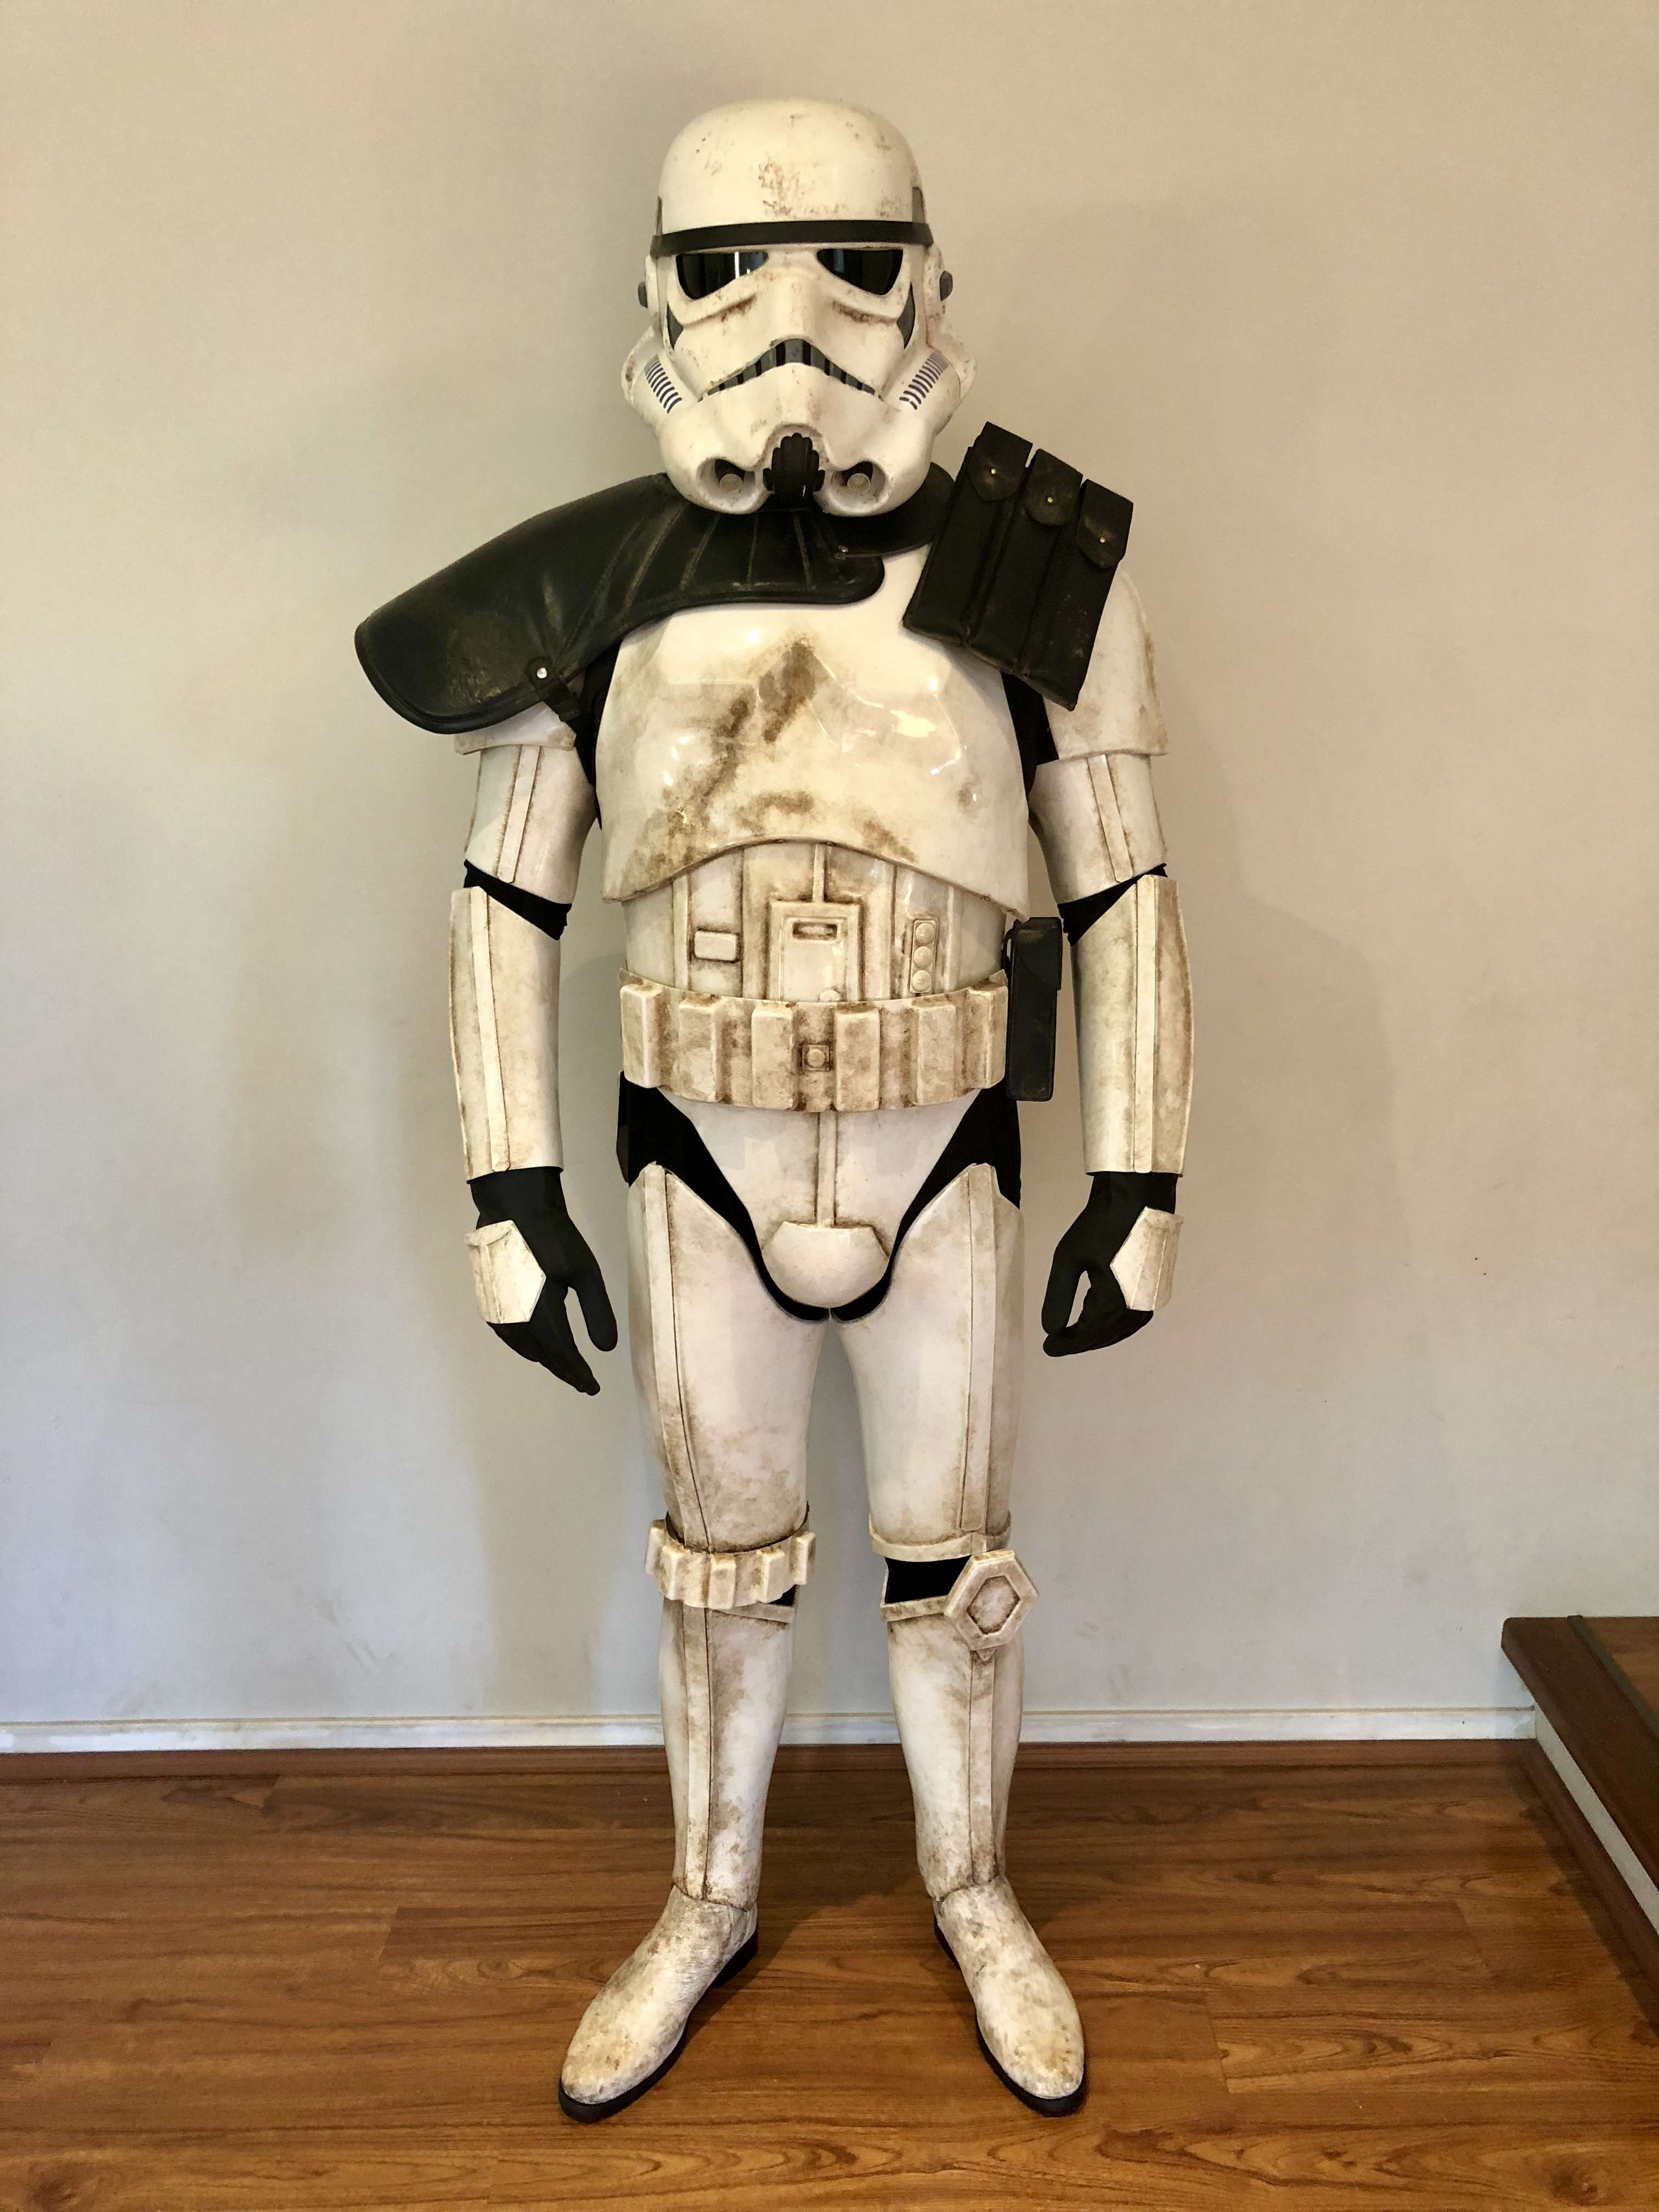
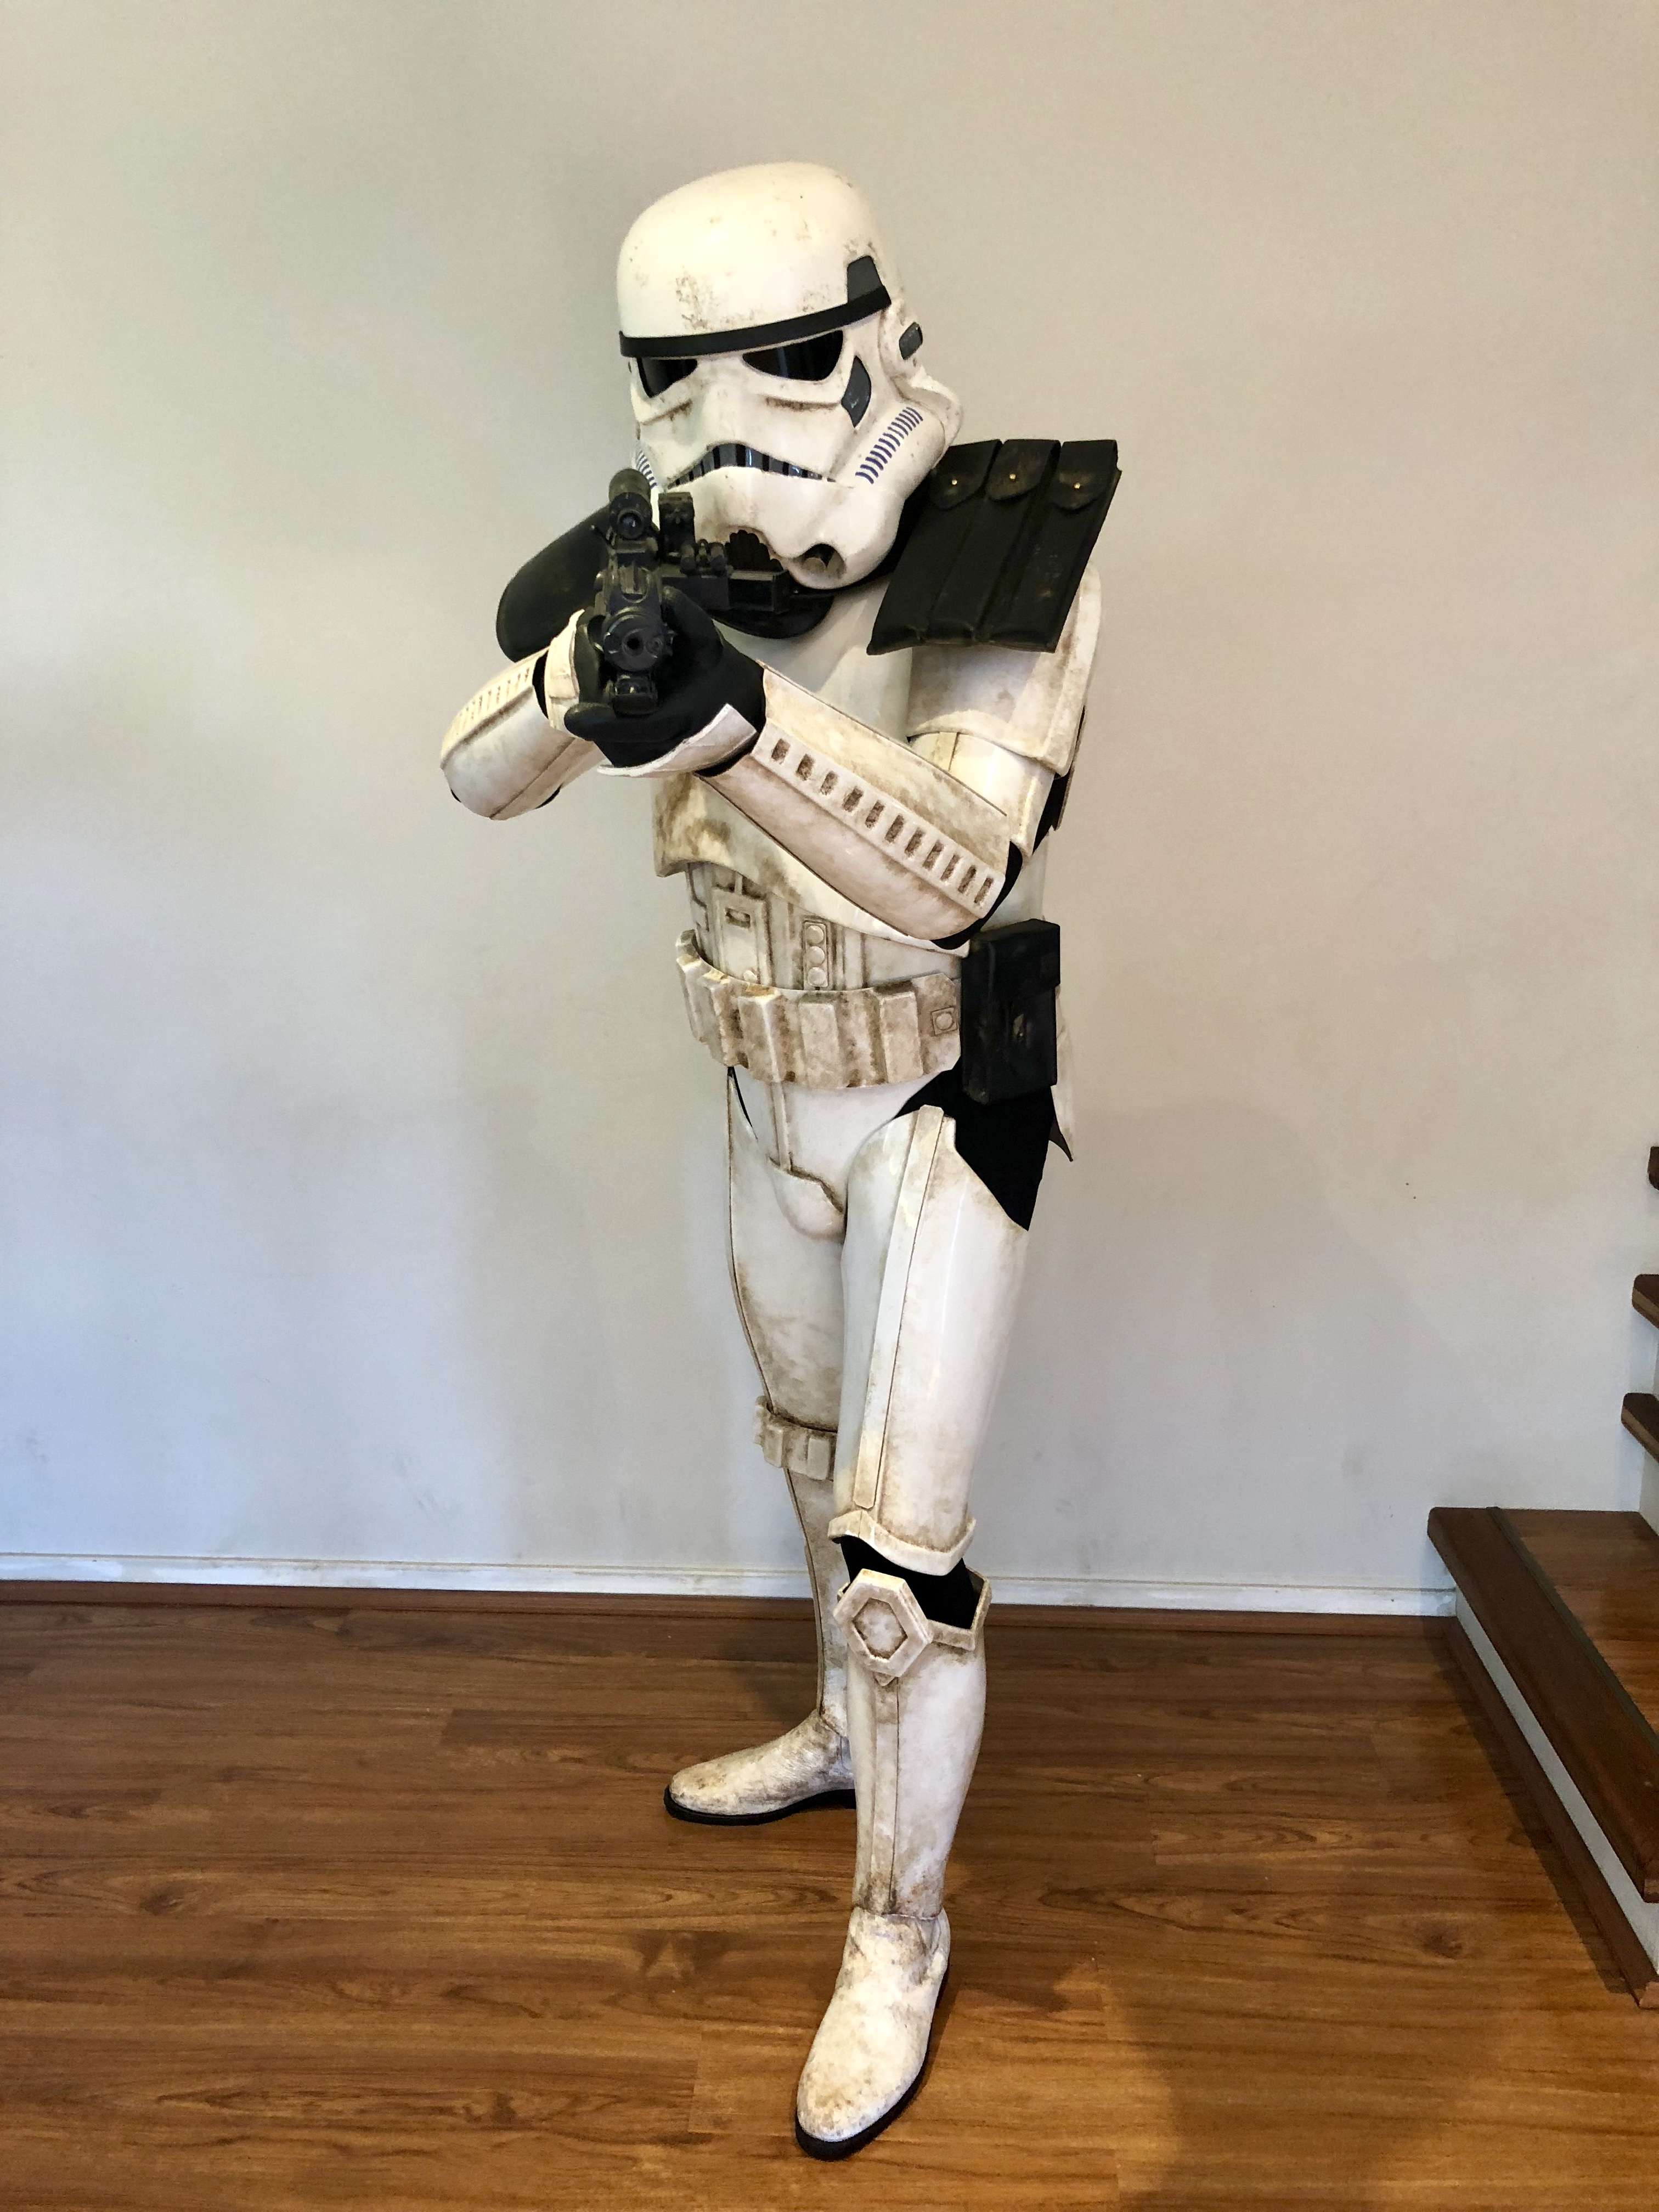
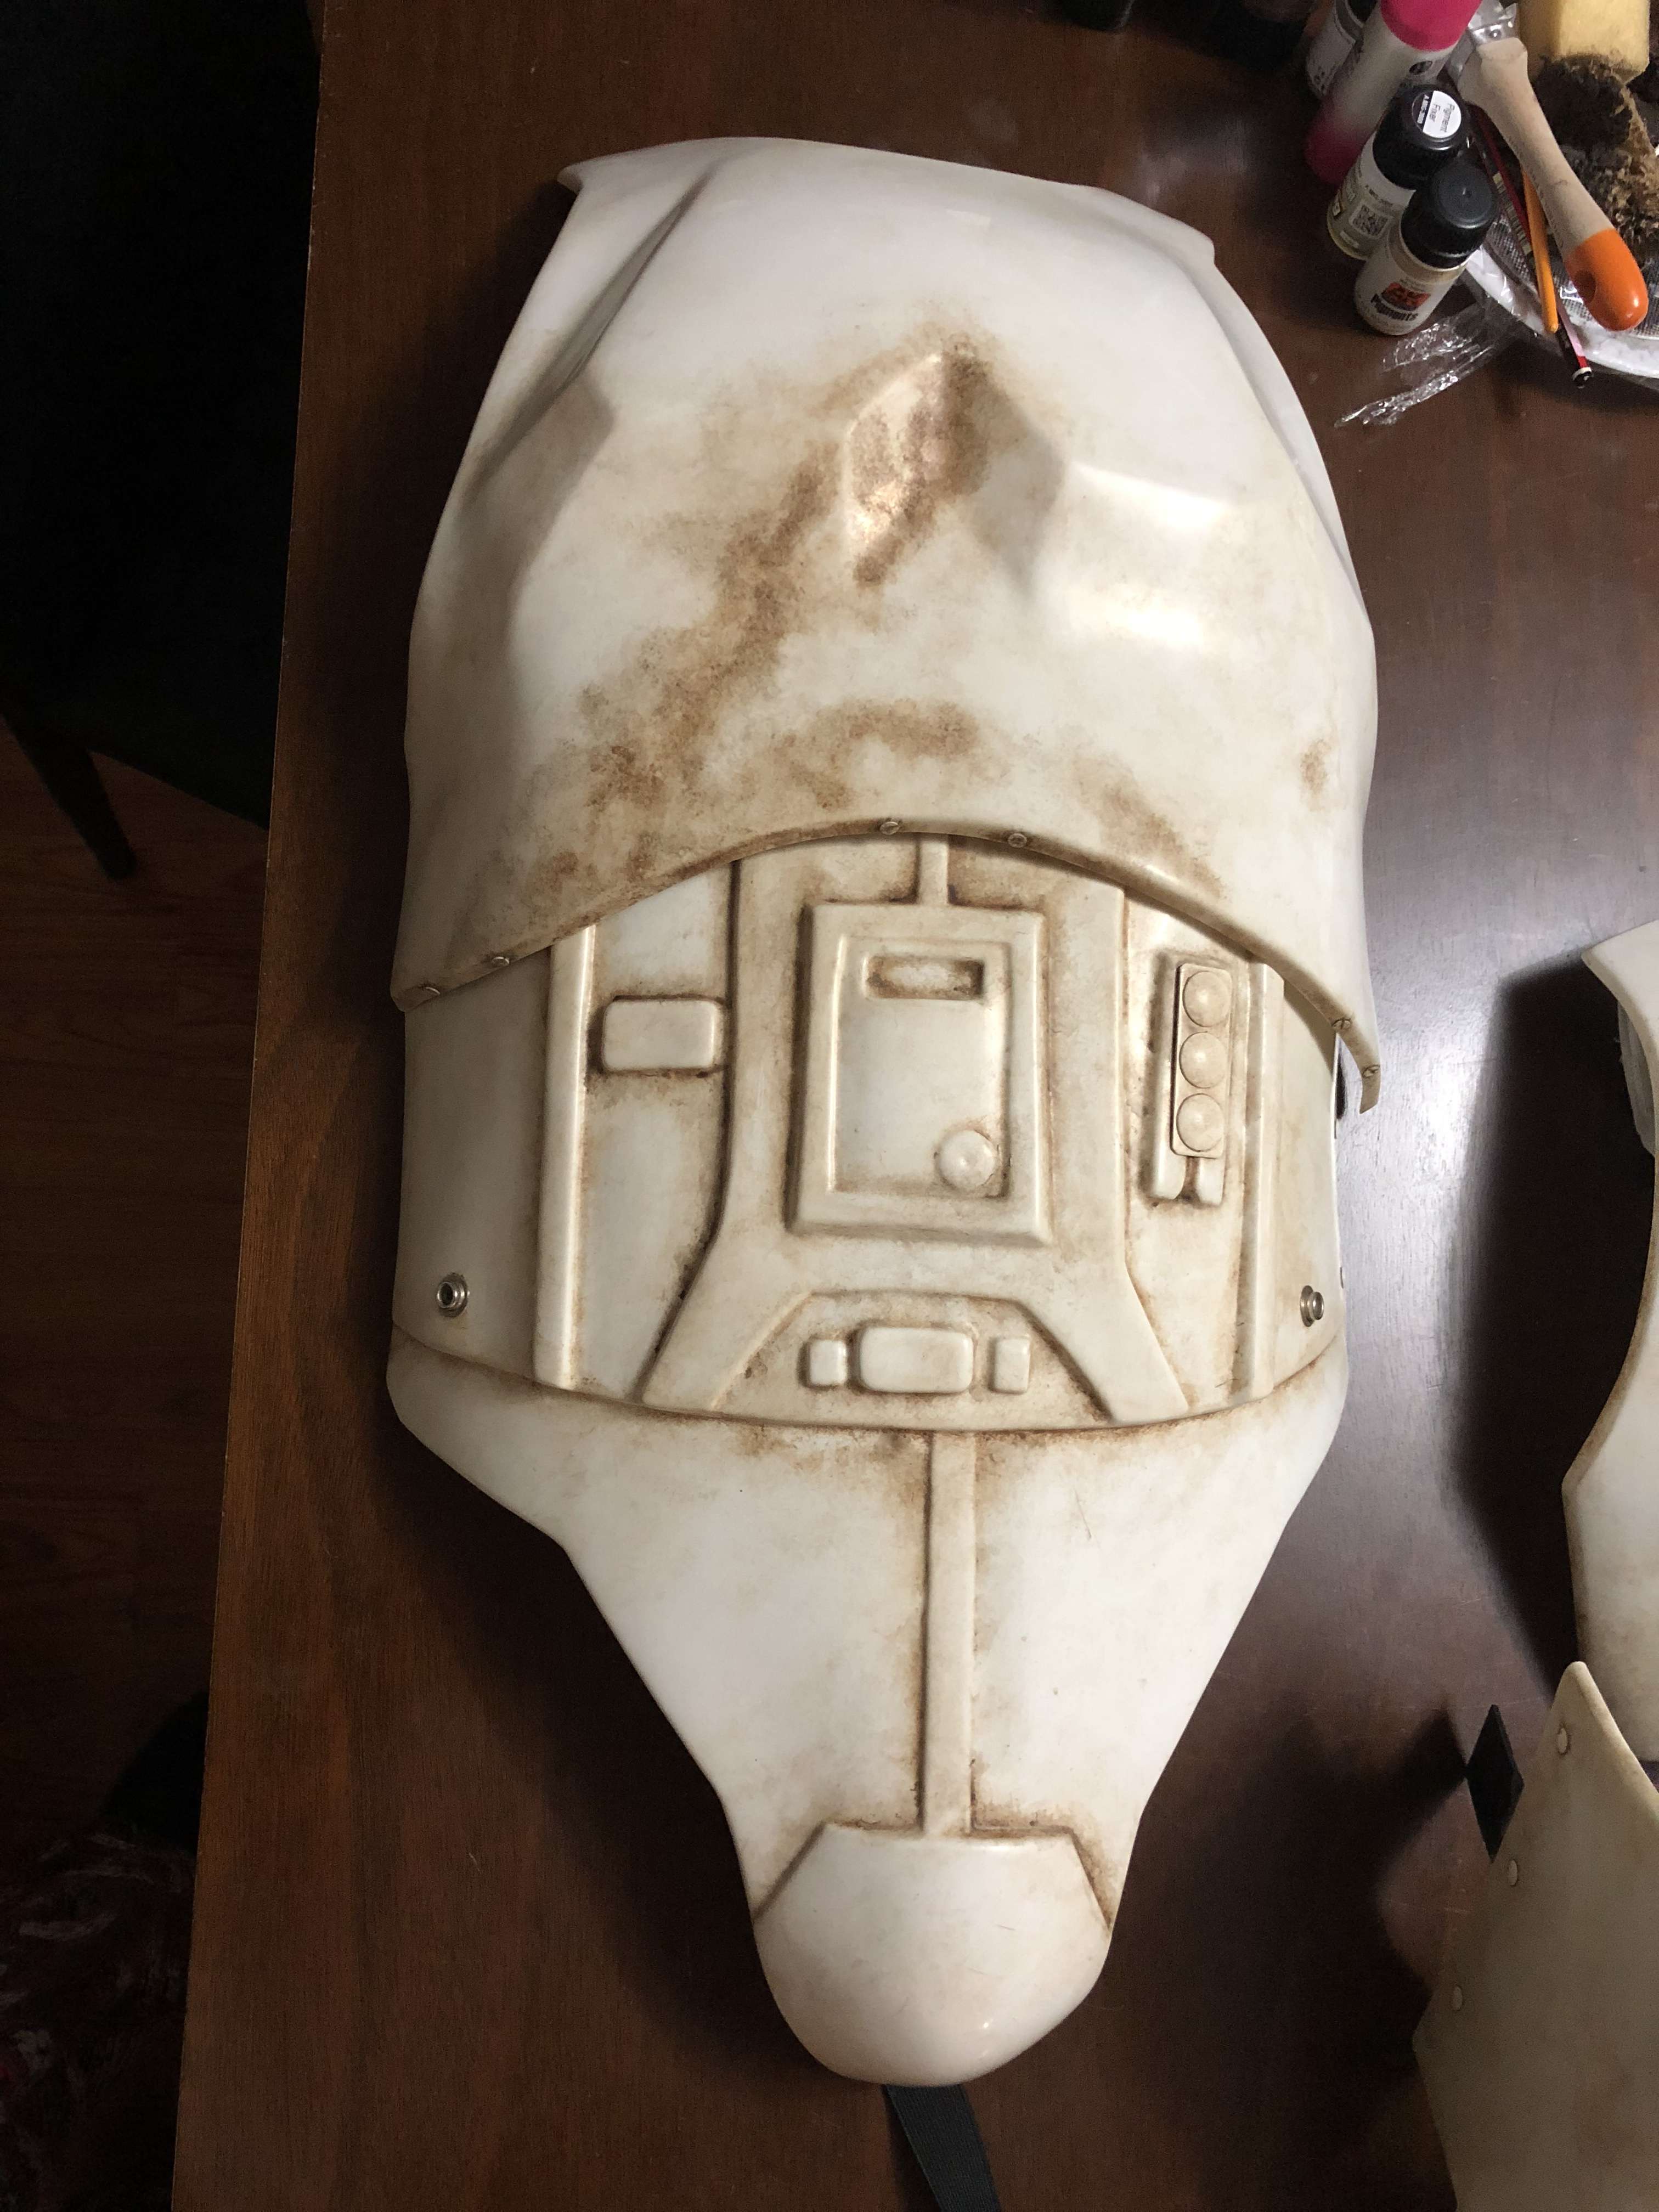
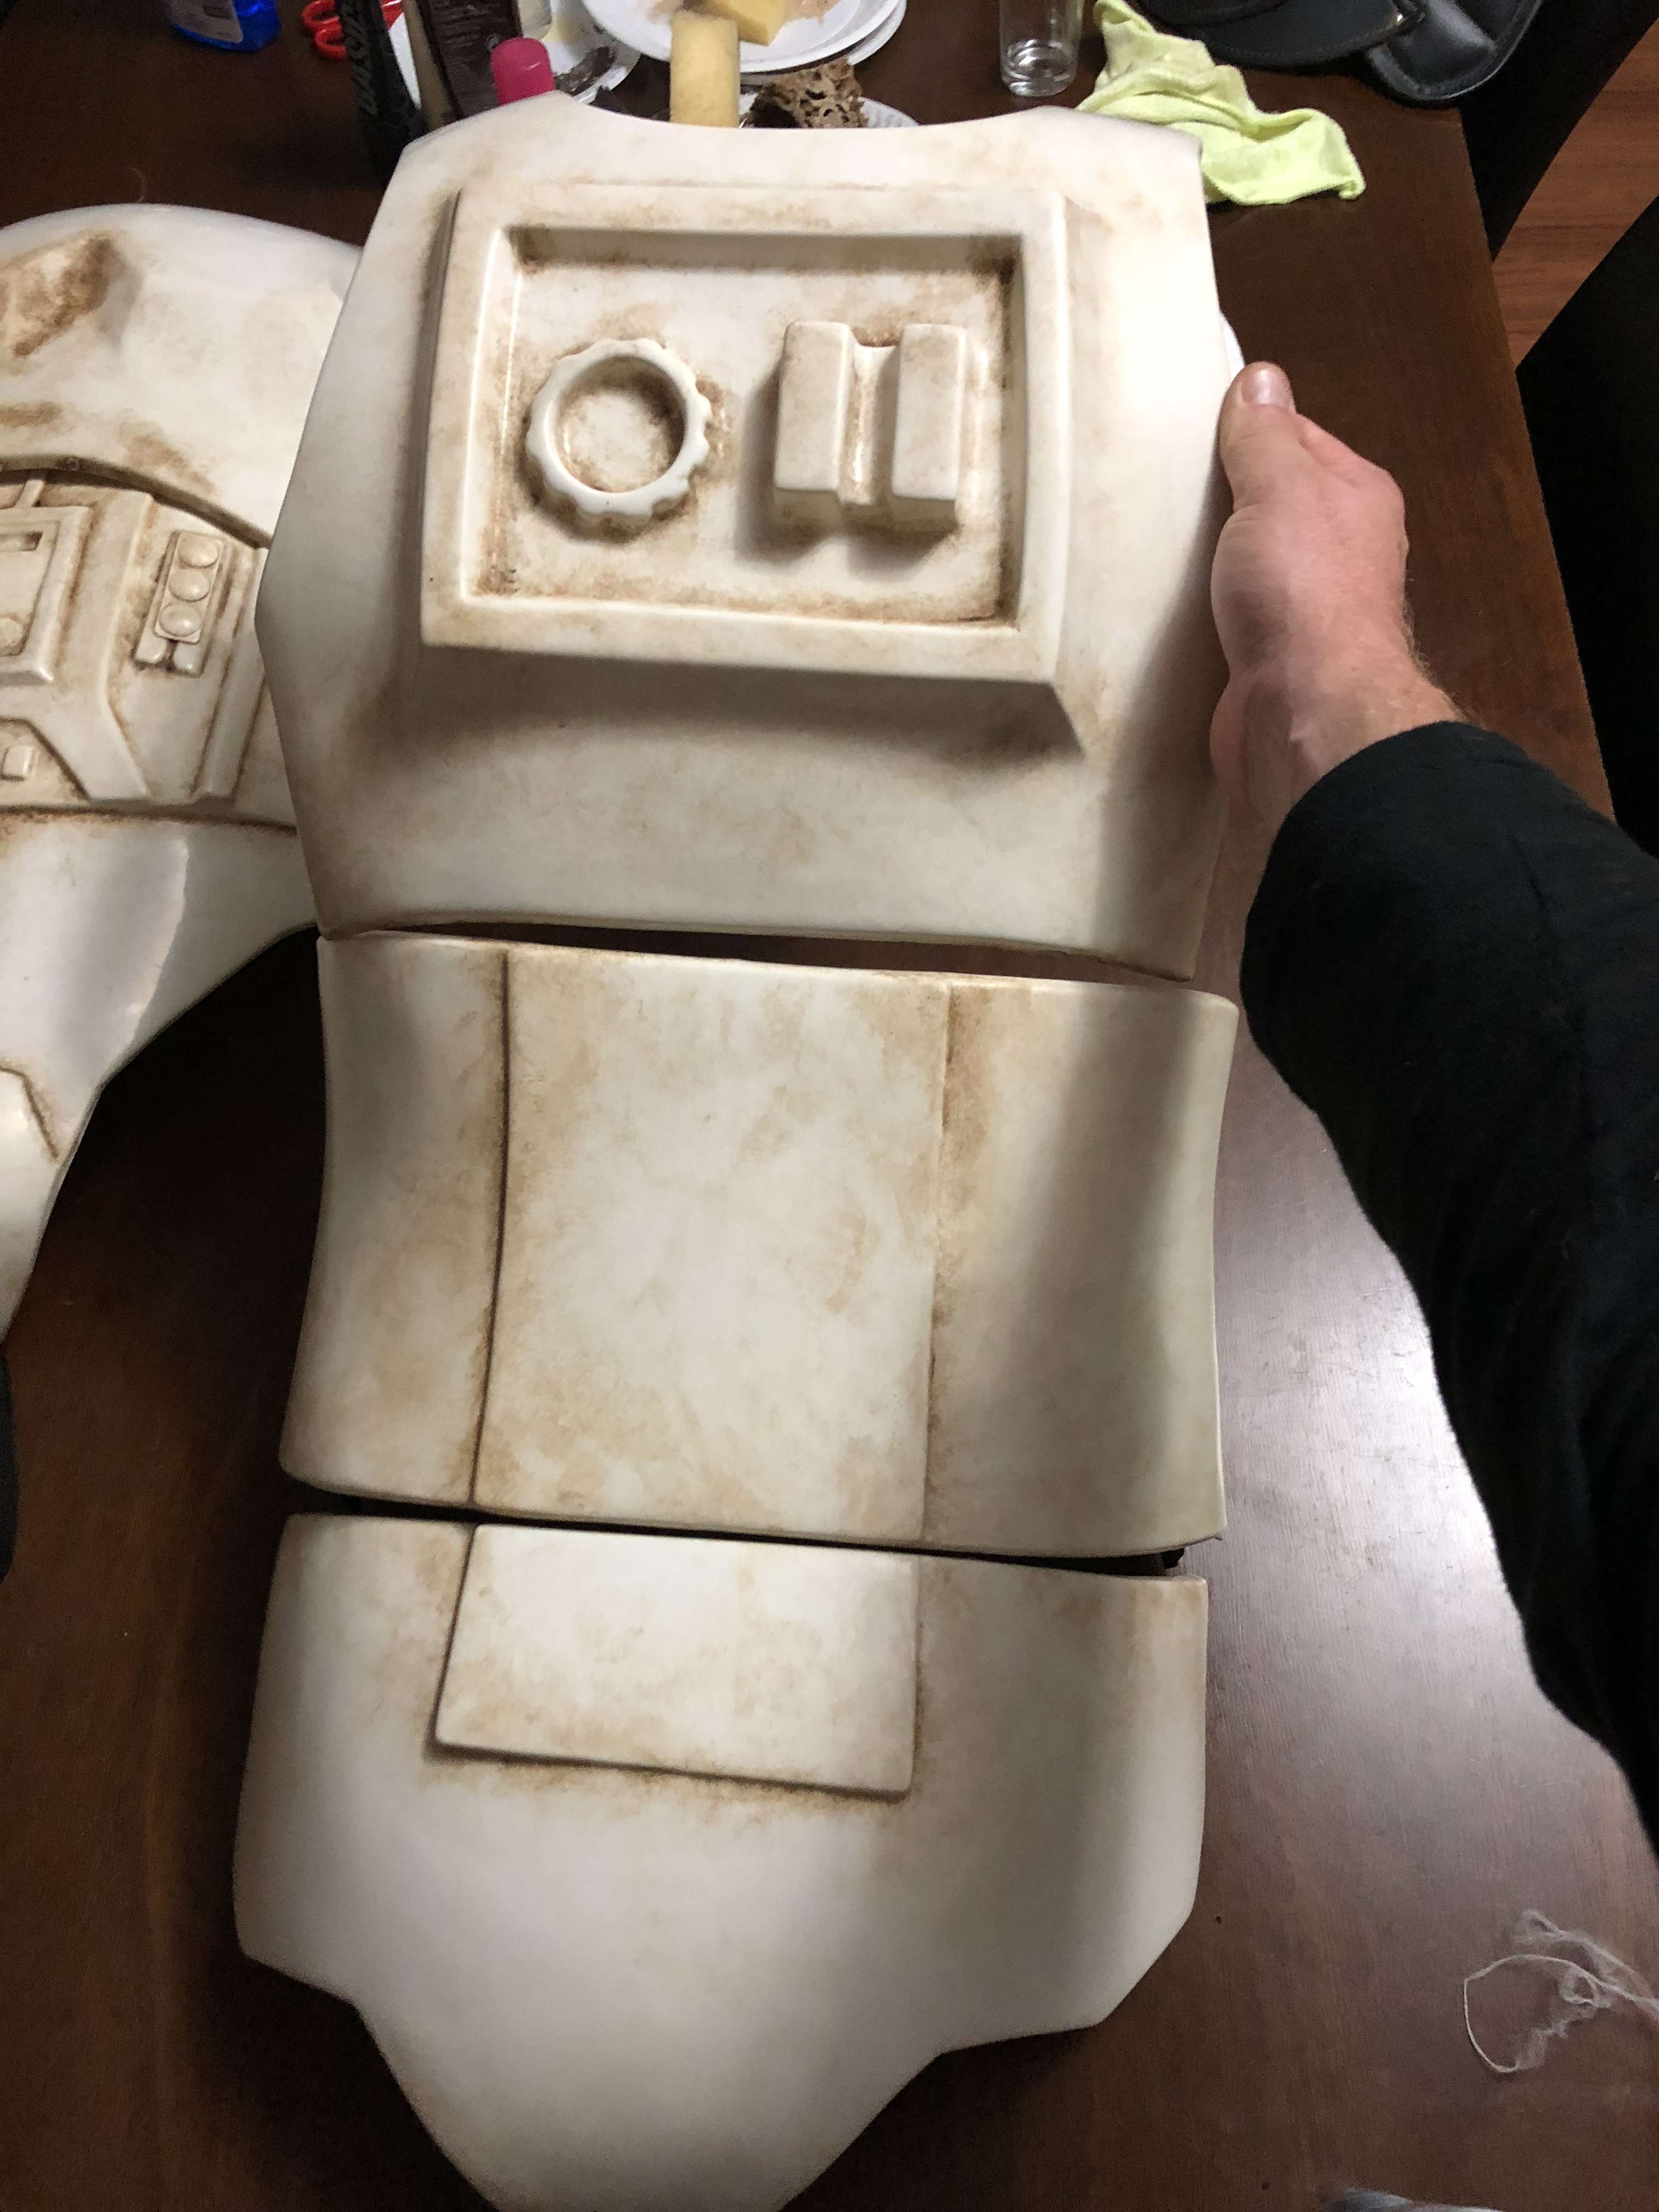
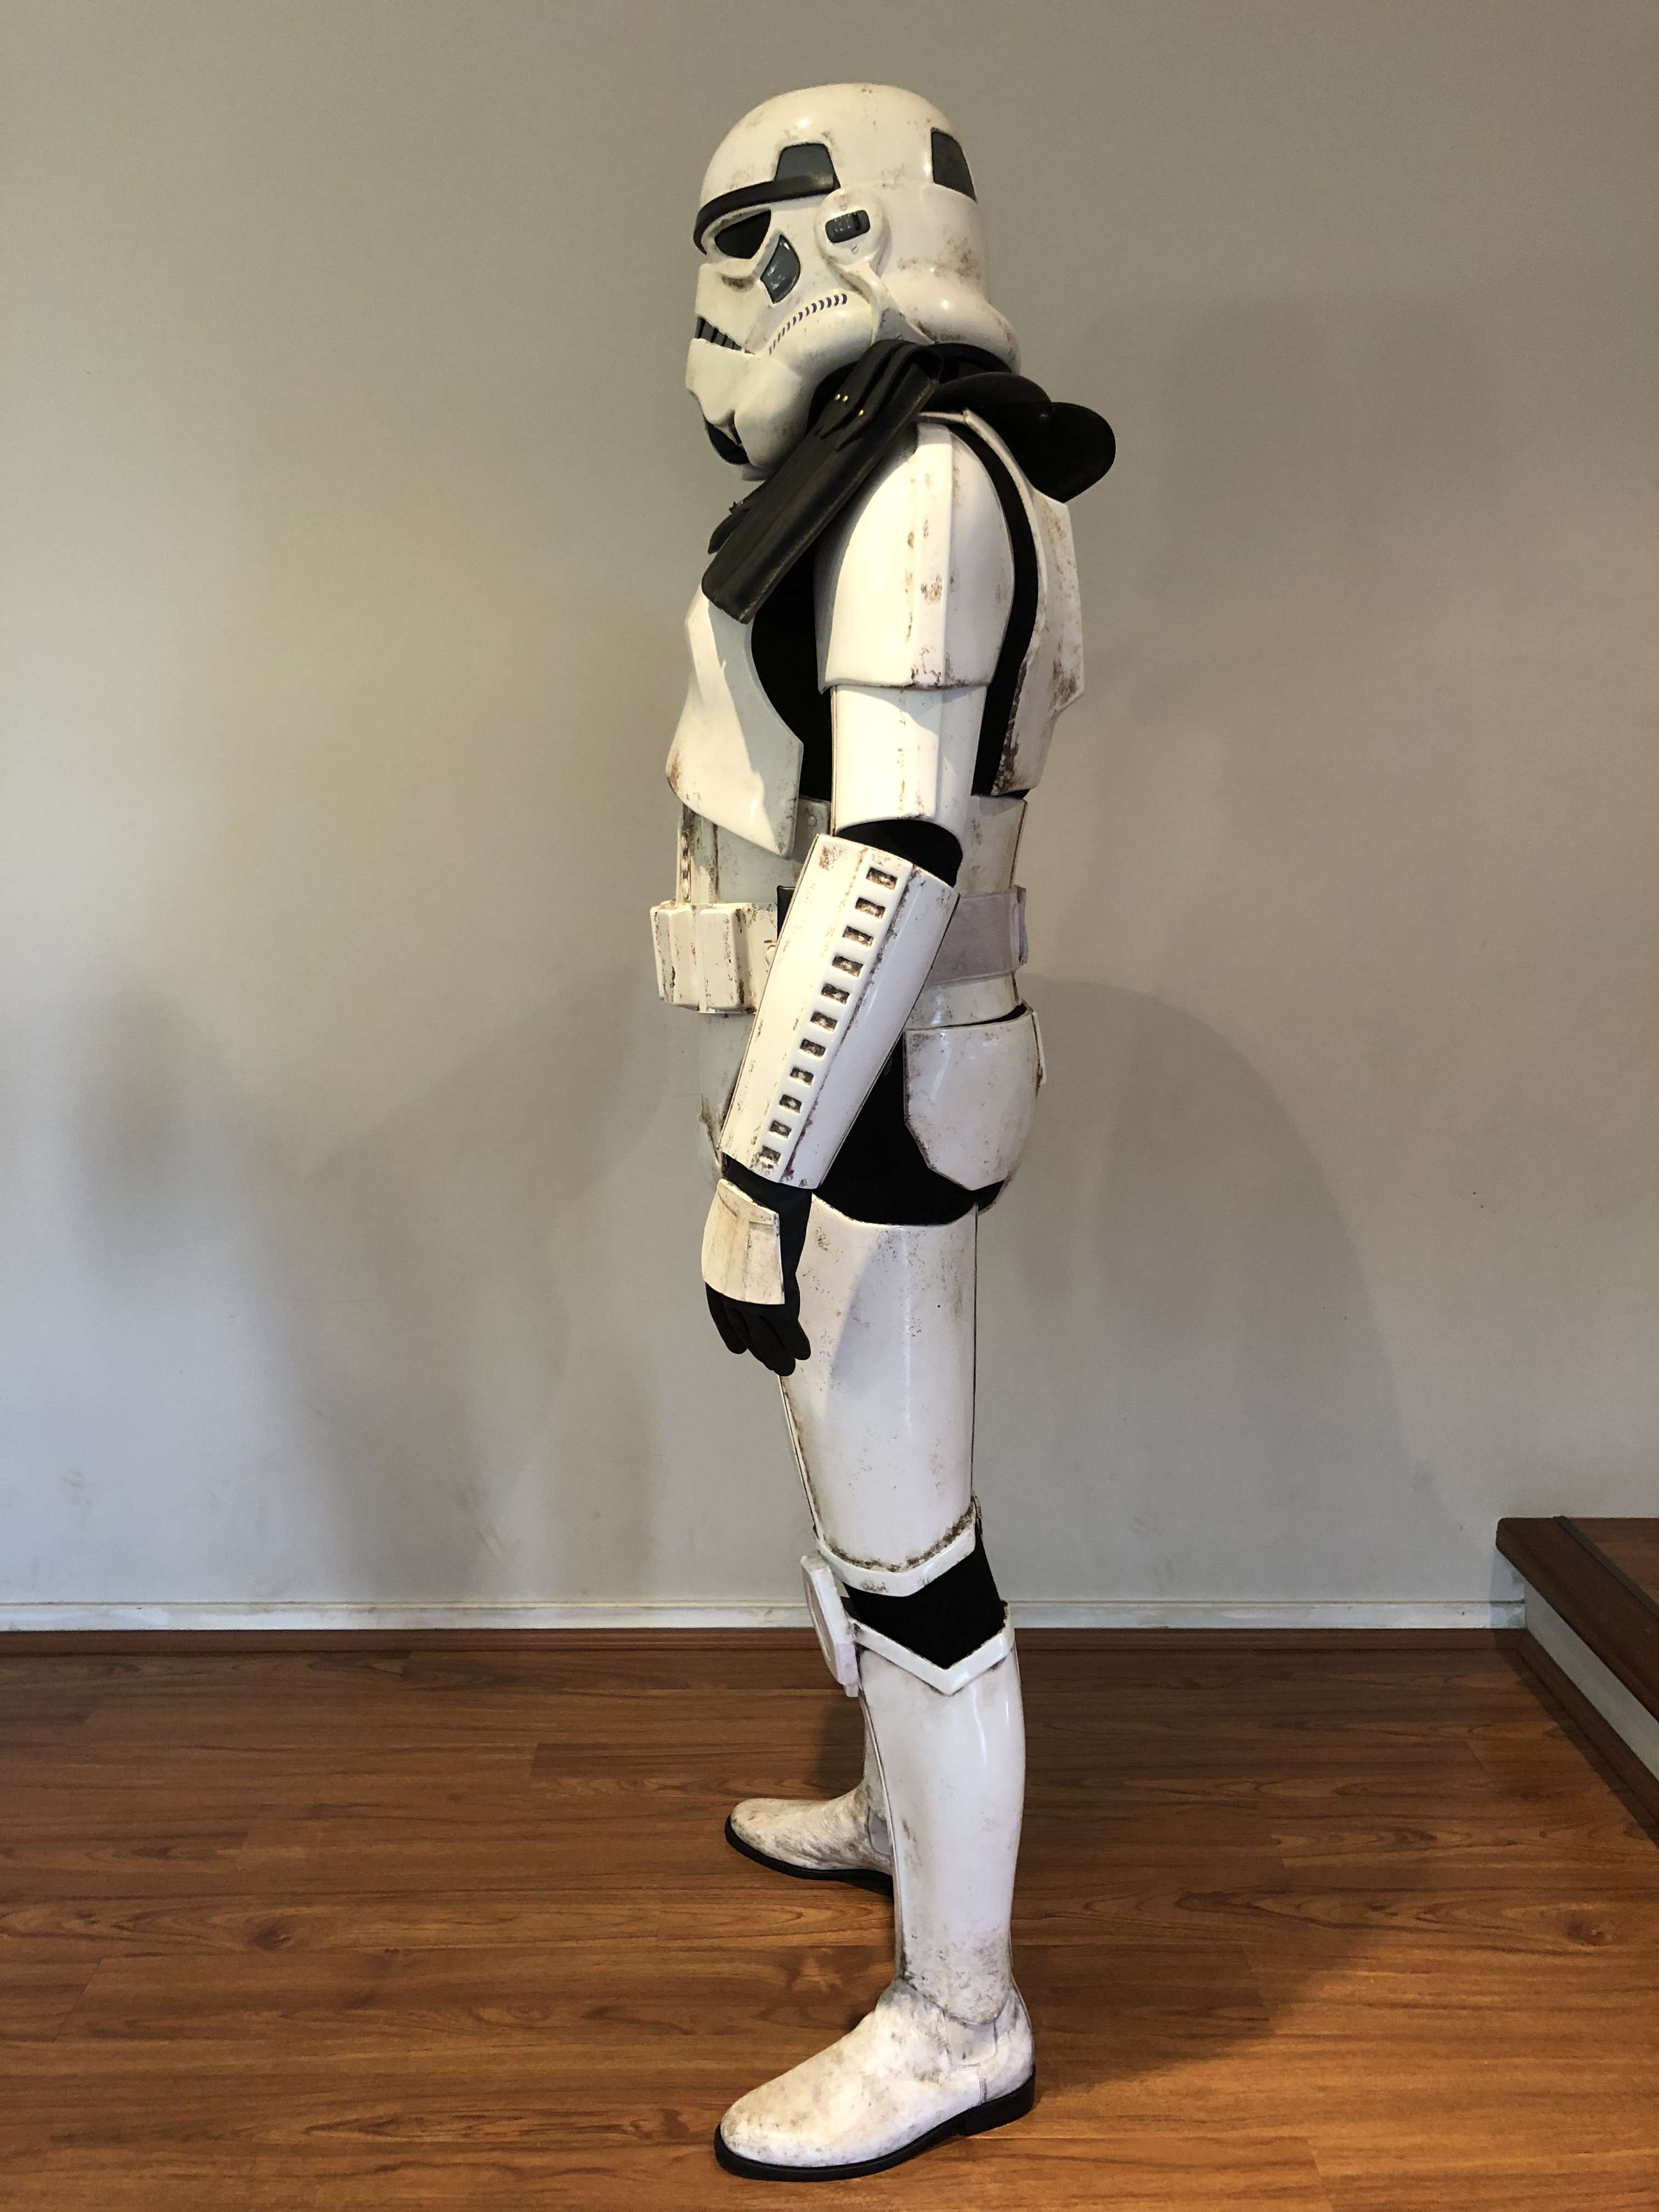
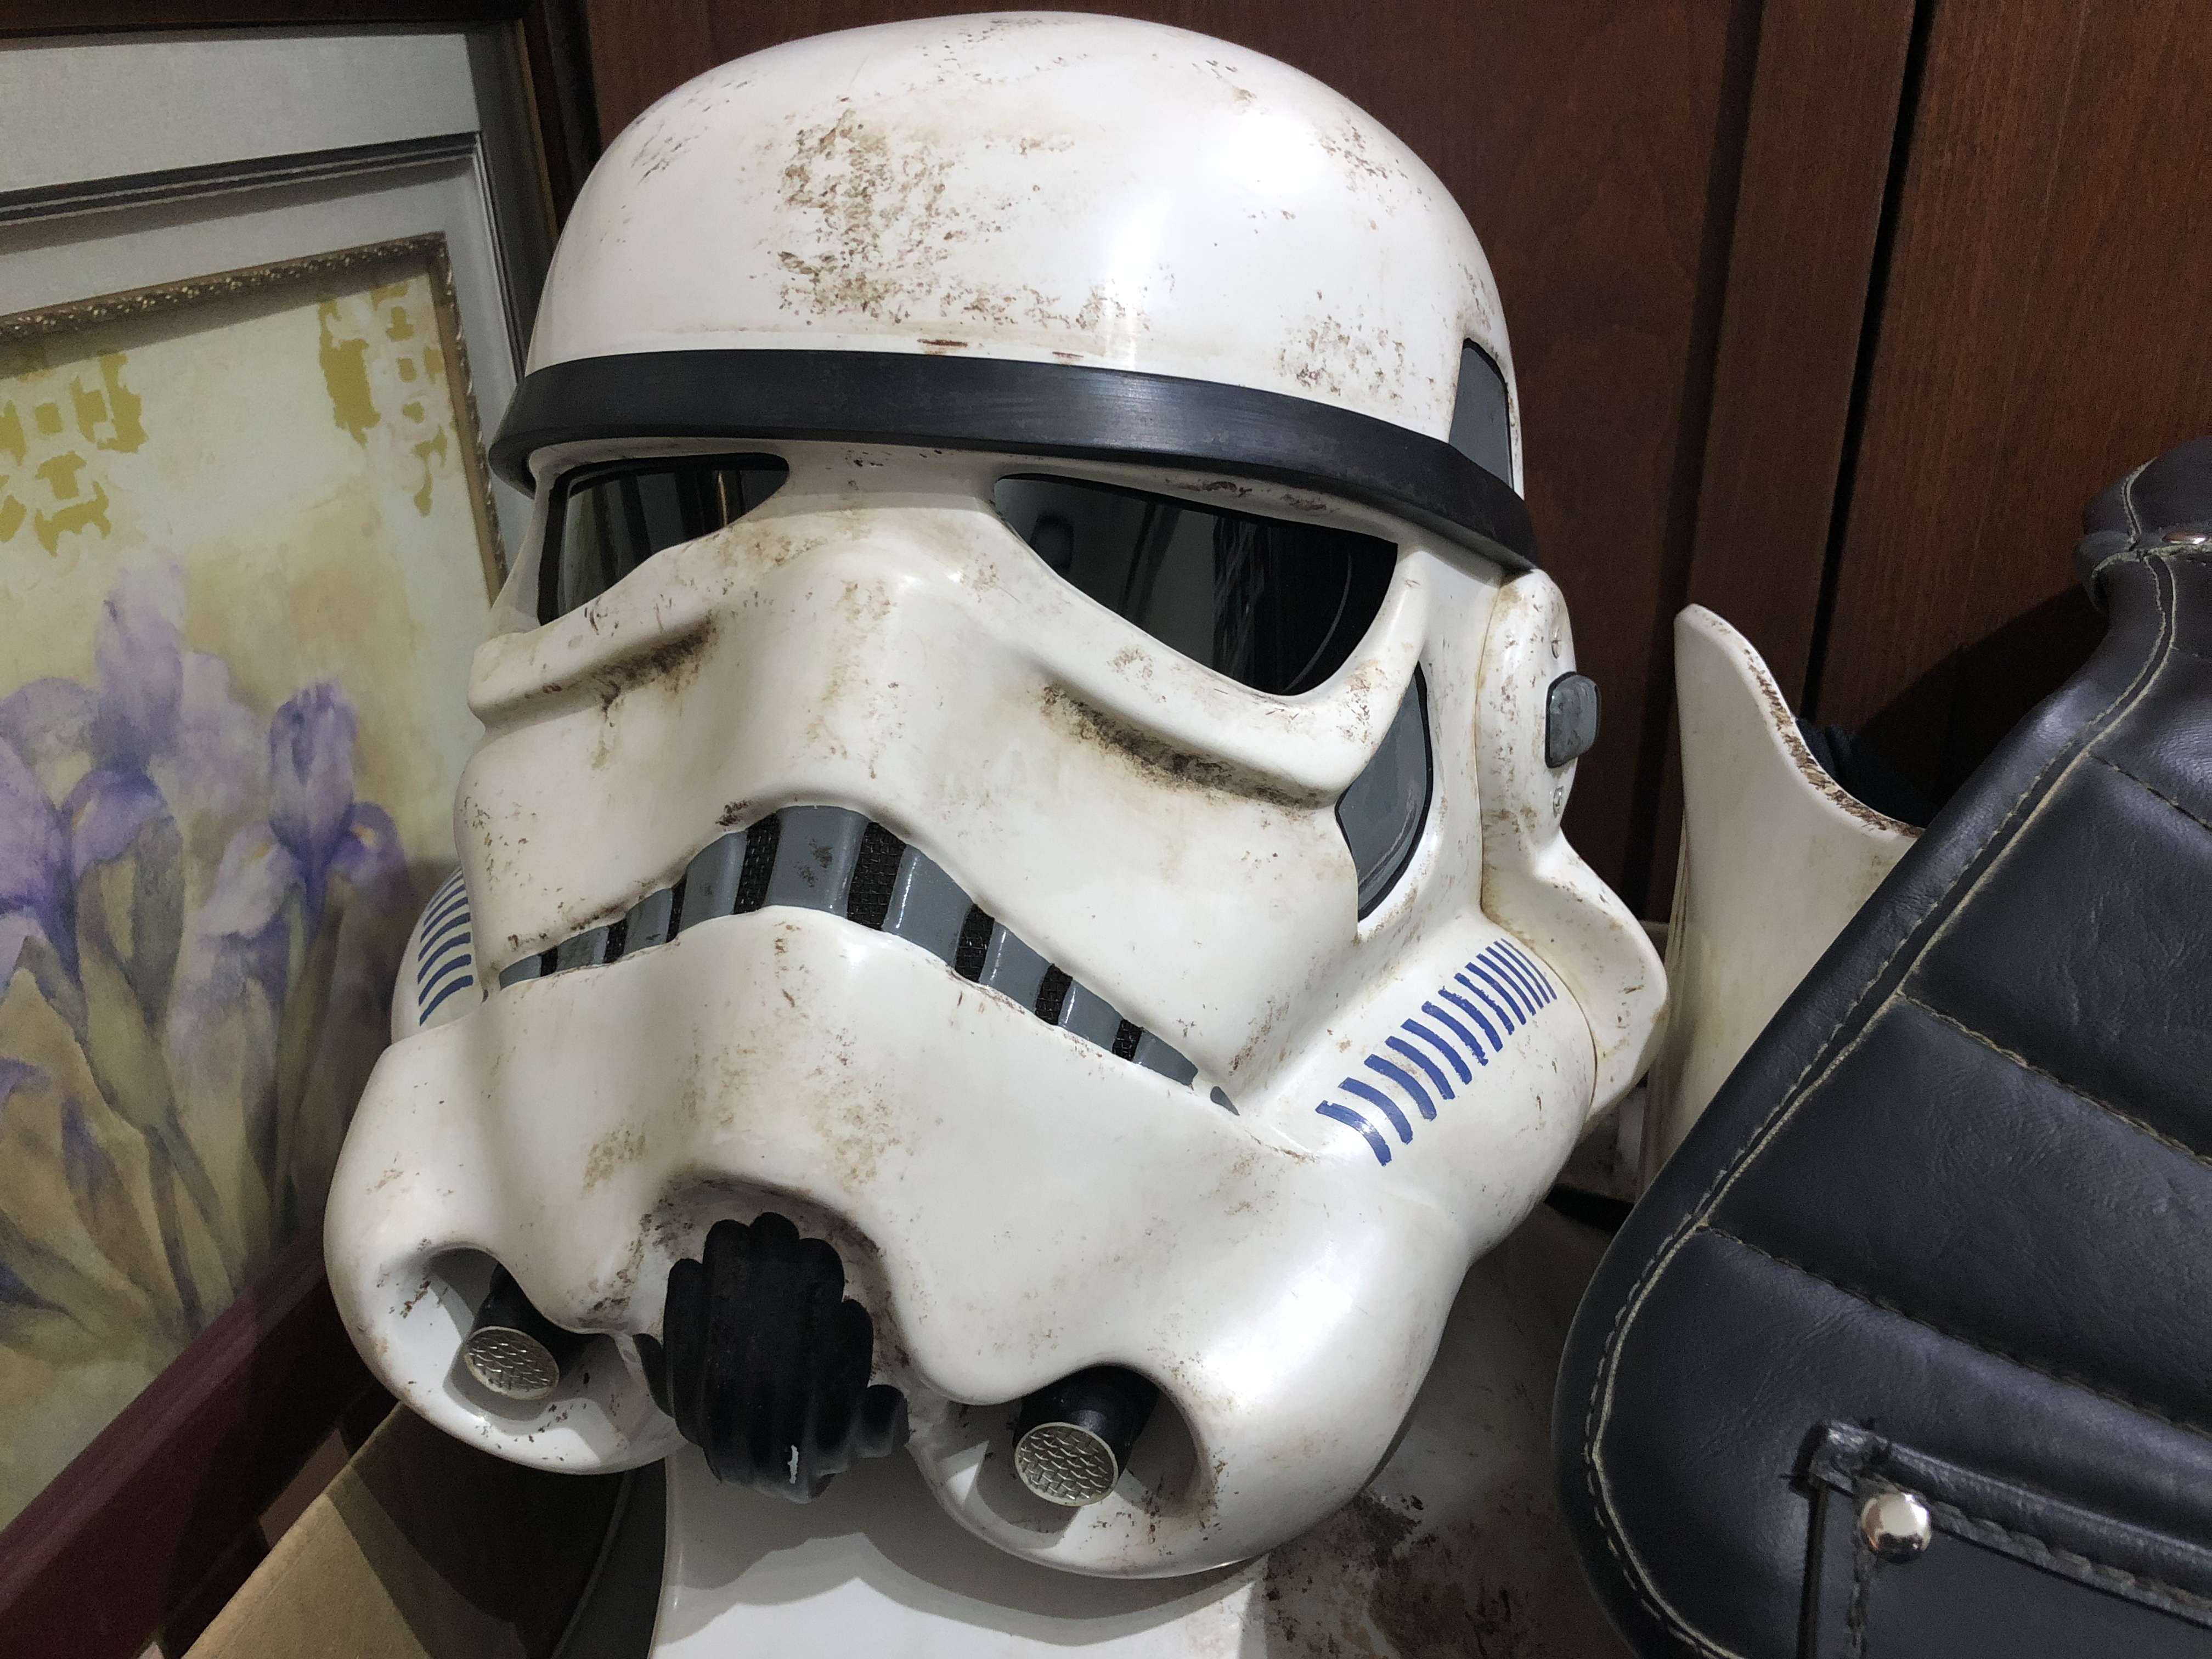
Been a busy week getting the weathering changed and doing a few minor upgrades.
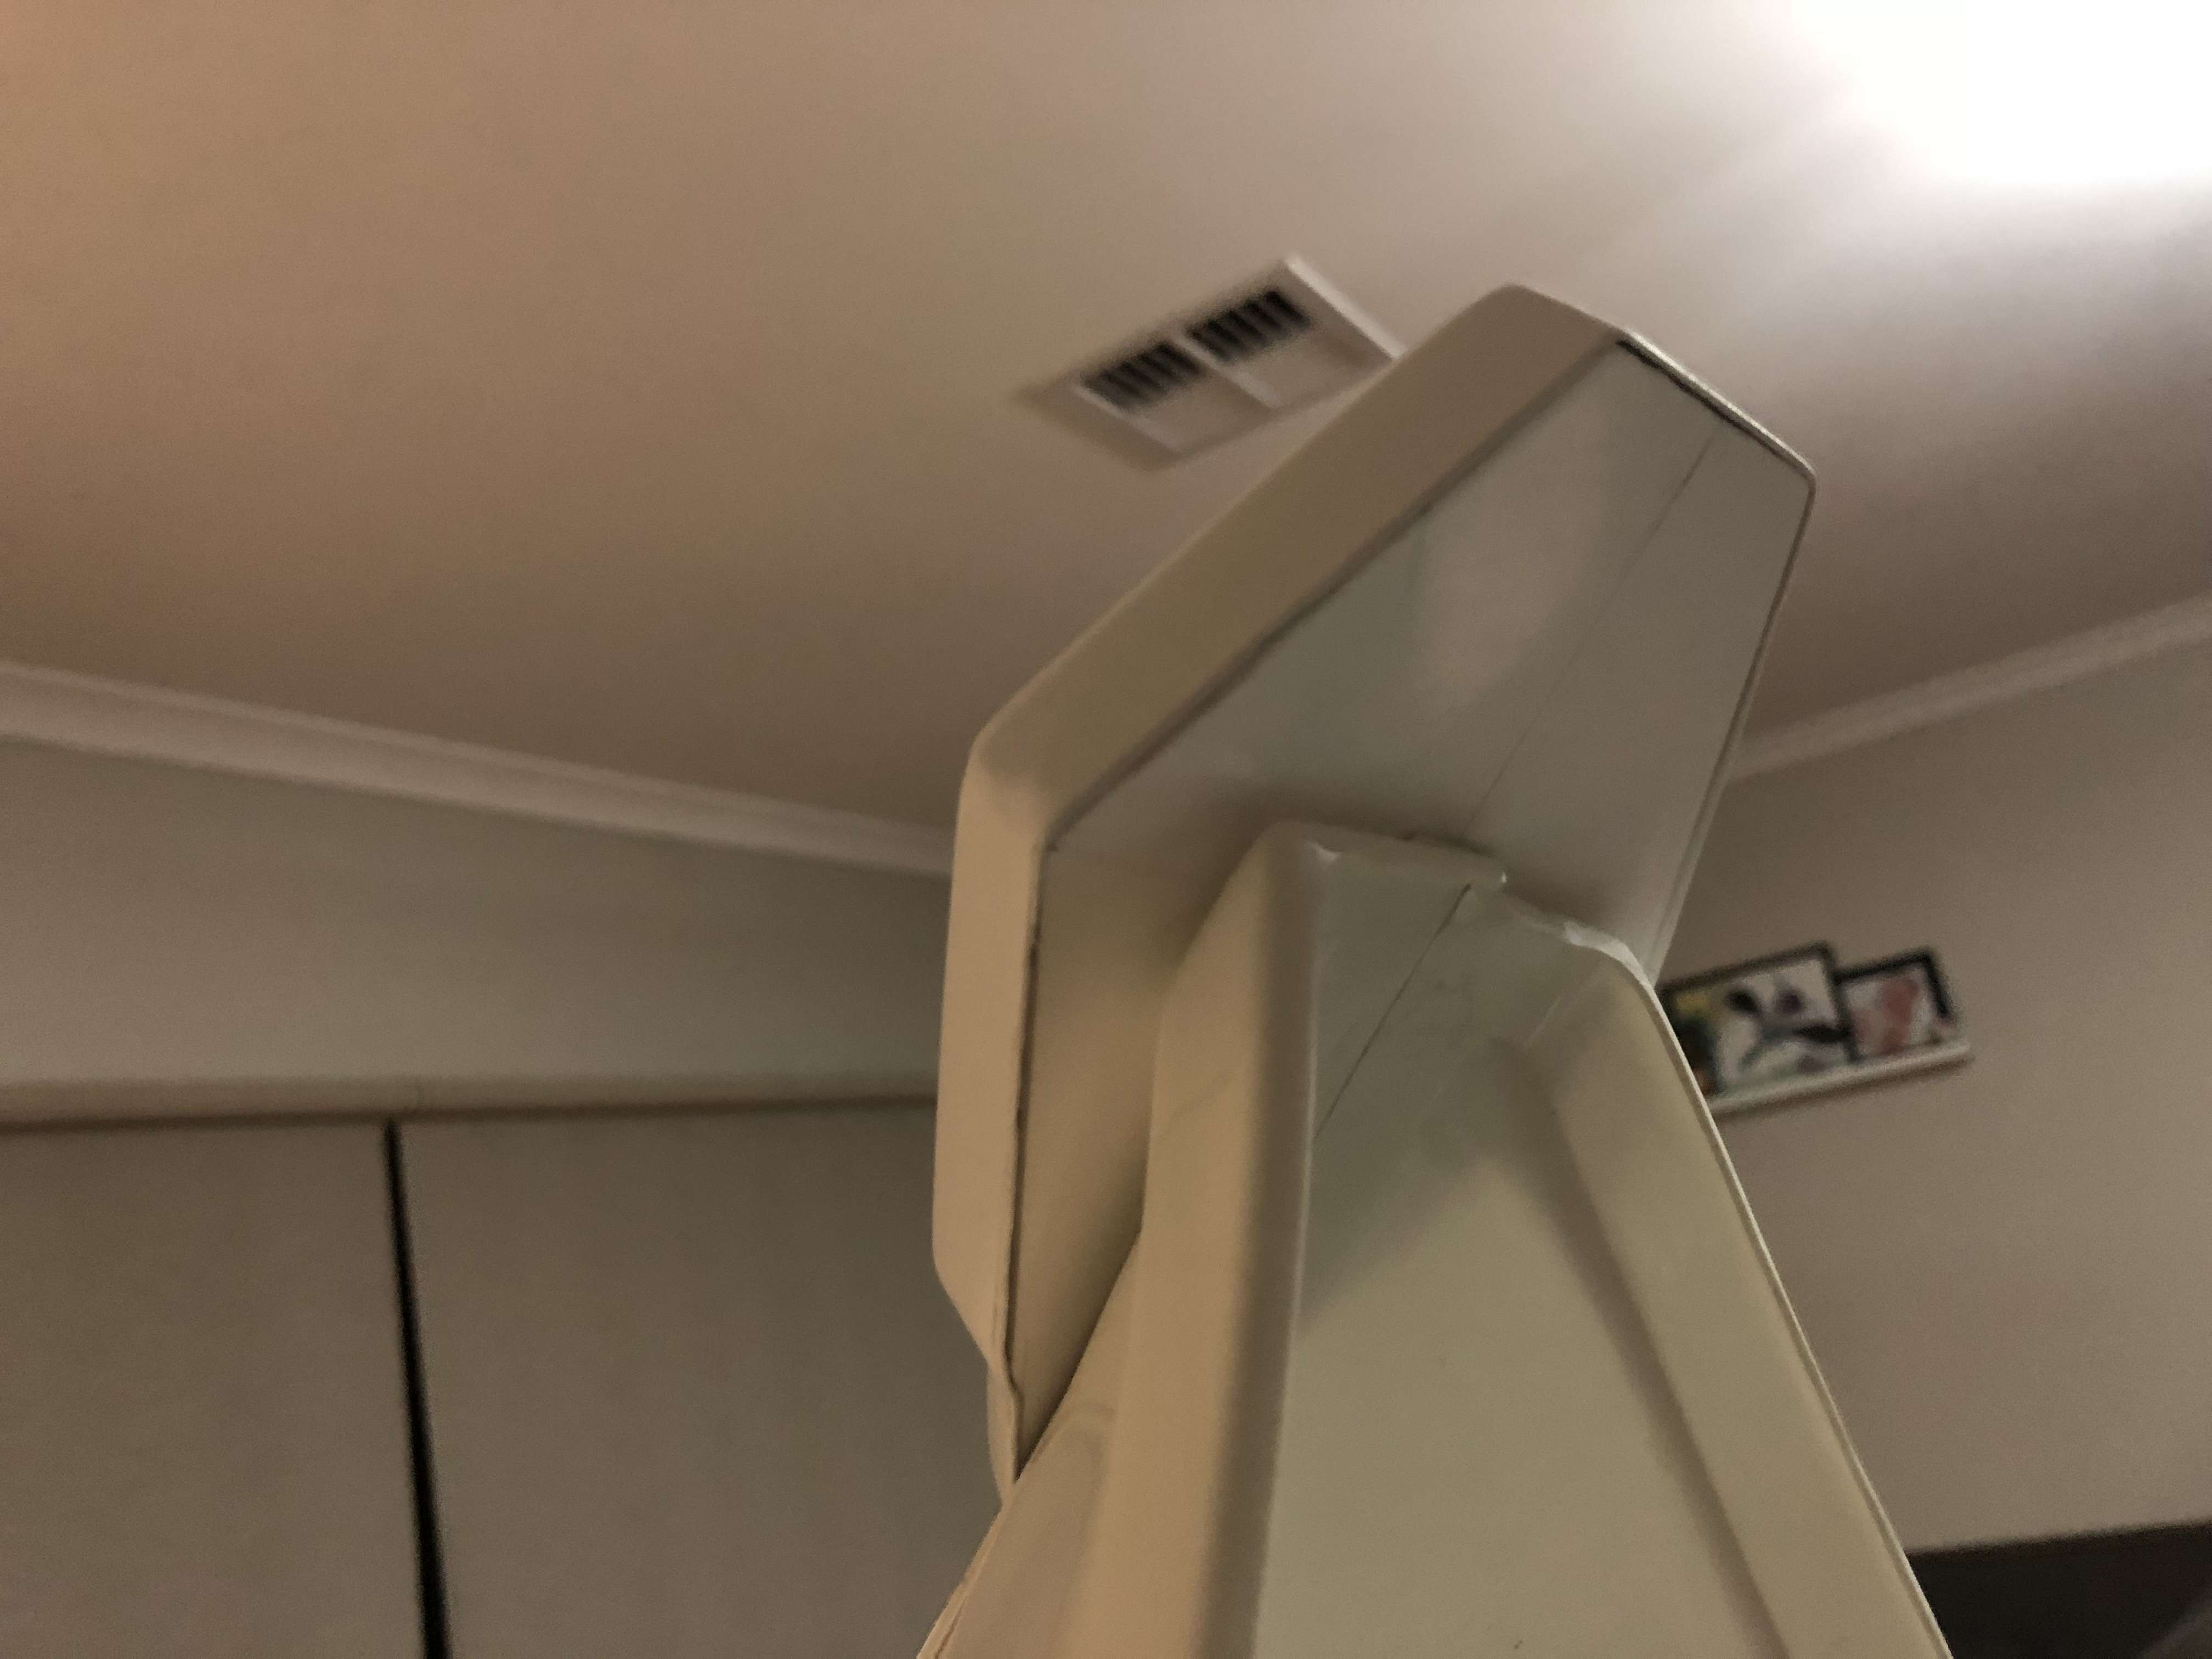
Before I started the torso again I installed the small screws on the return edge of my chest piece to simulate the bracket strapping system
When I went for my first approval I was also told the ab piece sat a little high. I did feel this was happening so I decided to create a bracket & pin system on my kidney & ab pieces to keep them inline and help keep the ab down. Seems to work well and also keeps them together to keep the gap down
I also took the oppertunity to cut down the thickness of my diamond knee plate as well. To weather my pouches & pauldron I used hairspray and some dirt I had which gave a little bit more to the pauldron/pouches but nothing overboard. So time to send in approval pics again
-
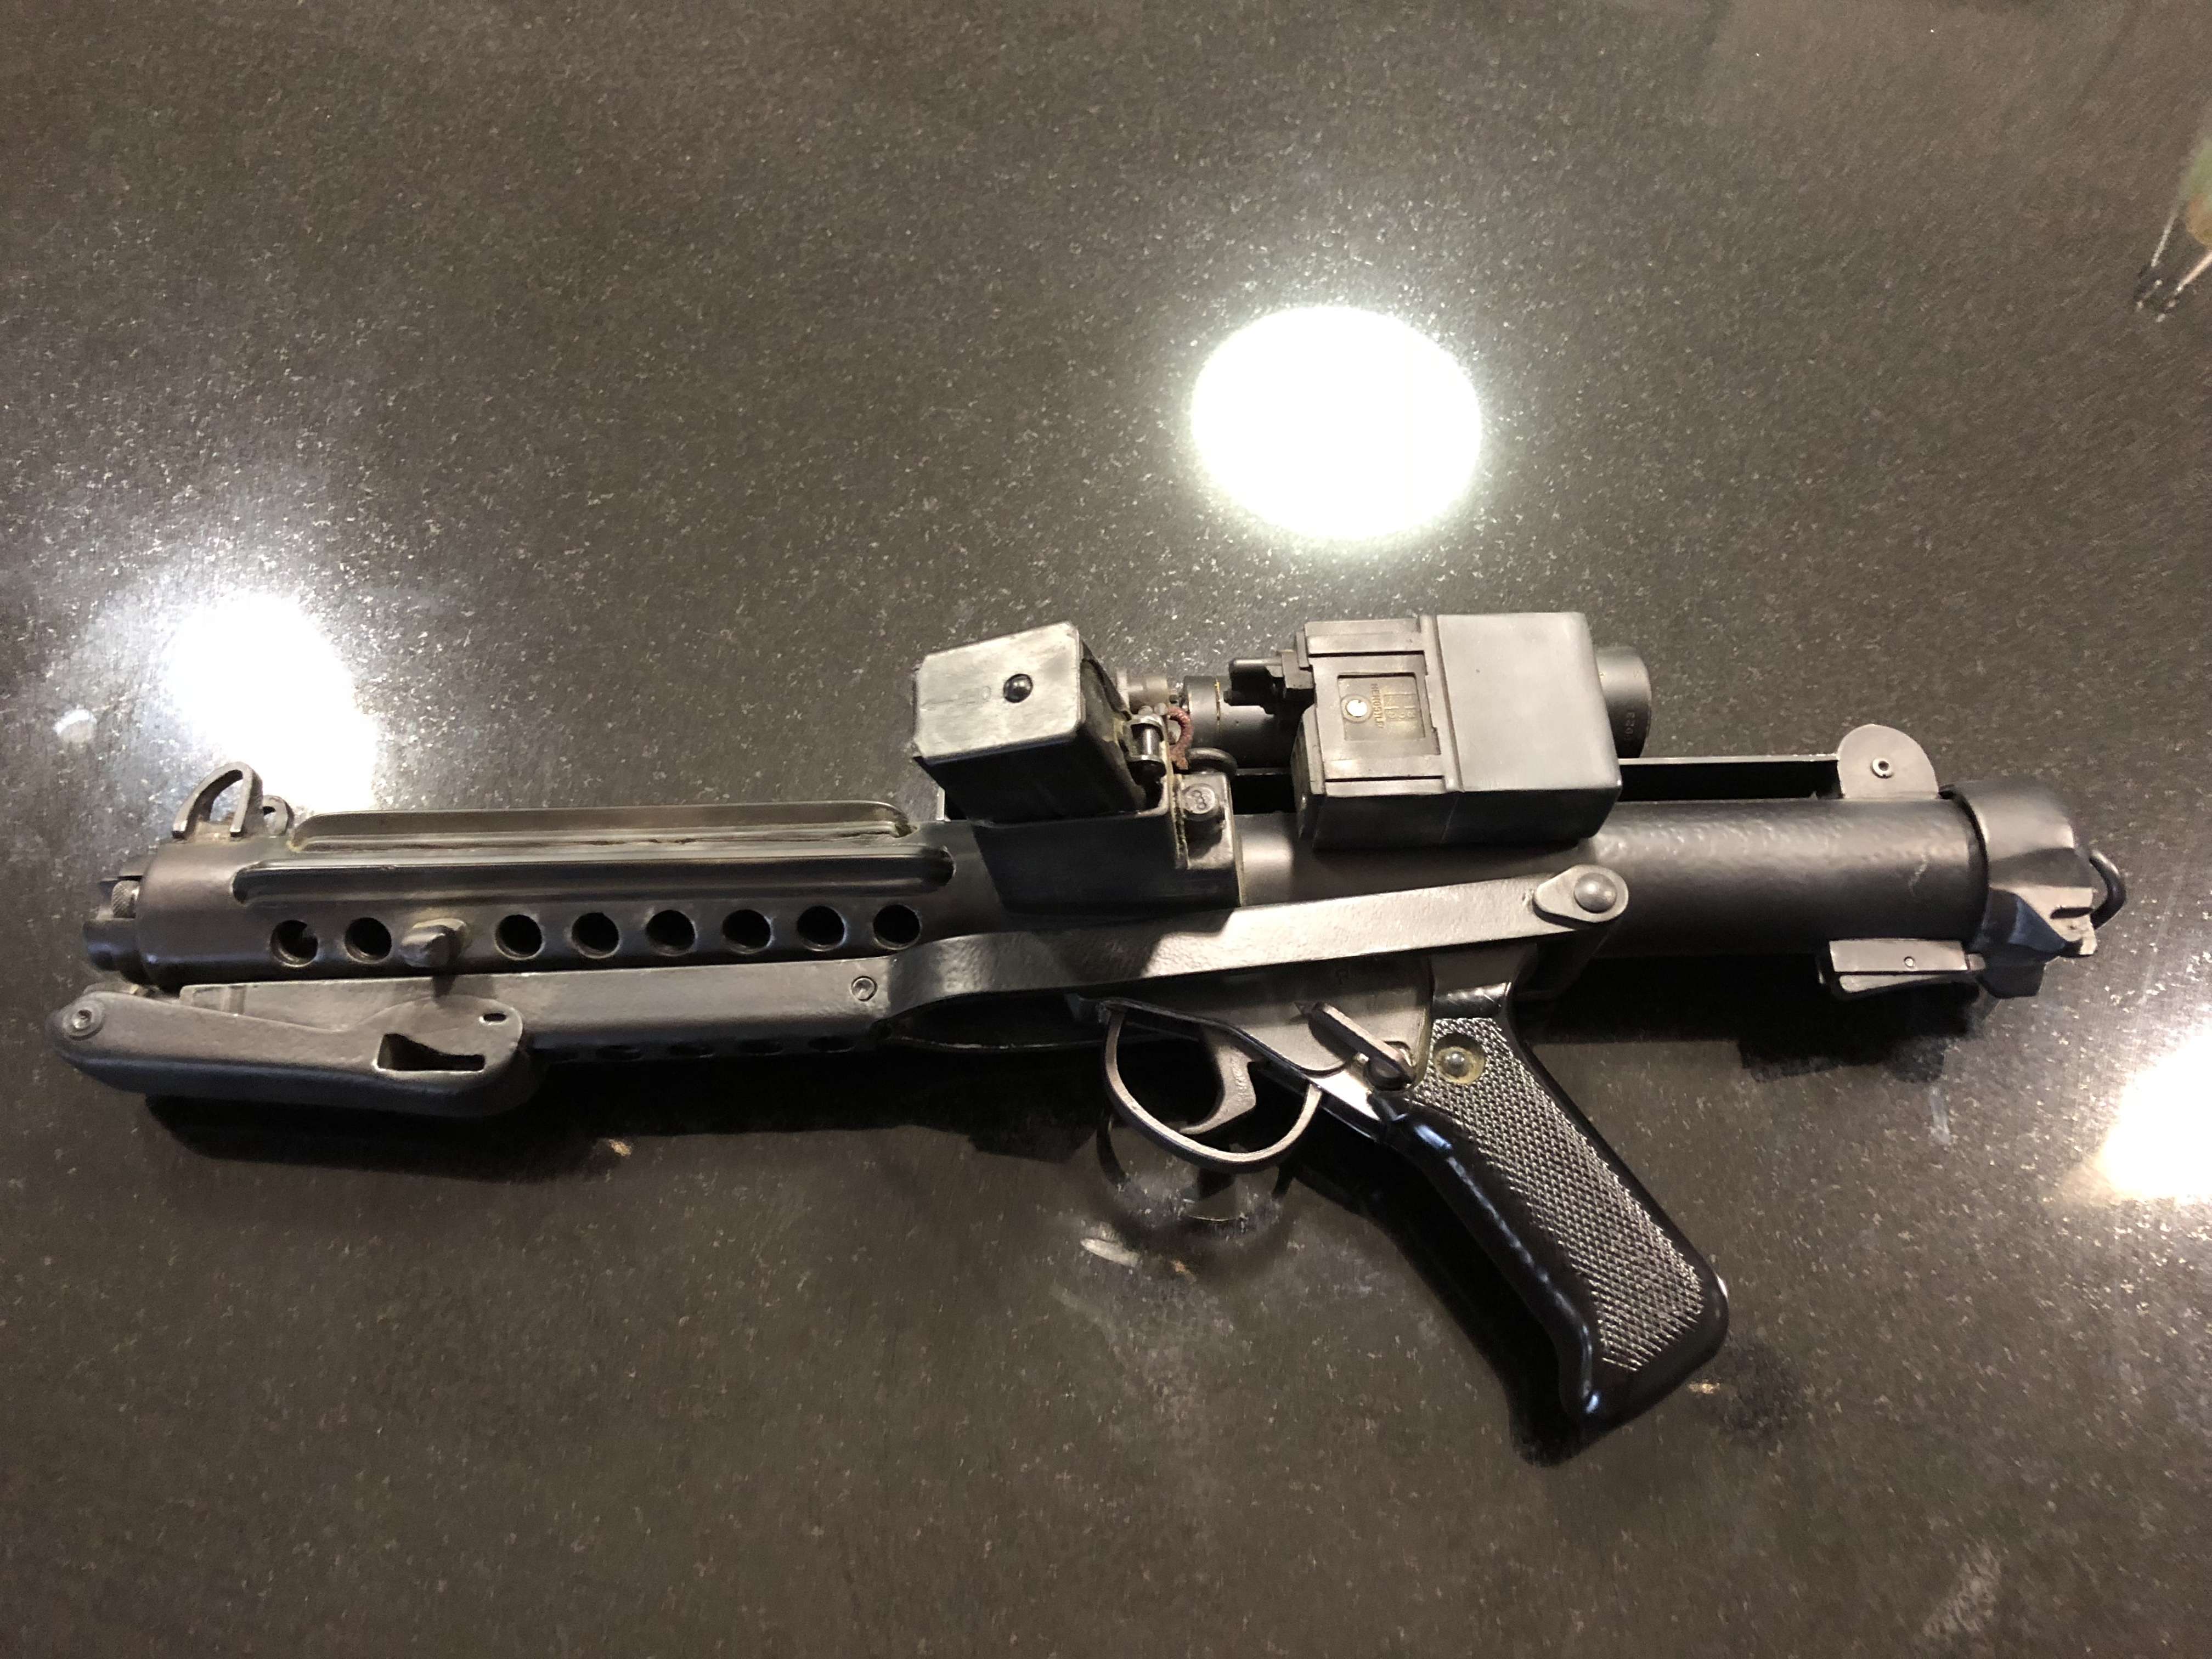
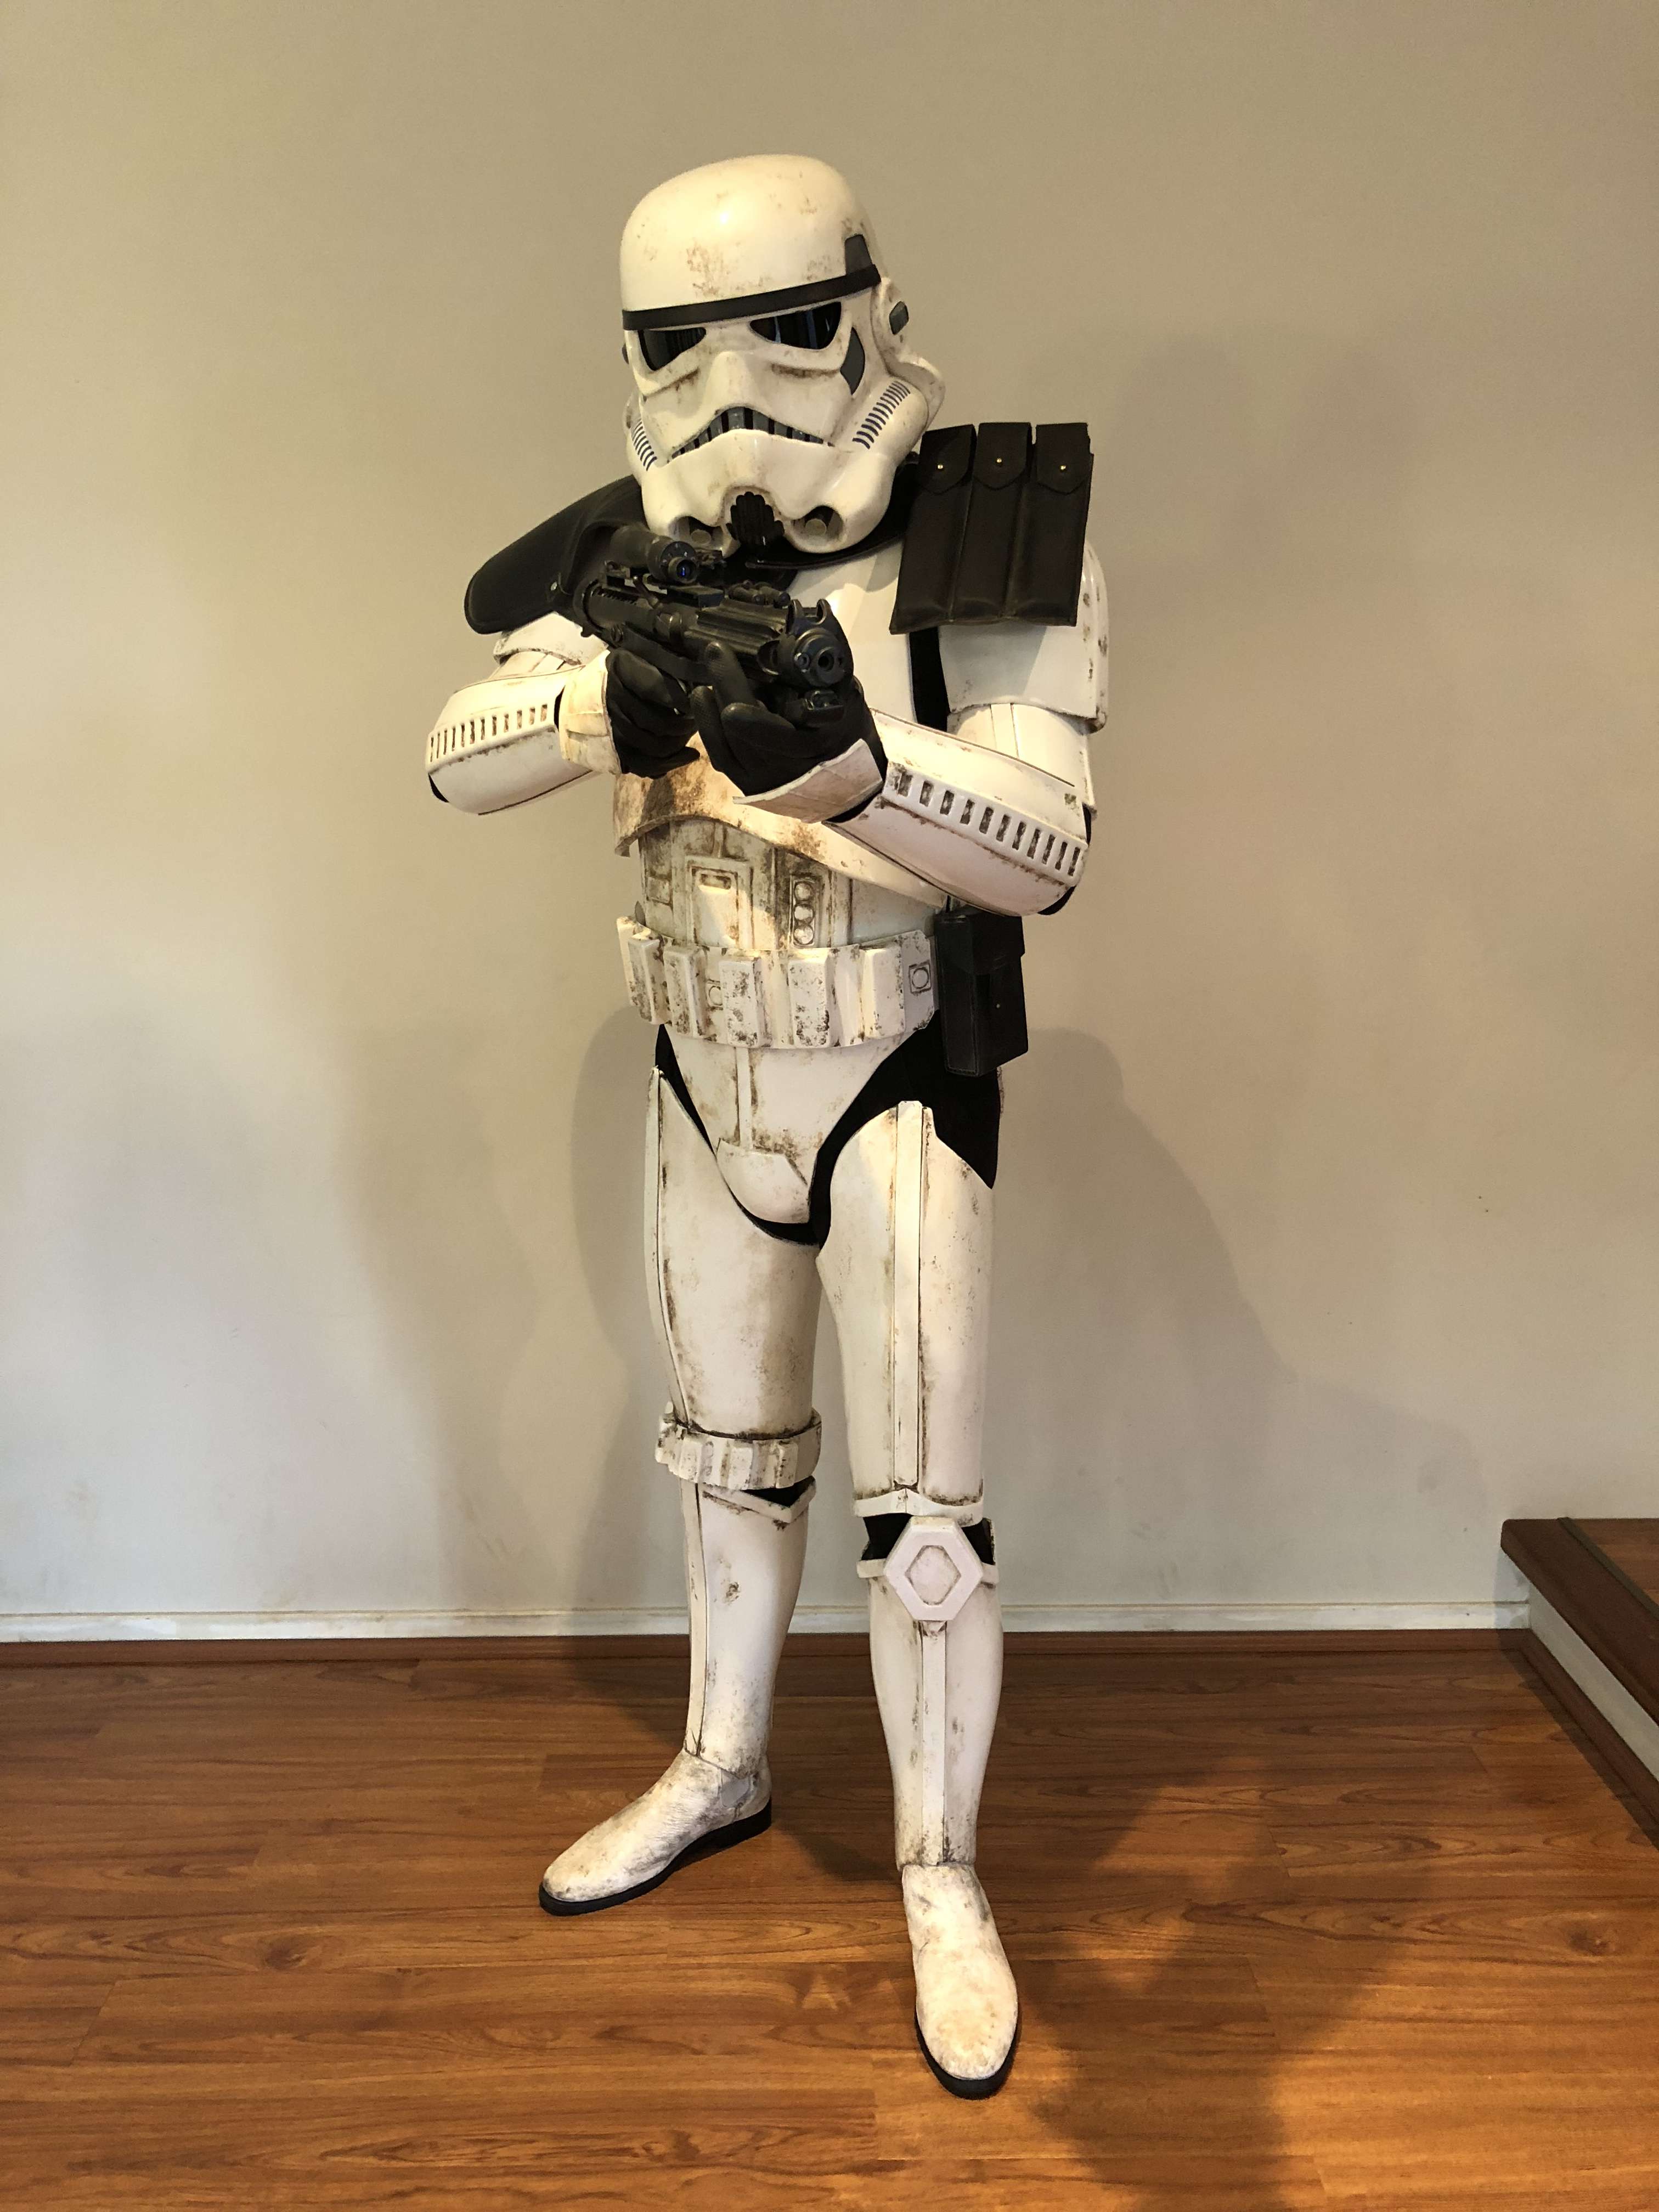
Also forgot to post I finished my E-11 last weekend, came out alright
-
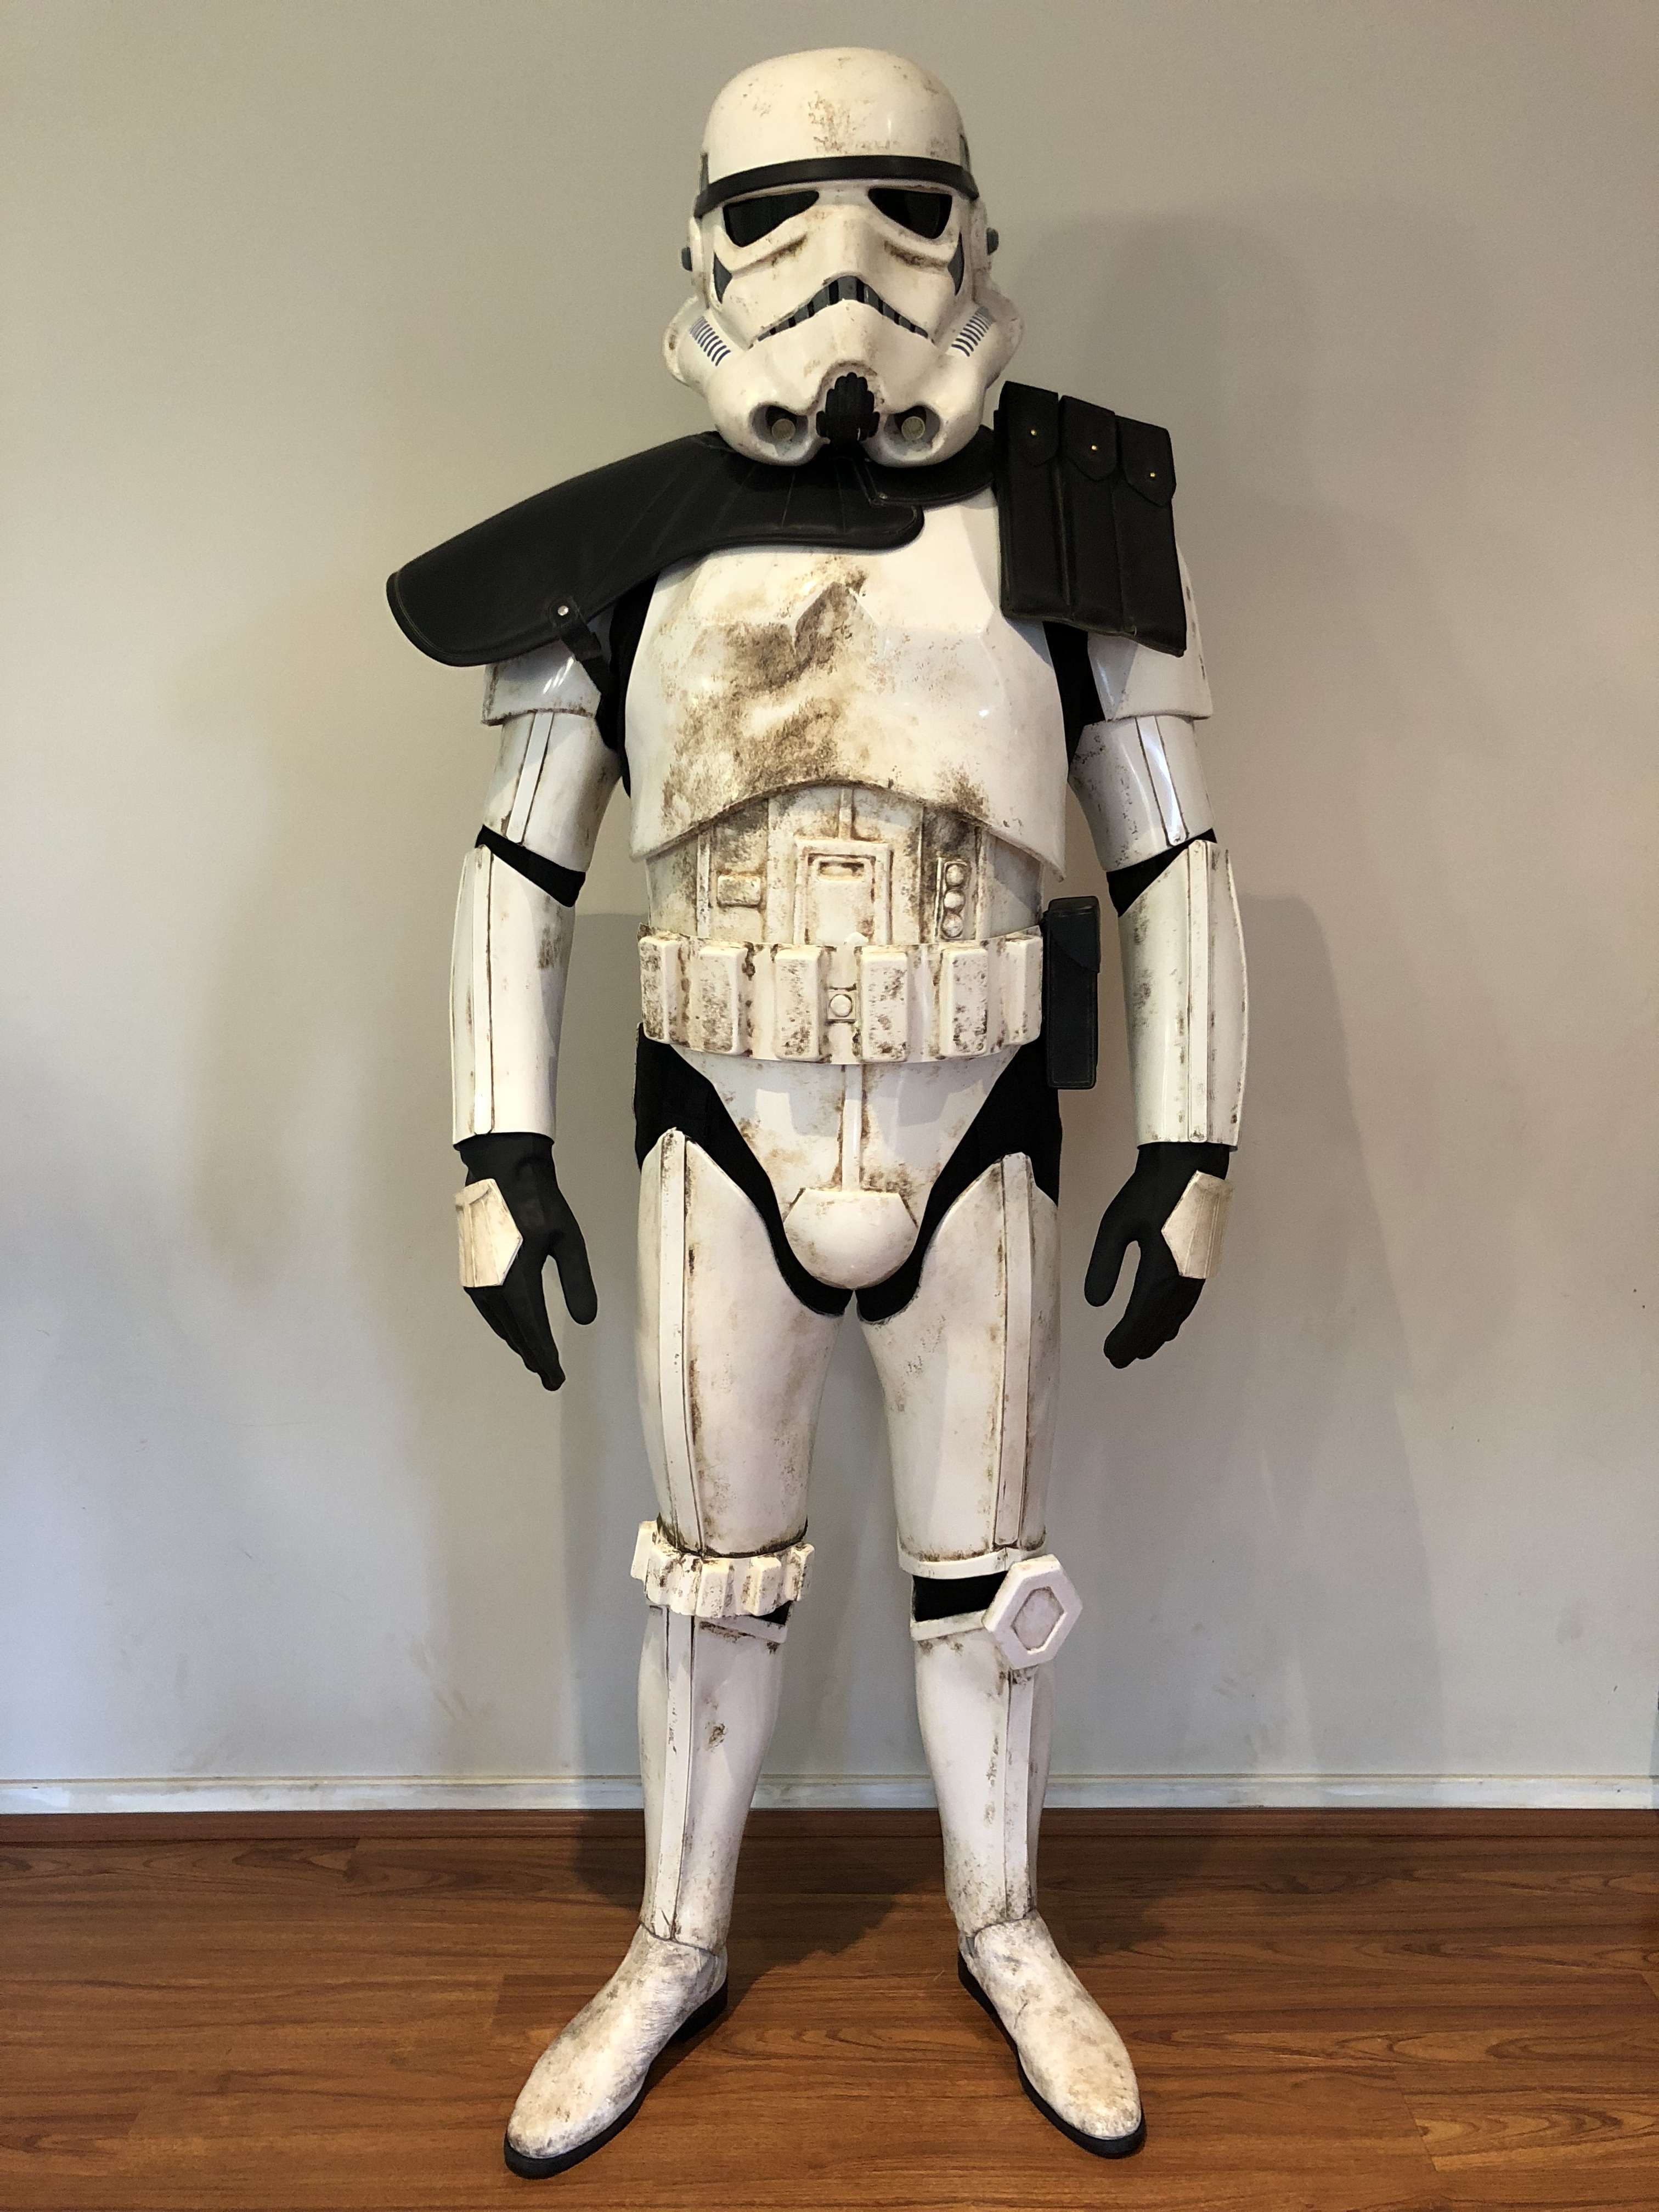
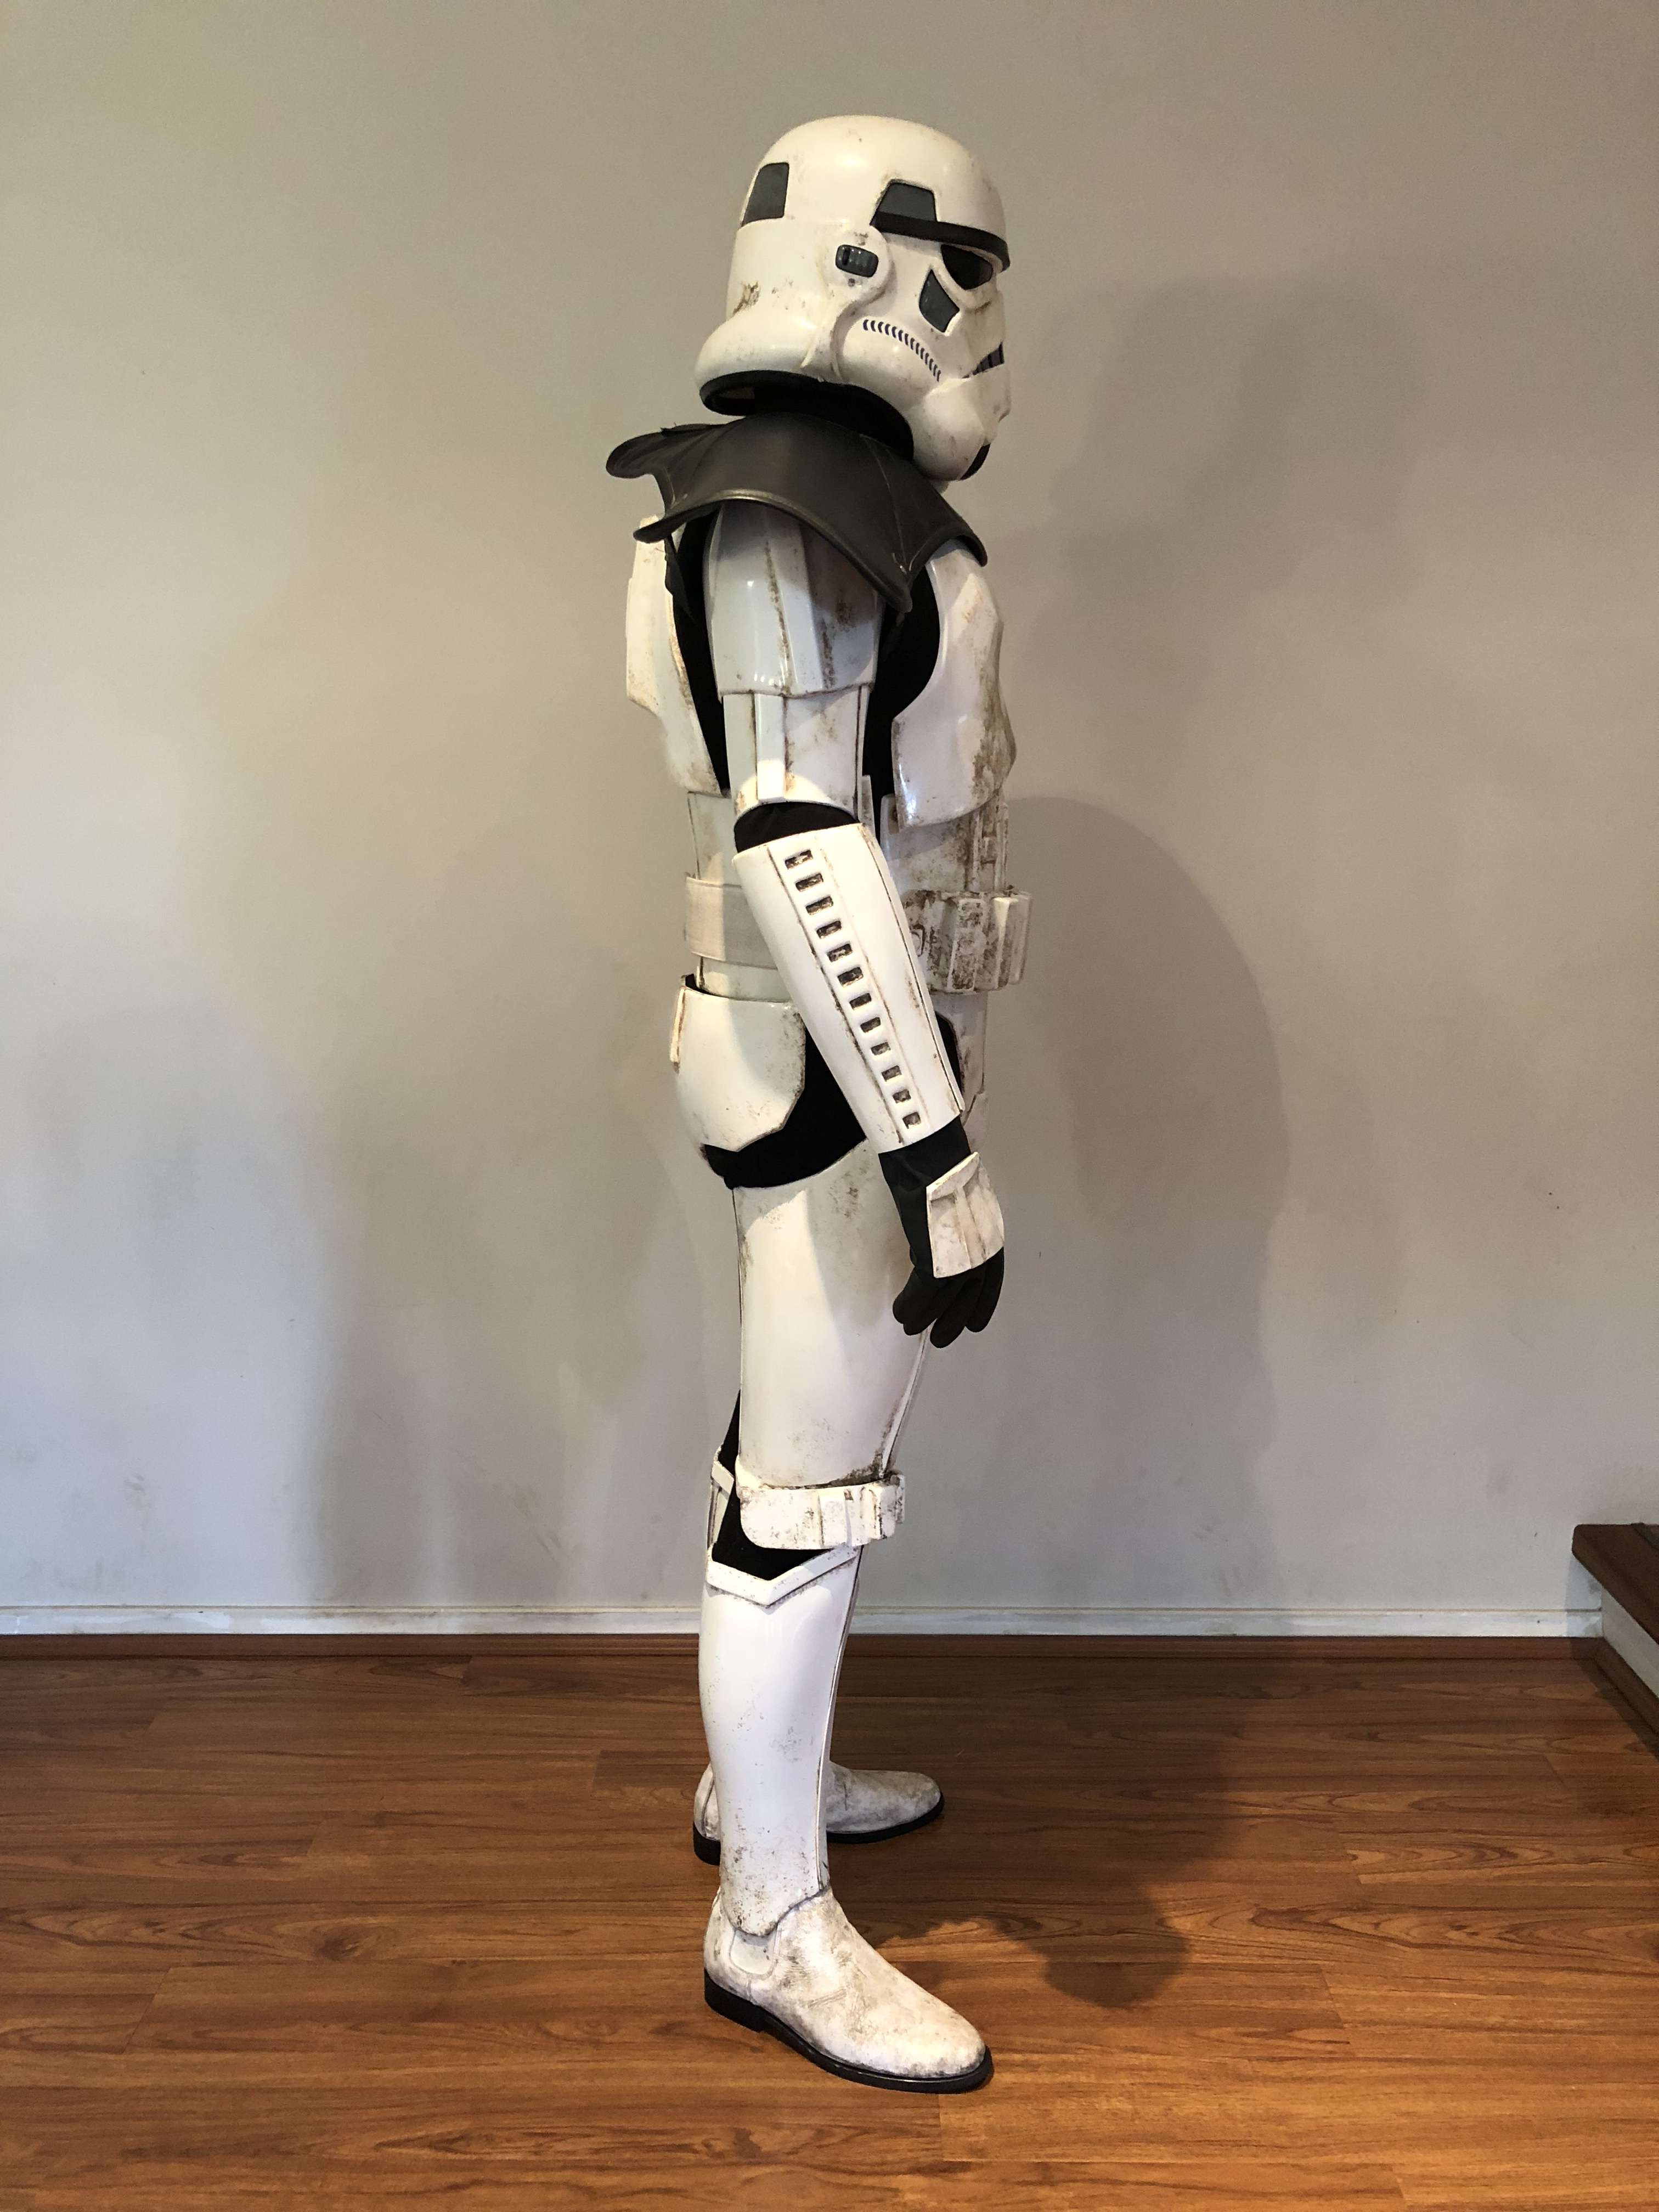
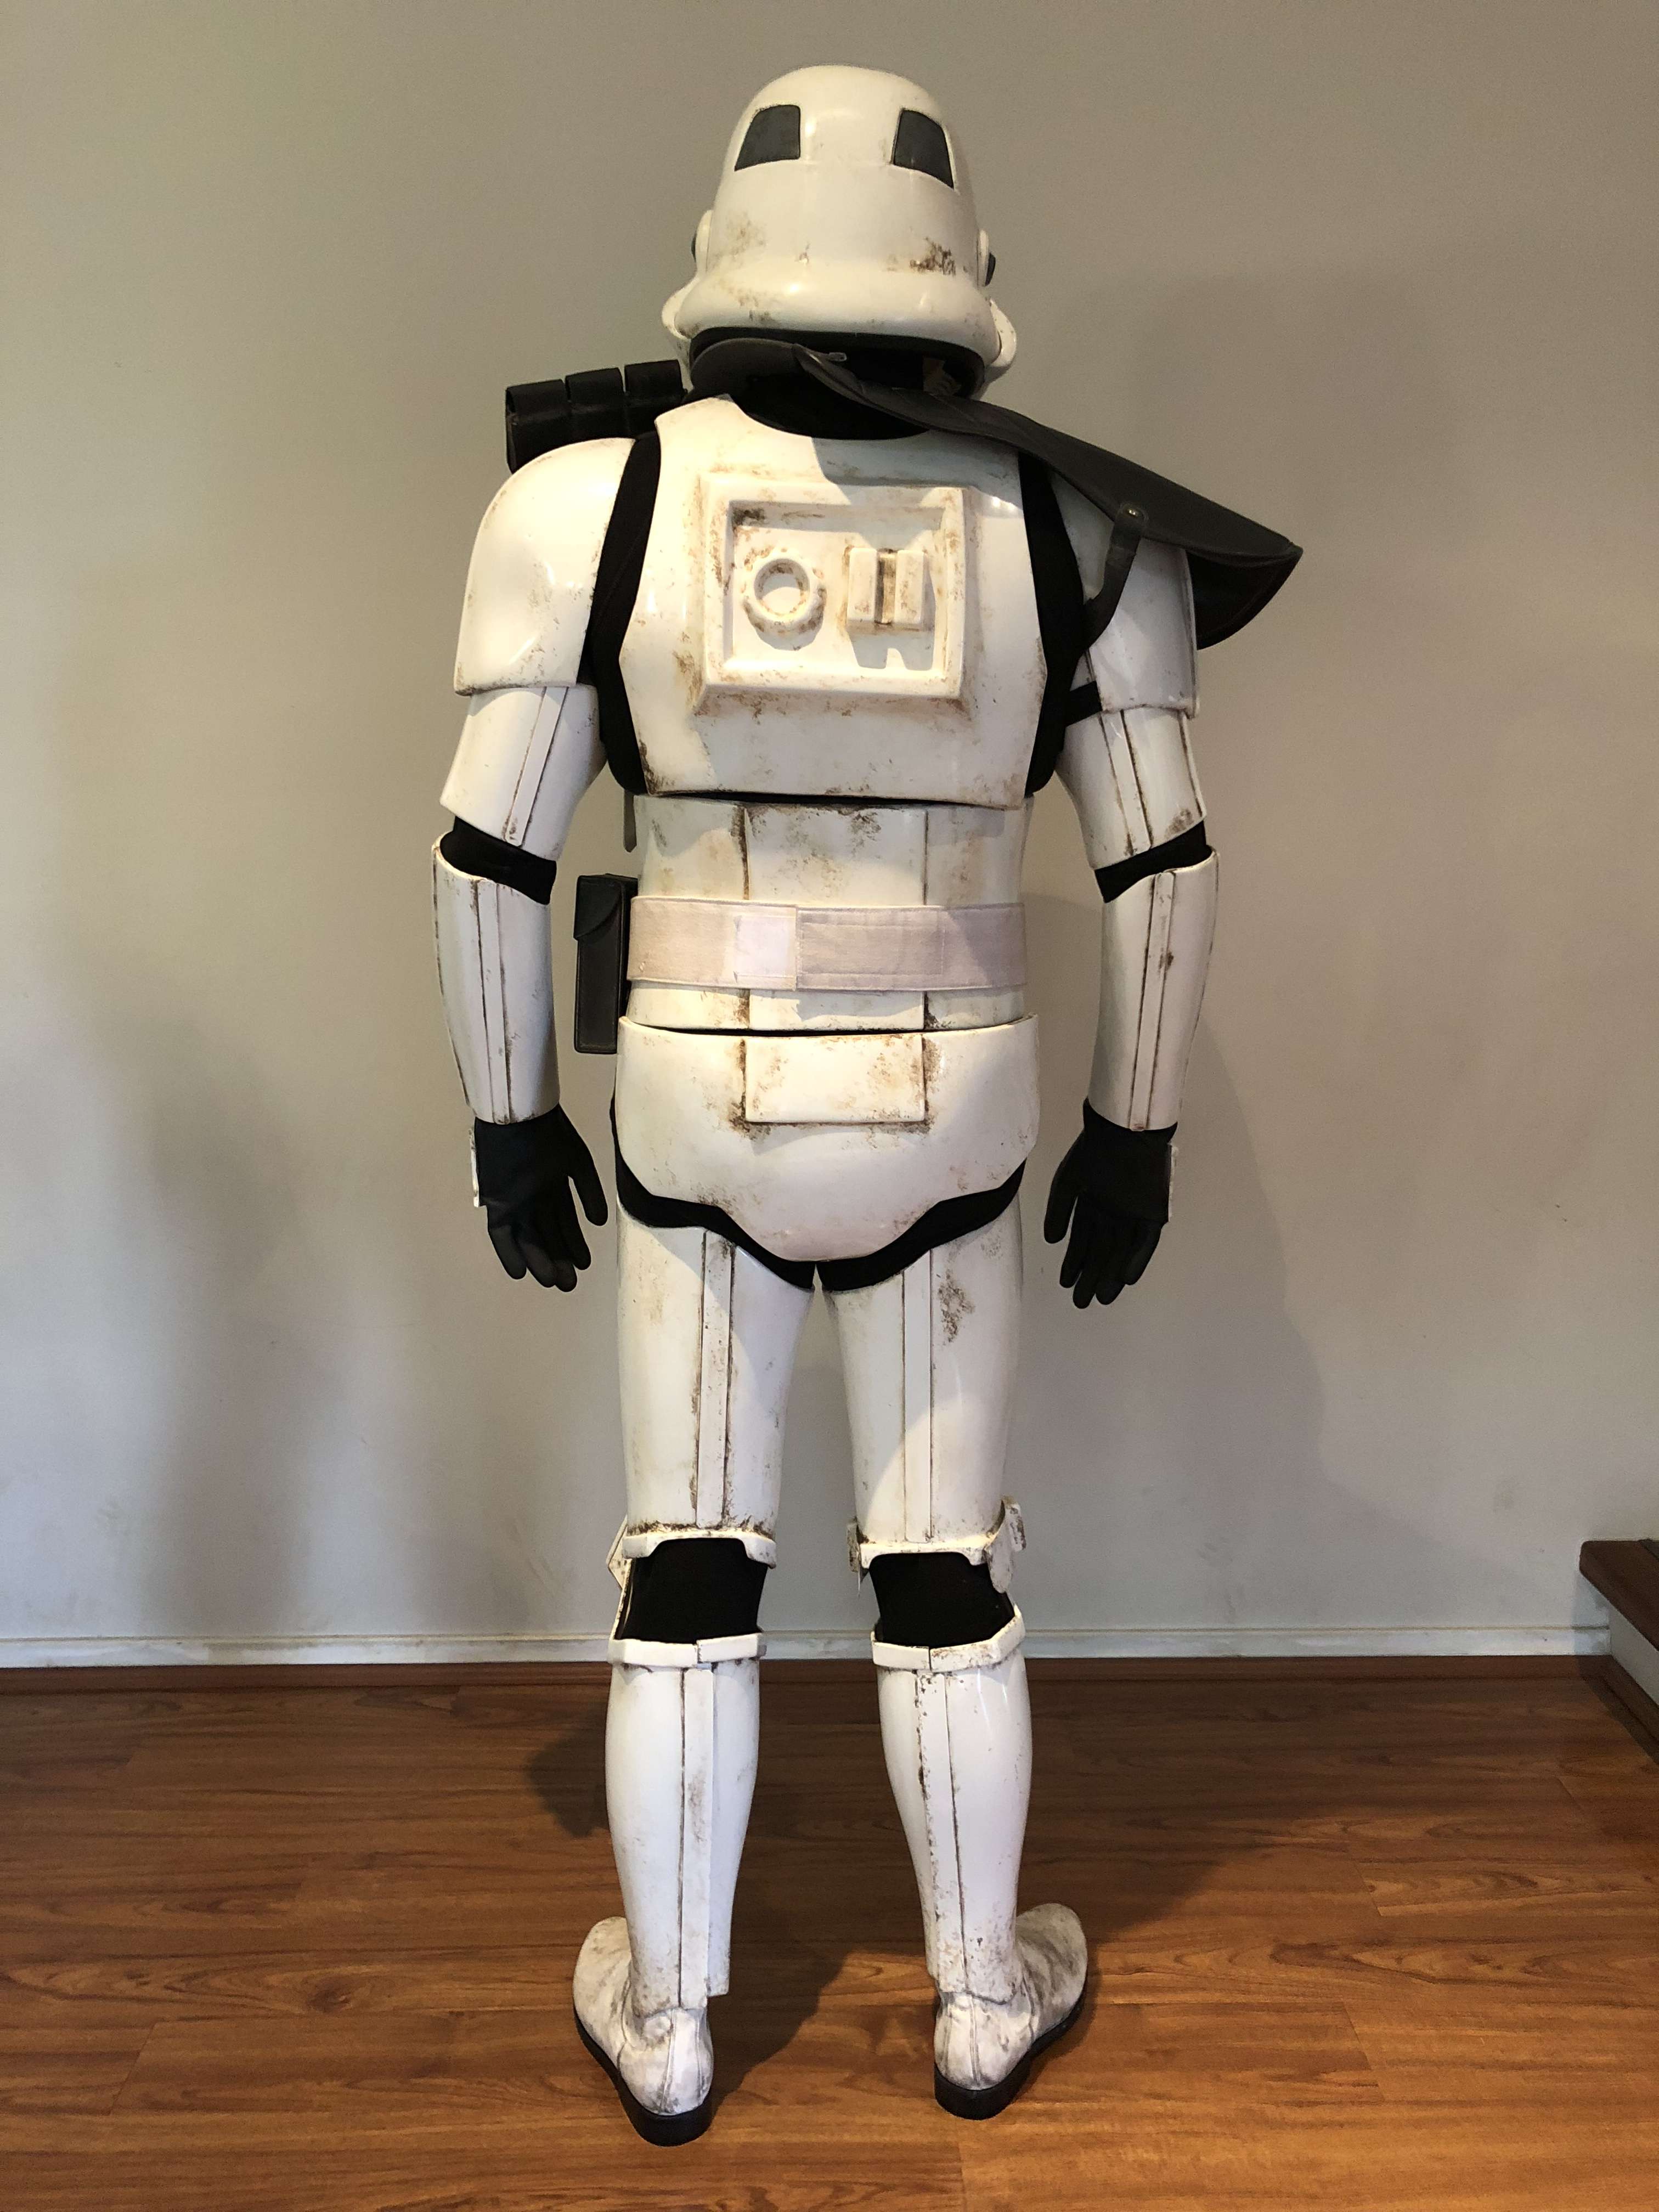
Thanks for the advise guys. After the setback I had I decided I would try and blend in a brown over the top of my existing weathering but I just couldn't get the finish I wanted. So back to the drawing board, I cleaned the torso down and started again.
Because I want to go PO & possibly go SWAT I wanted to get a movie accurate finish and decided on the trooper to emulate
This is where I am at with my torso so far. I was asked to use more Burnt Umber in my tones this time which I have done with a light wash (Burnt umber/Black/Cream) on the first pass and then a more dark grey highlighting wash (Burnt Umber/Black) on the second pass. I might hit it with more solid darker tone in some places tonight but not sure yet.
Ran this by the GML overnight and he has given his approval so I will blend in the arms and legs tonight and hopefully go for approval over the weekend.
-
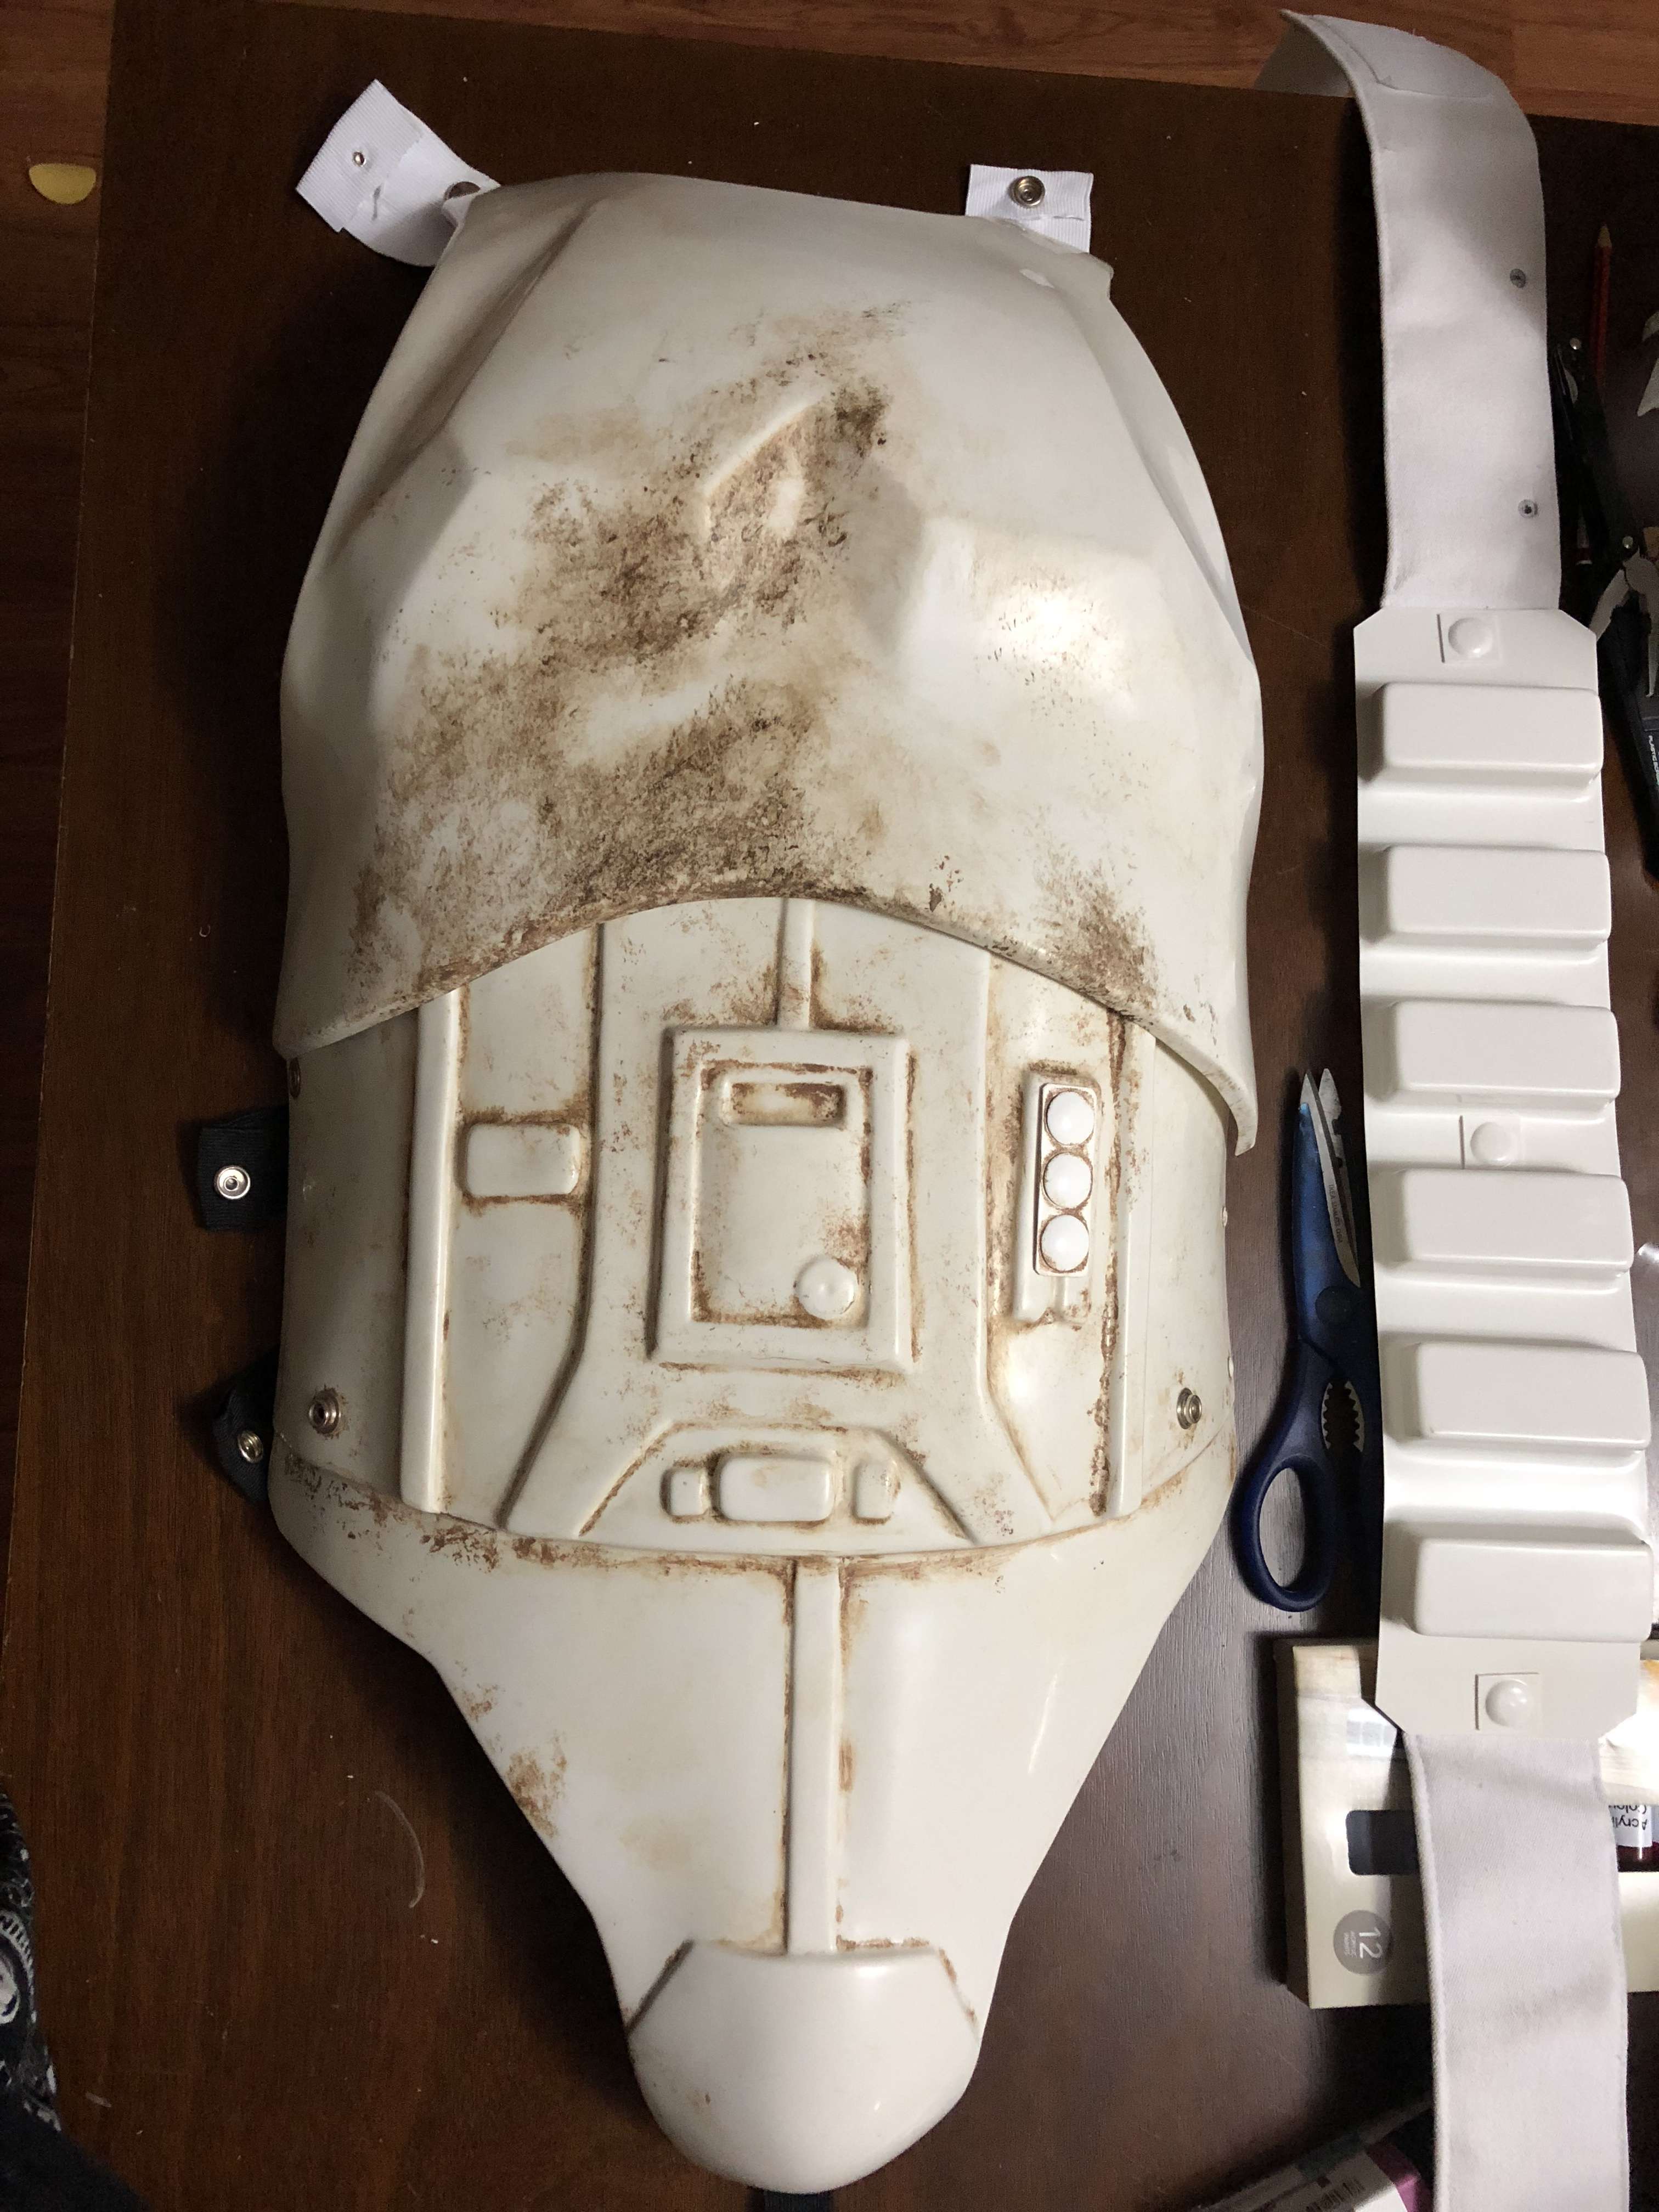
Well I went and submitted my Sandtrooper to the GML yesterday.
So I have just heard back and I have been rejected due to my weathering being to dark. He also wants more on my pouches, pauldron and on the back of the belt on the velcro area which I can understand but I didnt think my colour was that bad. What do you guys think?
-
I had to build my 3 button plate to. I used domed head car interior trim clips. When I built my Tie kit I needed to use 2 of them in the trident area and so I had 4 left. Cut the backs off and glue them to some styrene sheet, a bit of paint and all good
-
2
-
 1
1
-
-
Thanks Steve. Yeah I know what you mean bout the pouches etc but it’s hard to capture the effect with pictures. In person it’s more noticeable. I have even been told my boots aren’t dirty enough but again in person they are better.
-
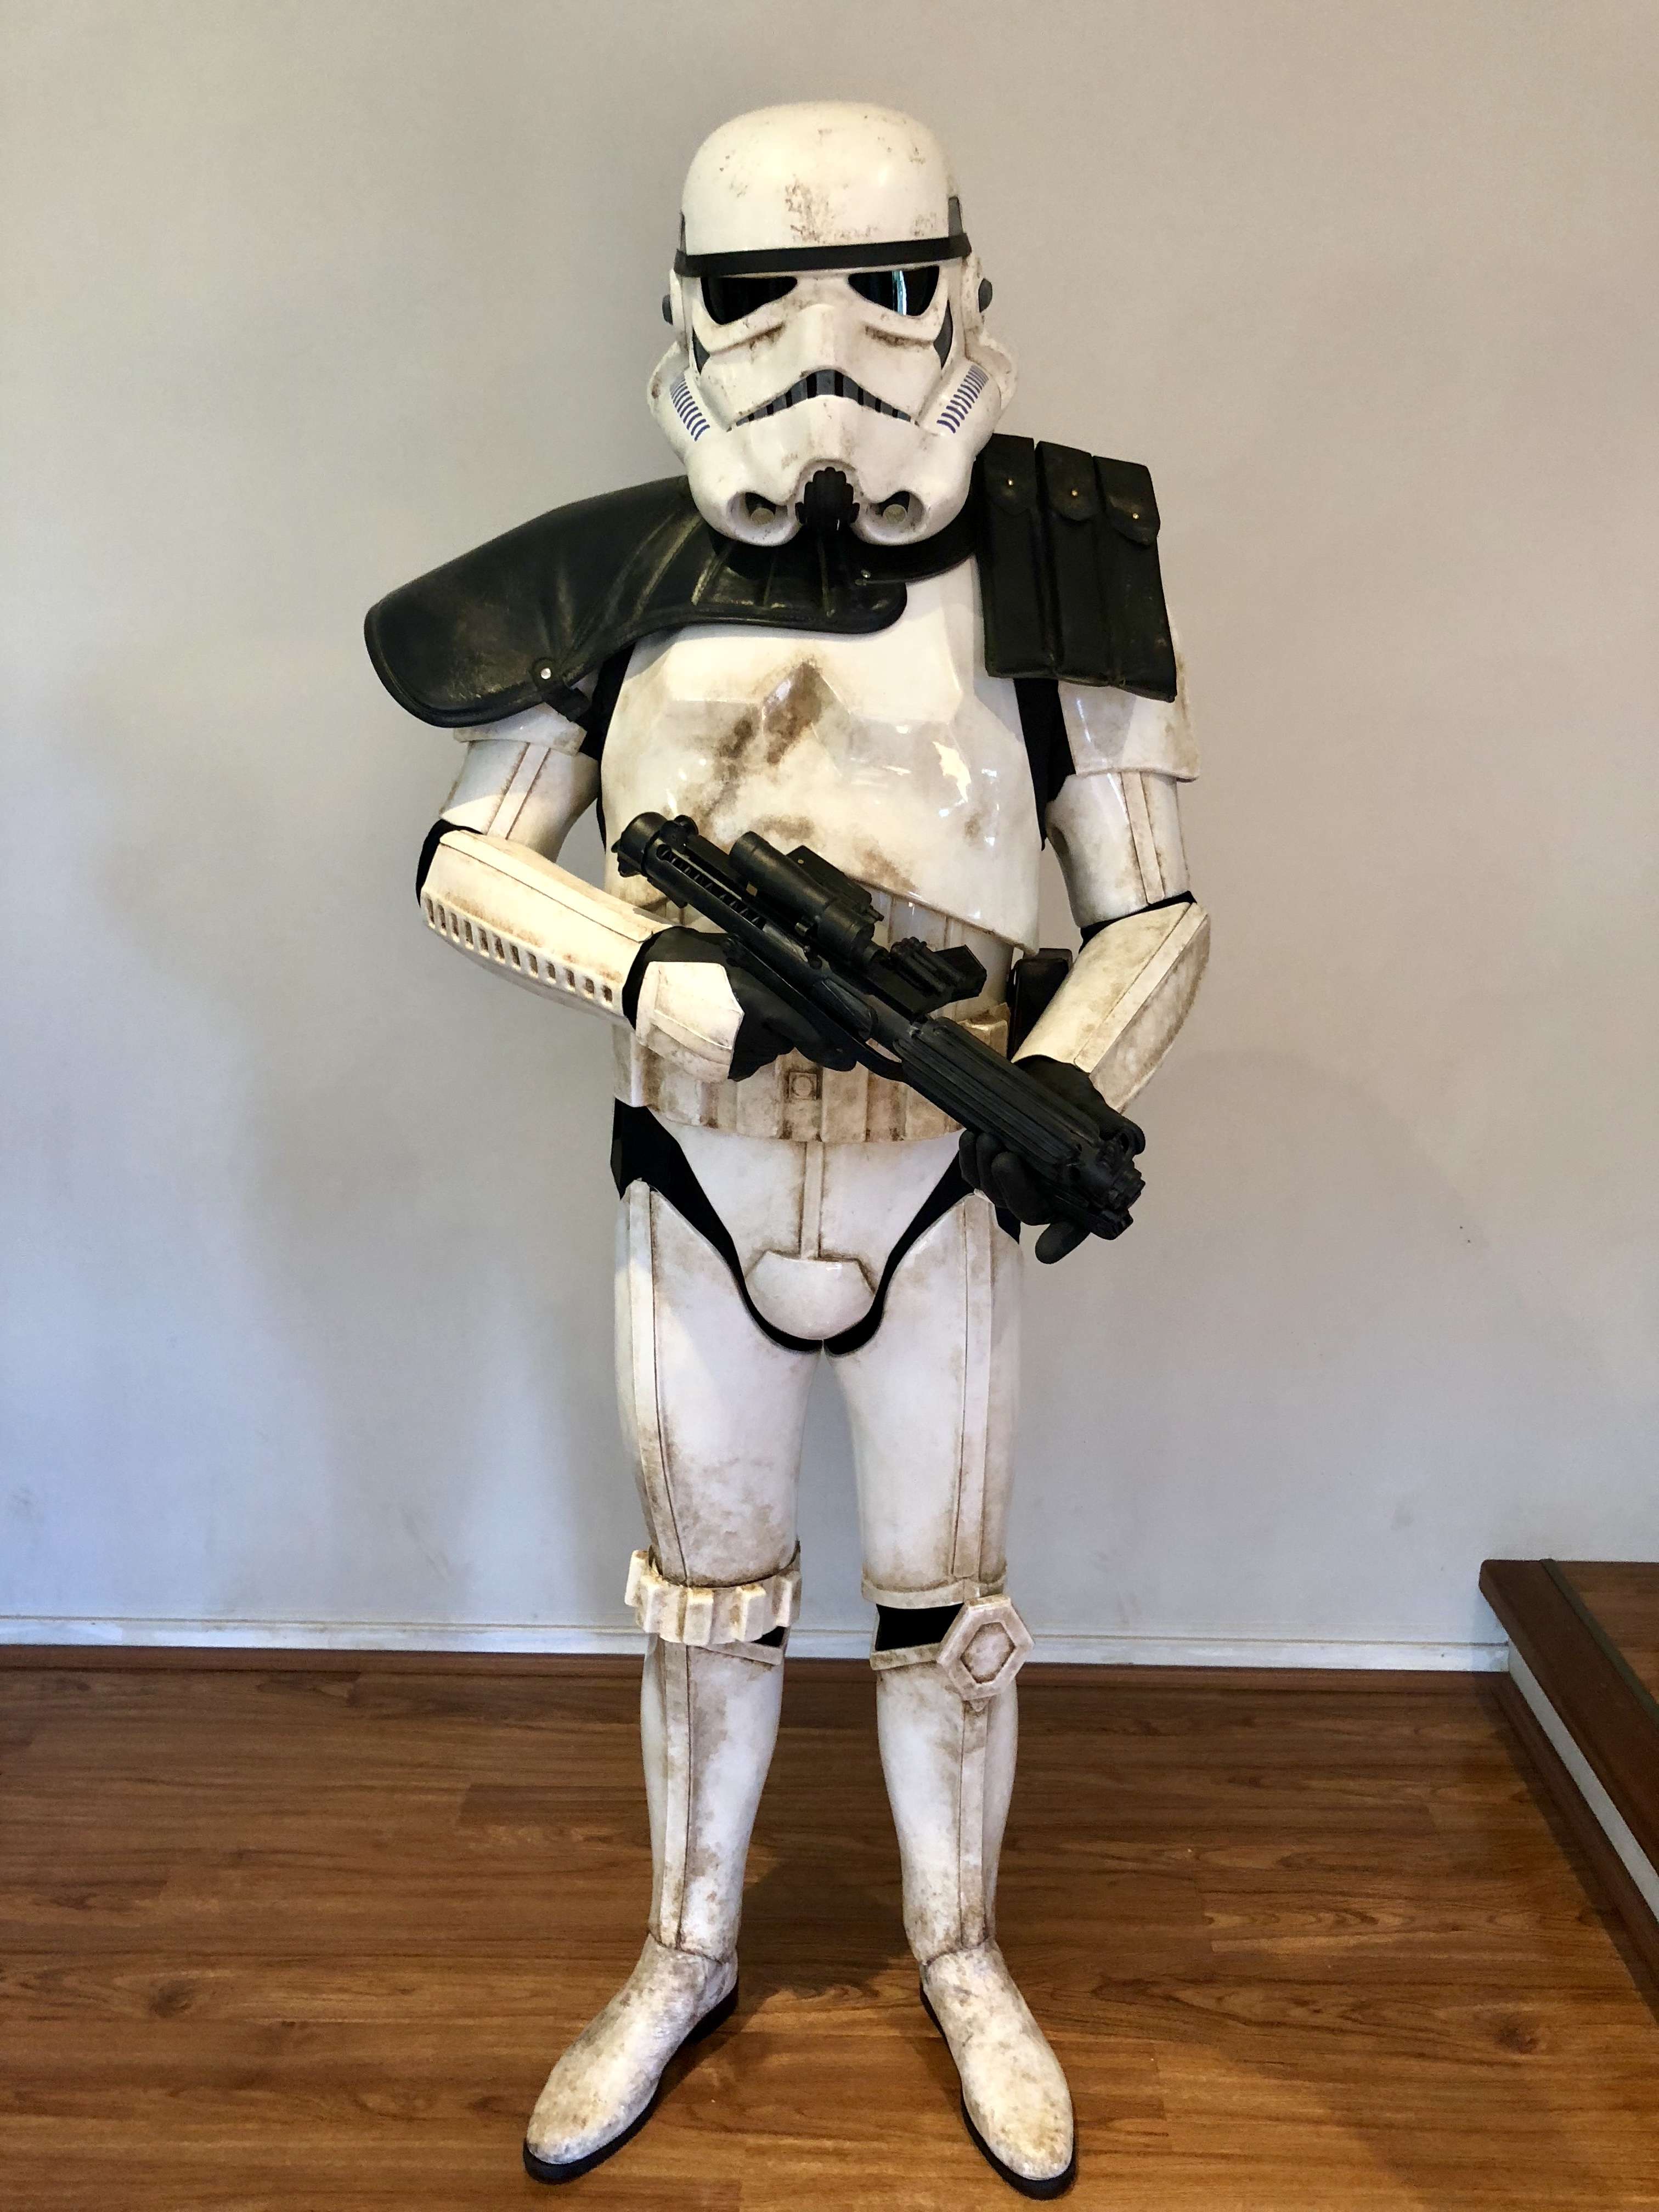
Progress has been slow and steady, just getting a lot of small things done before approval pics are sent in.
I had a test fit the other night but wasn’t to happy with the height of the thighs but also with how they were supported so I spent a day building a custom belt/suspender system out of black webbing. Definitely happier with both the support and the heights but will post up a pic of this later on.
While I am on the thighs I also cut out the backs of the knee’s for better mobility and finished off the weathering in this area plus added some foam to the outside half to take the pressure off.
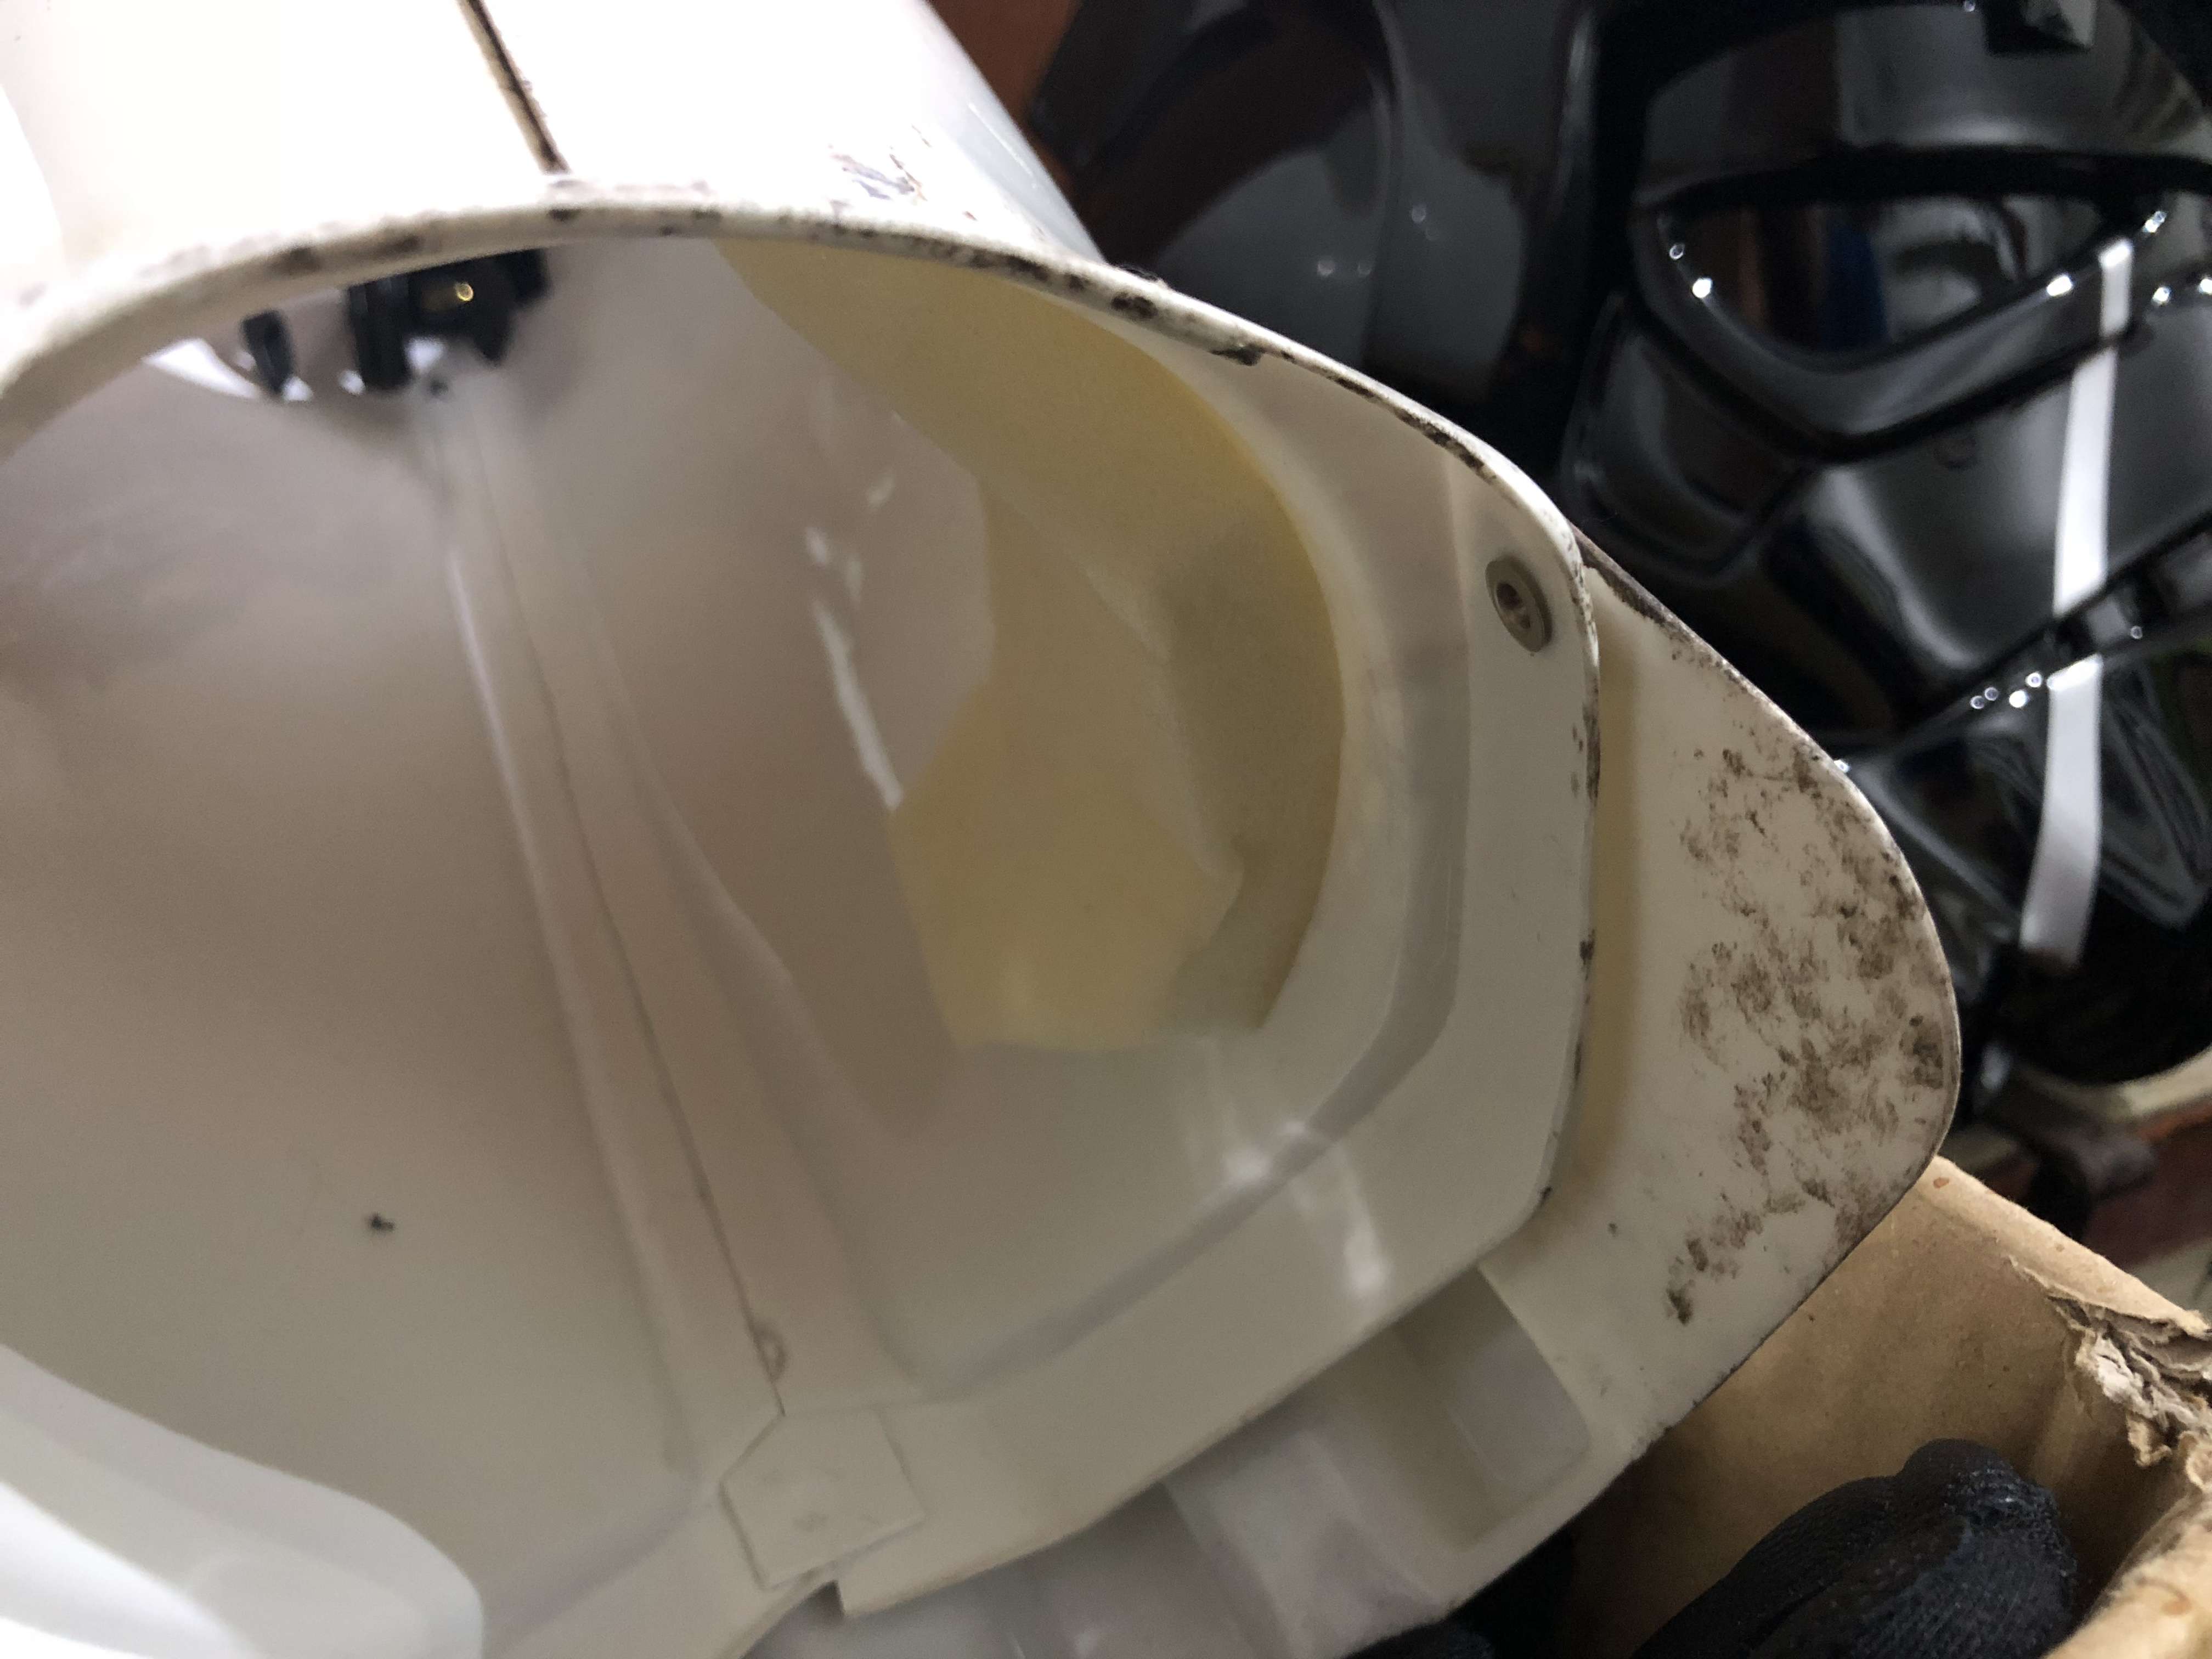
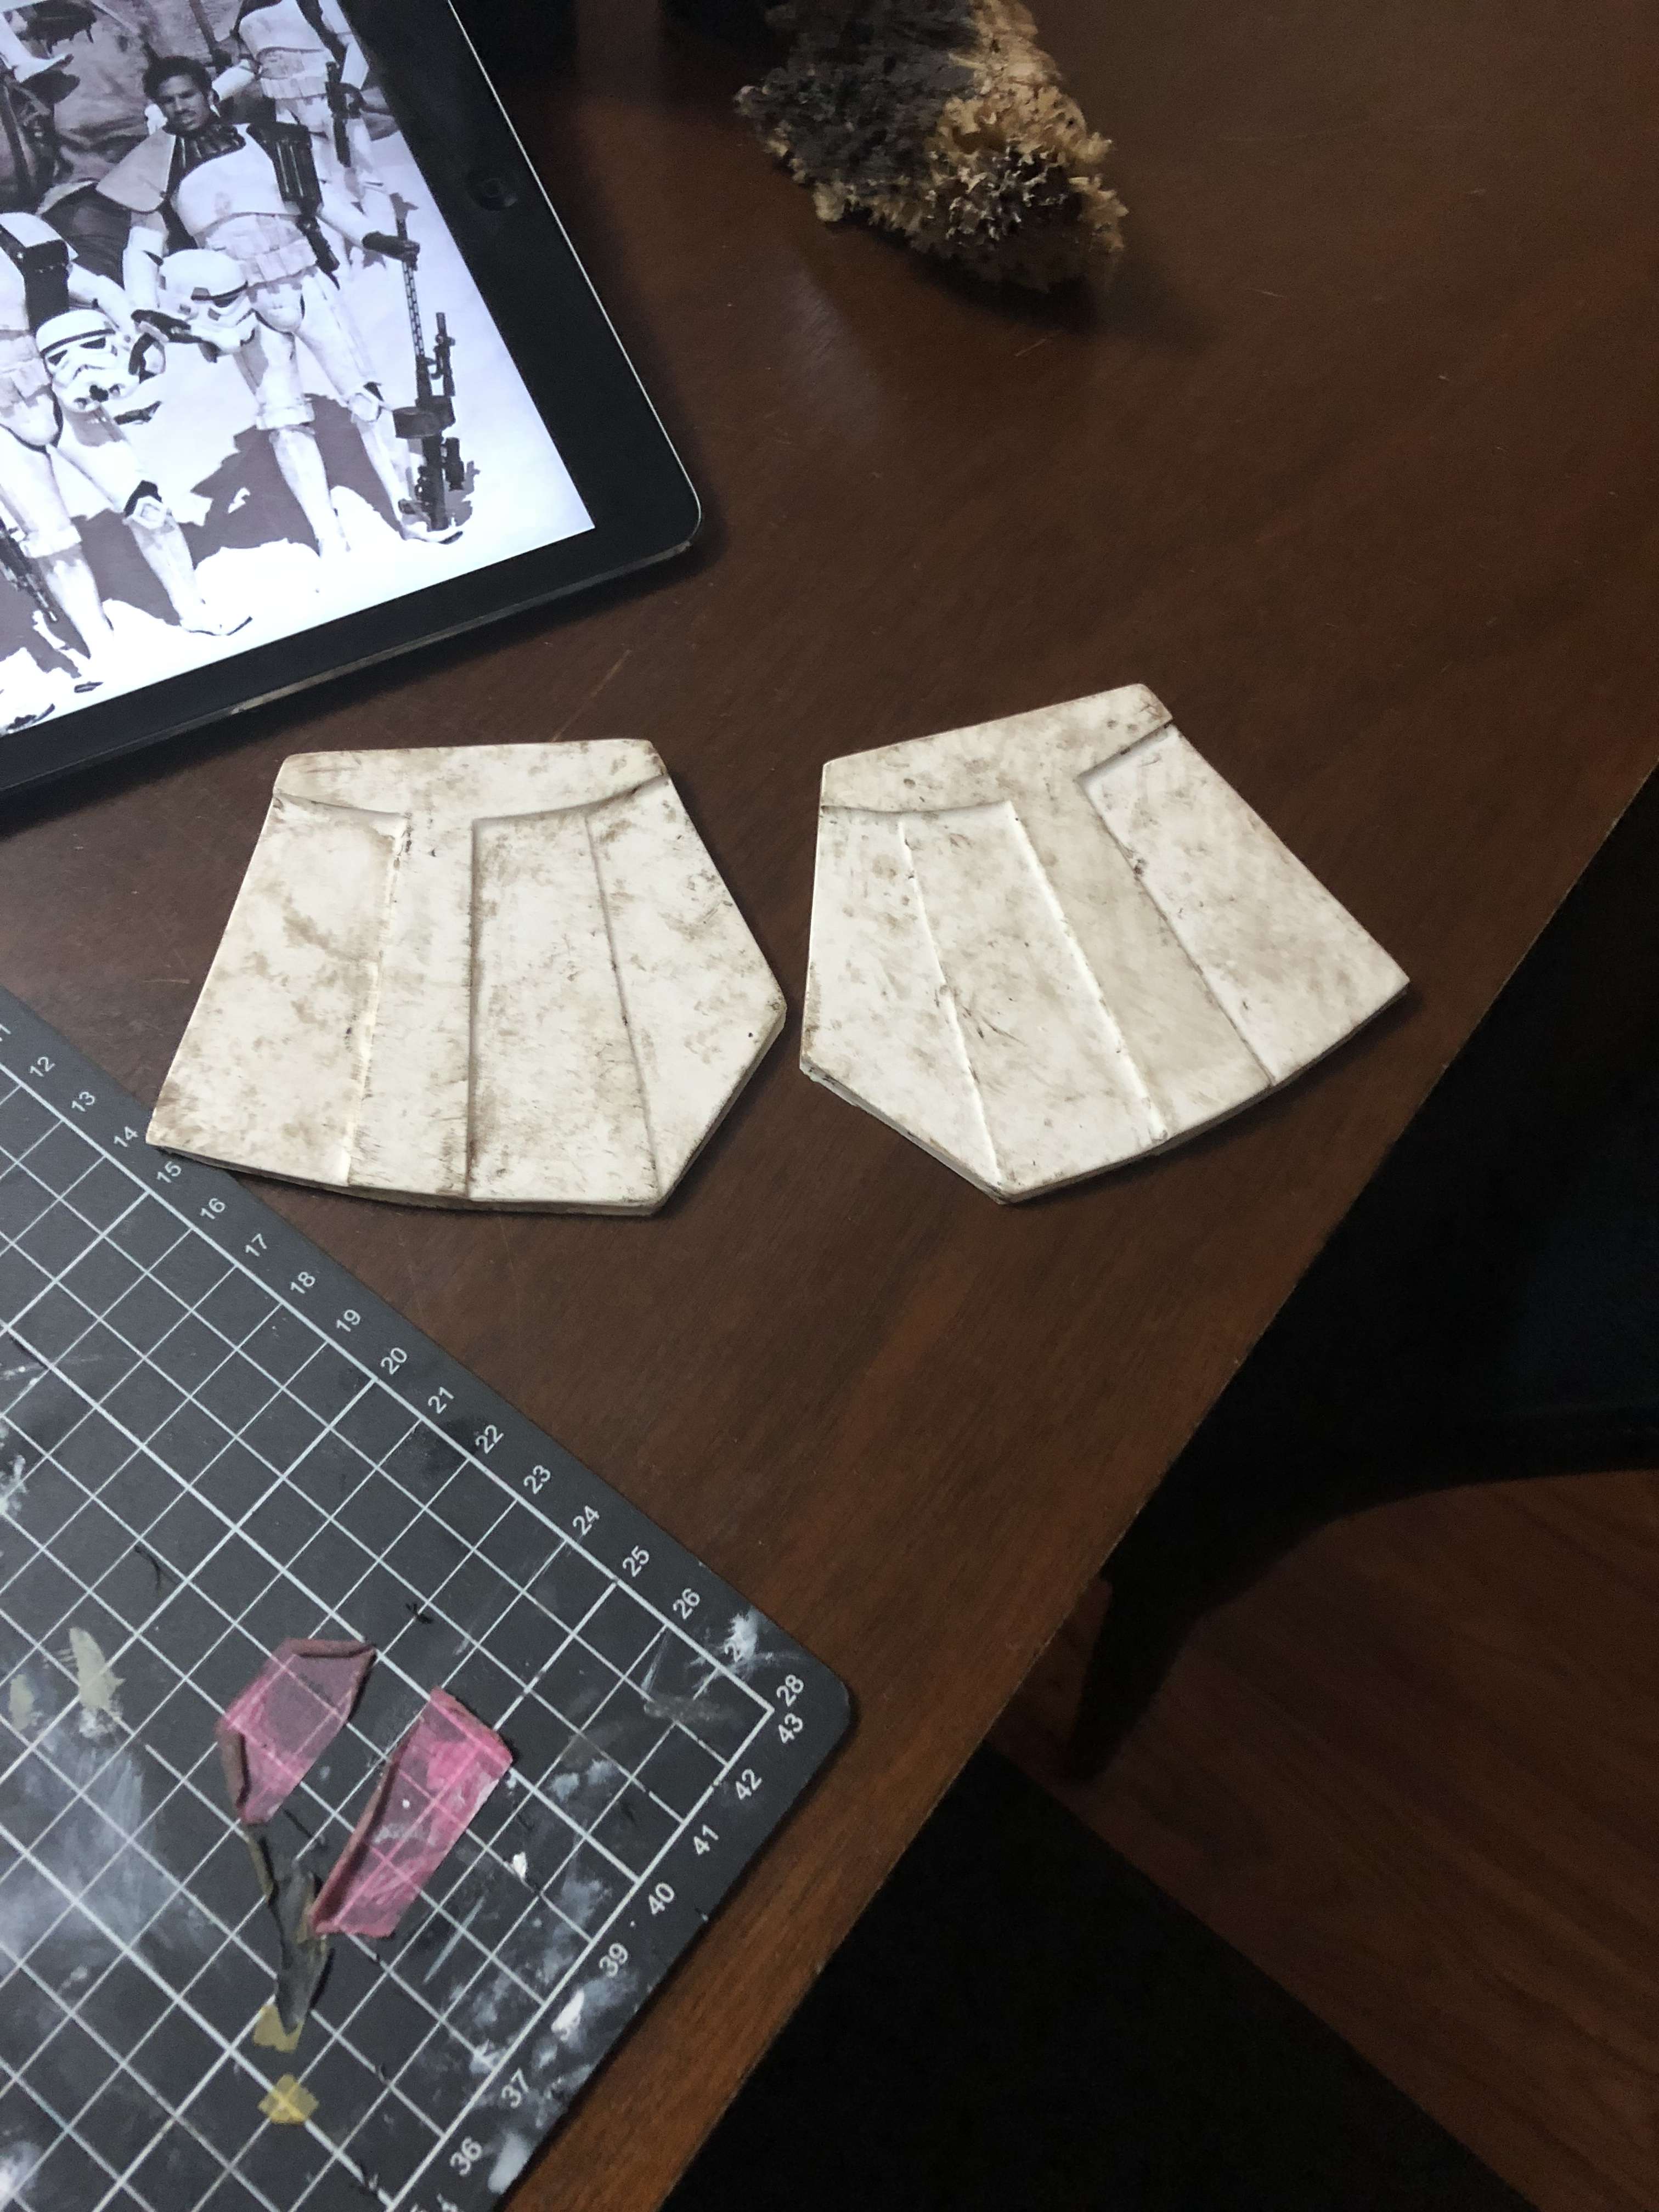
Also added my green lenses to the bucket
and weathered my pauldron & pouches. I didn’t want to go overboard but wanted a dusty look

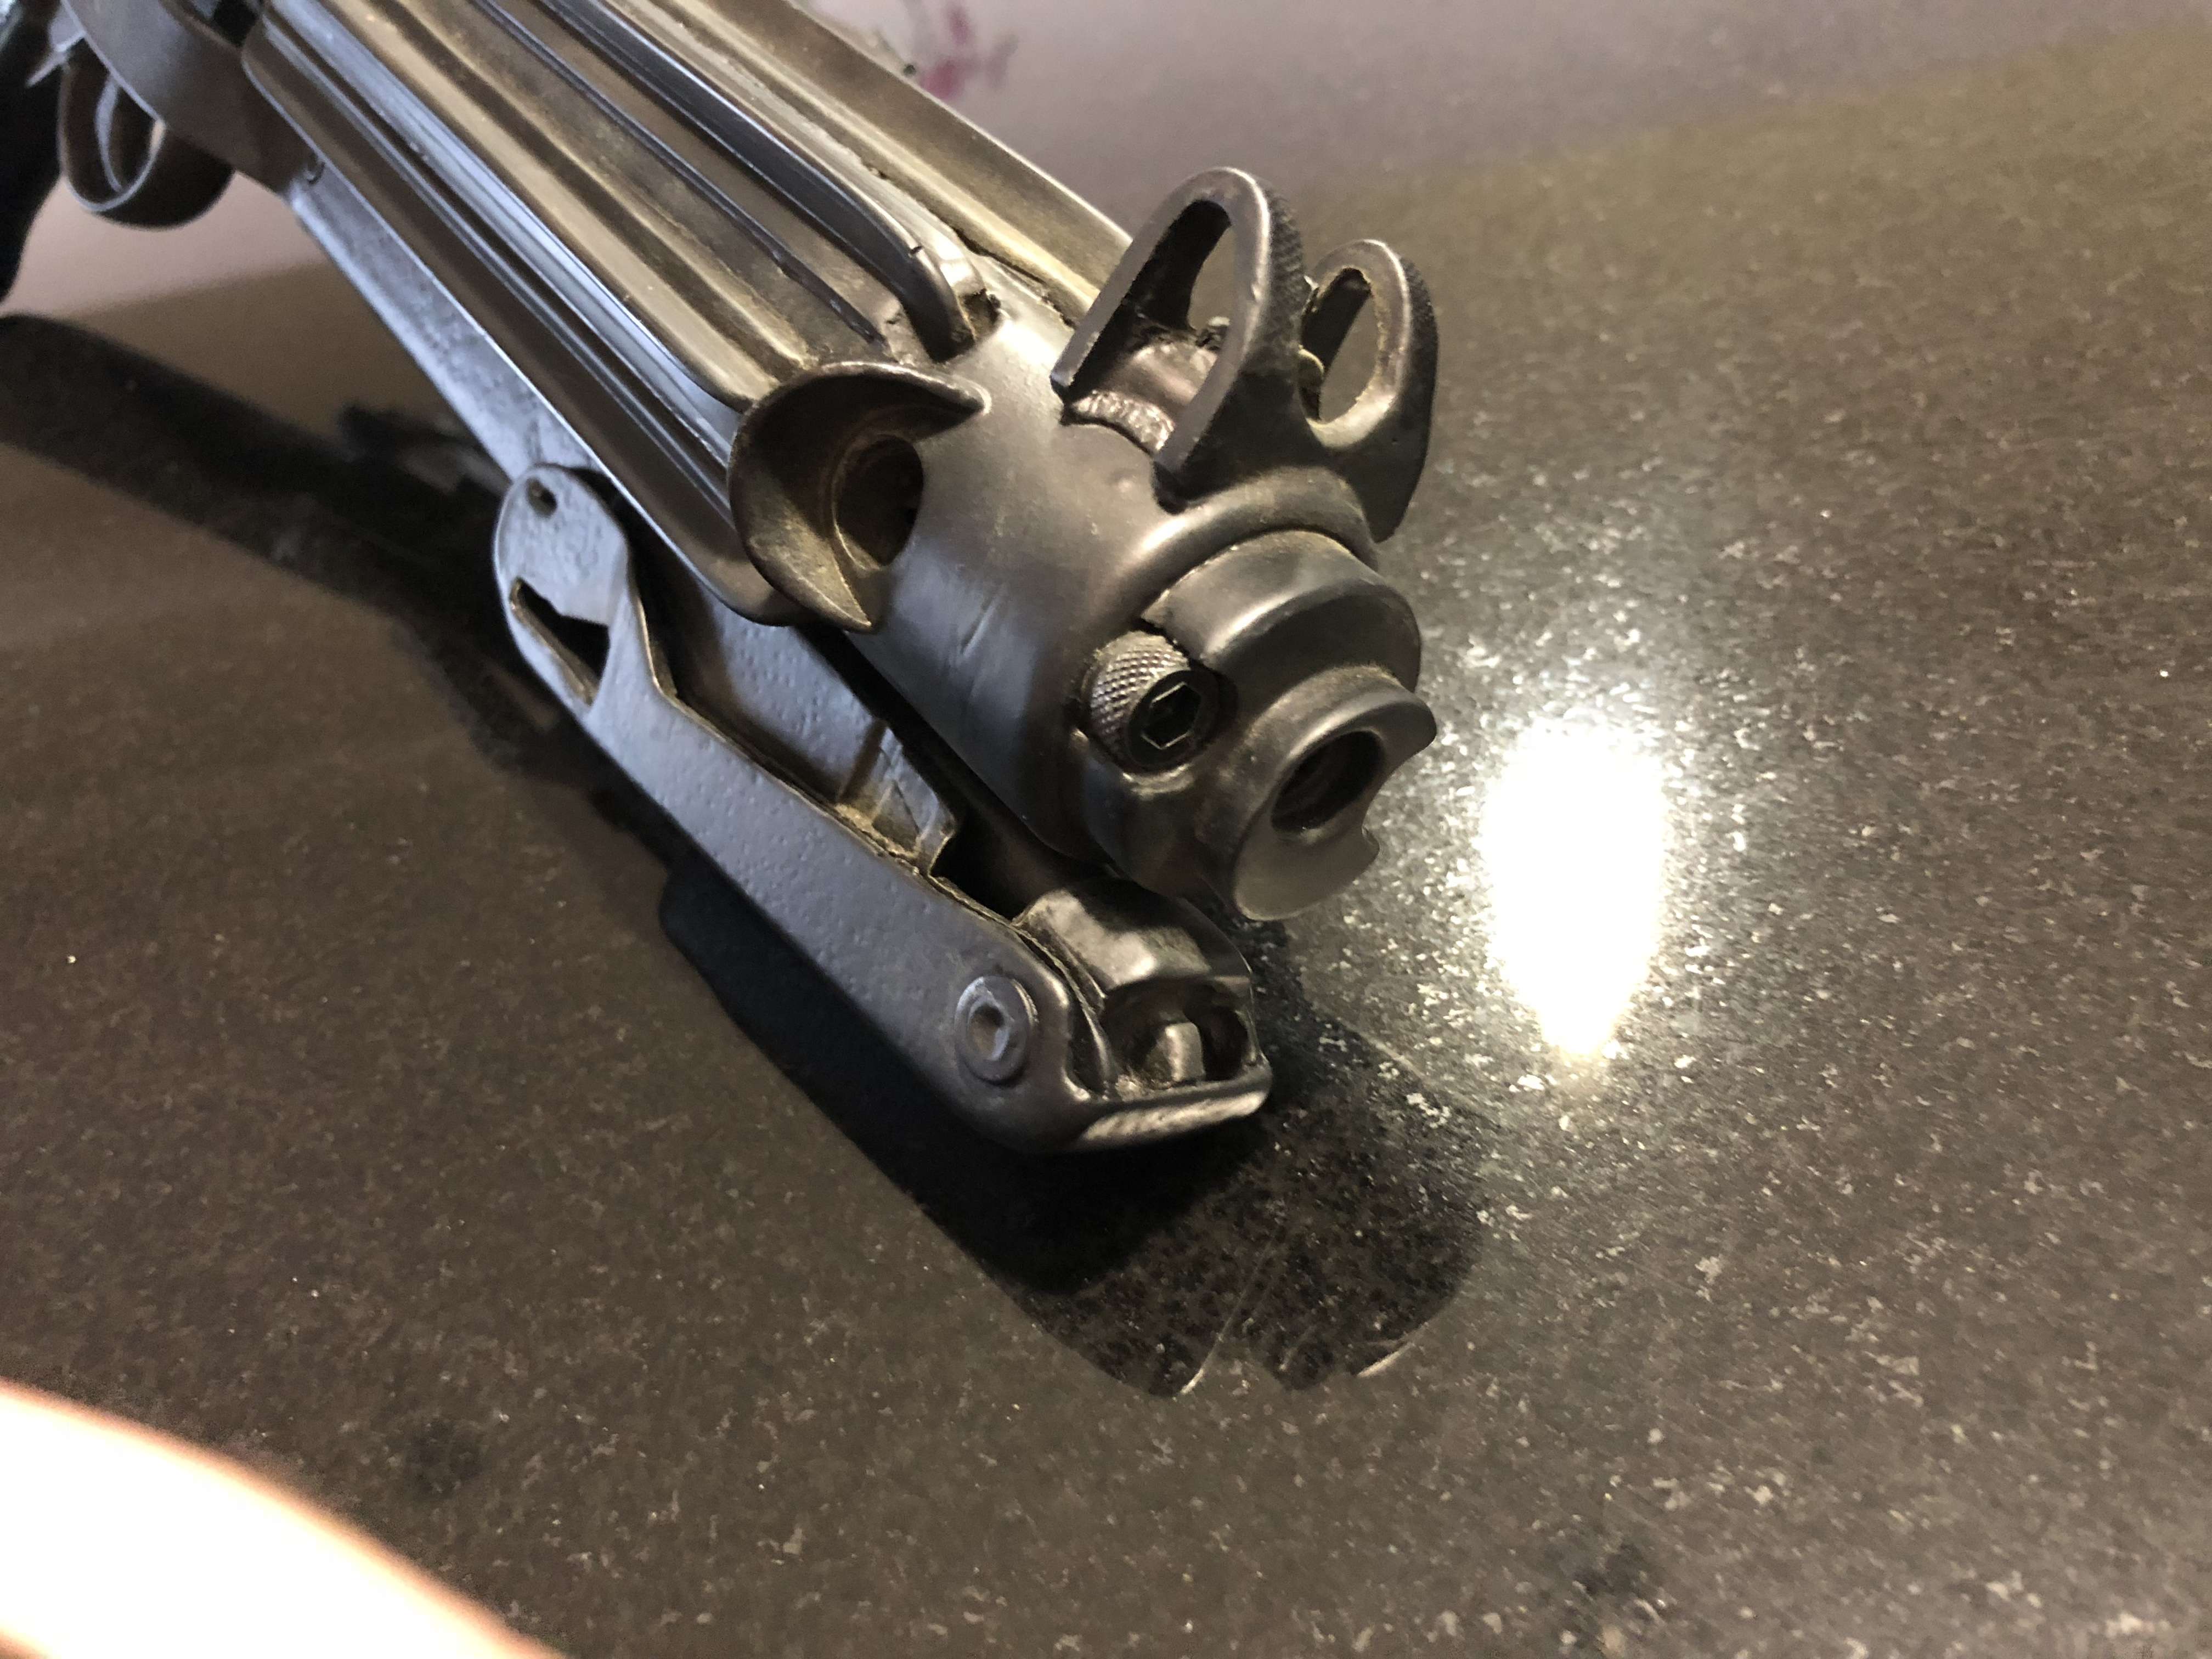
and finally, I am still working away on my E-11. I finished my folding stock so decided to try the hammer finish, really happy so far. Just finishing the main body now and painting some detailed parts before the hammered finish goes on

still got to add the screws on the return edge of my chest piece to simulate the brackets and then I think it’s going to be another test fit and possible submission pics if it all looks good. I would love to finish my E-11 first though but will decide when it happens
-
I use a cloth neck seal as well. I wear one with my Tie pilot and we don’t have to, but I think it looks a lot better. So when it came to getting one for my TD I got a second one from Darman. Cloth is breathable and movement is good.
-
Nice, would most defiantly be in for a kit!
-
Not that I am a member yet (hopefully not long now though) but I have been watching this topic for a little but and I have to admit I do like that 2 tone cap posted above. Maybe a brown & tan colour with the MEPD shield attached to the front?
-
1
-
-
Just converting to metric, so about 130mm. The current plate is 3/4' or about 170mm at the moment.
Hopefully I can get it off and cut it down tonight
-
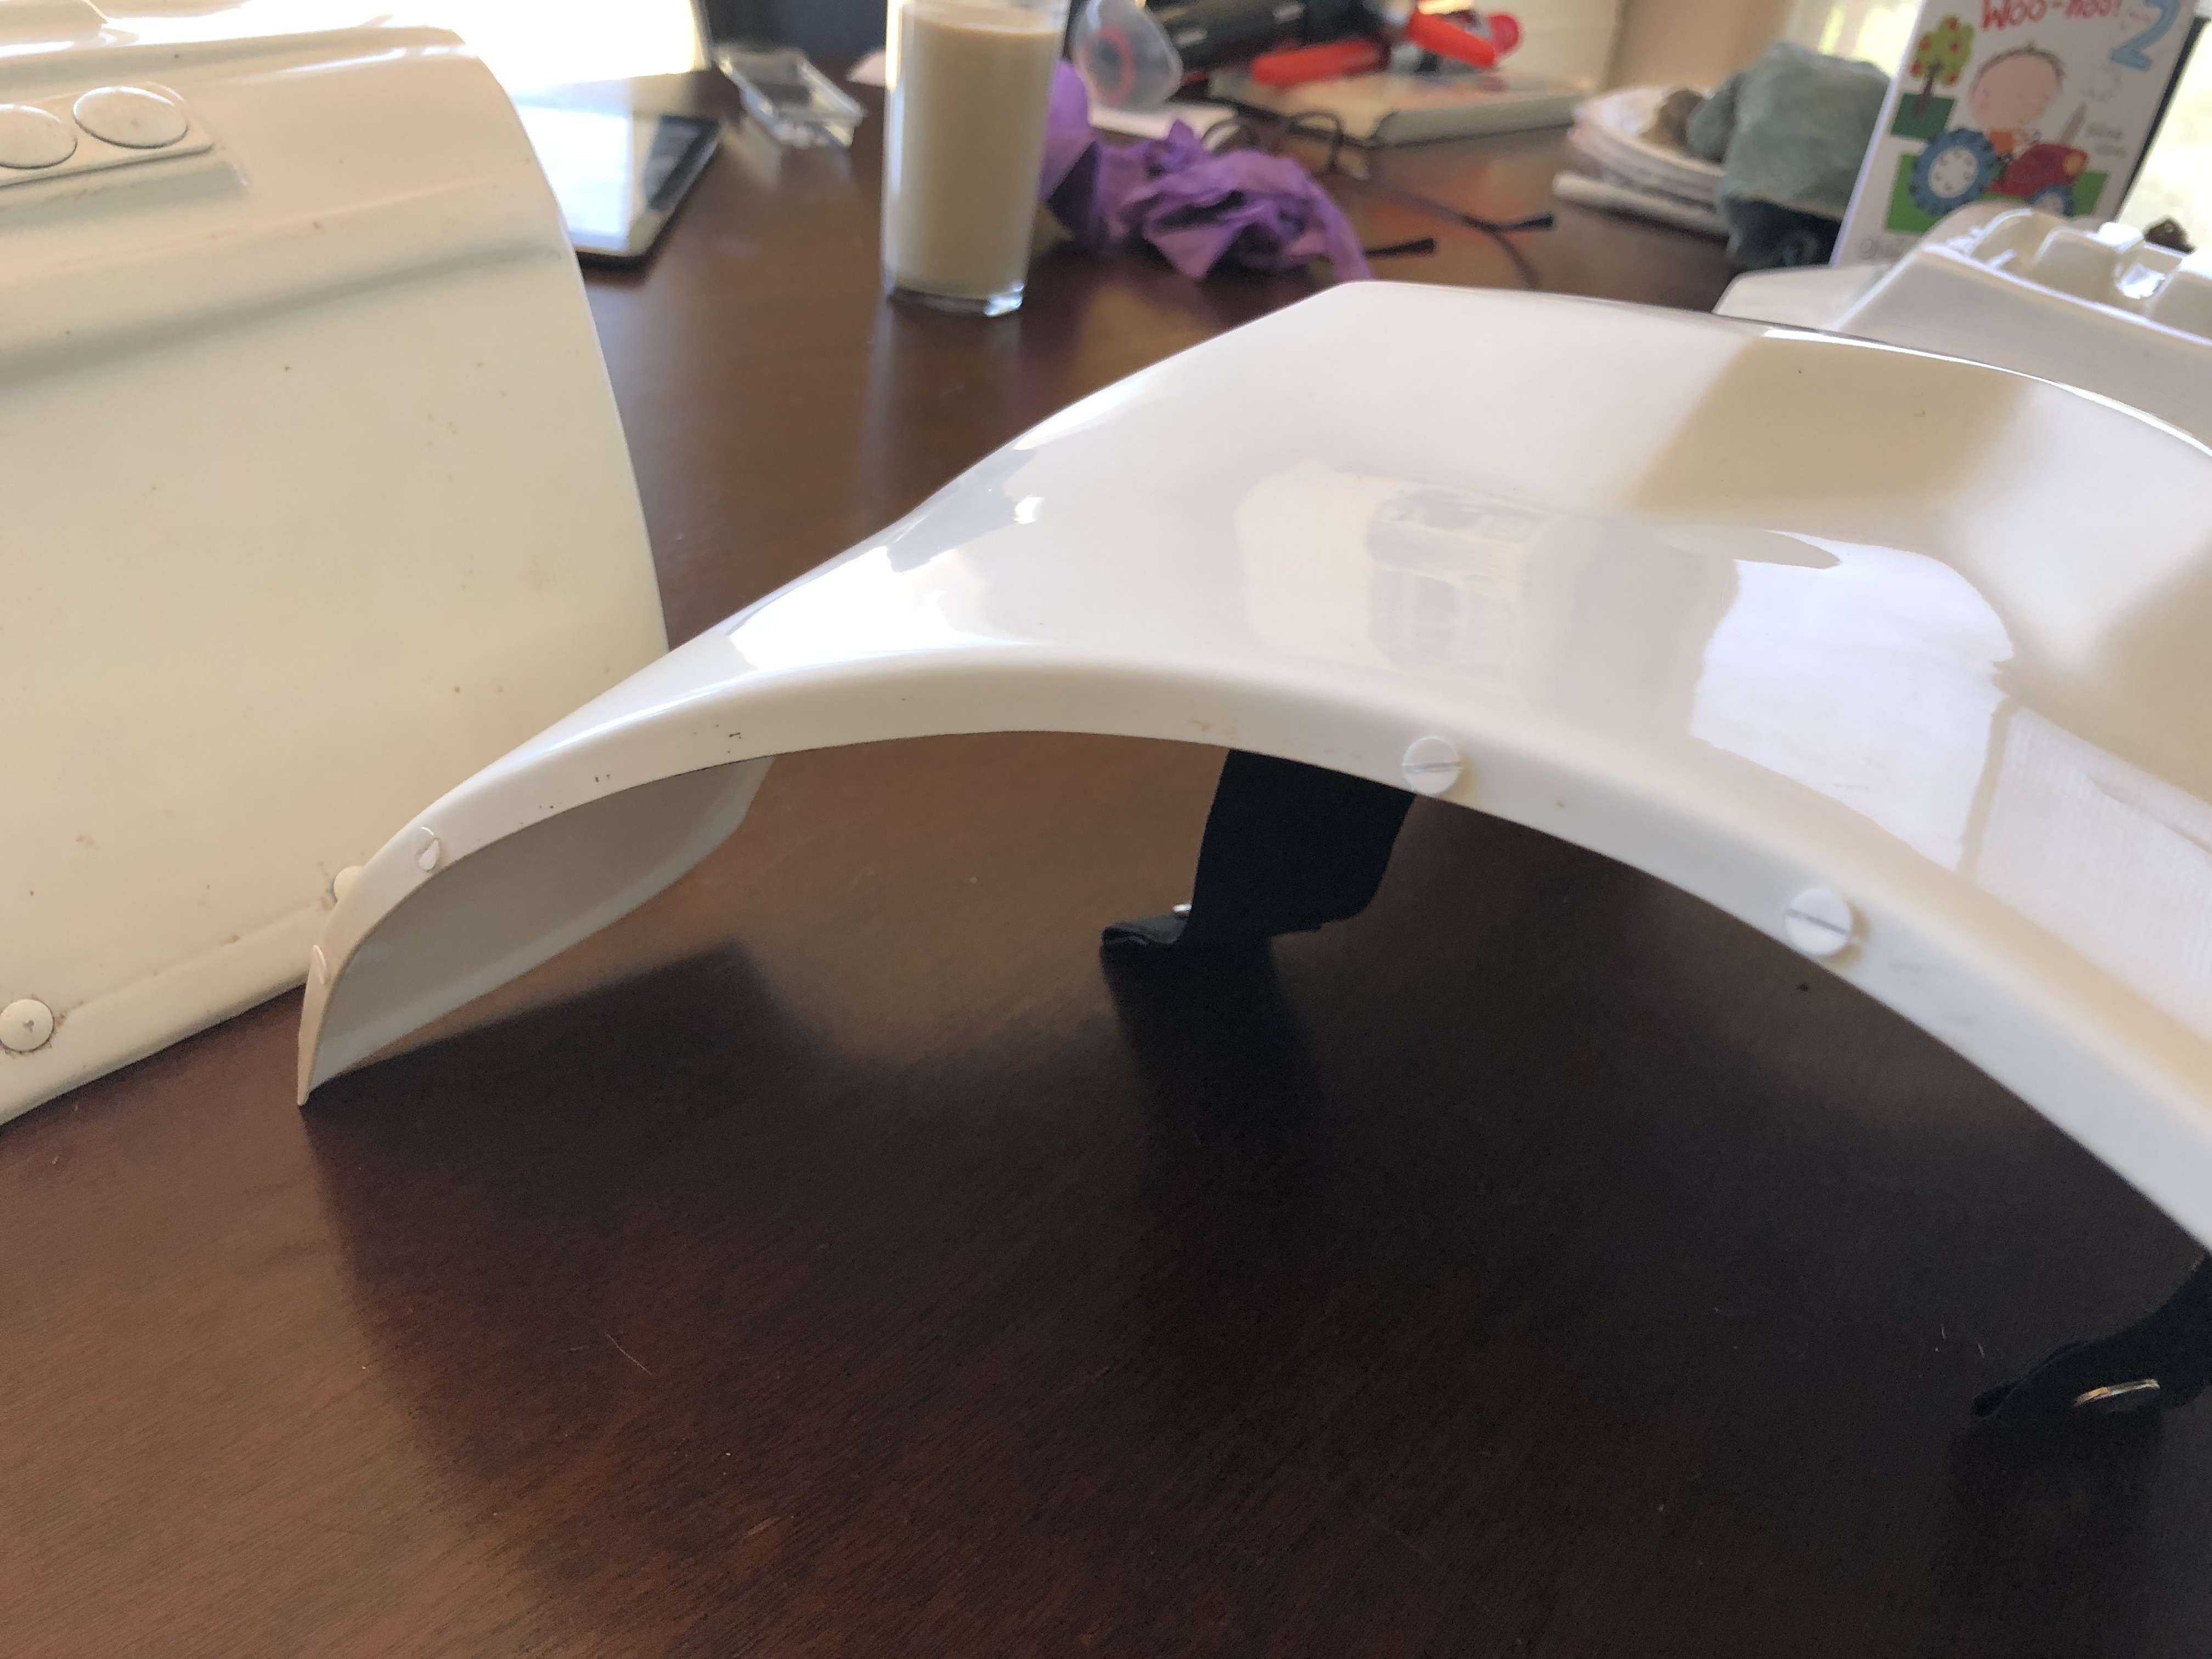
Bugger! Ok so looks like the knee plate is coming off. How thick should it be. I couldn't find any reference on the CRL and looking at the plate I though I could see a cut line impression. What should it trim to?
The plate might have been glued to the shin with E6000 but the internal's aren't
")
-
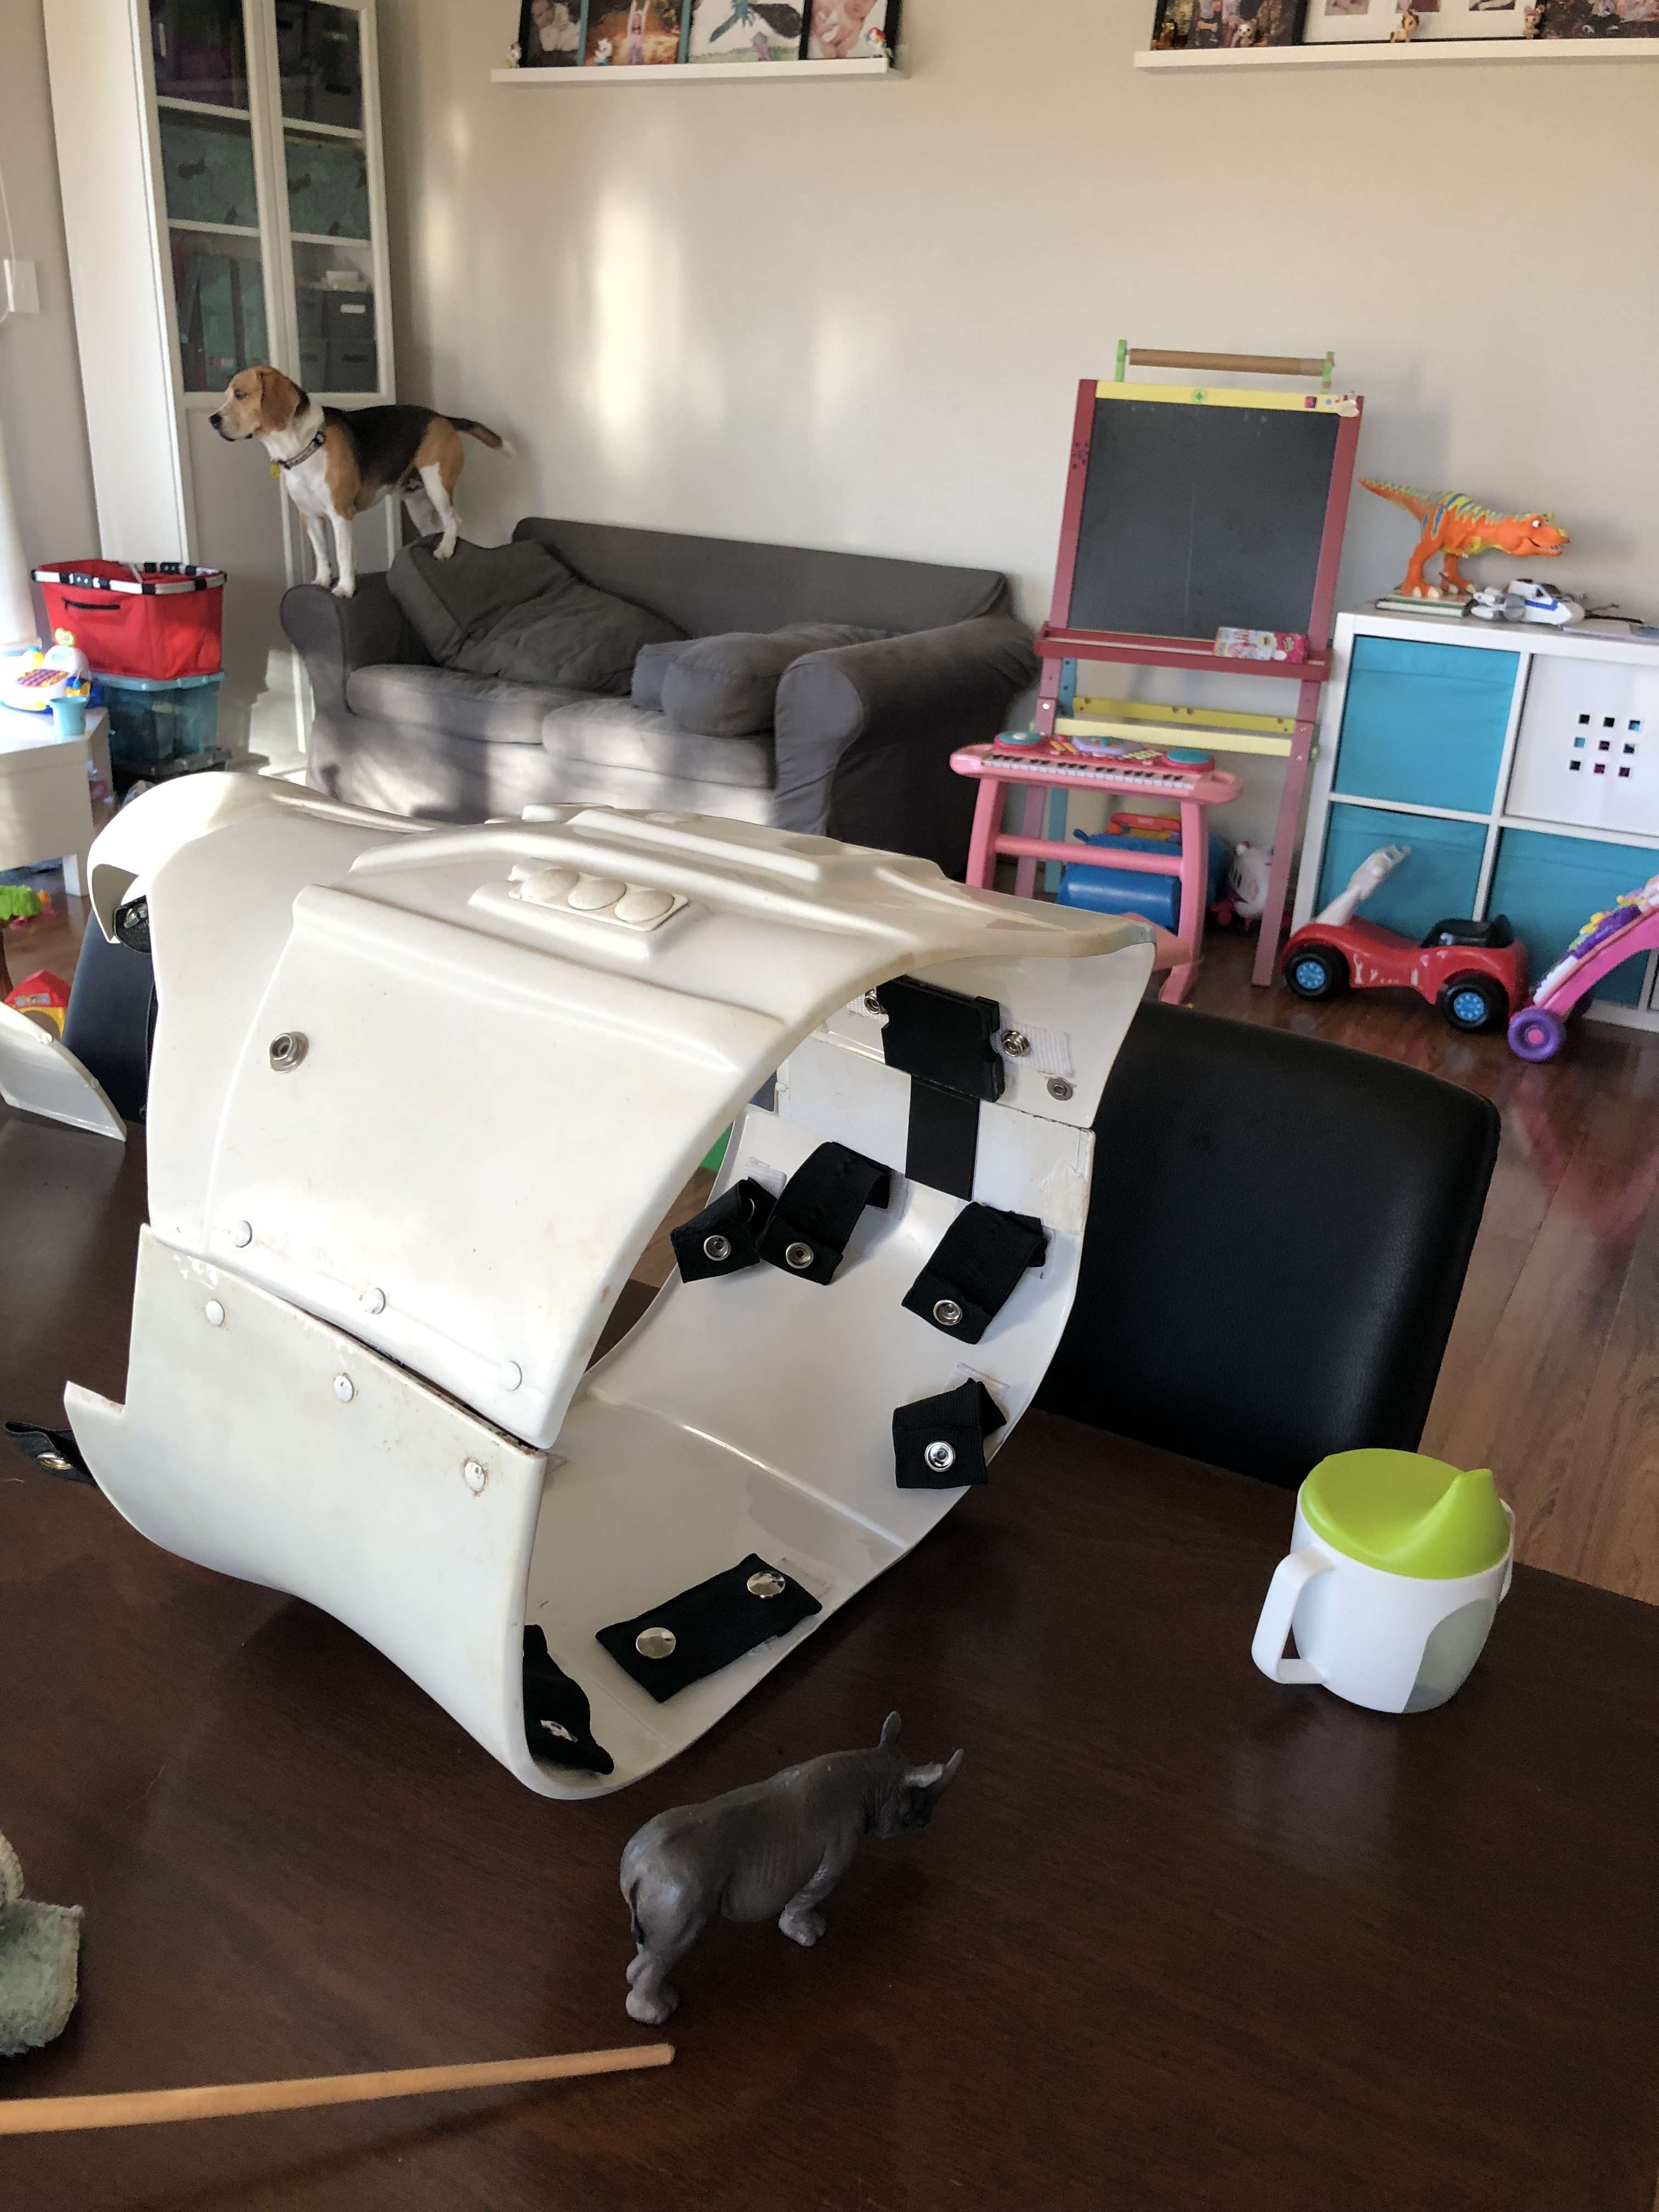
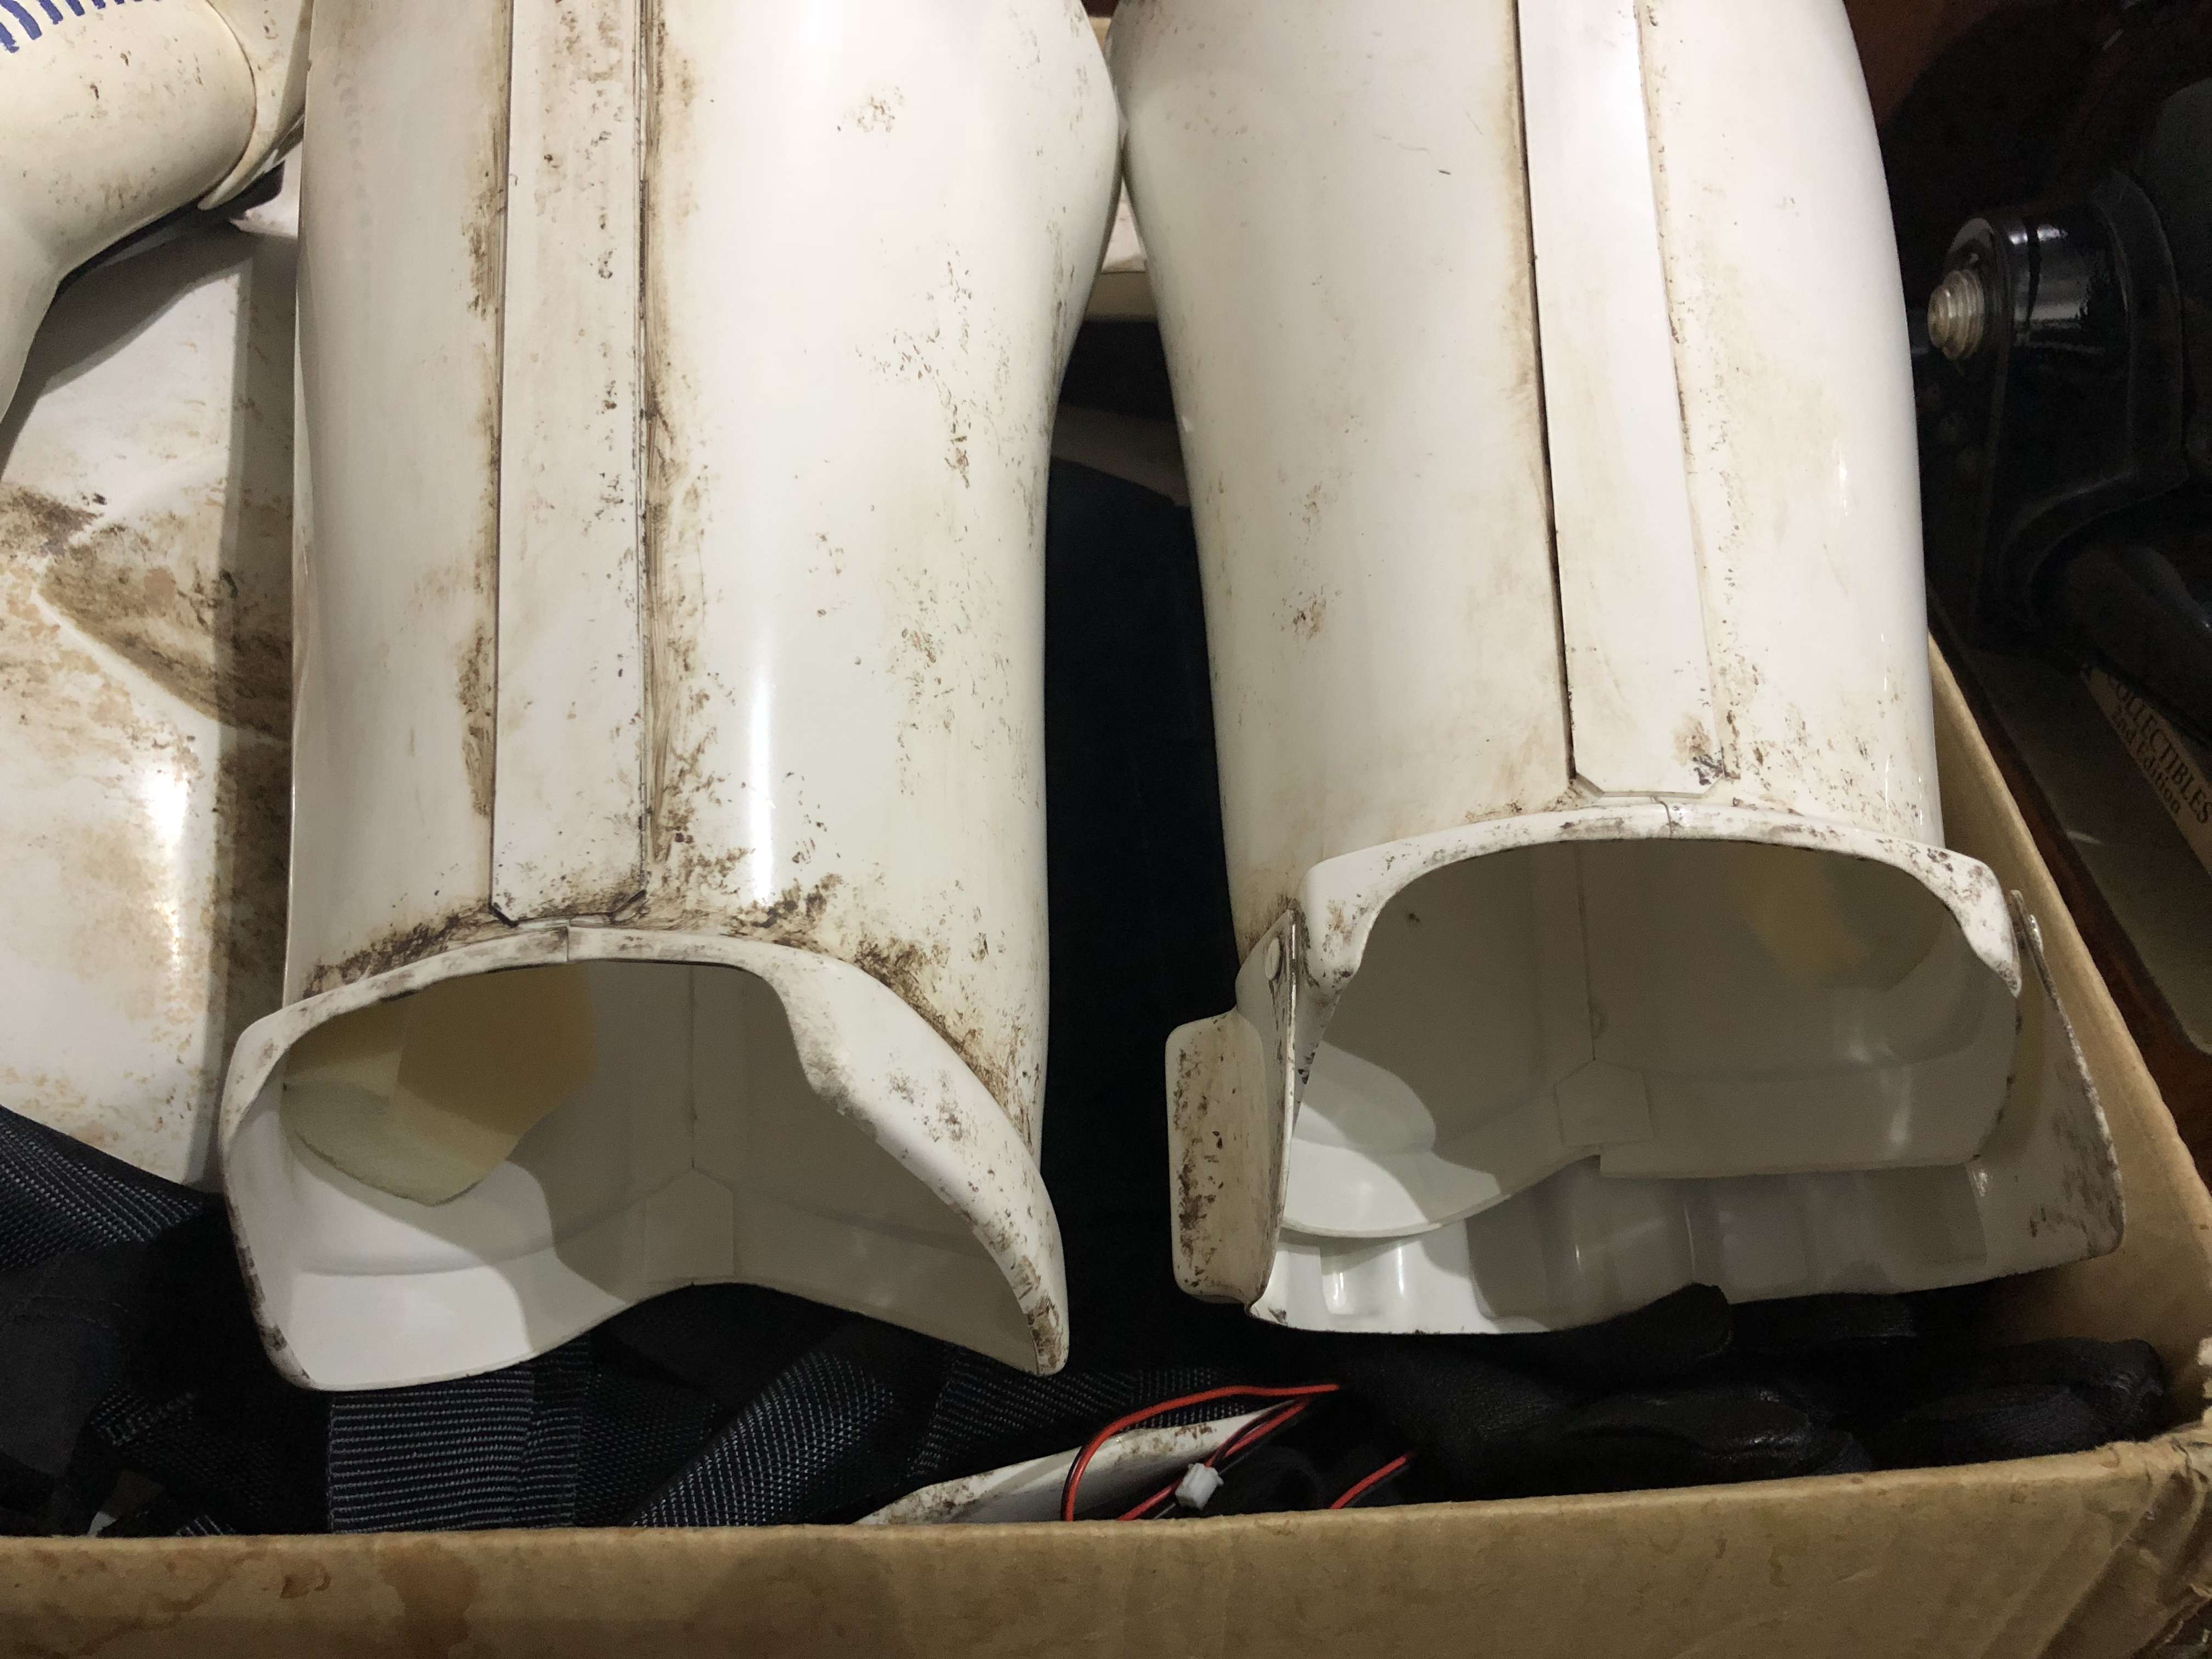
Got a bit achieved over the last couple of days.
I trimmed up the sniper knee plate and attached it to my shin. Decided to fill in the plate with spare ABS and put a plate on the back before using a bit of E6000 to attach
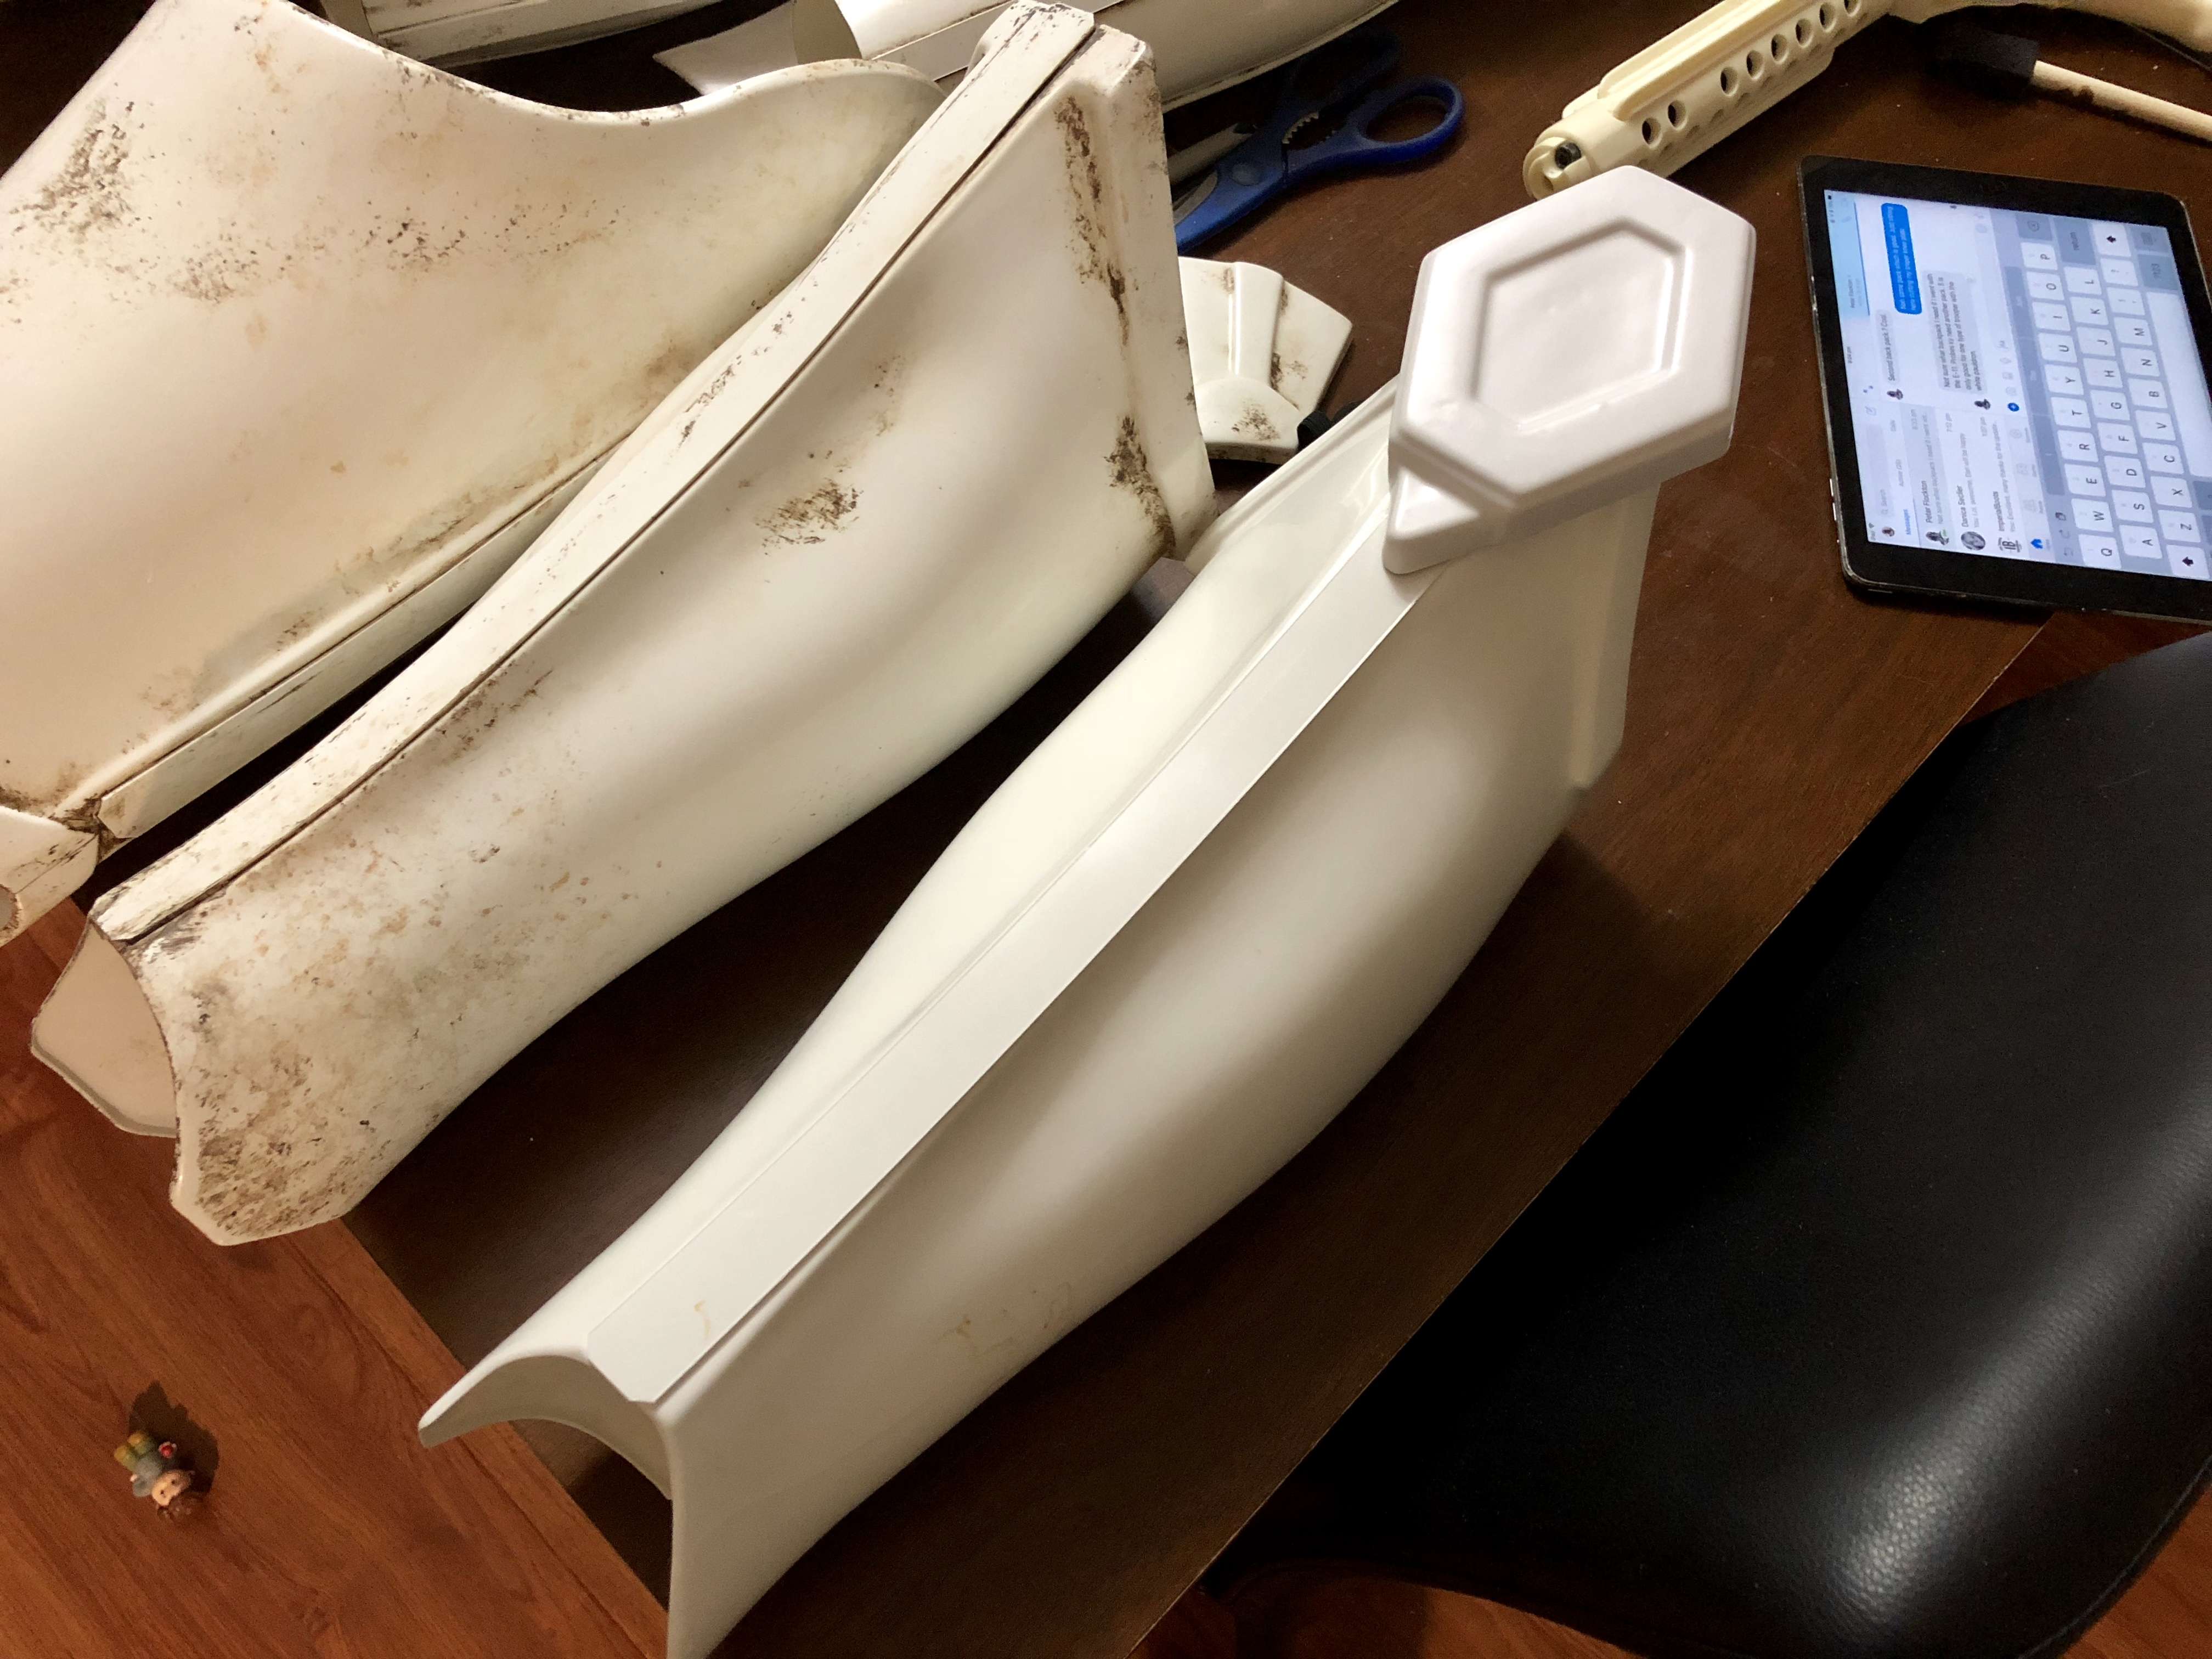
Once dry I can continue my weathering. I planned to get the shin & boots done and anything else If I had the time. Was really hard to dirty up brand new white boots but I am really happy with the result.
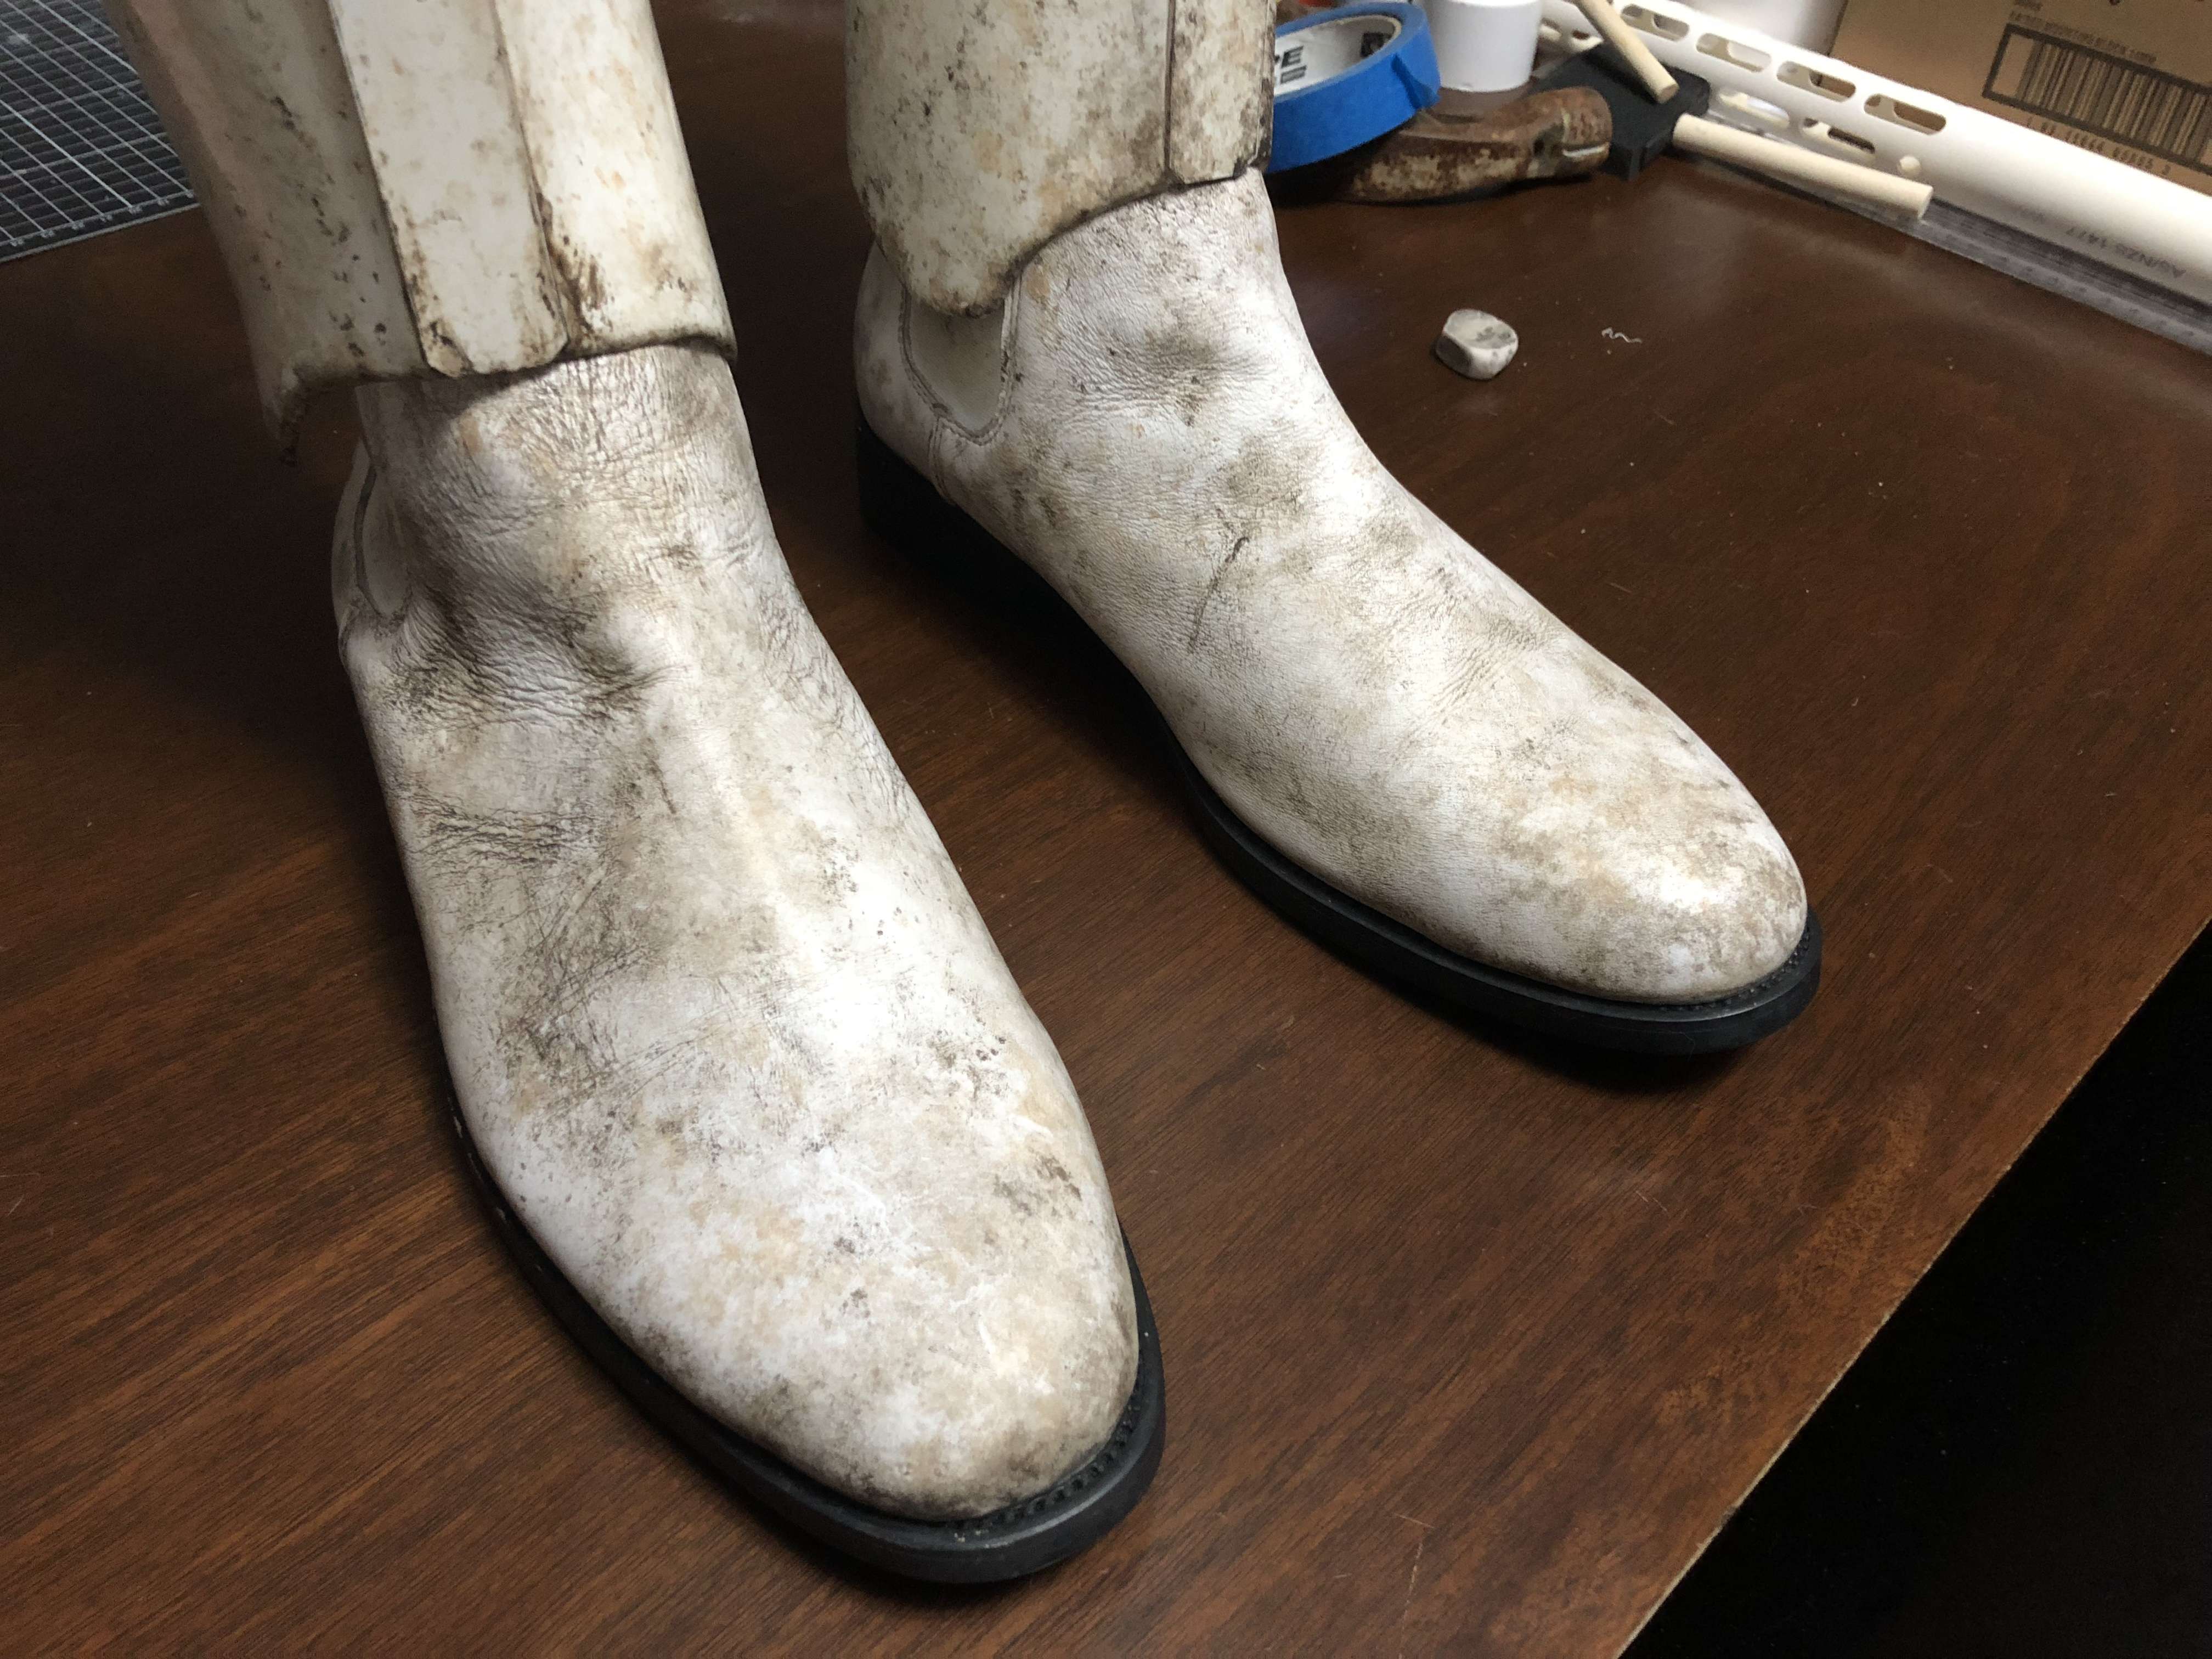
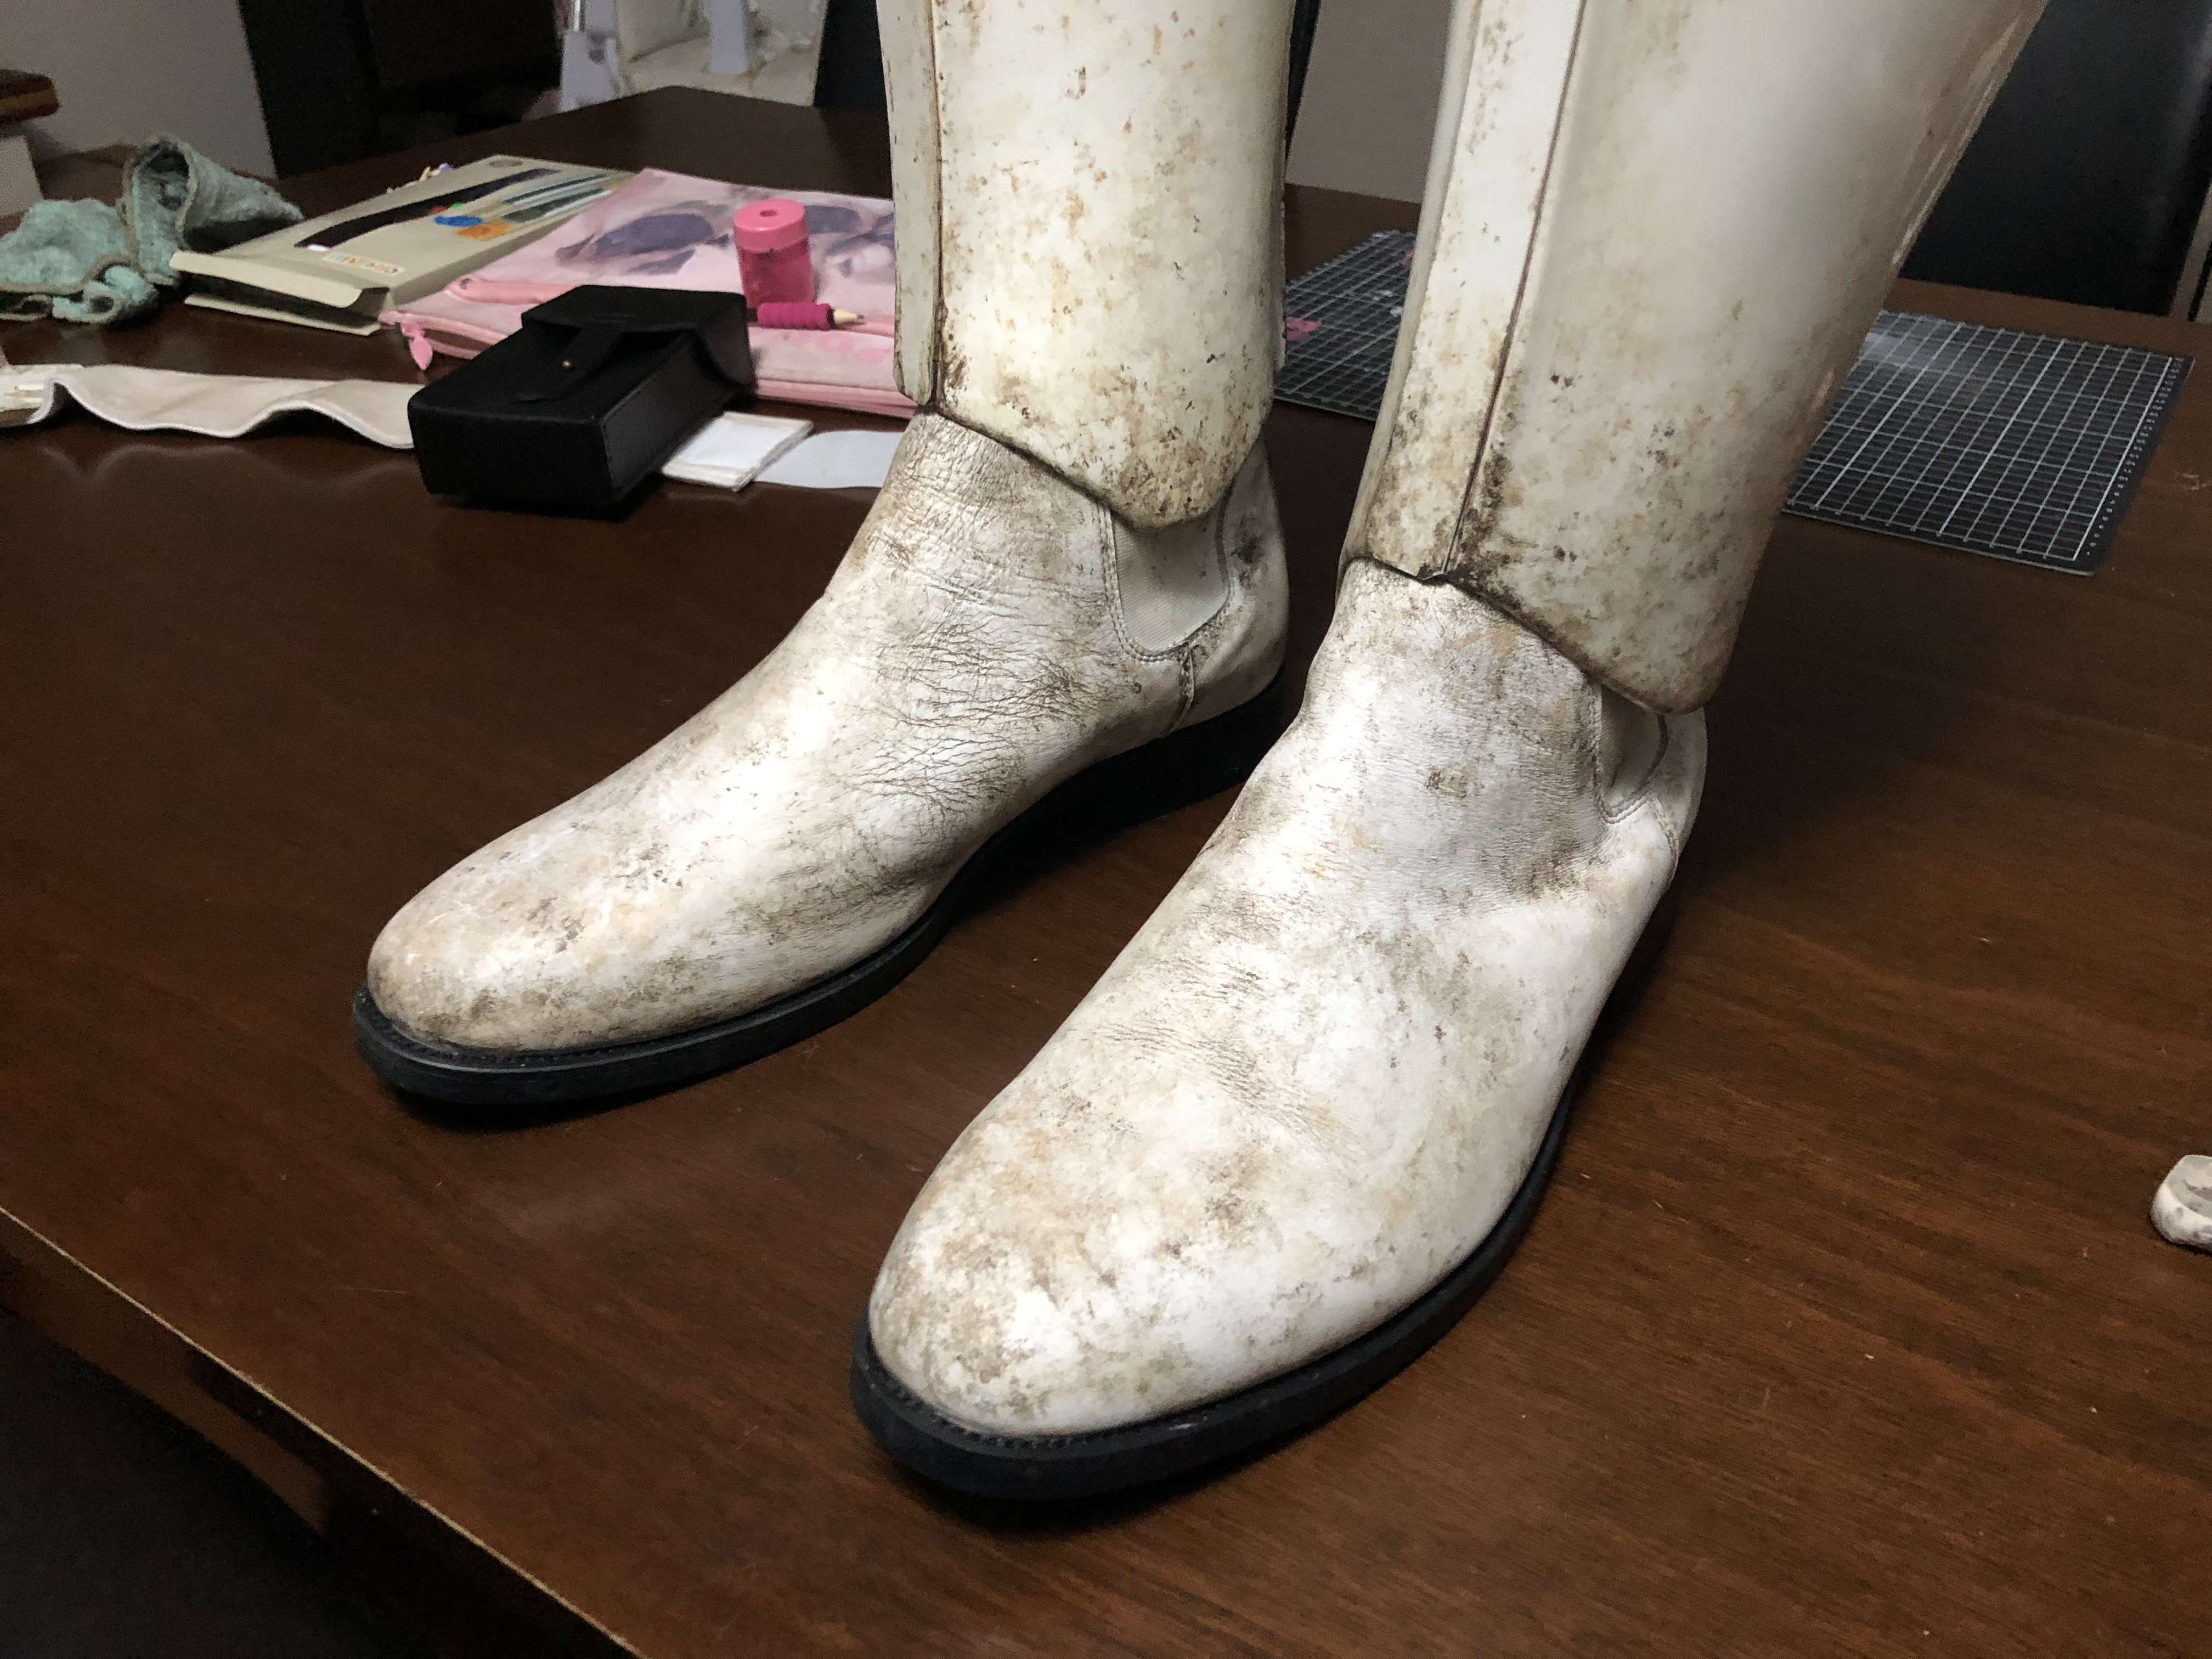
Here is the boots with both shins
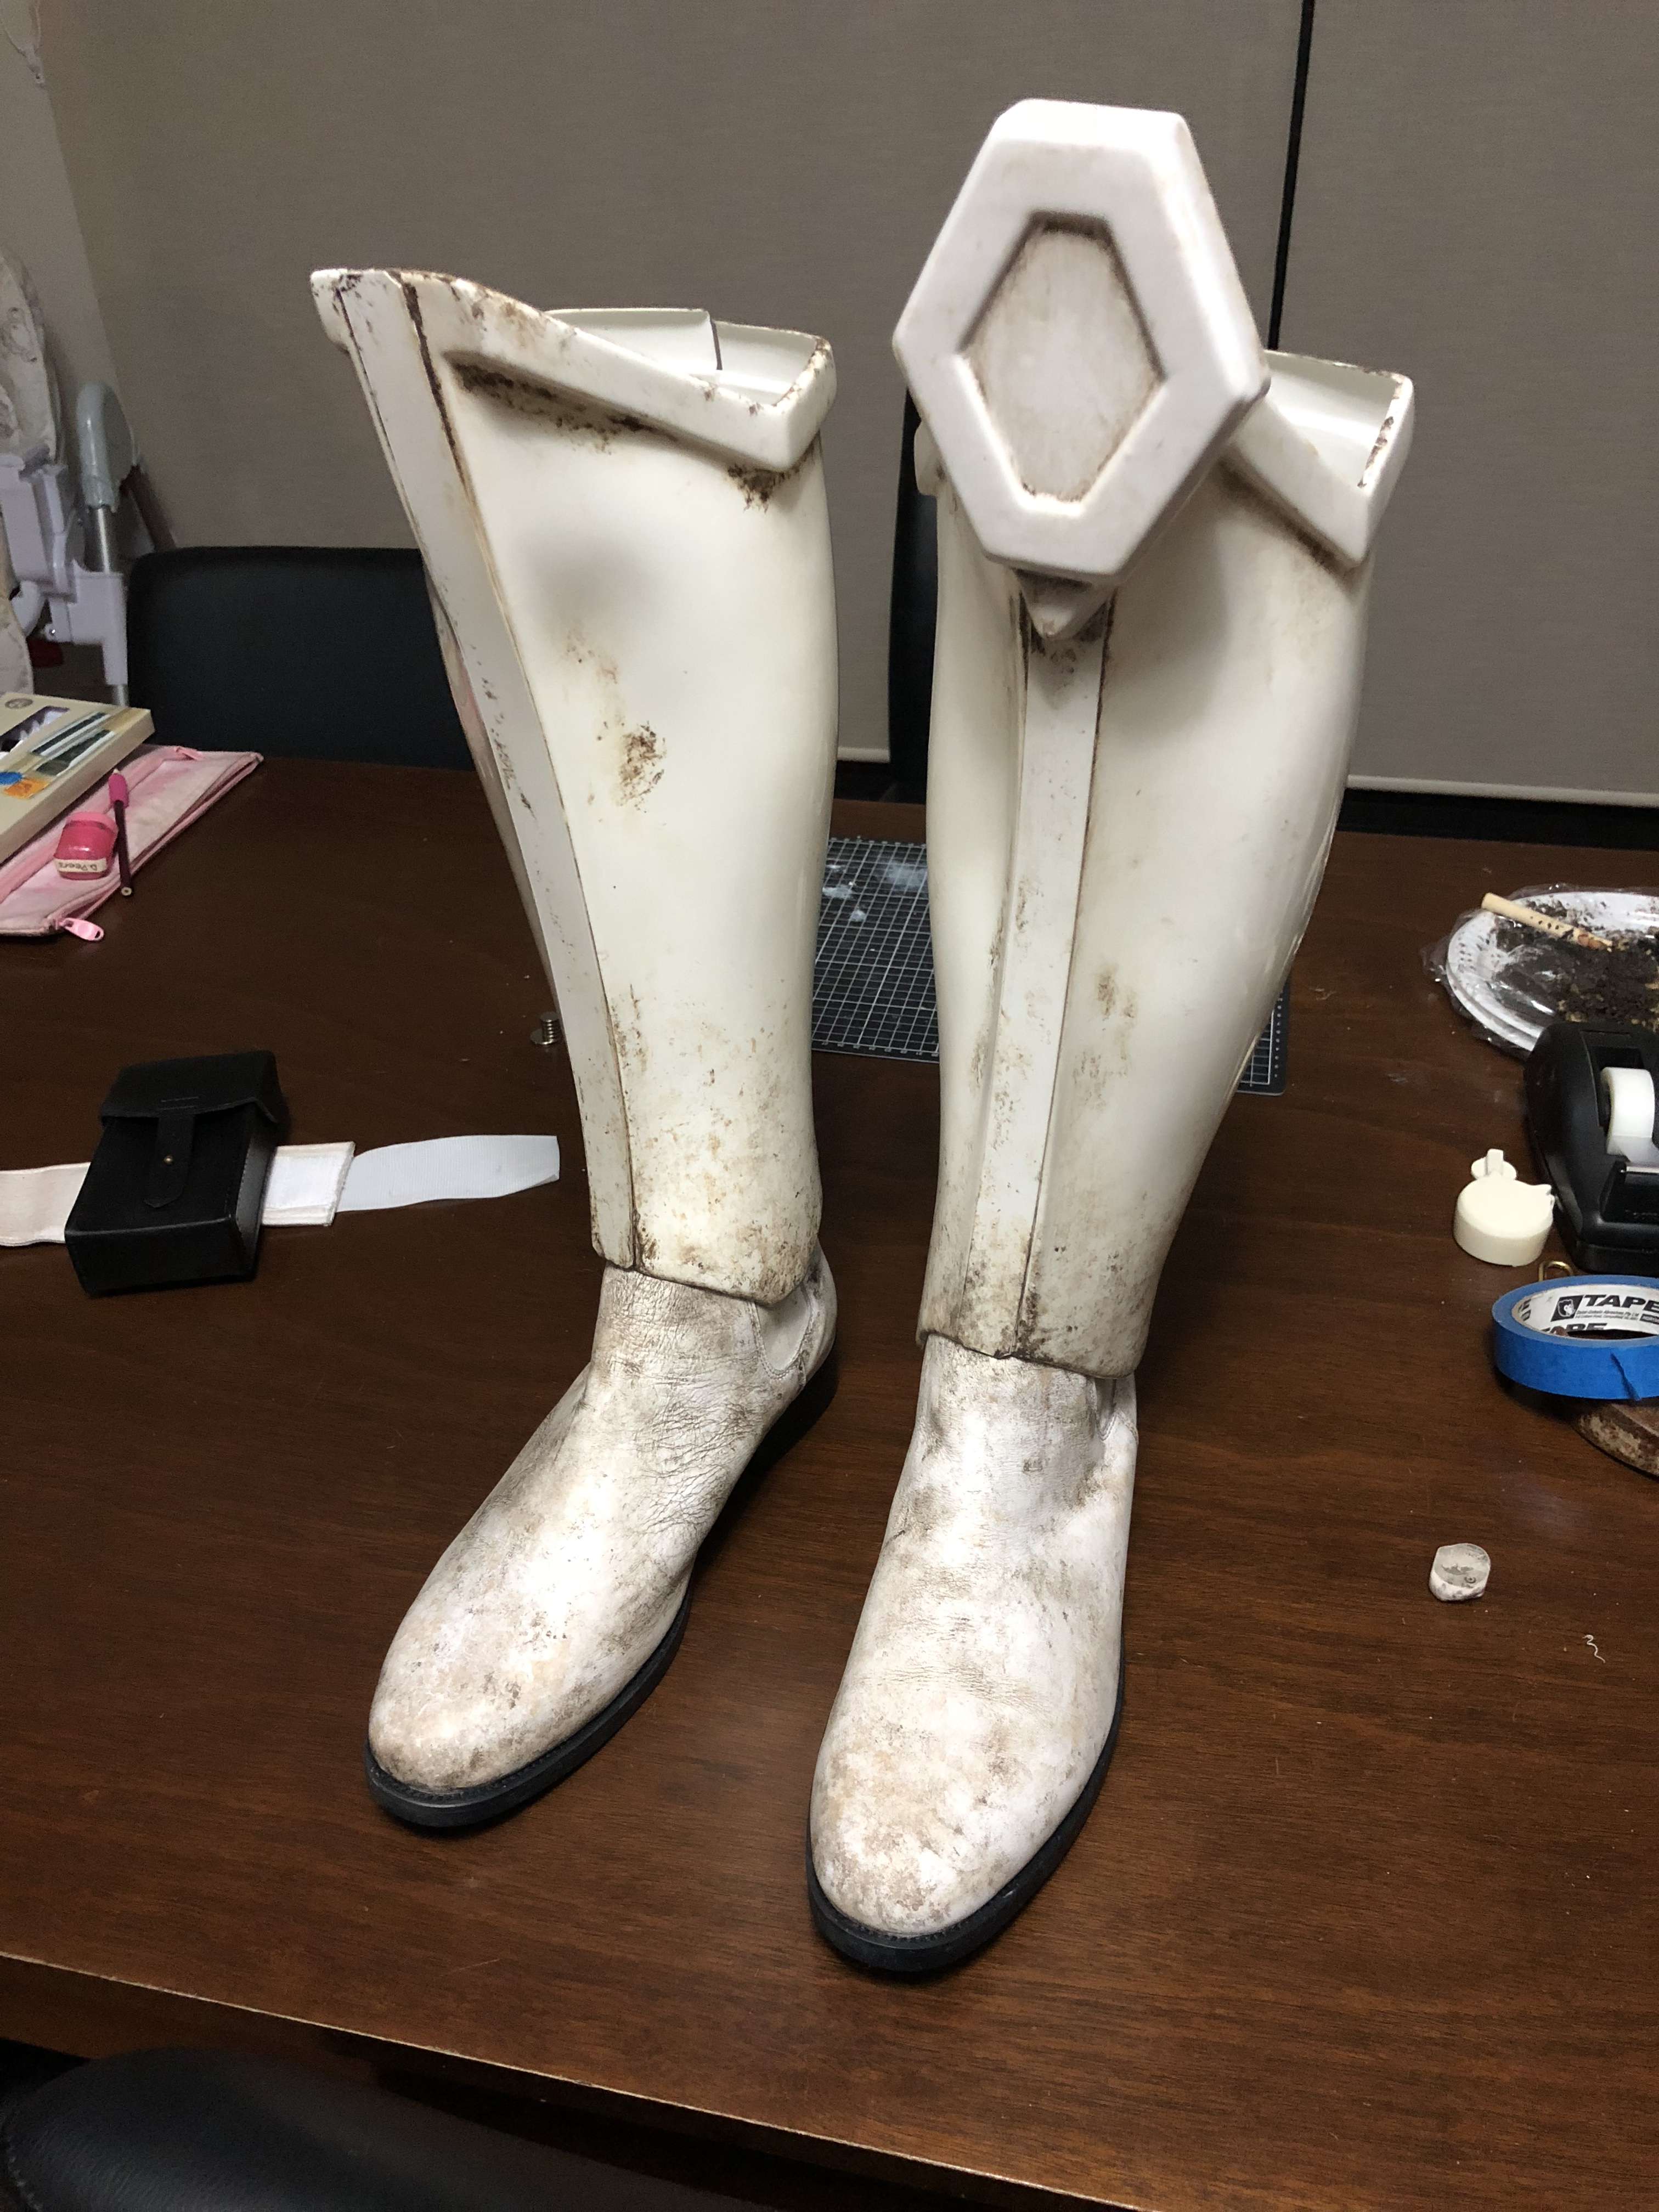
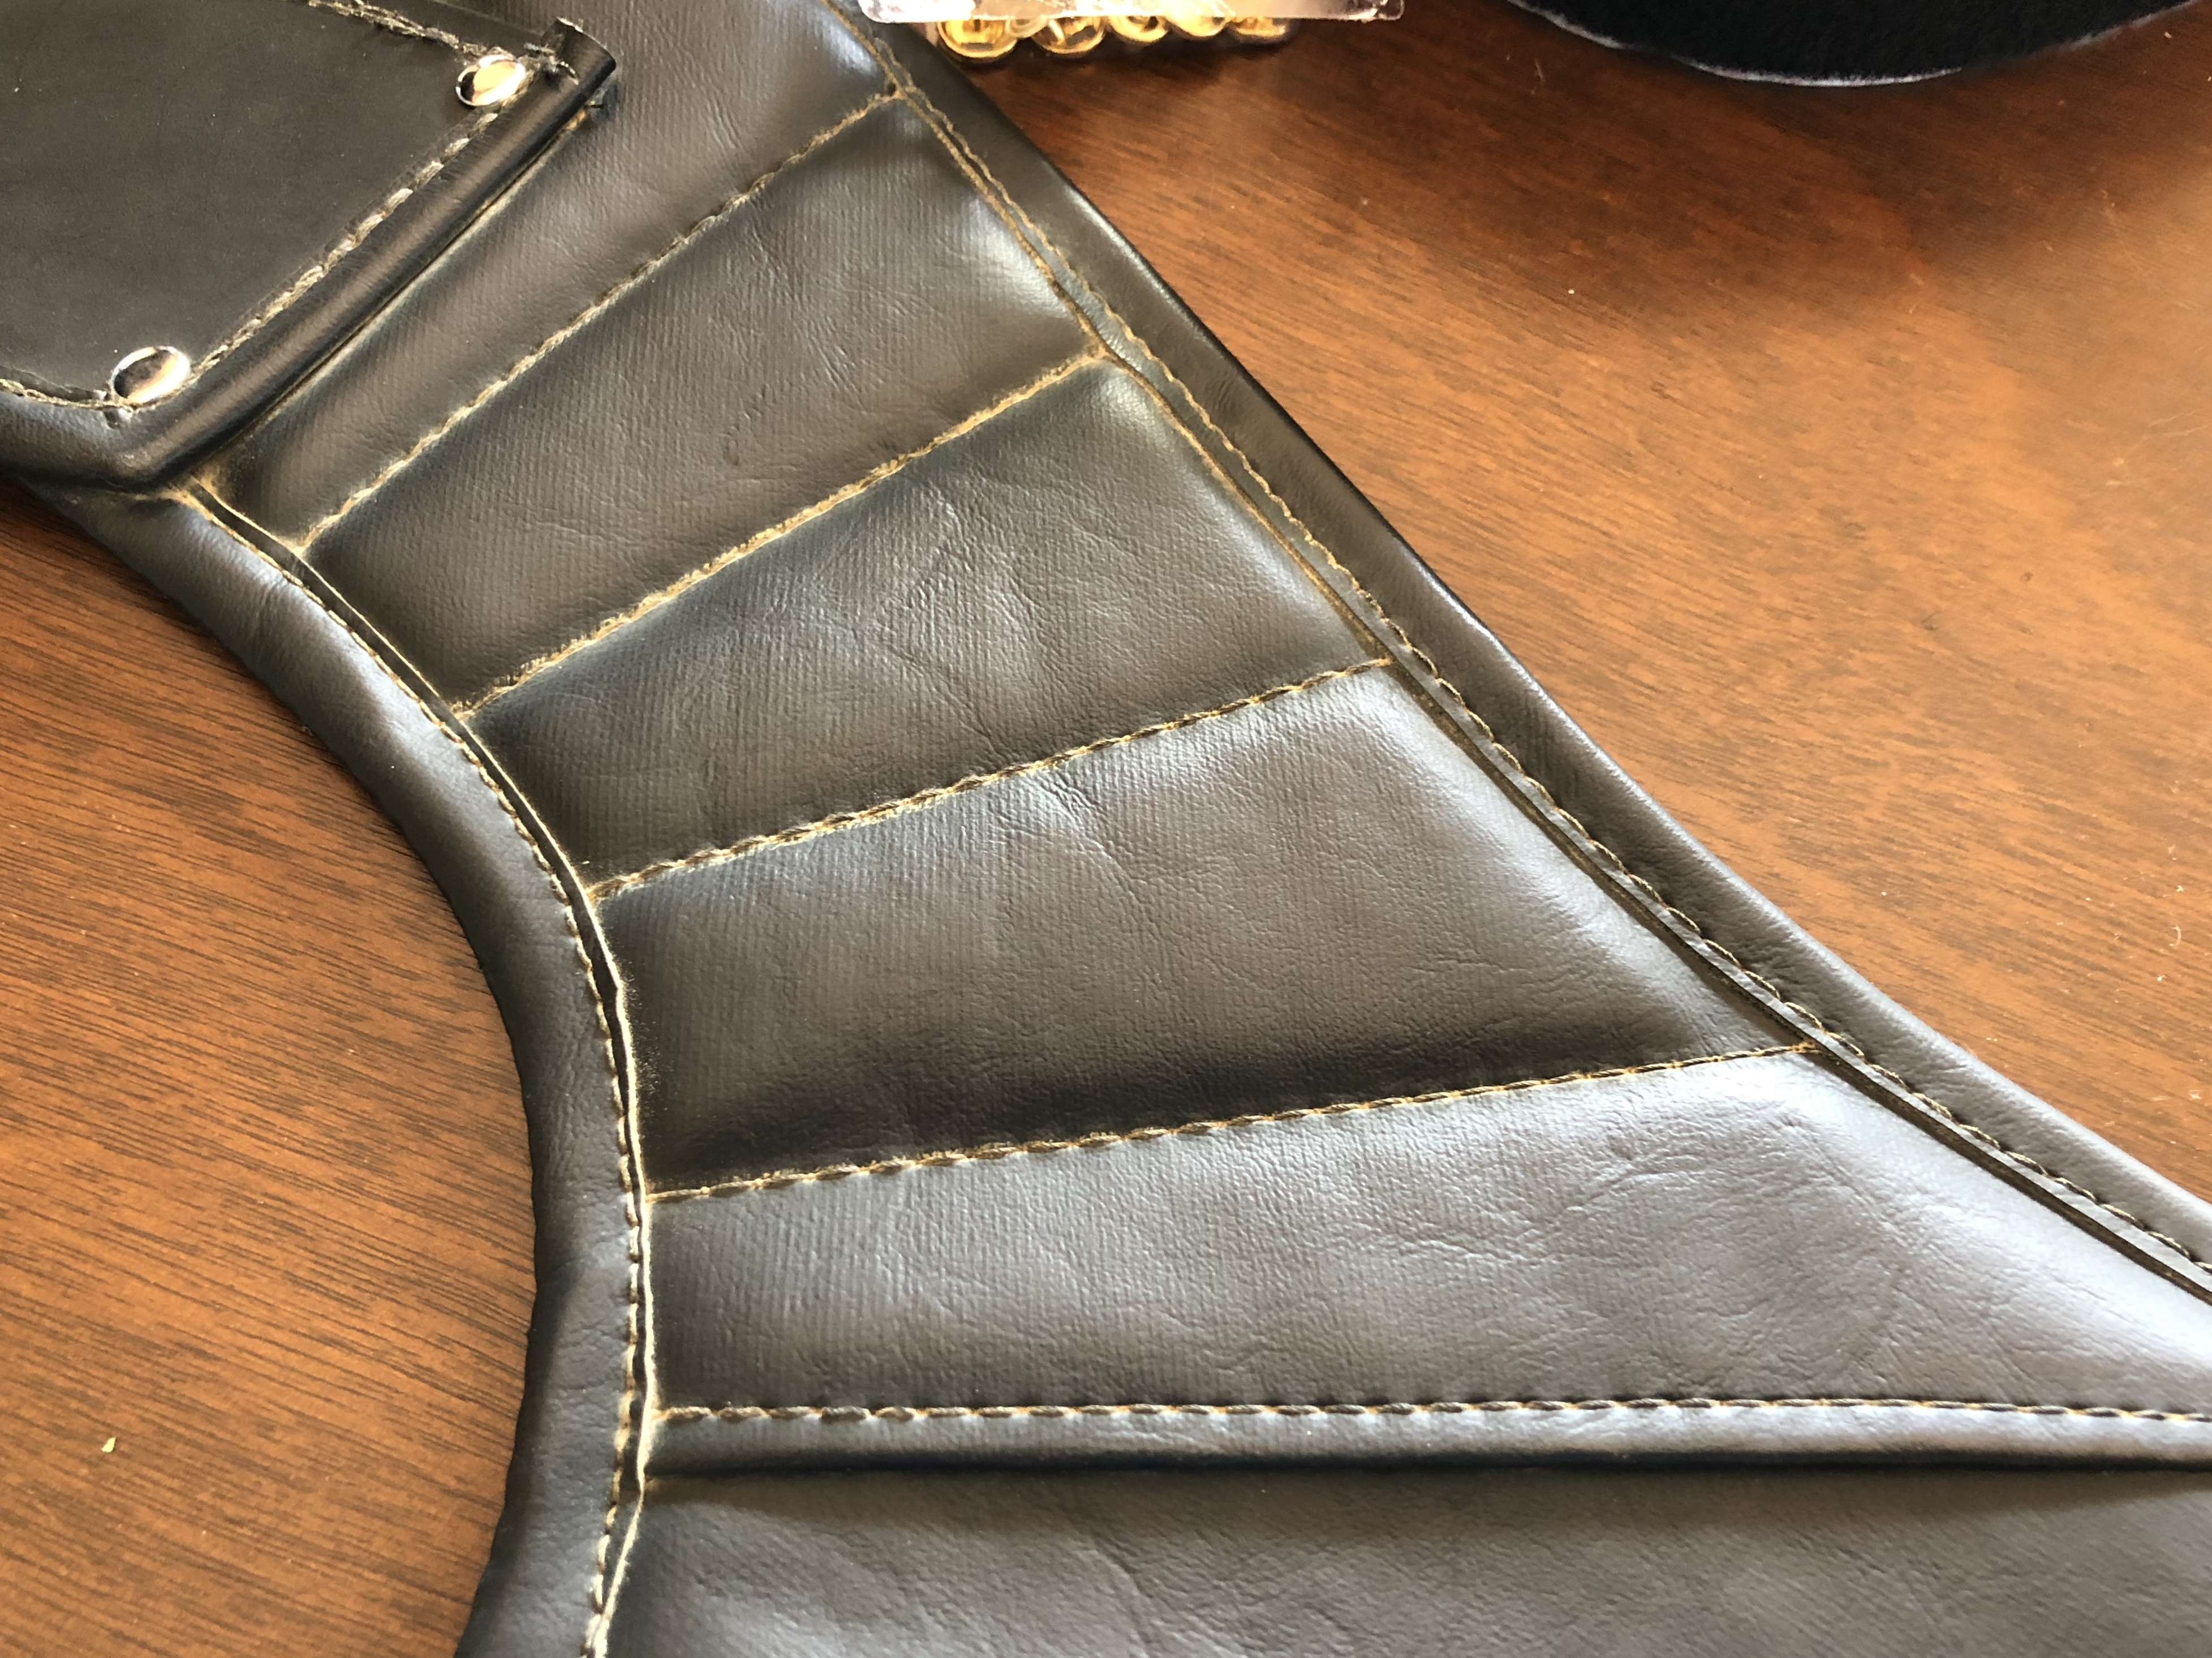
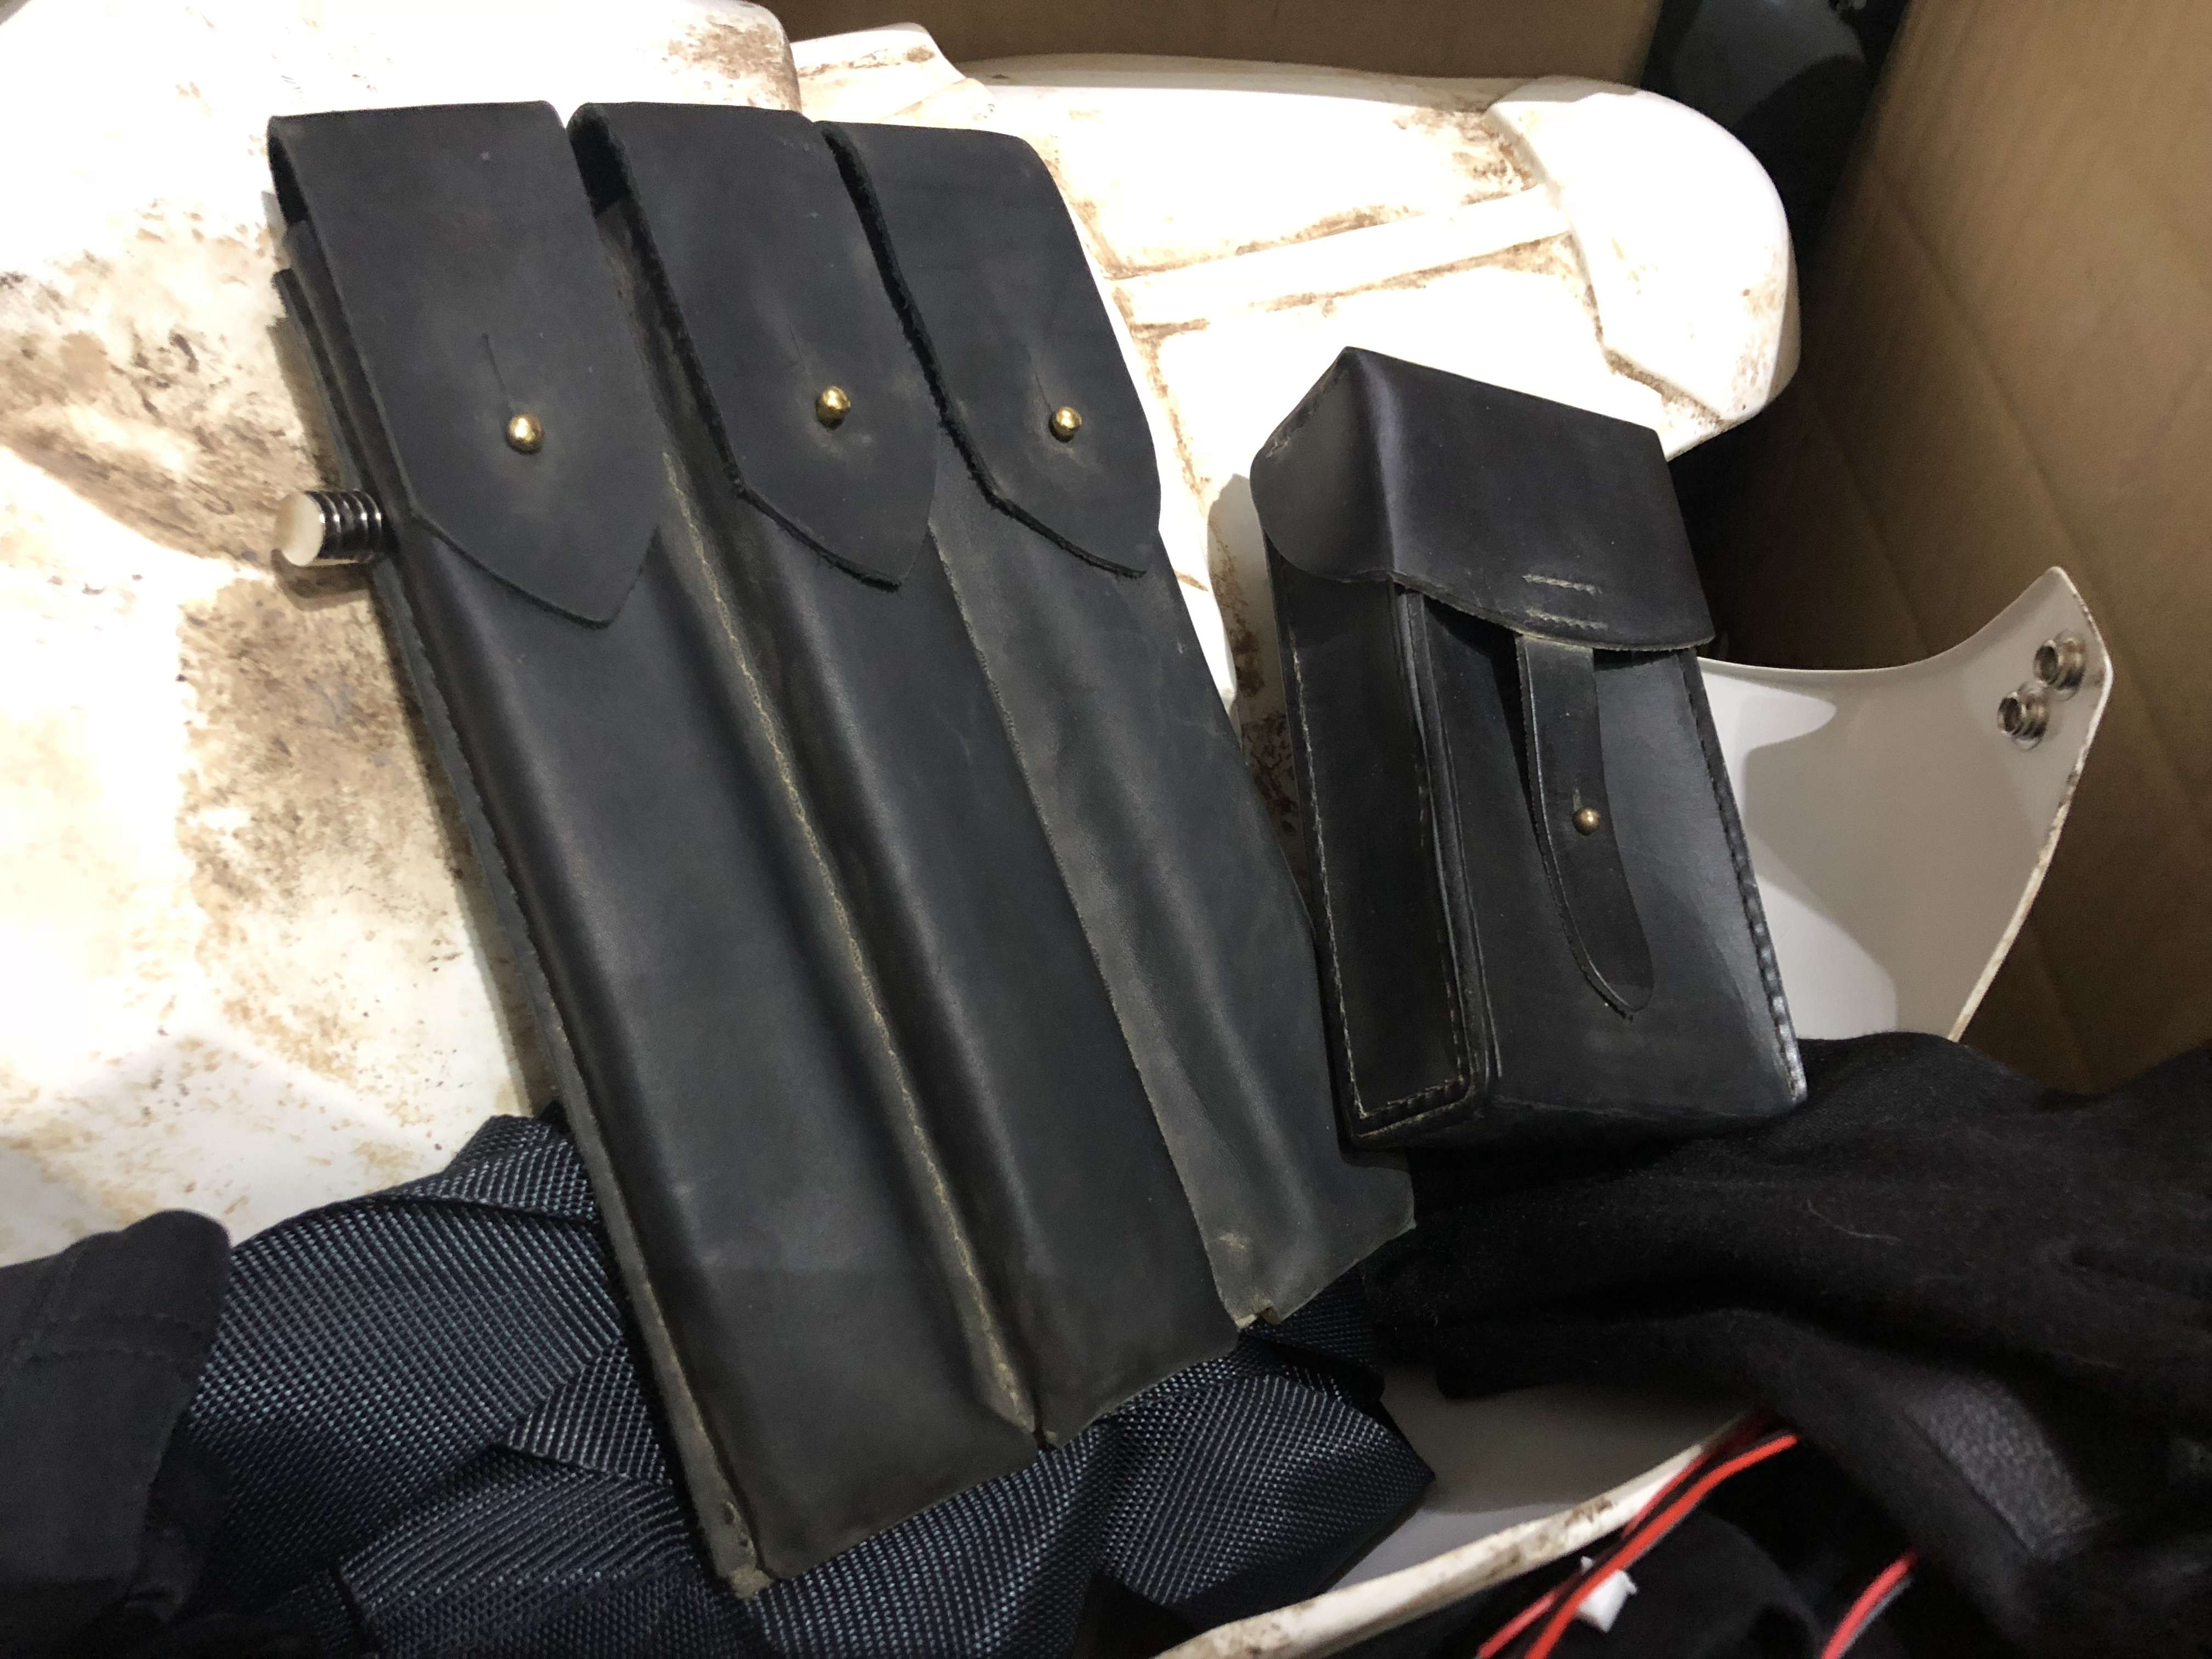
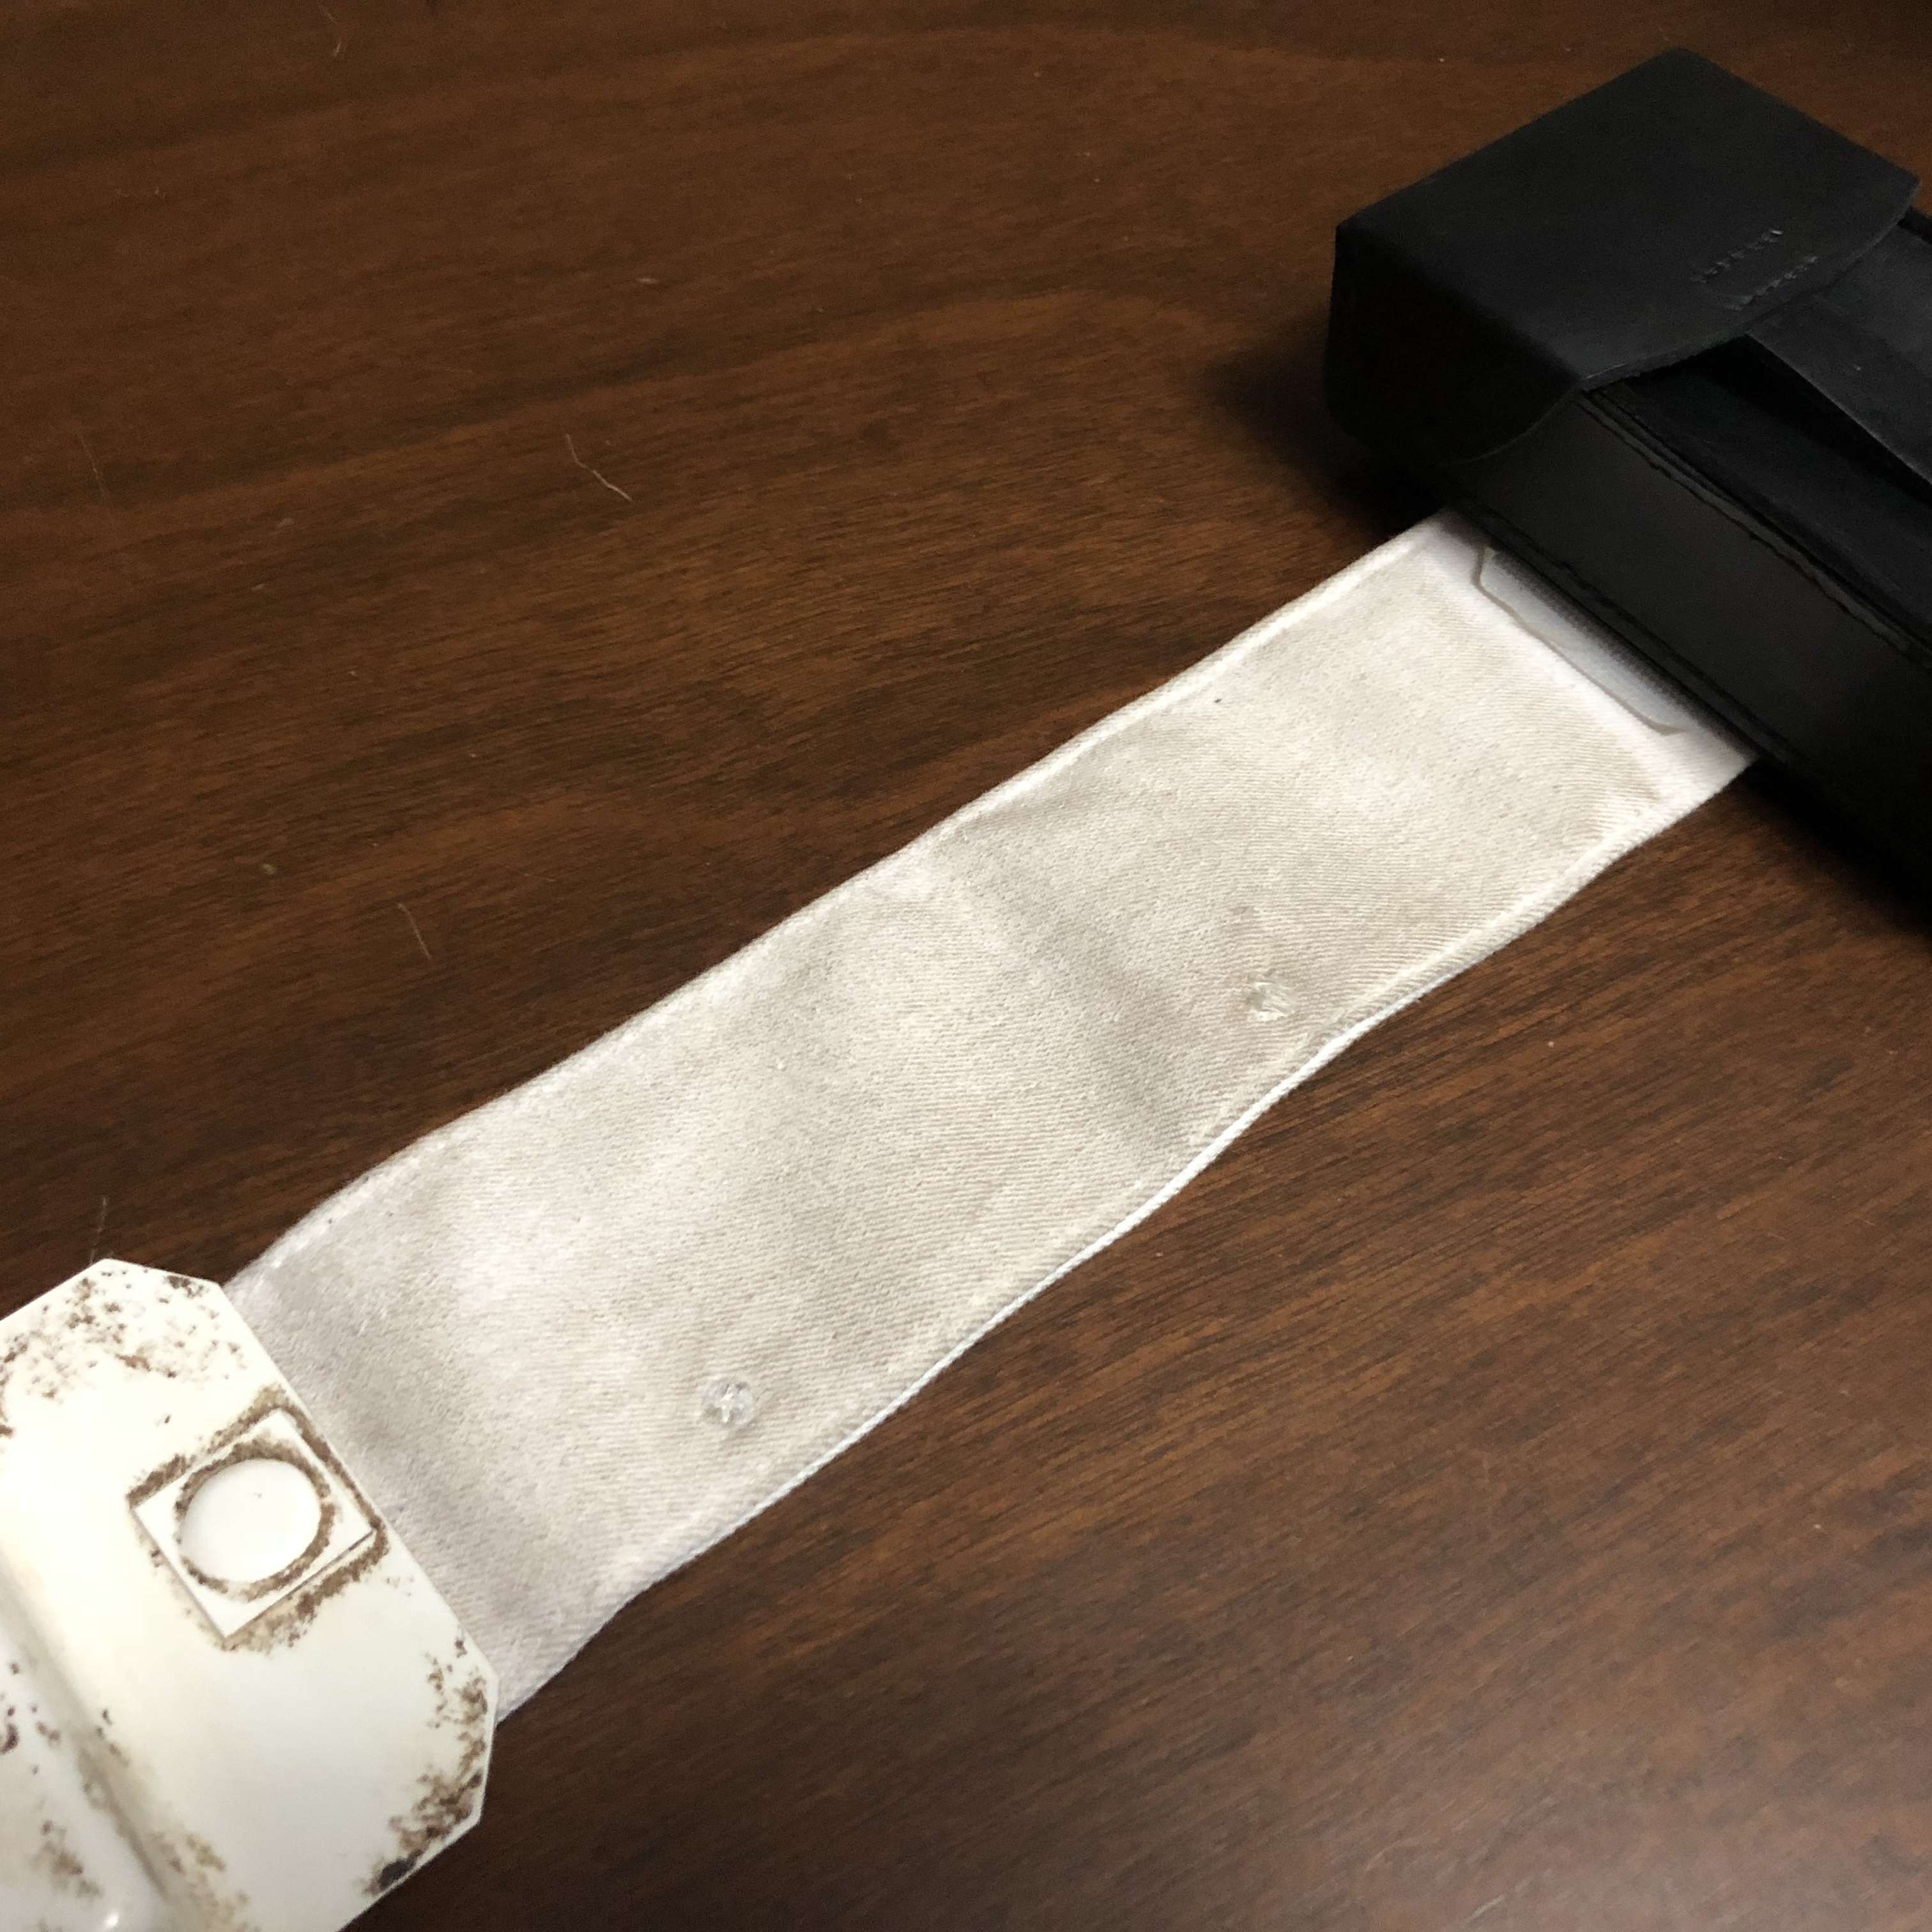
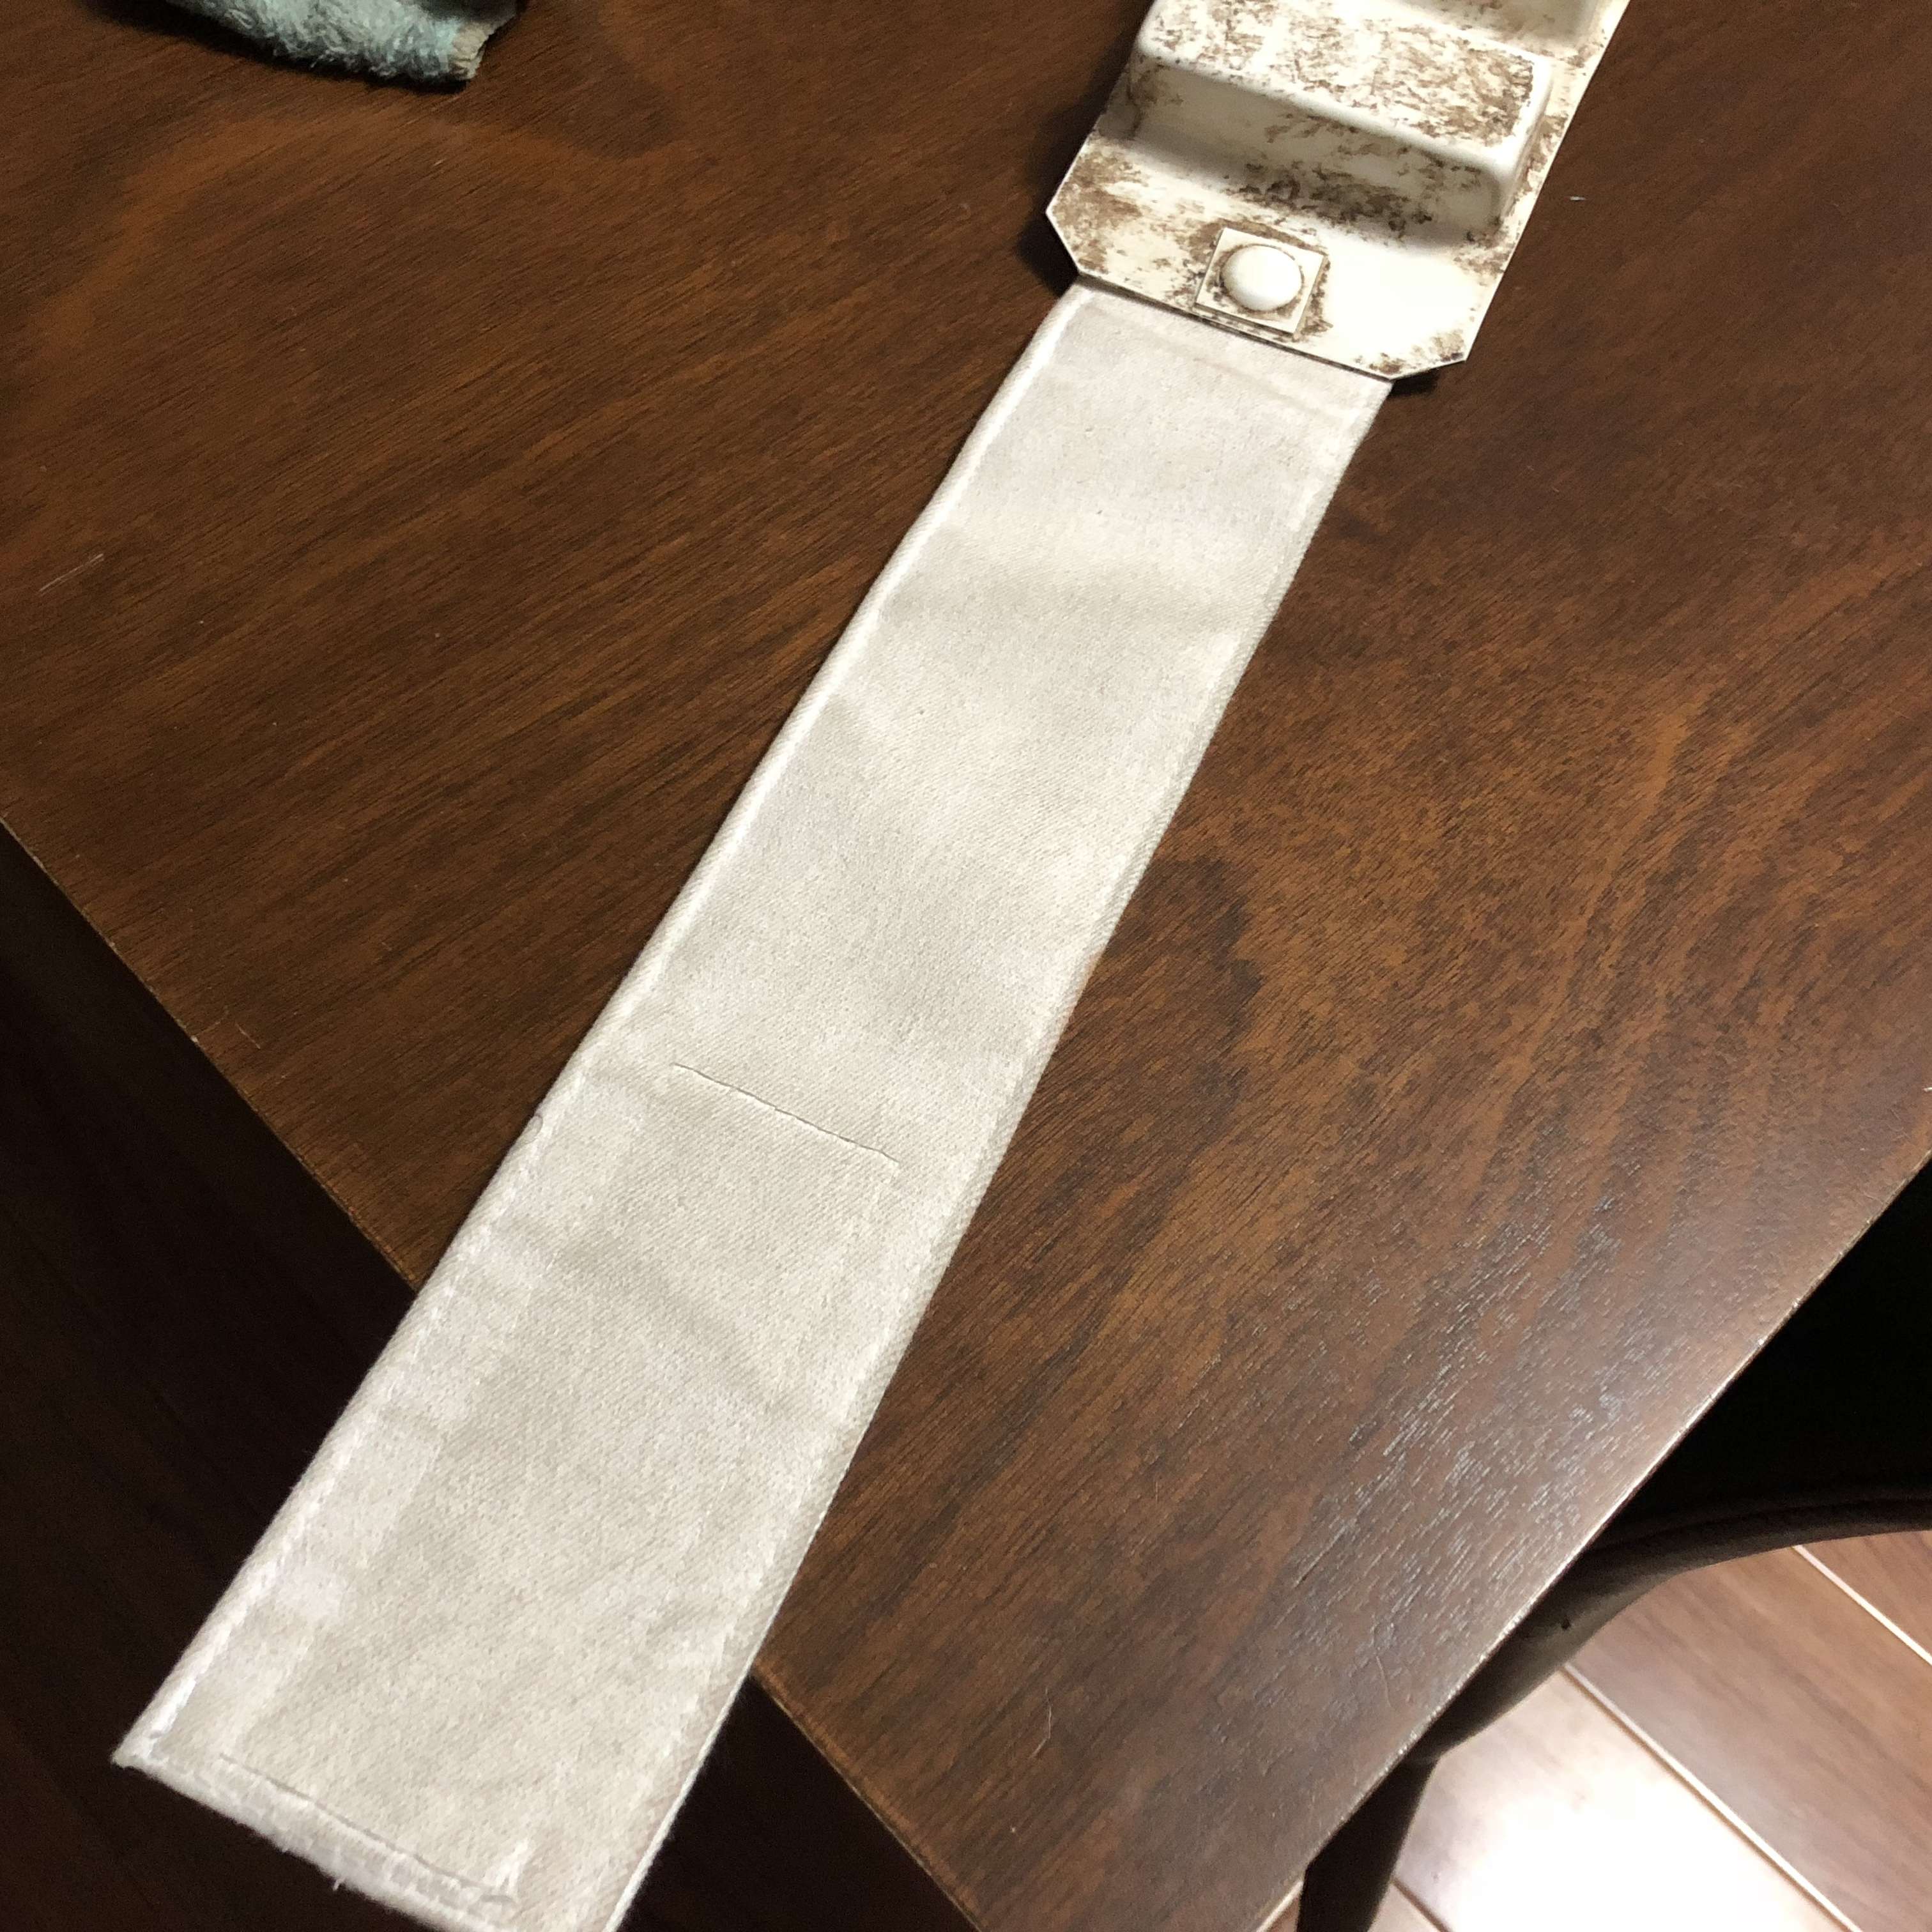
As a bonus I also managed to get my belt and shoulder strapping weathered. I used the suggestion from Airborne Trooper and grabbed my rag I used for wiping my acrylic paint down from the weathering and wiped down the length of the belt. Got a great consistent colour and look. Also sewed up the hold left from the E-11 holster originally on the belt.
Next job, to dust the pauldron and pouches, work out a strapping system for the shoulder holster as I won’t have a backpack straight away & fit my lenses to the helmet. After that I should be ready for test fitting and submission!
-
Look what finally arrived!

Time to finish off my trooper!
-
1
-
-
Thanks guys! Glad I am on the right track with the build.
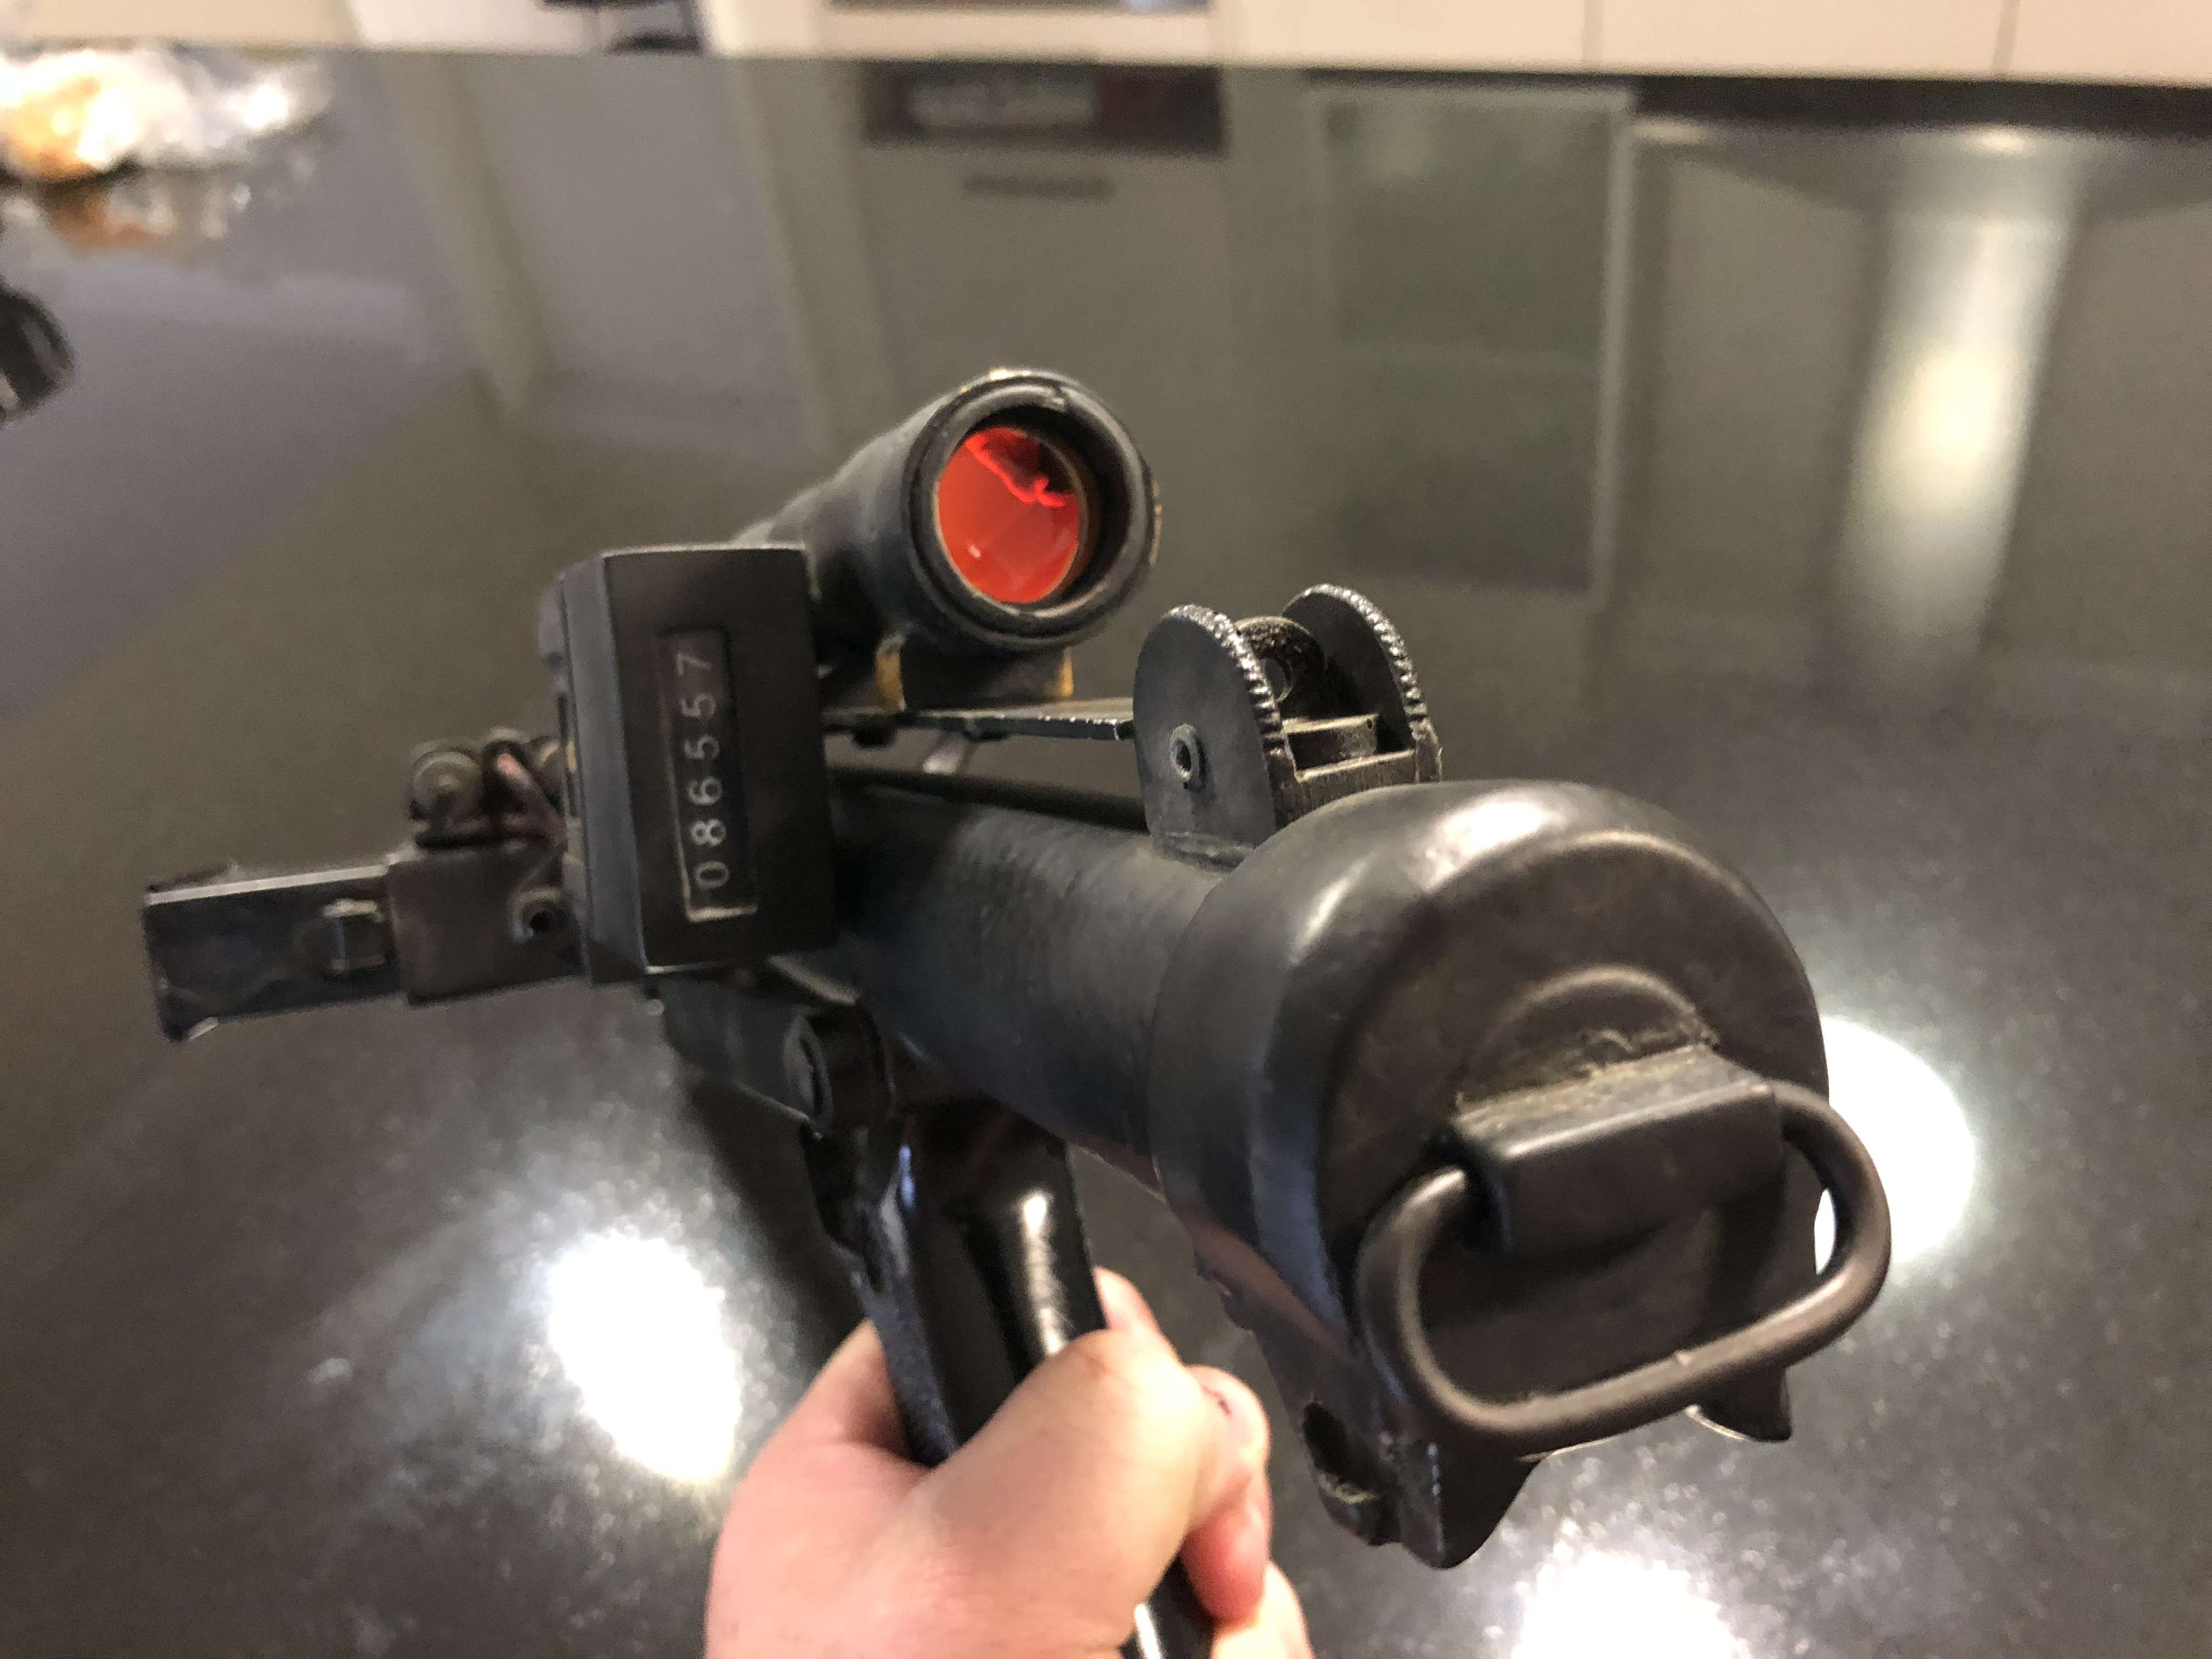
As I am waiting for more parts to come in I decided to build my E-11 this weekend. As a Tie Pilot I carry a DL-44 but have always wanted to build a nice E-11 for trooping. I am starting with a Doopydoo's full resin kit but also purchased a T-Jay completion set to finish off the build. I like the kit, there are just some rough spots and I think I can iron a lot of it out. There will be no electronics in this one, might save that for my other project I have going as well
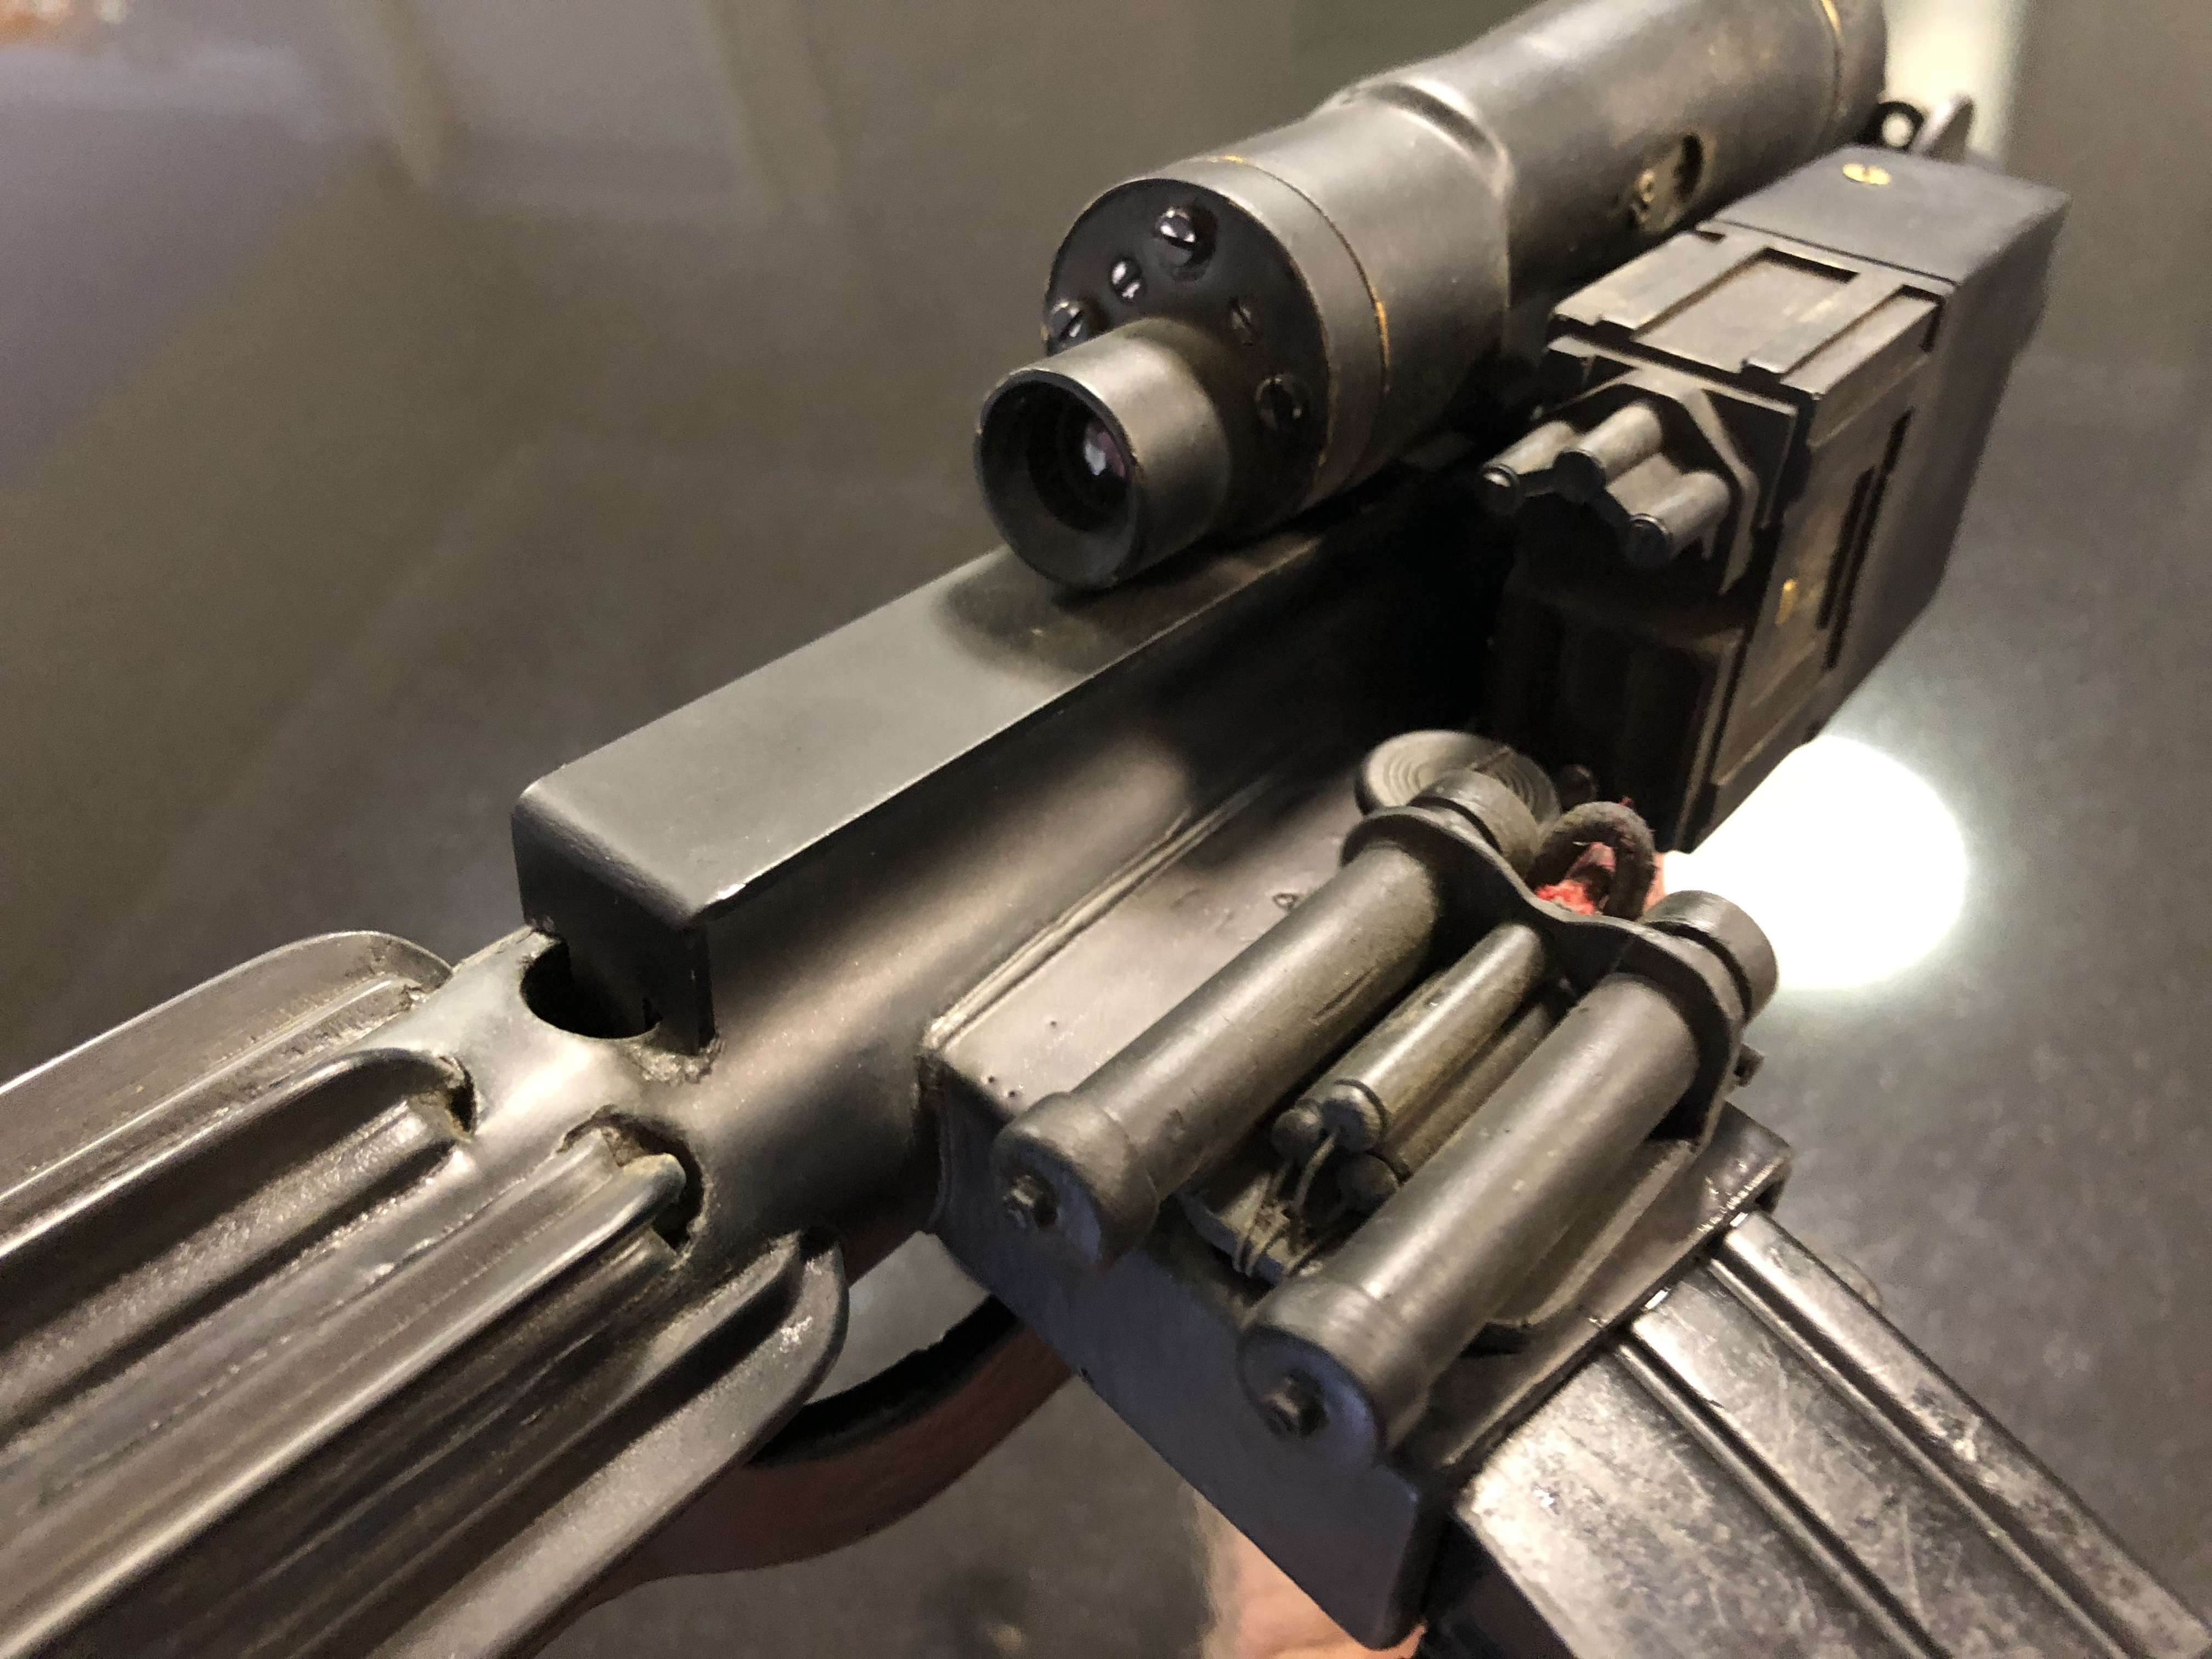
I didn't take a lot of pics while I was building but here are some from last night. First pics are of both parts I mainly focused on. On the sterling I managed to get everything cleaned up attached the handle and mag port and I also drilled out the bottom set of holes along the barrel. Also drilled out the lumps of resin at the front of the barrel and replaced with proper hex head screws.
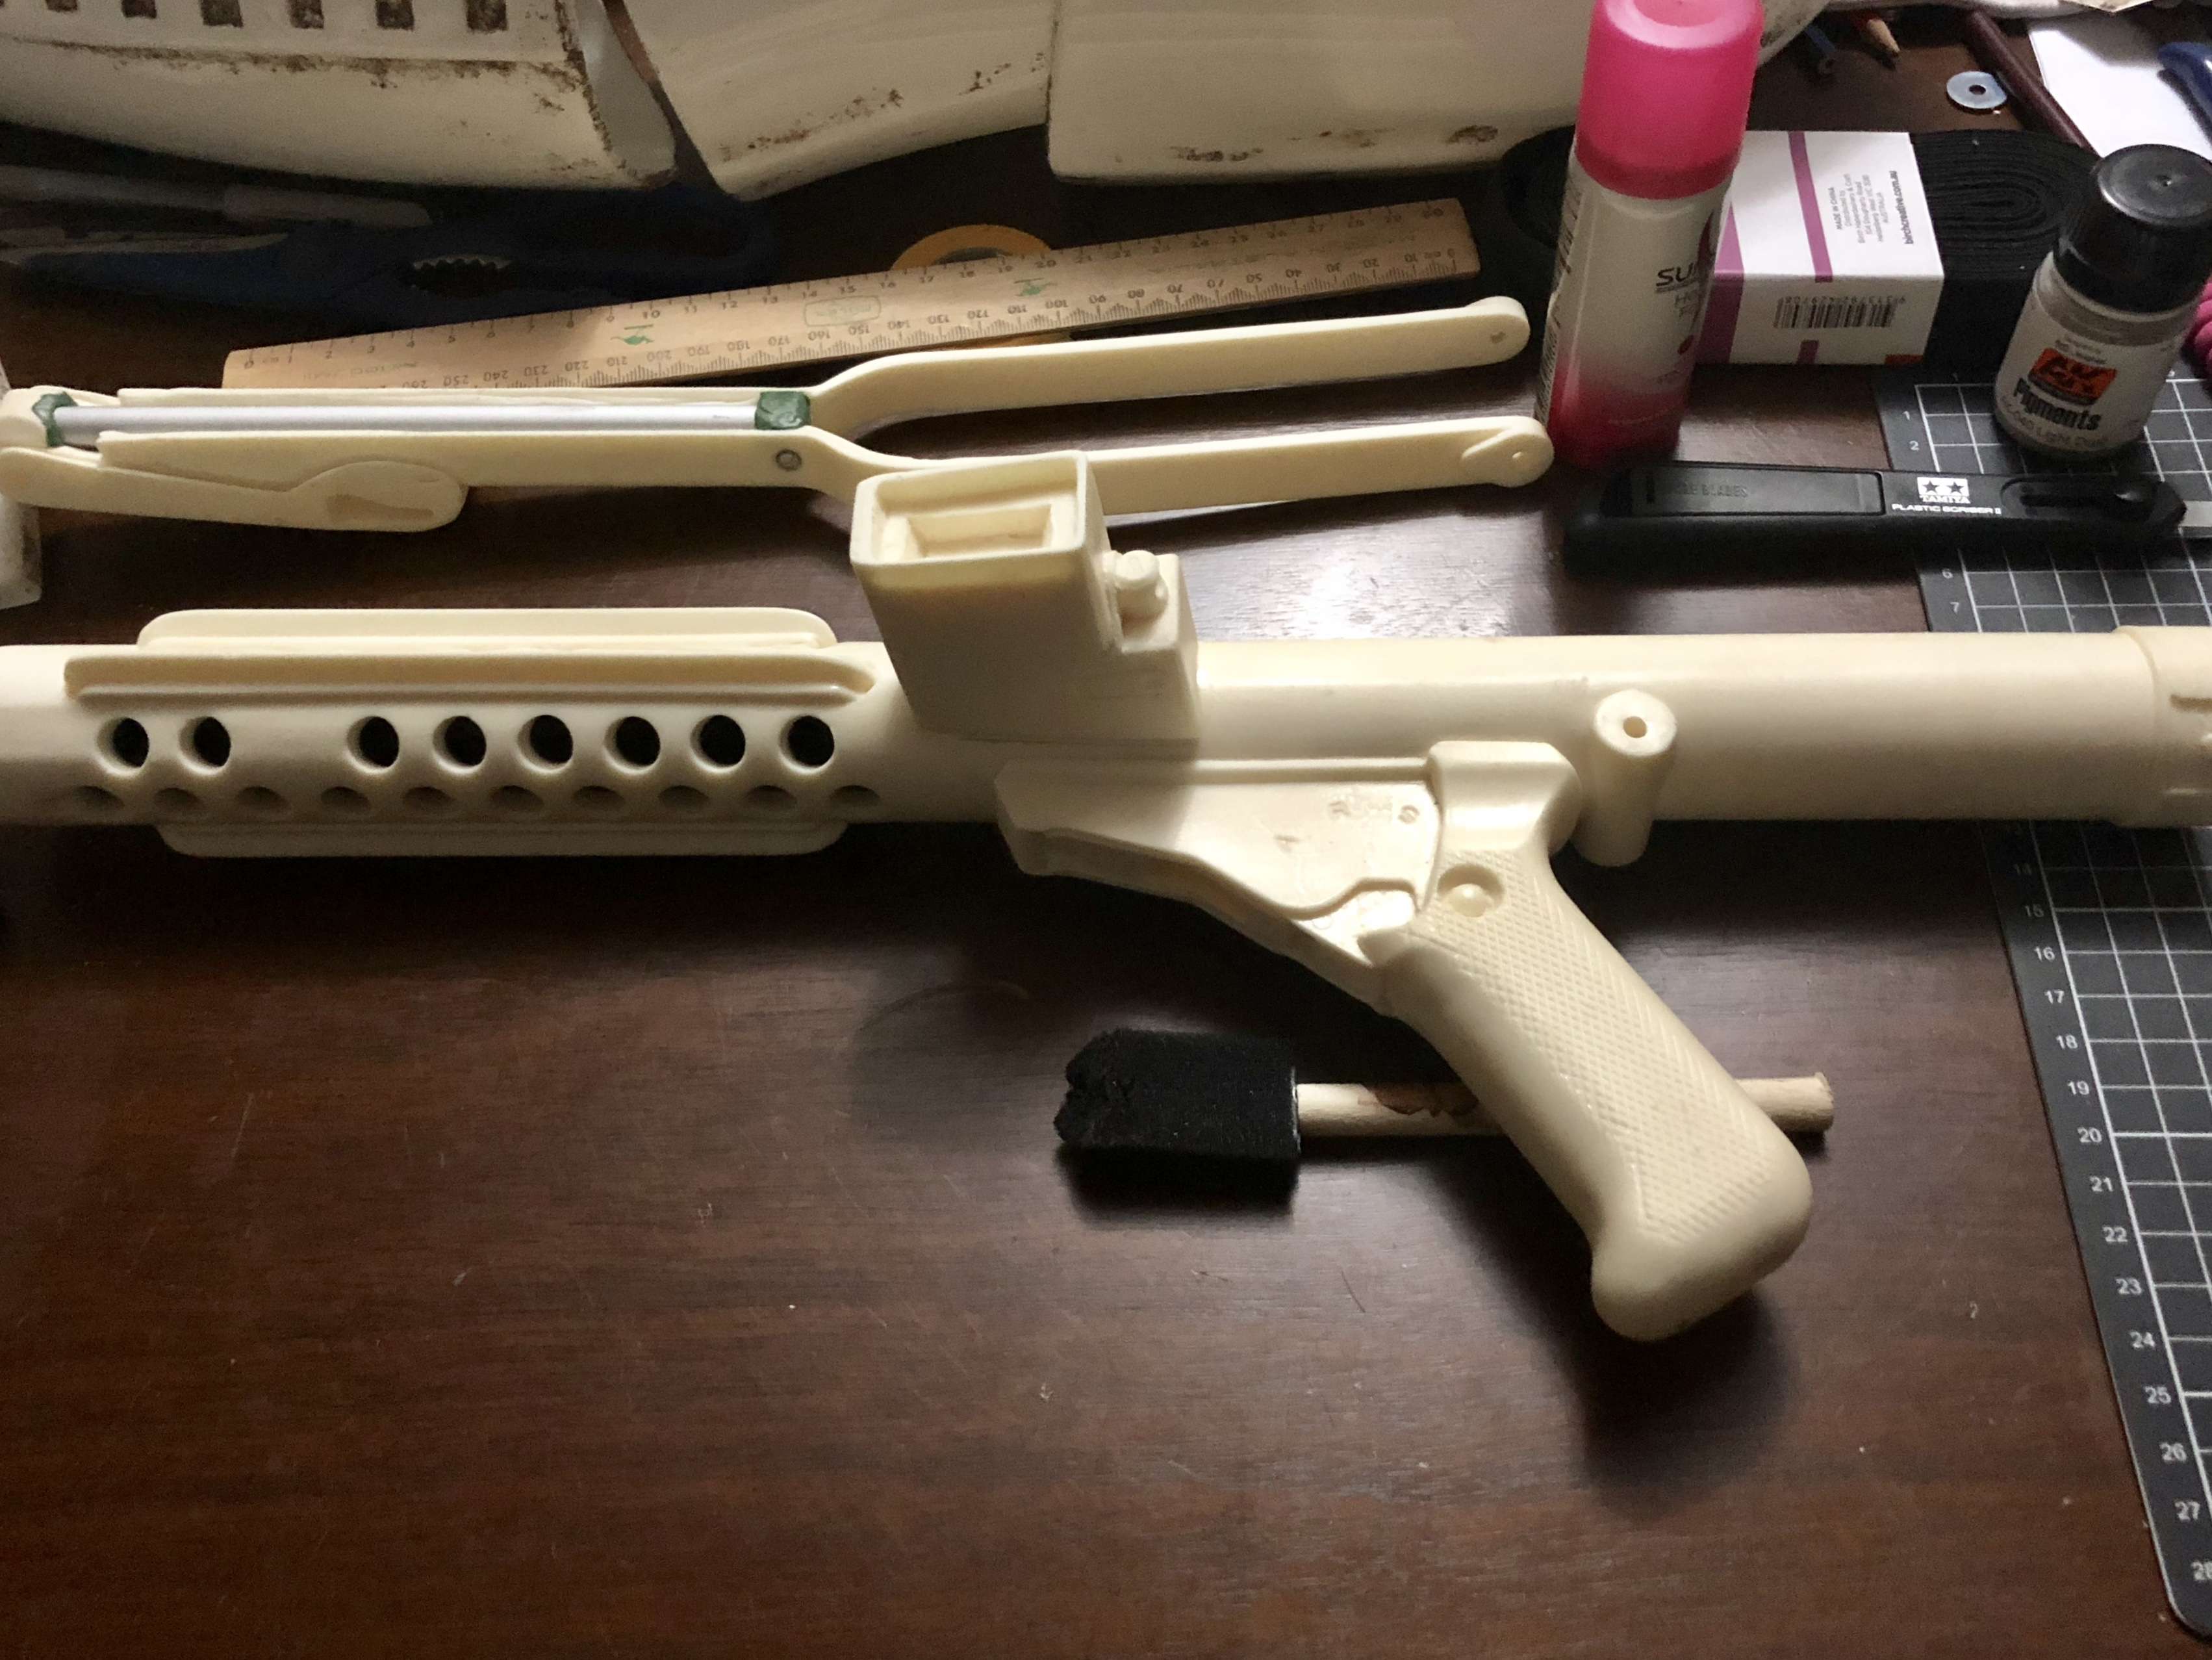
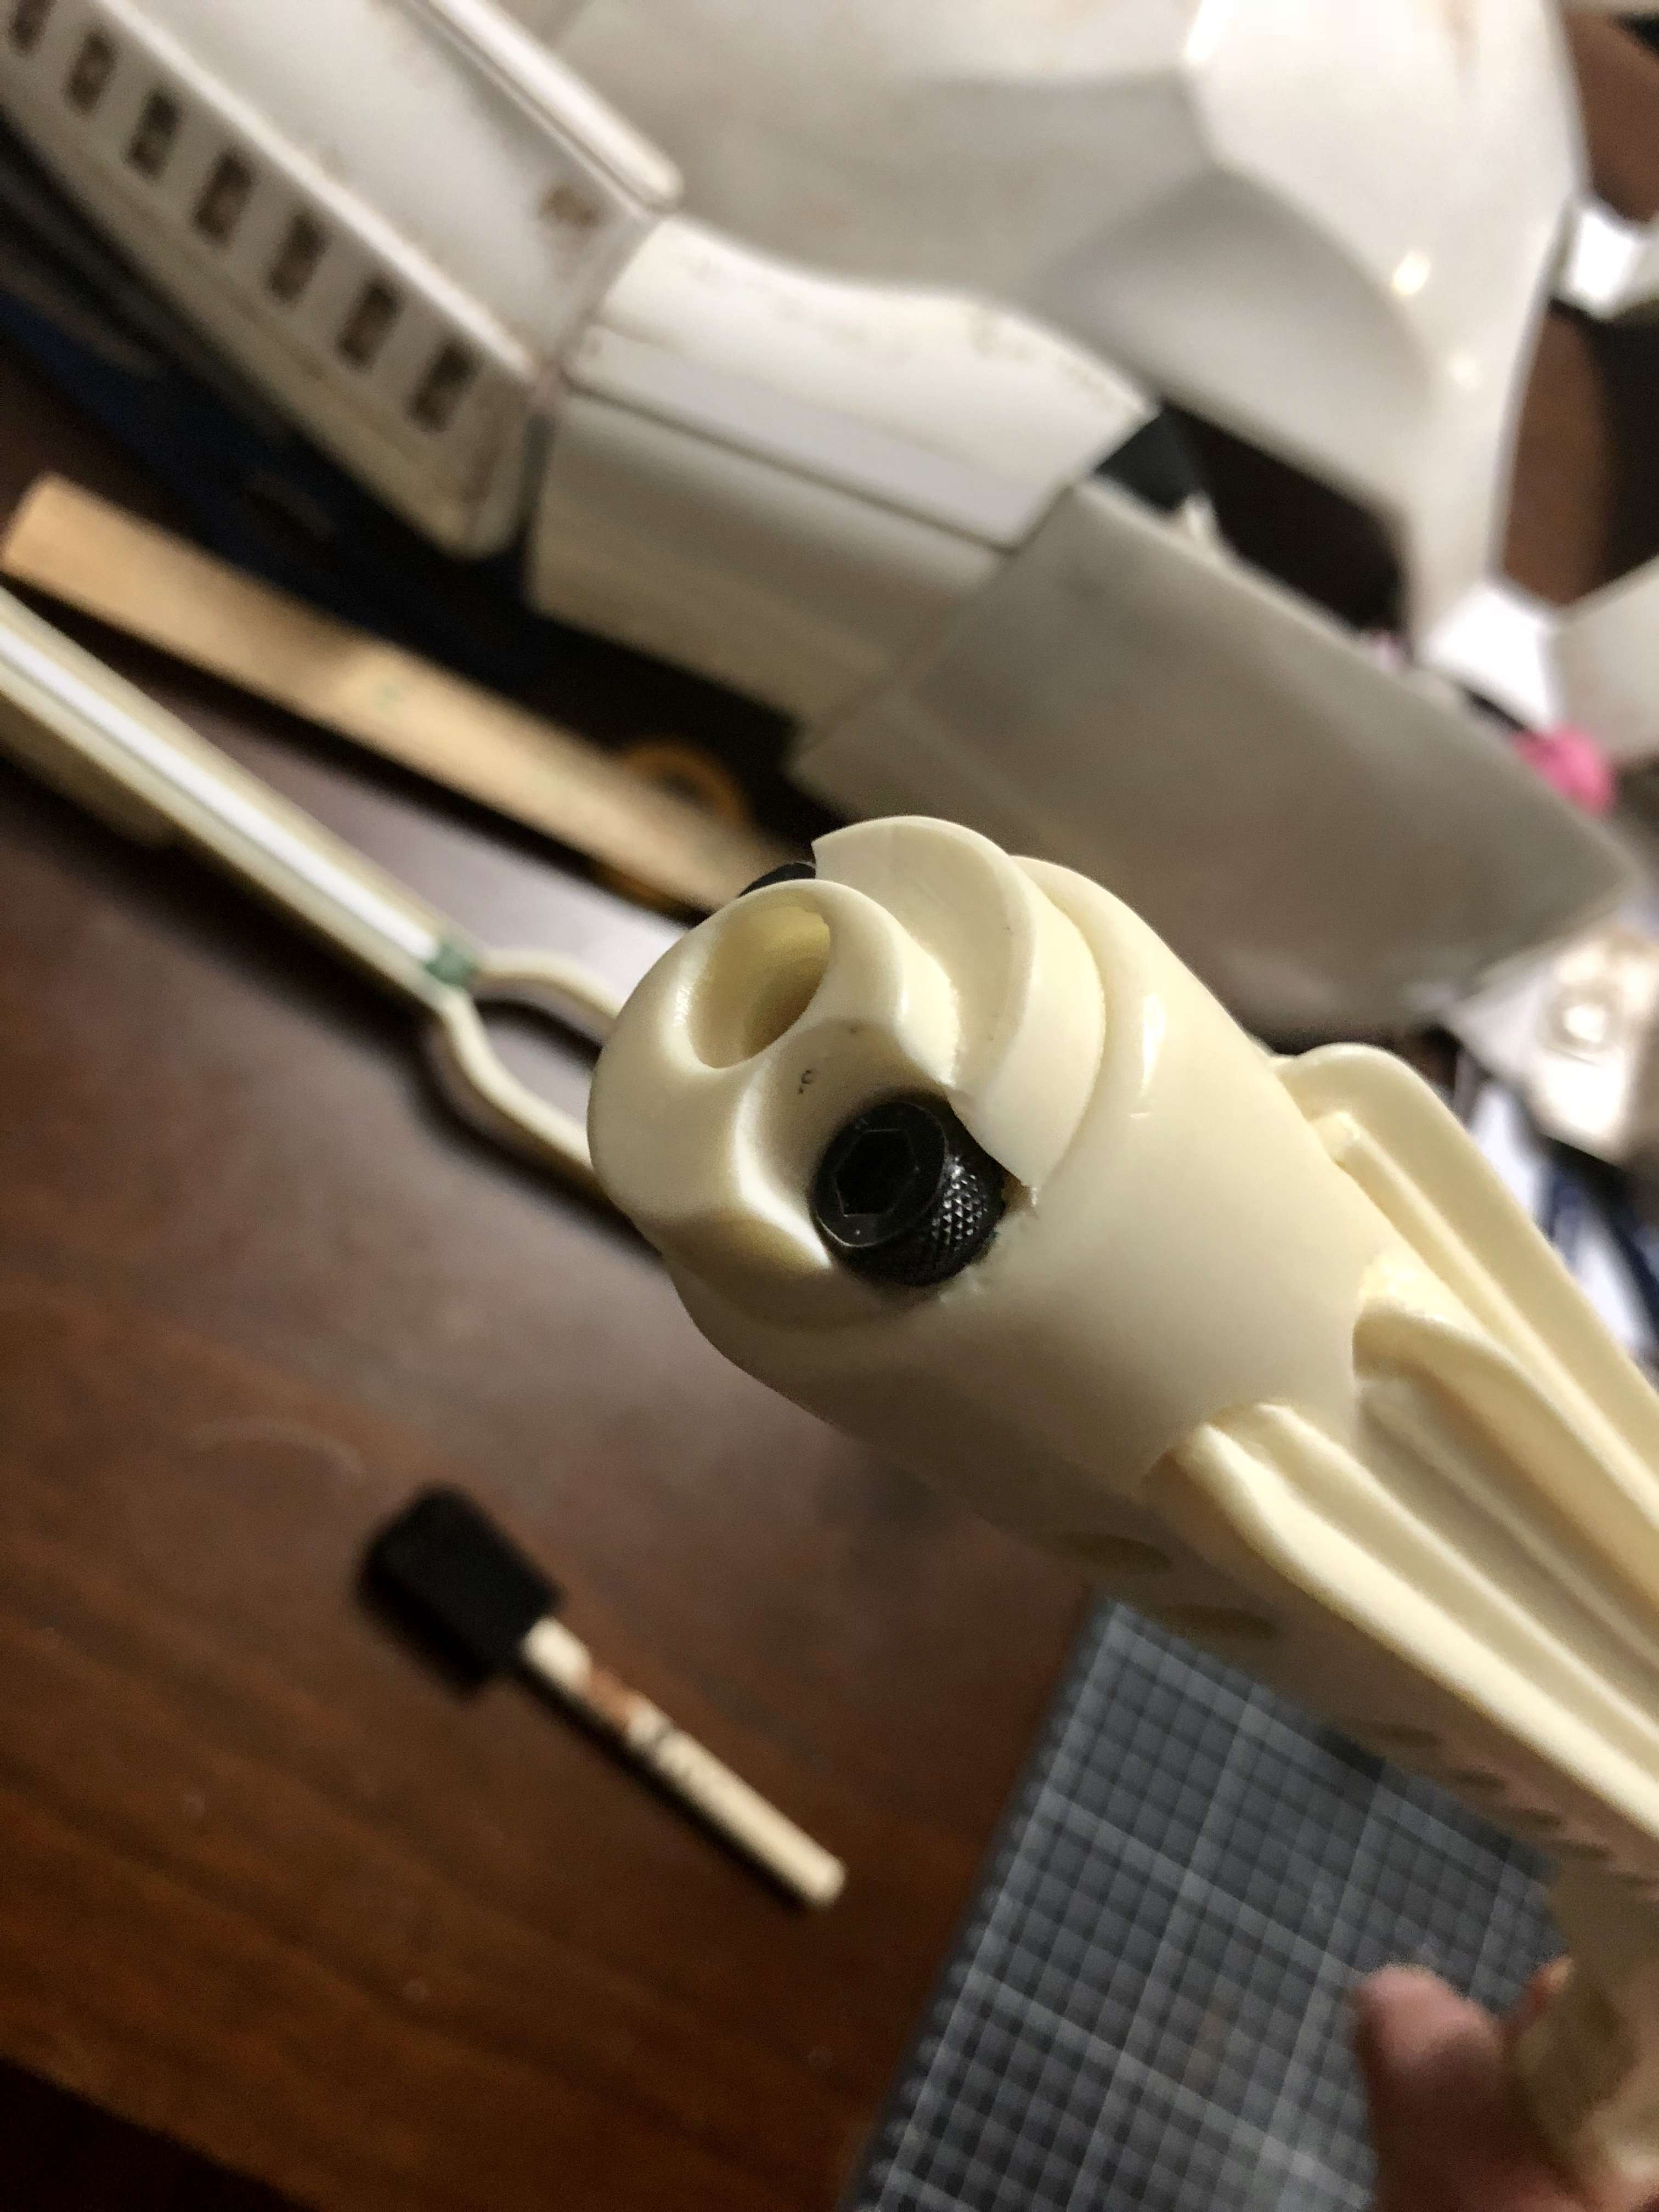
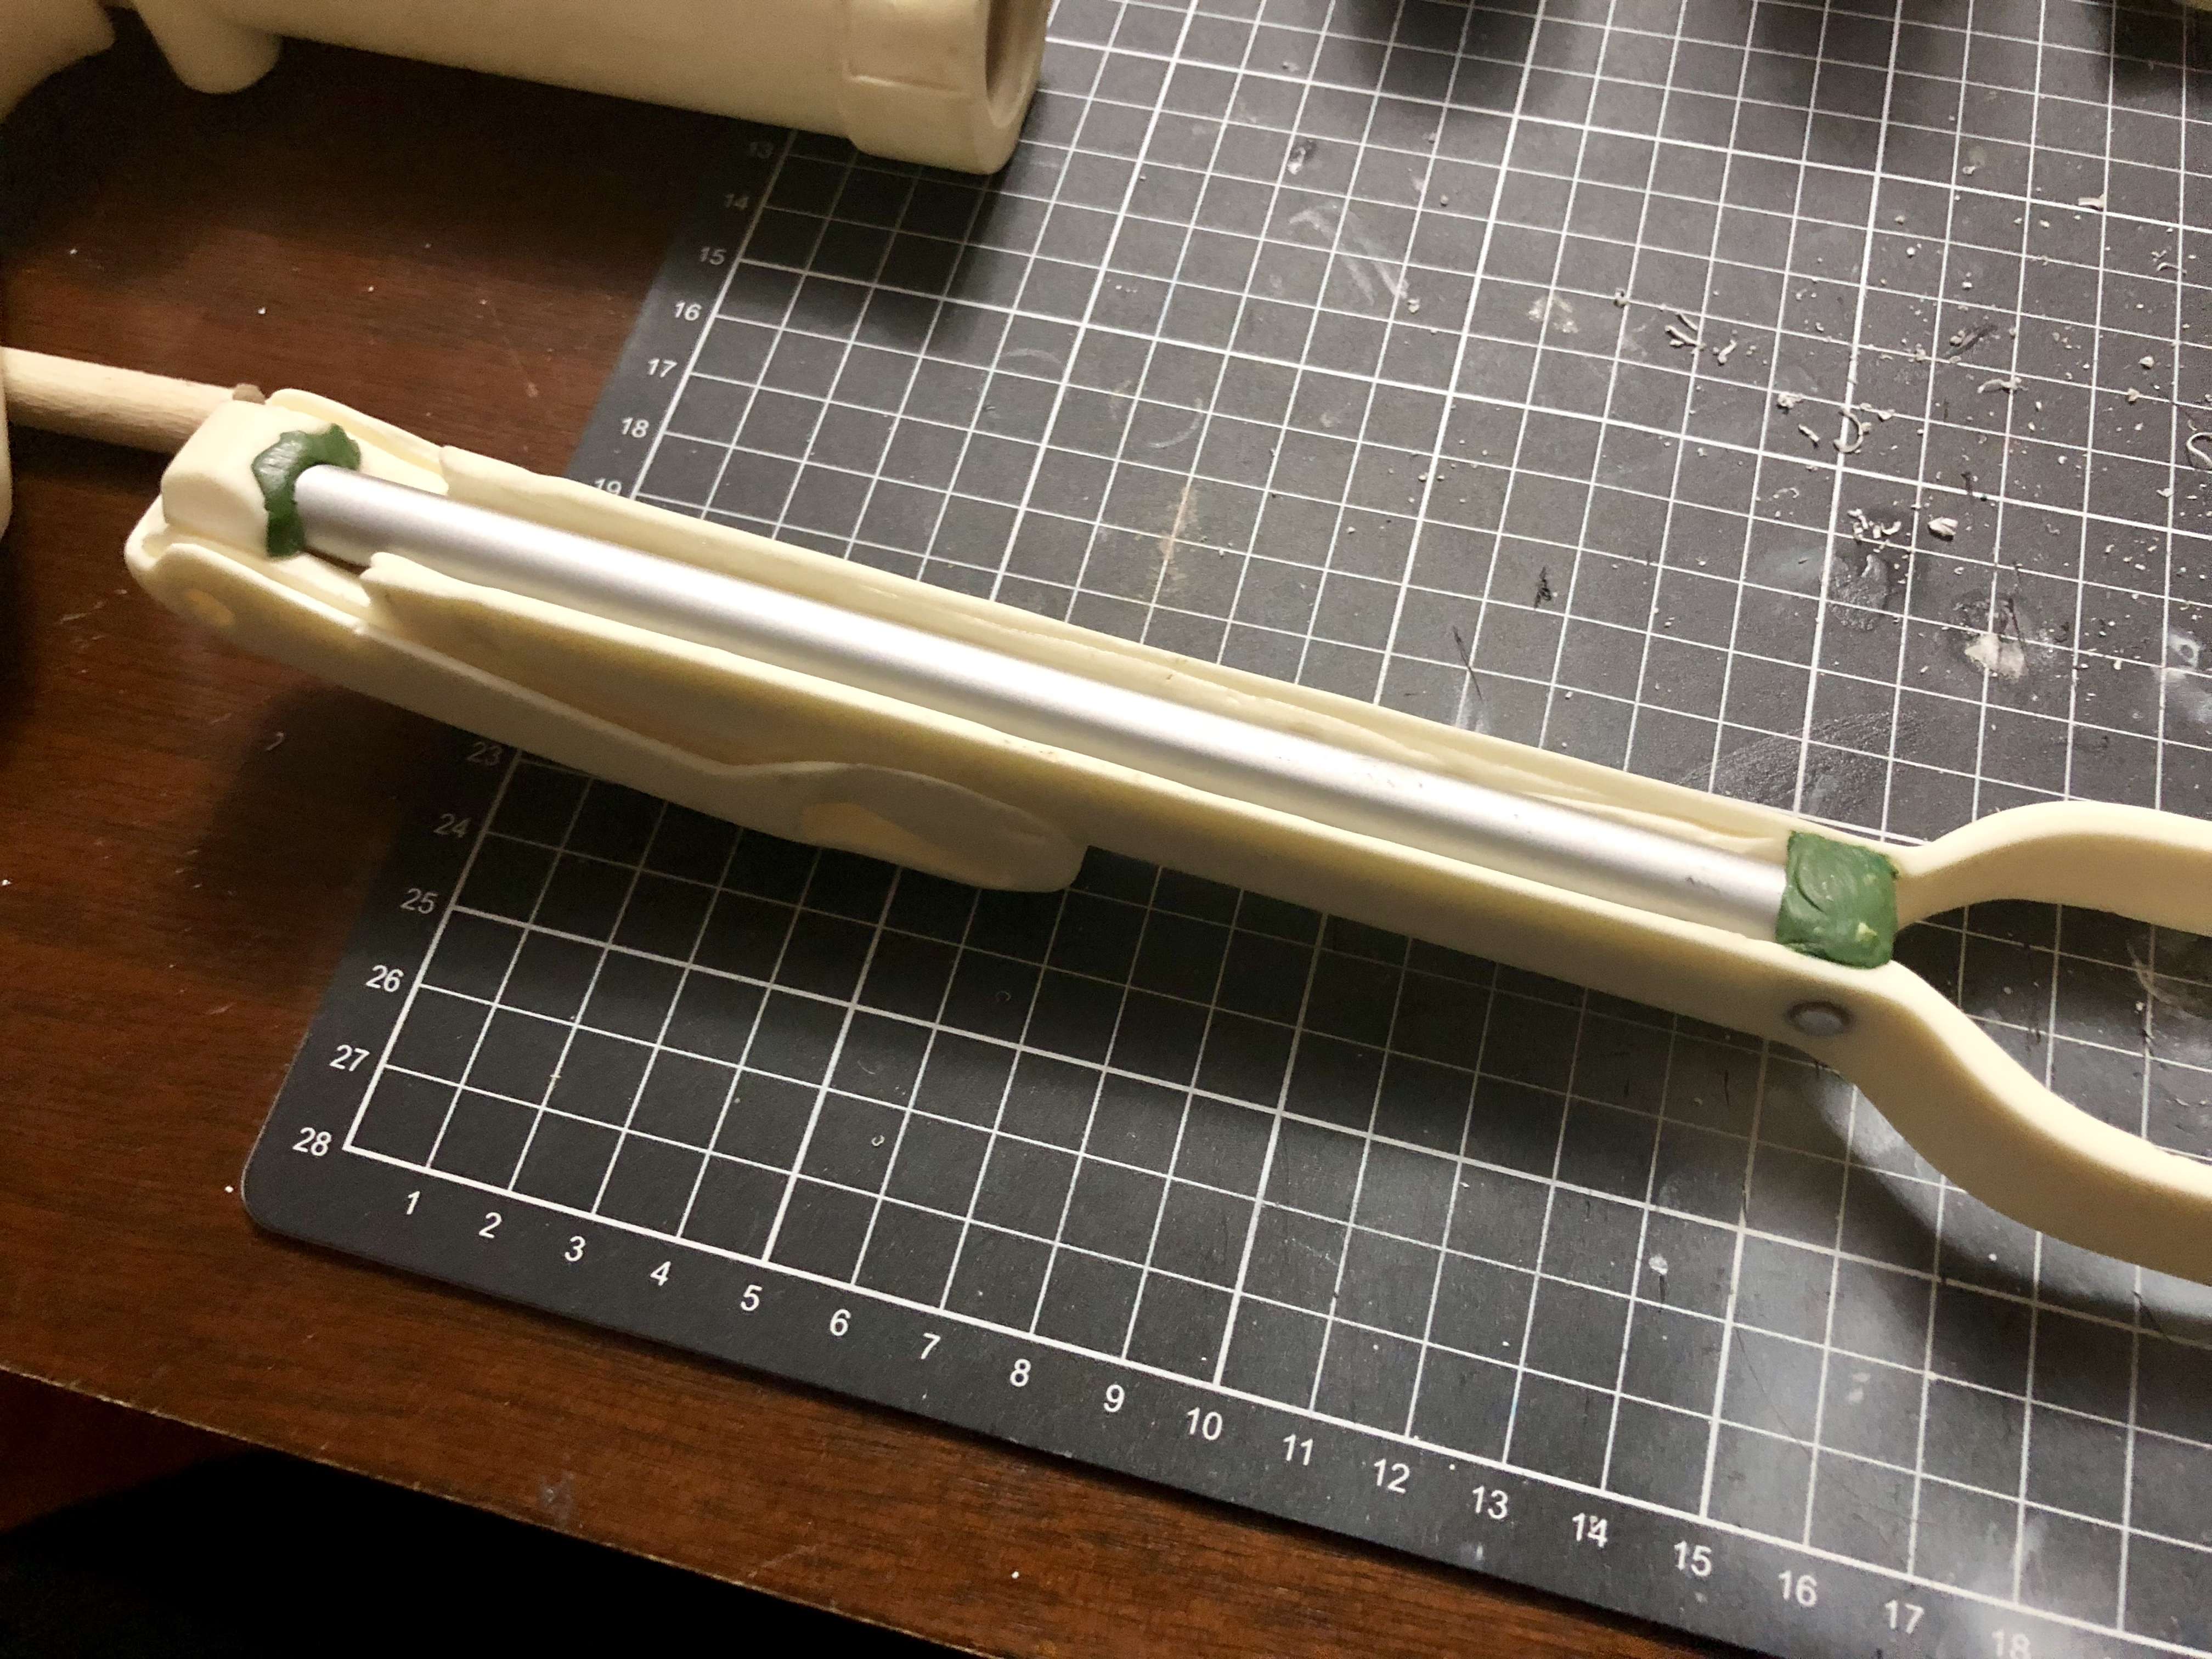
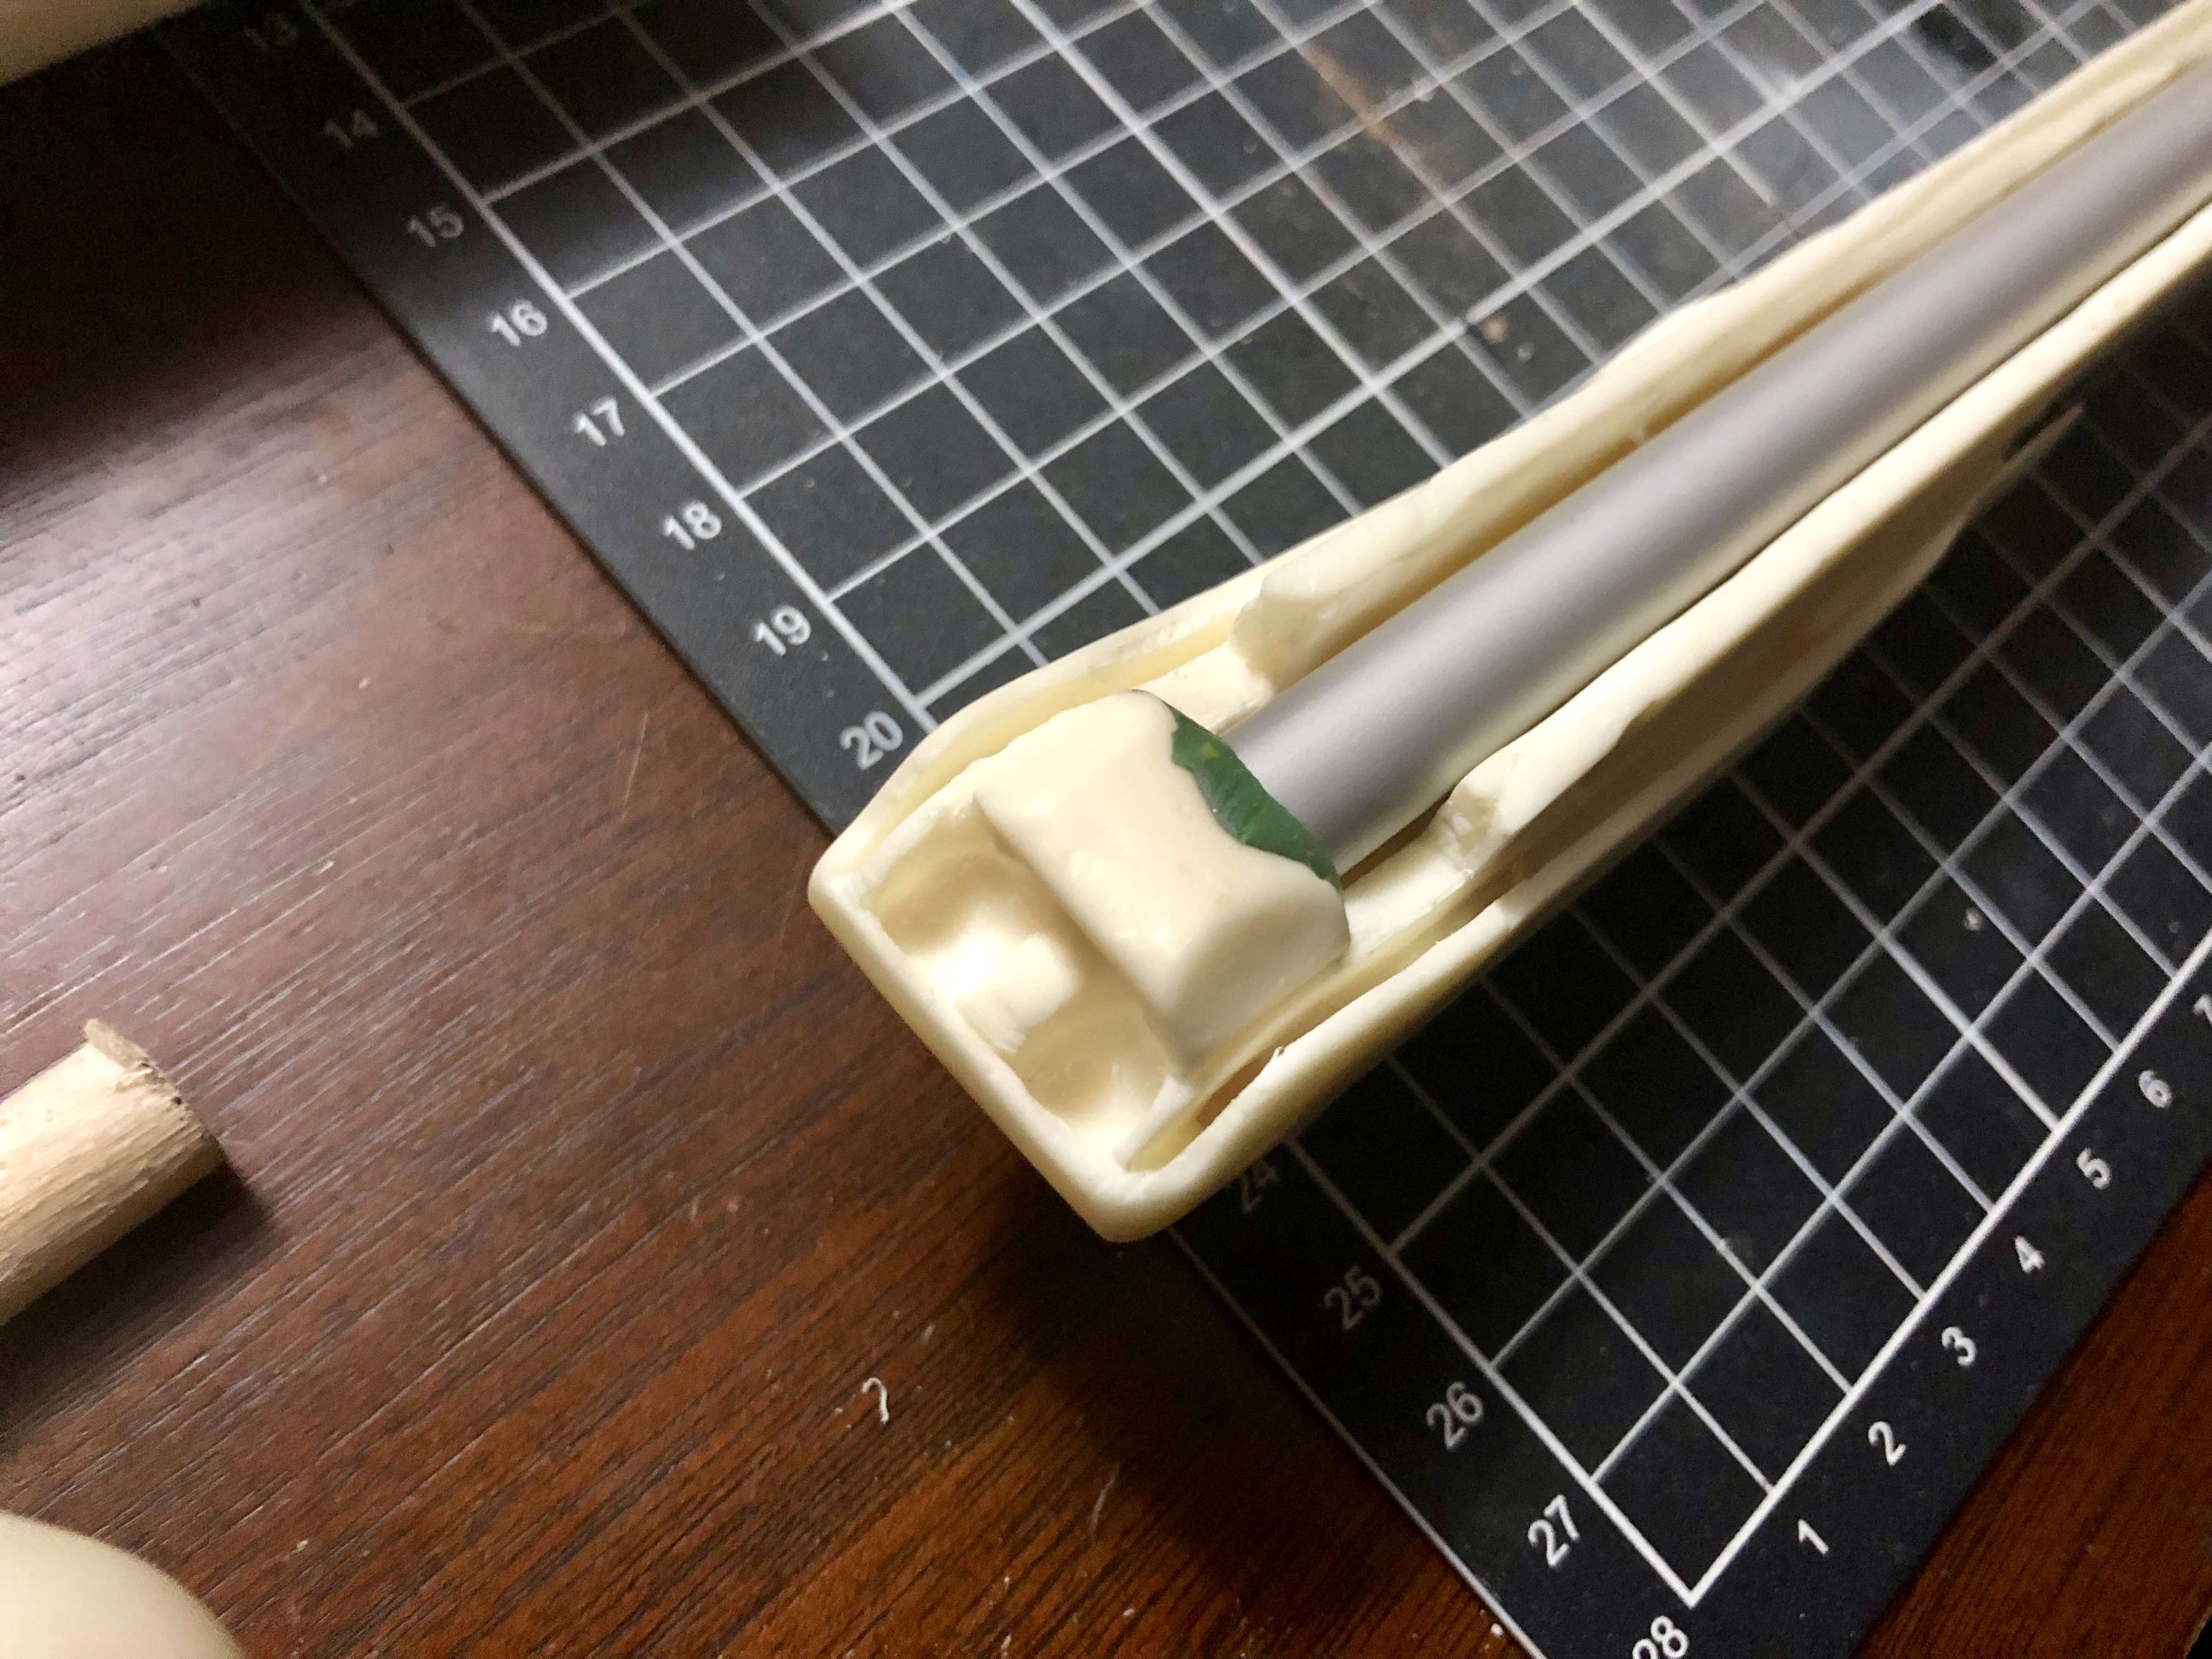
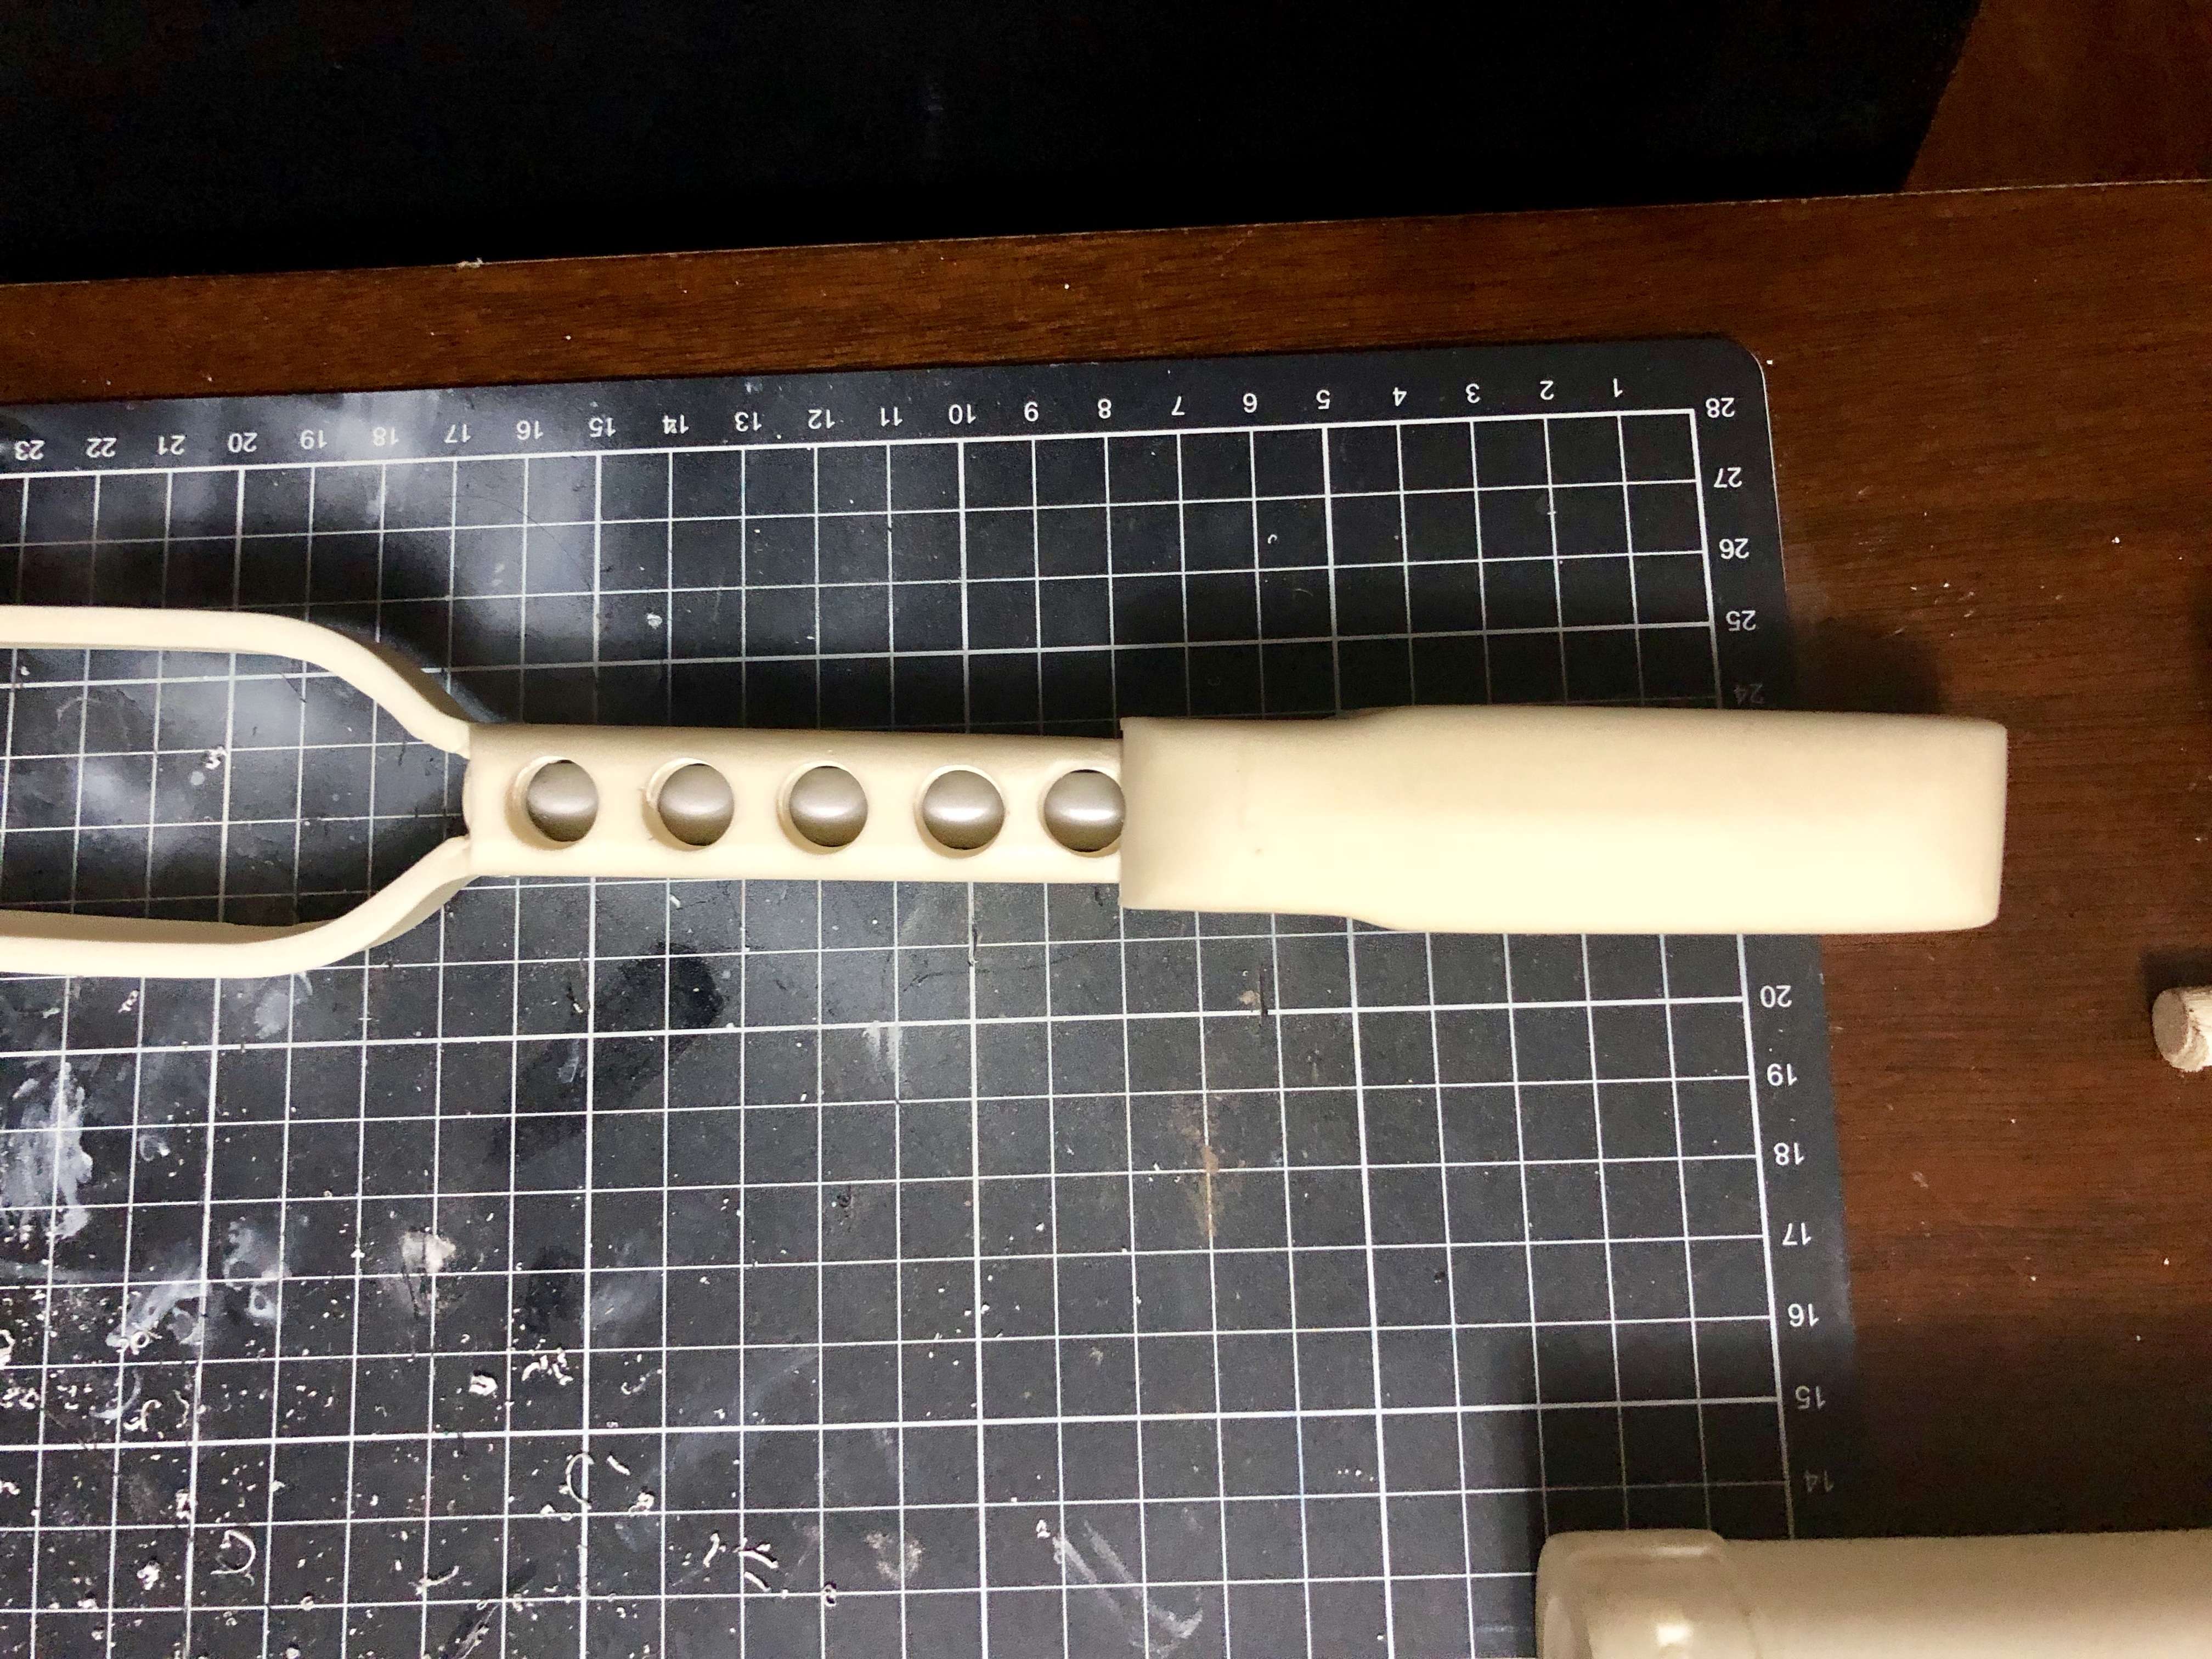
I also worked on the folding stock. Though the majority of the work will be covered up when in position I am one of those people that just want to get everything looking right so I have cut out the molded rod on the inside and drilled out the frame holes on the bottom, cleaned up the front area to give a cleaner look, cut out certain area's to make them look like they are all separate parts, drilled out the rivets to install new more details ones and then finally used a bit of filler to recreate the connections at both ends on the rod. Still a work in progress as there is a little more to add yet

-
Well done, nice job!
-
1
-
-
Nice work, looks great
-
12 hours ago, Airborne Trooper said:
Wet sponge and washed out burnt umber acrylic paint. A little goes a long way
Many thanks, will give it a go.
Didnt get a huge amount done in the last couple of days, just finishing the weathering, adding a little more on the bucket in certain areas, like around the ears, but that's about it. I did manage to get my latex handguards on last night though
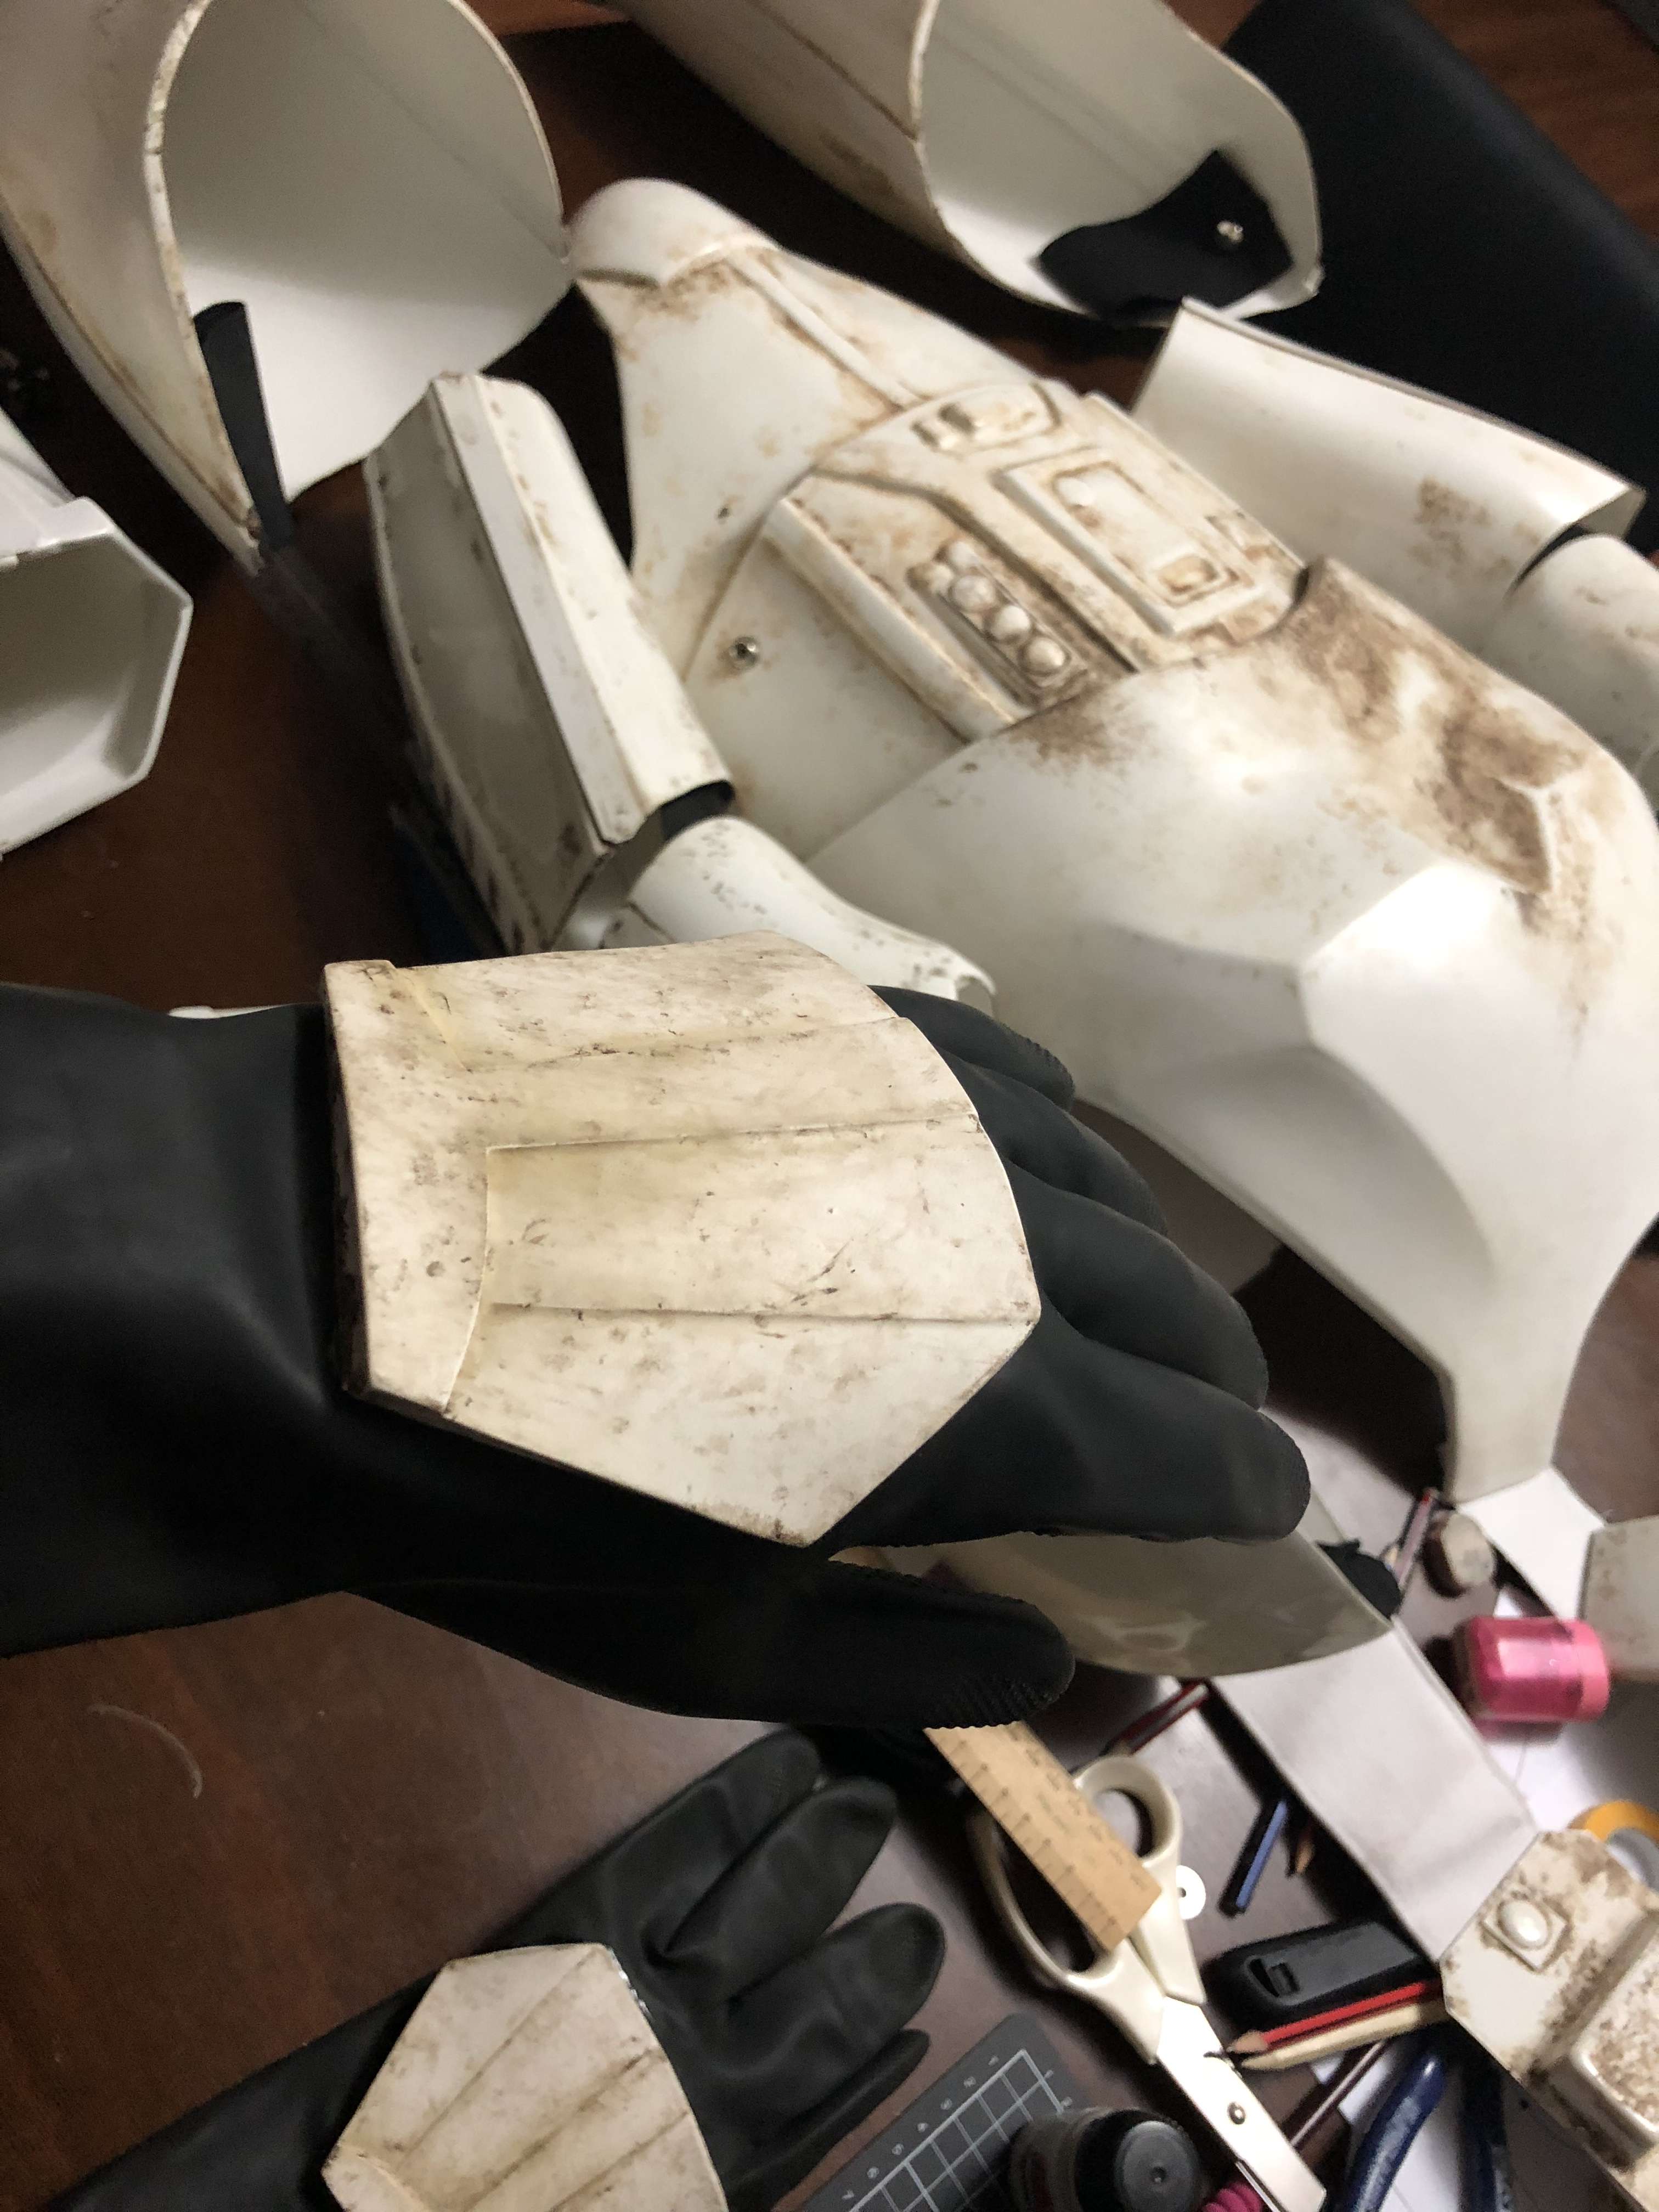
Just need to weather the gloves around the connection and I am set. Since I am still waiting on the pauldron/pouches/sniper plate I think this weekend will be devoted to preparing my E-11. Its a doopy's with the T-Jay completion kit. I am also working on a pipe build blaster and if it works, I will post the progress
-
Thanks guys! Really appreciate the comments. Got a little achieved last night but will take some pics later tonight of more progress.
mikelbrierly: Thanks for the tip on the belt. I was thinking I would have to do something about the holes but I will definitely get onto it.
Question while I am thinking about it. What did everyone use to weather there canvas part of the belt and shoulder bridges?
-
Thanks Hausi, much appreciated. Don’t worry, ordered these when I first got the suit
just got to glue them to my chemical gloves
-
1
-
Duden15s RS Propmasters/TM Sandtrooper WIP
in Sandtrooper Armor
Posted
Nice! I wear a Darman neck seal as well for my Sandy & my Tie and I love them.