

deckard1138
-
Posts
130 -
Joined
-
Last visited
Content Type
Events
Profiles
Forums
Posts posted by deckard1138
-
-
Awesome! I’ve got the same sander. Harbor freight had it on sale. Worth its weight in gold. I used it on my pack build and 2 sets of armor. Really works nice for fine tuning pieces. Looking good!
Sent from my iPhone using Tapatalk-
 1
1
-
-
Hi, I have used rivets, reposition the leash as well so the pouch is attached to the canvas belt at the correct angle.
Thought of trying that but I suck with a rivet gun, they never turn out right.
Sent from my iPhone using Tapatalk
-
My MP40 pouch popped the stitches on the back. It’s too far down the pouch for me to be able to sew. Does anybody know of a good glue I could use? I tried Weldwood because I heard it was perfect for the job but it’s not holding well. Thanks in advance!

Sent from my iPhone using Tapatalk
-
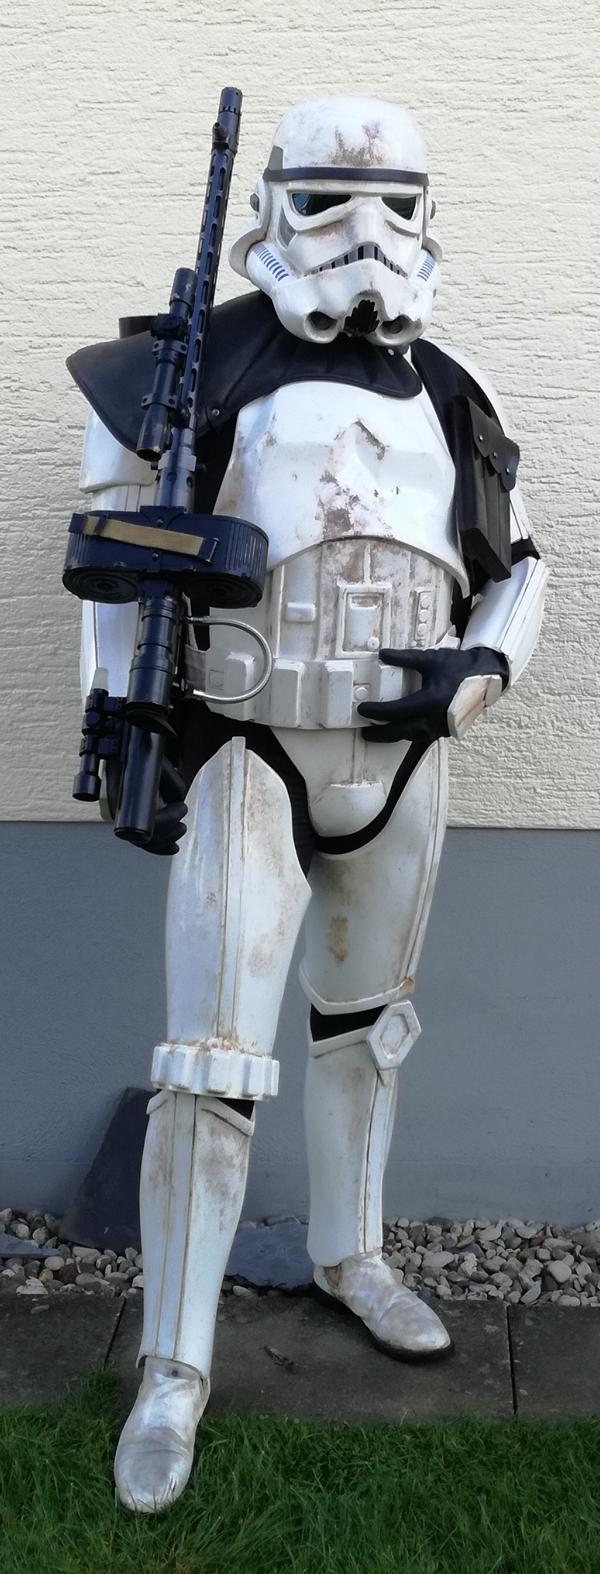
Some pics with weathering. Just submitted to my local garrison..


Sent from my iPhone using Tapatalk -
hi, im trying to buy from doopydoos the mod kit but every time i tried, i cannot pay, there no add button to shopping cart with chrome and when i tried to email them i received sending error like the adress does not exist anymore. is there another seller or better way to contact them.
thank in advance
Looks like they’re having an issue, I tried it to see what would happen and it told me they were unable to take my payment at this time. They’re hard to get a hold of in general. Guess you could try calling them.
Sent from my iPhone using Tapatalk -
Thanks guys, I think I’ll try that out. I’ve got all the leftover Velcro from my sons Anovos kit we never used. Glad you guys like the pack, it’s a Crashmann kit. The grey is the battleship grey I got from amazon, I like it better then the slate grey I previously used. Thanks again for the help guys!
Also happytrooper, love the videos, we started the dlt19 but didn’t finish it yet...
Sent from my iPhone using Tapatalk -
I had them longer originally but then there was too much room between my body and the front/back plates. The chest usually sits fine over the abdomen, not like in the photo. I’ll keep an eye on it though. Thanks!
Sent from my iPhone using Tapatalk -
Thanks, I’m using the bracket system and that’s as low as the chest will go. Maybe if I use longer elastic it’ll drop lower. The field pack was a fun build, really enjoyed that.
Sent from my iPhone using Tapatalk-
1
-
-
Here’s where I’m at after 10 days. Next up weathering!


Sent from my iPhone using Tapatalk
-
1
-
-
Not sure how many he has. I’m sure you could contact him through the 501st site. Goes by Gattaca and is part of the outer rim garrison.
Sent from my iPad using Tapatalk
Ok, thanks
Sent from my iPhone using Tapatalk -
That’s awesome! Is this an ongoing project that he sells? I’d love to pick one up.
Sent from my iPhone using Tapatalk -
Check out Thomas, one of our awesome SWAT members thighs. See how he has some ridge showing. That's perfectly acceptable. You just don't want a ton and if you need wider, do it on the rear.
Looks great, thanks for the pic. Everything turned out looking pretty good. Only problem I’ve had at all with my build is the rivets for the belt. I had to keep cutting them off they weren’t working right. I scraped them and ended up using Chicago screws...
Sent from my iPhone using Tapatalk -
not quite yet.
We have to tally all of the expenses up, and then factor in the amount of work needed to make each one.
Then we can determine pricing based on the break-even point + profit margin.
Ok, thanks. I got to check out one of your E-11’s at an event last week...nice work! That’s a solid piece of gear..
Sent from my iPhone using Tapatalk -
You can do it either way. I made a little stack of abs pieces and put mine on there.
Thanks, that’s what I ended up doing too..
Sent from my iPhone using Tapatalk -
Close to done. I need to attach the belt which is coming today, put both halves of the torso together and measure cut the back side of biceps and forearms then weather it all. Backpack and blaster are already done and waiting....can’t wait to start trooping!
Sent from my iPhone using Tapatalk -
Perfect, thanks for the help bro!
Sent from my iPhone using Tapatalk -
Sure does thanks man! One question, is the back hollow or does it sit flush with the edges?
Sent from my iPhone using Tapatalk -
I’m ready to add this on the left shin, my question is how thick should it be if you looking at it from the side, and do most people add a flat back to it or just leave it hollow? Thanks in advance
Sent from my iPhone using Tapatalk
-
Has the price been announced yet?
Sent from my iPhone using Tapatalk -
Can you share some pictures? Might make it easier to help identify the parts. Just leave a little extra material, you can leave some ridge showing with the cover strips but not too much. Shim in the back if you need a lot more room.
Yeah,good idea.. Here are photos of the shin and thigh back. Instead of being smooth they have a slight ridge like the fronts have. I’m not sure yet if I’ll be able to have the ridges match what the cover strip size should be. It’ll probably be close. Hope I’m making sense, thanks!
Other than that question I’m going through the kit at a good clip. I’m doing all the fronts inner/outer strips and then I’ll size the backs all at once. I needed to add an inch shim to each side of the torso. I should be done before months end. I guess submissions are off for this month while the census is going on but there should be a new sandtrooper out and about soon..

Sent from my iPhone using Tapatalk -
After a 10 month wait my armor came yesterday. I jumped right in and began trimming everything with no issues. I’ve built an Anovos kit prior to this one so I’ve got a few questions. Which side is the top of the kidney plate, flat side or the ridge side? How should the back of the thighs be handled since there are ridges? It looks like I may have to have it just a bit larger than the 20mm strip in the rear. The Anovos kit didn’t have ridges on the back of the thighs so that was not an issue. Has anybody glued an abs disk to the abdomen panel? I’m leary about heating up the abs to push a washer into it. Any advise is welcome, thanks!
Sent from my iPhone using Tapatalk
-
1
-
-
Thanks for the info guys, much appreciated!
Sent from my iPhone using Tapatalk -
I'm using the line 24 snaps to connect my shoulder bells, the kind set with a punch. To avoid seeing the snap from the top should I glue a piece of fabric over it or paint it? How is that normally handled? Since a standard TK uses shoulder bridges it's not an issue for them. Or should I just use sew on snaps here. Thanks!
Sent from my iPhone using Tapatalk
-
I think I used Testors model master Blue FS35109. Saw it on a list somewhere but don't recall where.
Sent from my iPhone using Tapatalk
New Users, introduce yourselves here!
in New Members
Posted
That’s how I weathered mine, acrylics then fullers earth. Then I went back in and would tint some of the fullers earth with acrylics. I was a professional illustrator for years and worked in the toy industry. I kind of looked at the armor as one big model. I think a combo of the two mediums gives you a nice real world feel. I used liquitex acrylics, raw umber/Payne’s grey and the 2nd coat was a mix of raw umber/raw sienna. Also added some 50% grey and pencil at the end. Looking forward to see your finished armor!

Sent from my iPhone using Tapatalk