


HappyTrooperDotCom
-
Posts
172 -
Joined
-
Last visited
-
Days Won
5
Content Type
Events
Profiles
Forums
Posts posted by HappyTrooperDotCom
-
-
Hey Guys,
Thanks so much for the recommendations! I appreciate the helpful tips. I may have found a method that is working for me. I've been using a sponge brush to get in the crevices. I put it on a little thick, let it dry for about 5 mins, then rub off in spots with a damp old rag. A few random remnants stay behind. To get the coverage a little broader, I then get a damp paper towel, folded into quarters, place some of the acrylic on there and mash it around on the paper towel. Then I press it in spots against the armor. It is giving me the tone that I want. Once that dries a bit, I gently go over it with a dry paper towel, it gives it kind of a dirty polished look. Hopefully this will work. Even though I used a slightly different method, all of your photos helped me get an idea for placement of the paint.
Thanks again for the suggestions! Great job on your weathering!
-
Fellow troopers,
I recently finished my Anovos kit, my next step is to get some weathering done. One of my other hobbies is plastic aircraft modeling. Because I'm used to working with paints, I chose to go with the acrylic weathering method. I guess it goes without saying that weathering 1/48 scale aircraft is different than weathering full-size TD armor. Needless to say, I'm facing a little bit of a challenge.
I'm going for the subtle/sandy look. I have a few acrylic colors that appear to have worked for other TDs: burnt umber, a lighter chocolate color, a coffee color, and some light gray. I'm starting with the burnt umber, basically splotching it on with a natural sponge (also tried a sponge brush), letting it dry for about 5 minutes, then twisting it off with a damp rag. I must be doing something wrong, it seems like too much comes off and too much stays on, can't find that happy medium. I've had to wipe off my kit a few times now.
If any of you guys have some tips, I would be extremely grateful. Wait longer for the acrylic to cure? Use a hair dryer? Use a different rag? Paper towels? Dry? etc. Let me know if you have any helpful tricks.
Help me MEPD...you're my only hope. Thanks in advance for the assistance!
-
Yesterday was the best day I've ever spent in my garage...made a lot of progress.
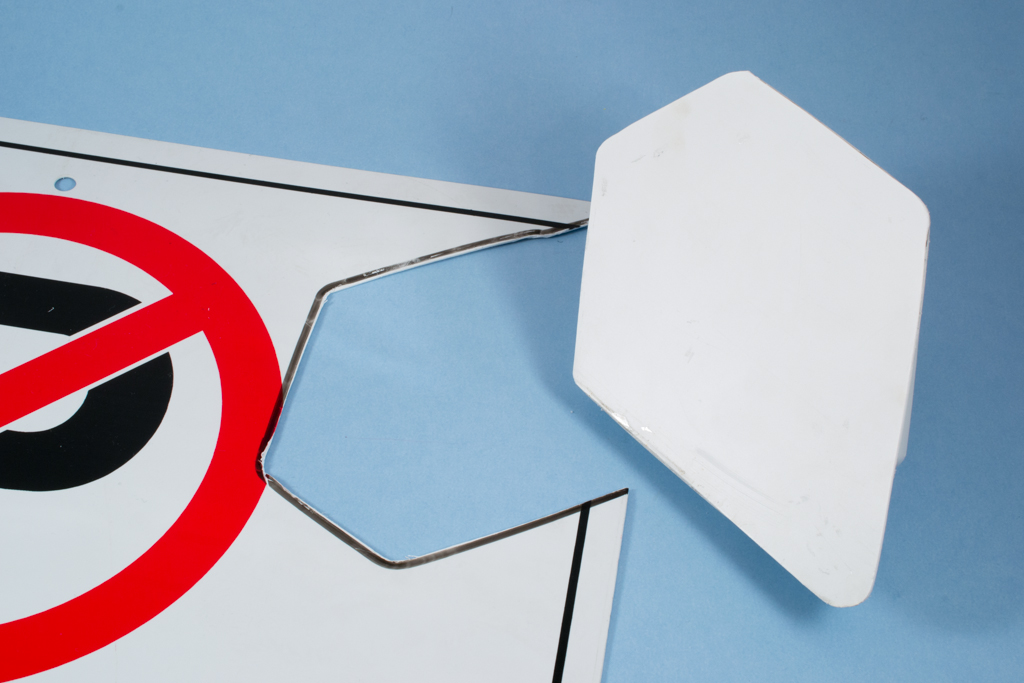
I am using the diamond knee plate from ATA, it looks great, however the back is hollow. It looked a little incomplete and it didn't give me a lot of options for connecting to the shin...there just weren't enough connection points to glue. I purchased a "no parking" plastic sign from Home Depot and cut out a template around the knee plate. This filled in the back and gave me a bigger surface area to glue to the knee
Got the 3 button ab plate on:
Airbrushed Testors Gray on the back vents and tears:
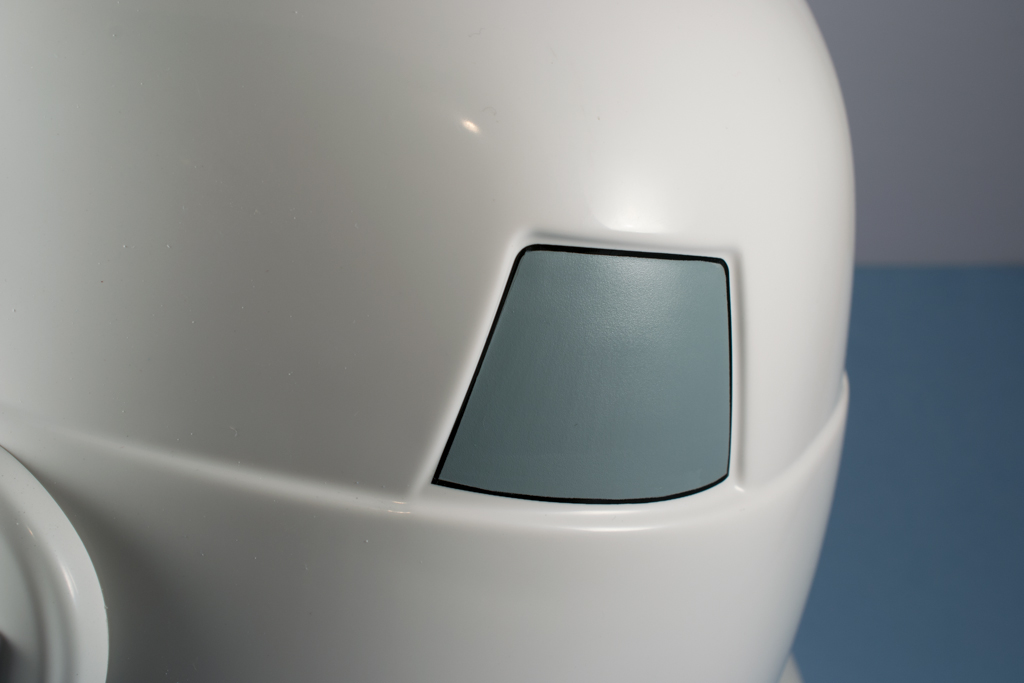
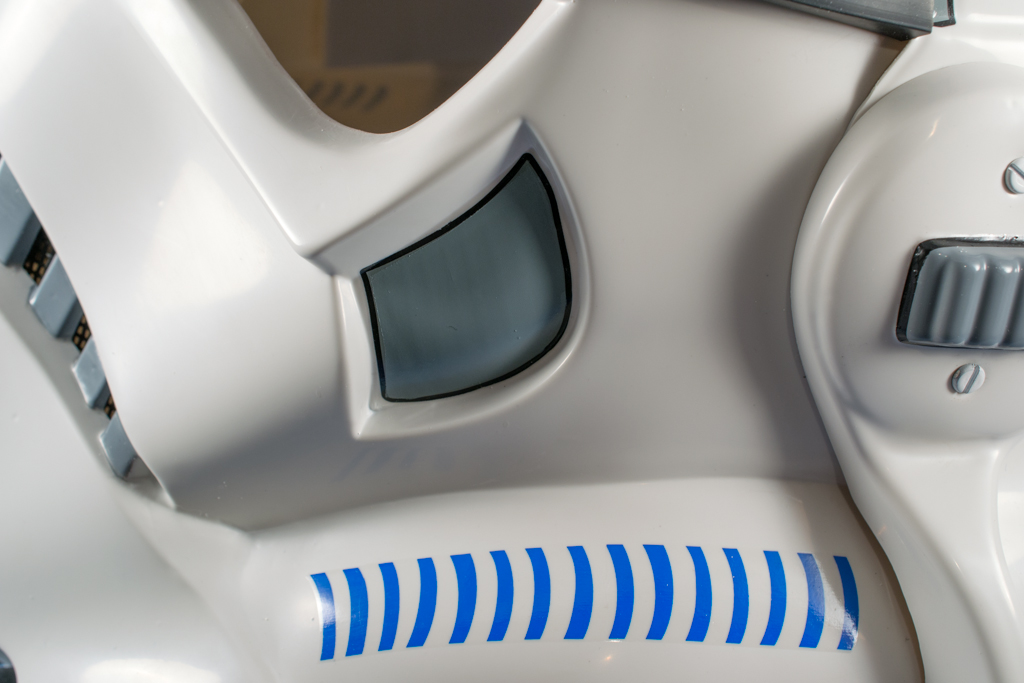
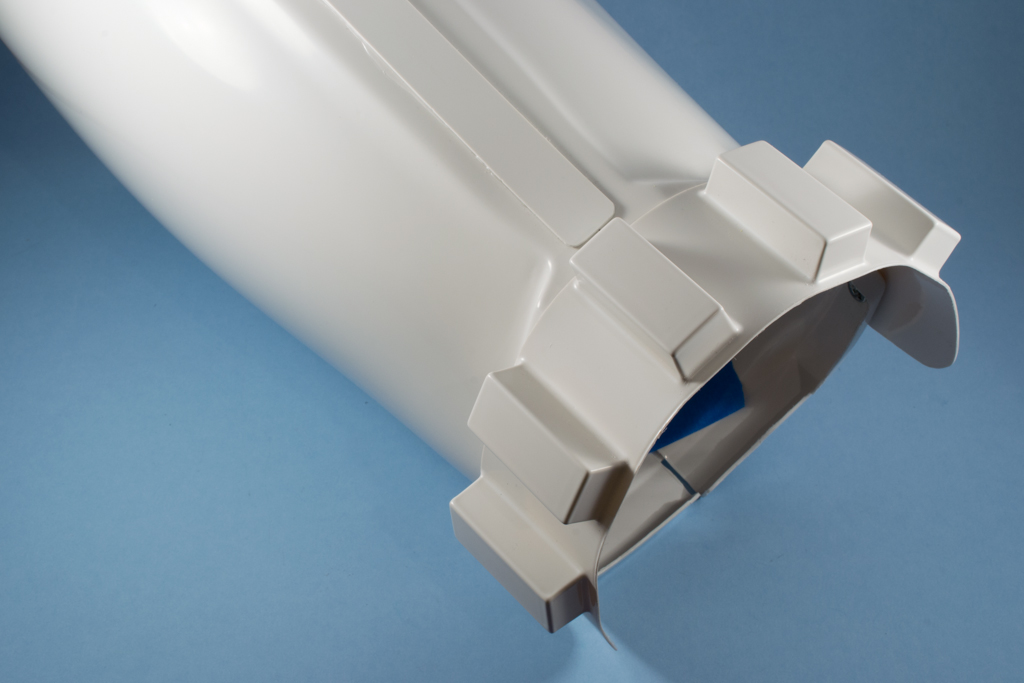
I was having trouble with the Anovos supplied green lenses. Like most of their other connections, they use velcro. I couldn't get a good fit in the helmet. I disassembled to get better access to the eyes and decided, now that everything is out, might as well lightly sand the inside of my bucket and plasti-dip it. I masked everything with painters tape and paper towels...still had a little overspray on the outside. Fortunately, it came off very easily simply by rubbing it with a clean cloth towel.

Going to start weathering now, I am going to try the pandatrooper/gundamzeppelin method with a few types of acrylic paints. I will also try to fasten those lenses.
I did need a quick break from the armor, so I switched gears and started the scootch backpack
Time to get dirty!
-
-
I made some progress this weekend, getting closer to my goal of becoming a TD!
As some of you may have heard, there's been a lot of confusion about the Anovos shins. Some may have been mislabeled apparently. In the Anovos instructions, parts 24 and 25 make up the right shin and parts 27 and 28 make up the left shin. ukswrath (Tony) has a phenomenal how-to on the Anovos TK kit at whitearmor.net. According to him, his shins were not labeled properly, a few other whitearmor.net users also reported this issue. I sat befuddled for a few nights (its my first build...proceeding with caution...researching). I tried Tony's configuration part 25 with 28 and part 24 with 27. They looked right when taping for fitting, but after glueing, there was clearly a problem. My left shin was huge and my right shin was painful to put on. I measured the circumference at the widest point of both shins. The left shin was over 19.5 inches and the left was 17. Even my wife could see the difference. I removed the covering strip and rubbed off the E6000 with a clean dry towel. I test fit parts 24/25 and 27/28 with lots of painters tape. I also measured the circumference again. This time, we had a winner. Both shins looked the same size and fit a little better. Many people over on whitearmor.net apparently had issues with the shins...maybe it was a mislabled batch. Mine seem to match the Anovos instructions.
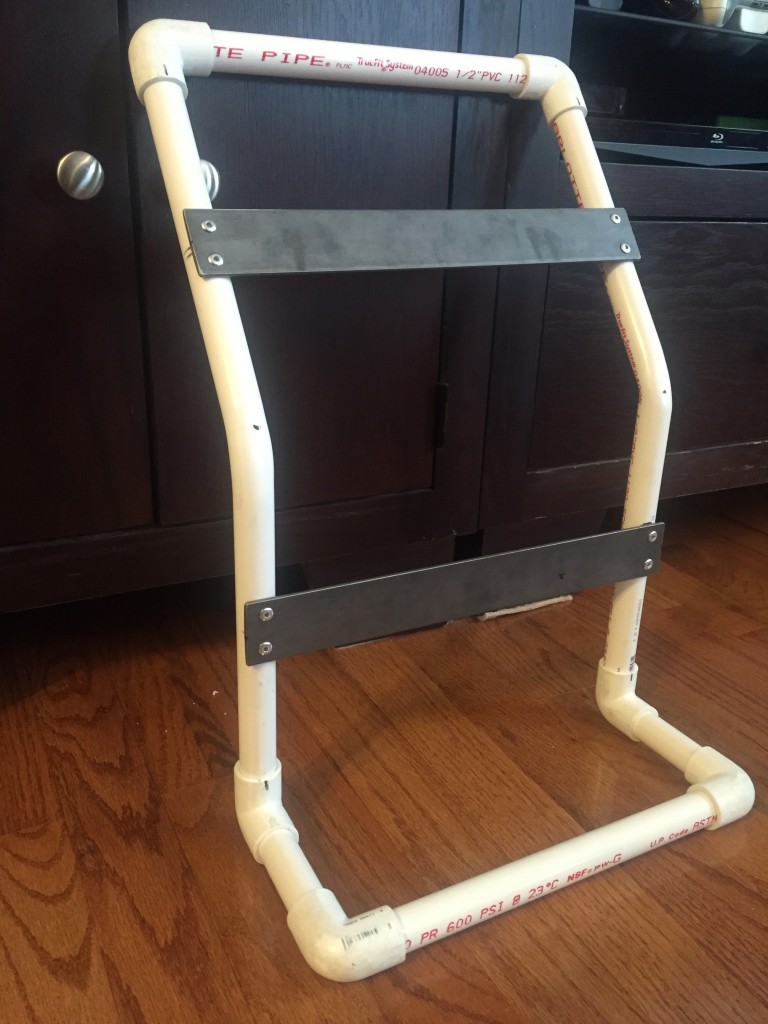
Here's a shin in the oven:
I've finished both arms (shoulder bell, biceps, forearms), and secured the Anovos supplied strapping in place. It seems that seasoned veterans at whitearmor.net are not using the Anovos strapping system. I'm going to give it a try (because fellow MEPD member Mikel is also doing it). I already have it, it is very easy to install, and so far seems robust. Only time will tell. It is a velcro system, the velcro may wear out after a while. I'll see how it goes, and then replace when/if necessary.
Shoulder bell straps:

Forearm and bicep:
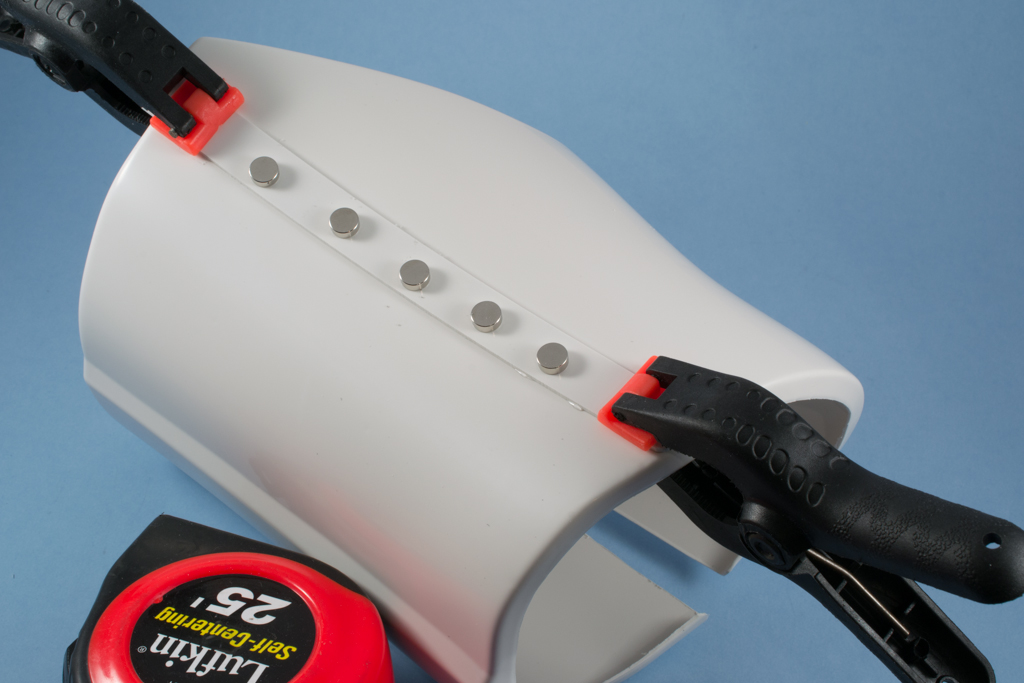
The thighs are also complete. The front cover strip was fairly easy to secure. The rear strip needed a little more pressure to get the 2 thigh pieces flat so that the strip bonded to it. I secured the rear thigh strip with clamps on both ends, rare-earth magnets in the middle, and then placed 2 text books on top of the magnets to apply pressure. After 24 hours, I had a nice flat bond on the rear side of the thigh.
Thigh front (still needs glue cleanup):
Right thigh ammo belt:
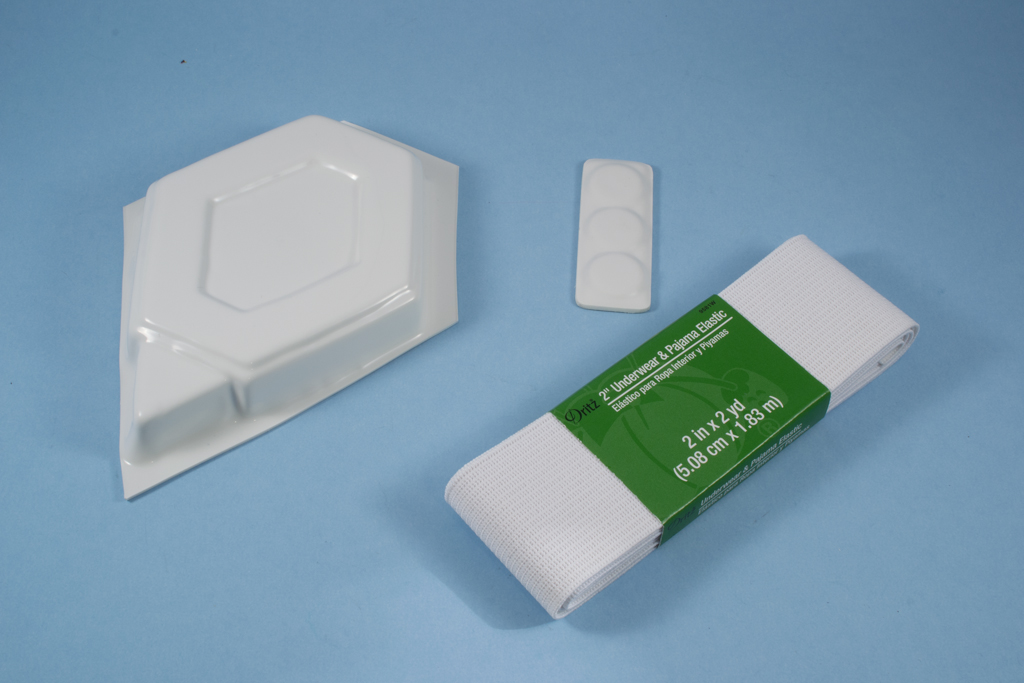
Getting parts to make this TK a TD (ATA diamond knee plate and 3 button ab plate, also some 2 inch elastic for the shoulder straps:
To do:
- strapping system for thighs
- white strapping for shoulders
- attach diamond knee plate
- attach 3 button ab plate
- clean up helmet (sand out eyes a little, paint rear vents black/gray, paint tears black/gray, mount green lenses, foam inserts)
- weathering
Question for you guys. I have rivets on my kidney plate to secure some straps. I also have 2 rivets on my right thigh at the knee, securing the leg ammo belt. Do these need to be painted white? Can you think of any other mods that may need to be made?
-
Thanks Damon!! And I am planning on using the Anovos provided strapping, especially because it's so adjustable with the velcro, that way I can get the sizing dialed in before I plan on using a more permanent strapping system. One thing about the Anovos strapping to note though, is that they say for the split rivets on the side to place them 20 mm from the edges, and it should be 10, so when you get to that part, take a moment to search online for the correct placement. Good luck!!!
Thanks for the heads up, I hope to get that completed over the weekend. I'm gonna give the Anovos straps a try too. Good luck on the rest of the build and keep those progress pics coming!
Thank you too Airborne!
-
Hey Mikel, nice job on the build so far! I just started an Anovos TD build over the weekend. Are you going with the Anovos supplied strapping? Like you, I'm following Tony's build over at whitearmor.net, and it appears he swapped it out. I guess when I get to the strapping part I'll evaluate it. Just wondering what you were thinking about the strapping system.
Also, thanks for the tip on using the extra flash for inside the assemblies! I saved all mine in case I needed filler. I'm definitely gonna follow your lead on this. Great idea.
-
Thanks for the encouragement fellow troopers. There just isn't enough time in the day...hard to focus on work with this armor waiting for me to build it. As you all know, this is a big investment, initially, I was apprehensive about pulling the trigger on all of this stuff. Now that I'm building it...I want more
 Guess its easy to get addicted to this hobby/lifestyle LOL
Airborne, thanks for the info on the E6000, I'll try removing it tonight. I have been removing the plastic film from the pieces I'm building. Been leaving it on until I'm ready to secure the parts.
-
I received my BBB on Friday afternoon, couldn't wait to dig in and get started! My ATA 3 button ab plating and diamond knee plate also arrived on the same day. Shout out to Terrell at ATA, super friendly, quick to respond, quick to ship, and good quality parts. This is my very first armor build, as anxious as I am to tear through this and complete the build, I'm going to go slow, research, and try to get a good quality build completed.
Tools used so far:
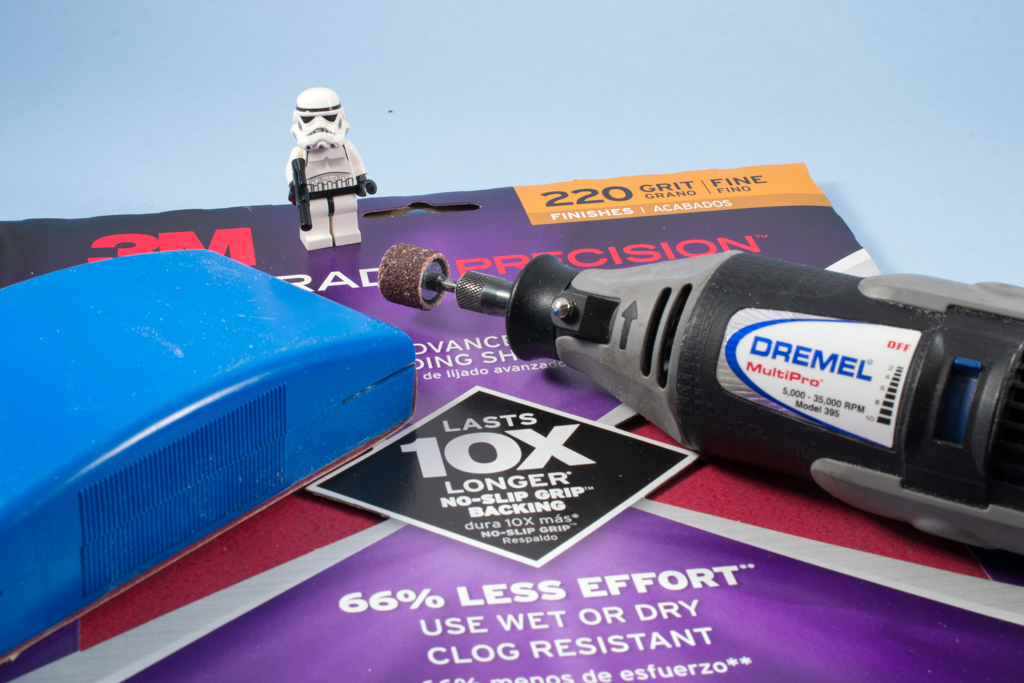
- Duratrax curved body scissors (for cutting lexan plastic)- Dremel rotary tool for carefully sanding rough/rounded edges
Building materials used so far:
- E6000 adhesiveExtras:
- utility/work gloves (there's a lot of cutting, gloves provided a little relief)
- dust mask (there's also a lot of trimming/sanding, those particles probably aren't good for us)
Gonna have some help with the build:
The journey begins:
The Anovos instructions appear to be thorough. They recommend using a utility knife to score the trim points. I was a little apprehensive because I didn't want to slip and scratch the armor, and I was also worried about the "score and snap" method that they were suggesting. I have seen other troopers on whitearmor.net having success trimming with a dremel. Even though I had one, I felt I would have more control with a pair of lexan scissors. I had both straight and curved...the curved won hands down. It took me about 4 hours trim all of the pieces in the box. I used some work gloves and the lexan scissors. Why gloves? Because my hands were getting sore from the pressure on the scissors, and...that plastic has some sharp edges. The gloves provided a bit or protection from cuts and scratches.

I woke up the next morning and started trimming some of the edges with a dremel sanding bit and some 220 grit wet/dry paper on a sanding block. I wasn't cheap with the sandpaper, when it felt like it was losing its coarseness, I changed it out. The sanding also took a few hours.
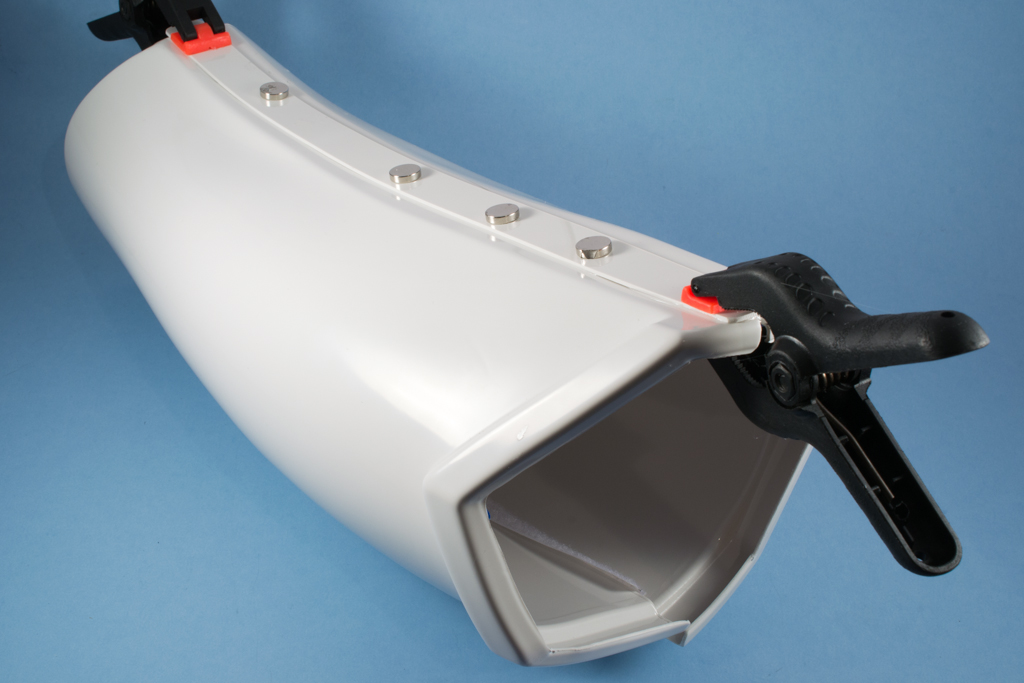
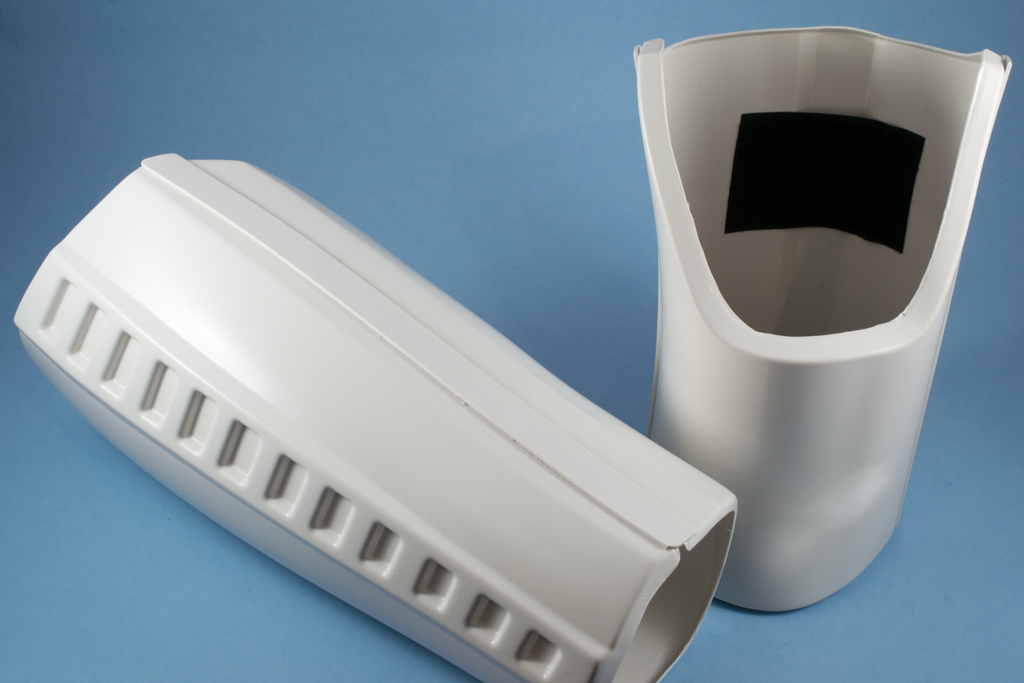
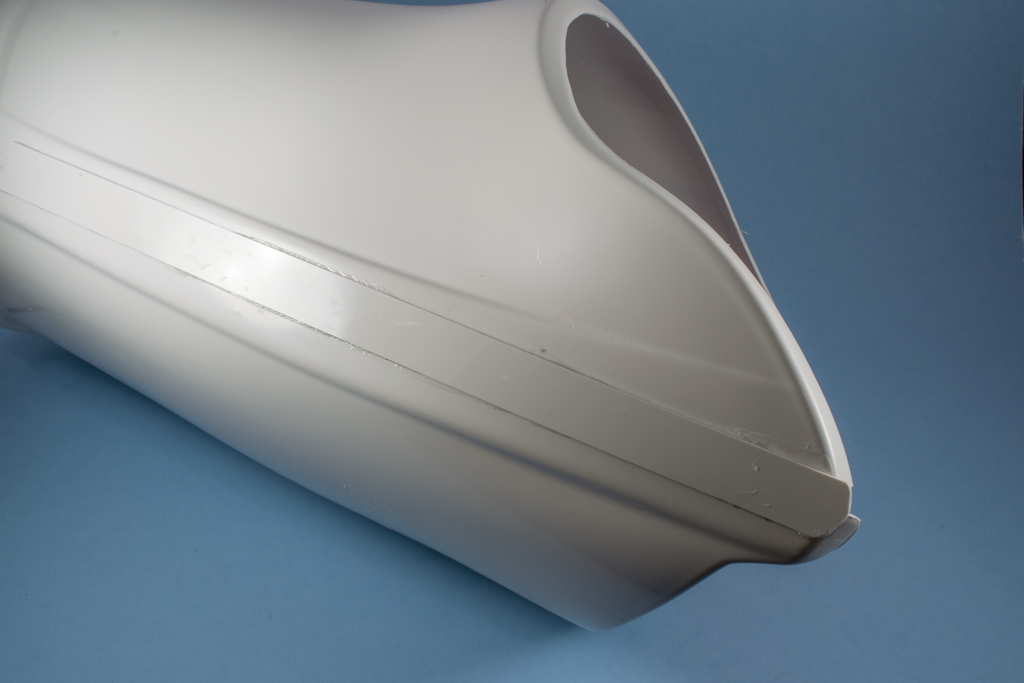
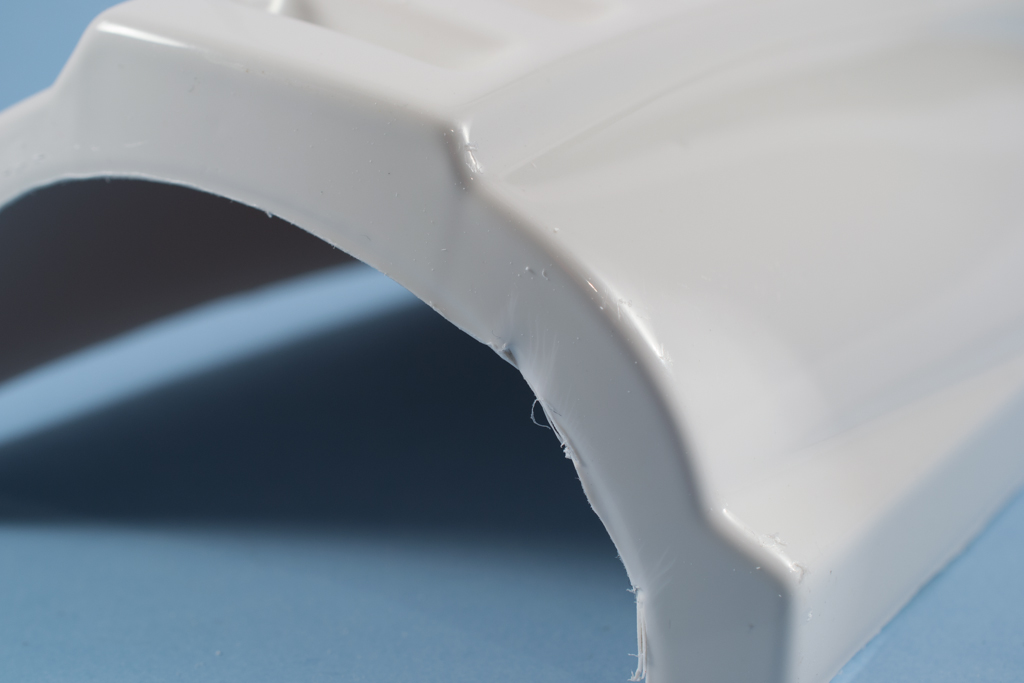
Here's a forearm piece before dremel-ing and sanding:
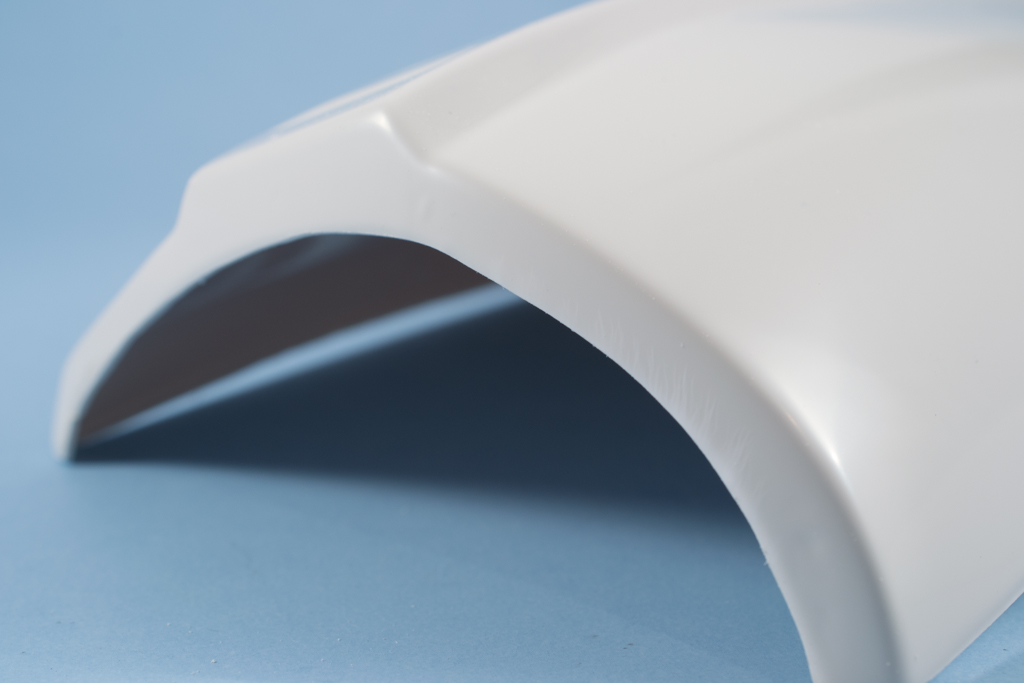
And the after shot:
I wanted to try fitting some pieces together before the end of the weekend. Because this is my first build, I started with a small section: the biceps. Applied some E6000 to both sides of the bicep, applied the covering strip, secured with clamps and rare earth magnets. I would do more today, but the wife is probably getting divorce papers ready due to all the time I've spent in the garage this weekend.
I think I will continue glueing stuff...while it is curing, I'll look for any drilling/snapping I can do on the torso pieces. So far, its been a fun start :-) Some of the E6000 has leaked out of the seems...is this easily removed after it dries? It feels like it may just peel off. Thanks for reading!
-
When is this beauty up for sale?

-
Hey fellow Troopers,
My name is Damon, like the rest of you, I'm a big Star Wars fan. I am married, have 2 kids (that also love Star Wars), & live in Northern VA (close to DC). I like to make Star Wars short films and make inexpensive Star Wars props with my kids. We built this lightsaber a few weeks ago: click here to view.
According to FedEx, my Anovos BBB will arrive today. I'm looking forward to getting started. I have tons of MEPD pages bookmarked already. This place is a treasure trove of information. I am hoping to document my experience.
My goal is to get 501st membership. Can I go in directly as a TD, or do I need to start as a TK? Since I'm starting with a fresh kit of armor, I'd like to just build it as a TD. Any feedback would be appreciated!

ANOVOS armor tweak questions
in Sandtrooper Armor
Posted
That is a great idea, looks awesome, well done!