


HappyTrooperDotCom
-
Posts
172 -
Joined
-
Last visited
-
Days Won
5
Content Type
Events
Profiles
Forums
Posts posted by HappyTrooperDotCom
-
-
WOW, looks great, I love the red lighting.
-
I second Airborne Trooper...very impressive scratch build. Nice work Trooper!
-
Hey LoveMonkey, Sorry for the late response. I originally tried "plastidip" spray on the vinyl tubing thinking it would bite into that tube...no dice. It was tacky the next day...very tacky. I purchased some Duplicolor vinyl spray from Advance Auto Parts. Here is what I used:
Even with the vinyl roughed up, that plastidip wouldn't bite at all. The Duplicolor took to it very nicely and cured quickly. If you try hard enough, you can scratch it off, but overall, it is tough. I am pleased with it. Trooped with the T-21 twice now and the tubing is still holding up. I'm not sure if you have and Advance Auto Parts near you, I'm sure a Google shopping search would yield some results.
Good luck! :-)
-
LOL, I wasn't signed in when I posted this...oh well.
-
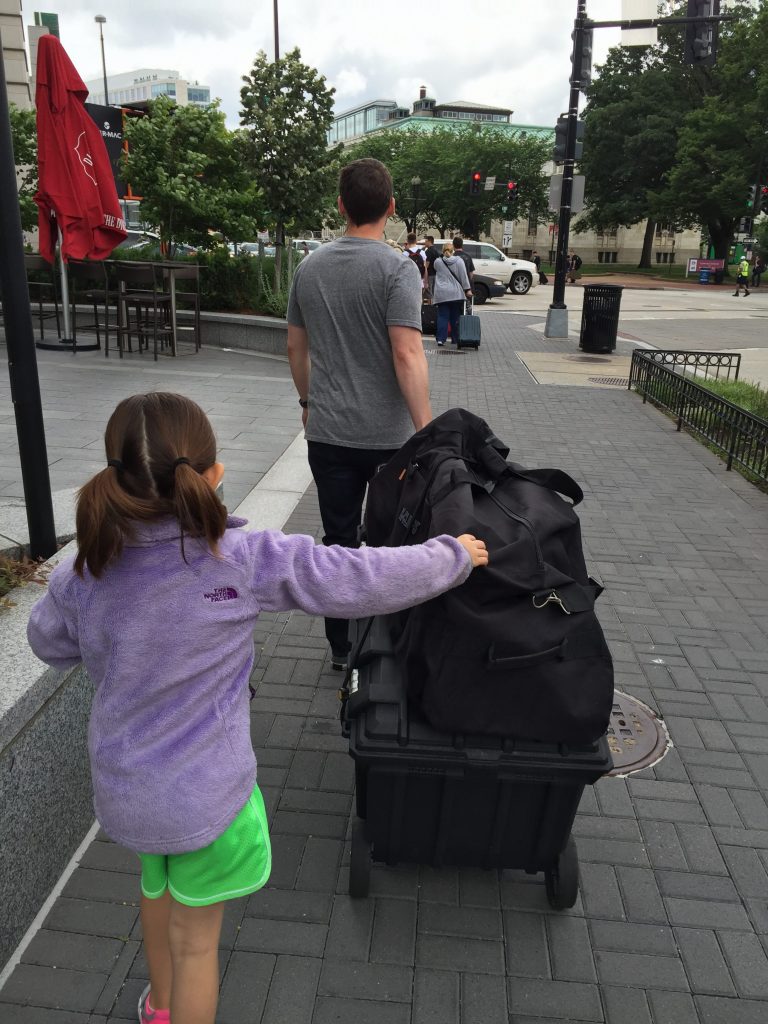
Evan, thanks for the bungee cord idea. I attended AwesomeCon in DC a few weekends ago. We had to walk about 2 blocks. With the backpack-bag bungee'd to the armor case, 2 blocks was nothing! Thanks for the tip!
-
Excellent job!
-
Lookin' good Tim! Glad we had good sandy coverage at AwesomeCon! I was there on Sunday in the Blast-a-trooper booth. Wish I could have met you.
If you are on Facebook, check out Old Line Garrison's post. You are in a few pics:
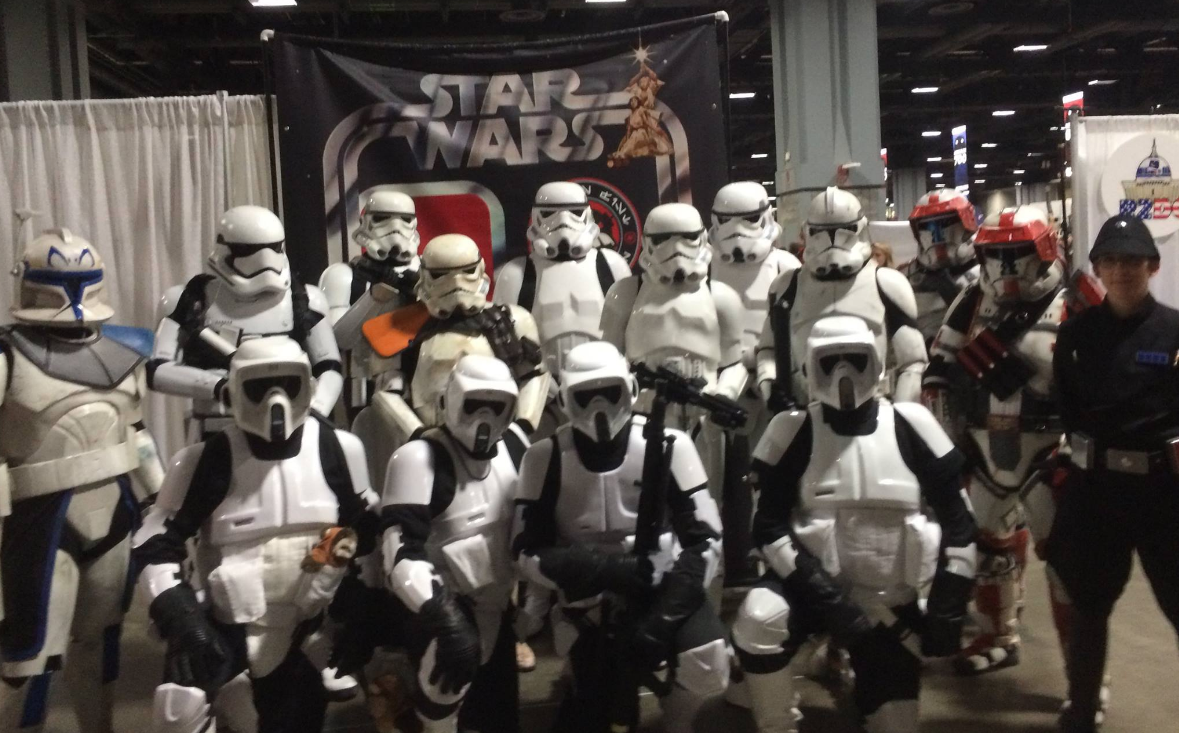
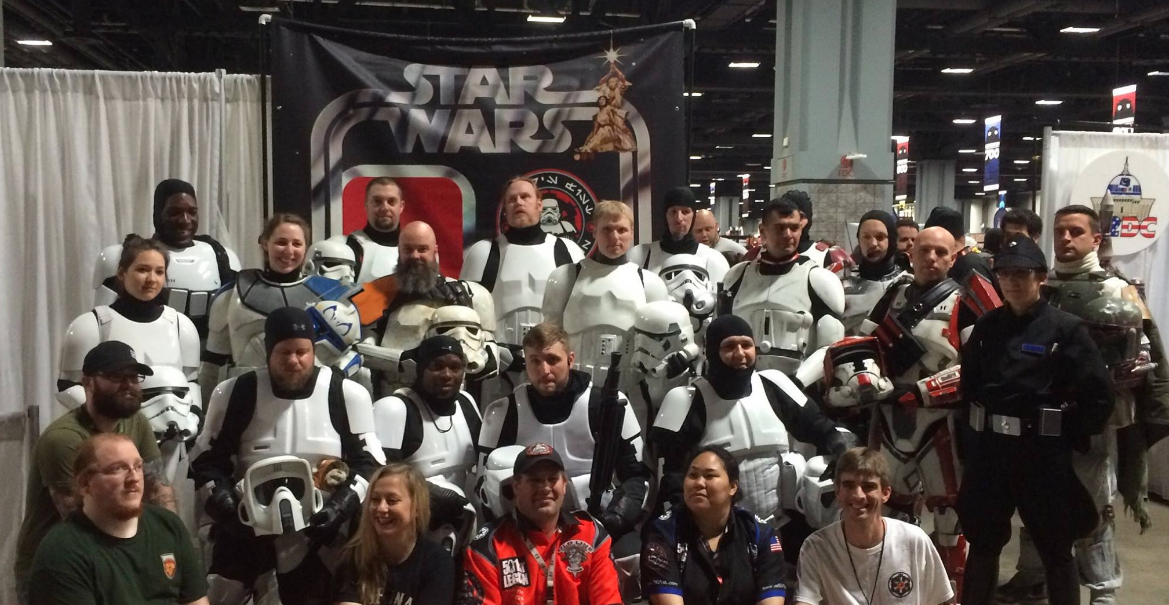
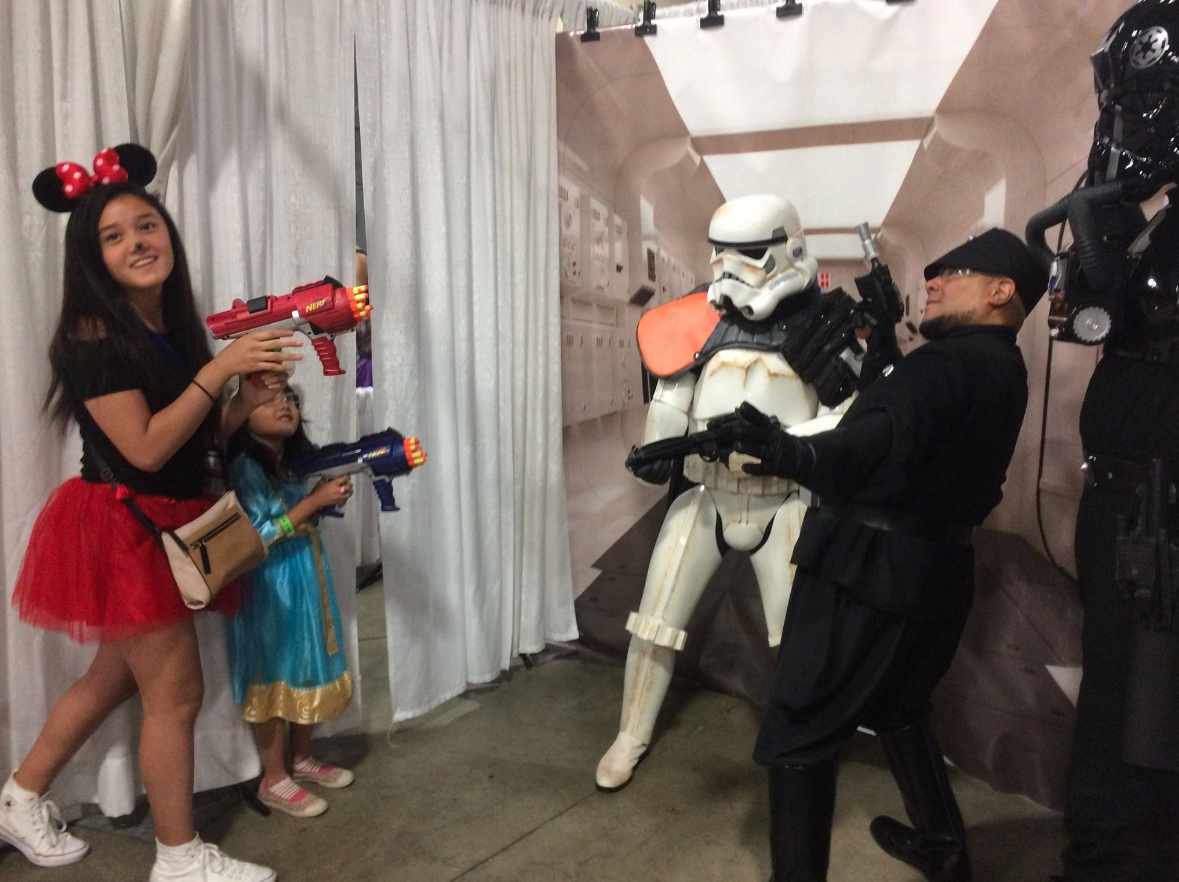
Some Disney princesses took some shots at us. I couldn't hit them for the life of me. Sadly, every one of their shots hit us

-
This is the solution I think I am going with. And using a bungee cord over my armor crate.
Like the bungee cord idea...thanks! Gonna try it tomorrow!
Sent from my iPhone using Tapatalk
-
EXCELLENT job! Love it!

-
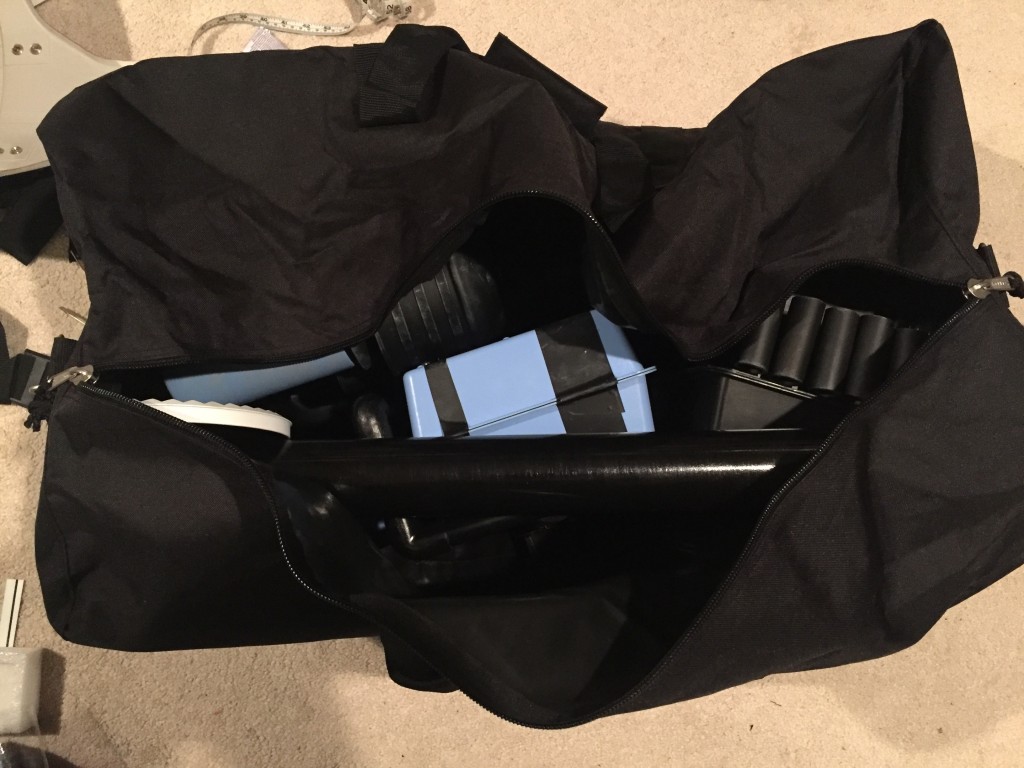
I use a plain old duffel bag from Amazon. It isn't as sturdy as a hard case, however, I can still transport it rather easily either on top of my wheeled armor tote or even over my shoulder. I keep my pack zipped up while in storage to prevent it from getting dusty. I suppose it provides light protection from scratches and stuff. I've seen some other trooper with hard cases for their packs. I guess you need to compromise between protection and weight. This little pack was easy on the wallet, has been great for storage, and for trooping events that I've attended.
Amazon link for the duffel: http://amzn.to/1WgyJqm
BTW P3laton3, that disassembling pack is awesome.
-
Fellow Sandys,
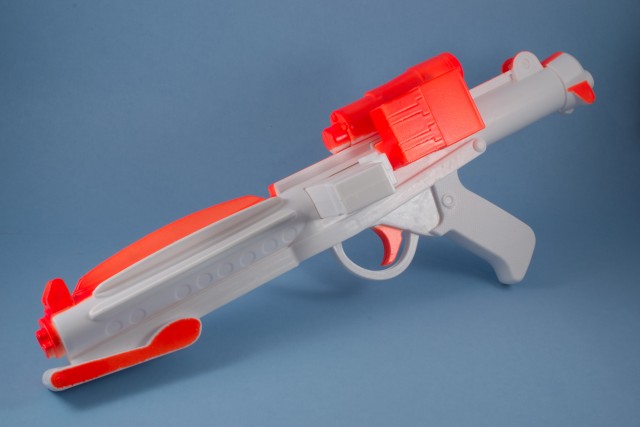
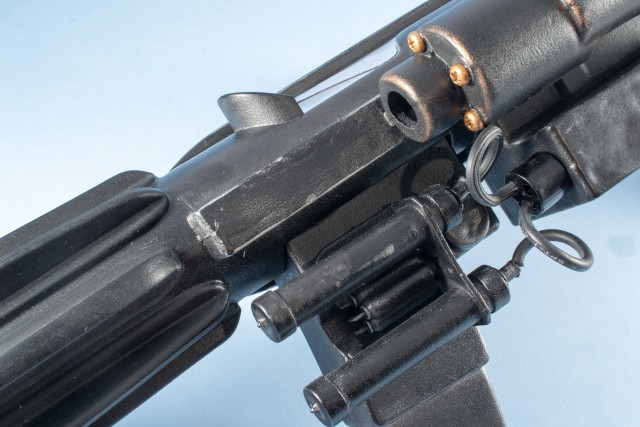
As you know, us TDs/TKs aren't on the top of the pay scale at the good ol' Empire. We have to make do with our meager paychecks. I thought I'd share my cheap and easy E-11 prop build in case there are any other troopers looking for an inexpensive E-11.
I used Rubie's Star Wars Rebels Stormtrooper Costume Blaster from Amazon, a drill, some paint, and some greeblies to spice it up. The blaster isn't 100% screen accurate when it comes to size and shape, but it is pretty close. With a little TLC, you can turn a toy into a nice prop.
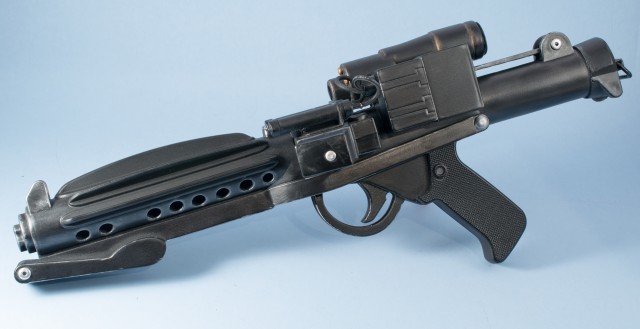
Greeblies used:
Electric shaver power cord from Amazon for $5, got the idea from whitearmor.net
5/32” x ¼” pop rivets from Home Depot for $5
Hard drive screws from work for free
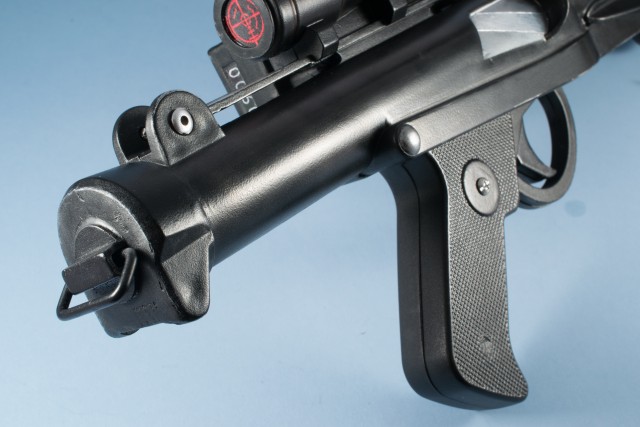
3 pin inline mic connector used as the Hengstler counter connector, from eBay, 2 for $5 shipped
E-11 power cylinders from Shapeways.com for $10 with coupon
E-11 D-ring from Shapeways.com for $2.50
E-11 D-ring mount from Shapeways.com for $3.50
Scope reticles for free from whitearmor.net
If you are interested in the build, you can check out the YouTube video here:
Its not the best looking blaster in Mos Eisley, but it is a fun build and not terribly expensive.
-
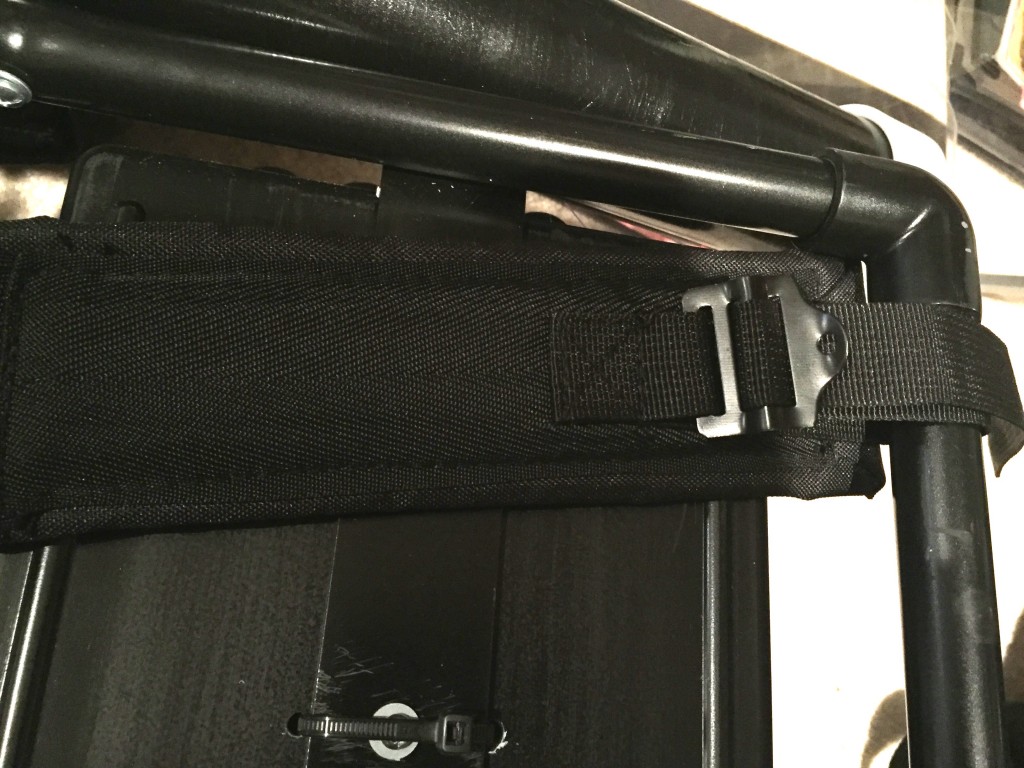
wvtrooper, I ended up using these straps from Amazon for $15:
They didn't require any drilling/screwing for attaching. The straps wrapped around the frame securely. Here are some pics:
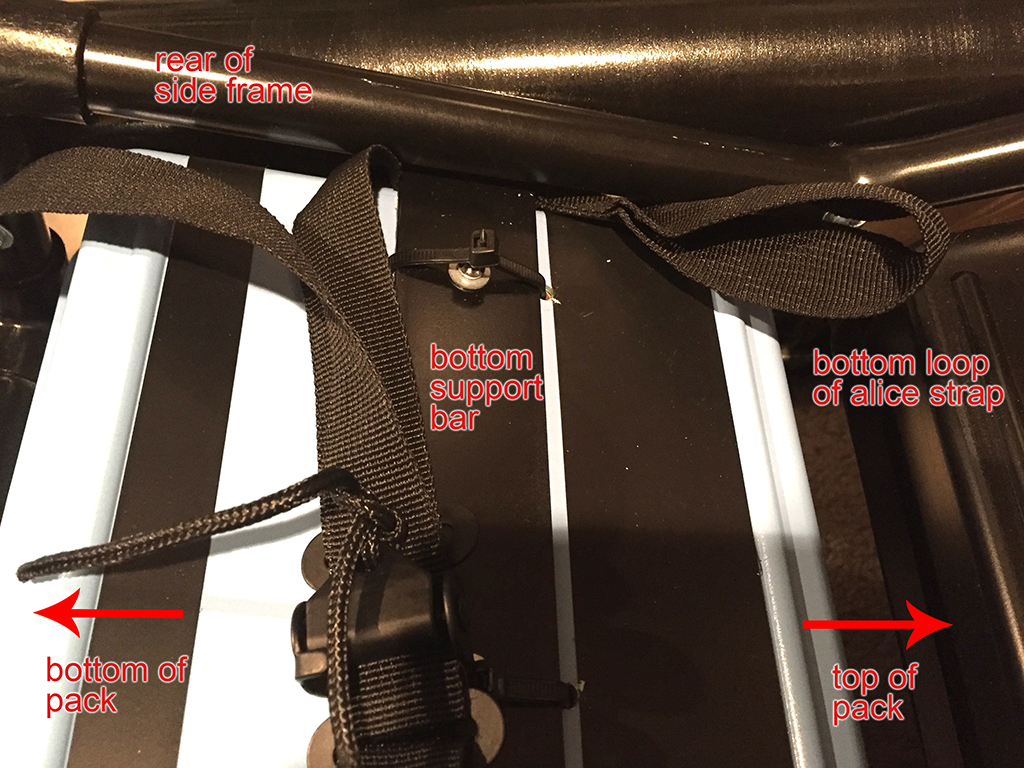
Just pulled the top of the strap through the bottom loop to secure it against the side/bottom of the pack frame
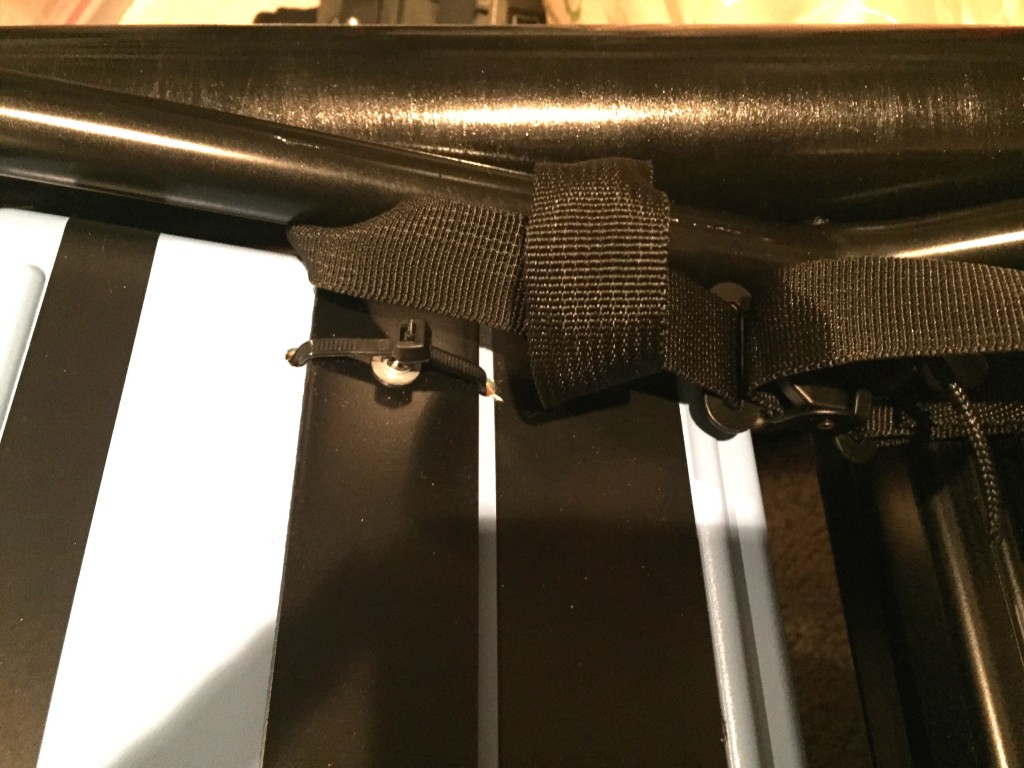
To secure the top of the straps, just wrap the top of the strap around the top of the frame
Feed the end of the top strap into the first hole in the buckle
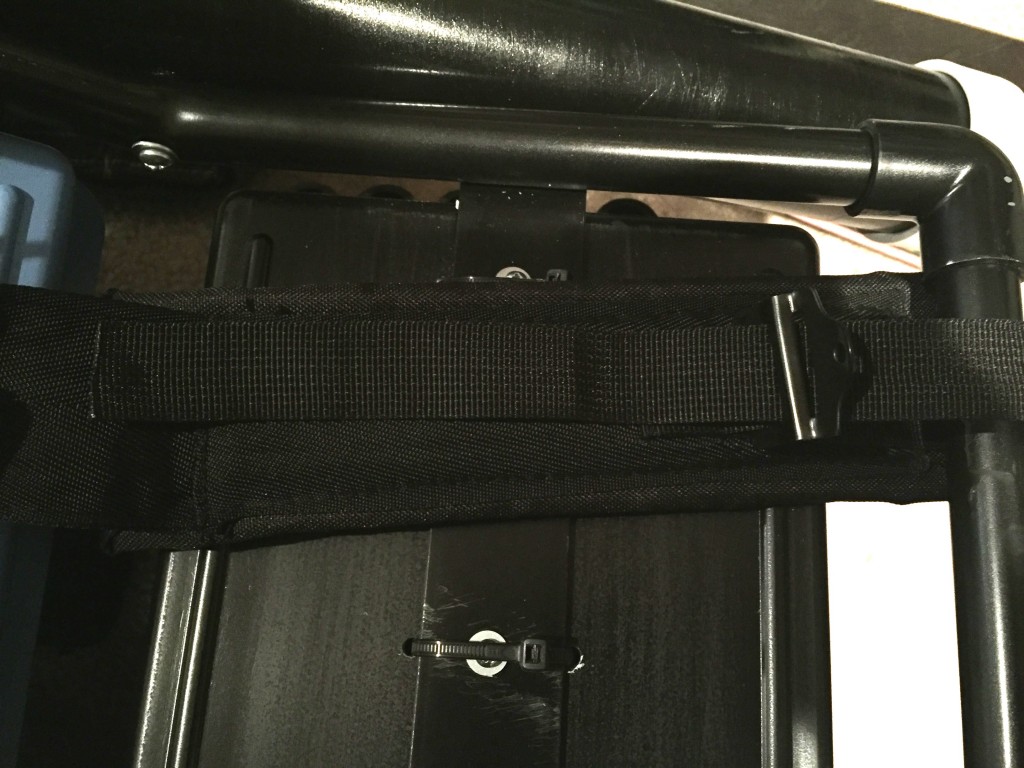
Bring the strap back up through the 2nd hole and tighten
-
Hello,
Damon Degner requesting access to the 501st section
TD-10900
http://www.501st.com/members/displaymemberdetails.php?userID=21217
Many thanks! :-)
-
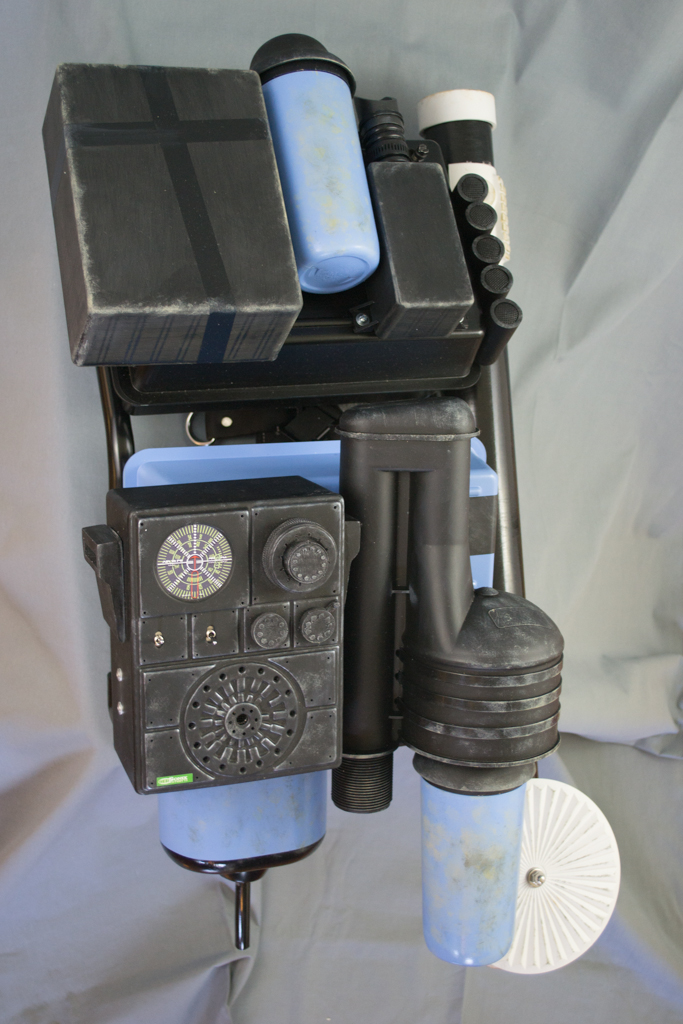
Greetings Fellow Troopers!
I wanted to share my pack build in hopes that it may help others in the future. These guys here at MEPD make it way to easy for us rookies :-) There are some FANTASTIC how-to articles on this site. Prior to registering, I silently lurked and began taking notes and collecting parts. I tell ya, getting parts for a pack build is quite the scavenger hunt. I ended up pulling parts from all different sorts of places. As for the build, I basically used ideas from other troopers on this site and applied them to my build. This is more of a "where I got my stuff" post.
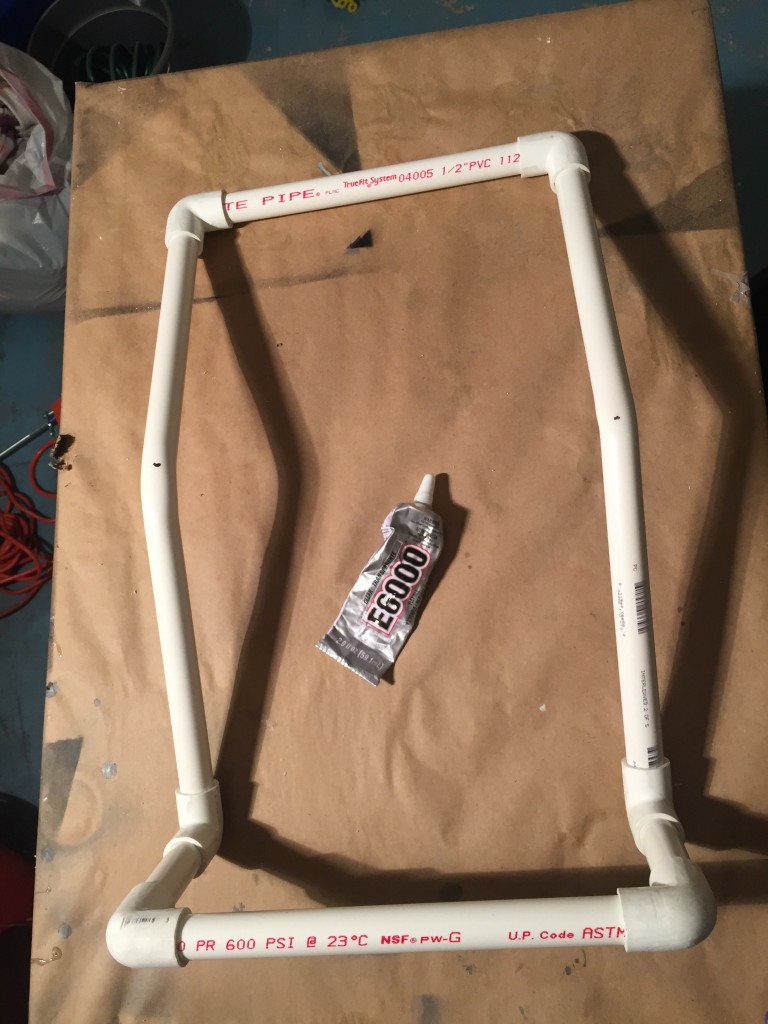
FRAME
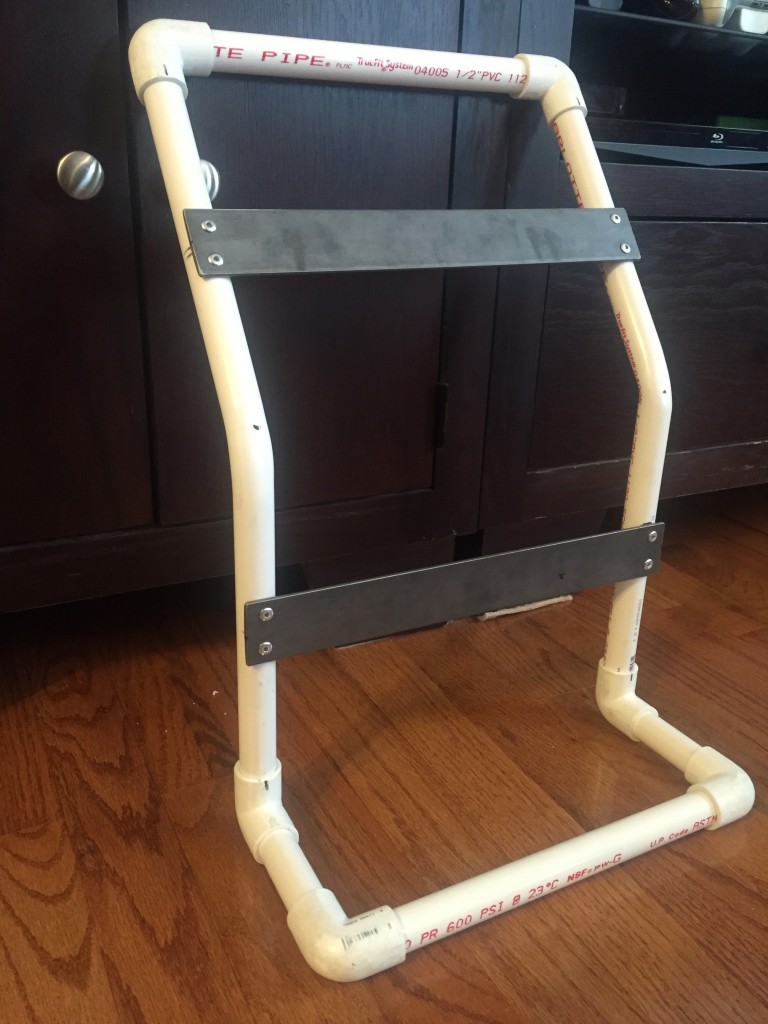
For the frame, I emulated Scootch's build found here: http://www.whitearmor.net/forum/topic/6474-howto-scootchs-backpack-tutorial/page-1
I used the same type of 1/2" PVC pipe, elbows, and metal rod. For the bend, I didn't have a heat gun. I put on a respirator that I use for spray painting and carefully rotated the pipe over my gas stove. It eventually started to bend. I had a protractor and was able to get the angles that I wanted. Once I had the cuts and bends, I secured the frame.
Here's the metal bar I used from Home Depot:
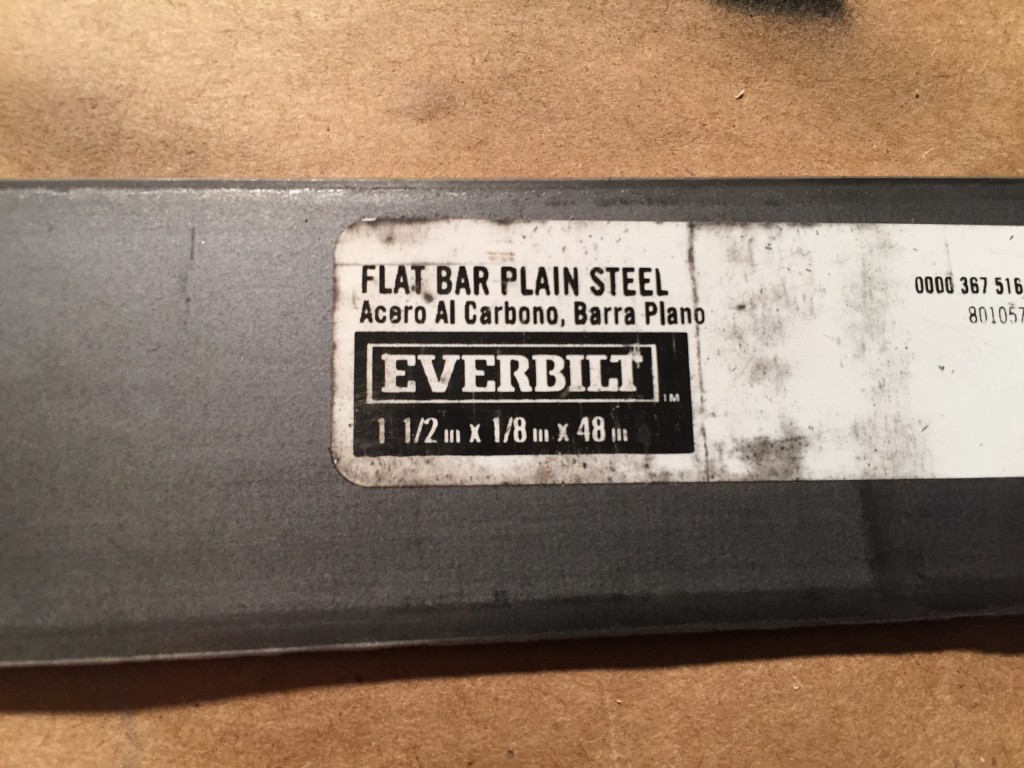
I rounded off the sharp edges using some emery cloth:
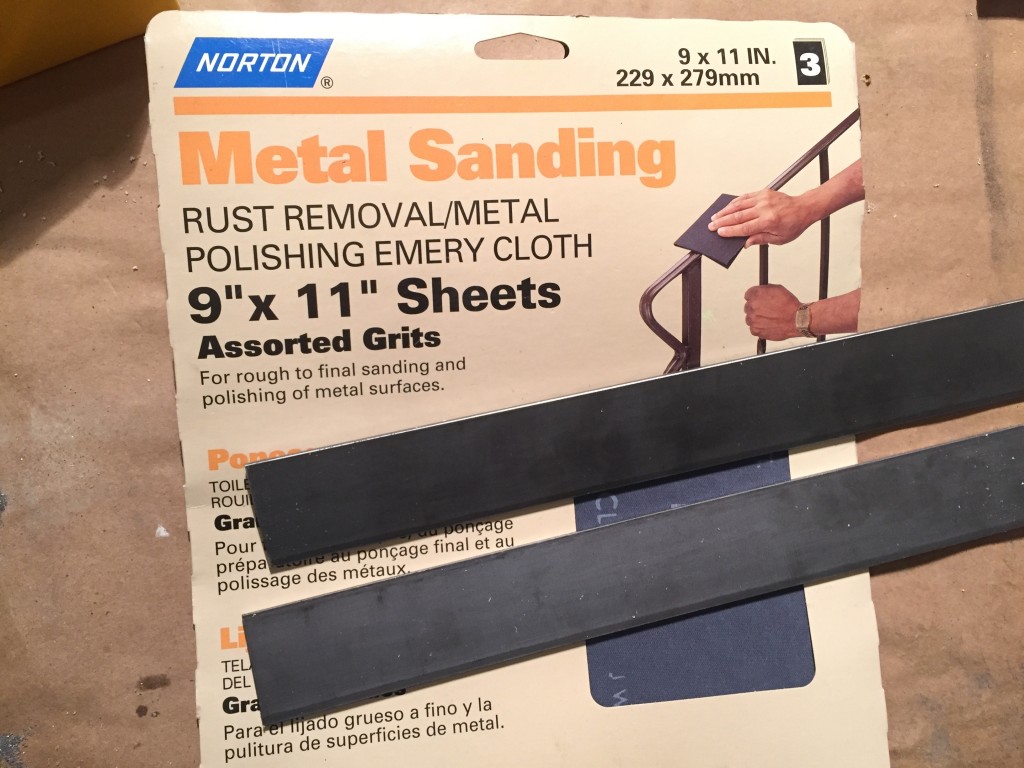
And there was great joy across the land:
Again, I simply used Scootch's measurements and ideas, it was spot on.
SEED TRAYS
I purchased my seed trays from Parks Seeds, also an idea from Scootch:
http://parkseed.com/medium-perma-nest-plant-trays-and-domes/p/v1589/
These are great trays, however, I wish I had signed up on the forums earlier and purchased trays from one of the MEPD members (Crashmann or any others that produce trays). Would much rather support them.
For mounting, I continued using Scootch's method by hot-gluing some oak to reinforce everything.
TUPPERWARE STUFF AND CUPS
For the 2 cups, I went to Target and bought 2 packs of Wet Ones. Yep, another Scootch idea. For the radar dish, I purchased a replacement tupperware pitcher lid from eBay. The 2 "bells" on top of the wet ones were tupperware pudding cups also purchased on eBay.
CISTERN
I picked up a cistern from Gordonator, couldn't be happier :-) I told him that I've never been happier to receive a part from a toilet.For securing the cistern and mounting the bell/cup, I used Jancelot's method found here (awesome idea with the magnets to get that mounting screw in):
http://forum.mepd.net/index.php?showtopic=13825&hl=cistern#entry176498
TOOL BOX
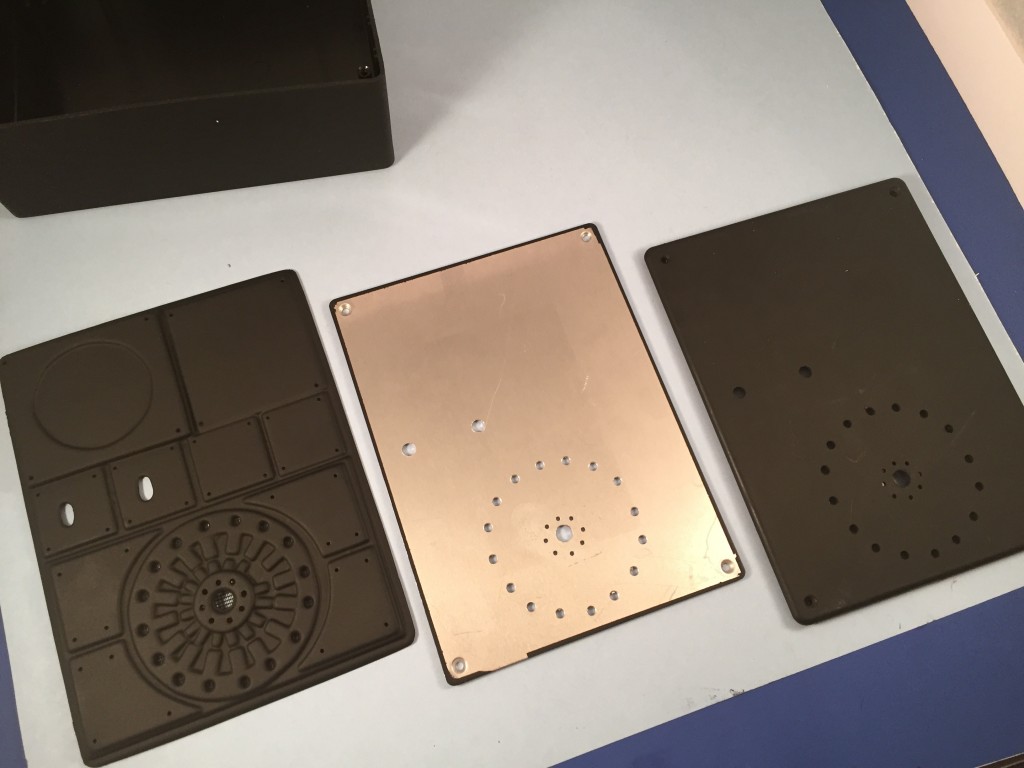
I picked up a project enclosure at Radio Shack for the tool box. I actually picked up 2 of these...one for the tool box and one for the Sonix Radio.
https://www.radioshack.com/products/project-enclosure-8x6x3?variant=5717251141
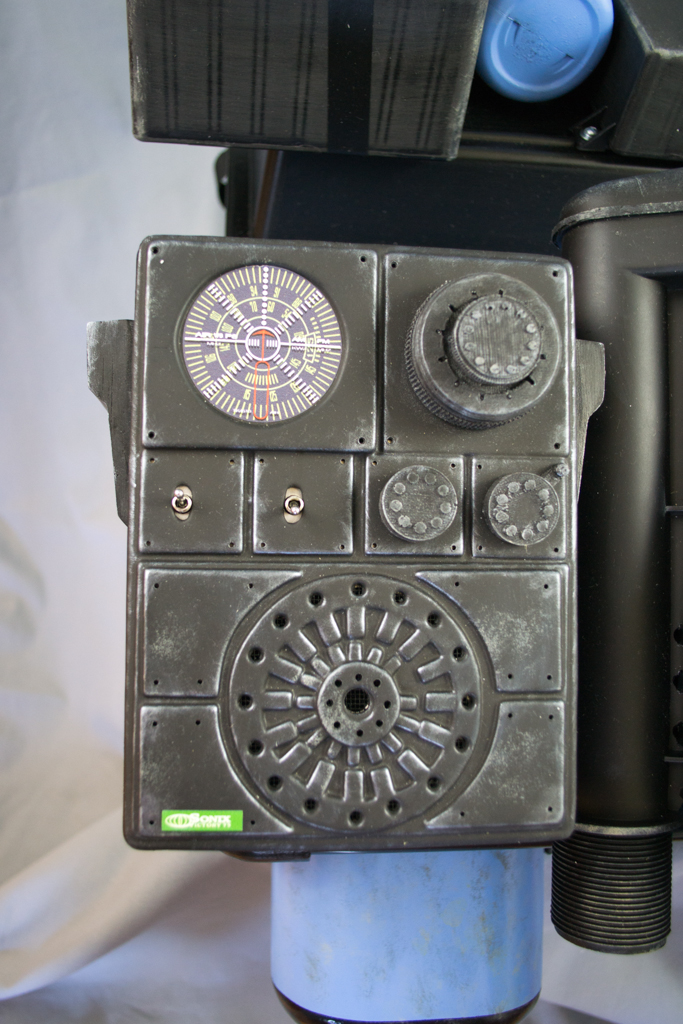
SONIX RADIO
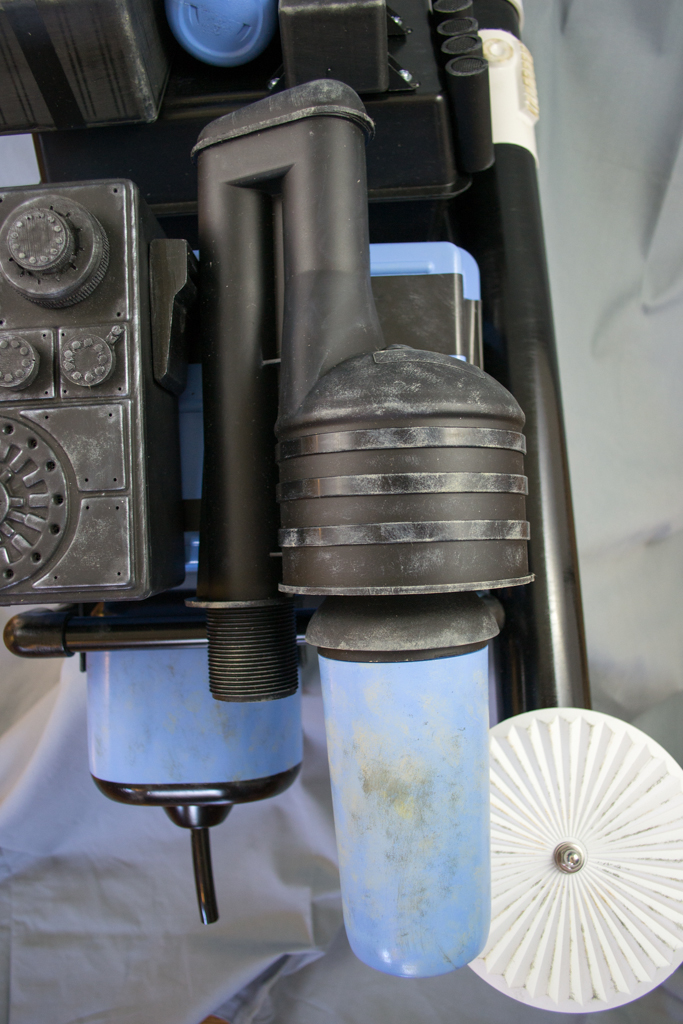
I picked up the Sonix from TrooperBay. I only used the faceplate and knobs. I attached the faceplate to the Radio Shack Project enclosure. The enclosure comes with a metal lid, I used it underneath of TrooperBay's faceplate to make it look a little more metallic underneath. I drilled out the speaker area and also the little screw holes around the frame.
Put some screen behind the speaker area and secured it with hot glue.
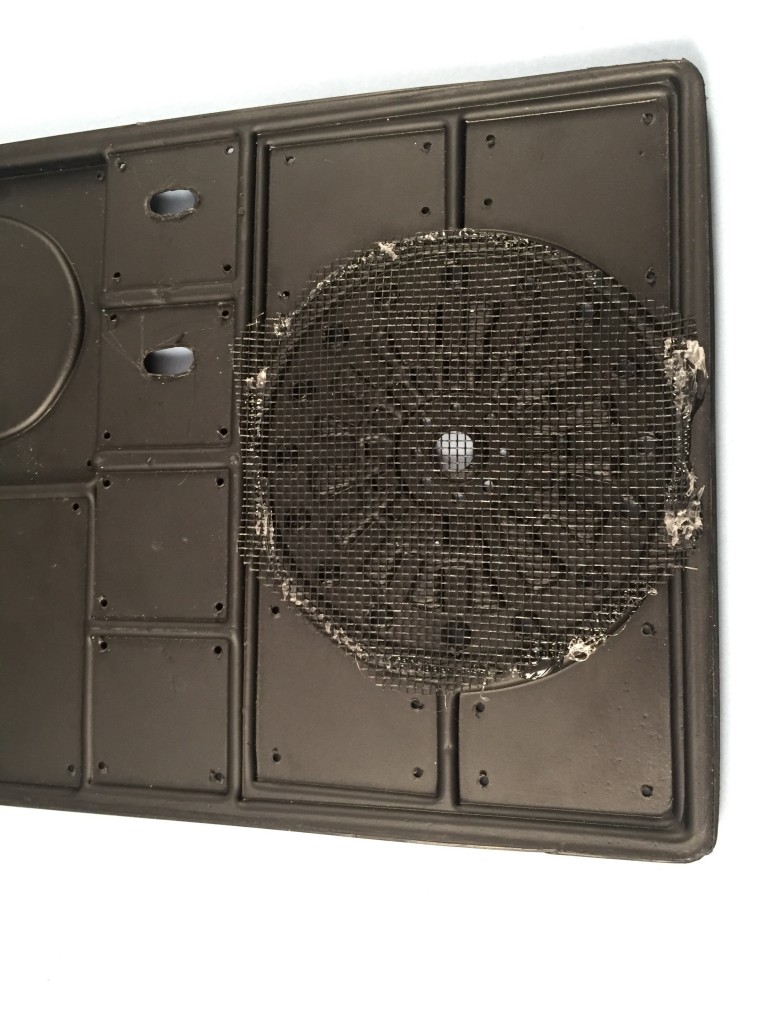
To secure the faceplate and keep it removeable, I cut off these "nubs" inside of the enclosure with a Dremel cutting bit.
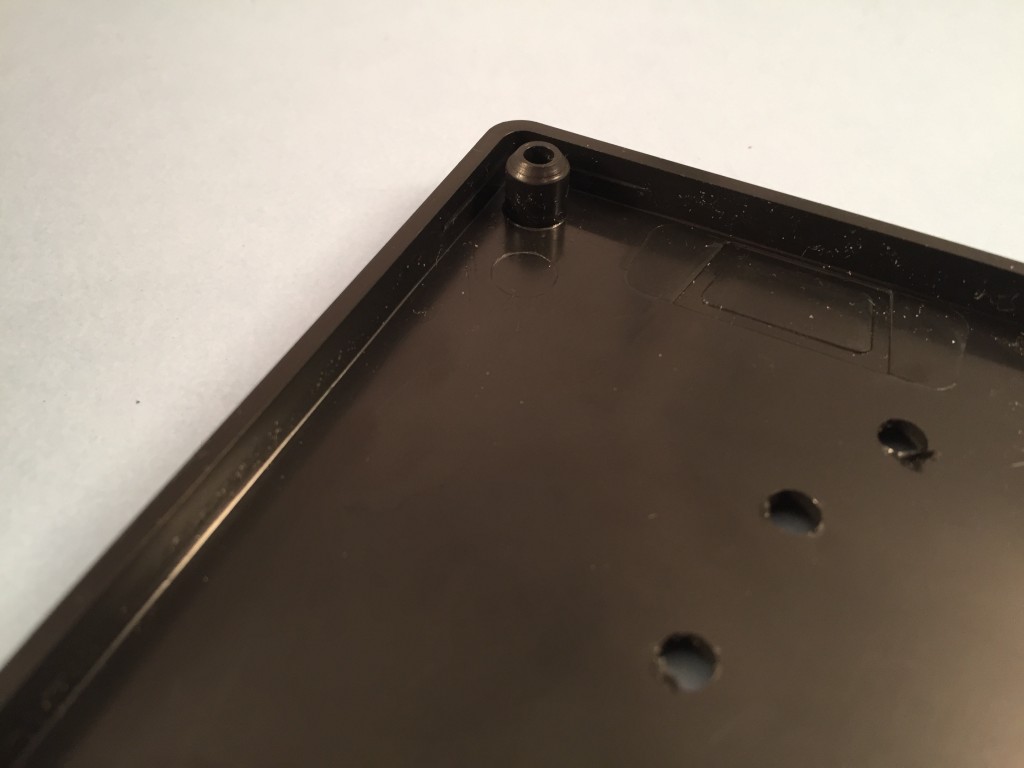
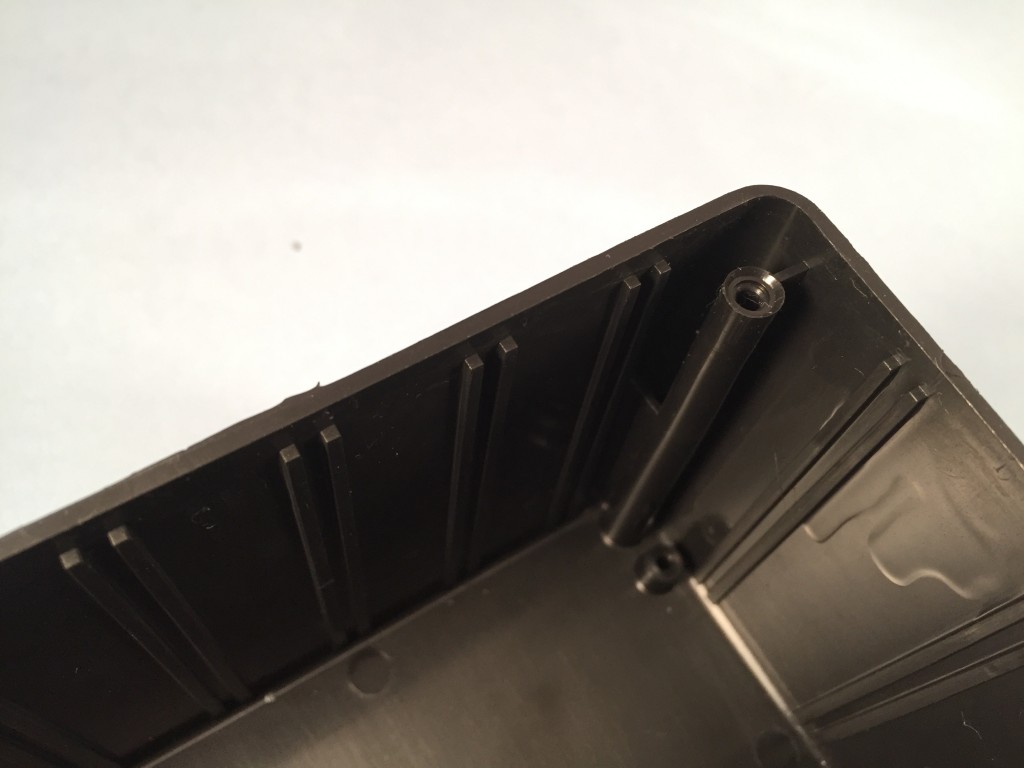
I cut them down enough to secure a few leftover rare-earth magnets from my TD armor build and secured them with epoxy putty. I secured the toggle switches with epoxy putty.
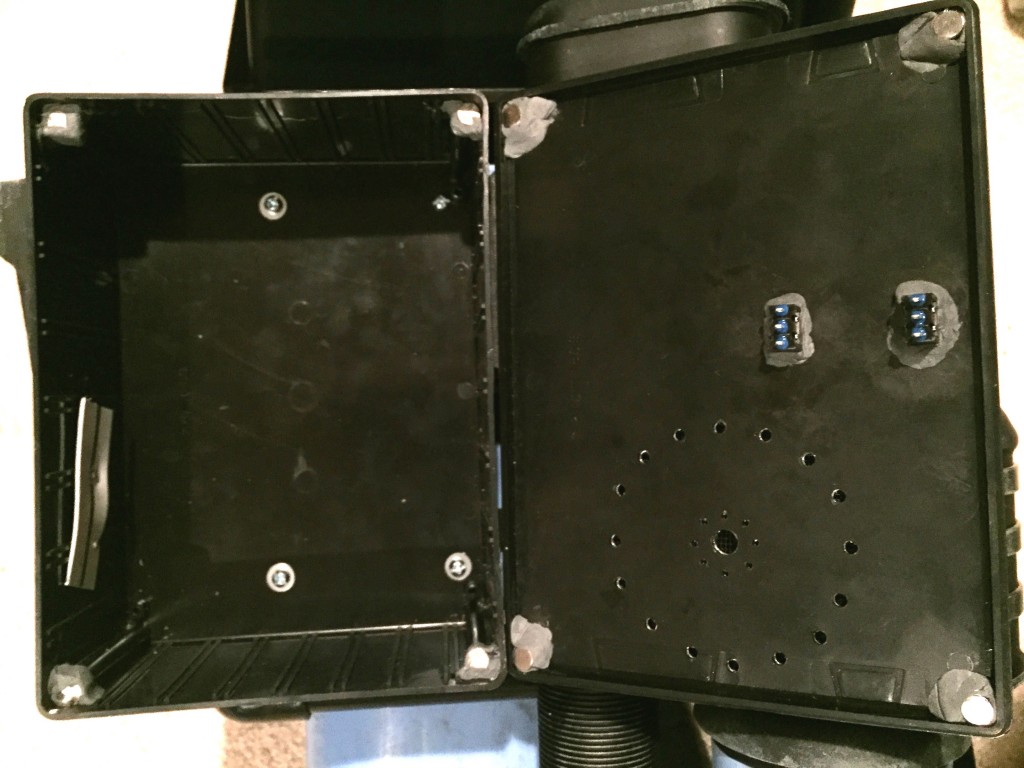
Switches from Radio Shack:
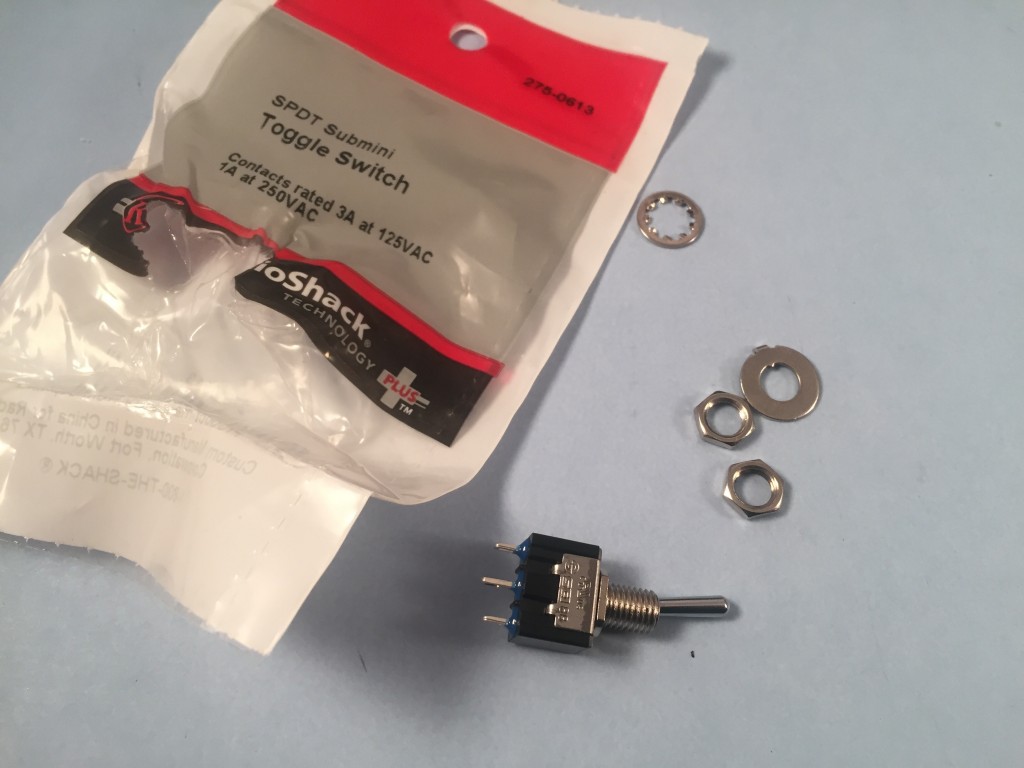
I plan on putting some kind of speaker system in there one day. For now, its just my iPhone with one of those rubber speaker stands.
CANTEEN
Got the canteen from Crashmann. He was lightning fast with shipping, and extremely helpful. He answered lots of rookie questions and really helped me out. I wish I had found Crashmann before I started this crazy scavenger hunt, I would have bought everything from him. We live fairly close to one another...I owe him some beer...a lot of beer.
EXHAUST PORT
This was a hodge podge of stuff. Again, I used a project enclosure from Radio Shack:
https://www.radioshack.com/products/radioshack-project-enclosure-6x3x2?variant=5717250245
The other stuff I picked up at Home Depot:
3/4" PVC
3/4" PVC Coupling (sawed at a 45 degree angle in a mitre box
Ribbed conduit: http://www.homedepot.com/p/1-1-4-in-Steel-CSST-Coated-Protective-Conduit-up-to-3-4-in-CSST-Tubing-11-12512/203073935?keyword=811000111258
the securing screw
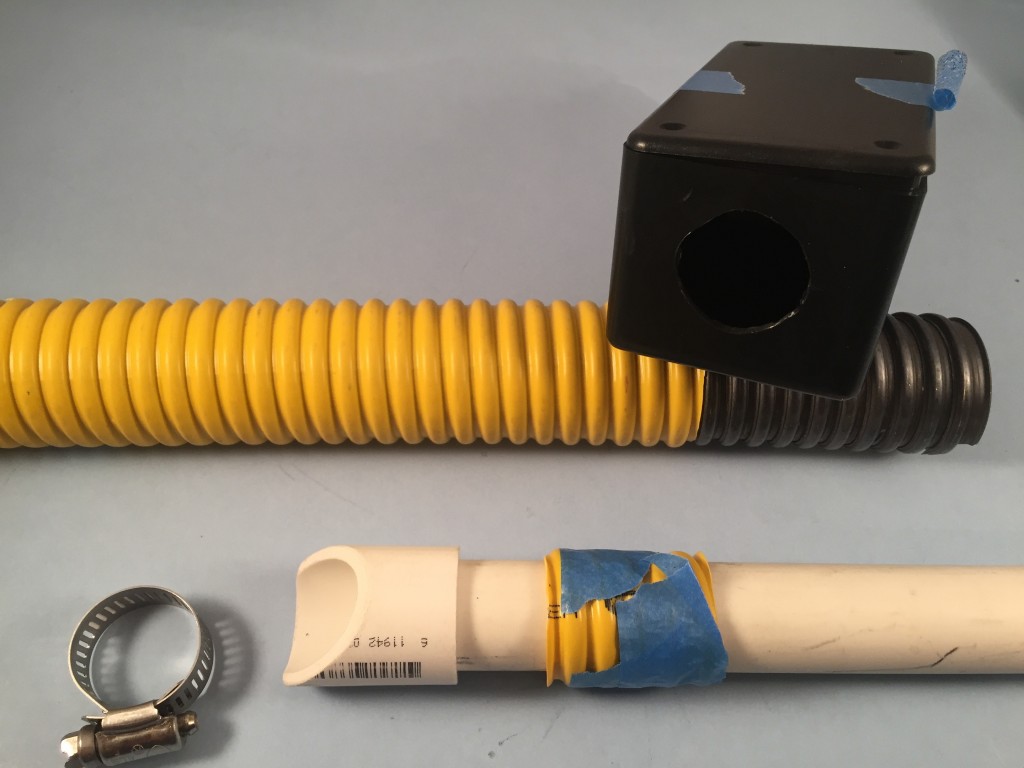
I cut a 1 inch hole in the enclosure so that the PVC could fit in. I sliced off some of that hose with a razor blade and painted it.
For the securing brackets on the bottom of the exhaust port, I just cut some left over plastic into strips and triangles, then painted it black.
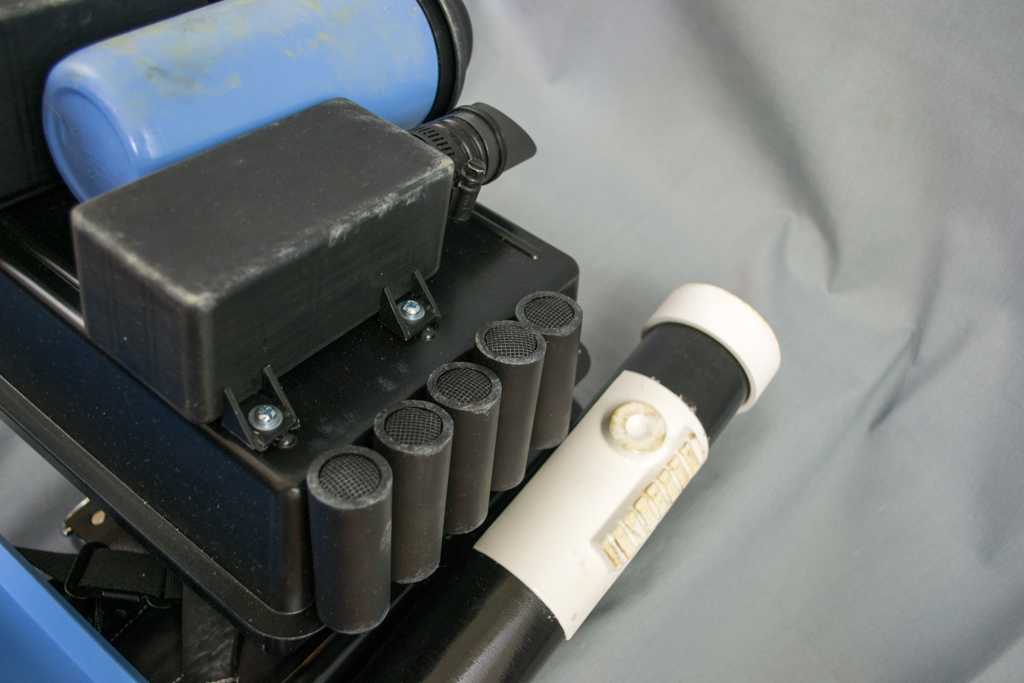
MORTAR TUBE
I used 2" PVC pipe, some 2 inch PVC couplings cut in half, and some 2 inch test caps to close the top of the couplings. I had a leftover thermal detonator "plate" from my TK kit and just glued it on the side with E6000.
SHELLS
For the shells, I used 3/4" PVC pipe. I spray painted 5 pennies flat black, cut a few squares of screen and pushed the penny and screen through the shell. Once the penny/screen was where I wanted it, I sloshed some E6000 in the bottom which hopefully secured it.
SECURING THE TOP TRAYS TO THE BOTTOM TRAYS
I used Pandatrooper's method using zip ties and "L" brackets:
http://forum.mepd.net/index.php?showtopic=7028
TAPE
I found this 2" wide tape at Amazon: http://amzn.to/1SzvI5c for securing the bottom blue trays. I used regular electrical tape for the thin strips.
STRAPS
I picked up these alice pack straps on Amazon for $15 bucks.
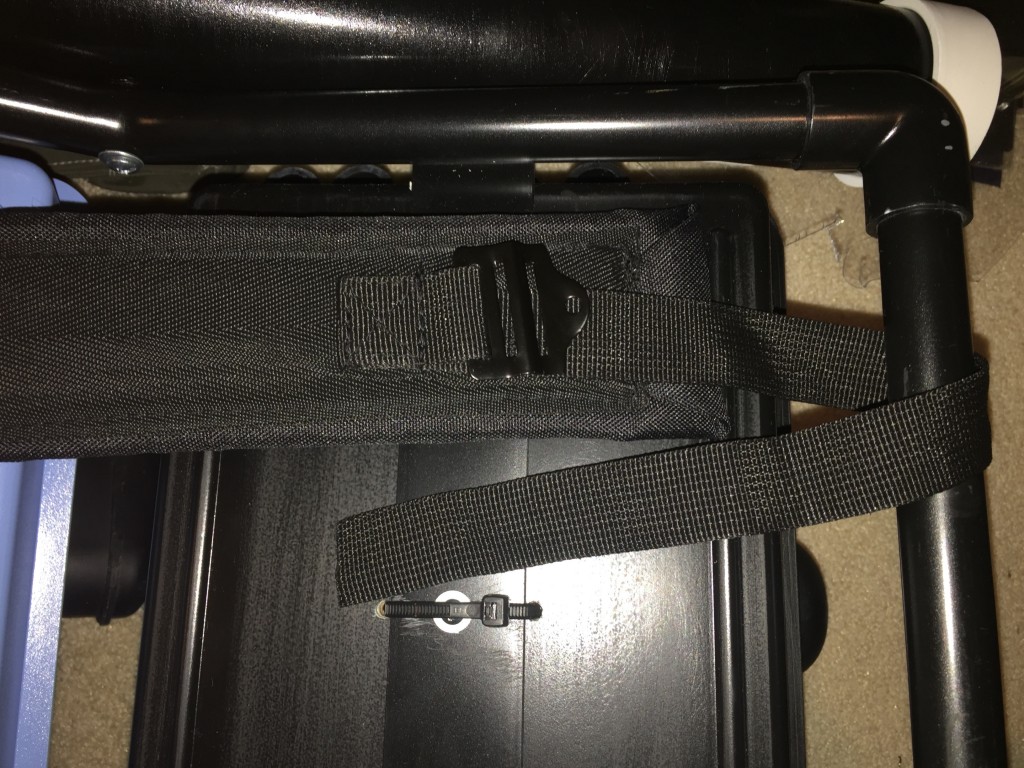
It didn't require any drilling to secure the straps. I wrapped the loop end of the strap around the bottom of the back at the side frame and metal bar, then fed the upper strap through it
Just pulled the top of the strap through the bottom loop to secure it against the side/bottom of the pack frame
To secure the top of the straps, just wrap the top of the strap around the top of the frame
Feed the end of the top strap into the first hole in the buckle
Bring the strap back up through the 2nd hole and tighten
WEATHERING
I used some Testors Acryl silver on the Sonix radio. Just drybrushed some here and there along the edges and places that may get worn. For dirt, I used "Folk Art" brand acrylic paint from Michael's. I used: Ash (gray color) and Country Twill (tan). I applied it using a folded wet paper towel. I would dab some on scrap plastic until just a little was left on the paper towel and I applied on the gear.
All done!
Thanks for reading! I finally finished my Anovos armor too and was approved by my local garrison earlier this week. Thanks to all who have helped me achieve my goal of becoming a TD!
Last but not least, found a light travel duffel that fits the pack nicely. Got it from Amazon: http://amzn.to/1WgyJqm Obviously not much in the way of protection, but should aid in transporting the pack.
-
Hi all,
I've had a chance to work on my Anovos TD over the past couple of days. A couple of questions have come out of my work...
1. Does anyone have a 3D printing file of the sniper plate?
2. The strapping that Anovos has provided....can I use that? I read in a few thread that there was specific strapping requirements but in reading the CRL, I can't find out what the specifics might be?
Thanks.
Hey Ryan, I am almost done with my Anovos TD, I am weathering the armor and finishing up my backpack.
For the sniper plate, I contacted Mark at ATA, he had very fair pricing and a quick shipping time. The sniper plate was hollow, so I used a piece of ABS behind it to fill it in and give it more surface area to fasten on to the left shin. He also sells the 3 button ab plate. Hit him up at ataworks at yahoo dot com
I am going to try the Anovos supplied strapping for now. Most of it seems pretty secure, the only part I am not liking is the ab/kidney connection. I think its the right side that has 3 velcro to velcro connections. Its hard to fasten when getting dressed, and hard to get it lined up. I want to get approved with the 501st, then I may change to snaps.
-
Lookin' good! What kind of case are you using for your pack? Looks like some kind of suitcase? I am finishing up my pack now. Even though the components seem to be secure, I am afraid of one of them getting snapped off. Need to protect it...like most of you, I've spent a lot of time on it. It would break my heart if something broke off of it.
I have that HD Husky box for my armor too, nice and roomy!
-
I'm working on my pack now. I am going to use the Radio Shack project enclosure for the exhaust port.
https://www.radioshack.com/products/radioshack-project-enclosure-6x3x2?variant=5717250245
Dimensions are 6"x3"x2" its 5 bucks.
I have some lexan (little thicker than ABS) that I am using underneath for the mounting brackets and triangles. I cut them into 2 strips, and then cut 8 x 45 degree triangles.
Also drilled out about a 1 inch circle in the top to fit my 3/4" PVC pipe with a coupling on top. For the ribbed hose, I'm using this:
It is only 3 bucks, has metal conduit inside, so it is difficult to cut through. I've found that you can just slice off a piece of the yellow plastic hose with a utility knife, then just screw it off in a twisting motion (not using the metal underneath). The hose is too big for a 3/4" PVC pipe, but if you slice your piece right up the middle, you can size it to your pipe and just glue down the overage with plastic epoxy or E6000. I didn't want to buy a giant piece of hose for 2 inches of material. This did the job with some easy modification.
Here's a pic of all the stuff:
-
Awesome suggestions, thanks all!
-
Hello Everyone,
For those of you with packs, do you have a tried-and-true set of backpack shoulder straps that you prefer? I'm trying to finish up my pack, the only thing that I'm missing are the shoulder straps. If any of you have suggestions, I would appreciate it. I'm going to start looking on Amazon and eBay.
Thanks all!
-
May I ask which backpack straps you used? Pack looks awesome, nice job!
-
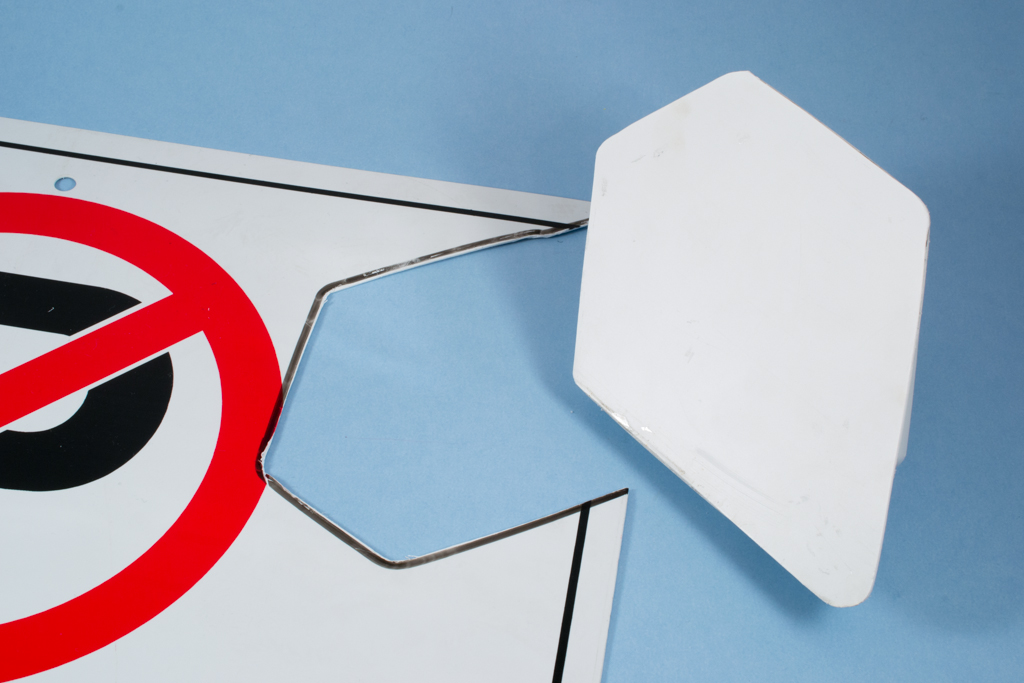
I picked up a "no parking" plastic sign from Home Depot that I've been using for various plastic patching. I traced around the knee plate, cut with Lexan scissors, and then fastened it together with E6000. It gave me a little more surface area to attach to the top of the left shin. If you trim the rear cover too much, it will sink into the knee plate. Leave a little excess on the outside of the rear cover so that you can glue it. If there is too much excess, you can sand it off after the glue has cured.
-
Thanks Airborne, glad to hear that, those edges hurt even with gloves on, glad they can come off. I'm gonna cut 'em off tonight with the ol' Dremel.
-
Nice build, looks great!
-
So, I had to take some steps back. I went to an armor build party with the Maryland Old Line Garrison. I got to speak with the guy that approves the costumes, super awesome guy, very knowledgeable. He definitely knew his stuff. Even had some of his work on display (biker scout and a TD). He politely pointed out that I did not trim my return edges where the covering strips go. While I was a tad disappointed, I was happy he told me about it. Better to know now. Thankfully, I used E6000 for all of the connections. I pulled the thighs, shins, and forearms apart. Measured the appropriate distances and trimmed. In the process of securing everything again. A few days setback, but I am grateful to Mike @ the Old Line Garrison for pointing it out. I'm still waiting on my boots and pauldron, so a few more days won't make much of a difference. While the E6000 is curing, i still have my pack build to work on.
If you take a look at the pics in this thread, you can see how far the return edge sticks out...it is very apparent on the thigh pieces.
You live you learn :-) Still enjoying the build!
Attaching Mortar Tube to Move Along Pack
in Field Backpack
Posted
I used the Scootch method listed here:
http://www.whitearmor.net/forum/topic/6474-howto-scootchs-backpack-tutorial/page-2 (scroll down to the mortar tube section)
Basically, before you mount anything on your frame, you drill 2 holes through the frame out the side, and also on the tube. You only need to drill on one side of the tube, then insert wall anchors in the tube. The lag screw goes through the frame and then into tube's anchors. That way you don't need to drill holes on the outside of the tube.