

TD-11516 "Ish"
-
Posts
14 -
Joined
-
Last visited
Content Type
Events
Profiles
Forums
Posts posted by TD-11516 "Ish"
-
-
woohoo!.......Thanks Felice!
and thanks to all for the warm welcome!
-
-
Doh.... Looks like I missed that detail!
OK wires added..
-
I appreciate the encouragement and helpful answers to my questions for shimming the kidney section and helmet mods.
It was sort of unnerving cutting into my RS armor. Looking forward to serving in the Mess Hall and hopefully trooping with you officers some day!
-
can you not see them? I have them shared from my cloud drive.
-
Name: Eric Proshuto
501st ID: 11516
MEPD Forum name: TD-11516 "Ish"
Garrison: KorribanFront 1
Front 2
Front 3
Front 5
Front 6
left
Right
back
Before dirtying it up
before dirtying it up
before dirtying it up and adding shims
Before dirtying it up and adding shims
Just having fun with filters
Green Lenses
Bucket front 4 teeth
Hovi Mic tips detail
Right Side detail
left side detail
Dual snaps
6 rivets with Shim
left shoulder strap
Right should strap
Butt, back OII, kidney
neck seal
neck seal
boots
Thigh detail
Thigh R+L
knee plate detail
Leg armor detail
DLT-19 detail
DLT-19 detail
DLT-19 detail
backpack
backpack detail
backpack detail
backpack
Shoulder bell, bicep, forearm with internal black strapping
Glove Latex flexible
Gloves
belt ammo pouch
belt detail
Small spanish hip pouch
MP40 shoulder pouch
Pauldron
Internal strapping main body and Shoulder, bicep detail
Parting shot Anthony Forrest bucket
-
The return edge was made with my hobby iron. Sorry that you're having to make modifications to an RS! I absolutely love their kits, especially the bumpy helmets. If I could afford one I would have it in a heart beat. Just need my kids to be out of diapers and stop drinking so much milk and I could afford it maybe lol.
Congrats! Enjoy them while they're young.. before you know it they're all grown up and ready to head out and explore the world on their own, that and there moody
 I'm gonna miss my youngest (the 16 yr old) when he's off to college.
Anyway..I have an iron too. but its one for burning wood. I hope it will work. I use it to burn the holes in the plastic for the snaps and rivets etc. it has several diff size tips. Not sure if I can set it low enough but I am sure I can get it figured out how to make the rolled edge.
-
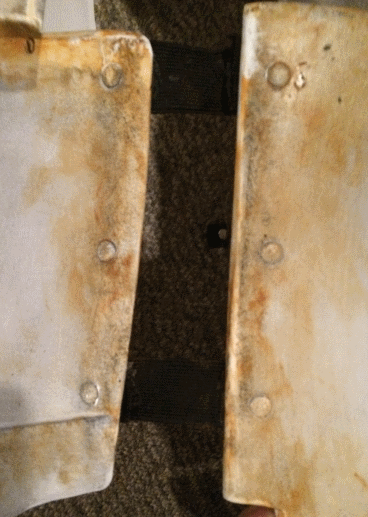
No you're only going to have the shim glued and in place on the kidney side so only the holes on the kidney will be filled. What I did was I made return edges on the top of my shims and also gave them a warm water bath so I could give them a slight curve by hand so they weren't so straight. Remember you want to make a shim on both sides of the kidney, not just one side. So when you measure your gap, divide that in half so you can make equal size shims.
Got it.. I really appreciate your help!
I ordered this commission from RS propmasters and if I had to do it all over again I would not have paid for the commission (assembly), to date I have redone almost all of the strapping and have added my own custom weathering. Its been more of a hassle to undo and redo. It would have been much simpler to do the whole thing myself. Next project (Tusken Raider) I will definitely do all myself... may even make a Darth Vader for my 6'3 and still growing 16 year old. Either that or a Chewbacca, the kids going to be a giant
Again thanks for the tips. I like the heating and rolling the edge I'll do that.
-
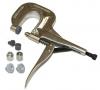
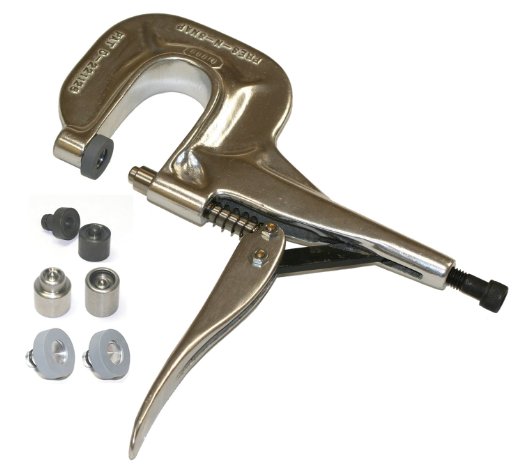
There have been a few ways guys have done them. This is my preferred option and what I suggest. Remove the split rivets by bending the legs back up and pull the it out with pliers. Use ABS paste to fill in the holes. Add a backing plate using spare ABS or a for sale sign and put in a piece of ABS to close the gap. Use ABS paste to fill the seems and sand smooth. Drill new holes in the shim piece so it is 10mm from the top and edge and space evenly like before.
Thanks.
I have the rivets removed now and have some new rivets and ABS for the Shim on the way. Should I paste over all 6 original rivet holes and drill 6 new holes in the shim so that they are centered?
Also I have RS Propmasters armor, so where the two pieces meet up is rolled over/curved inward. What is the best way to transition this with the shim? just more paste and sand?
-
I need to adjust my armor and add a 2-3 inch piece of shim to the kidney sections on both the right and left side.

Do I pop out the rivets and redo them or affix the shim using snaps inside (I have a snap tool)
making one side fixed and the other side float? both sides fixed? What if I get fatter? fixed would not be good.
Just looking for the best option and suggestions from you who have been there done that and how you would go about it now.
If I should remove the rivets, what is the best way to remove them? I don't want to crack the abs. Seems like I would have to use a lot of force to pry up the little ears that are bent over.
thinking towards MEPD and SWAT eventually so the look and fit and finish are important. How would you proceed? The armor is RS. if anyone know a good place to get the same rivets they use in the US that would be helpful too incase I need to redo them.
Thanks
-
UPDATE ----- Approved into the 501st - TD-11516
I made adjustments to armor (old pics removed and new ones replaced on cloud drive)
I have been recently working on adding more weathering. I want it to have a bit more Burnt sienna hue. I will submit more pics when I'm ready to request deployment for MEPD officer.
Need to work on my pouches and get them to hang correctly.
------------------------------- Older Post ------------------------------------------------
Comments on new Armor.
Goal - get into 501st first - application submitted just waiting on approval
Armor seen here:
https://onedrive.live.com/redir?resi...t=folder%2cJPG
I do need a few adjustments to fit my 6' 1" frame.I just ordered some E6000 glue to redo the shoulder straps and thigh straps to fix my armor gap between the thighs and clam shell.
This should let the chest and kidney section so sit a bit lower, not choke the crap out of me, and not cause the chest and kidney section to spread as seen in the pics. Its a bit pinched right now and I'm singing soprano
 I can redo the pictures so none of that shows if needed. I didn't see that gap till after they were taken.
I am also going to add some shims for the side strapping so there is no black space at all. I did not want to make any changes yet to address the current fit from the commission build from RS propmasters. I know I will need to make the tolerances changes on the side better for entry into the MEPD.
Getting stoked for trooping! Hopefully I can get approved soon for entry! - Just got my order placed for the Rom/FX
Quick Question - how do you request a TD number once you are approved for entry?would love to have a TD number that matches my serial number on the armor.
ish
N9BOW
Eric
*DONE* TD-73511 requesting deployment
in MEPD Police Officer Program
Posted
Congrats!