

Strider
-
Posts
811 -
Joined
-
Last visited
-
Days Won
1
Content Type
Events
Profiles
Forums
Everything posted by Strider
-
That's what we're here for, bro Just one final word to the wise; you might want to ask the buddies from your Garrison which exact colors they used (if you haven't already done so) because it's cooler when it looks like you're all coming from the same dirtpit
-
I like the new weathering much better. The old one had a little bit too much of a "rusty" touch for my personal taste. I wouldn't stress it too much at the moment though. As long as you don't seal it you can always go back and change it (which I have done a lot). I use "Sterilium" (a fluid to keep your hands sterile) to rub off and lighten any weathering and it works like a charm. It actually looks more naturally if you're repeating the process a couple of times.
-

*DONE* TD82160 Requesting Deployment
Strider replied to Shadowfax821's topic in MEPD Police Officer Program
Almost there...looking good, bro! -
Thanks, buddy. I have no doubt yours will come out anything less than awesome
-
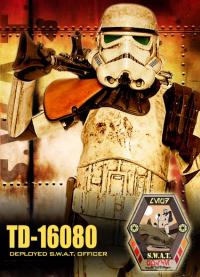
*ACTIVATED* TD-16080 requesting SWAT Deployment #39
Strider replied to Strider's topic in MEPD S.W.A.T. Program
Thanks. Great job yourself Sarah -
Thanks, Charlie. Coming from you that means a lot. Yet I can't take the credit for it; this build is inspired by so many others, partularly brothers from the UKG, that I really consider this a team effort.
-
Name: Constantin Legion ID #: TD-16080 Call sign: Strider Garrison: German Garrison Trooper Emulated: Cantina Captain Some action shots: Not my pose but I still love it ;-) Bucket: Bucket reference pictures: Boots. Made for walking: Chest weathering: Inside/Strapping: Chest weathering reference pic: Accessories: BFG: Sides and backpack: Link to backpack WIP incl. research on coloring and type of pack: http://forum.mepd.net/index.php?showtopic=13820&page=1 Backpack reference pic (only backpack, not the trooper):
-
If you are curious about the size difference of the old and new pack here's a comparison picture (Left new, Right old):
-
I've made some good progress in the last couple of days and finished the pack. Alltogether I'm pretty happy with the parts and the way it came out except for one thing; you'll notice that the "old" radio templates do not fit the "new" packs anymore so that will definitively be a candidate for a future mod. Unfortunately at the moment, there is no radio with the original dimensions out there. Given the accuracy level I'm aiming at making it myself would probably be barely acceptable at best so I rather wait until a better solution or casts from a found Sonix Victory surface. 'nough said, here are the final pictures:
-
The Karrimor frames I have seen so far do come in different varieties (mine has a different strapping system, eg) but all use the same frame. It's really kind of a mistery which other frames they used given that these needed to have almost the exact dimensions of the Karrimor frame to fit the seed trays. I think some more research about 70ies style boyscout backpacks is in order ;-)
-
Some more progress - finally I can smell the end of the tunnel... ;-) I've attached the lower seed trays to the aluminum profiles as well as the canteen to the lower tray. Basically I assembled and cut all the aluminum profiles instead of using metal ones to save weight and get exactly the lenghts and shapes I was looking for. I was glad that it worked out to use the original strapping system which is much more comfortable as well as adjustable compared to a cheap "self-made" solution. To prevent the pack from scratching my armor I've attached a buffer made of leather and foam on the bottom alu profile; For the inside I used 2,5mm ABS stripes as reinforcement. This will also hold the zip ties which I'm planning to use to hold the upper seed trays. Basically my aim was to assemble everything in a way that would enable me to and change everything later without having to cut open anything. You never know what further mods the future may bring ;-)
-
*DONE* TD 22445 Requesting Deployment
Strider replied to Perona's topic in MEPD Police Officer Program
Looking great, bro! You might wanna ask for Sandtrooper access first >>> http://forum.mepd.net/index.php?showtopic=12352&page=52 Good Luck! -
Thx for the pointer - I'll check it out
-
Ah, I love brown boxes - especially when they're from my favorite UKG armorer ;-) IMO they fit absolutely perfekt on the Karrimor frame: What do you guys think? Let me know before I attach them ;-)
-
Well, that would be the ultimate goal but let's take it one step at a time - I don't want to overstrain his patience
-
As some of you may or may not know I've been in touch with Bigred (TK-3257) about some more information about his Sonix radio and he recently got back to me. As a quick recap, there are currently 3 sources of found Sonix (or derivatives) radios the MEPD is aware of: 1. Sonix 75 from Bigred ---> http://www.501st.com/forum/viewtopic.php?f=29&t=56013&start=20 2. Sonix 75 from Bob C. (Radio enthusiastic, not affiliated to the Star Wars community/501st) 3. North Star radio (Sonix derivative) from 1970s (MEPD user name) >>> http://forum.mepd.net/index.php?showtopic=9335 So without further ado, this is the information about the measurements that Bigred has shared (posting of this mail with his permission): Which would translate to this: My take on it: Given the recently surfaced new measurements of the somewhat larger Karrimor frame it does make sense that the radio is also slighlty larger as anticipated. The width of the radio reflects the measurements that "1970s" has already taken however the hight given by Bigred is about 2cm longer than the measurements from 1970s (take from the North Star Clone). He mentiones a 5 pin din socket on the right side but no D-ring, though it would be possible that not all Sonix radios had the D-ring. He states that both jack plugs on the left side have the word "mic" above it but I think that's just a typo as he mentioned in his thread about the found radio that the word above the lower one is "ear". I'm very much looking forward to check out the new pictures he aims to send and will certainly put them here in this thread. It would be great to finally have secure information about all measurements and "greeblies" of the Sonix!
-
Hey Brandon, great to seeing you join the dirt pit! I've followed your Arduino build over on FISD and currently building something similiar into a MG15/RT97. Welcome to the MEPD!
-
Fitting looks good. Yes, the shoulder bells definitively need to get closer to the elastic band. I can't clearly see the return edge of your shoulder bells but they might need some more trimming. Great start!
-
Great Tutorial, Felix! Makes it look all too easy ;-)
-
You do know that he is a fictional character, right?
-
Just received a new part today I have to say John (Quartermaster) has done an outstanding job, I couldn't be happier with it. Originally I was going for the authentic tupper lid but turned out I got the 5 inch version which just seemed too large.
-
Congrats, well done!
-
I was wondering were you where hiding, lol. Armor looks spot on, fantastic job bro! Also noticed you've learned from my 'mistake' with the belt ;-) Just one thing; if it's possible I would try to make the shins have a more tapered form but this is really a tiny detail. Well, done! Now comes the best part: The weathering
-
The link is for 501 members only so Lee can't access it. What I find peculiar is that this find is 5 years old and nothing ever came of it, no more pictures, no castings, nothing. Misterious... I'm happy though to drop David a line and ask if he would be willing to share some more pictures.
-
Couldn't agree more. I don't think 'bragging rights' give you enough motivation to spend all this time and effort getting your gear in shape. It's the process that counts, learning new techniques, materials and tools. I don't want to stress it since you've only asked a question about a holster but if you give it a try you may find that it's the beginning of an exciting journey. Cheers

