


T-Jay
-
Posts
19 -
Joined
-
Last visited
Content Type
Events
Profiles
Forums
Posts posted by T-Jay
-
-
Never heard of this, although I live in Germany - but that doesn't mean anything.
This site was launched in September 2010 and seems to be a bit outdated, as the latest comment I found is from July 2012.
However, there is an option to contact the maker for price info and availability. So if you want to give it a try...
-
Looking really good. Please show us a picture when the paint dried. So curious...
-
Very cool. Increases my interest for a TK-TD conversion at some far away day...
-
Wow, very cool !
Looks great. Awesome kit to upgrade the E11. Good luck with the sale. Saludos.
 nice
niceThanks very much guys! Most of these sets so far went to FISD members and I thought our dirty guys could use them too.

Must admit, I am not very familiar with the Bapty, but if there are additional things required, just let me know and I can try adding them into the kits...
Thanks in advance
-
These real 6-digit counters are now available with the Completion Sets as a limited upcharge-option.
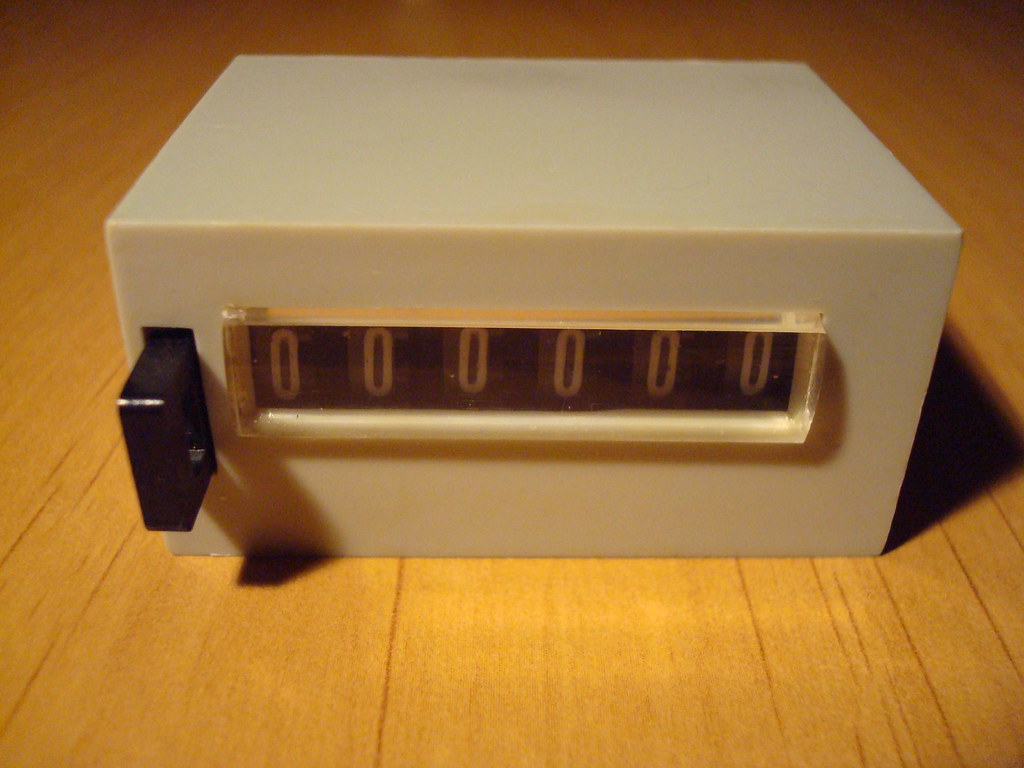
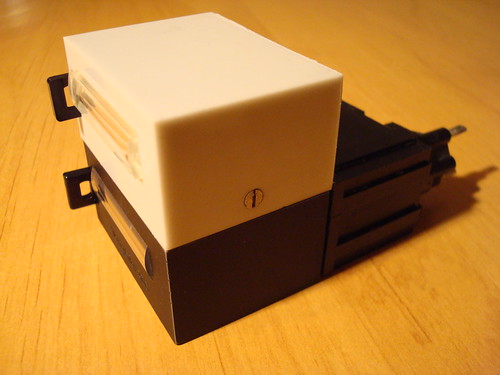
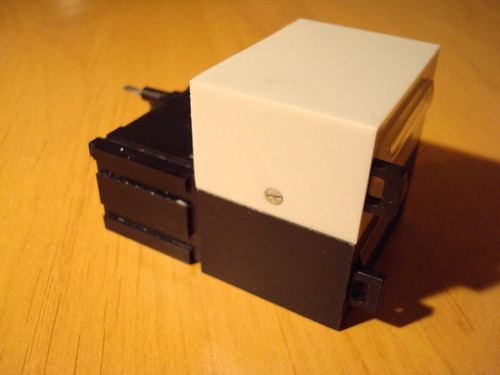
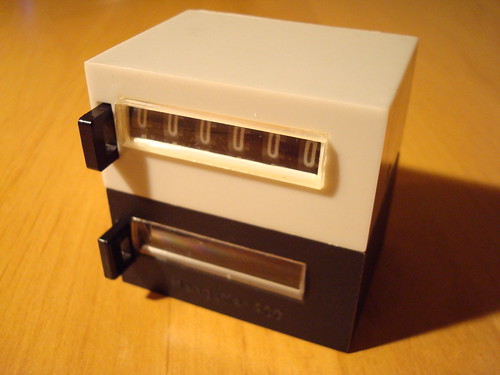
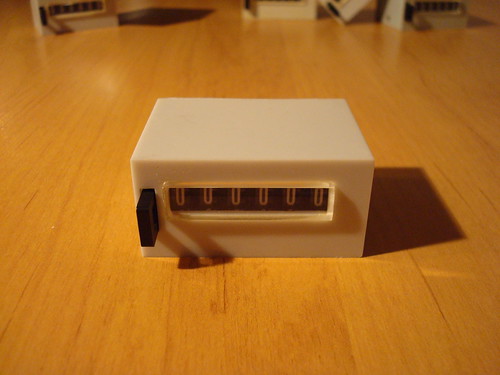
- exactly the same dimensions as the original Hengstler 400 counters
- 6 rolls, each in black with all lettering in white (screen accurate)
- can simply be adjusted to your individual numbers
- with operational reset button
- curved window (D-shape) with zoom-effect
- cover screws on top and bottom
- price is 30 Euros (upcharge when ordering a Completion Set)
- no additional shipping costs (worldwide insured shipping is included)
Just cut your resin counter in 2 halves (where the front cover meets the rear bracket) and add this adjustable counter to the rear half.
Many thanks to Dennis (Blue Snaggletooth) for his friendly support on bringing you this opportunity!
This offer is limited. First comes, first served…
Please send a PM if you are interested. -
A very nice resource for builders

Would be great if some high res pictures or detail shots could get added...
-
Thanks Rick and Damian.
-
Ah - a familiar face
 Hi Bas
 -
If you search for nice details to make your E-11 build more realistic, you might get these problems:
- time consuming research to find (and get) the accurate stuff
- you’ll often have to buy complete bundles/boxes just to get one single part
- several orders will cause multiple shipping costs and delays
With the “E-11 Completion Set” for resin blasters you get a lot of extra parts in just one step:
#01: accurate hex screws for front muzzle and grip (with crosshatch pattern)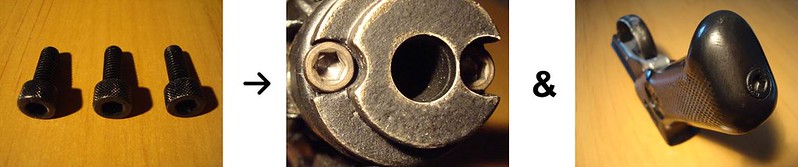
#02: small grub screw for front sight
#03: accurate aluminum stripe (correct thickness, long enough for scope rail, counter holder and front sight pin)
#04: small screws (2 pcs) for scope front
#05: small screws (3 pcs) for scope front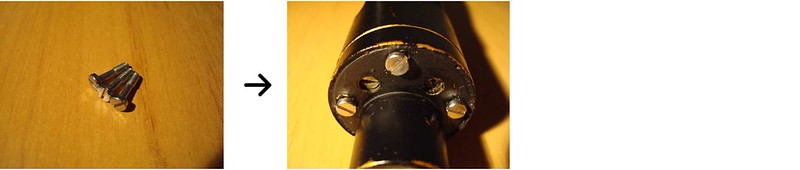
#06: short mounting screws (5 pcs) for scope (2), counter (1) and folding stock (2)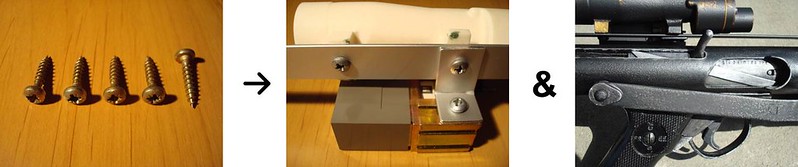
#07: long mounting screws (2 pcs) for more stabilization to magazine receiver port
#08: medium mounting screws (2pcs) for front lock of folding stock and more stabilization to the handle
#09: small brass screw for counter or scope rail mounting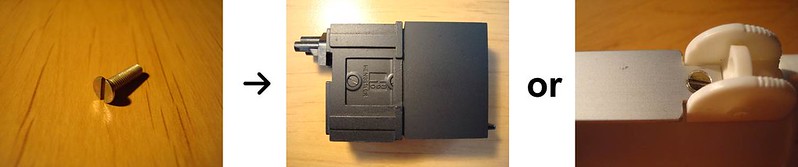
#10: accurate screw head to replace the screw in the grip (LOCK/FREE)
#11: flat head nail for a movable trigger (you will also need the spring from a ballpoint pen)
You can use the front end of the nail for the selector switch
#12: accurate steel wire (correct thickness) to create inner spring (see Sterling reference pictures for amount of visible coils)
#13: accurate metal ring (some layers of insulation tape will avoid sounds in end cap)
#14: accurate aluminum channel to modify your end cap clip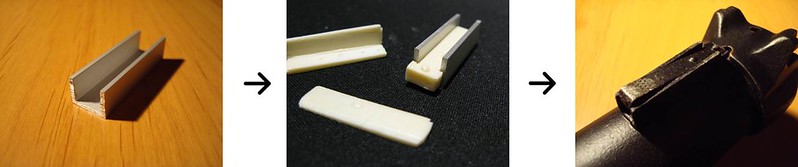
#15: big grub screw for magazine receiver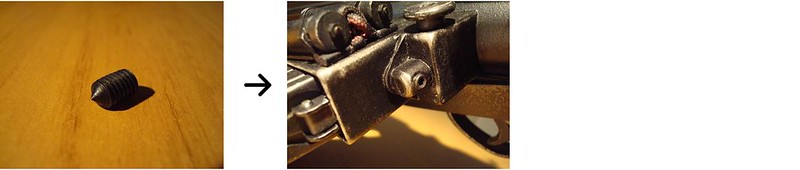
#16: LED head and foam to fill your magazine body and make the little button pushable
#17: plastic tube for inner bolt (perfectly fills the inner barrel of a DoopyDoo’s full resin kit; not recommended for pipe builds because of the wrong diameter)
#18: aluminum tube to create an inlay for the folding stock
#19: thin ABS plastic sheet for repositioning of clearing strip and to add wing stubs on power cylinders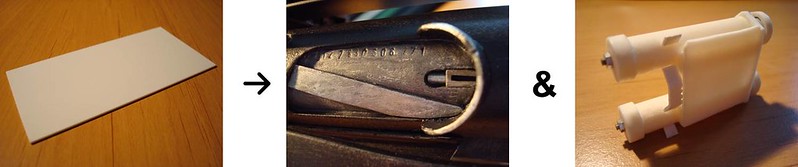
#20: original 10BA nuts and bolts from the UK to correctly upgrade your power cylinders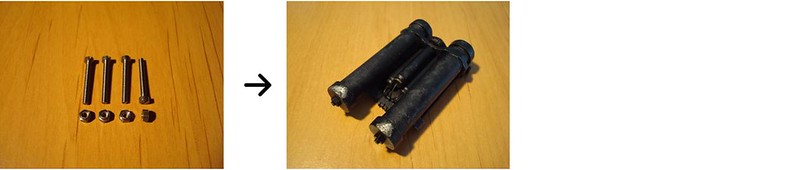
#21: accurate aluminum cylinders and wire for building the central capacitors
#22: red textile insulated wire for the rear side of the power cylinders
#23: green stuff (7 cm) two-component epoxy modelling clay (might not sound much, but if not wasted it will be more than enough)
#24: super glue (2ml) less is more…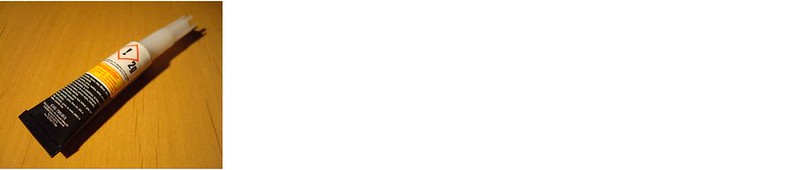
#25: cable ties (3 pcs) to provide tight pressure when gluing parts to the receiver
#26: a bit of real rust powder to add aging and weathering to your blaster (less is more)
Price is 32 Euro. This includes PayPal & worldwide insured shipping. (30 Euro in Germany because of cheaper local shipping).
Will now also accept payments in USD and GBP. Please send me a PM when you’re interested.
If you also want accurate details for your resin counter, have a look at the next posting.
Feel free to ask any questions and/or check out my E-11 build to see, how most of these parts got integrated. -
Don’t know if this has ever been discussed anywhere, but could it be possible, that a Renault car logo was taken to vac-form the sniper knee plate?
In the early 1970’s Renault had changed its logo as you can see here:
So when the TD suits were in production, that logo already existed on cars.
Compared to the TD knee plate it just looks a bit wider, like if the original was cut in two halves and some little pieces were added to top and bottom.
Then filled the surface to get a smooth result. (picture of sniper knee taken from the CRL)
Is there any confirmed information about that?
-
Hello everybody,
although being registered for quite some time now, I haven’t posted much and feel I should introduce myself here.
My name is Tino, living in Germany, 38 years old, father of two kids (5 + 8).
In 2013 I started the TK journey on the FISD with an E-11 blaster build that took several months (and modifications).
Next step was my TK (Troopermaster) and when it came to light weathering, that was the first time I had a bit of that feeling, which you all here will surely know and thought:
There could be more to that suit than just TK… But that has been left for the future, as an additional upgrade. So, maybe some day I will do a TK-TD conversion.
In the meantime I am offering Completion Sets for E-11 builds and currently working on some other nice things for the community…
As my TK was just meant as a display, I am not aiming to become a 501st member - but you never know what comes your way…
Best regards to all the dirty ones here (wow, there are much more and cooler smilies than on the FISD
)Tino
-
Very cool. Looks like comming straight from the battle on Hoth...
-
Very interesting weathering, makes the parts really look like metal.
May I ask you to let us know, how this was done? Dry brushing? Dabbing?
The only thing I wonder about is the weathering on the T-tracks. Is that correct?
-
That guy really seems to be an artist in what he does...
-
Noel, Vince already won that bucket a week ago.

Have fun with it, Vince - and post pictures.
FS: Completion Sets for E-11 kits (like DoopyDoo’s full resin kit) incl. worldwide shipping and PayPal
in Closed Project Runs
Posted
All conversion counters are gone.
Completion Sets V 1.9 are still available.