

TrainWreck
-
Posts
277 -
Joined
-
Last visited
Content Type
Events
Profiles
Forums
Posts posted by TrainWreck
-
-
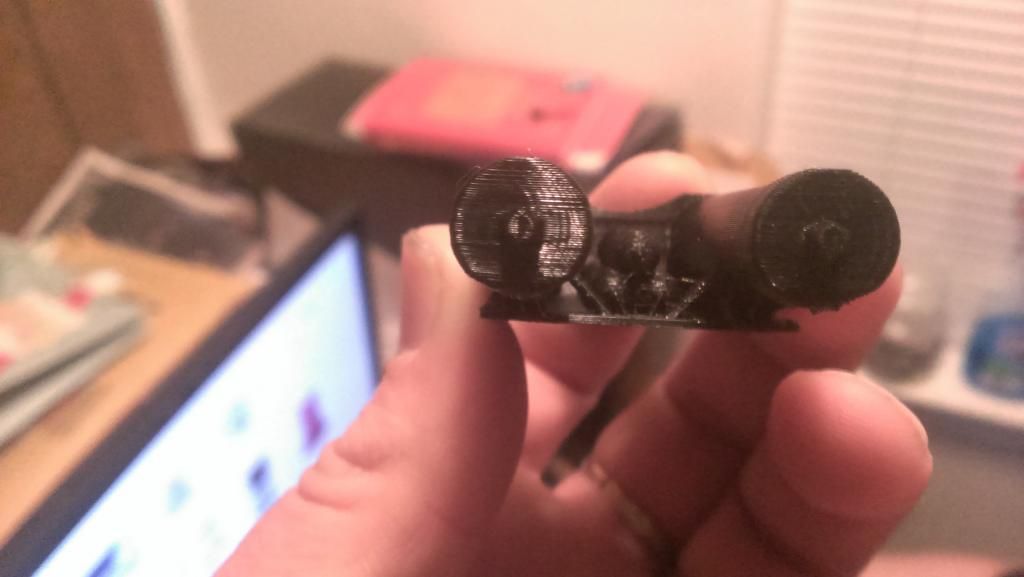
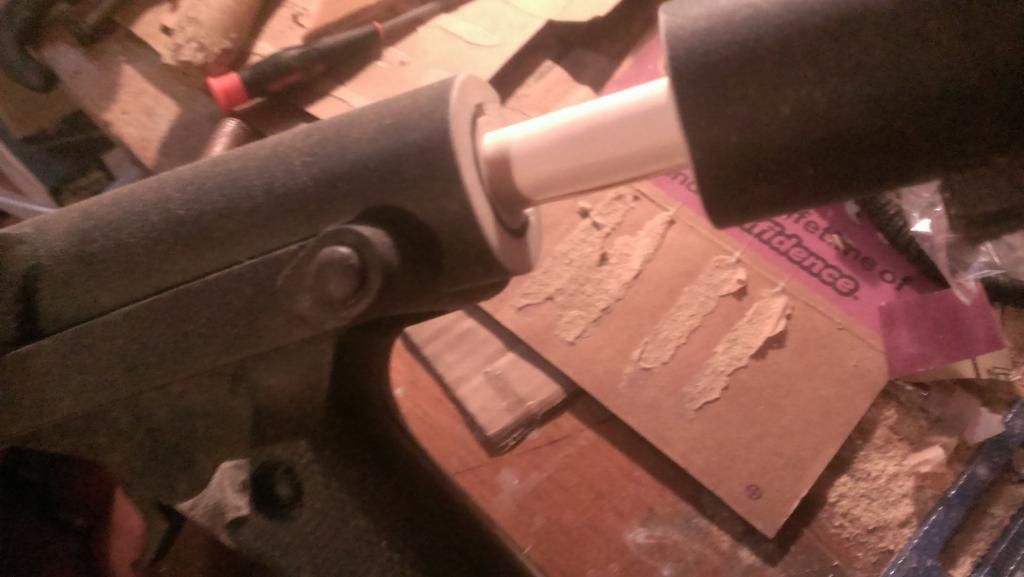
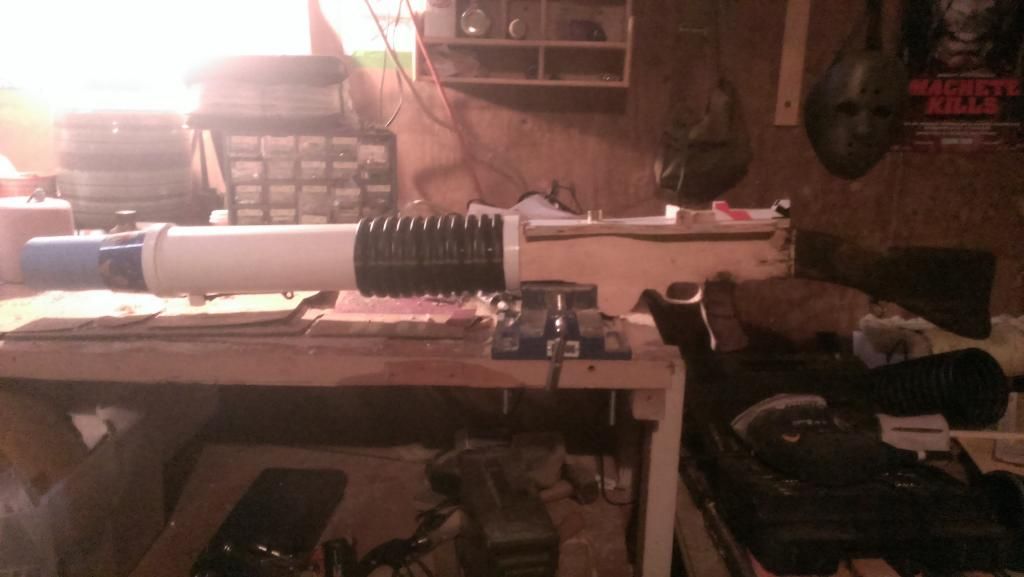
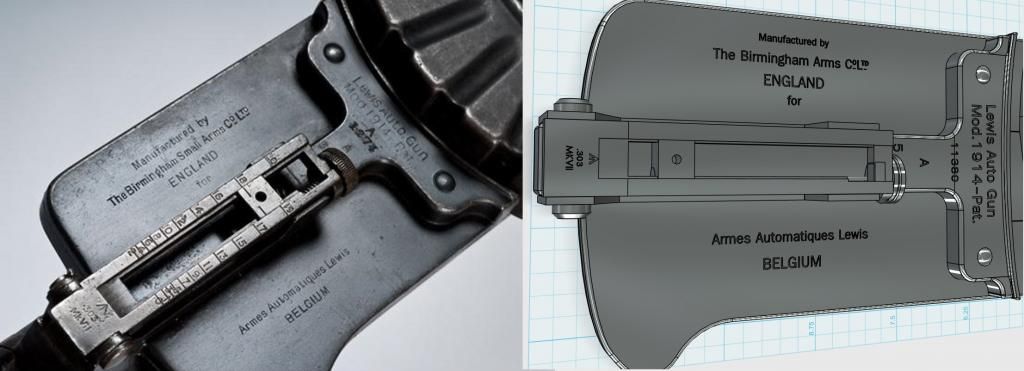
OK just a quick update. I have all the pieces of the receiver plate. There is going to be some definite sanding, gluing, and detail work in my future, Hopefully it will be warm enough this weekend to work with the 3D print epoxy and see how that goes. At the bottom are some photos of the "big"power cylinder by the new one, and some close ups of the first one to give an idea of how the raw surface looks. I'm definitely going to need to add real bolts, nuts, and wire since none of the small details printed well. Also the lettering on the plate didn't turn out well at all so I am scraping that part entirely.
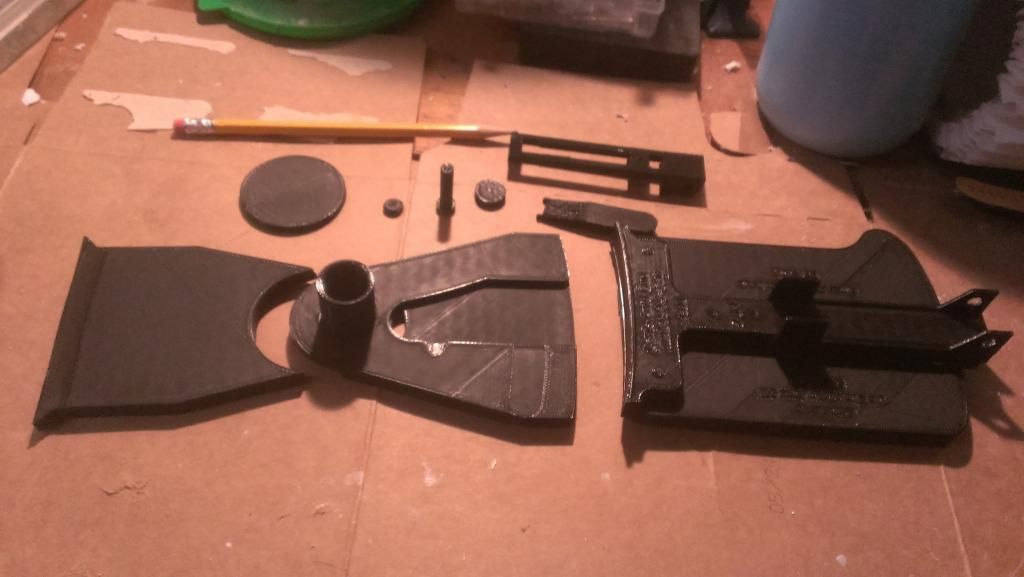
I call this my "power cylinder by H. R. Geiger..."
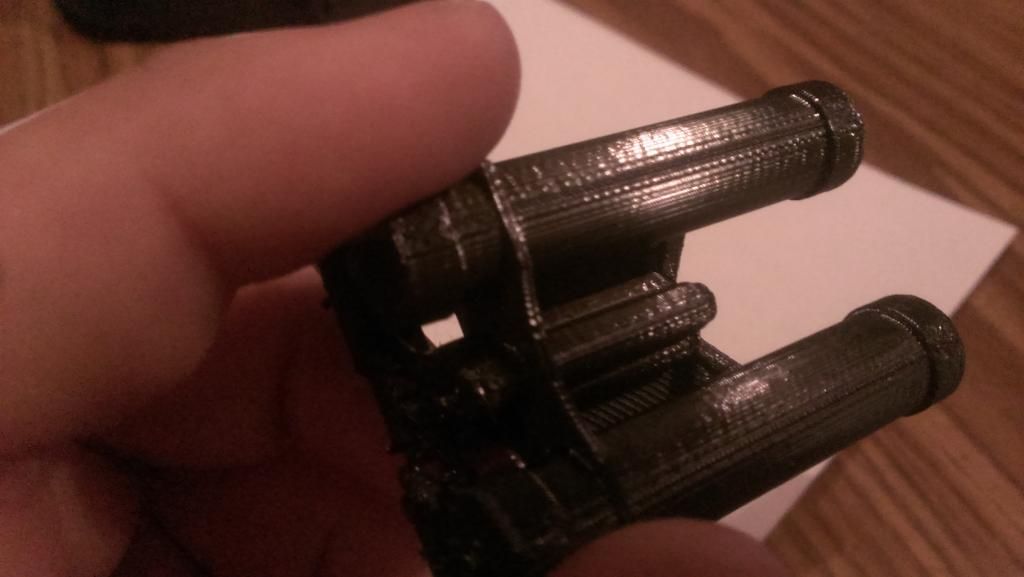


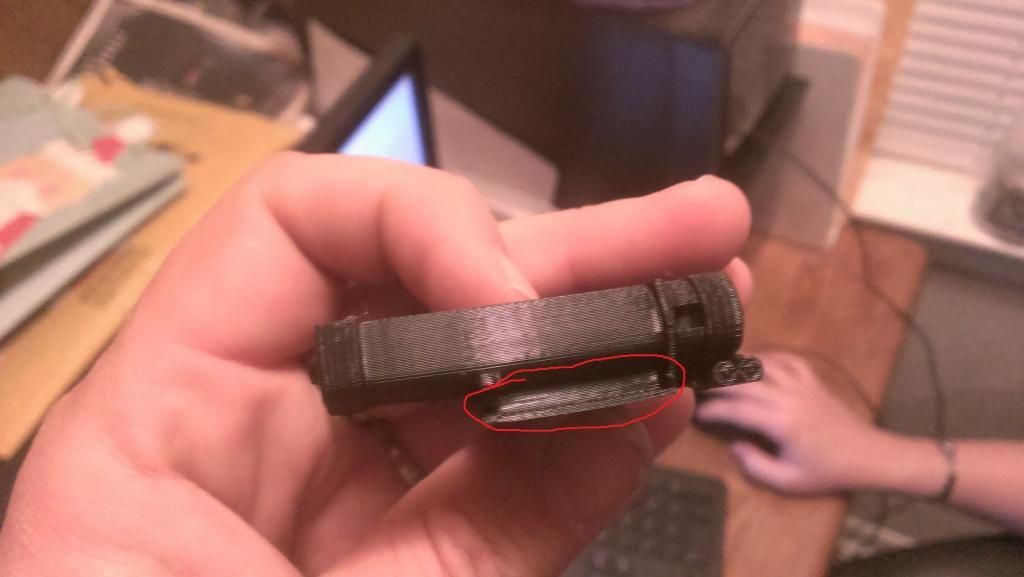
Also a quick note. in the next picture you will see that the area in the red circle where there should be space is full of plastic. This is because the printer can not print over thin air so it creates stands to print on. they are very thin and are designed to be broken off or cut out. That of course is all part of the clean up and finishing work on the print.
Speaking of which, I'll try to over document the next phase of all of this so until then!
-
I'll admit I redid my tube stripes about 5 times before I was happy with them but it is satisfying to paint them.
-
-
Milliput is my friend to....
-
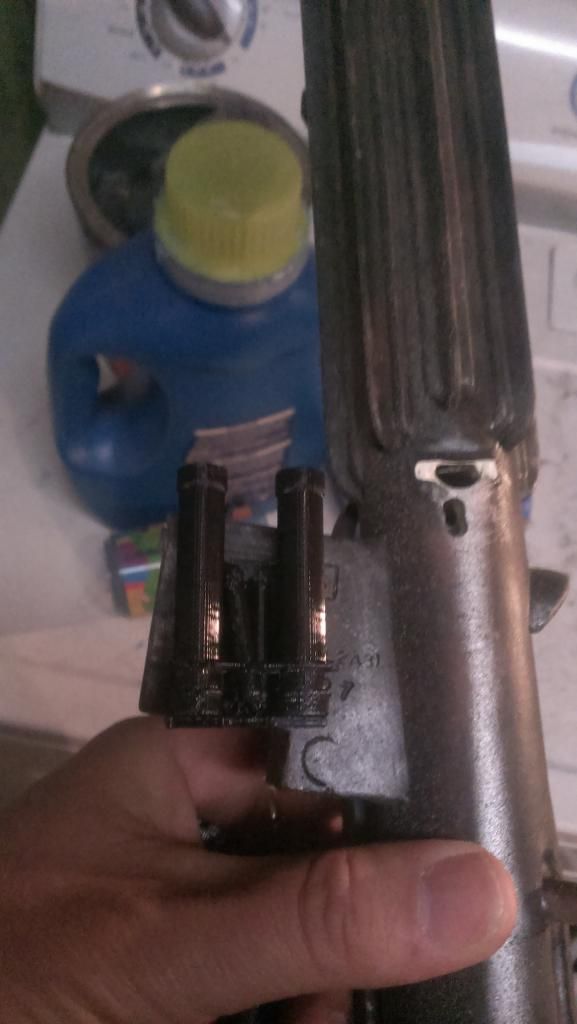
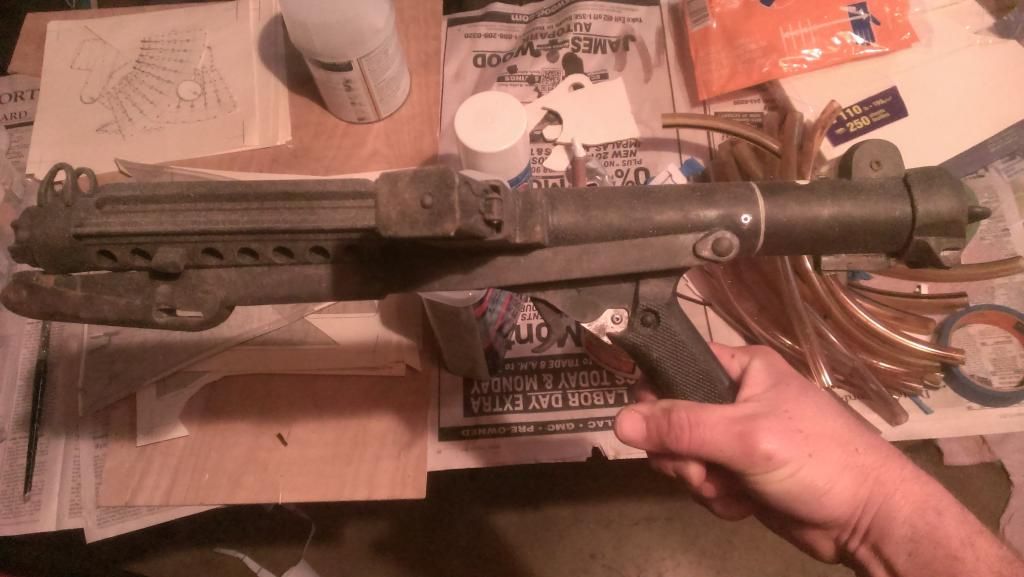
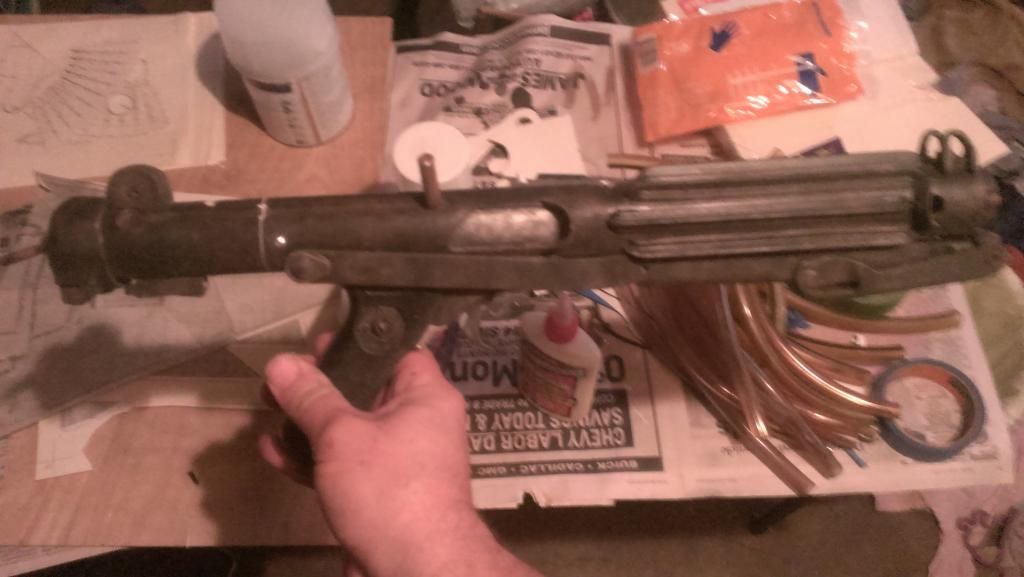
Just a quick update. I got the first prints back but there was an error. So I have a 6"x13"x6" space to work with. I had multiple objects in each file trying to conserve space and print time. Well it only printed one object from each file. So I currently have the center of the lewis plat, the rear sight with out all the pieces to put it together, and the ideal power cylinder. I have the issue corrected with the library and he said he would get on printing out the rest of the files. I spent an evening IMing with Dark CMF about the power cylinder. It's a little to big so I have re-sized it using measurements off of Dark's E-11 and just ordered a smaller Tunisian for myself for now. First impressions is it worked but they are going to need a little work with the 3D print epoxy, sanding, and some exacto work. Also the really small details like the wires and nuts on the power cylinder and the small lettering on the rear sight did not come out very well. The power cylinder details can be corrected with real nuts, bolts and wires. Not so sure the lettering on the Lewis plate is going to end up being a good idea but I won't know until I see the back of the plate.
I'll try to get pics up later this weekend. Until then!
-
*sigh* getting my hands on a real M39 is on the bucket list. I just have too much money sunk into too many projects to justify it (to my wife 😉). I'll totally keep you in mind if and when I get to that point.
-
Hey no problem. Go ahead and send me a set and I promise you I'll put them on there. 😁
-
So I am starting a full Bapty conversion after all on Love Child. I still have A LOT to do but this is where I am at so far:
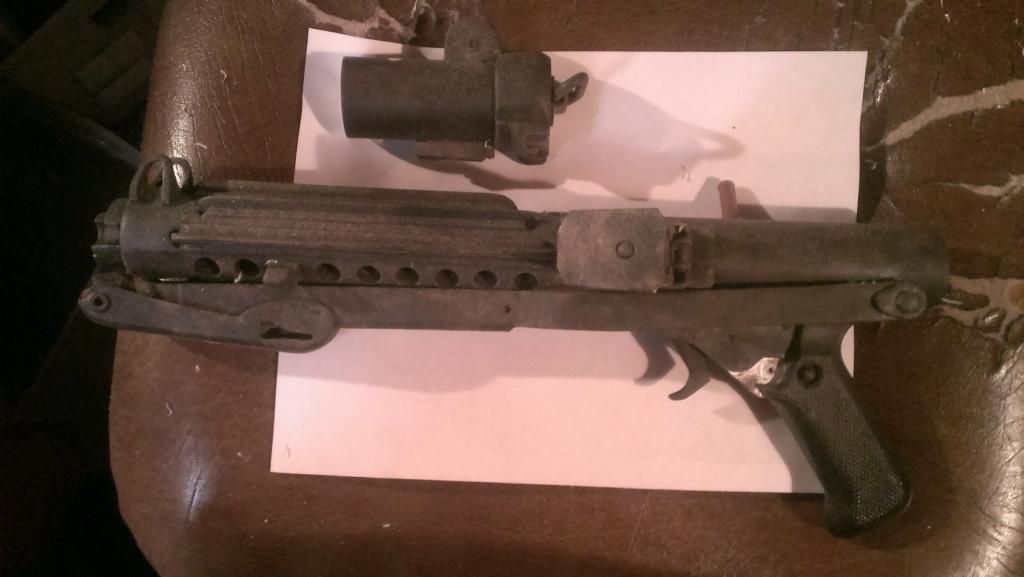
I've definitely got a lot of bondoing in my future. I have a new resin counter box for it, new scope coming from doopy, going to 3D print myself a power cylinder and make a new sight rail. Oh and I still have to get the trigger and magazine out and put in a new trigger guard and wood block. SO MANY PROJECTS!!!
-
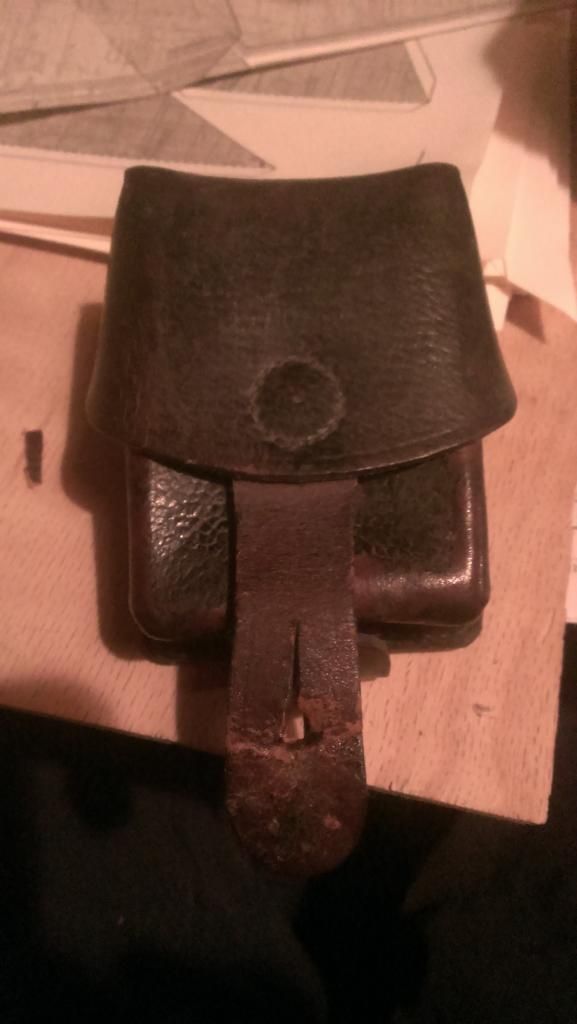
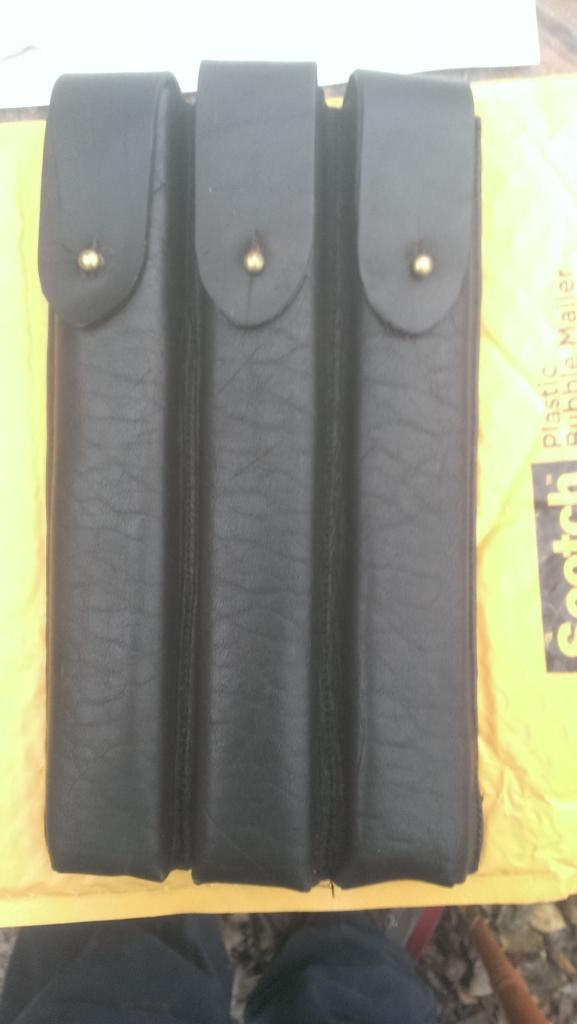
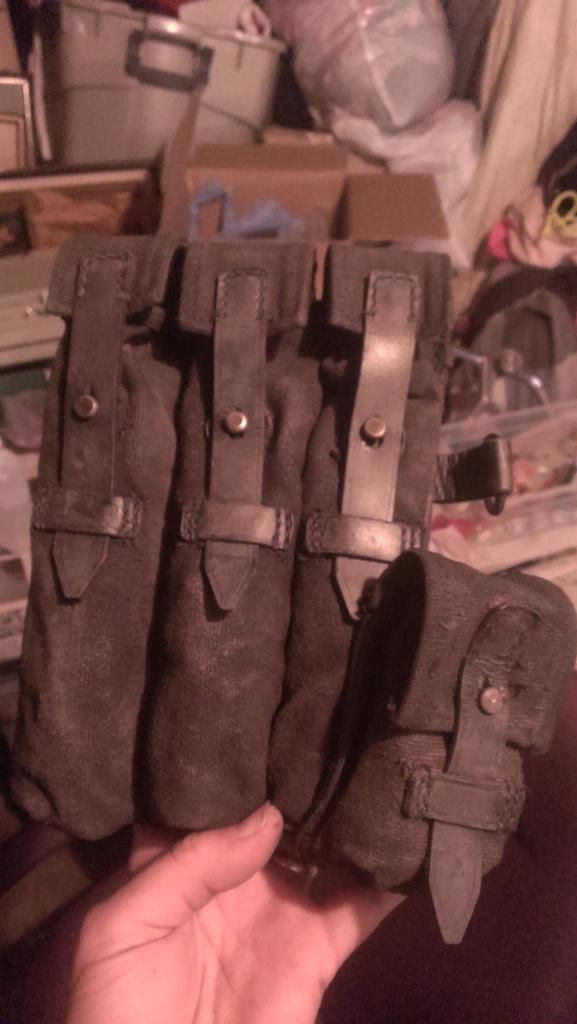
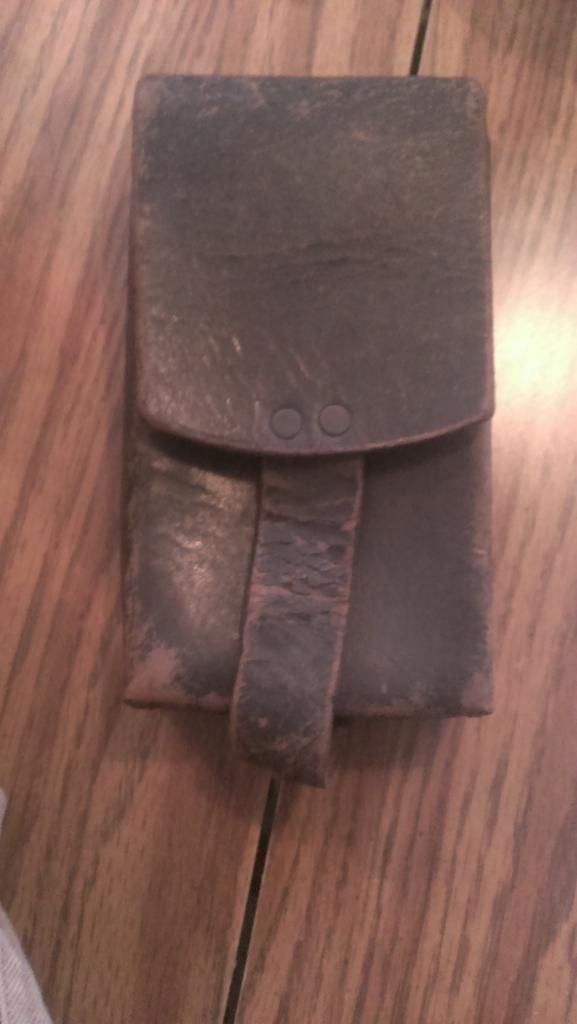
So I'm still about 2 months out from my armor but I thought I would go ahead and start this. Looking over stuff I will also have enough stuff to do the Desert version of the Captian but my bucket has already been painted and weathered for STS. I am about to just dump a bunch of photos of everything I have done and have here. At the end I will post pics of my backpack work, medium Spanish pouch (bought so I would have something bigger on me for longer troops), and the Bapty conversion I am in the middle of on my DD E-11 (I had origonaly planned to do an ESB TK when I built it but caught the dirty bug in the middle so finished it off with bapty in mind but never finished the conversion). So here it goes:

...and the first time I finished it:
...and what it looks like now in the middle of the conversion:
...and here is a list of my various build threads:
http://forum.mepd.net/index.php?showtopic=12819&hl=trainwreck
http://forum.mepd.net/index.php?showtopic=12830&hl=trainwreck
http://forum.mepd.net/index.php?showtopic=13107&hl=trainwreck
http://forum.mepd.net/index.php?showtopic=13225&hl=trainwreck
http://forum.mepd.net/index.php?showtopic=13226&hl=trainwreck#entry169160
...Aint that a mouth full...
So what do you guys think so far?
-
Still need some parts but...
How is the color blue I picked out?

-
So I had a pretty rough day at work so I'm just going to post comparison photos for now and will try to get to an analysis tomorrow. There are definitely things that could be changed around a bit. I'm still new to 3D modeling so some stuff might be beyond my expertise and some stuff might be fixable in "post."
Any way starting with the photo Vince posted:
...and this was that bottom transition I was talking about:
Hopefully over time this will get improved upon and made more accurate. I can already see a couple of easy changes I can make.
Thanks for all of the feedback and good words so far!
-
Oh yeah. I'll get a side profile of the model tonight and make a comparison photo. Thanks!
-
I'd post a pic of that transition but I'm on my phone at work. I'll have to do it tonight.
-
I think I know what your talking about. I believe if you look at the underside it actually has a curve transition that makes it part of the side details. I have been trying to figure out how to do it in such a way that it would be part of the sides and the above plate would rest on it. In reality I did a halfish version with the thin plate that you se on this. I might just end up thickening the bottom. I'll have to play with it. Thanks.
-
The only thing that I can think of was that I excluded the marks on the sight. Part of that was because I'm unsure of how the embossed lettering is going to look printed and the other was well I want to make sure they are exact and I just haven't had time to do it.
-
It's too late for this particular print but I'm sure I'll edit as time goes on. Now you have me curious...
-
Thanks guys!
-
Andy! Just want to say thanks for all of the research and work you guys did. There is no way I could have pulled off the power cylinders with out it. I'm glad you posted here. I had ment to link to your thread but apperently didn't. I'm going to correct that now (probably should link to panda troopers thread for the T-21 template as well).
Thanks for the good words! There is always a waiting list at the library so I'm expecting to see the cylinders in a couple of weeks.
-
So I recently discovered that our local library has a maker space with two 3D printers. It's cheep and all I have to do is send them the files and they print them out. I currently am waiting on my first order and am about to send off some more things. I am creating this thread so I can share with you guys the process of this journey (I will also probably be cross posting this with FISD).
So the first thing I had to do was teach myself to 3D model. I started off with a web based program called tinkercad ( https://tinkercad.com/ ). It is a pretty intuitive program and has a good set of tutorials to get you started. It didn't have a whole lot of options with how you can manipulate the primitive objects though and round surfaces don't render smooth. So after a week of that I graduated myself to 123D Design, a program owned by the same company ( http://www.123dapp.com/design ).
After watching a few youtube tutorials on it I have been rock and or rolling for a couple weeks now.
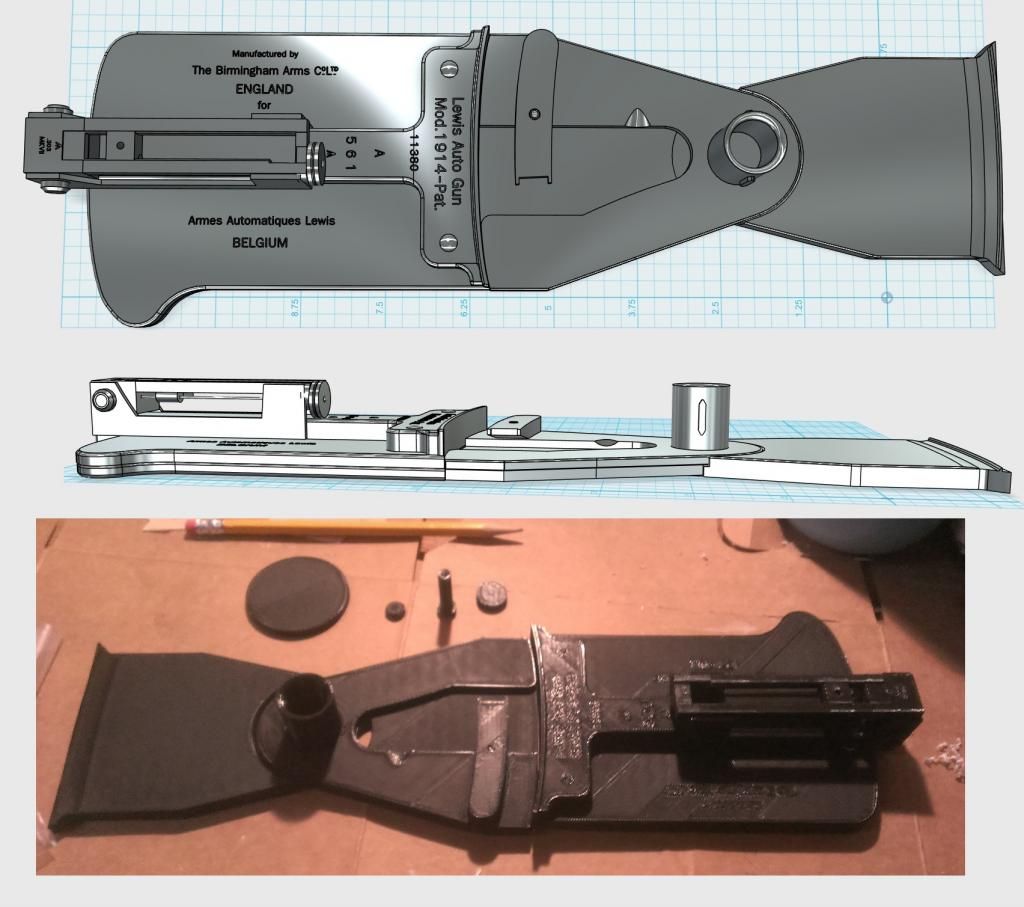
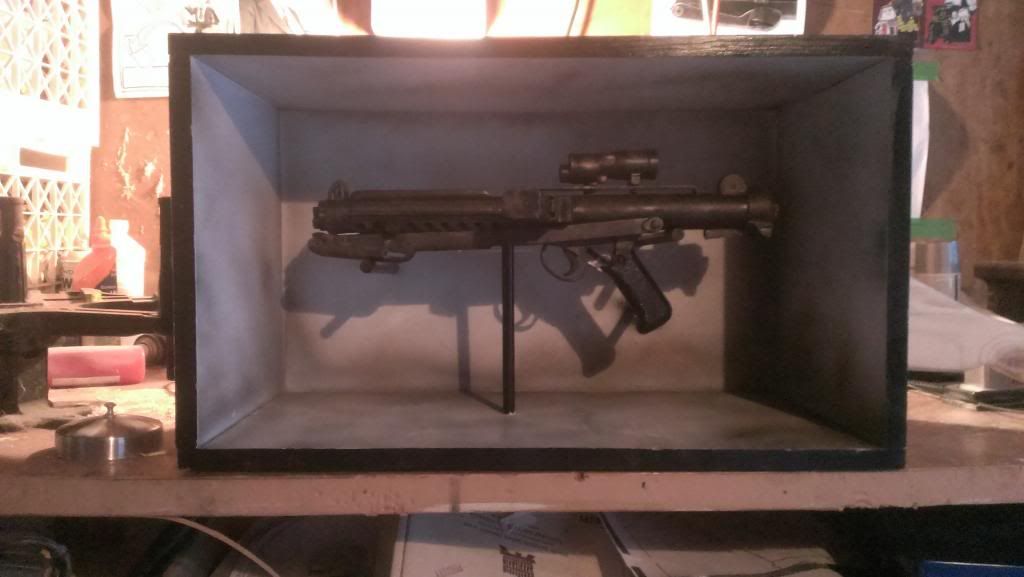
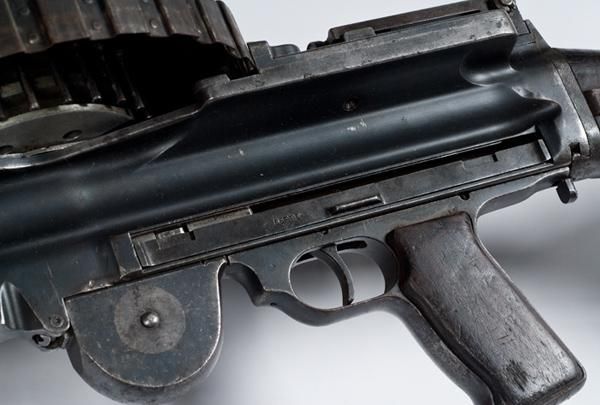
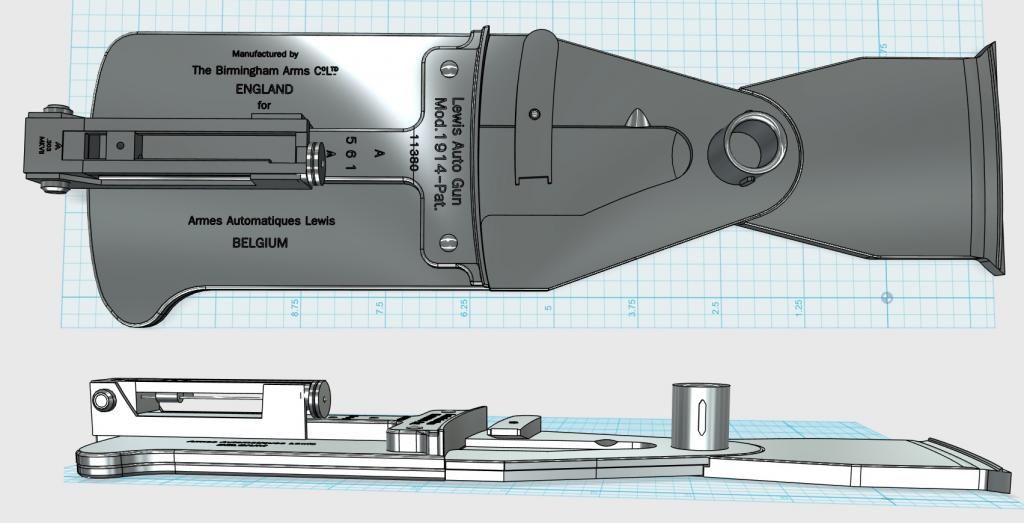
First up is the magazine receiver plate for a Lewis Machine Gun (AKA the T-21 Light Repeating Blaster).
I started off with trying to make my own out of wood and plastic but it was just not working for me. But this is!
I based this off of PandaTrooper's Template (found here: http://www.whitearmor.net/forum/topic/10313-new-t-21-blaster-template/?p=130310&hl=blaster%20template&fromsearch=1#entry130310 ) and a lot of reference photos!
 [/url]
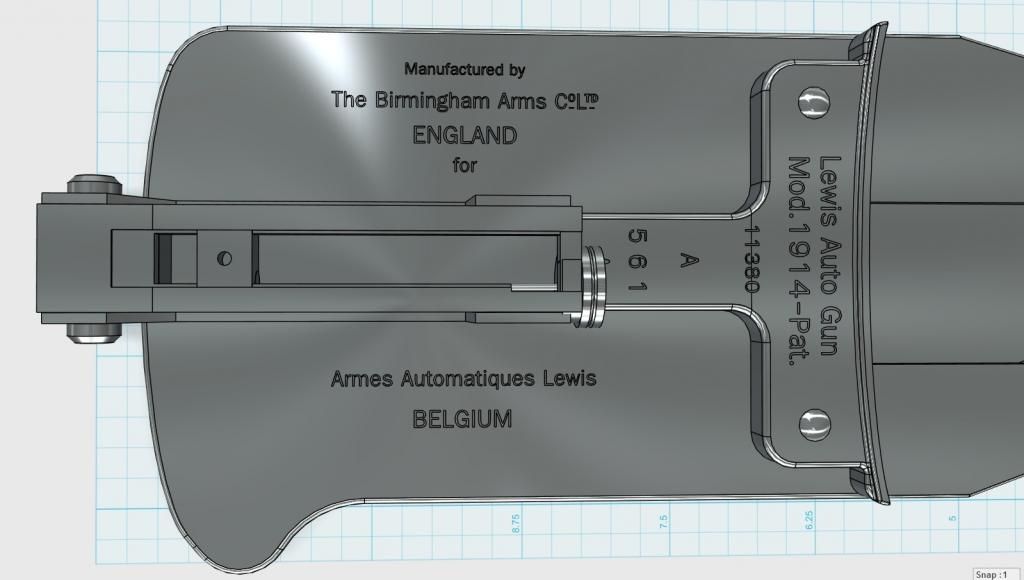 [/url]
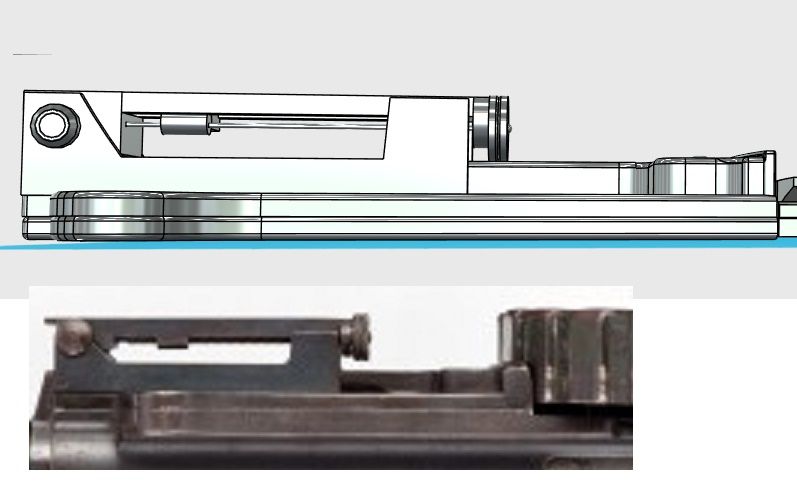
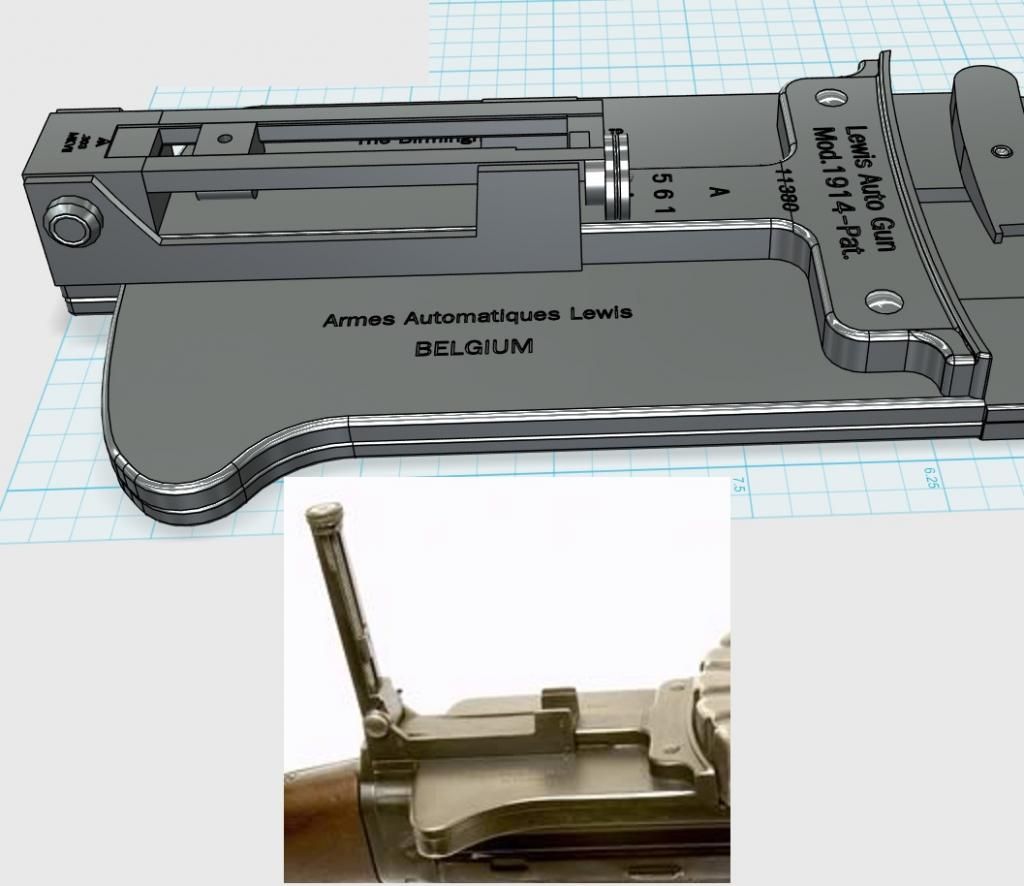
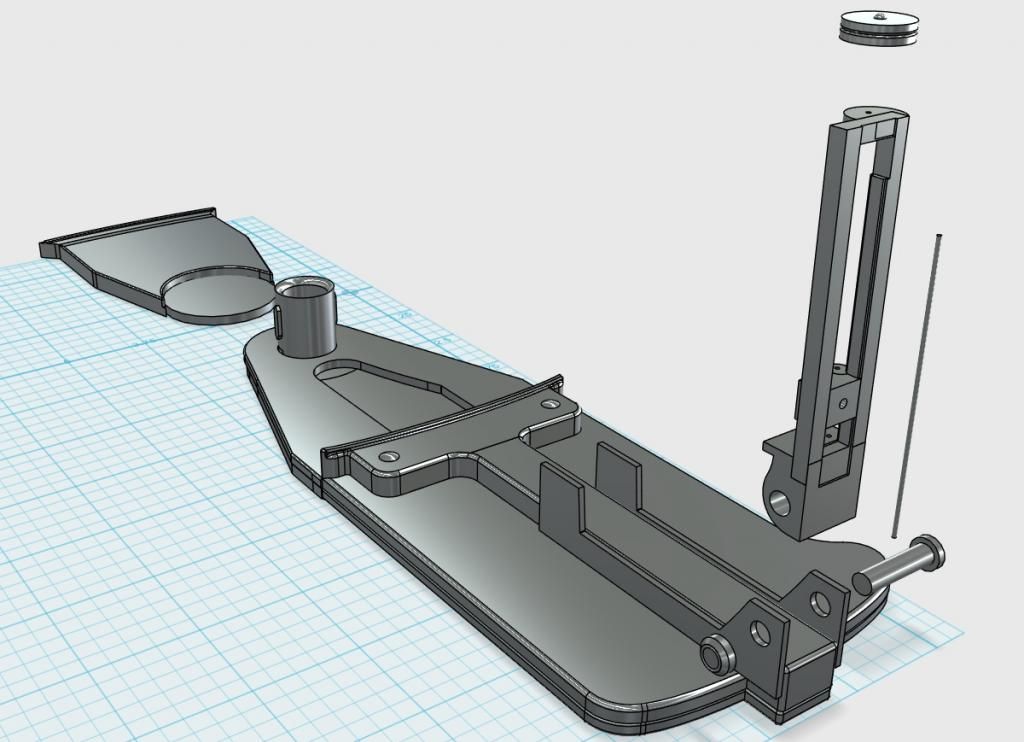
Now in order for the rear sight to work I am having it broken into parts that will print individually (plus the plate is too long for the printer so I have to print it in two pieces).
This is an exploded view of the plate to give you an idea of what it entails.
 [/url]
This is what I currently have submitted to be printed.
I'm planning on modeling the cooling fins and side details of the gun as well and possibly the sloped transition into the front barrel with the front sight. A sort of pipe build kit if you will.
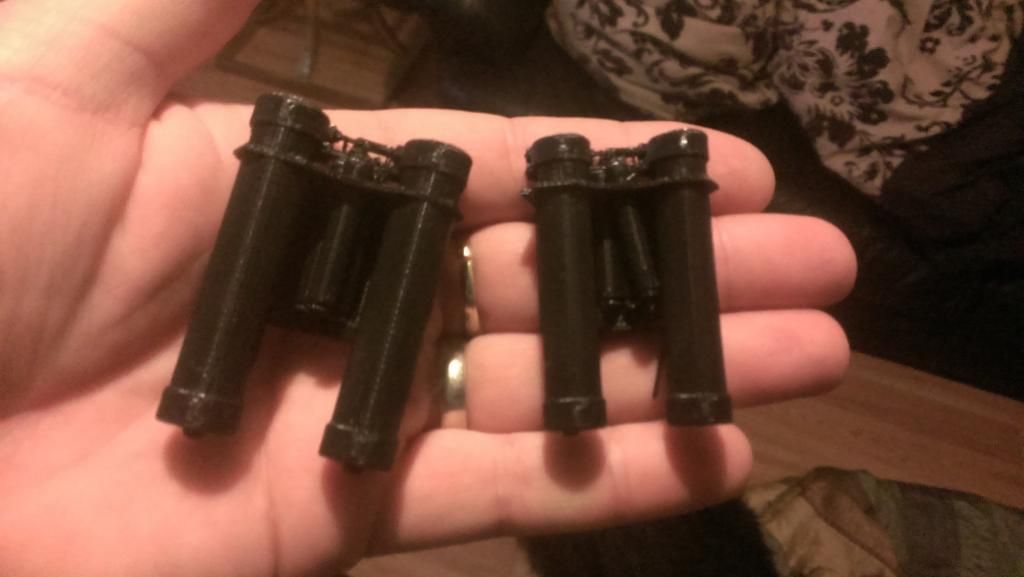
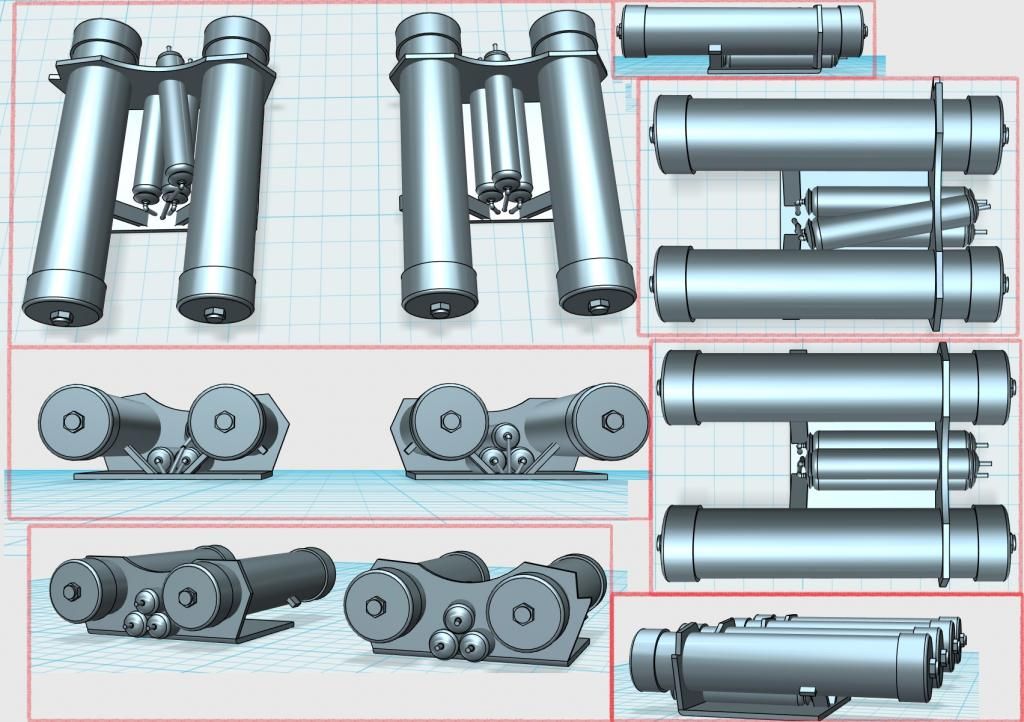
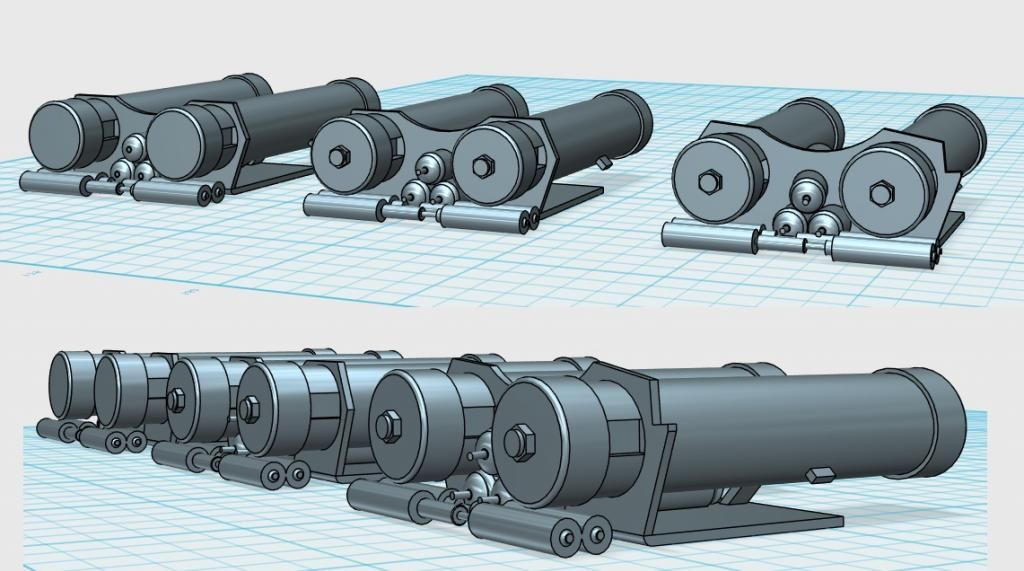
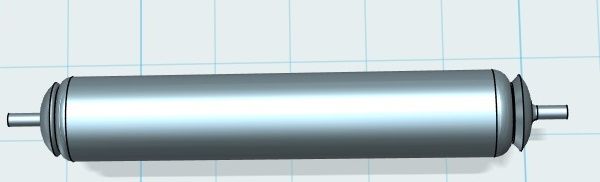
Now on to power cylinders for the E-11.
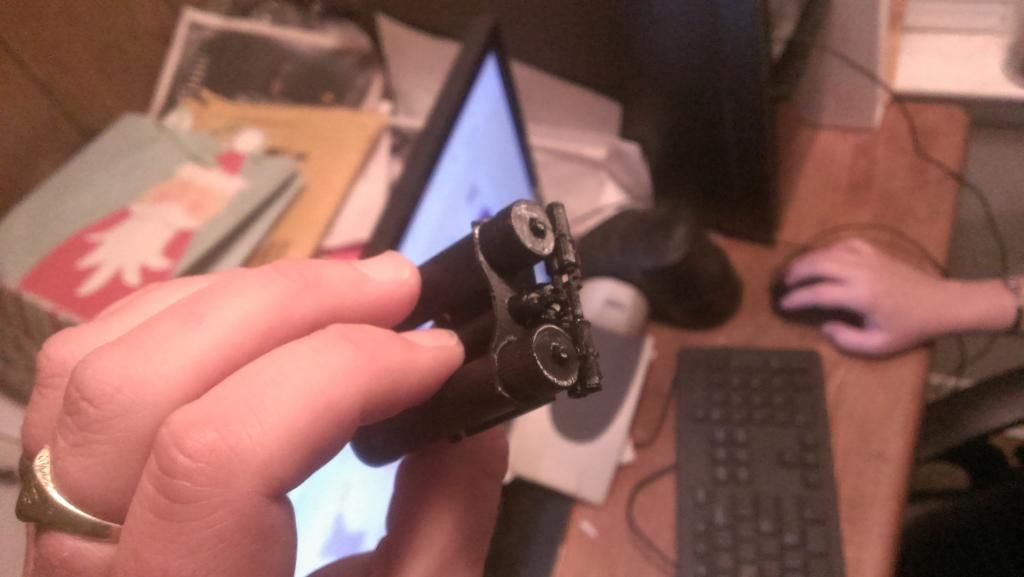
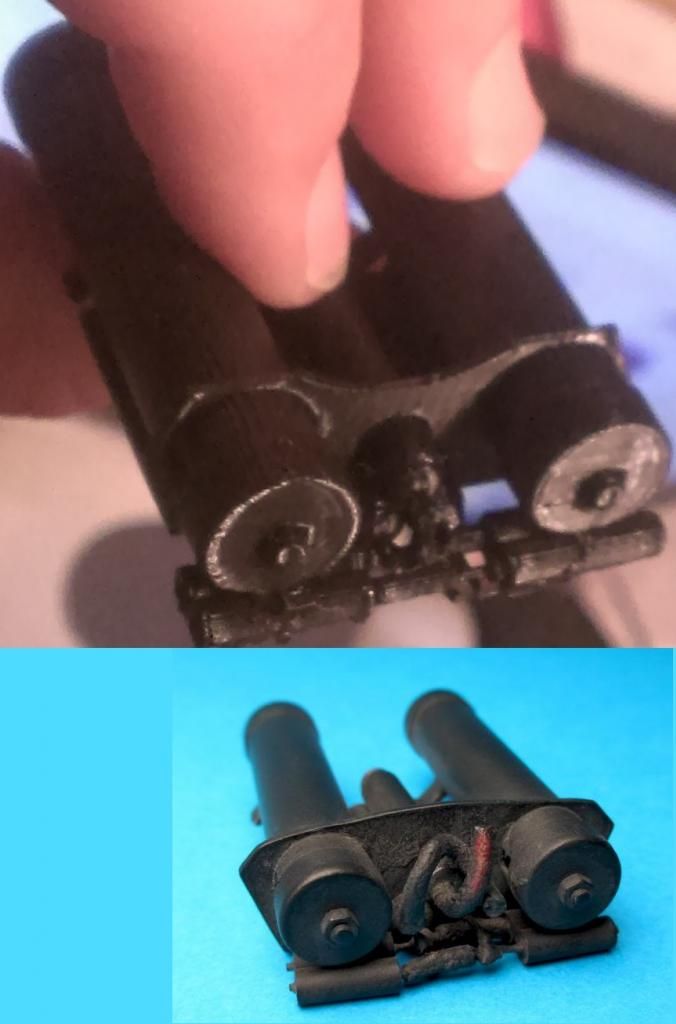
I dived into the Power Cylinder Research Thread (check it out if you haven't read it http://www.whitearmor.net/forum/topic/17306-e-11-power-cylinders-research-thread-renamed-from-3-central-fuses/ ) and got enough measurements and reference photos to model them today. I built three different ones. Since I'm going TD I made a a Tunisian one for my Bapty conversion (Type D). I also made an "ideal" one (type A) and an ideal one missing the bolts and wires so I can attempt to put real ones in. I'm still messing around with the wiring in the back but this is what I have so far.
 [/url][/url]
This will probably be the only thing for an E-11 I'll make (though I've been toying with the idea of doing ESB greeblies as well).
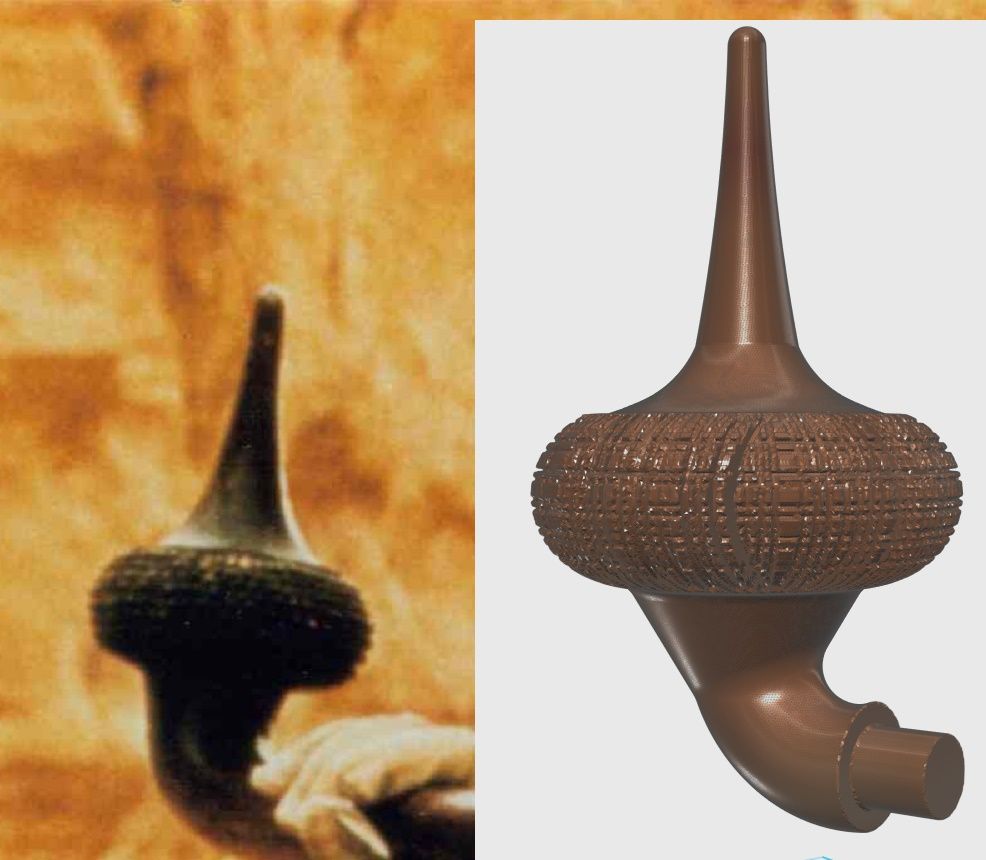
Though not storm or sandtrooper related I've also been working on a pineapple gaffi head and mask greeblies for my Tusken.
]
 [/url]
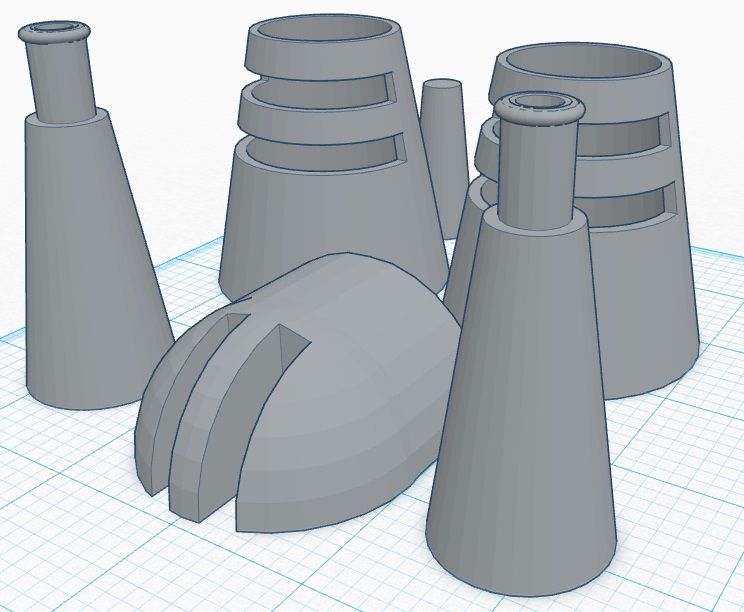 [/url]
That last photo was an example of what can be done in the first program mentioned, Tinkercad.
I will probably also be attempting a radio face plate for a TD pack soon as well.
As I get parts printed I'll post pics of me working on them.
Thanks for checking this out!
-
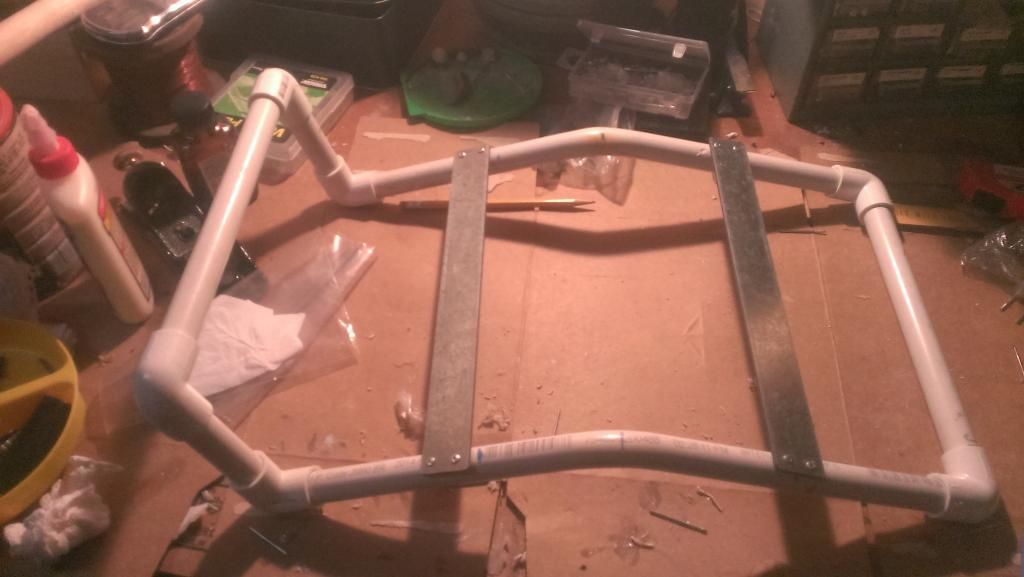
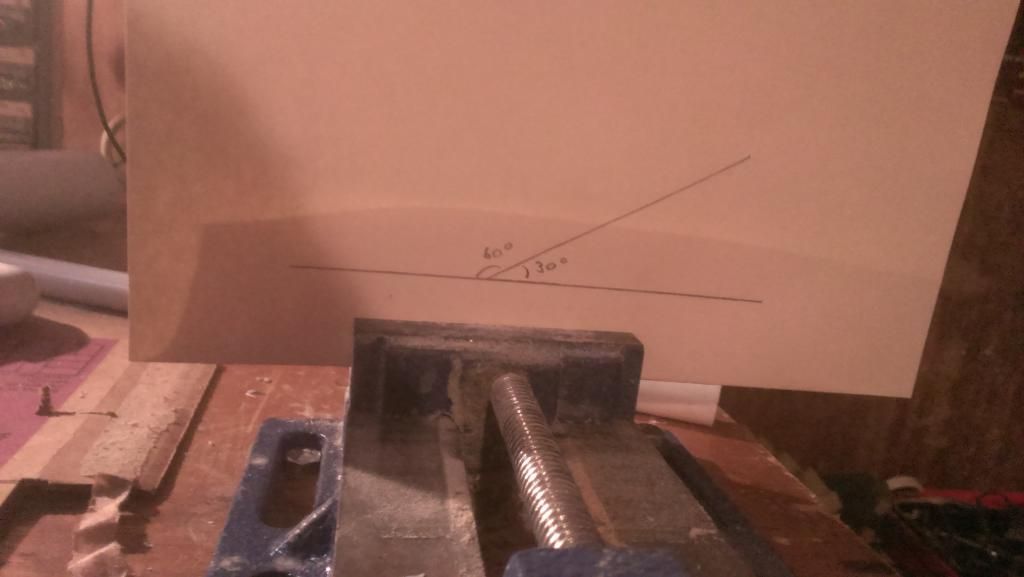
So even though I'm going for the "Stop that ship" trooper I of course will need a backpack for police deployment. Since it's not needed for SWAT I have the luxury of picking which back pack I like the best. That would of course be the filter pack. For this I'm using Scootch's excellent thread as an over all master plan (found here: http://forum.mepd.net/index.php?showtopic=5225 ) and will be using Pandatroopers various builds as reference for some of the parts.
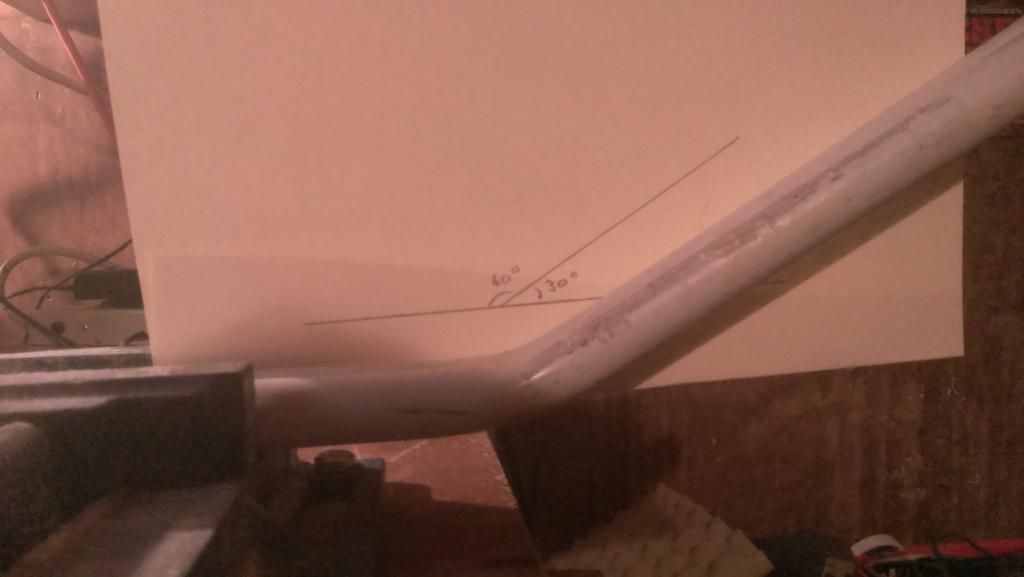
I started out cutting out all of my PVC and cross bars and assembling the frame:
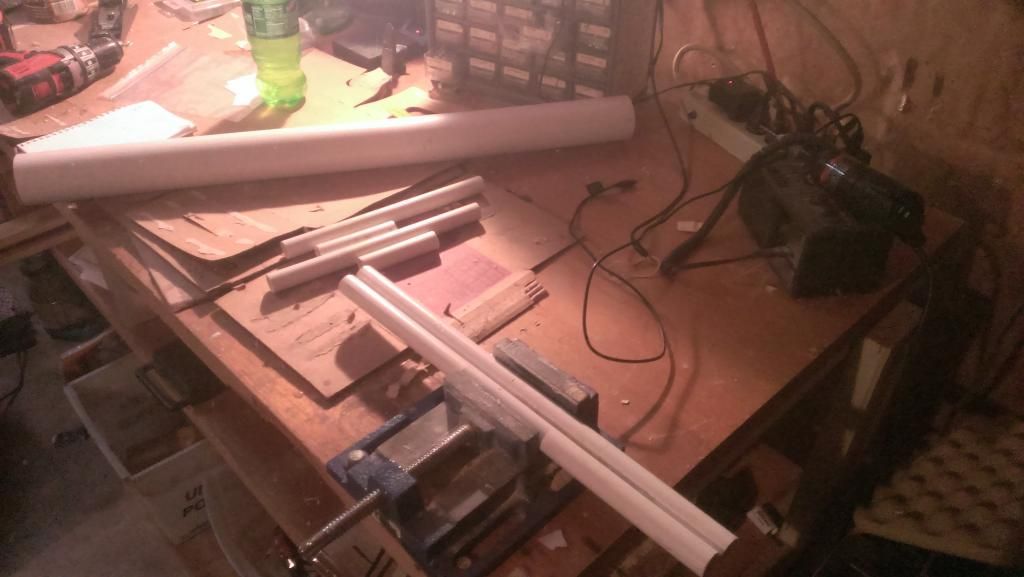
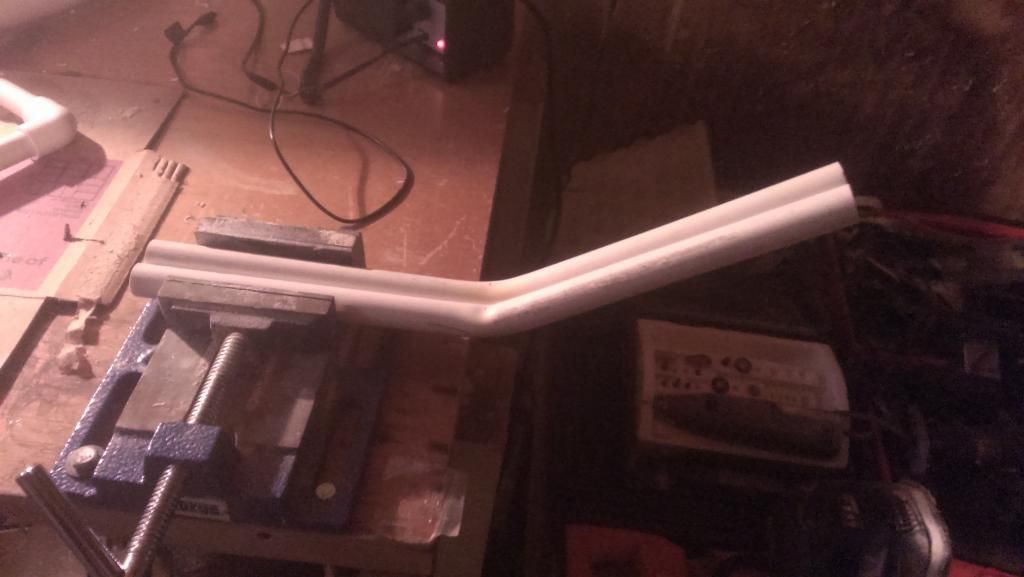
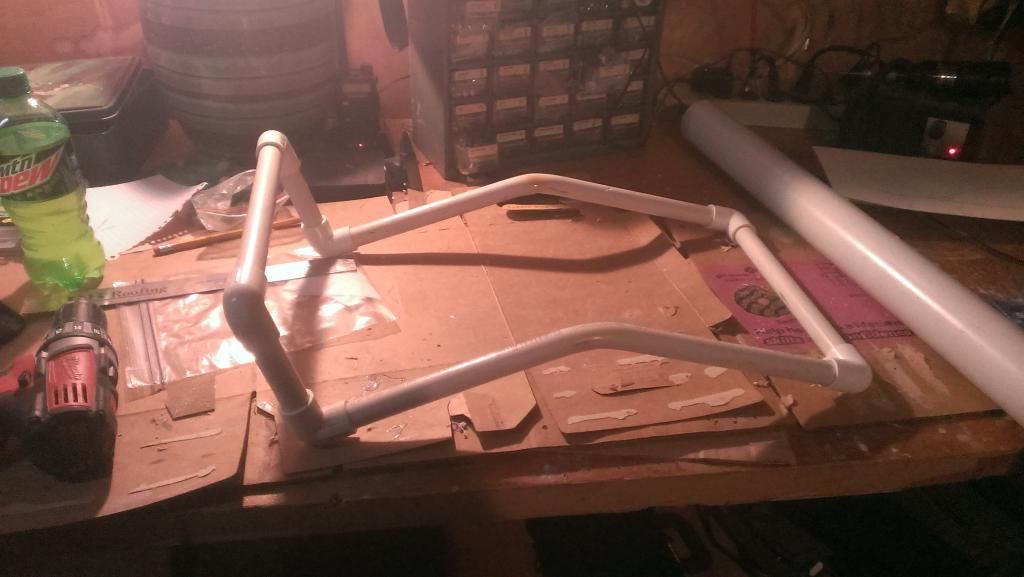
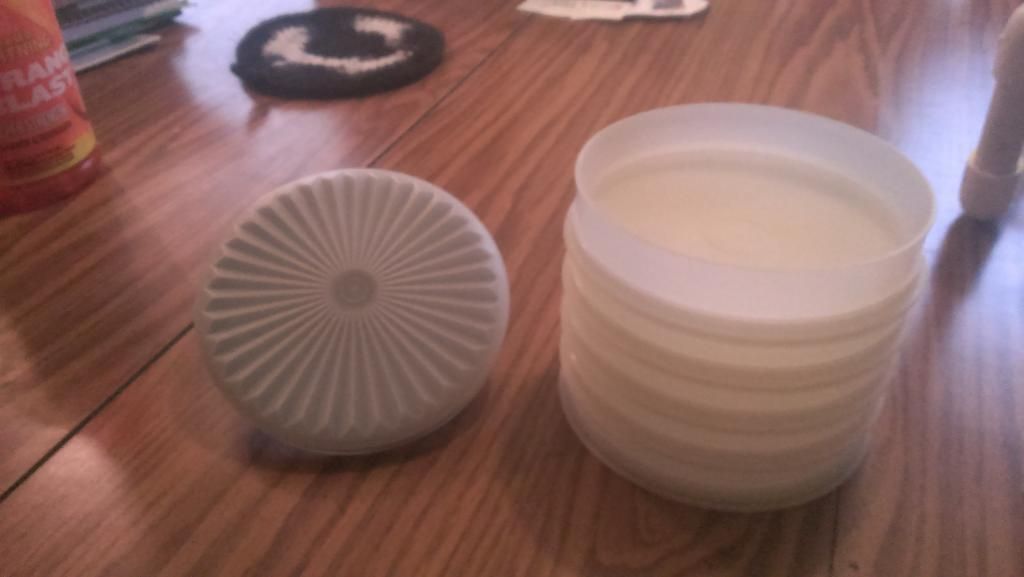
I'm slowly assembling parts as well. Note that not all of the parts in these pictures are going to be used. The filter I bought was too large and an attempt to mod it made it too short, and I am not going to use the end caps on the mortar tube (also ignore the yellow bins in the background).
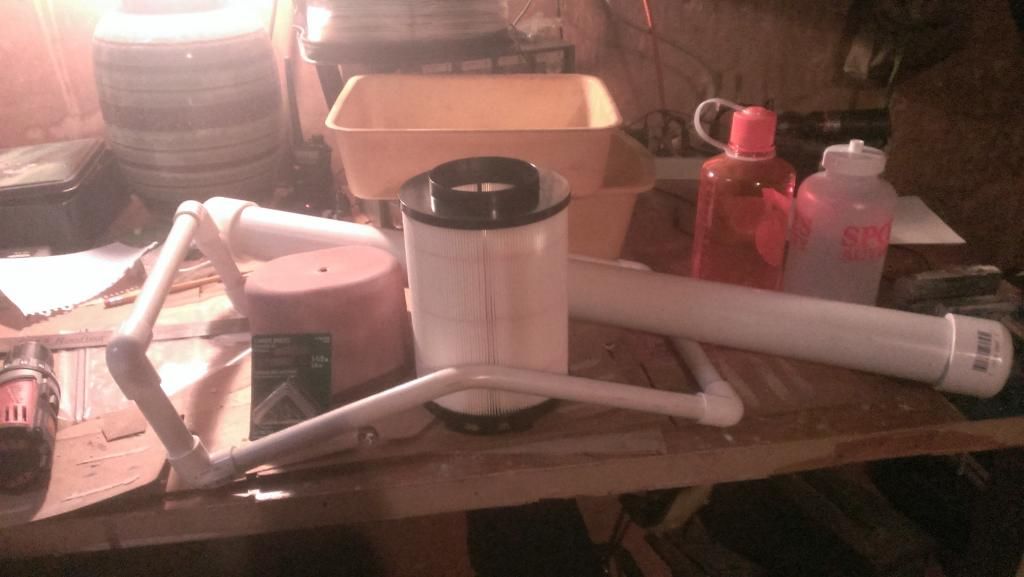
I have pudding cups and a thermal detonator from MonCal on the way. I still need to order the toilet siphon, bottom for the bee stinger, Tupperware stow n' go, make or find a filter, tube on the opposite side from the mortar tube, and I'm going to model and print a radio face plate (did I forget anything?).
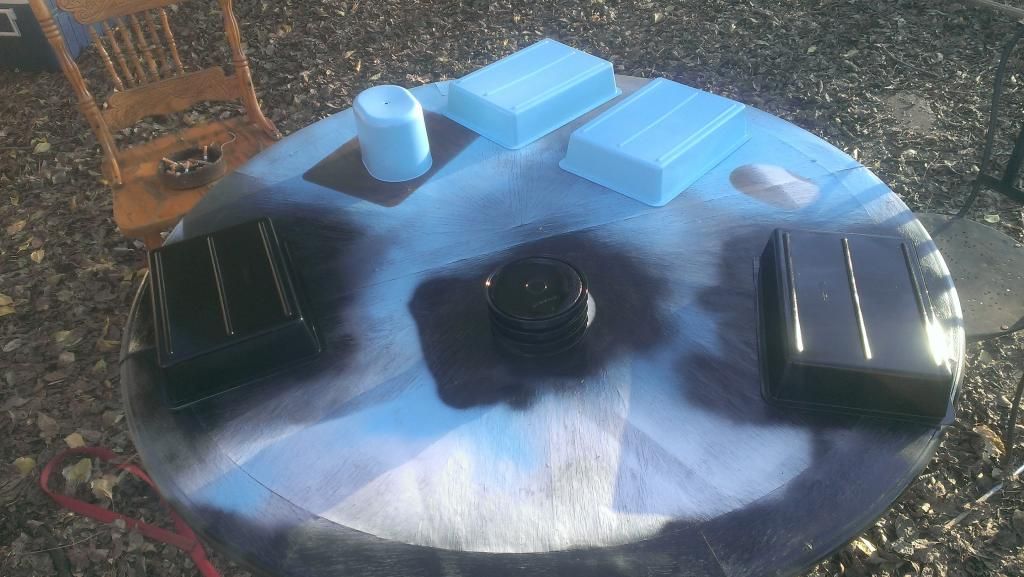
I went ahead and primed what I have this afternoon:
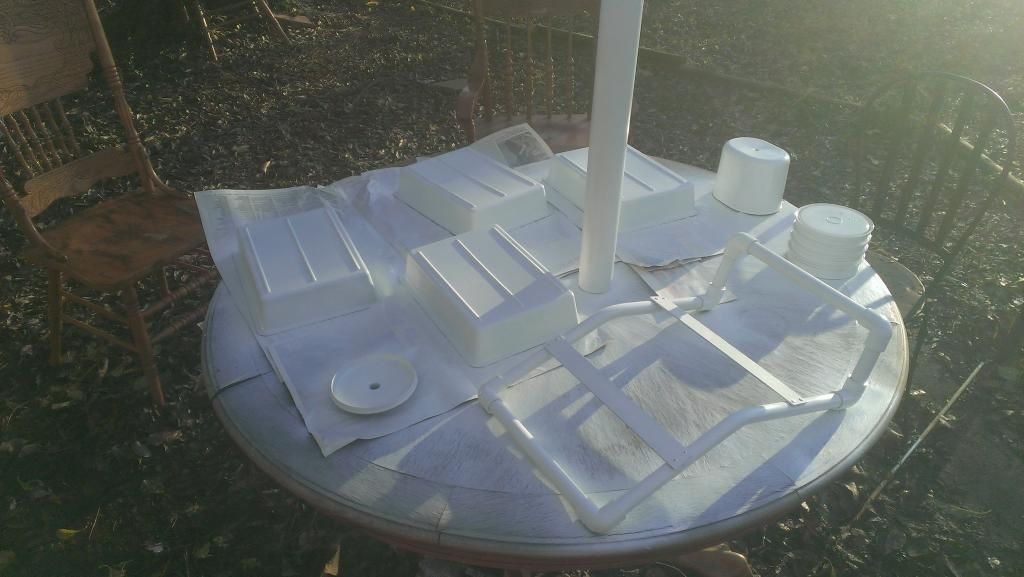
More to come!
-
Thanks!
-
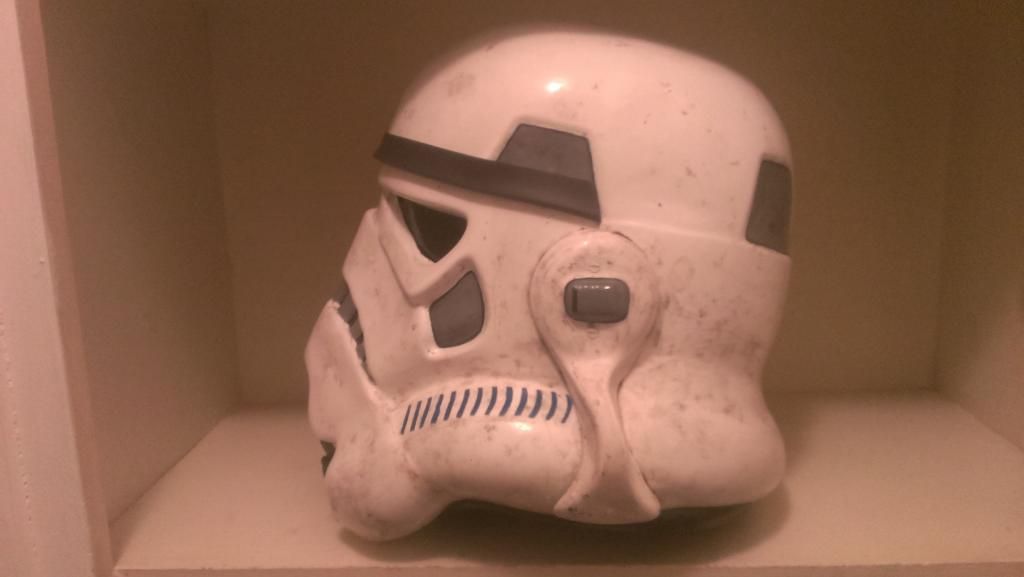
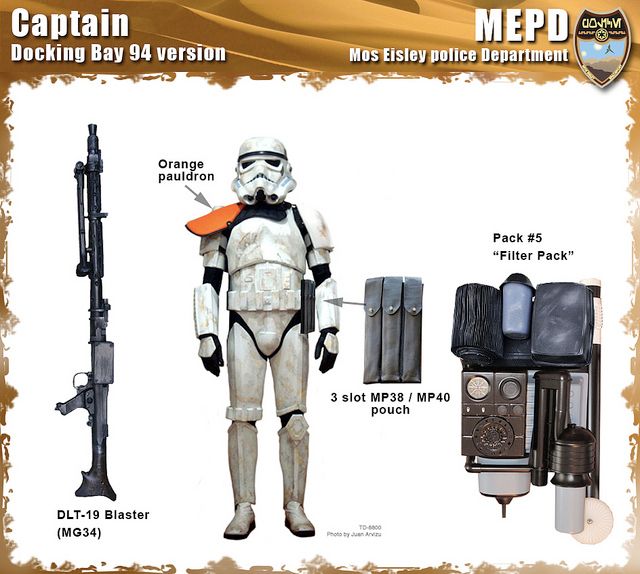
I don't get my armor until March but I have the bucket finished (I'm about to start on a filter pack too but of course that is for police deployment).
-
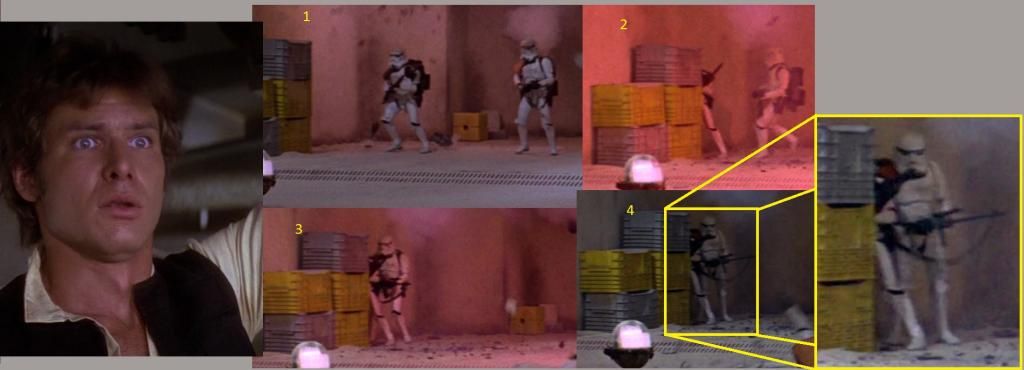
I believe this is supposed to be him:
-
I'm pretty sure he has an orange pauldron. You might be right about the gun.


TrainWrecks 3D printed E-11 Power Cylinders and T-21 parts
in E-11 and Bapty Blasters
Posted
Thanks. The printer I have access to is at the local library so I can prototype with it but not do production runs. The plan is to cast it once I have it finished. Unfortunately I still need to learn to cast (which is in the works) so it might be a while before I have a product I feel comfortable selling.