

TrainWreck
-
Posts
277 -
Joined
-
Last visited
Content Type
Events
Profiles
Forums
Posts posted by TrainWreck
-
-
In the same vane for anyone interested this exists as well: https://youtu.be/dHfLX_TMduY
-
Right on. I'll check it out.
-
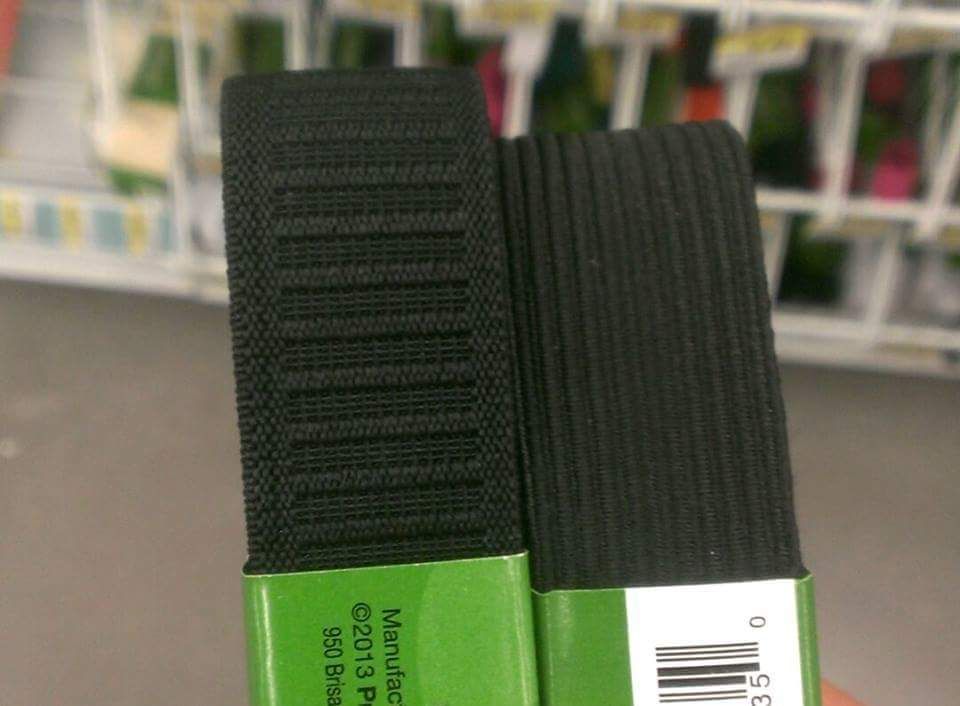
Right on guys. Thanks. I was just having one of those moments in Joannes. I went with the ribbed just because you could feel a tangible difference in how sturdy it was.
-
Does it matter for SWAT? Ribbed strikes me as being more durable.
-
You can also find black women's leggings for about $10.
-
If he wants to have them up on the web I would recommend not having it with Star Wars tags. That way he can show people and link to it without having to worry about Lucasfilm hunting down every copy of it.
-
I think you're being blocked by Lucasfilm. Look at the url that appears when you are taken to the web page. Playing around with a Google search took me to a Lucasfilm remote access login.
-
If anyone is interested some of the guys from the Central Texas Squad started a gofundme campaign to help Scott's family.
-
That shot is in "Deleted Magic." I have a copy of it. I've been meaning to post screen shots but just haven't had the time.
-
No that was Falice trying to sell me a scope. Mine is a doopy scope.
-
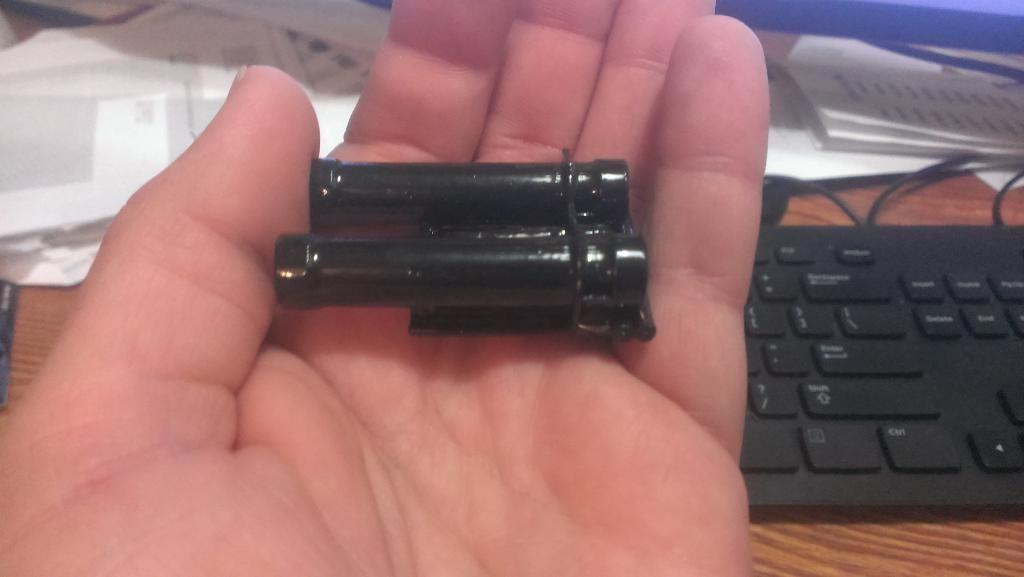
Thank you sir! Here are a couple with the cylinder added:
-
Stay on target! Stay on target!
-
I've been really bad about keeping my threads updated. But I just talked to ATA yesterday and he is currently working on the June orders from last year. I'm a July order so I'm very close!
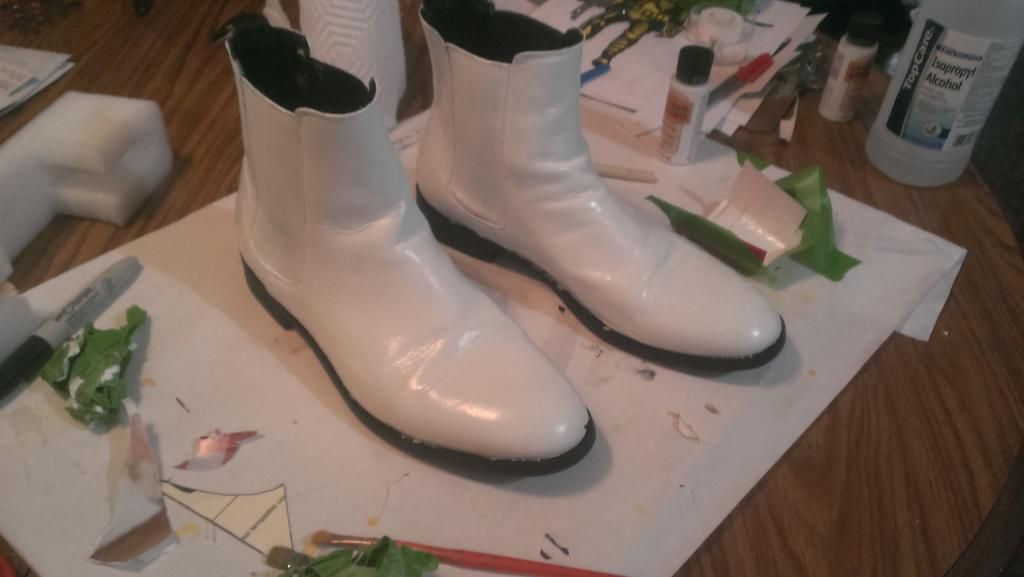
Just a few quick photos that most of you have probably seen on some of my other threads.
Painted boots:
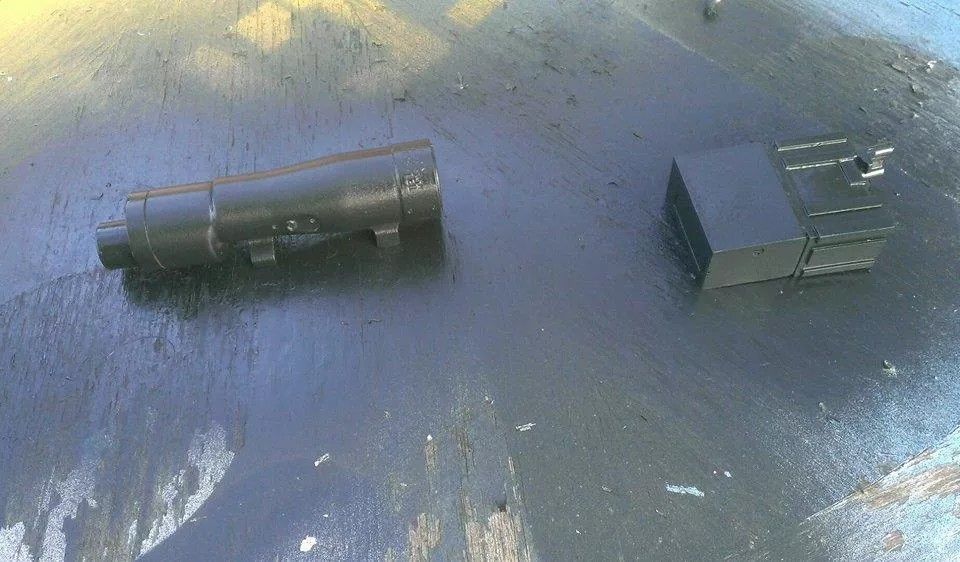
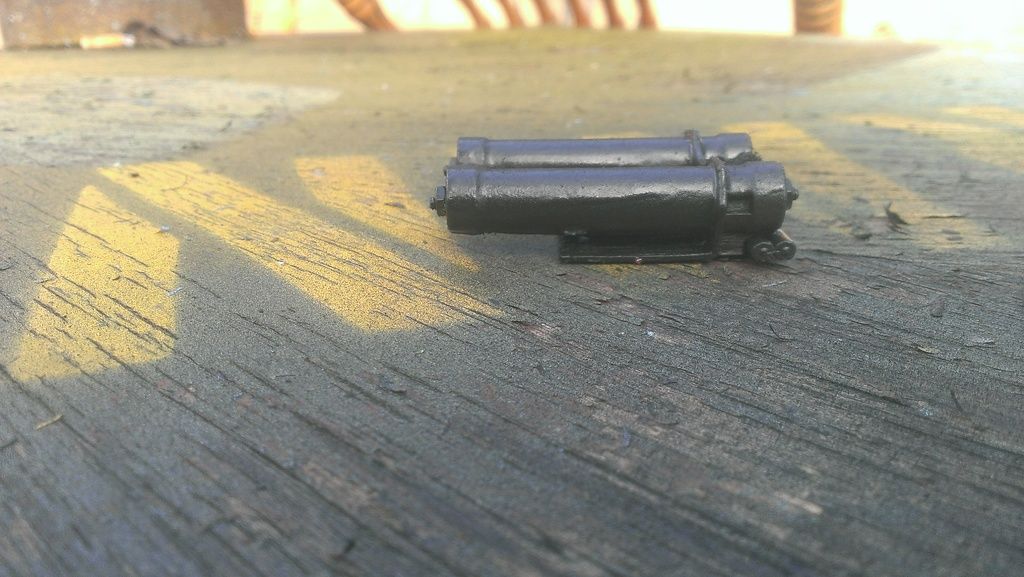
3D printed power cylinders finished:
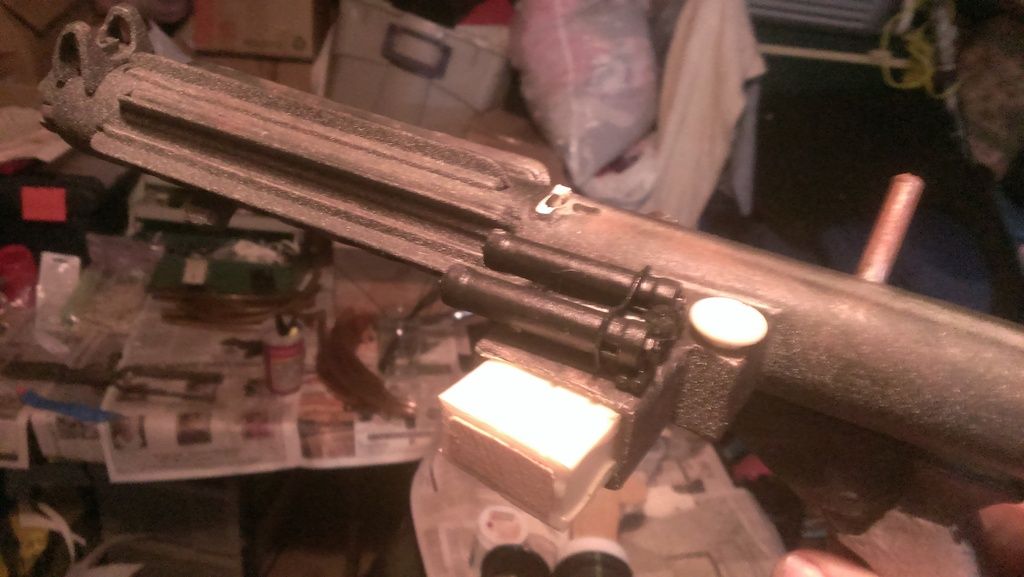
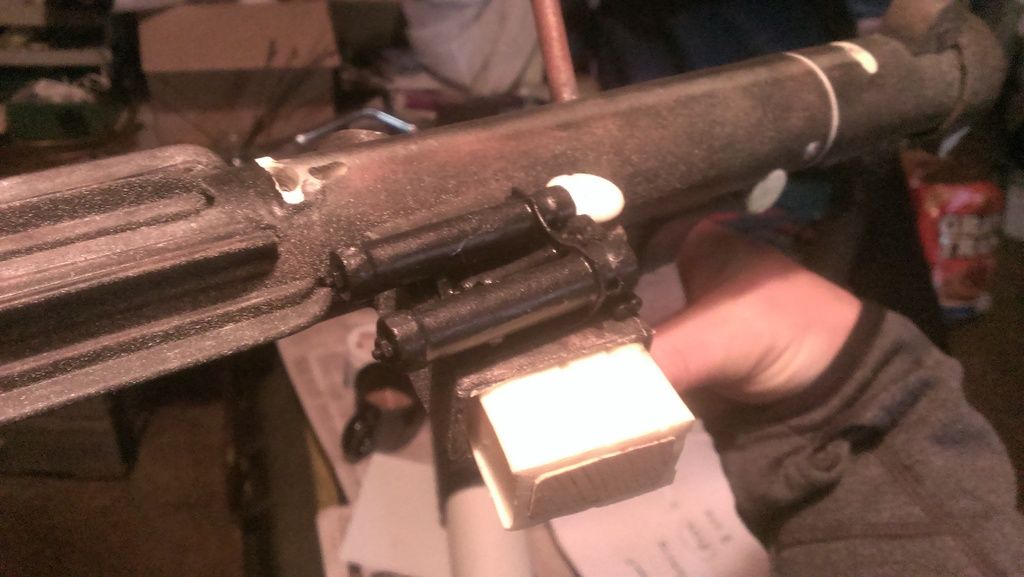
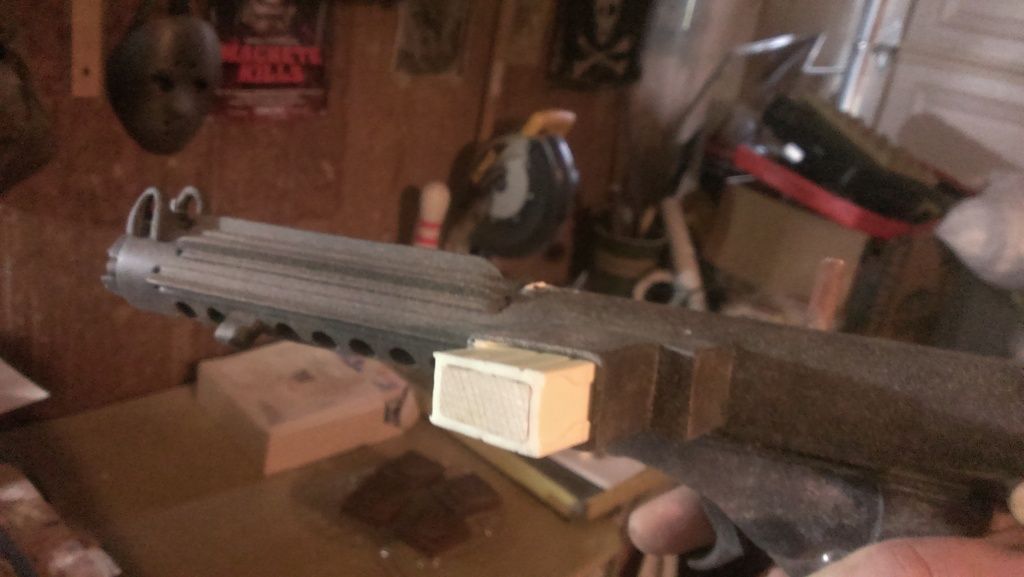
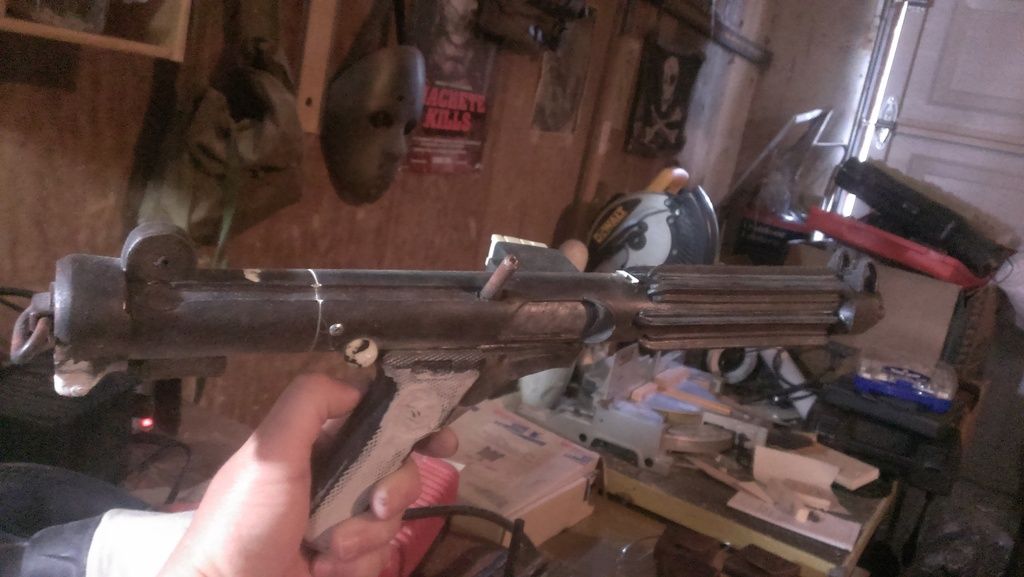
Wood block added to E-11:
Slow and steady wins the race!
-
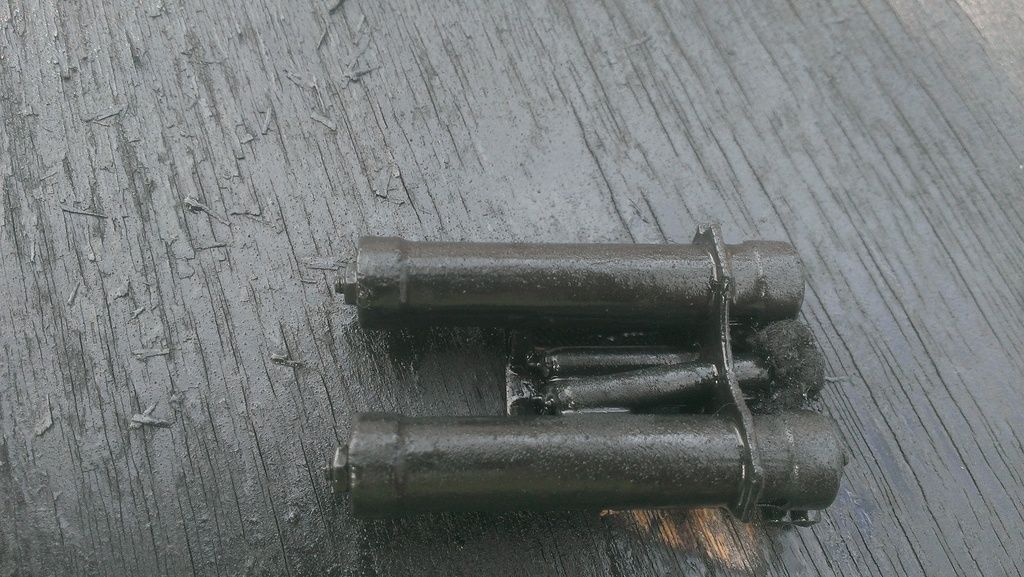
All right. I have gotten my power cylinders finished. After using an exacto knife to cut away the little extra bits I first did a layer of XTC 3D (an epoxy coating by smooth on) to give it a smooth finish. I then added the nuts and bolts, some nylon wire covering in the back, and then used matt black auto spray paint to finish it. Unfortunately between the XTC 3D and the paint I lost some of the sharp details and I screwed up and didn't center my nuts and bolts very well. Over all I'm happy with the end product seeing as I have about a $1.50 invested.
After the XTC 3D layer:
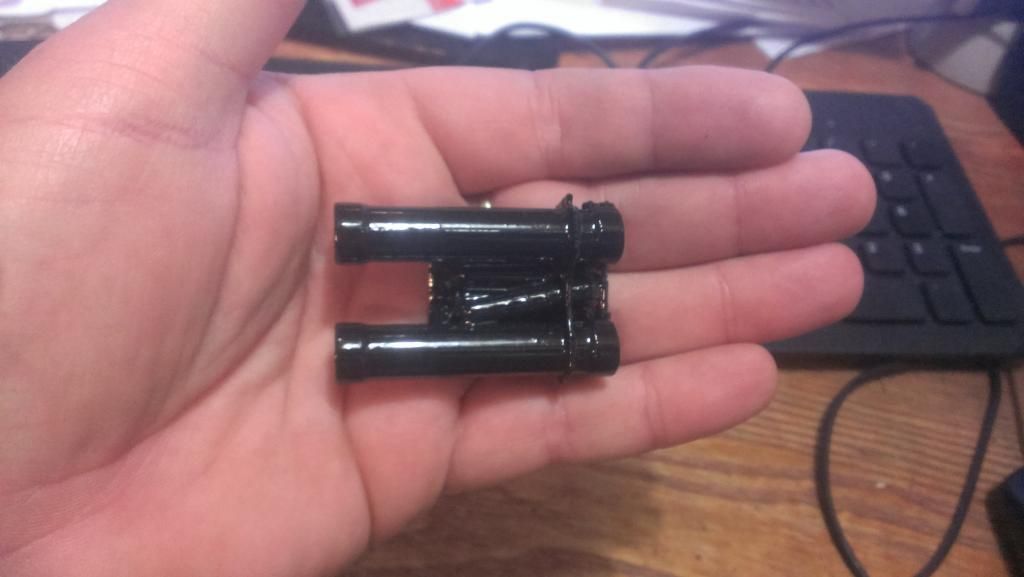
Bolts, nuts, and nylon wire covering:
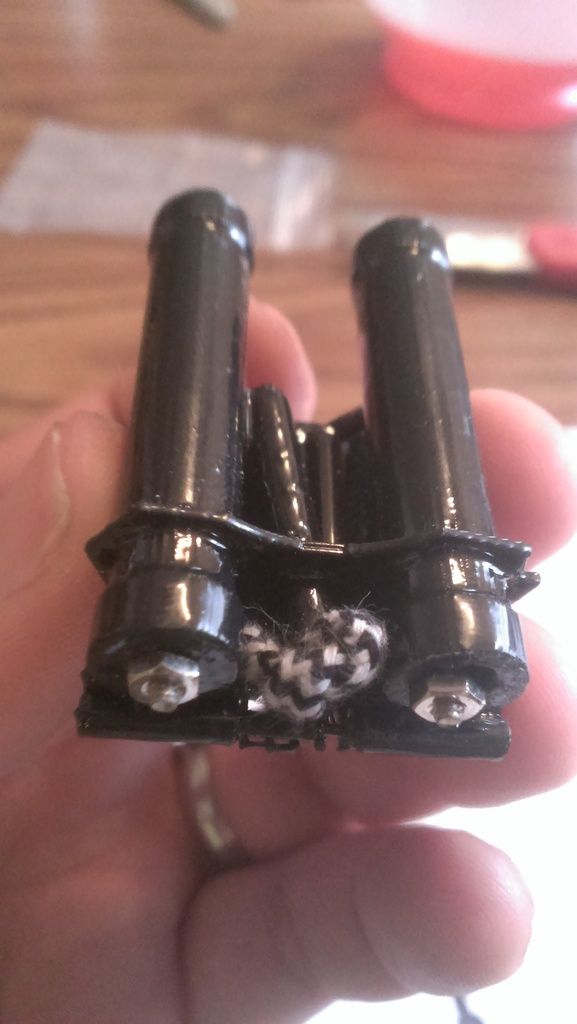
...and the finished PCs:
I guess I should get back to the T-21 parts soon.
-
Right on!
-
Well the two most common materials are PLA and ABS. The big problem with PLA is it is not very heat tolerant so there is the possibility of warping in a car or out in the sun. I'm not sure if any of the finishing epoxys give it add protection from the heat though they definitely strengthen it.
-
Wow. TrainWreck, you are getting really good at creating 3-D printed models. Ever thought about doing the entire canteen version?
I played around with the entire canteen last night. I wasn't really happy with my initial results so I just threw this out for now (it took me 10 minutes over three versions). I'll play with it some more when I get a chance.
Thanks for the words!
-
Since everyone seems to be having difficulty sourcing the faucet covers for the bee stingers I thought I would model one for everyone that can be printed if you have the means.
I based the dimensions off the one I have so it is 6.25" x 4.5" x 4.5" with out the slight taper mine has. It also has a 1/10" thick wall.
This is what it looks like:
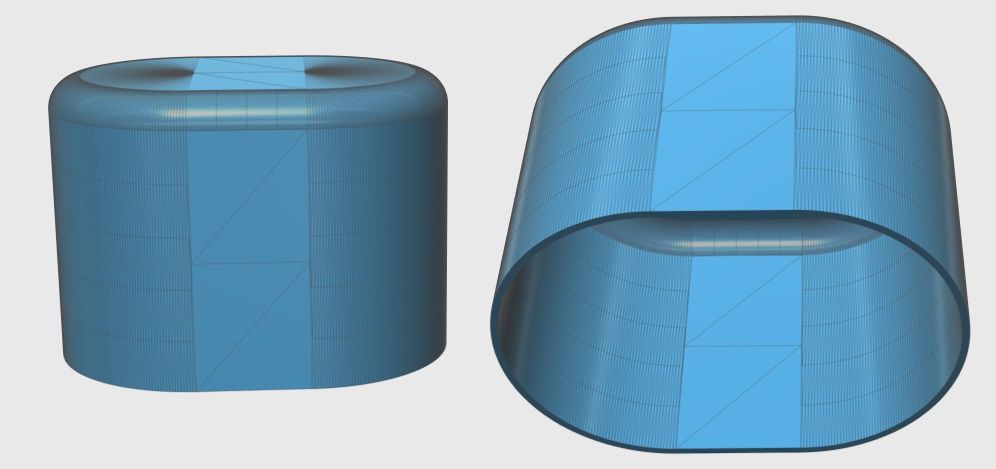
And here is the URL for the dropbox I put the .stl file in:
https://www.dropbox.com/s/qhpx39wbzmd9fwc/beestingerbase3.stl?dl=0
Hope this helps someone!
Cheers!
-
From my understanding someone was concerned that the vacuuform pull would be too long and would have some issues with the integrity of the plastic.
I got really lucky and found mine on the side of the road...
-
Gary. Do you think the toggles need to be printed individually as well or just the knobs?
-
Nicely done. I am excited to see the finished product.
Aren't there 3D printing place online that will print your file and ship the product to you?
Yes there are but it's as much a budget issue for me as anything. The local library is orders of magnatudes cheaper than the online services. Frankly I have so much going on right now it probably is for the best I have to wait on prints. Projects are starting to pile up in my shop.
Thanks again for all the feedback!
-
Thanks guys. I'm kind of stalled out right now. I've taken on too many projects and with the cold weather I just can't do anything that requires setting. Bare with me as I periodically make updates to this.
-
Dude, those power cylinders look awesome! Did you sand them at all before using the XTC?
And again, I HIGHLY suggest printing the knobs separately.
I also use 123D Design

No sanding so far. The only issue I have with the stuff is it does soften the edges a bit. I haven't tried to sand the stuff so I don't know how hard it is.
I'll have to go in and cut out the knobs. The two smaller ones won't be a problem but the large one will be a pain since it's sitting in that indent. Luckily it will be a while before that gets printed so I have time to play with it.
-
Super! Makes me want to learn more about CAD drawing and 3D printing. Great job on both the radio and cylinders.
Download a free copy of 123D Design. Autodesk (the company that makes it) has a bunch of tutorials on youtube (I think I just googled 123D Design tutorial). I was ready to rock and roll after about 20 minutes and the program is much easier to use then Blender or Fusion 360.


Happy b-day to our Chief, Big Kahuna "Rick" Dirty Boy
in Off Topic Cantina
Posted
Happy birthday!