

Doc
-
Posts
66 -
Joined
-
Last visited
Content Type
Events
Profiles
Forums
Posts posted by Doc
-
-
Good luck man, glad to finally see you made it into here

-
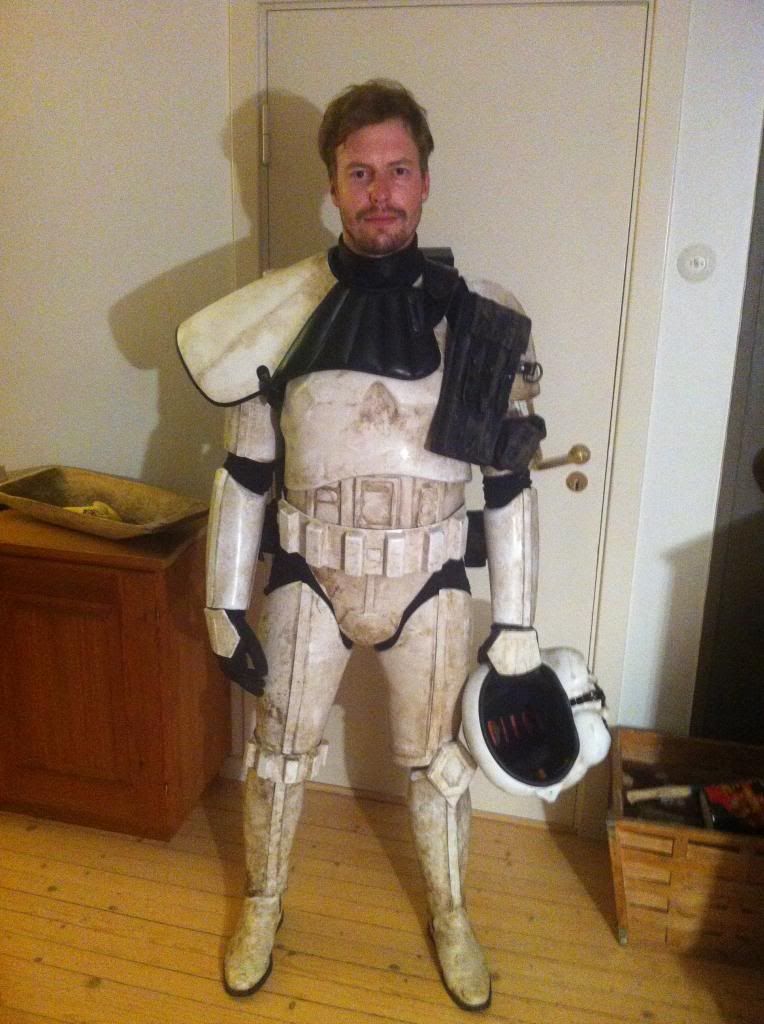
Congratulations bro! You look awesome
-
whats up Doc?
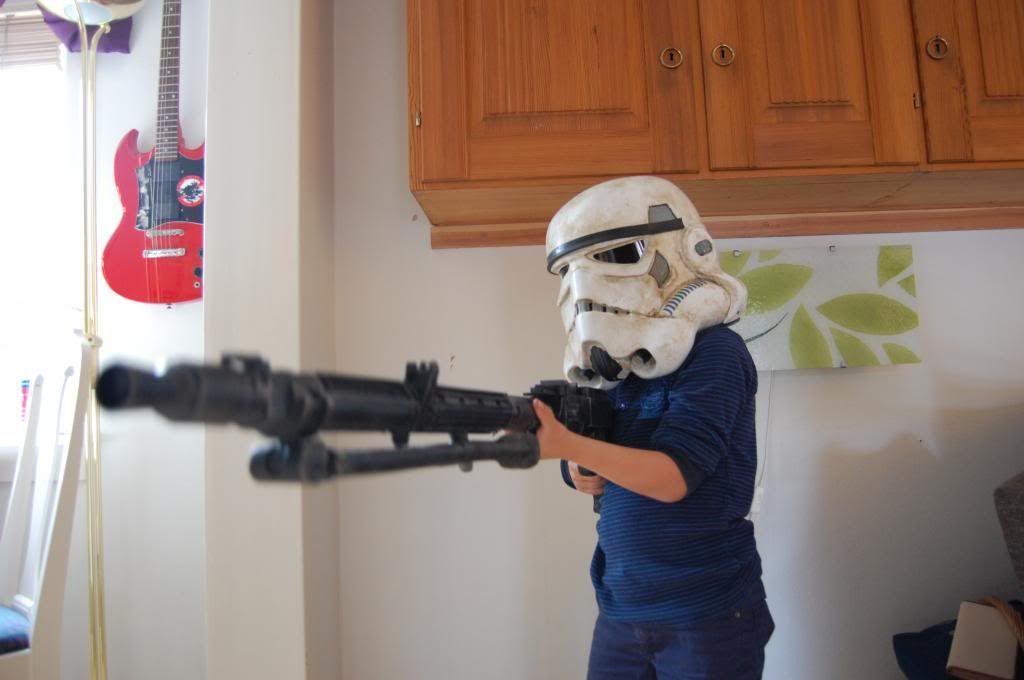
Hahaha, looking around the house, trying to find something that generates 1,21 gigawatts.... 1,21 GIGAWATTS!? Great Scott!
-
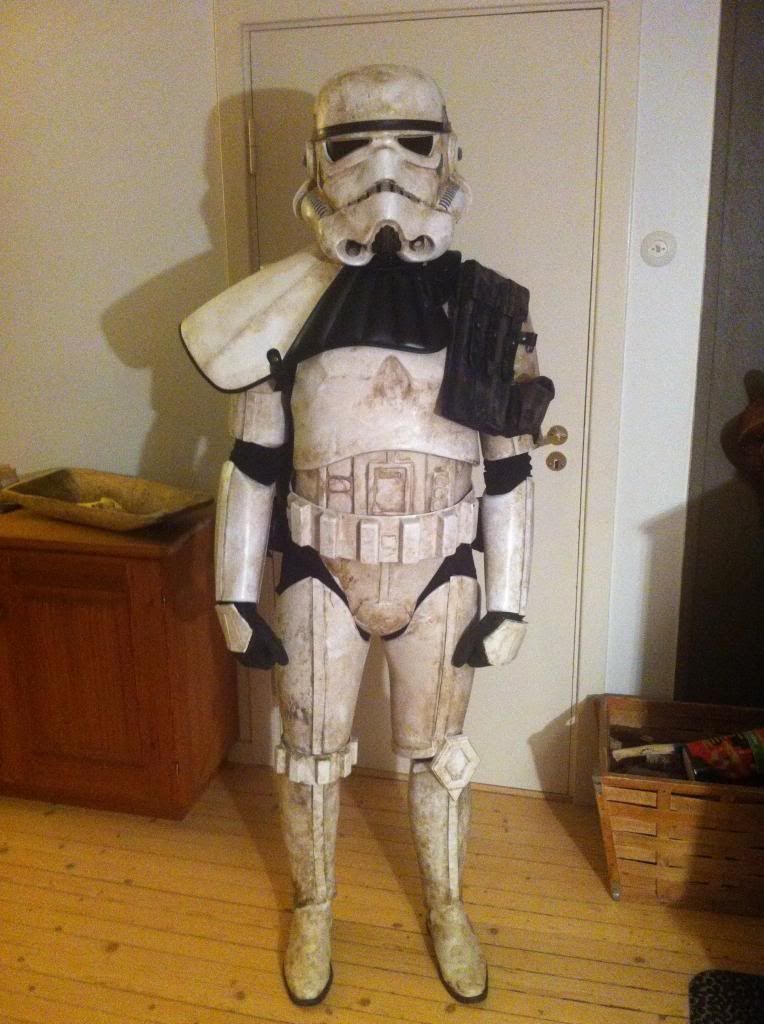
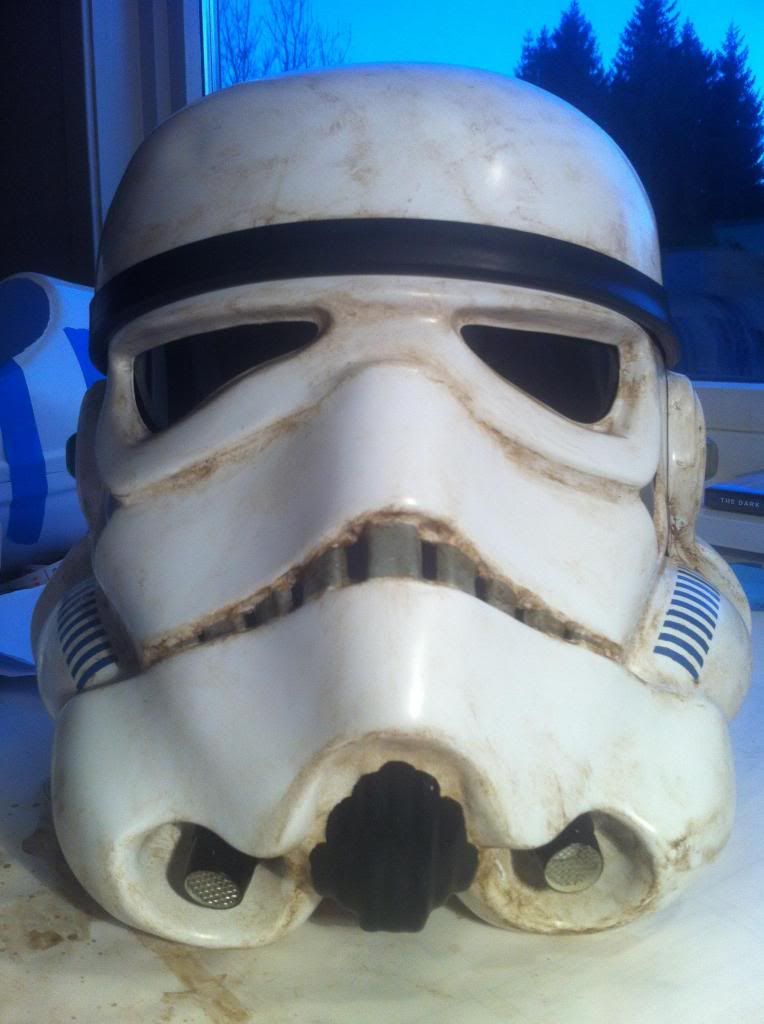
Very nice weathering Craig
-
Obiously I changed my callsign to "Doc"

-
No problem, troopers helping troopers
-
I hugely recommend Bobamaker. I am awaiting a full suit from him. His gear and service is top notch! Check out his website and be amazed
http://www.bobamaker.co.uk/ -
i think your ready to do the kids version

Hehe, that would have been cool! My kid on the other hand looks quite contempt with the real size
-
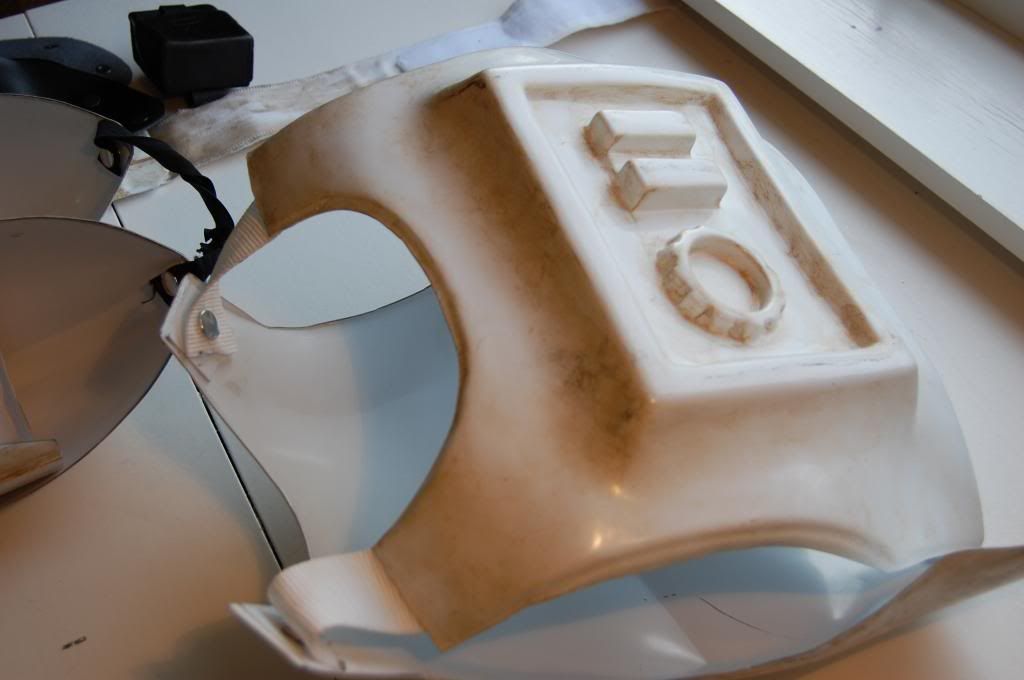
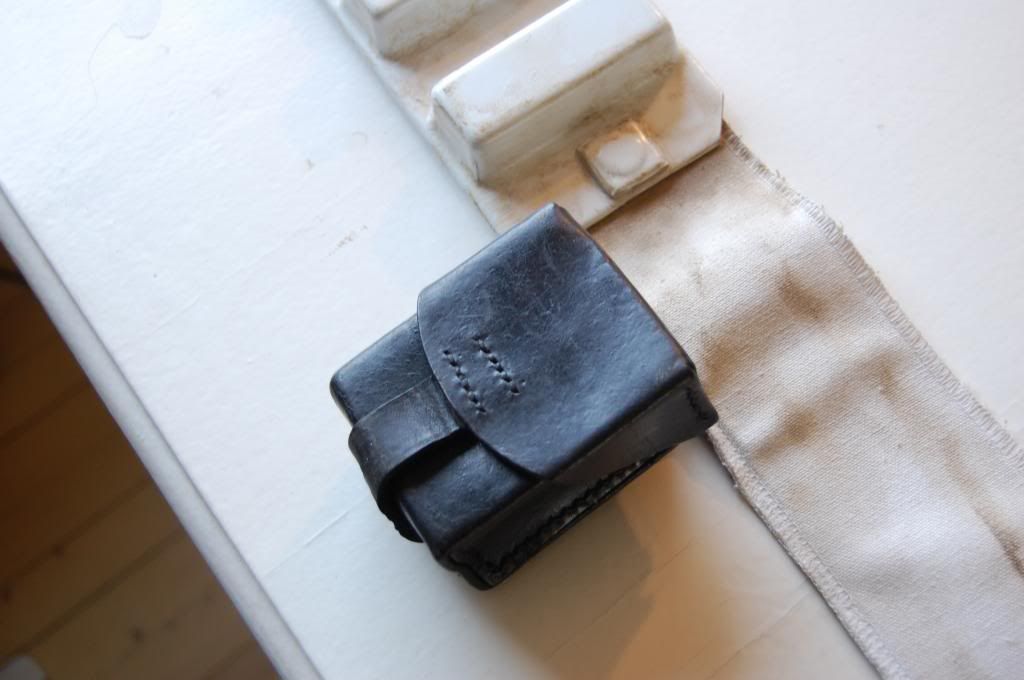
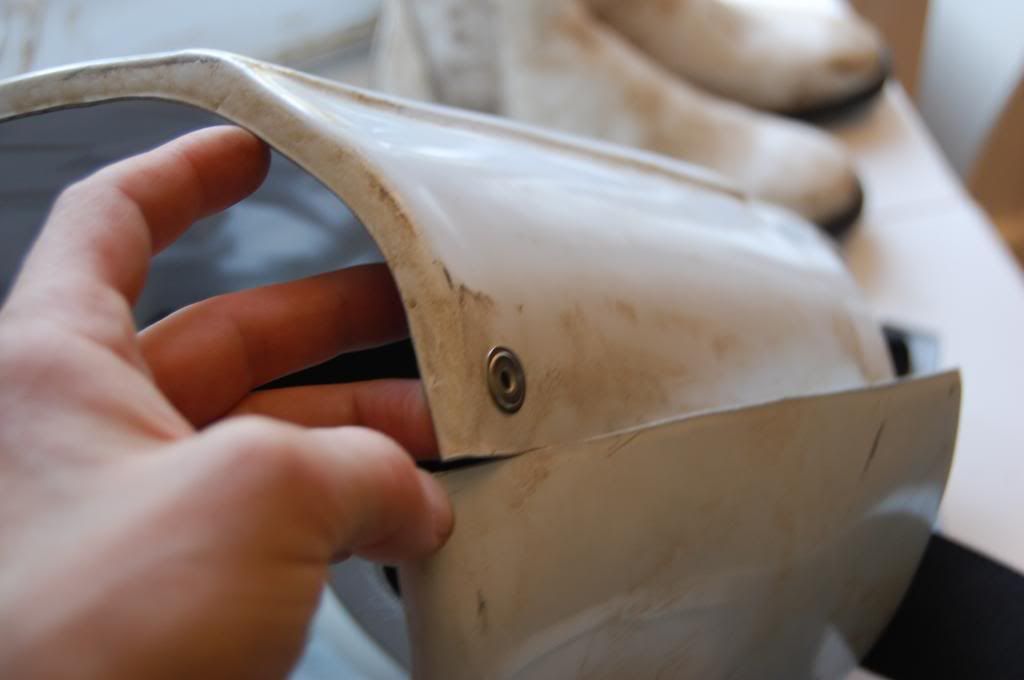
@ Lars - Here is a look at the screen used TD armor. You can see the detail in the lwer left side of the ab box..

Here is a close up of Rolf's armor showing the AB detail...
(The RS and TM Armor Kits already have the ab detail in their molds)

I currently have ATA armor which does not have this detail like the TM and RS suits do. I simply used a Pop Rivet of equal size (eyeball the measurements) and painted / weathered over)
Here is the how ATA Armor (Ab section) looks right out of the box...

Here is my ATA armor after the simple 'pop rivet' mod...

Again, there are different ways to replicate this detail. See Juan's 'battery top' method, as well!
It is a small detail for sure, but it definitely adds to the screen accuracy of one's armor.

Good luck!
Thanks allot, I´ll get on it!

-
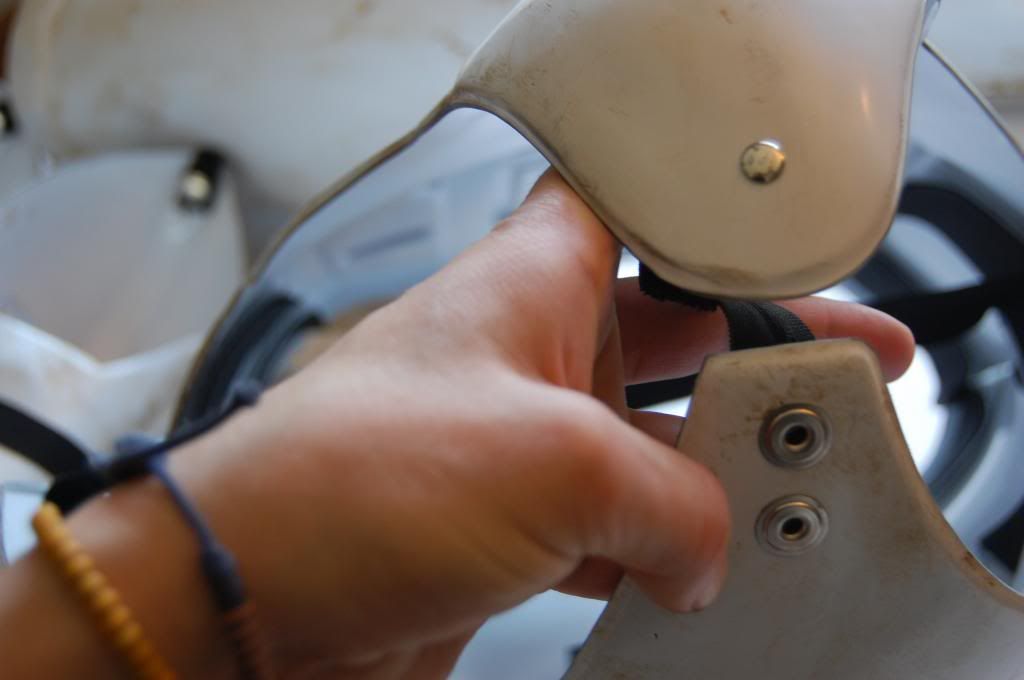
Hey Lars if you want to add the rivet detail to you AB box its pretty easy to do.
Hey Rick
Do you have any photoes/advices regarding this detail? Would be very helpful -
Looks superb. I need one of those bad boys once I've paid off my T-21 :-)
Talk to Alfredo, he will hook you up
-
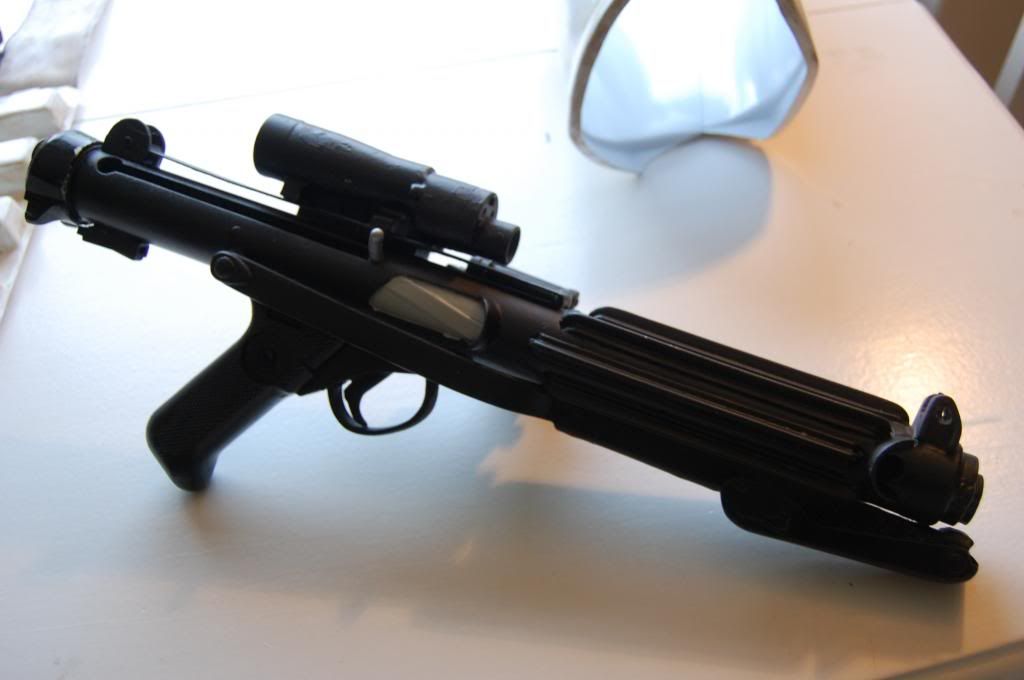
Nice! The E-11 is awesome!
-
Welcome to the Deployed Officers bro'....
And hmmm...that weathering technique does look familiar to me
Thank you everyone, great to finally be a part of the bunch!
Does it look familiar? Well, I have learned a thing or two from the best! -
Congratulations Craig!
-
Woho! Thank you so much! I so ready to hit the beaches of Tatooine (read everywhere)!
-
Thanks all
for kind words! -
Hey Lars if you want to add the rivet detail to you AB box its pretty easy to do.
Also its not required for Police Officer but if you switch your shoulder straps to elastic waistband material it will make a big difference. I only mention these things since it appears youve spent alot of time nailing down other details.p
Thank you Rick, I really appreciate these kind of detail advices, I intend to slowly work on these kind of minor details from now on, so I am grateful for any advice
-
Rockin build man....should be no problem joining the force
Thanks
Joining the force, hahaha! -
Ok, here we go!

Lars Skaarud
TD15501 http://www.501st.com...815&costumeID=2
Your MEPD forum name: larsska
Nordic Garrison
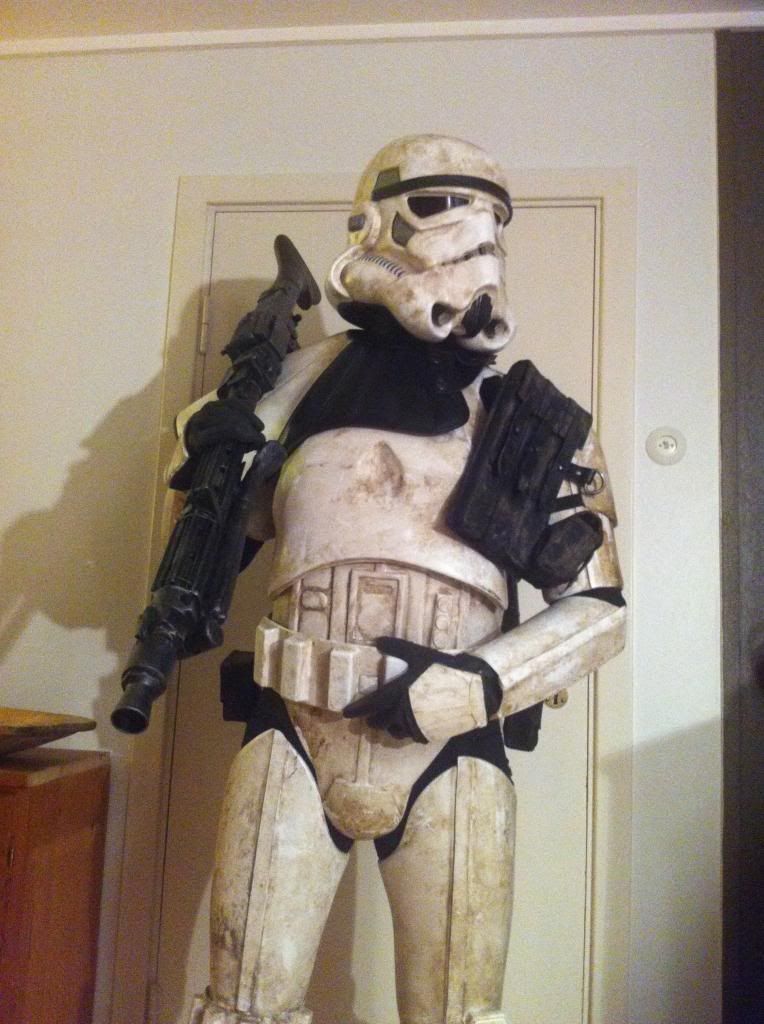
-One helmet off photo. This is not to be a random picture of you. It is to be a photo of you, in costume, without your helmet on. A mug shot if you will.
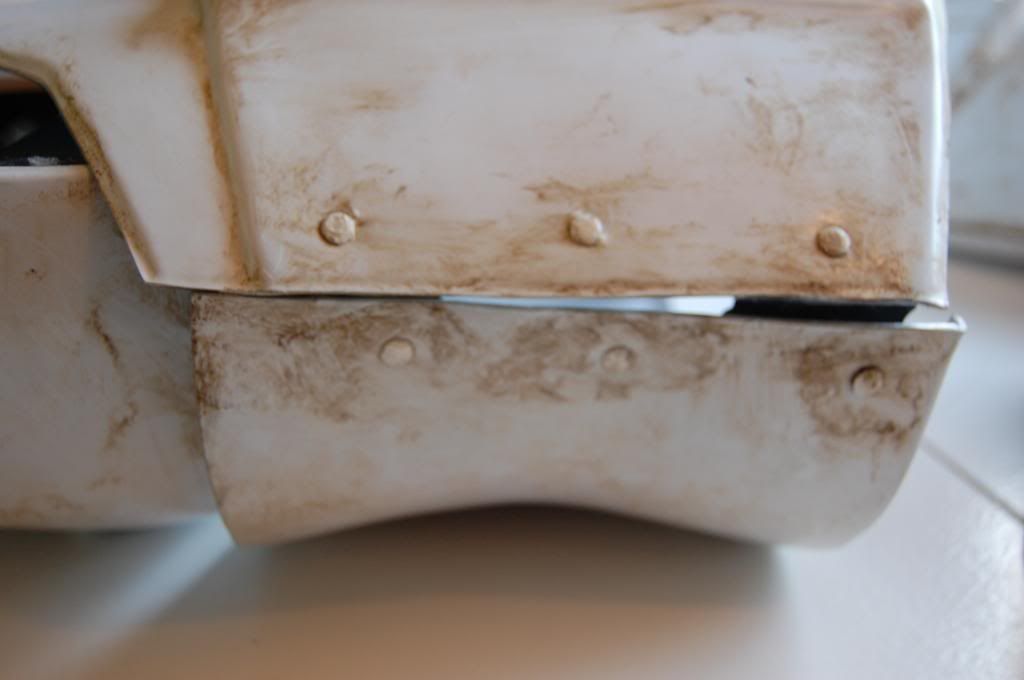
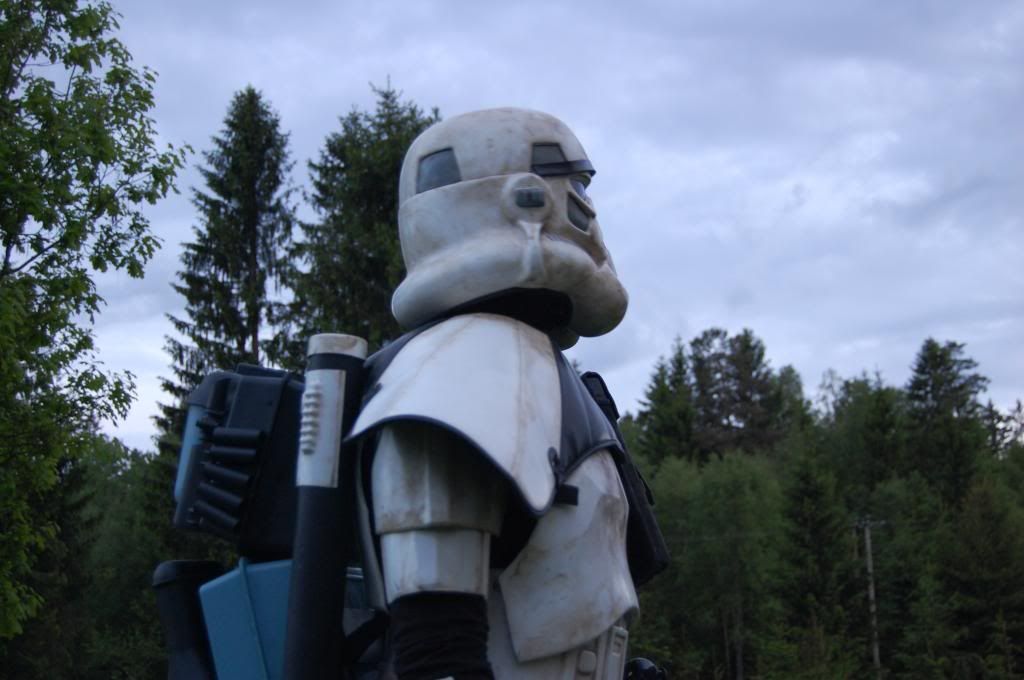
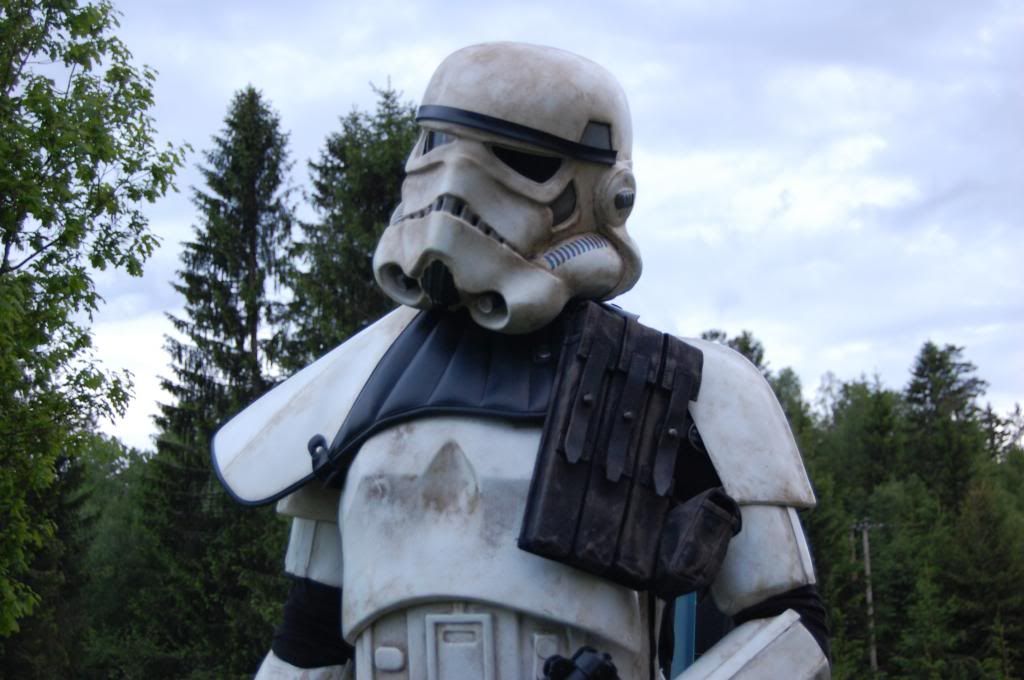
-One full armor, helmet on, front photo. Show in one picture the whole look of your armor and gear. Also show Sniper Knee Plate clearly enough.
-One full armor, helmet on, right side photo. Showing the pouches mounted on sides if you have them and the gap closed.
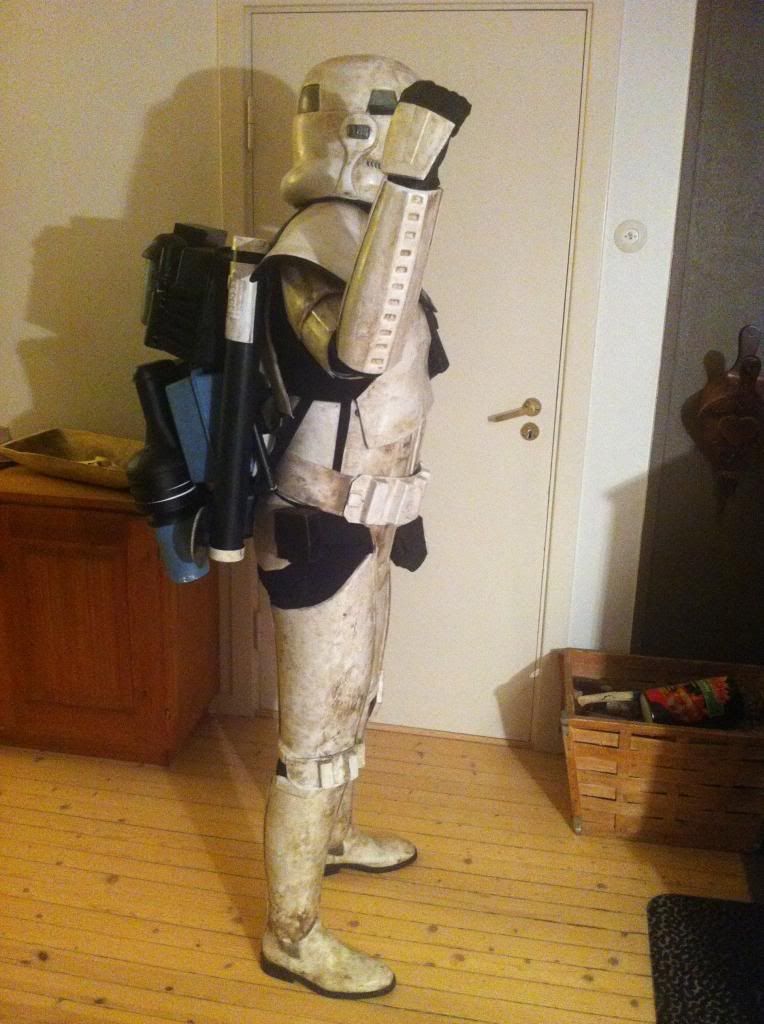
-One full armor, helmet on, left side photo. Showing the pouches mounted on sides if you have them and the gap closed.
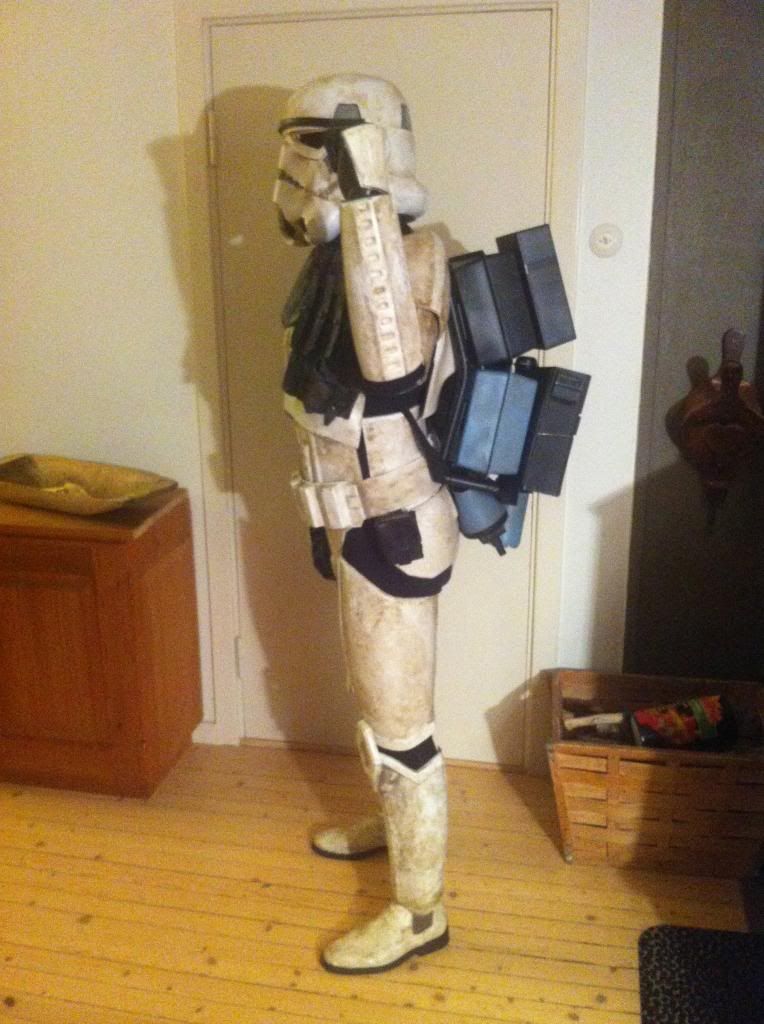
-One full armor, helmet on, back photo. Backpack most appear clear enough for evaluation.
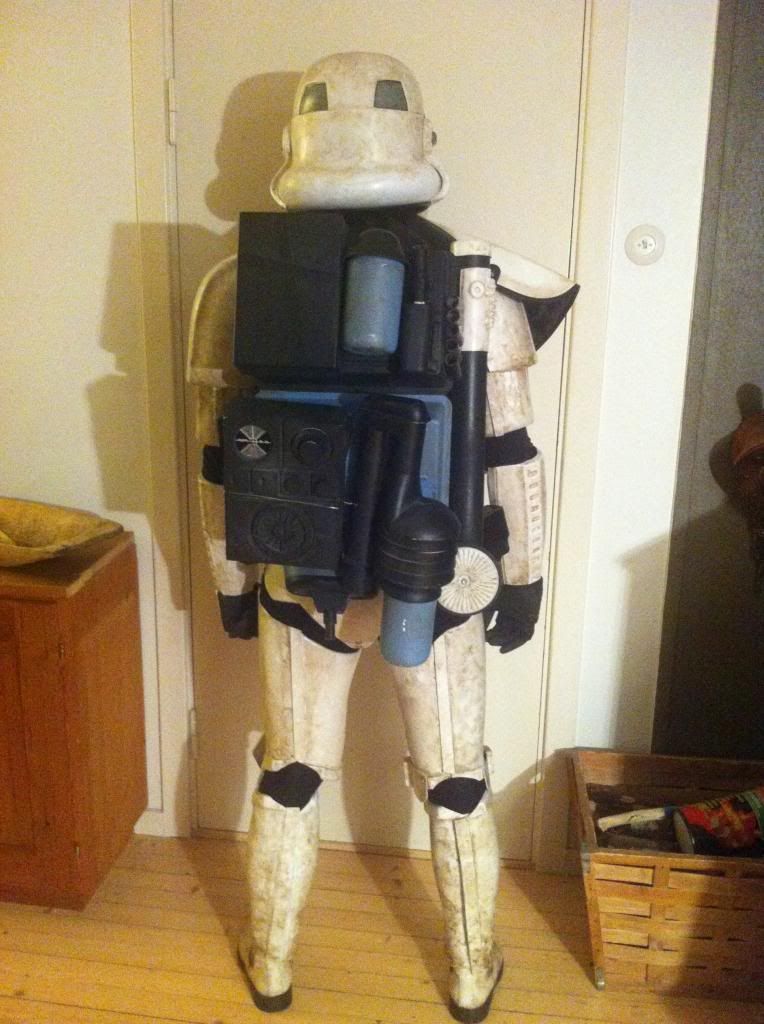
NOTICE! These pictures are from a while back, therefore the lighter weathering on some pictures.
-Canvas or elastic shoulder straps detail photo.
 -
-Canvas belt detail photo.
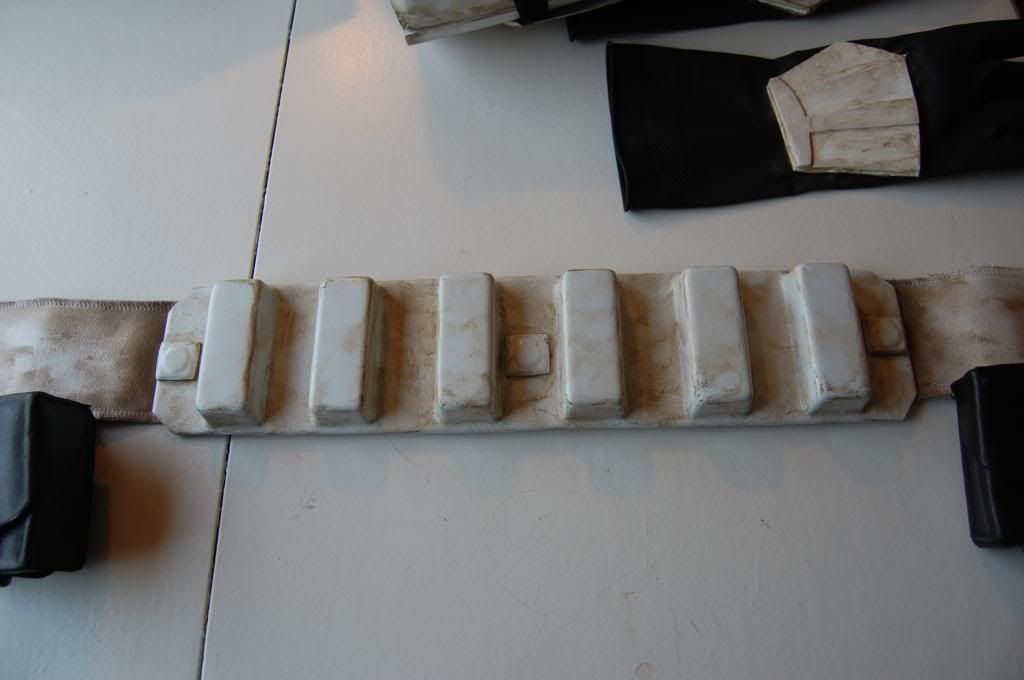
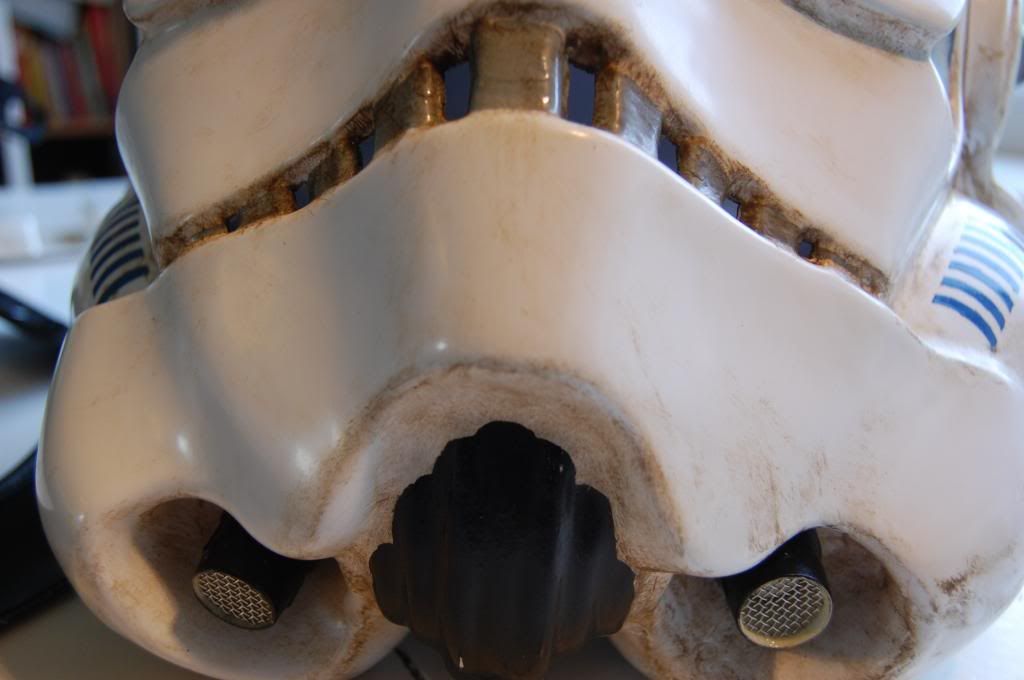
 -Abs details close up photo. Showing the 3 buttons an TD abdominal plate.
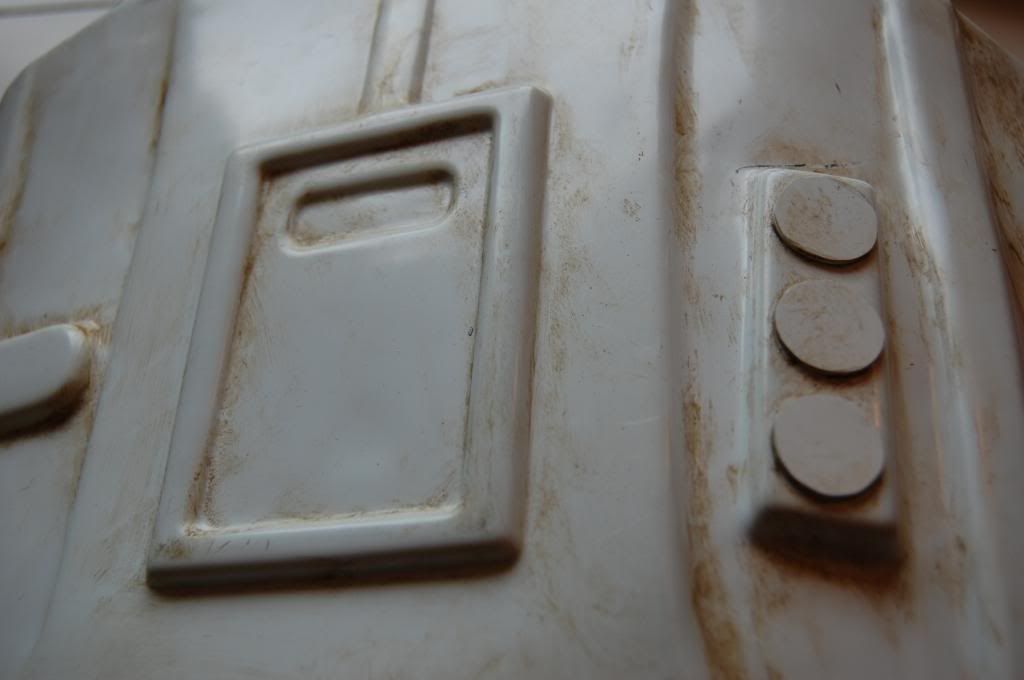
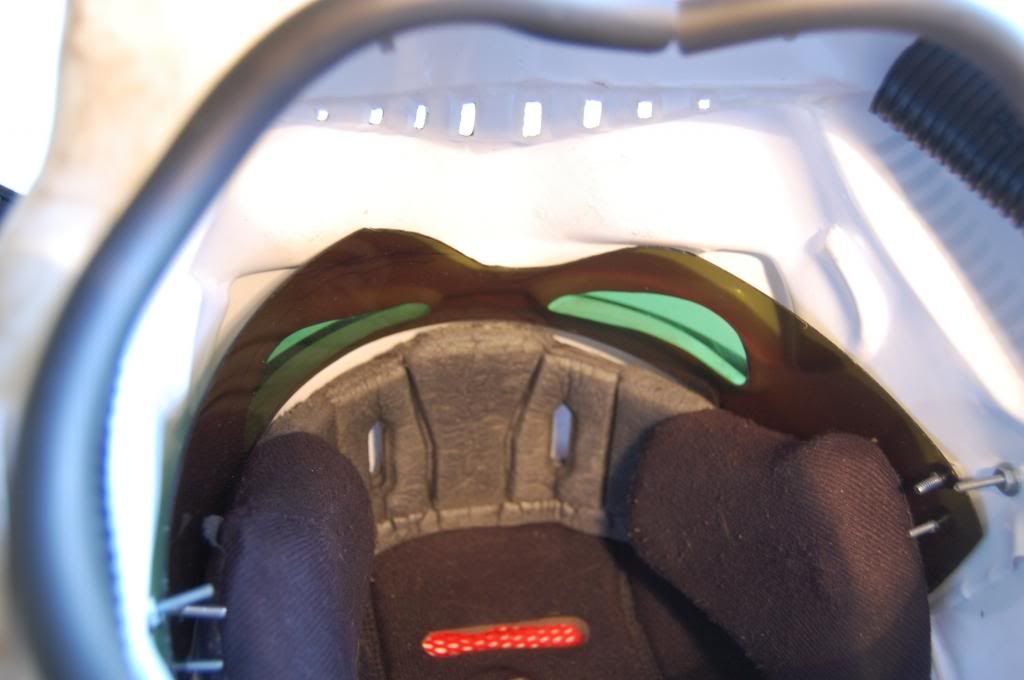
Bucket (pictures can show details individually or in groups):
Weapons:
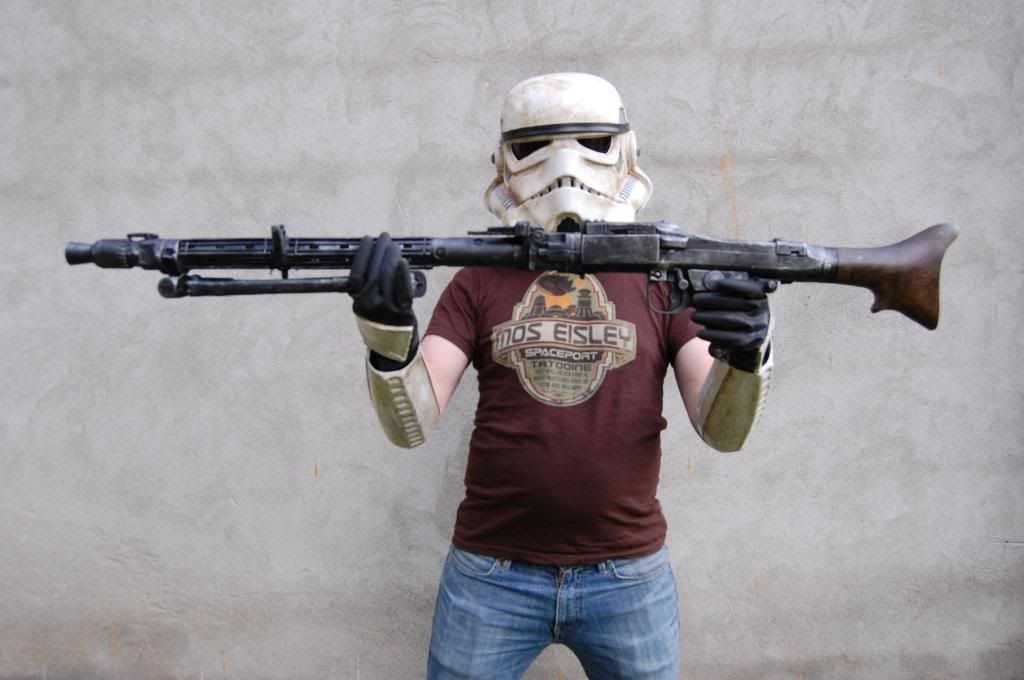
DLT-19
E-11
Finally,
-One (or several) full body action (or attitude poses) good quality picture.
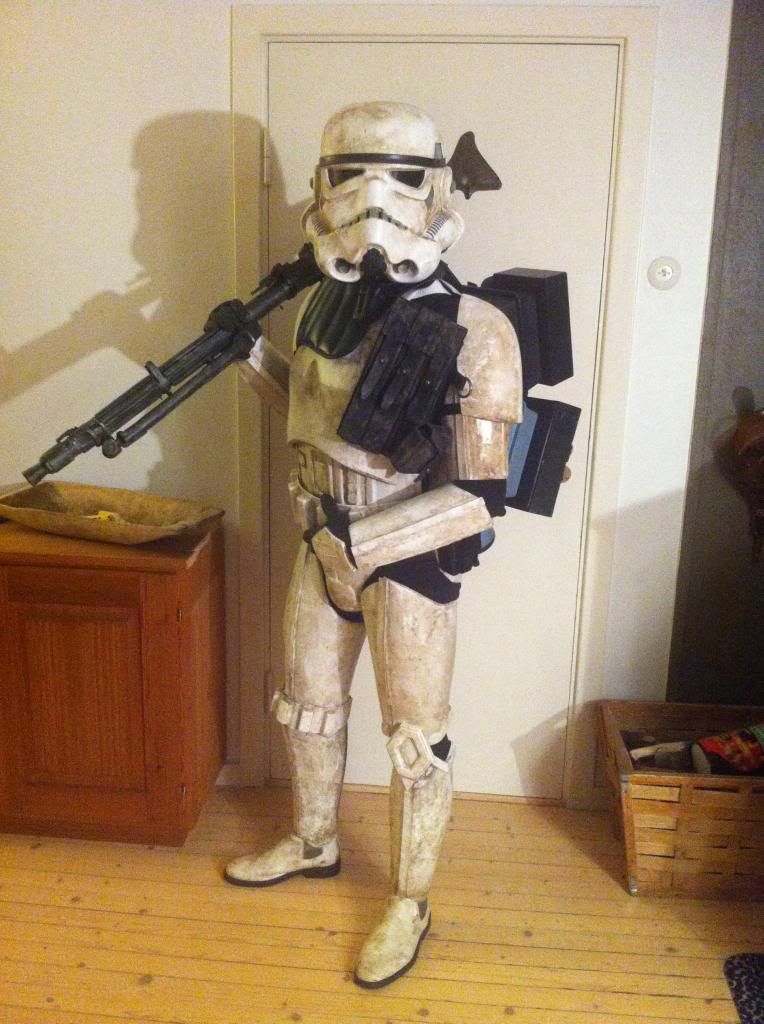
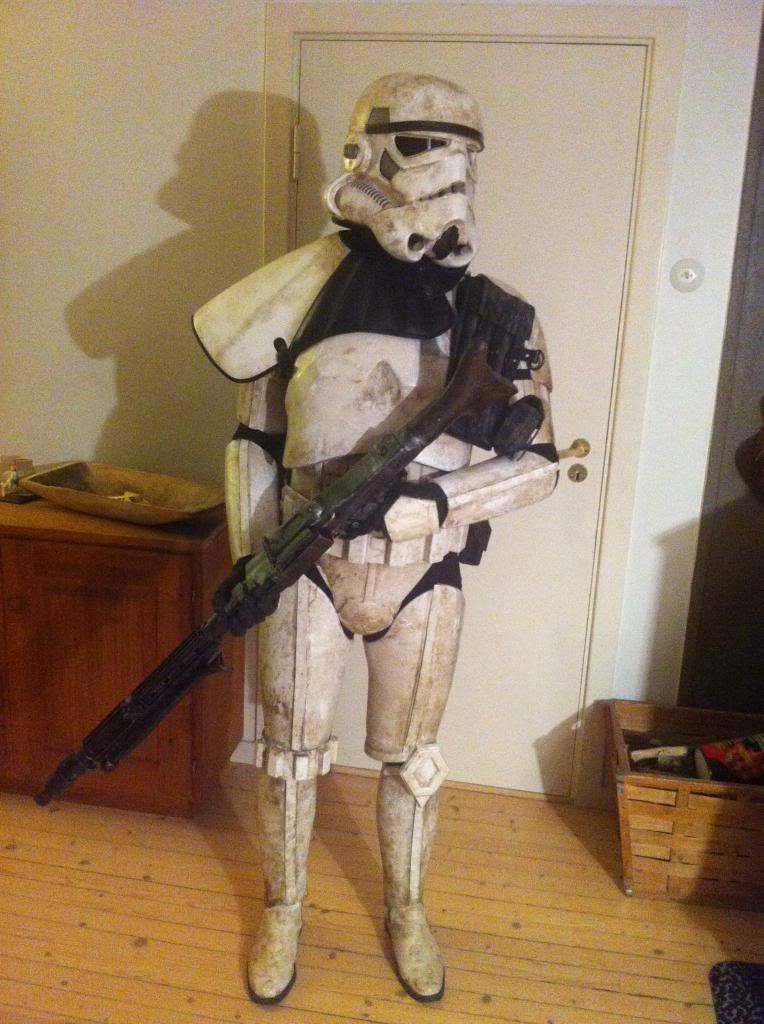
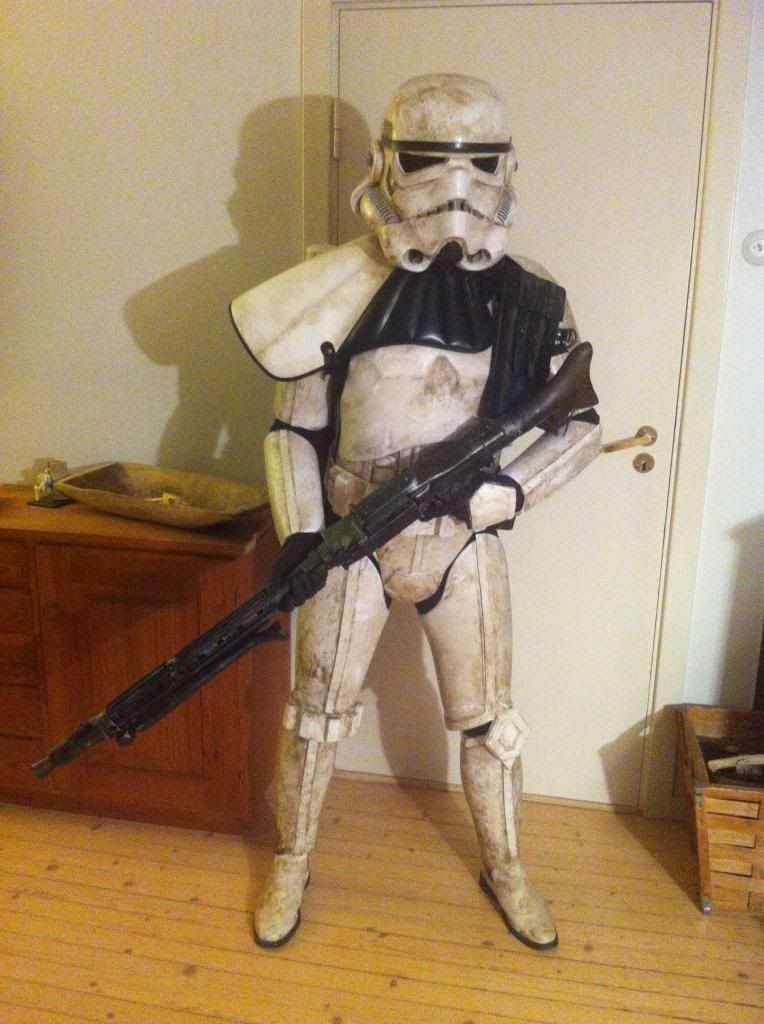
Hoping for a positiv respons!
-
Wow! That´s outstanding!
-
Great build and pics man.
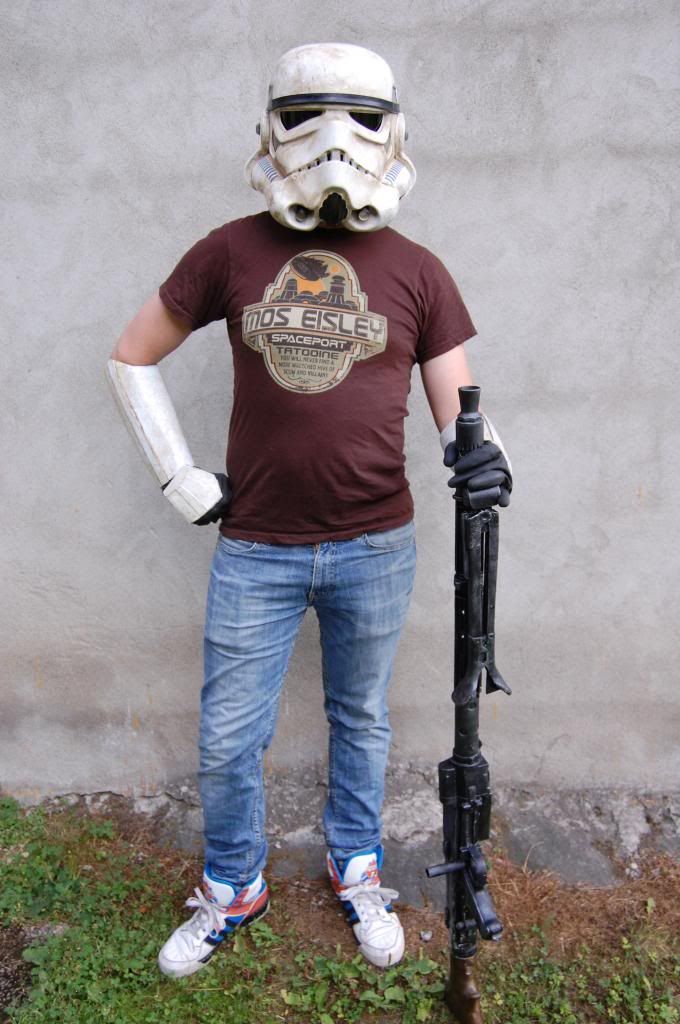
 Hey, where did you get that t shirt....i want one....
Thanks
The tee? Essen man, Essen -
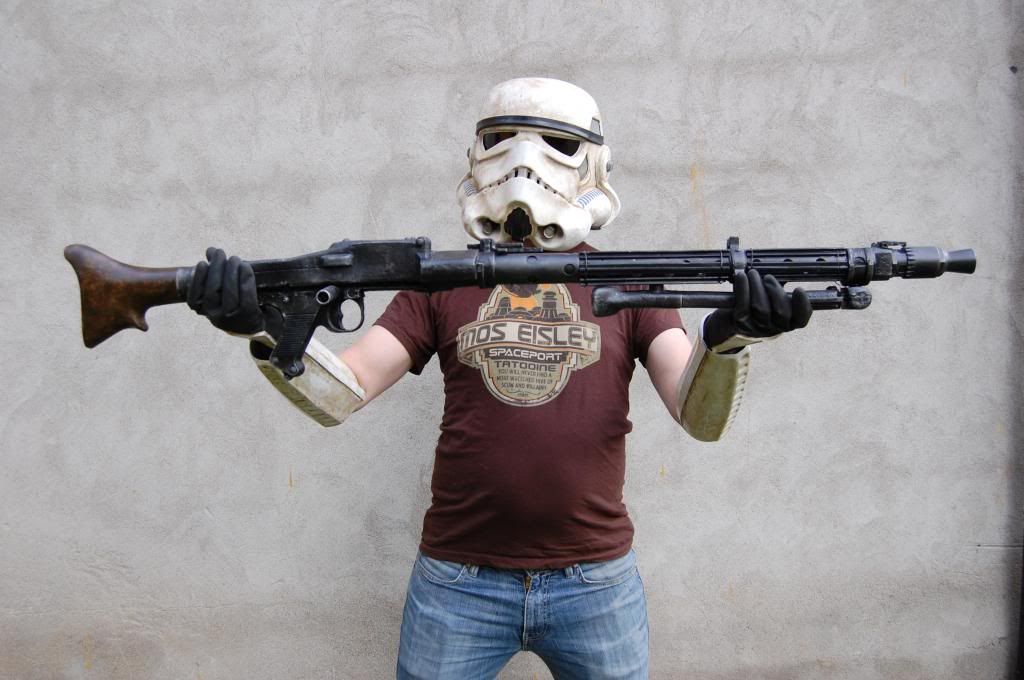
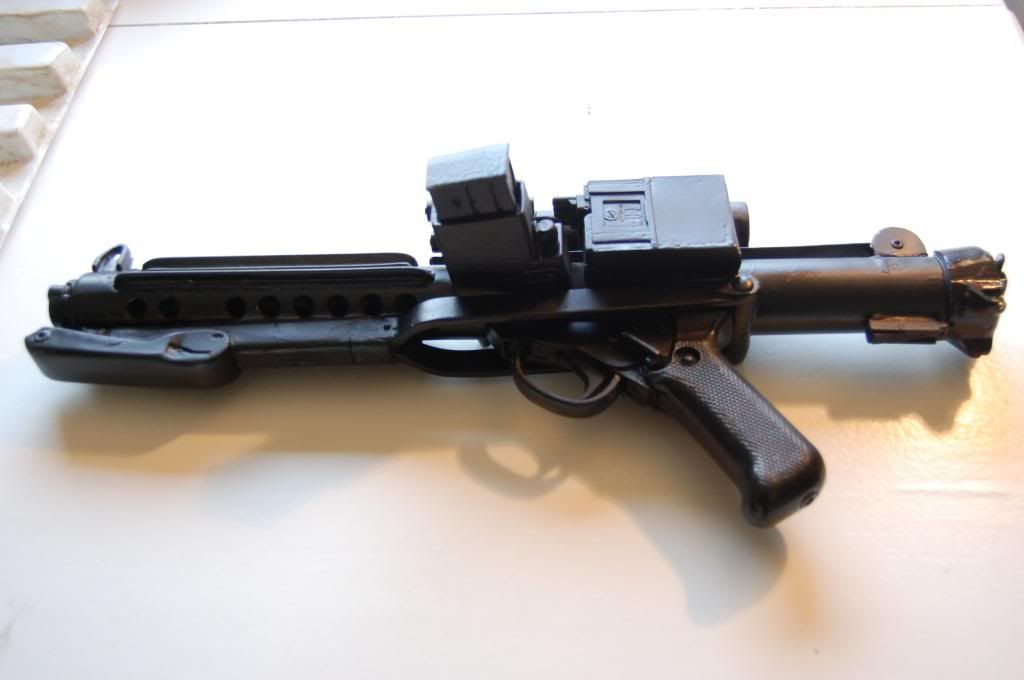
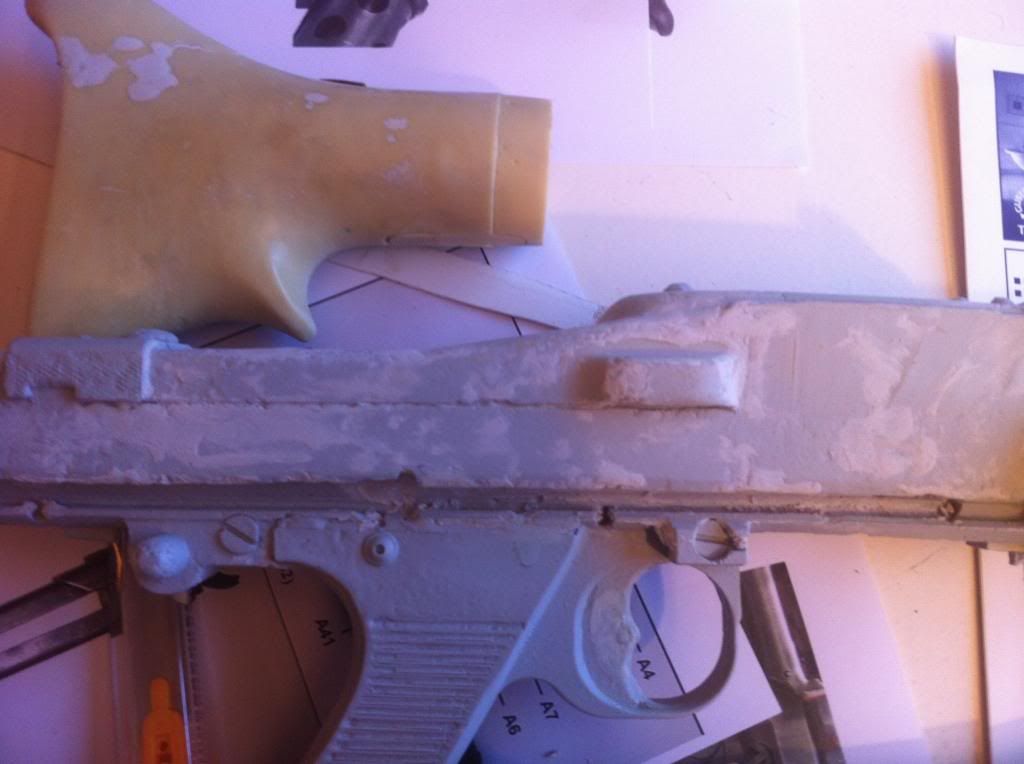
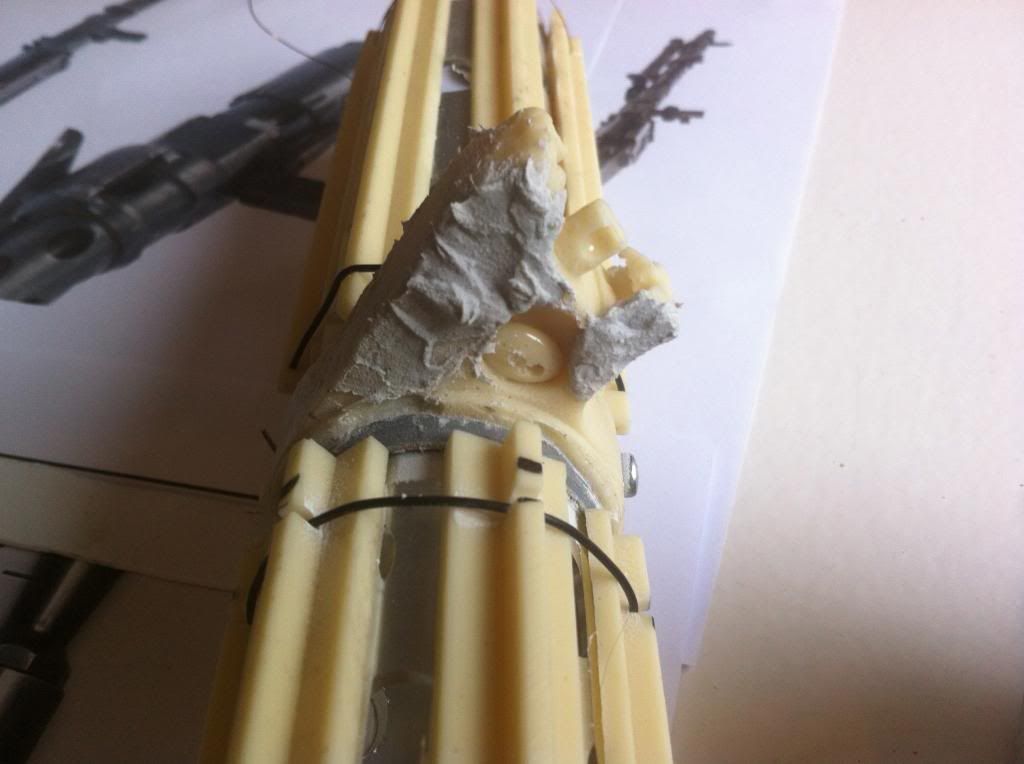
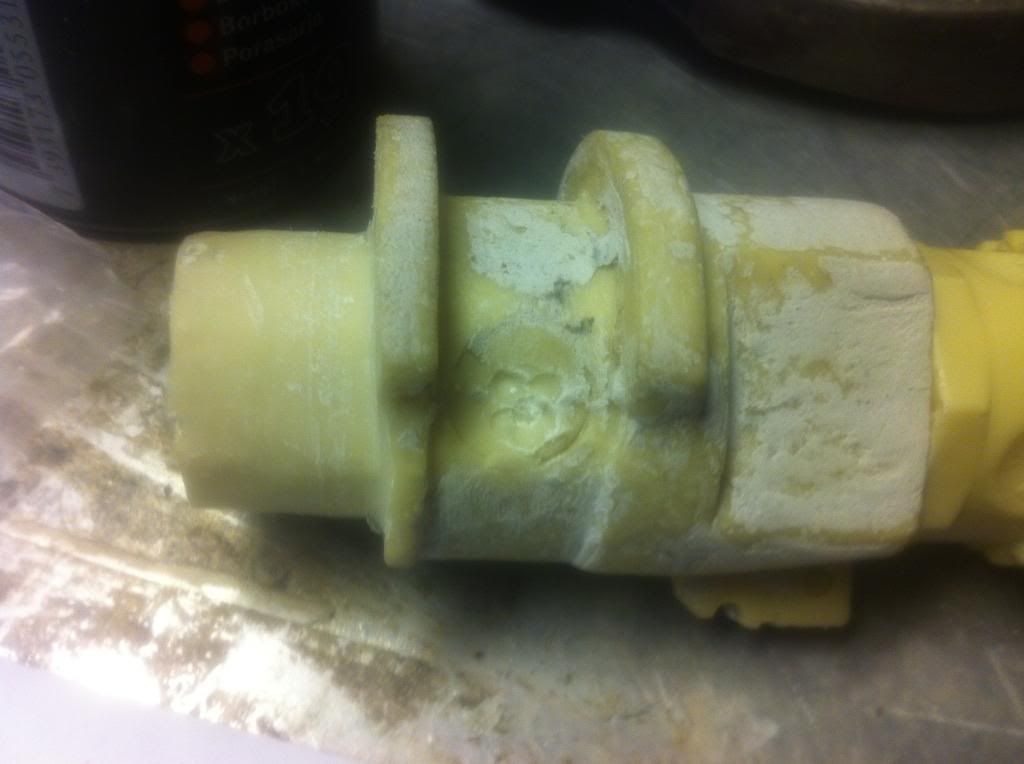
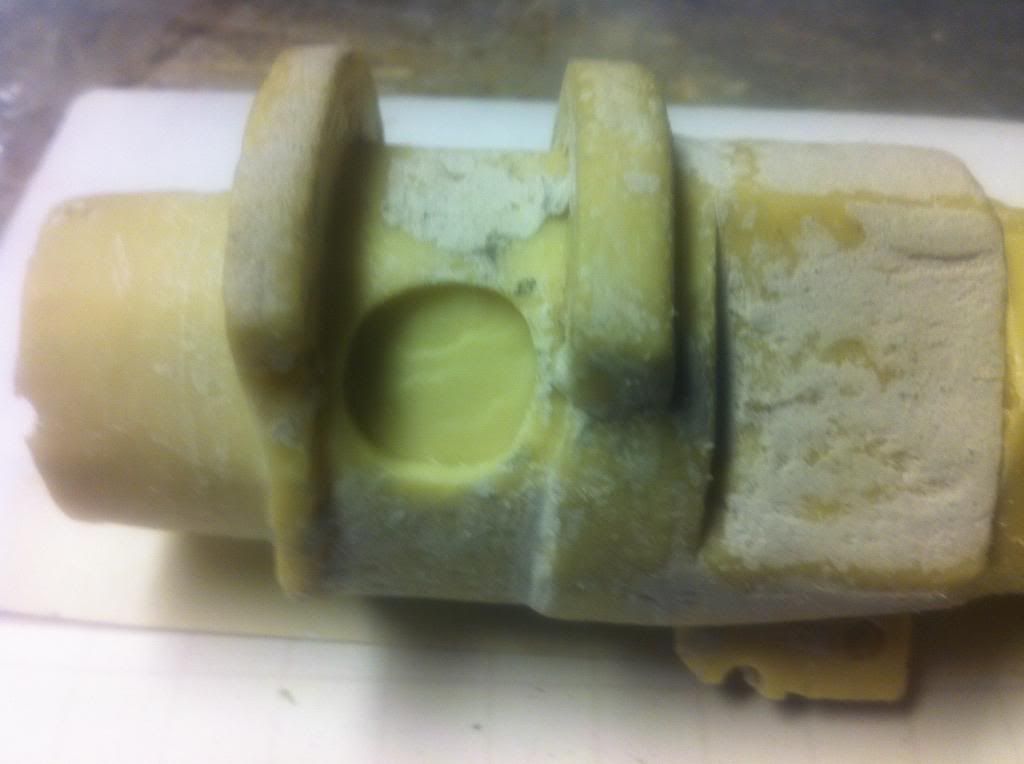
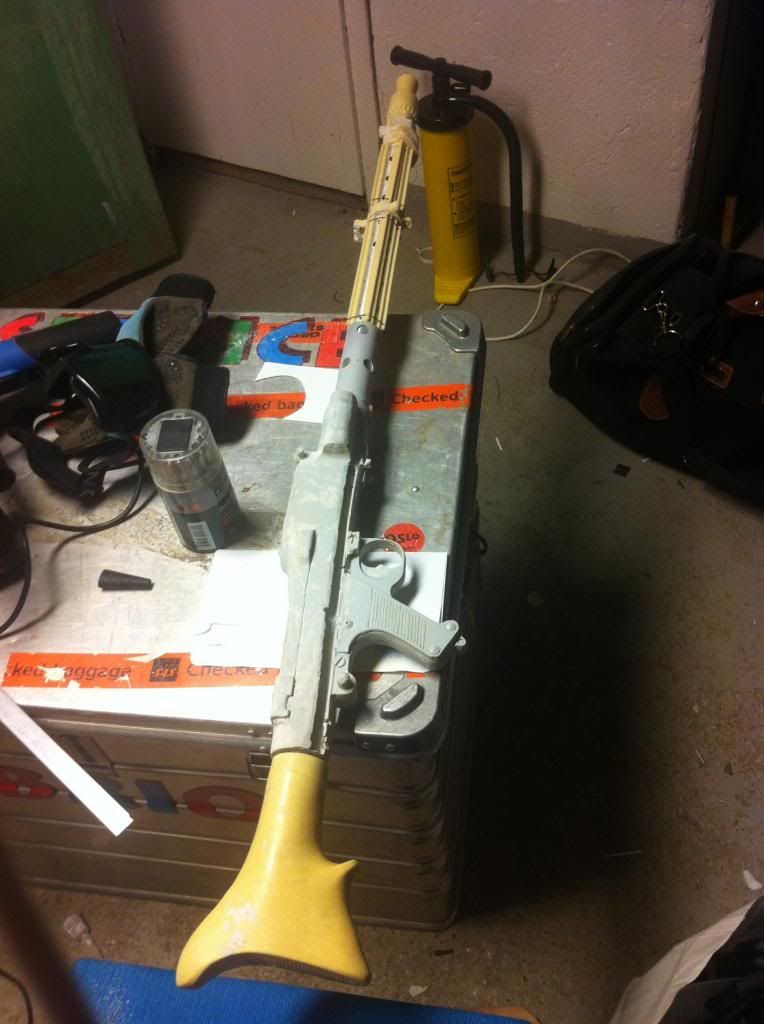
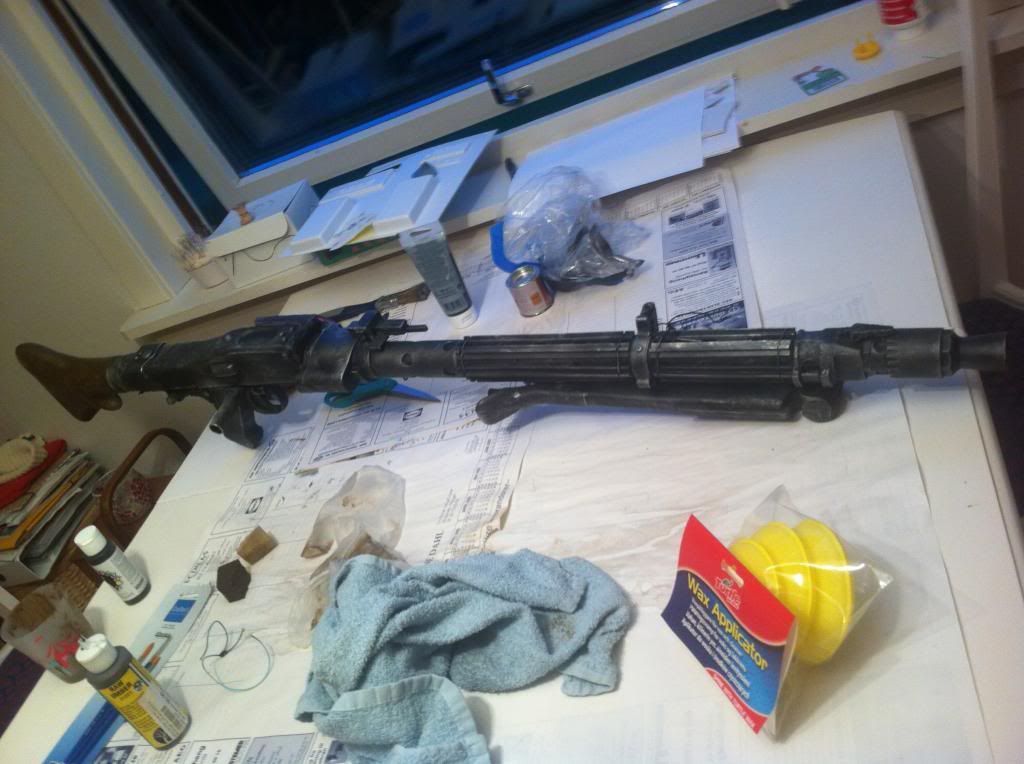
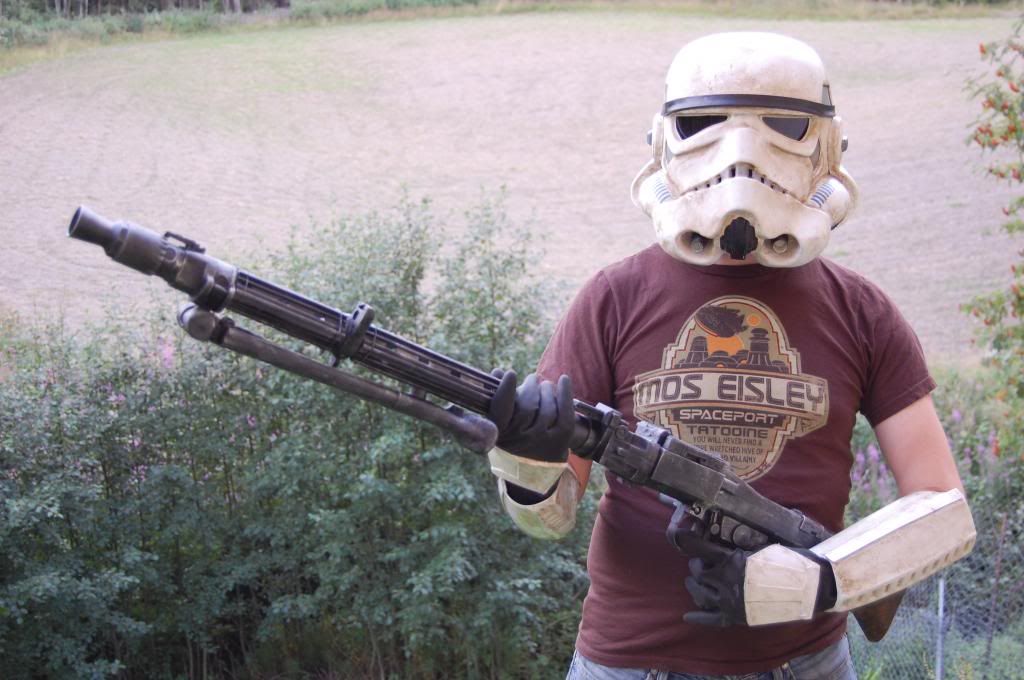
Hello, just wanted to post a thread of my first "big gun" build. I have very little experience on building weapons, have only made a couple of Droopy-Doos E-11. So I was excited, and a bit nervous. This is how it came down.
The parts: I bought the parts from Alfredo Vasquez Gutierrez in the 501st German Garrison. He makes various weapons, but this weapon he molded the resin parts from a real MG-34. It has captured allot of small nice details. I meet him by coincident at a troop in Denmark, and bought the parts. He sold them for 300 Euroes.
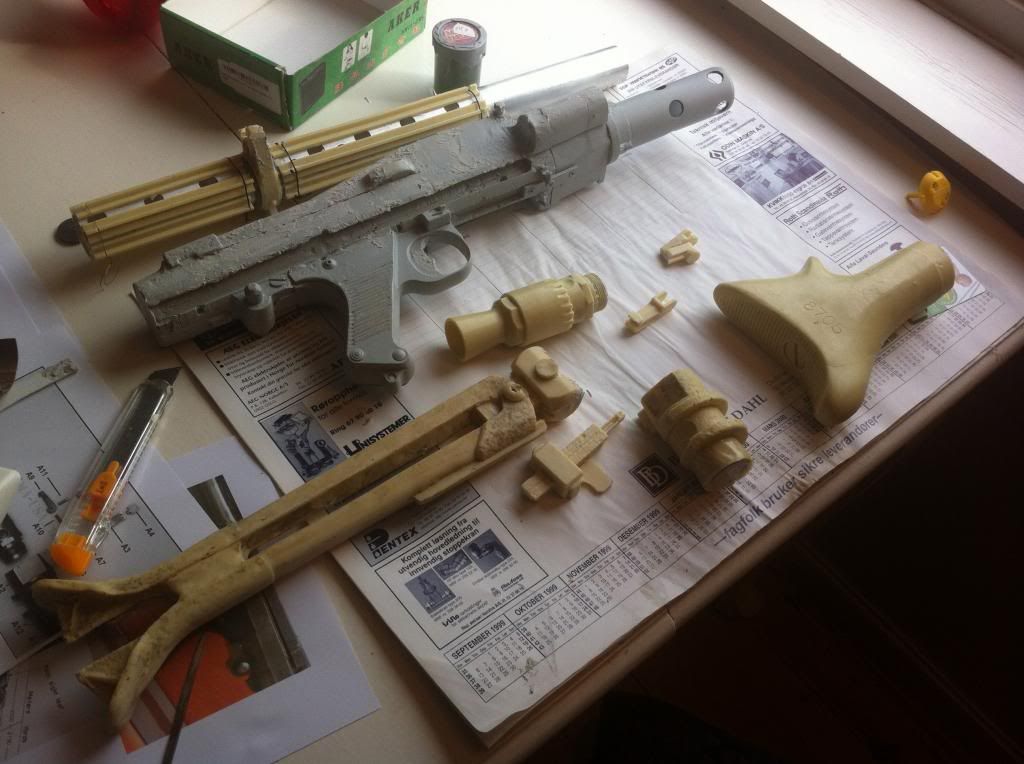
The build: Easy and fun. Quite easy actually, even for a beginner as me. First I patched up imperfections with epoxy filler, sanded and sharpened some of the details using Dremel.
Before and after:
To fasten the butt stock I attached a wooden plug in the rear that fitted the socket in the butt stock. (relax guys, we are still talking about weapon building here)
Glued on the rest of the parts, like the disc. Forgot to take pictures...
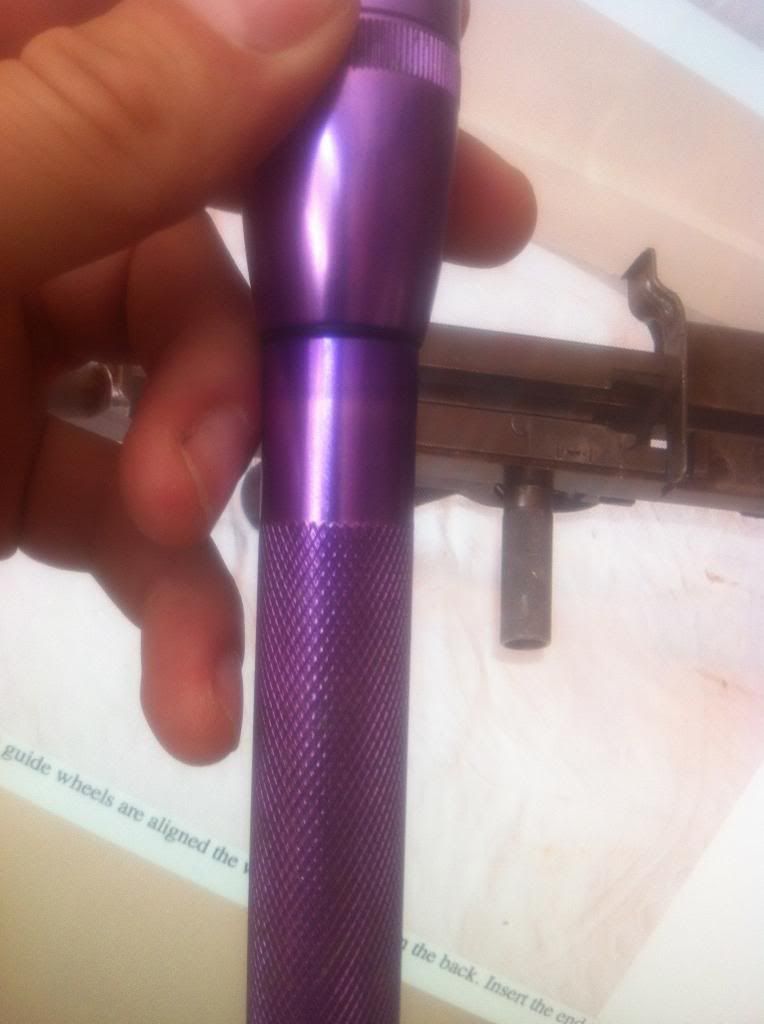
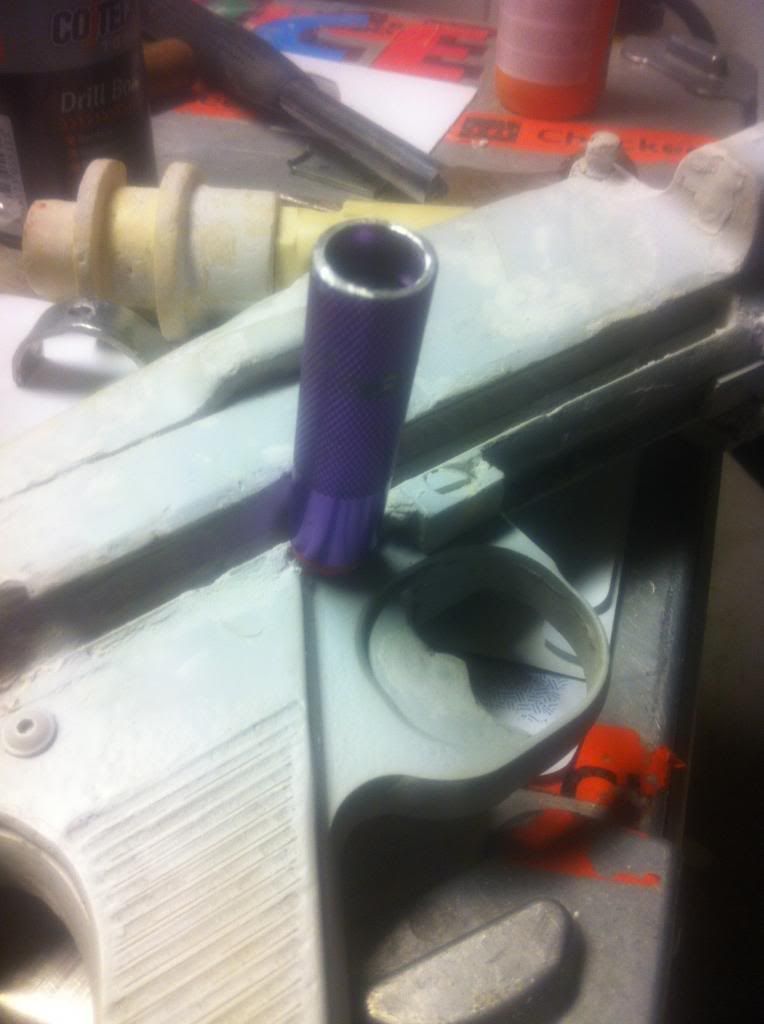
Used a Mini-Maglite as a loading handle! It had the right size and the diamond pattern I needed! Manage to attach it a little too low on the weapon, hmmm. Big mistake, with the glue I used (Loctite) it have to stay there I guess....Don´t want to crack the body of the weapon...
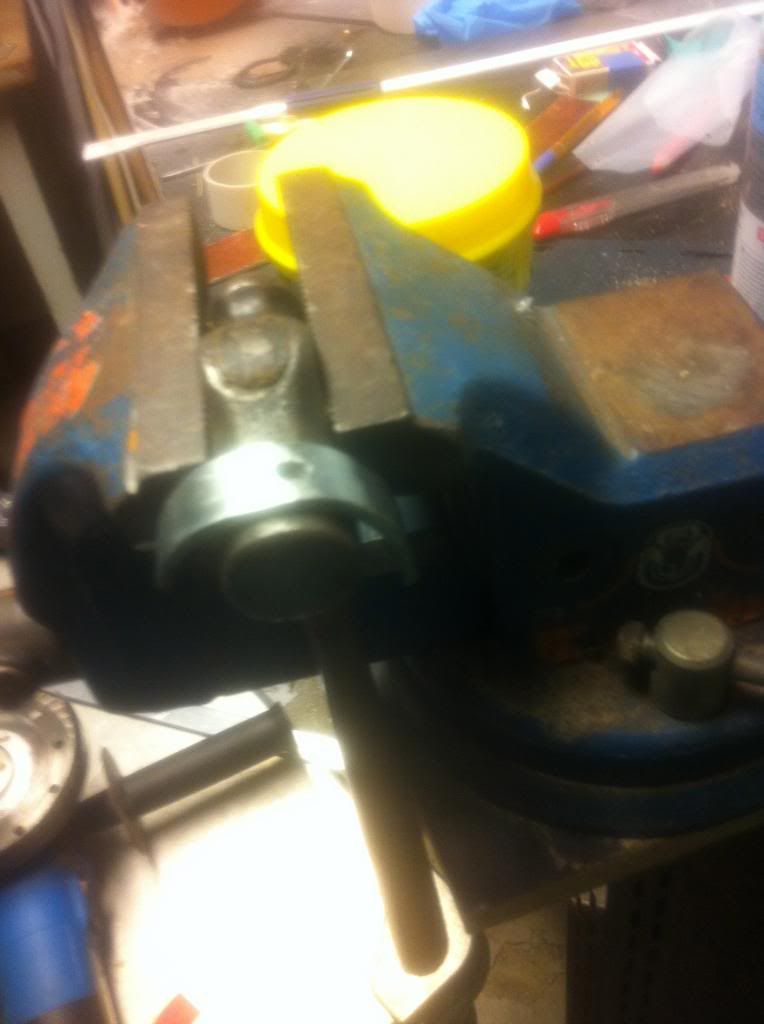
Bended a piece of metal to fit as bipod mount. Drilles a hole and attached it to the bipod
I also made a ammo box of a wood chuck. This could have been more accurate, but wood and me don´t play nice... It will play the part ok, I guess
Then I glued together the three pieces of the barrel. This was the hardest bit. Getting them to align perfect. On the first picture, close, but no cigar...

Then I glued the bipod underneath.
I also drilled a tiny hole in both barrel and main body, to insert a pin to hold the weapon together. This means I can pull out the pin, take of the barrel off and makes it much easier to travel with.
Paint job: The whole weapon was primed, then coated in silver. Then I painted it black, except the butt stock.
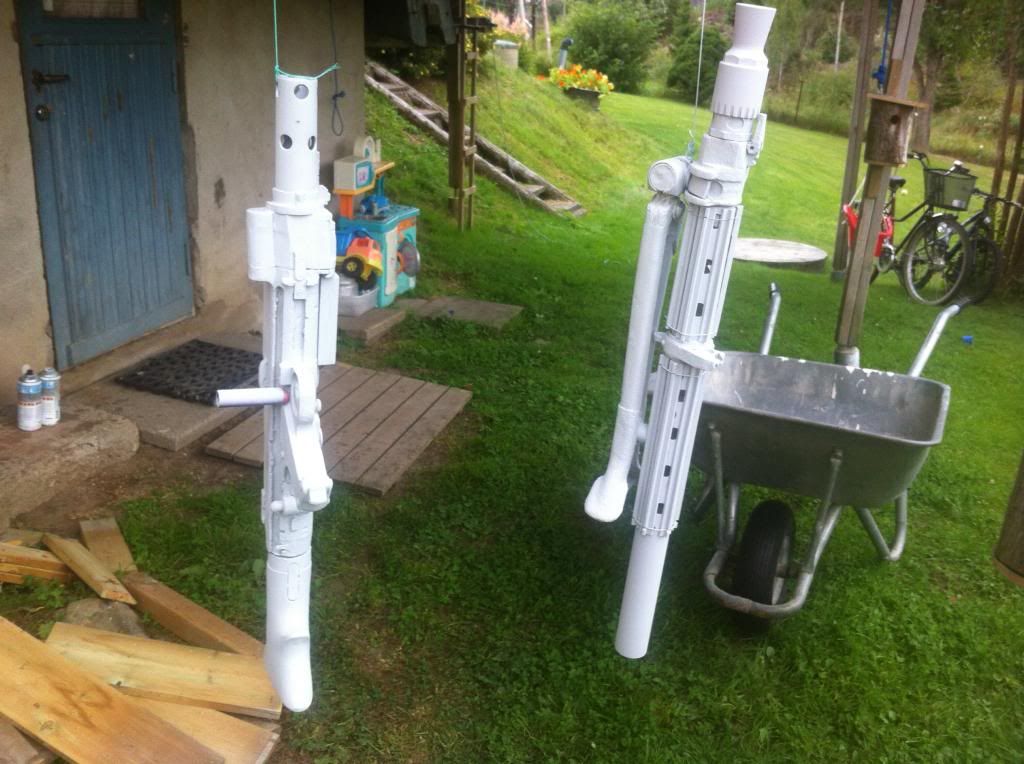

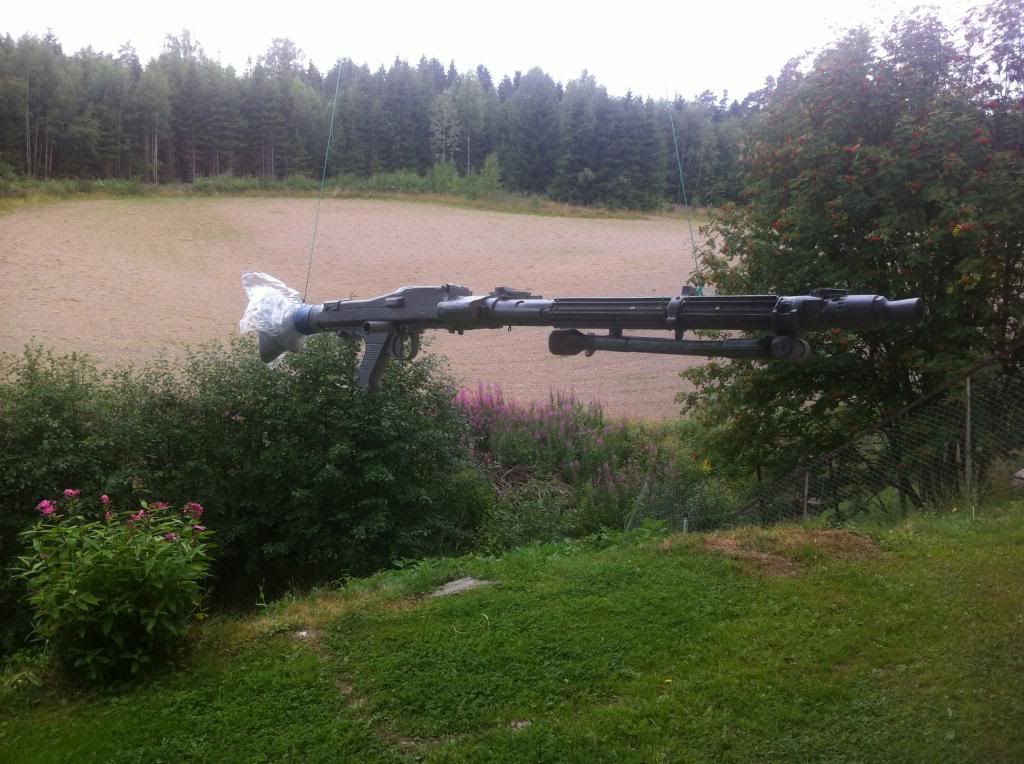
Then I brushed the weapon with dry silver paint to metallize it, and washed it with some black acrylic paint mixed with water. The butt stock was painted with Woodland Raw Umber, because I had allot laying around (And it will match the armor hehe) Sealed the whole thing with transparent sealer paint.
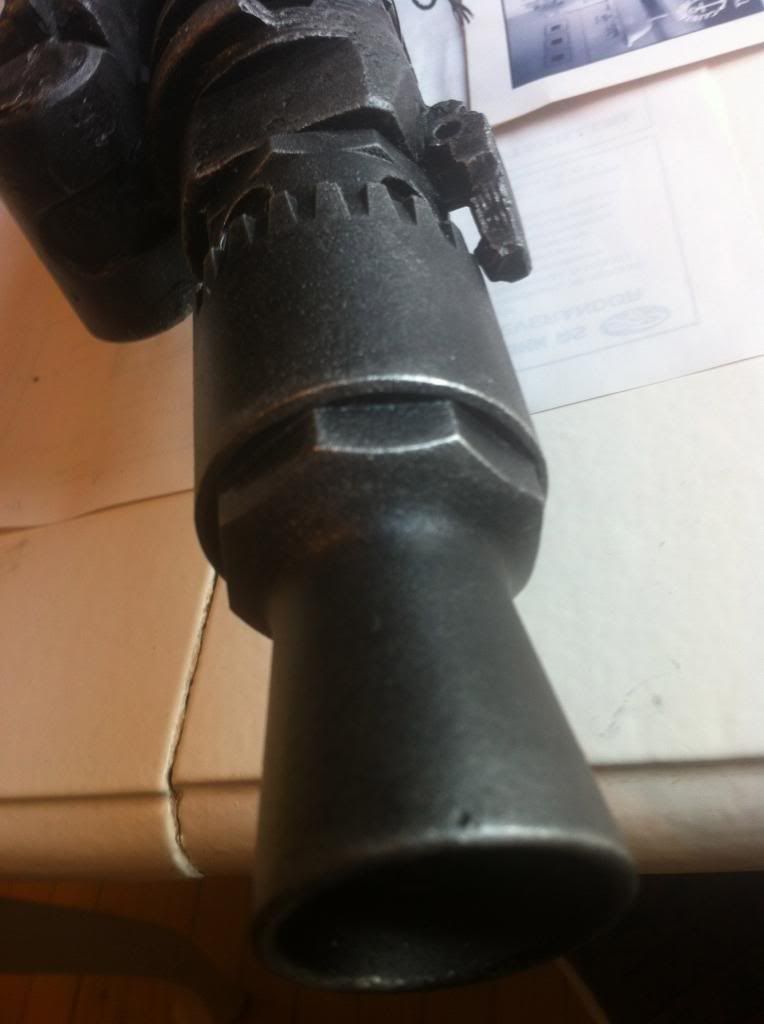
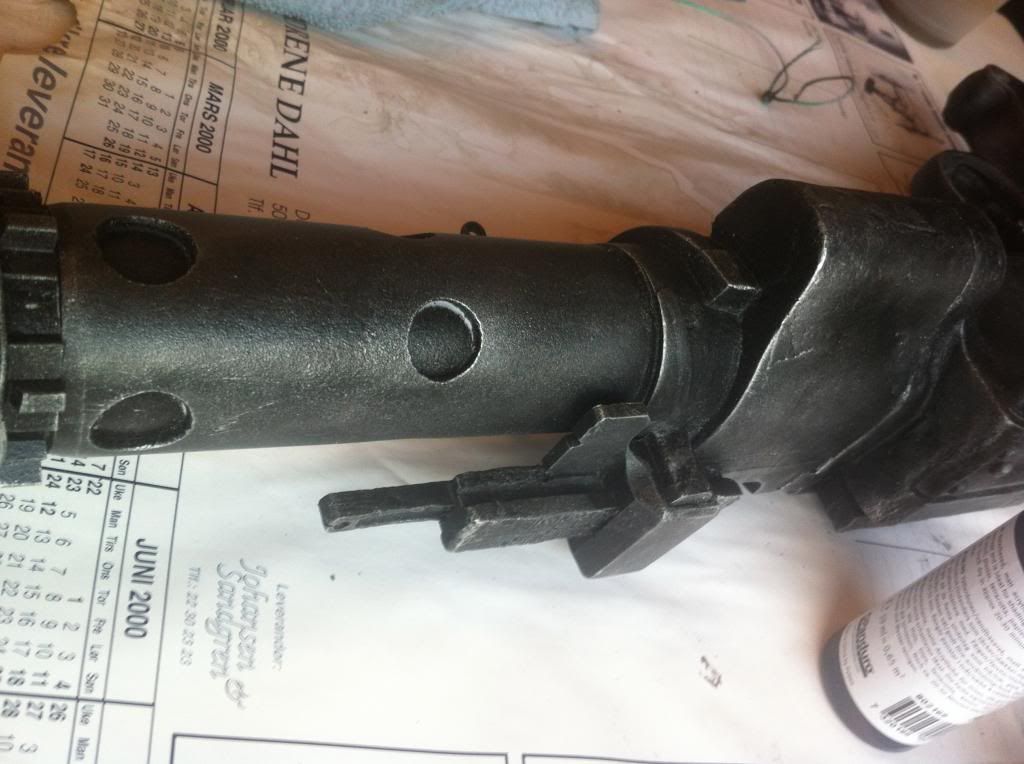
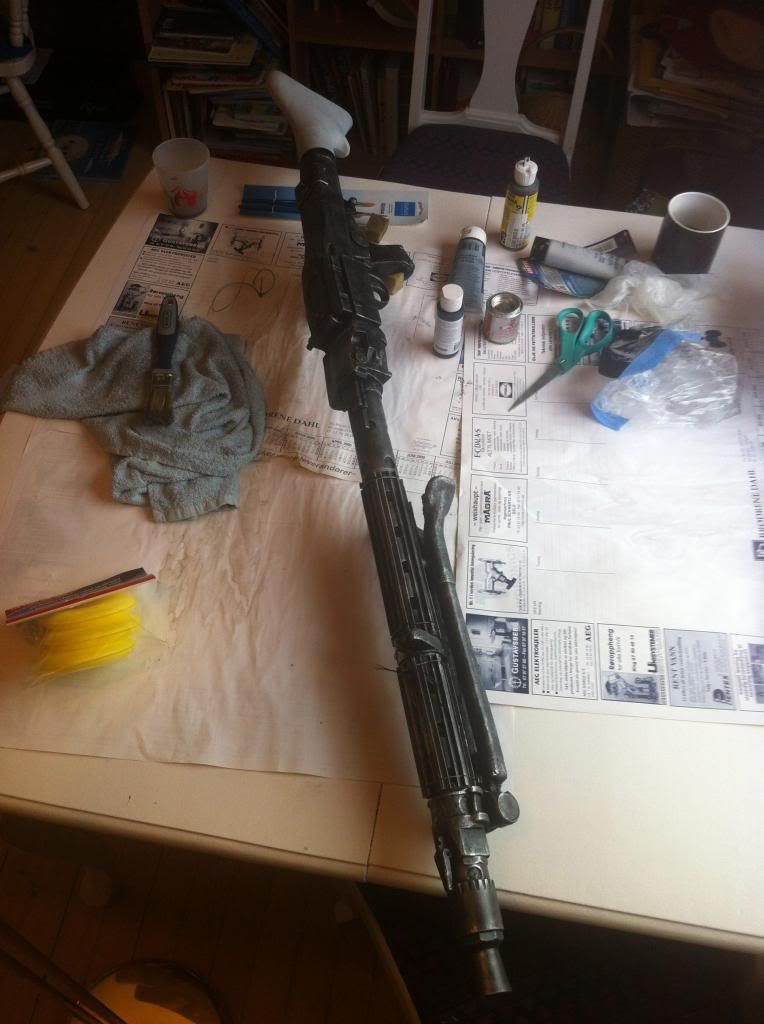
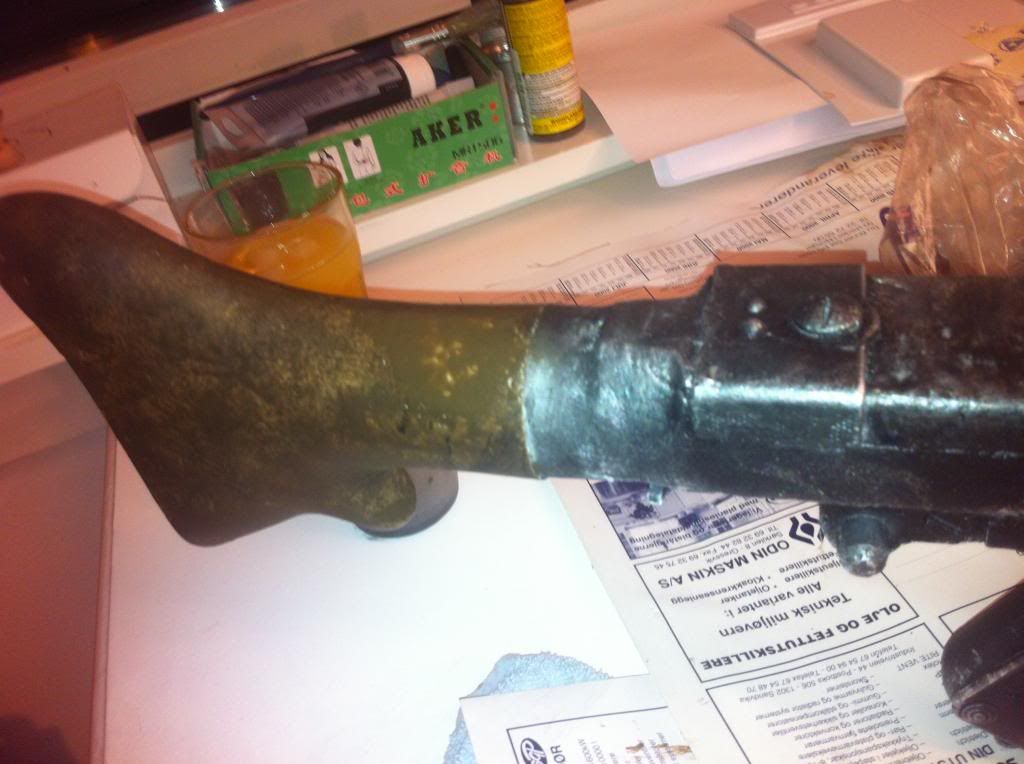
DLT-19 completed, just ned to fix something on one of the two front sight pieces (wich is missing on the pictures.)
-
Thank you guys
I´ll report in ASAP -
AWESOME!!!! CONGRATS my Brotherrrrrrrrrr!!!!
TY, you may recognize the lovely backpack? Awsome!


*DONE*TD-30502 Requesting Deployment
in MEPD Police Officer Program
Posted
Looks amazing bro!