

Havoc6538
-
Posts
259 -
Joined
-
Last visited
Content Type
Events
Profiles
Forums
Everything posted by Havoc6538
-
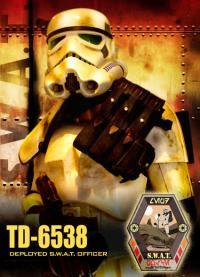
*DONE* TD-6538 Requesting Deployment
Havoc6538 replied to Havoc6538's topic in MEPD Police Officer Program
Good spot on the belt. The corners were rounded off (I bought the kit pre-trimmed and never even noticed that). These are now cut at 45 degrees. Will post pics as soon as I can. The website that hosts my pics is undergoing maintainance and won't let me upload anything for now. I'll add the o-ring ASAP and post the pics together. -
*DONE* TD-6538 Requesting Deployment
Havoc6538 replied to Havoc6538's topic in MEPD Police Officer Program
You were right, I'd never thought to weather the mic tips themselves. Now done: Left side rivets: Crotch snaps: Top right ab snap: Pack now weathered: Re. the blaster ring, if the CRL demands it, I'll reluctantly add it, but I'd gone by this article posted here: http://forum.mepd.ne...?showtopic=5759 The bapty blasters used by the sandtroopers had no o-rings, but if I can't get cleared without it, like I said, I'll add one. Checking belt details. Pic to follow. -
*DONE* TD-6538 Requesting Deployment
Havoc6538 replied to Havoc6538's topic in MEPD Police Officer Program
There is no ring on the back of my blaster. I never added one as I understood that this was accurate for the sandtrooper blasters. Other pics not included, as I thought those details were only needed for SWAT clearance, but no probs, pics to follow. -
Your Name: Simon English Your 501st TD ID with a link to your 501st profile:http://www.501st.com...php?userID=5509 Your MEPD forum name: Havoc6538 Your Garrison: UK One helmet off photo: One full armor, helmet on, front photo: One full armor, helmet on, right side photo: One full armor, helmet on, left side photo: One full armor, helmet on, back photo: Canvas or elastic shoulder straps detail photo: Canvas belt detail photo: Abs details close up photo. Showing the 3 buttons an TD abdominal plate: Helmet: A close up photo clearly showing the flat green lenses: Detail photo showing no stripes on all grey traps and tears: Detail photo of frown, showing 4 teeth cut out and grey paint. Detail photo of hovi-mix mic tips (or replica) mounted on helmet. Detail photos of blue tube stripes: At least one picture showing the whole weapon: Detail pictures of mods required for the specific weapons: In this case, added dirt: Photos of DLT-19 to follow once mods completed. One (or several) full body action (or attitude poses) good quality picture:
-
Cheers guys. Updating my sig will have to wait. Photobucket are undergoing maintainance so can't upload my update.
-
I got cleared! Woohoo! Will update my profile and Sig when I get home. Will submit deployment pics in the next few days.
-
Docking bay Sgt v1 is nowhere near a dirty as those two, but I might add a little more as the camera's flash makes it all disappear.
-
Yup, mines attached exactly the same way, and like Beren's, is pretty much aligned with the control panel button.
-
Well, now the waiting begins. Backpack is finished (see my other work-in-progress thread for details) and I've submitted photos for garrison clearance.
-
Tonight marks the end of an era. Backpack is done and costume pics submitted to GML for clearance. So here she is, all finished. Such a relief to get it done, but now wondering what I'm going to do with my spare time...
-
The mortar tube is obviously a holder for copious quantities of the delicious McVities Jaffa Cakes that fuel the UK Garrison. The rest of the back pack is just a heat exchanger to keep them cool so they don't melt in the desert heat.
-
Yep, Vader's not cheap, but you get such a great reaction when you wear it, then you have to spend your day trying to act like an evil Sith lord but with the biggest smile on your face. Once my Sandy is finished, I'll be taking my 6 year old Vader costume off-line for a bit for upgrades (armour and helmet mainly). Your kit looks great so far, really nice helmet and armour. (And loving your man cave too.)
-
Beer and Jaffa Cakes huh?...now I know what TDs keep in the "mortar tube". It's a Jaffa Cake holder.
-
That's cool, I know how to apply for UKG clearance (this will be my 4th costume - sold my TIE pilot to fund it), just wasn't sure which came first. Joe, when I get the chance, I might do just that :-)
-
It does, thanks guys.
-
Roger that. I'll go without for now and see what happens later. Thanks, Scribbler.
-
Sorry if this is a silly question, but which should come first? Garrison/GML clearance or MEPD deployment? The main reason I ask is that in other detachments I am (or have been) part of since joining the Legion in 2005, I've never had to get the costume approved by the detachment, only my garrison GML. I assume we get clearance here first. Otherwise, having been cleared by my GML, when it comes to MEPD deployment, if I had to make any changes to my costume I'd have to reapply for GML clearance (assuming I'm going by the book!). So is it the case that I request deployment here first, and having got it send in pics to my GML for garrison clearance? But this also doesn't make sense, as we have to provide links to our 501st profile, which I wouldn't have if this was my first costume... It's probably very simple, but I can't find this info on the site and no-one seems to have asked it before. I'm so confused, lol!
-
*DONE* TD-21112 Requesting Deployment
Havoc6538 replied to Vf2112's topic in MEPD Police Officer Program
Congrats Vince. Nice kit, well done. -
Bump!
-
For the radar dish backing, I went with the CD in the end. Then bolted it through the mortar tube with a cap nut painted the same shade of off-white as the dish. I went through my garage this morning, figuring there's GOT to be something I can use for the stinger. Going by this pic and the alley check footage, it had to be something cone shaped: Luckily, I found a funnel I didn't even know I had. I cut a slice out of it the right size, cut a length of tube and cut a hole the diameter of the tube in the bottom of the jug I'm using as the main piece. I flipped the funnel piece over, embedded it in a piece of plasticene and positiioned a bit of pipe through it, then filled it with fibre-glass resin. I'd put a film of vaseline on the pipe so the resin didn't stick to it. Once hardened, with the pipe removed, I could clean it up: Tidied, the final bit of pipe glued in place and primed: And finally, the finished stinger, screwed through the jug base in to the resin, and glued around the pipe on the inside where it enters the jug base.
-
I've painted the bee stinger part, just on the lookout for the parts to use for the actual sting. At the start of the build, I bought a load of bits from a UKG member (radio faceplate, mushroom caps, exhaust, and toolbox), but have now discarded all but the toolbox and the reshaped exhaust box. This is how the exhaust came: Not very accurate. I chucked the pipe - can't use it. Then I made some mounting brackets from some scrap ABS: I backfilled the box on the inside and sanded the corners over, giving it a more gentle curve, as on the originals, and I fitted the brackets. This is how it looked after a coat of paint: For the pipe, I couldn't find what I needed, so I made it. I took a short length of plumbing pipe, cut the same length again so I had 2 identical pieces. Then I made a cut down the length of one piece and wrapped it around the outside of the other after applying a generous coating of polyweld . This created a piece the right thickness, but I had to fill the gap on the outer piece (hope this makes sense). Once that was done, I cut the end at an angle, tidied it all up and primed it, to get this: I glued it onto a narrower guage pipe and added an o ring: Added the ribbed pipe around the lower piece (I couldn't find one with the reinforcing ribbing at the correct angle) and the hose clip: And here it is finished on the pack: I think maybe the actual exhaust box could have done with being a little longer as the top of the exhaust sits slightly lower than it should, compared to the bottle next to it, but I have to work with what I've got. I've also now fitted the radar dish, pics to follow.
-
I'm not far off finishing my pack for Docking Bay sgt V1. The SWAT CRL shows it as a #3 pack and names it as the "Move Along" pack. I take it from that that the Docking Bay sgt. V1 pack does NOT have the lab pipe, same as Move Along trooper. Can anyone confirm this for me? Also, I've finished the exhaust (will post pics on my WIP thread soon) and need to fix it to the top tray. Does anyone have any pics that show what was used to attach it? I was just going to go with some black dome head screws.
-
Humbrol 47.
-
Put me down for one. Smally - x1 Joe Versku - x1 Dazauto - x1 Havoc - x1
-
Coming full circle..