

silverboyd
-
Posts
146 -
Joined
-
Last visited
Content Type
Events
Profiles
Forums
Posts posted by silverboyd
-
-
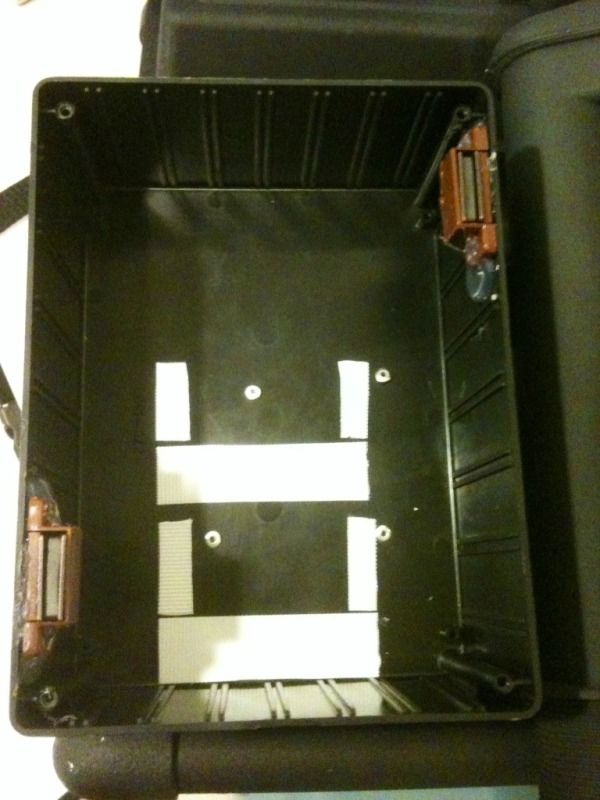
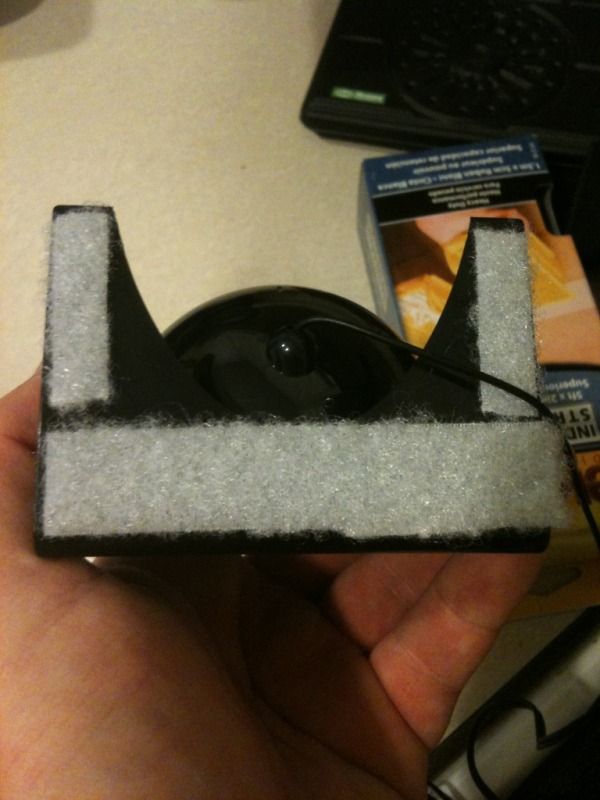
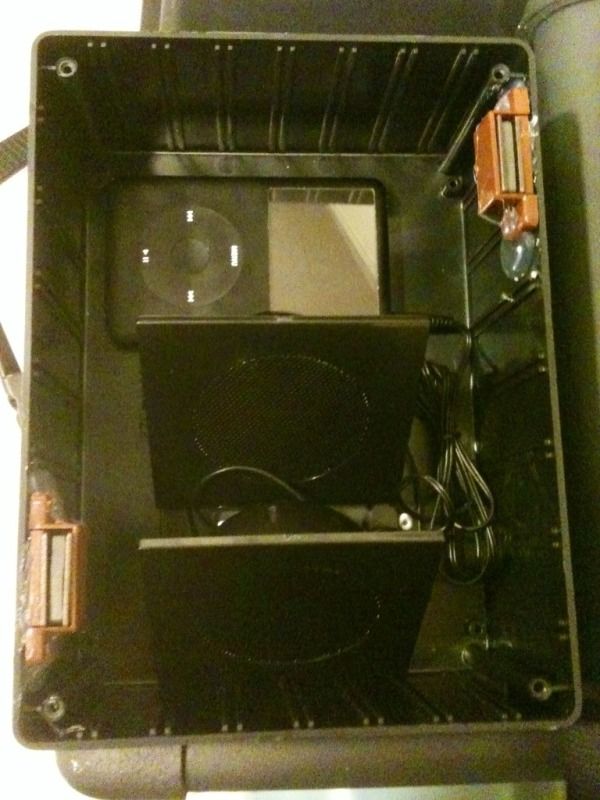
Today I installed my simple speaker setup for the inside of my backpack radio. I found some small speakers at Walmart that were only $5. Attached them to the inside via industrial strength Velcro. I also attached Velcro to the back of my iPod. Seems to work like a champ.
-
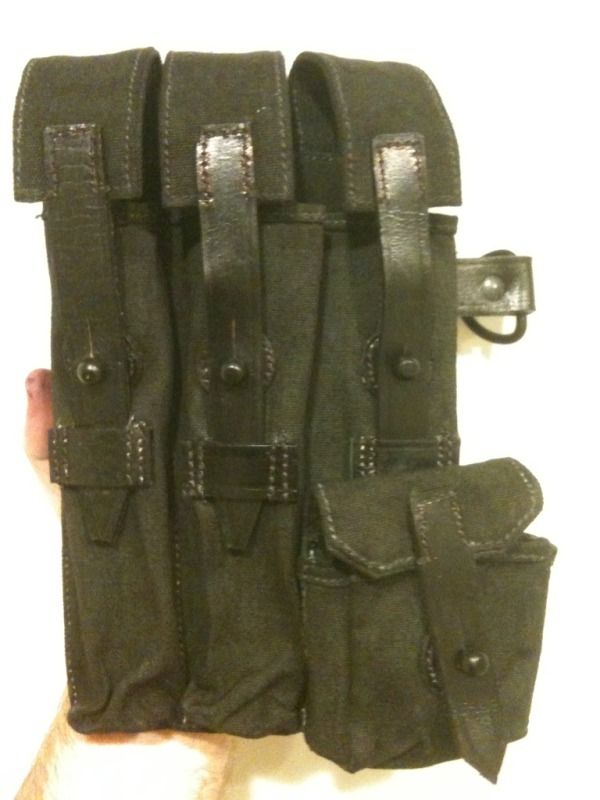
Weathered my pouches using the simplest method I could think of. Actual mud from my backyard. I simply rubbed it into the canvas fabric and let it dry in the sun. I loved the way it looks. Now to just attach them to my belt and backpack.
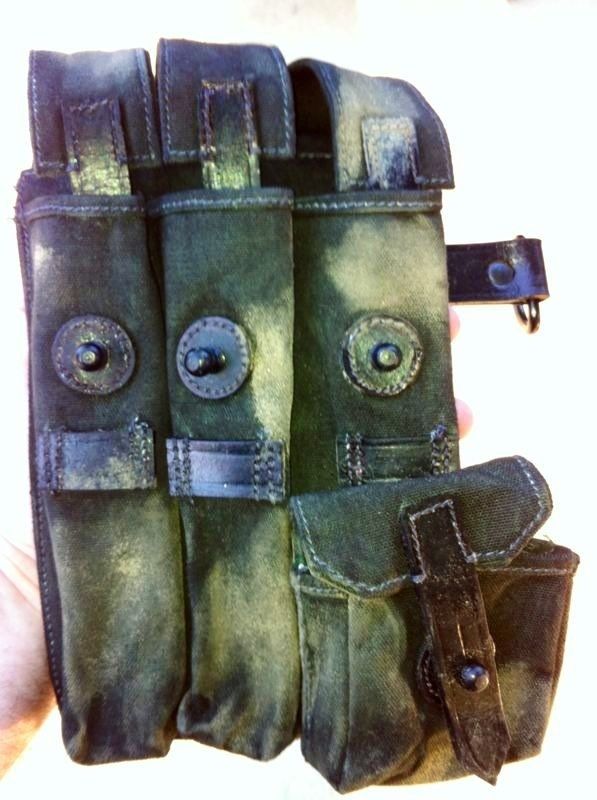
Some of the parts that look too dirty I'm going to rub off so that it doesn't look too concentrated in one area. I'm very pleased with it.
-
The mortar tube is the last piece I need. I measured the inside diameter of my Thermal Detonator end caps and they are 2 3/4" diameter. I have the AM kit. The only pipe I can find is 2 1/2" (too small). Any suggestions on what to do?
-
Thanks fellow troopers
-
Even if no one sees either strap....i still wanted to go that extra step

I'm awaiting more male snaps to fasten the shoulder straps to the back piece.
-
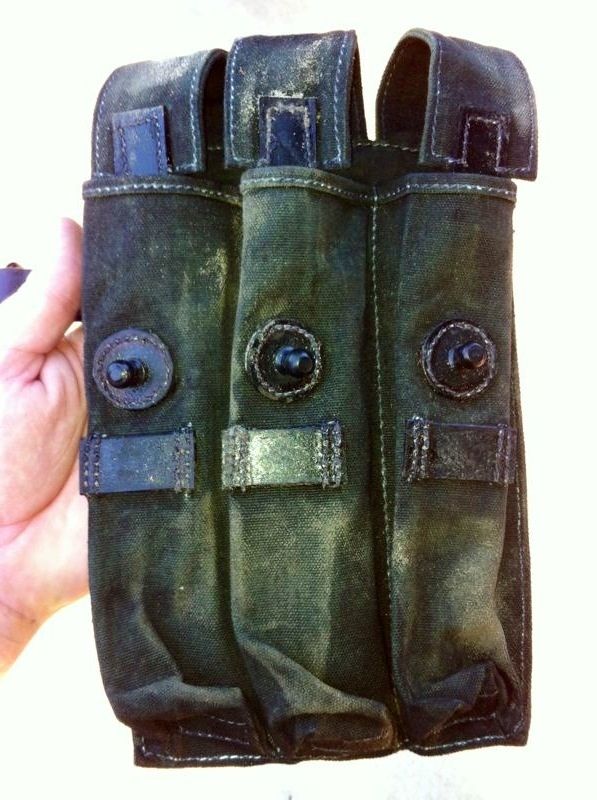
Shoulder and hip pouches...from green to black. Just need to touch up the stitching on the hip pouch. Can't wait to attach them to my belt and backpack
-
Yeah...but I wanted to keep the leather straps as they were. Didn't want to paint over them. Didn't feel like taping it up either. I think they look good. Tomorrow I'll get some actual dirt on them
-
Spent an hour or so "coloring" the pouches with a Sharpie permanent marker. This tip was given to me by a member of another Garrison. I like the results. Now to add some dirt and light weathering.
-
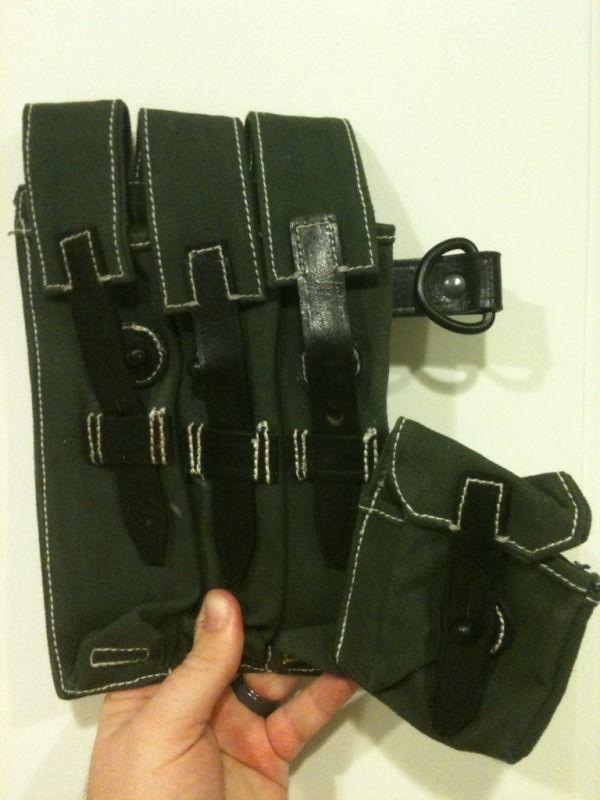
I took the tool pouch off of my MP40 shoulder pouch so that I can move it in and I re-attached it. Now to weather and make the pouches black.
Now to weather and make black. Any tips on making it black without using dye? I've been told a Sharpie marker worked nicely as well as Plasti-Dip....thoughts?
-
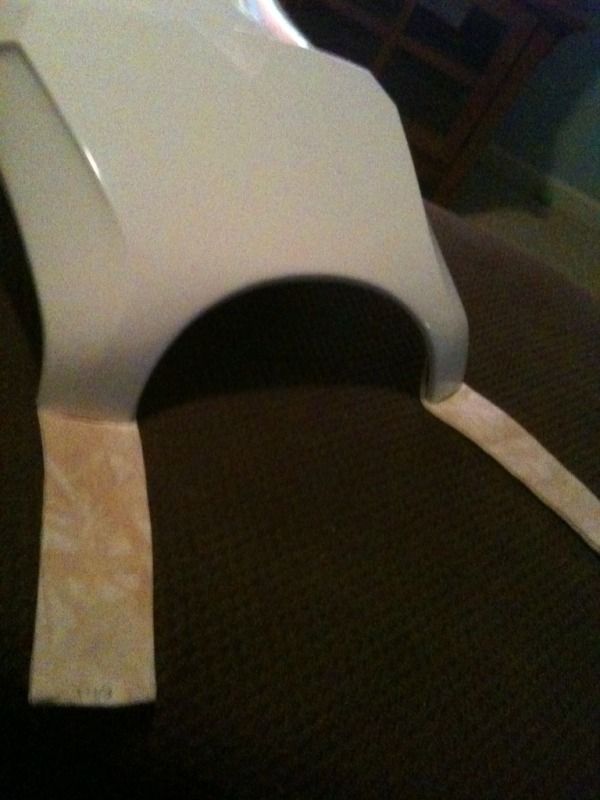
Got some white canvas at the local fabric store.
Since I'm going Sandy, I don't want the shoulder straps to look clean. I decided to take some of the material and soak it in a tea bath for 1 1/2 hours.
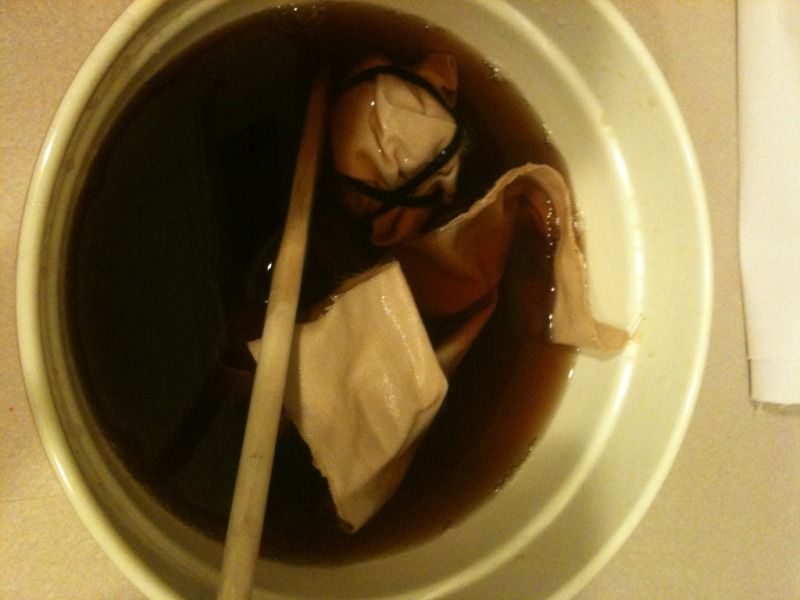
The result was pretty cool.
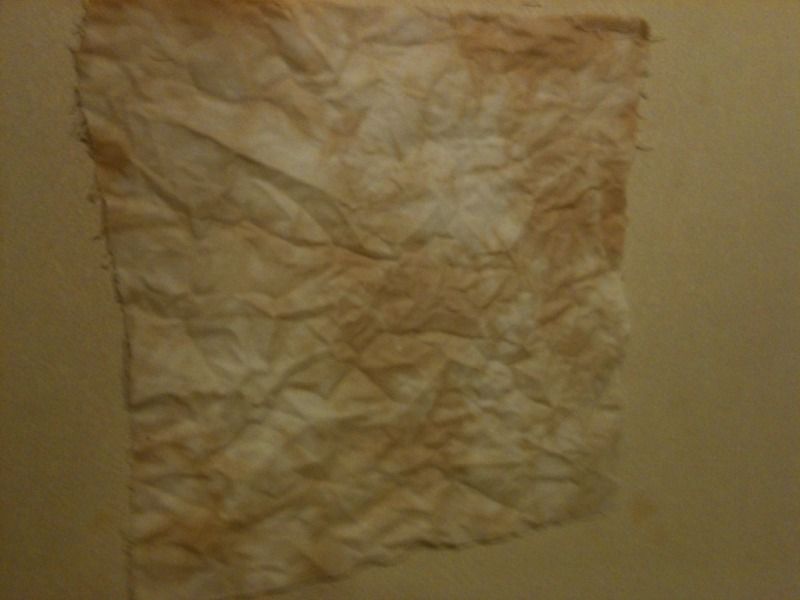
I'll iron the canvas, sew the edges, add heavy duty snaps & attach them to my chest and back armor. I think it will look nice once I get the rest of my armor dirty. May also rub on some actual mud to the fabric and once it dries...rub it off
-
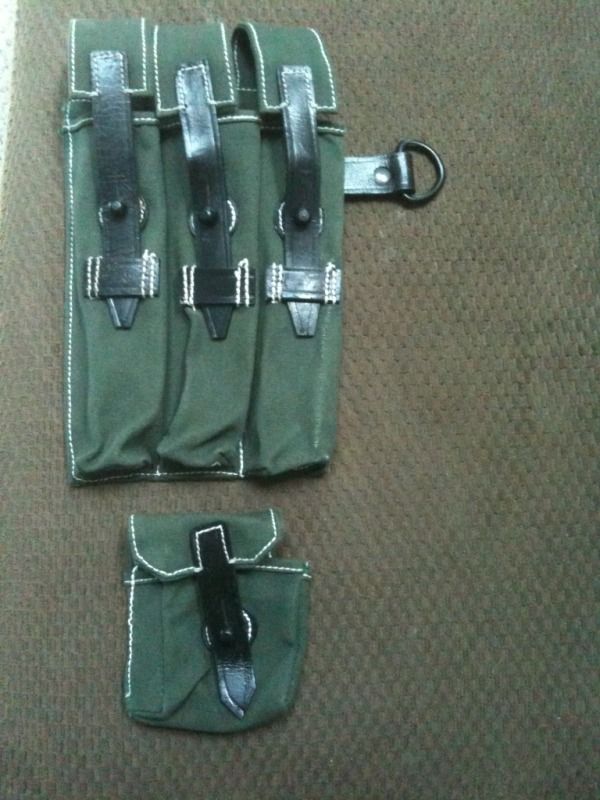
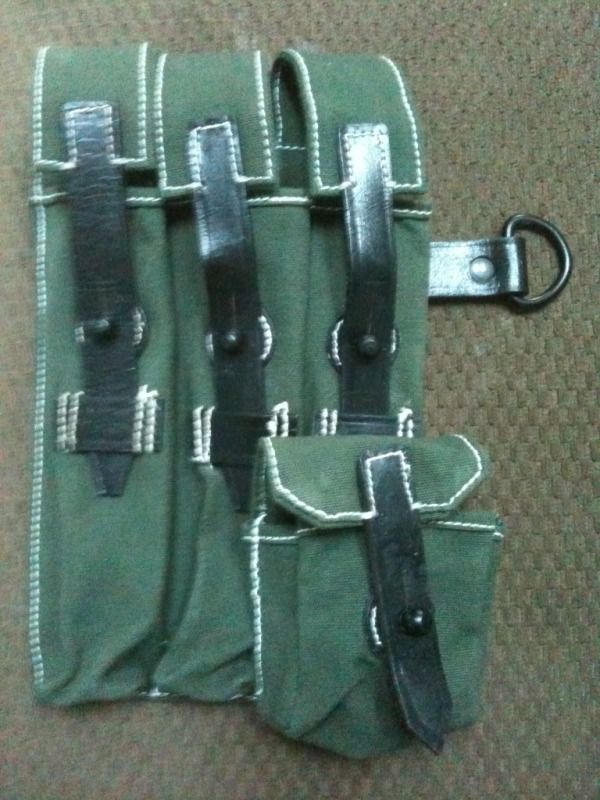
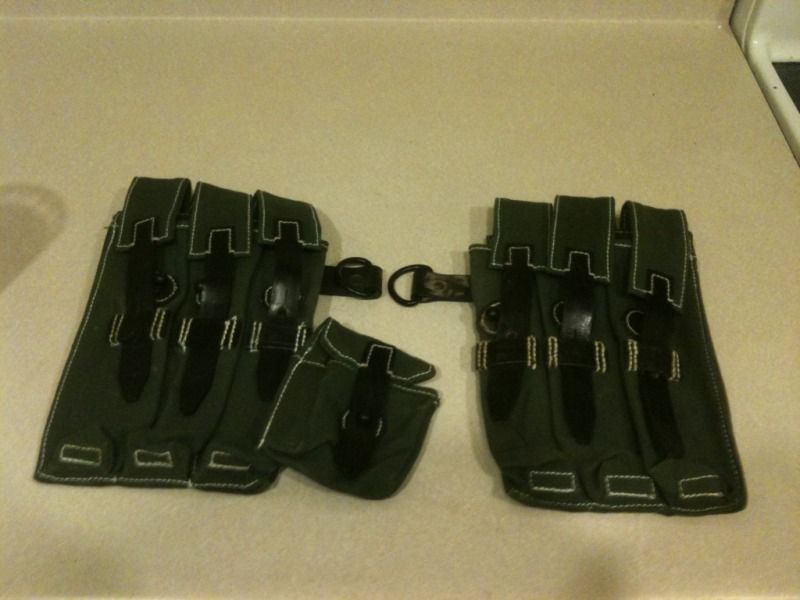
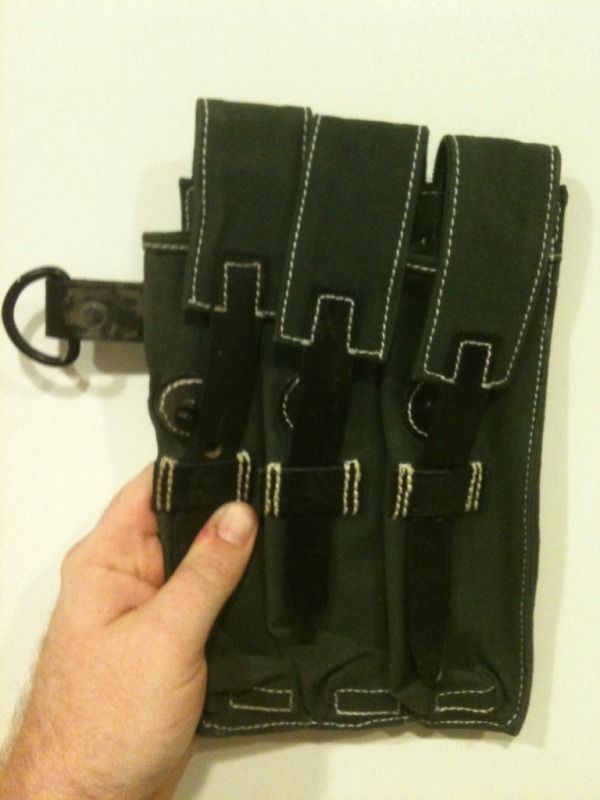
Today I received my German WWII MP40 Canvas Pouch set from Numrich Gun Parts. They were around $35 for the set after shipping. I believe the color of the set you receive is chosen at random. I received the dark green canvas pouches. They are great quality. I just need to unstitch the tool pouch and re-sew it back on having moved it over an inch or two. I'll weather them, fix the loops on the back of the pouches and either dye them or cover them in a few coats of Plasti-Dip (which I've seen done by another trooper and it looks great). I have posted the link below if you're interested in ordering from the place I found them.
-
With the thighs...did u have to taper them at all to fit you right?
-
I'm about to work on an AM kit I just got. Do you think using the overlap method was fine or did you also use interior / exterior shim and cover strips too?
-
I just got my AM kit yesterday. I'm nervous about it for some reason. Did you use the overlapping method mostly? I am trying to start on the biceps and forearms and trying to figure out the best way to approach this thing. Any pics of you working on those parts?
-
Thinking of just wrapping my E11 in bubble wrap or something but here is a link to a ski bag that I'm thinking of buying for my T21 Blaster. It's pretty cheap too. Don't need anything special.
-
Personally I used E6000 for just about everything when gluing on my Doopydoos resin kit onto my Hasbro mod. But I did use the 90 seconds epoxy as well and they both worked great. You can't go wrong with either in my opinion
-
I have spent the past few nights adding the "14 ribs" to the barrel of my T21 blaster build. While I've seen some people use corrugated downspout drain extensions...I opted to go for what I think looks a little better (in my opinion). I used 1/4" x 14'-0" white vinyl weatherstripping used for doors in your home. I could only find it in white so I used some black Plasti-Dip and sprayed it black. The nice thing about Plasti-Dip is it's flexible. Once it dried, I wrapped the barrel the best I could while gluing it down with E6000. It's very much on there and shouldn't become unraveled. One thing i noticed was while applying the E6000 it made some of the Plasti-Dip rub off. No worries though...I'll paint over it with some black paint and I think i'll be fine. Here are some shots of it before I finish the final paint touch-ups on the "ribs".
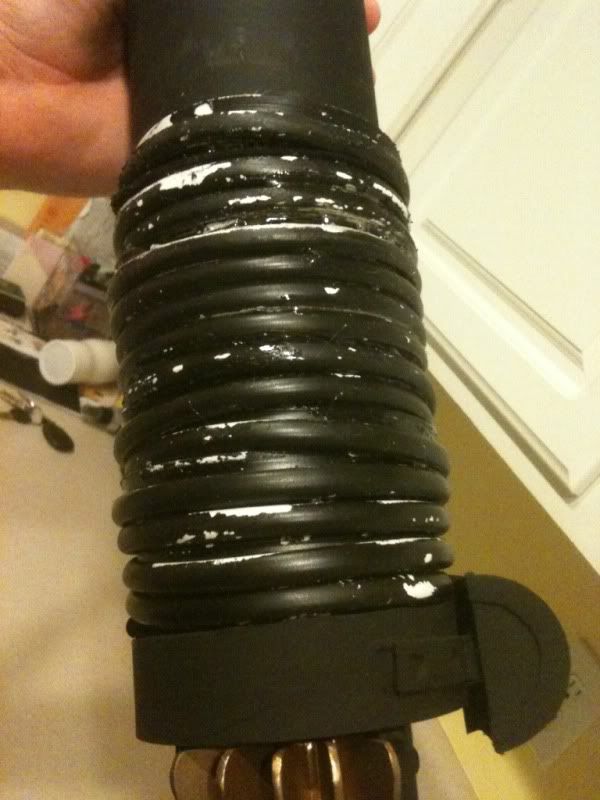
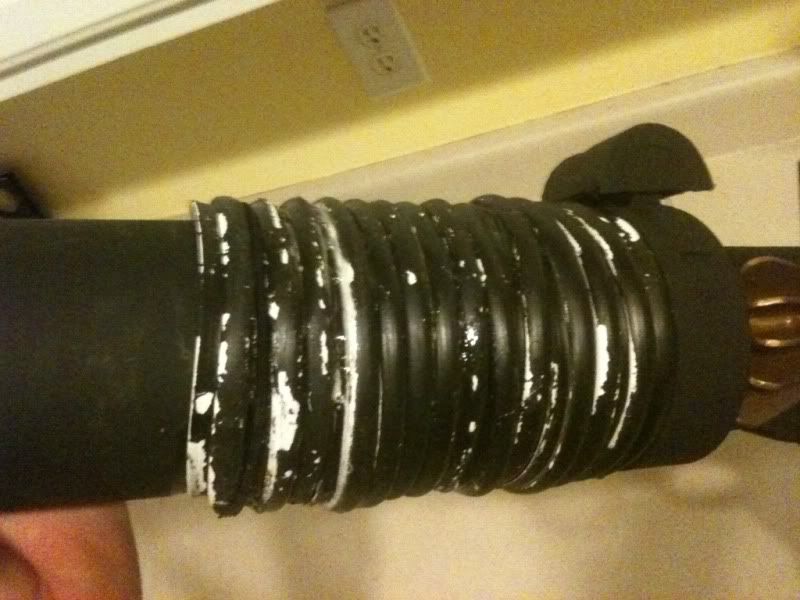
I'm aware that the ribs are not wrapped up perfectly but I think it adds "realism" to it. I also like the clumps of E6000 you can see between the ribs. It could be mistaken for "grime" that has gotten in the cracks due to patrolling in the Tatooine desert.
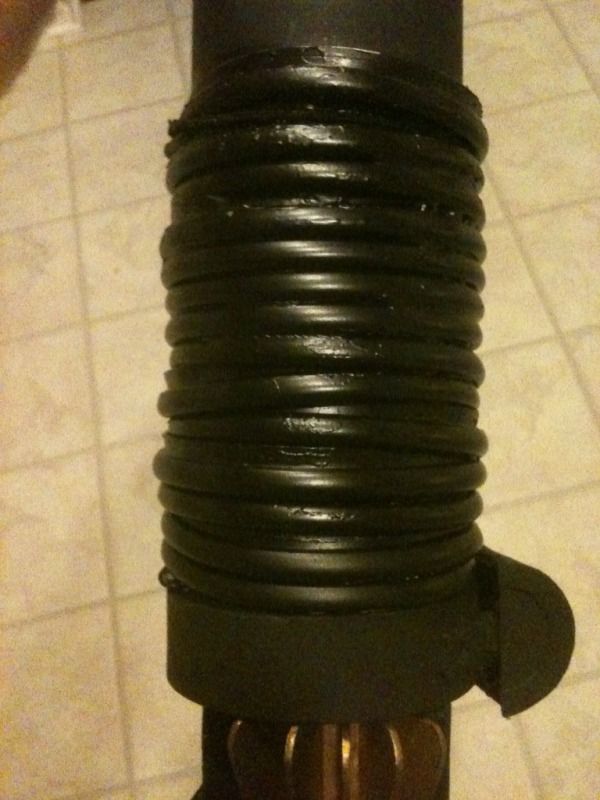
Here is a shot of the "ribs" after applying a few more coats of Plasti-Dip. I'm happy with the results. I can now say that I'm officially 100% finished with my T21. Started working on it last September. Can't wait to show it off @ future troops
-
I have spent the past few nights adding the "14 ribs" to the barrel of my T21 blaster build. While I've seen some people use corrugated downspout drain extensions...I opted to go for what I think looks a little better (in my opinion). I used 1/4" x 14'-0" white vinyl weatherstripping used for doors in your home. I could only find it in white so I used some black Plasti-Dip and sprayed it black. The nice thing about Plasti-Dip is it's flexible. Once it dried, I wrapped the barrel the best I could while gluing it down with E6000. It's very much on there and shouldn't become unraveled. One thing i noticed was while applying the E6000 it made some of the Plasti-Dip rub off. No worries though...I'll paint over it with some black paint and I think i'll be fine. Here are some shots of it before I finish the final paint touch-ups on the "ribs".
I'm aware that the ribs are not wrapped up perfectly but I think it adds "realism" to it. I also like the clumps of E6000 you can see between the ribs. It could be mistaken for "grime" that has gotten in the cracks due to patrolling in the Tatooine desert.
Here is a picture of the "ribs" with a few more coats of Plastic-Dip applied
-
I just did mine actually. I used 1/4" x 14'-0" weatherstripping. Got a whole roll for $4. Looks really great I think.
-
never thought of using elastic straps...i was thinking of using black nylon. my thing is trying to figure out the best way to attach the straps to the top of my pvc backpack frame
-
congrats
-
i'm at the point where i need to assemble my straps to my backpack frame. Can anyone post pics of how they went about attaching their straps to their frames? Any reference pics would be greatly appreciated
-
I wish i was in your shoes. I'm dying to get my hands ont he rest of my armor
-
http://e-sarcoinc.com/leeenfield3or4slingwwiwbrassstamp.aspx
I ordered (2) from this site as well as the Lee Enfield butt swivel. Looks awesome on my T21
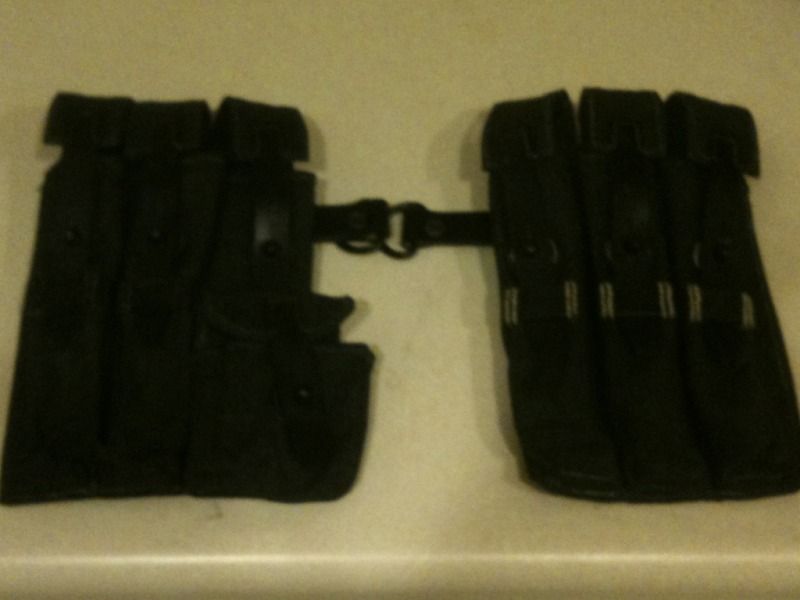
Attaching Ammo Pouches
in Pouches, Pauldrons, and other Accessories
Posted
I think I may try to do the same thing with the MP40 pouch to attach it to my waist belt. I have plenty of rivets. So basically (in review)....I will cut off the angled loops, stretch them out and reassemble them to the back of the pouch using rivets and rivet washers? Sounds easy enough.
Here's what I did to attach the MP40 pouch to my belt. I did just like what was stated above. I used a combination of rivets along with extra strength hot glue. Seems like an odd combo but it's very strong and has held on nicely. I wanted to keep things simple.
The hot glue reinforcing is sort of messy looking (who's going to see it) but it works
And here is the pouch w/ the belt going through the straps on the back. I like the end result