

SAND DEVIL
-
Posts
457 -
Joined
-
Last visited
Content Type
Events
Profiles
Forums
Everything posted by SAND DEVIL
-

*ACTIVATED* TD-8266 / TD-8266 / SWAT OFFICER # 015
SAND DEVIL replied to Blaster 8266's topic in MEPD S.W.A.T. Program
Anthony, Since we are doing the same one, I noticed the left upper thigh. It needs the 'notch' cut out. Check out the other 5 SWAT 'Move Alongs' and you will see it. Looking great and nice details on the weathering. -
*ACTIVATED* TD-10072 / SAND DEVIL / SWAT OFFICER #018
SAND DEVIL replied to SAND DEVIL's topic in MEPD S.W.A.T. Program
Jay, There won't be any "bell ringing" here brother. The MEPD didn't make no quitters. So after I picked myself off the ground, from my temper tantrum, I started to look at the pics again and the suggestions about the strips being to wide. I agree with you guys. The arms are not modified and are the correct strips that came with the set, so I just need to focus on the 4 leg pieces. I can't make my legs smaller (yes I know I can run, and started that). I can't take the armor apart without ruining it (strips are glued with superglue, not E-6000). So I sit and stare at the legs. and stare, and stare. And I think to myself: "Self, what you going to do"? Well, I am going to reshape the areas with bondo. I am going to sand, and sand, and sand. Then Primer and paint. Then re-do smaller strips on top. Re-weather them, and re-post pics. So I would like to "introduce you to my little friends" (in a Cuban accent)... Should be done before the weekend. Pending on no more temper tantrums. Thank you for the honest feedback. These are great fixes so far and nothing I need Juan to tell me or reiterate what you have all correctly said before. OFF TO THE SHOP TONTO....HIGH ** SILVER, AWAY! (I can't beleive that was edited by the server. Really??? It's from the old Lone Ranger (1950s). Whatever, stopping short of tantrum... -
*ACTIVATED* TD-10072 / SAND DEVIL / SWAT OFFICER #018
SAND DEVIL replied to SAND DEVIL's topic in MEPD S.W.A.T. Program
Jay, Like I said, I took the pauldron to a repair shop and had them add stuffing to make it more poofy. Here is a different angle, maybe it was the light. -
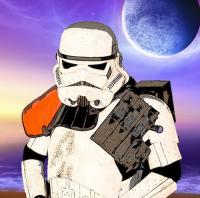
Funny. 18 year old daughter found this on 9Gag.com for me. I cleaned it up for the forum. And yes Juan, I did notice the lack of AB plate details and that this is a TK on the Left leg...They always complain and are high maintenance.
-
OMG (GOSH)!!! I had NO idea Juan had a sense of humor! That was fuuuuuny! Juan, Stop picking on poor Nick's jeans and get crack-in on SWAT approvals. Hehe.
-
*DONE* TD-10072 Requesting Deployment
SAND DEVIL replied to SAND DEVIL's topic in MEPD Police Officer Program
Instead of thanking everyone individually, I appreciate it. You guys have no idea how much you have helped this build. I love the topics and discussions and the brotherhood here. I have started to 'pay it forward' and will continue. That is what this group is about. I have had more help here than on my local garrison site. Not talking bad about my local crew, but THIS group always goes above and beyond. You guys are always there and ready to help. Thank you again. I couldn't have a better hobby. It is fun to watch my wife and kids and how interested they get about this. Son walks in the door from school; and the first thing out of his mouth is "Did Juan approve you Dad?". Wife is ready to start (well me do it for her) her first build and son as well. The 18 year old daughter, not so much. Anyone with an 18 year old daughter will understand. She does enjoy hearing about it though. I know she will get into it the first time she is a wrangler. And she did take all of my pictures. Thank you all again. -
*ACTIVATED* TD-10072 / SAND DEVIL / SWAT OFFICER #018
SAND DEVIL replied to SAND DEVIL's topic in MEPD S.W.A.T. Program
Rick, I knew better. And knew I couldn't get anything past you guys....or I would go Poof. -
*ACTIVATED* TD-10072 / SAND DEVIL / SWAT OFFICER #018
SAND DEVIL replied to SAND DEVIL's topic in MEPD S.W.A.T. Program
I like the way Juan gave credit for people who helped him on his SWAT build, so I updated the very first part at the the top of my post. THANK YOU FOR THE HELP BROTHERS! Upgrades v2.0 Fixed right side crooked Hovi mic on bucket (Thank you Anthony, again): I also put decals on the radio since the last picture and realized I could not have them on the Move Along Captain, so with much pain, I painted black over them. -
*DONE* TD-10072 Requesting Deployment
SAND DEVIL replied to SAND DEVIL's topic in MEPD Police Officer Program
I tried after reading that the next one was 200. But don't know sir. -
*ACTIVATED* TD-10072 / SAND DEVIL / SWAT OFFICER #018
SAND DEVIL replied to SAND DEVIL's topic in MEPD S.W.A.T. Program
Here is my first set of corrections: Radio wire and correct design on left near cistern (Thank you Daniel) Right leg ammo cut down. (Thank you Anthony) I also wanted Juan to see that I made my E-11 adjustable to accommodate the counter and cylinders, or remove them for SWAT. I know for this specific 'Move Along Captain' it was previously decided to not have either. -
*ACTIVATED* TD-10072 / SAND DEVIL / SWAT OFFICER #018
SAND DEVIL replied to SAND DEVIL's topic in MEPD S.W.A.T. Program
Anthony, Yep. You are right brother. Working on these right now. Glued the mics, so I hope the ABS doesn't break. Great call outs and pics. I appreciate it. -
*ACTIVATED* TD-10072 / SAND DEVIL / SWAT OFFICER #018
SAND DEVIL replied to SAND DEVIL's topic in MEPD S.W.A.T. Program
Rick, I was polite and told Juan I would wait a day......I know it looks fast, but the build and research has been over a year now. I have just been a little quite about it, until now. Too much too soon? Hehehehe. -
*ACTIVATED* TD-10072 / SAND DEVIL / SWAT OFFICER #018
SAND DEVIL replied to SAND DEVIL's topic in MEPD S.W.A.T. Program
Daniel, You are absolutely right about the wire on the radio. Working on that now. Pictures soon. I added the bucket details above. As for the cover stripes, might be an issue. I have an SDS armor set and I'm 240 LBS. I had to add to them because of my size. If that is a deal breaker, then Juan please put me out of my misery now....But I think it looks proportionate and good. However, I deflect to our fearless leaders to make that call. I vote that anyone can do it. I think I can, I think I can, I think I can. Bad camera phone shot, but shows the overall look, no troops yet, waiting on my garrison: -
*ACTIVATED* TD-10072 / SAND DEVIL / SWAT OFFICER #018
SAND DEVIL replied to SAND DEVIL's topic in MEPD S.W.A.T. Program
Anthony, Here are the detail and comps to other SWAT 'Move Along Captain's' I used as reference. Both ends have a 45 degree cut and I used canvas material at 3". Mine is on top. My belt: SWAT approved comparisons: -
*ACTIVATED* TD-10072 / SAND DEVIL / SWAT OFFICER #018
SAND DEVIL replied to SAND DEVIL's topic in MEPD S.W.A.T. Program
Anthony, I think you mean the right knee ammo belt? Here are some close ups as requested. I am trimming to the boxes now. Realized it was not right when doing some additional research. I'm also moving it down to show the bottom ridge of the right thigh piece. I shouldn't have missed that the first time. Oh well, nobody tell my wife I am not perfect. She already knows. The bottoms are rounded and a 90 degree top. Rivets, painted white. -
*ACTIVATED* TD-10072 / SAND DEVIL / SWAT OFFICER #018
SAND DEVIL replied to SAND DEVIL's topic in MEPD S.W.A.T. Program
Smally: I was wondering about the stripes. Here is my bucket. I used 'Done' Move Along Captain SWAT posts from yours, TD-7930 (Mike's), TD-7423 (Dave's), Rolf's and Juan's SWAT requests for reference. However they are almost all different counts on the stripes. I figured that meant it wasn't a required detail or not clear enough to determine on the screen. I will wait to make any mods when Juan chimes in. My bucket is first and then others for reference on what I mean: My bucket with 12 Right and 13 Left (all that fits on SDS bucket) -
*DONE* TD 66369 Requesting Deployment
SAND DEVIL replied to P3laton3's topic in MEPD Police Officer Program
Ruggero, That is an awesome build! I love the E-11 details you did. Impressive. -
Move Along / Road Block Captain Trooper. Name: Ben Anders Legion ID #: TD-10072 Forum Name: Sand Devil Garrison: Neon City Garrison Trooper Emulated: Move Along Trooper (pre-break version) Armor: SDS Pack: Crashmann, DirtyBoy, Gordon and The Home Depot found items E11: Doopydoos pipe Kit and The Home Depot PVC Pipe Pauldron: I won’t mention the name (he is on this forum), it was horrible/thin, snaps ripped out first time and so I took it to my local leather shoe guy who completely redid it (puffy). Should have gone with Trooper1’s. Handplates: Karin's Latex Boots: TKboots Pouches: Brad Bucholtz ‘Boo’ and WWW.WORLDWAR2-MILITARIA.COM Hovis: SDS Radio: DirtyBoy Weathering: 1 pigment (Burn Umber) and the Nevada desert (Yes I actually threw sand on it and my armor, then sealed) Electronics: Radio Shack, mic and amp Belt: SDS and canvas custom built Hardware: The Home Depot regular hardware 2) Post at least two, nice sized, clear photos of you in your armor at various angles. These photos will be used, in part, to determine if your weathering is satisfactory. ***Moved Photobucket around so pics were lost. Since I pulled my application for SWAT right now I won't waste server space, but here is the thread to see the build if interested: Armor: http://s1134.photobu...uild SDS Armor/ Bucket: http://s1134.photobu...e Along Bucket/ E-11: http://s1134.photobu...n/E-11 Blaster/ Accessories: http://s1134.photobu...on/Accessories/ Backpack: http://s1134.photobu...Backpack Build/ Member must currently be deployed as an MEPD Police Officer to be considered. - YES Weathering must be appropriate to screen used armor. Too little or too much weathering will not be allowed. - YES Pack, pauldron, and weapon combinations must match a specific trooper a seen on screen. - YES 3) Post a close up photo of each major area and/or item listed in the S.W.A.T. requirements while continuing to copy and paste the requirements they relate to above the photo in bold:
-
*DONE* TD-10072 Requesting Deployment
SAND DEVIL replied to SAND DEVIL's topic in MEPD Police Officer Program
Thank you brothers. Looking forward to the final carrot (SWAT). I am so glad to be a part of this group. -
*DONE* TD-10072 Requesting Deployment
SAND DEVIL replied to SAND DEVIL's topic in MEPD Police Officer Program
By the way, I will wait until tomorrow to start my SWAT post. I know you are tired of me and need some sleep. -
*DONE* TD-10072 Requesting Deployment
SAND DEVIL replied to SAND DEVIL's topic in MEPD Police Officer Program
THANK YOU BROTHER JUAN!!!!! You just made my day! Will do, sitting next to the pack and synching it up to the back of my head as we speak........I LOVE THIS GROUP! Thank you for taking the time out of your day and busy work schedule. I know we all have 'real jobs'. Have a wonderful night sir, I know I will....... SALUDOS SIR! -
*DONE* TD-10072 Requesting Deployment
SAND DEVIL replied to SAND DEVIL's topic in MEPD Police Officer Program
I changed out the 'Cap Nut' on the radar dish to be accurate. I know Juan will mention it later on.....SWAT???? Juan, Juan he's our man, if he can't do it nobody can... Singing and just waiting................ -
'Battlestar Galactica' prequel being released online Friday
SAND DEVIL replied to pashnak's topic in Off Topic Cantina
@ Smally, Dude you have to watch them, they are great. @ Nick, I was lucky enough to meet the best looking Cylon ( Tricia Helfer) this year at the Las Vegas Comic Expo. She had a BIG body guard, but I had a 16 year old wrangler who she thought was cute (my son) and got to talk with her for a little bit. WOW, she is awesome, and not just looks, very nice. Much better as a brunette though (IMHO). @ Smally, I hope MY wife doesn't read this...... -
*ACTIVATED* TD-8266 / TD-8266 / SWAT OFFICER # 015
SAND DEVIL replied to Blaster 8266's topic in MEPD S.W.A.T. Program
I used Juan and Rolf's SWAT posts. Then took a long time looking at the ref pics and screen shots for the chest and bucket. I didn't use the auction ones for the bucket. You are right that it has been changed and cleaned up. The screen shots and other SWAT posts give great details. Watch the right side mouth corner and crack on the tube. Those are the two parts with the most distinction, the rest is just general accurate weathering. But this just my opinion, so I would wait for more ideas and Juan specifically. Also, to Daniel's point about the cistern, I used 1" Gorilla Tape (any hardware store - US). It is thick and gives you the look you want without the threads that always show with masking tape. Here is my bucket with the crack and mouth I was talking about: (good luck and looking good) -
*DONE* TD-10072 Requesting Deployment
SAND DEVIL replied to SAND DEVIL's topic in MEPD Police Officer Program
Thanks team. I know how busy Juan is. We are getting just too popular, as a group. NEVER TOO POPULAR!