


Opfor
-
Posts
318 -
Joined
-
Last visited
Content Type
Events
Profiles
Forums
Everything posted by Opfor
-
Thanks buddy, you have done a lot already.. Excellent...I doubt you will need it but give me a shout if I can help you with this. About the only thing that took me a minute was trying to figure out how to go about opening the box...it is really put together very nice and tight. The only way to get inside was to take the two panel screws off the back, remove the usb port plate and then you can fit a small screwdriver in the box and pry off the back wall, once that is off you can easily take your time and take the rest apart. Piece O CAKE
-
I'm weathering it up now.... hope to request deployment in about 2 weeks.
-
If I tell ya, I'd have to kill ya I absolutely love my pack...YOU DID A FANTASTIC JOB! The guys that sells the MP3 system is in NY, you can probably walk over and pick one up.
-
Hey Guys, Wanted to share my newest upgrade to my radio box. After much thought on whether to run my voice and sandtrooper loop thru one speaker mounted up front I finally decided the only accurate way would require a second mounted in the radio box. I searched ebay for about an hour before finally finding the one I thought would do the job. Figured it might be easier to shoot a short video versus trying to explain what all it can do plus you can hear how loud it is. If you are interested you can do a search on ebay using Mini Portable Stereo USB Speaker for PC/ iPhone MP3 MP4. 17.55 bid with free shipping or 19.35 Buy it now free shipping (US Only). Store name is bestelectronic-store. I'm loving it so far. Hope this helps.
-
Yeah but have you got a formula to help us find those D*@$ Droids Pretty cool and scary :o
-
Have you guys seem this before? I thought it was
-
Hey Panda, Yes, I have to agree. I usually work on it a few hours and then come back the next day to see what I think about it. This last round has proven to look the best so far 2 days in a roll...I figure I better hurry and finish before I change my mind :o Your videos have really been a great help, appreciate you posting them.. Has the patch showed up yet?
-
Hey Pat, I'm up to change 3 now Ditched the gray and putting a small amount of the burnt umber in the creases and then adding a second layer of the fullers.. I think this is going to be what I'm looking for. Hopefully will finish up in a few days and send you some photos of finished product...all a work in progress

-
Hey Pat, Round 2, trying a different approach. Adding a bit of the gray acrylic first, trying to give it more depth and machine look. I think this is actually a bit closer to what I'm looking for, how about you?

-
Thanks Greg, How did you do your weathering?
-
Hey Panda, Was hoping to land you in on this topic, lol. I agree that on my pictures they do look a bit light in the photos, I was amazed at that after I took them. It really does look a bit darker in person, however I do think that I still want more. I do want some of that depth and was wondering if maybe I should have tried a light coat of the gray first and then wiped it off? Wondering if that would give me more of a machine/mechanical look? I guess it is too late now as the lower half has already been done with FE first. I could do the upper that way but I don't want to end up with a two tone suit :o So overall you like the FE but don't use it because of the rain? What about adding the layer of clear coat on top? This is my first time at weathering so I'm all ears when it comes to getting the best results.
-
Hey Pat, Here is what I have so far. I'm open to suggestions by any and all if you guys think I need to make changes or do more or less on this. I've still got the upper to do and will probably work on it over the weekend.

-
Hey Pat, I'm in the same boat as you.... but I finally dove in tonight. I picked up the acrylics a few weeks ago. I noticed on another thread a few weeks back that the fullers earth looked really sharp to me and certain sandtrooper on here hooked me up with a small bottle. I started off tonight trying the acrylics (burnt umber) on one of my calves. No matter how light I tried to apply it, it keep coming out too dark for me...I just couldn't in vision this color in the desert. Finally after cleaning and reapplying for a third time I tried the other side with fullers earth...WOW, GAME OVER for me. That is the look I'm looking for. It does a great job of dulling out the white shine and the way you apply is just too easy, spray with hair spray and lightly dust the stuff on, and then lightly wipe and rub what you want off. Easy to come back and reapply in certain areas to give it that built up look if you want. I'm pretty much following panda troopers videos as I really like his approach and reasoning on how it should look, just using fullers earth instead. The stuff even feels real on there, sandy and gritty. I actually got both boots, calves and thighs completed tonight, the best part is I'm no longer dreading it now that I know how simple and easy it is. I will try to shoot a few pics of mine tomorrow and upload them so that you can see the look mine is taking. It might not be perfect but I like it and that is what matters in the end.
-
Wow, hate to hear that. Hopefully they will get them on the way by next week. Good luck!
-
Just received an email a few hours ago stating that TKboots should have their shipment of boots in any day now. I've seen several threads on here over the past few months were folks were looking for them.
-
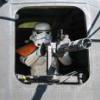
Hey Guys, Looking for some help and advice on doing the final touches to my EFX helmet. I would like to someday apply for deployment and I'm down to just two things left to do on my helmet. One is fill in the seam and the other is install the three screws on each side. Can anyone tell me exactly what screws I will need and where they go? Is it just a matter of drilling three holes and putting them in? How about the seam, looking to see what most people are using and if anyone has any photos of that area up close? I'm hoping this can be done without an entire repaint of the helmet. I do still have to weather this so that will be done last after this is completed. Thanks
-
Undersuit Questions
Opfor replied to sandtrooper's topic in Pouches, Pauldrons, and other Accessories
I realize this is a few months old but wanted to add that I found a great deal on black STARTER compression pants and shirts at Walmart, 10 dollars each, hard to beat that price. The starter emblem on the pants is on the left side just above the thigh piece and below the lower plate, so it shows up between the armor. The good news is that it is very easy to remove. I love my underarmor clothes but considering how the velcro and other various pieces of plastic are rubbing and grabbing at the undersuit I don't think I want to invest in that brand name on this -
Hey Aaron, Not bad at all, pretty much identical but without the posable arms. Not sure that it is even worth the 55 dollars extra that I paid to get that. Do you just lean your against the wall? I would hate for this thing to tip over and crack my helmet :o Thanks for the reply
-
Hey Guys, I'm very excited that I'm nearing completion of my suit( minus the pack and weathering) and one of the last things I want to do is keep it locked in a chest waiting to troop. I want to set this bad boy up and show it off. Shopped around and I found what I think is the best deal for a posable mannequin on the market. I went with an all black so that I at least don't have to put a black under suit on it. Found one where only the arms are movable at the elbows. This thing stands 73" tall and does the job. Only two small issues so far and one is that the left foot has a hole in it that allows the support rod to hold it to the base, so I can't get the boot on, not interested in drilling a hole in my boot . Can always lean it against the wall I guess but will have to work on that one for now. The other is that the arms really don't support any weight very well so this is the only position for now that I can come up with so as to include his DLT-19. A few of the guys were also interested and wanted to see what I came up with first before committing, so I took the plunge first. Best deal I found was on ebay, guys sells them for 195 plus shipping or best offer (that is always a give away that they will take less) started at 135 and he finally agreed at 165, total shipped anywhere in the US will be 209. Not sure if anyone else is interested but I did want to at least share my experience. So far I'm loving it and would recommend. If looking just go onto ebay and type in FLEXABLE BLACK MANNEQUIN. Any questions feel free to ask, glad to help.


-
Hey Pat, Thanks for sending, that is exactly the kind of info I was looking for. Sounds like the board is divided. I'm in the boat where all I currently have is my FX helmet and it is a BIG one. Sounds like most agree that it IS better than an FX but not the best most accurate version around. At least I would be improving and able to attempt deployment status which is something I can't currently do with my FX helmet.
-
Hey Guys, Couple of quick questions. Looking at these EFX helmets online and they look really nice. It appears that they are already built do you know if this is true? If so I'm really diggin that idea. I hear they will work for deployment but is there any other screen accurate helmet that you would recommend as compared to this? From what I'm seeing and I might be wrong, they already come with everything, correct lens, aerators and even the mesh. If these are already set for 129 free shipping ready to open and wear I'm thinking about picking one up and dropping the FX that came with my armor.
-
Very interesting, thanks for the reply.
-
Friend of mine gave me a welders shield that is green in color. It is VERY dark and was wondering if I have the right one. The specs on the side say IR/UV shade 5 JACKSON. Can anyone tell me if this is the right tint to go with? I'm wondering how hard it would be to see out of this in a low light environment. Thx
-
I sewed a bit of velcro to the front and back boot straps and put some velcro inside the armor. Working like a champ now, no rotation at all. Thanks again for the tip Nol,
-
I'm nearing completion of mine but that is only due to the help of some great nearby garrison members. I HIGHLY recommend getting some assistance if you can and have members nearby willinging to help. They provide great info such as "Yes, you can do it that way but here is a better way" or " you are going to want this to fit this way because". I would still be way behind on mine if it were not for their guidance. This is my first kit as well and I'm so ready to start TROOPIN as a SANDMAN, lol. Good Luck!


