


Tyranus
-
Posts
747 -
Joined
-
Last visited
Content Type
Events
Profiles
Forums
Posts posted by Tyranus
-
-
You're welcome - Glad you like it!
I'm very happy with mine too.
-
Not to hijack your thread either, but I am responding to your question about cylinders.
I was thinking of at least trying to use these parts to fabricate my own. They can all be found at Lowe's:
First the tubing itself:
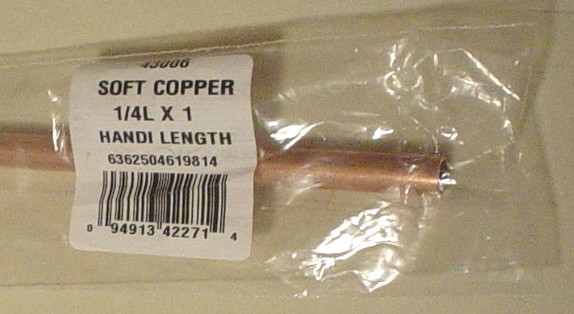
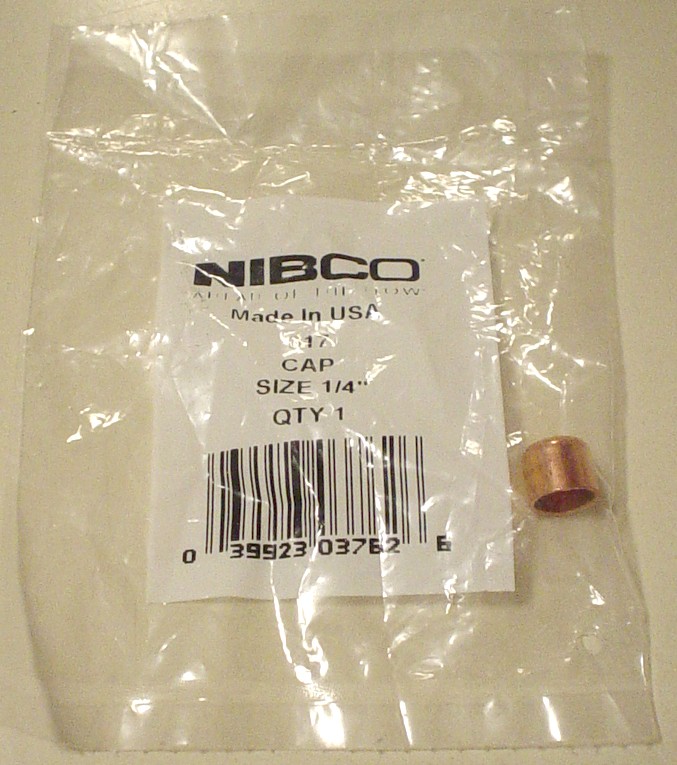
Then the fitted caps sized to PERFECTLY fit the tubing. I can sand or grind own the depth of the caps to match the prop.
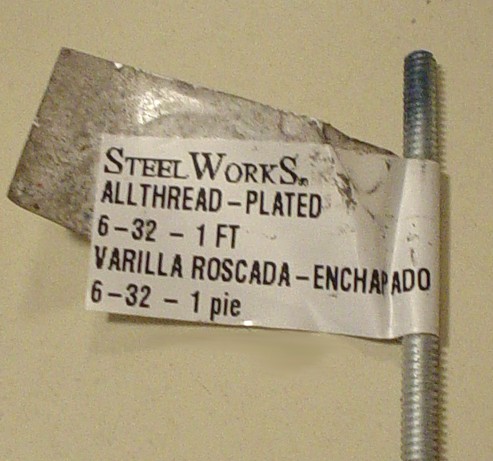
Threaded rod for attaching the hex nuts to. I thought I might fill the capped cylinders with some kind of caulking or glue and slip a measured and cut piece od threaded rod down inside.
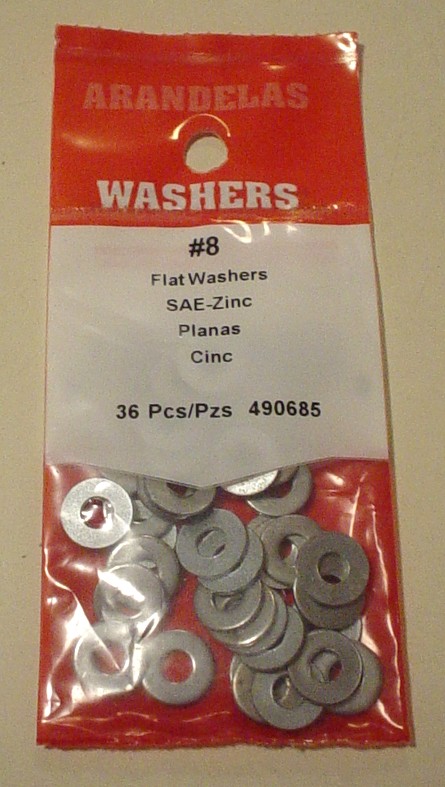
Then I was going to stack 2 washers over the front and cap it off with a hex nut, although I don't know if a cap would work better and be more accurate here, or perhaps in additon to a washer here. Thoughts?
-
Thanks Tony. I will consider that option.
Painting will be a while off, as I have some stripping and clean-up work to do first.
-
Great thread Brian!
Thanks for not hijacking (even though I wasn't worried about it)
-
Hey Ward,
Two things I have observed:
1.
The trigger guard on your Sterling looks like it may be "smooshed" in a bit giving it a slightly more oval shape that it should have.
2.
The eagle logo on your Hengstler is covered up by front "cap", mine is exposed when fully assembled, as a "window" is molded into that cap, yours appears to be a "modern" cap, and looks like the one on my "plain version" Hengstler.
3.
I achieve the "parkerized" finish using Rustoleum "Professional" flat black (the stuff in the silver can) by holding it back just as far as the spray pattern will allow while still coating the piece. As the paint is atomized from the tip and flying through the air it partially dries before landing on the piece being painted. You just layer it on letting it dry in between coats. If you let it cure for 1-2 weeks it really does make for a pretty durable finish at a "low" cost!
1. You are correct. I could opt to remove the trigger guard and carefully try to shape it back out with a few gentle raps from a hammer wrapped in cloth, or leave it and attribute it to one too many battles.
2. Correct again. The black plastic "receptacle" portion of the Hengstler I received does cover the logo, but comes with a measured template for cutting a window in the soft plastic for revealing the logo beneath. I just have not had time yet to cut the opening. I will most likely use a small diameter drill bit for the corners and then connect the holes with a razorknife and metal straightedge. When I have done so, I will post up another pic.
3. Thanks for the painting recipe! I have painted up several aluminum parts for my R2 Unit, and no matter how careful I am to painstakingly prime and sand smooth before, spray carefully in thin layered coats and allow to dry thoroughly for 2 weeks before handling, it always seems to be VERY susceptible to chipping. I have a friend with an auto body collision repair shop that can paint it for me in a heated booth and he says he can reproduce the parkerized finish if I want it.
To be honest, I'm not sure I want the Parkerized finish. I mean I know it is what REAL Sterlings had, but most of the props used in the film were probably rented, old battered Sterling with most of the finish gone giving the E-11 blasters the appearance of a smooth, satin-like finish. I'm just not sure which will give a better appearance when completed . . . Parkerized or a smooth satin black.
Thoughts?
-
Cool!
I can't wait to see them.
-
The manual does a great job of walking you through removal of the grip and the trigger mechanism.
-
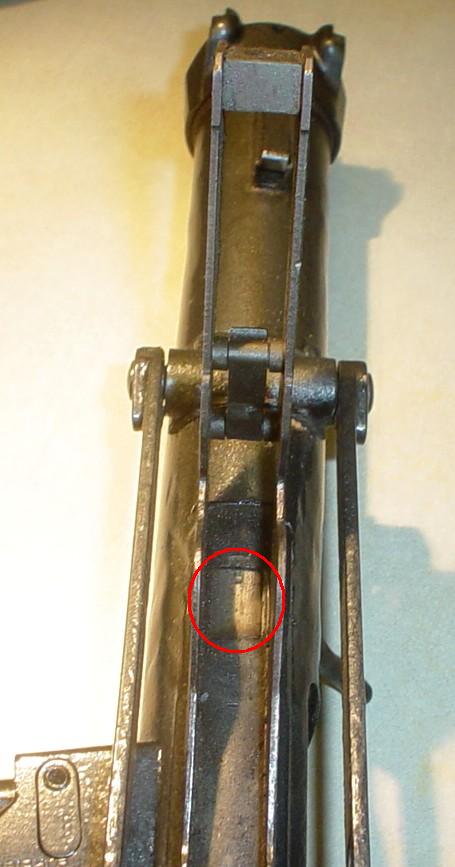
I think I will try drilling out the plug first to allow the trigger mechanism room to fit up inside and operate properly before I start grinding down the mechanism itself.
If you haven't picked up the Sterling Manual PDF I posted up, it really helped knowing how to remove the trigger assembly, and walks you through a complete stripping down of the Sterling.
-
Sounds like a good idea.
Anyone have any thoughts about the trigger and selector switch issue?
-
That's it exactly.
I am not sure what I may do there yet. Once I get all other pieces lined up and begin stripping the paintjob off to prep for repainting, I will check that out and figure something out.
Maybe I could even a piece of Styrene cut to fit, just to pop in and cover the hole. Once in place it could be painted black and dry brushed with a metallic silver to weather it.
-
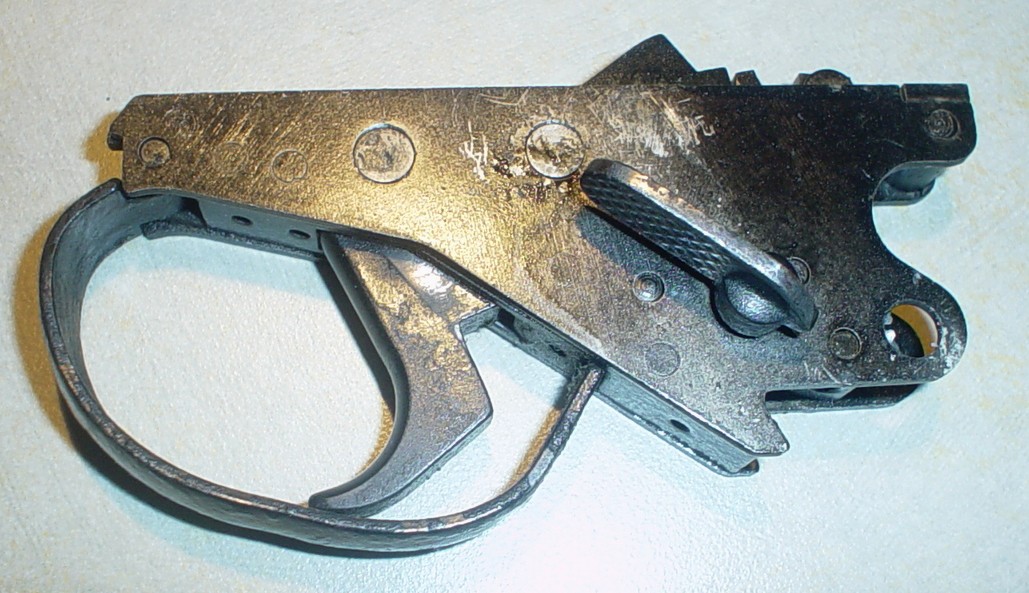
I removed the grip and trigger assembly. The trigger was able to be pulled just slightly, and the selector switch would not move. Once the grip and trigger assembly was removed, the selector switch works fine, and the trigger squeezes all the way in.
Here are some pics:

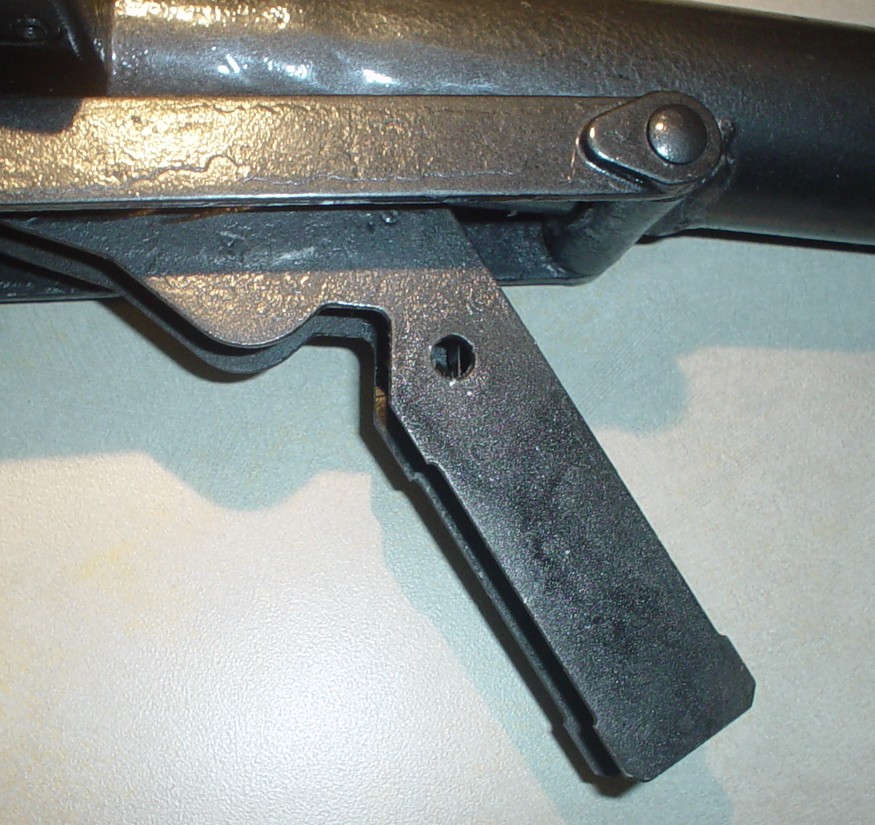
I am thinking if I grind down the tip of this part (circled in red) the trigger and selector may work when reassembled
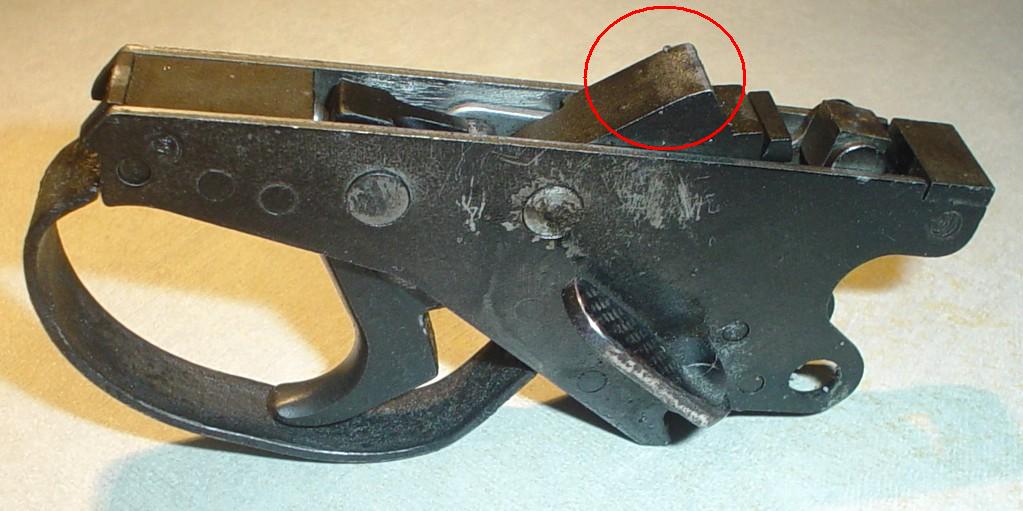
If not, I may try to drill out a recess in this area for it to slip into the solid plug in the barrel.
-
Thanks Dave.
I don't know how to weld, but I have a friend who can do it if necessary.
-
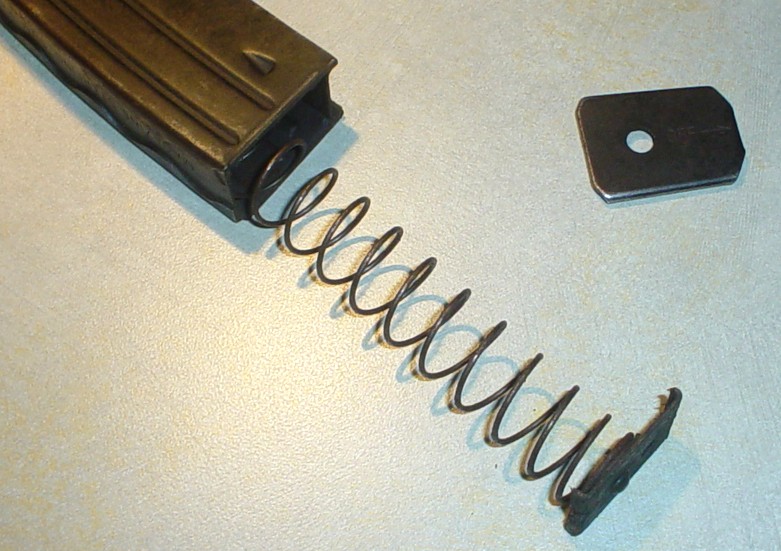
My thought on that was to cut the length i want, starting where the clip inserts into the gun, and leaving an extra 1/8th or so beyond that. then bend the edges out with some pliers or something, so that the endcap can slide back onto it the way it does now. Then take the spring, cut it down quite a bit, and put the whole thing back together.
After inspecting the way the end cap slides on and off, that was the exact same conclusion I had come to for cutting it down.
Mike seems to have run into a roadblock with the metal being very hard to bend and crimp into the small rails needed for the cap to slide on and off. I think I will try, as he did, and if it doesn't seem to be feasible, will glue it in place.
My thought was to leave a longer bit to bend back, giving me more leverage for the bending. I would then dremel off what isn't needed, and slowly grind it down to a perfect fit. I can always glue if it doesnt work.
The important part is that I want the mag to be removable from the E-11. If I have to use glue on the endcap to achieve that, so be it.
-
Thanks Dave!
I ordered a set of the rigid T-Tracks from Saberfreak (RPF). It may take awhile to get here, but it's on it's way.
I also found a guy that can make METAL castings of an accurate scope if we can't find real ones. Let me know if you are interested. I'm still not sure about the best way to cut the mag down. I'll have to look it over really closely.
I'm glad yours is coming along as well!
-
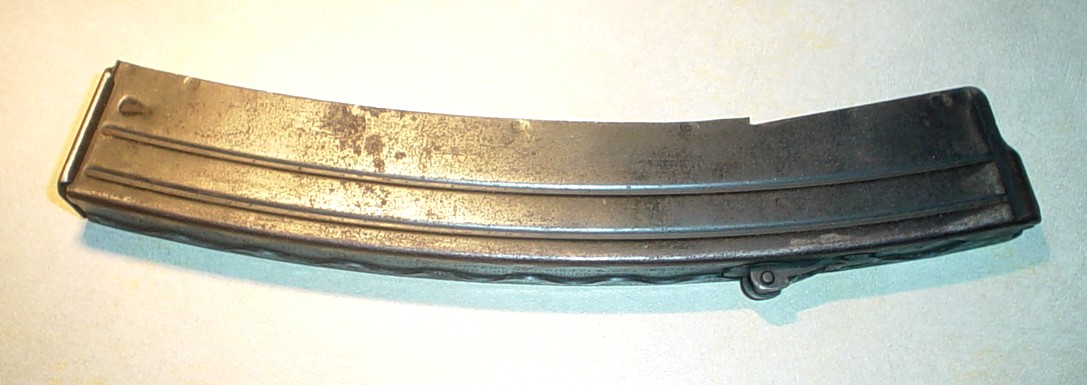
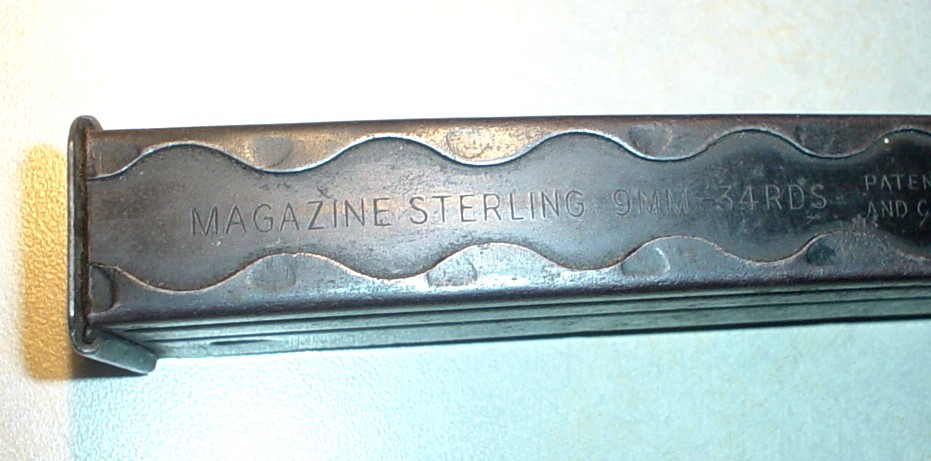
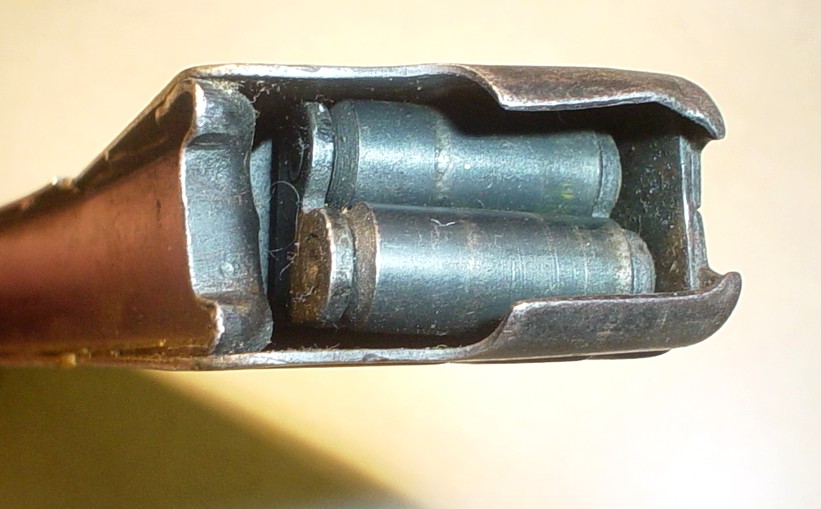
Here's a few pics of the magazine that arrived today too from IMA-USA:

-
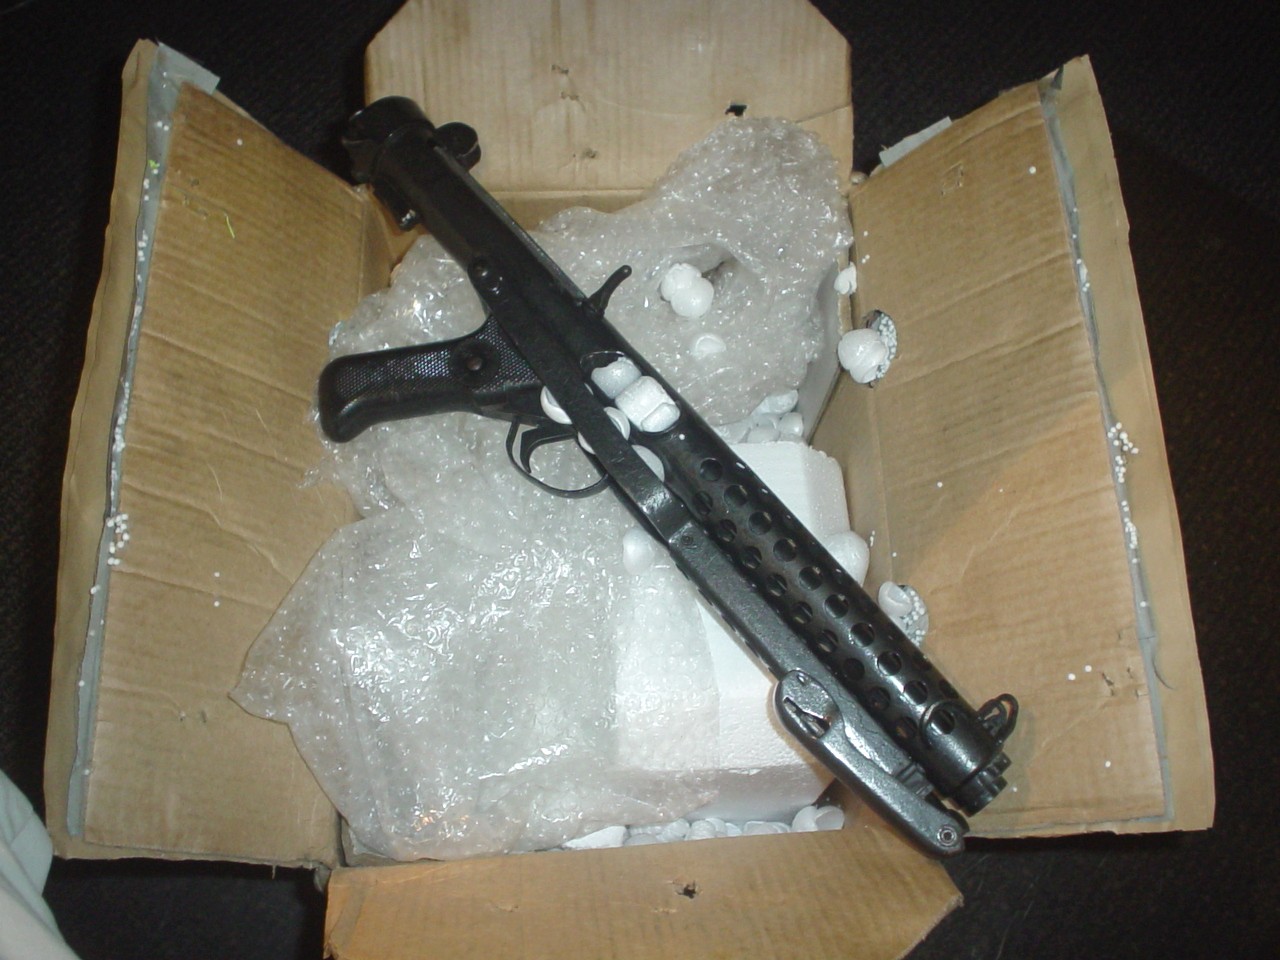
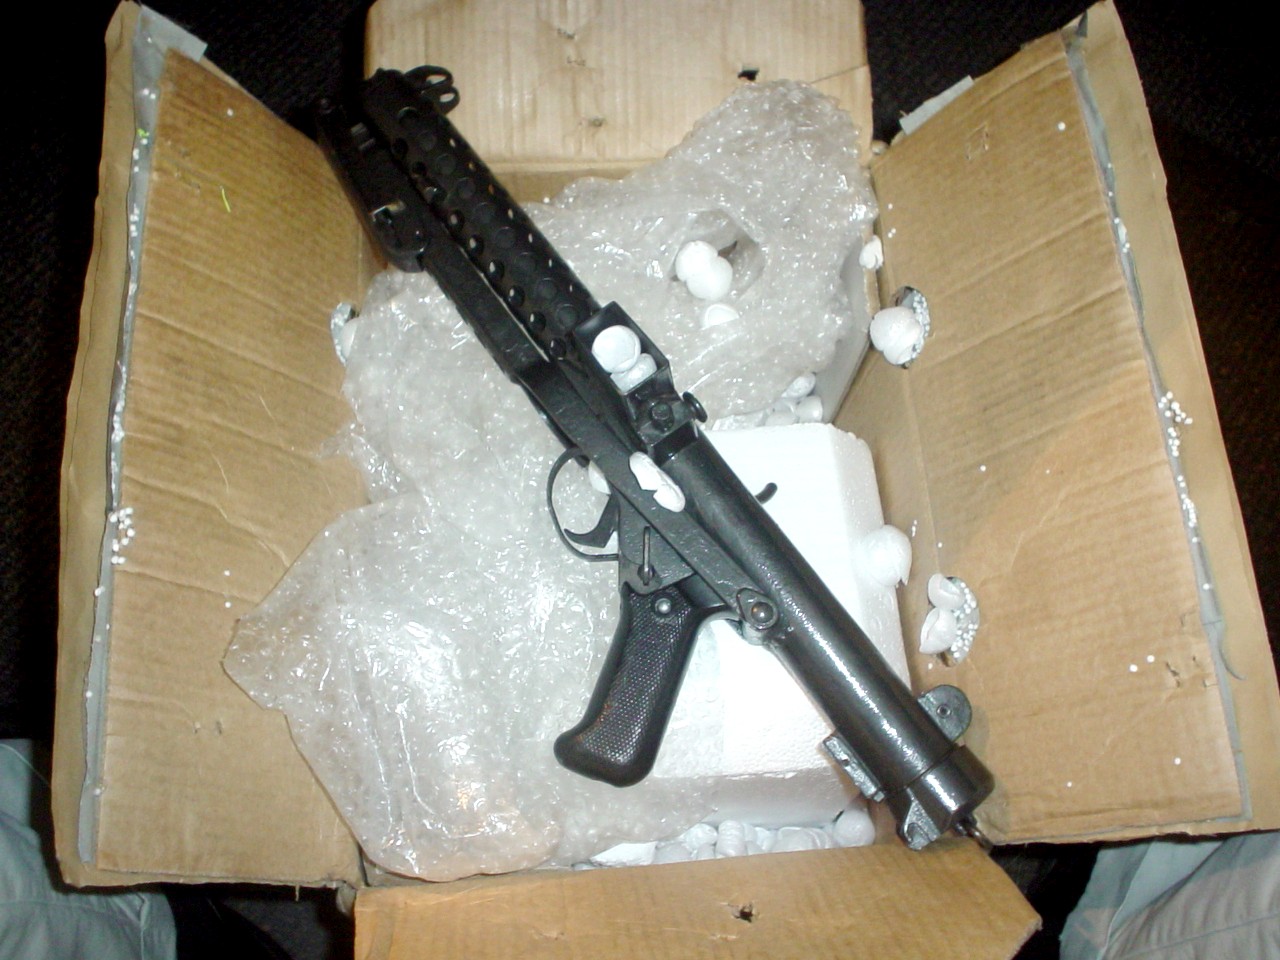
The Sterling package was waiting in my office chair this morning.
I opened it carefully under my desk. It was still pretty early, so not many people were in yet, and I snapped these pics to share:


-
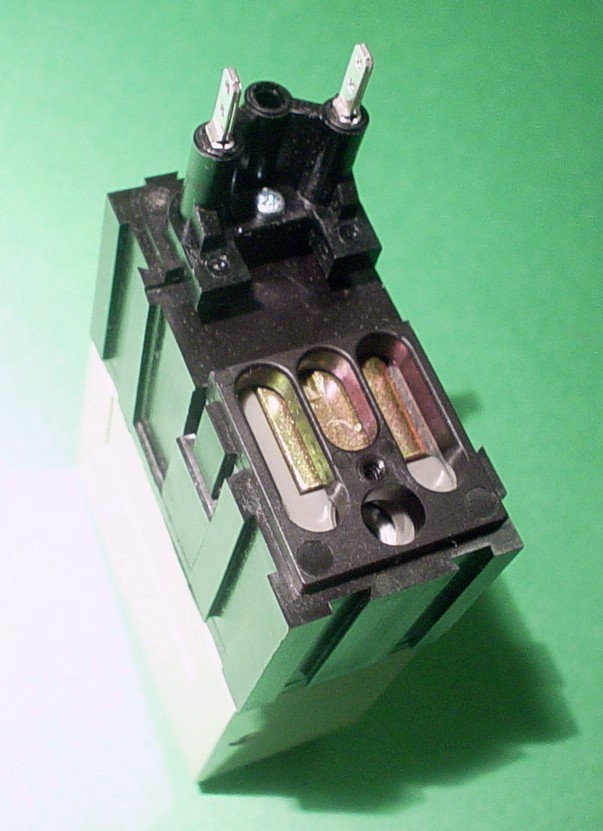
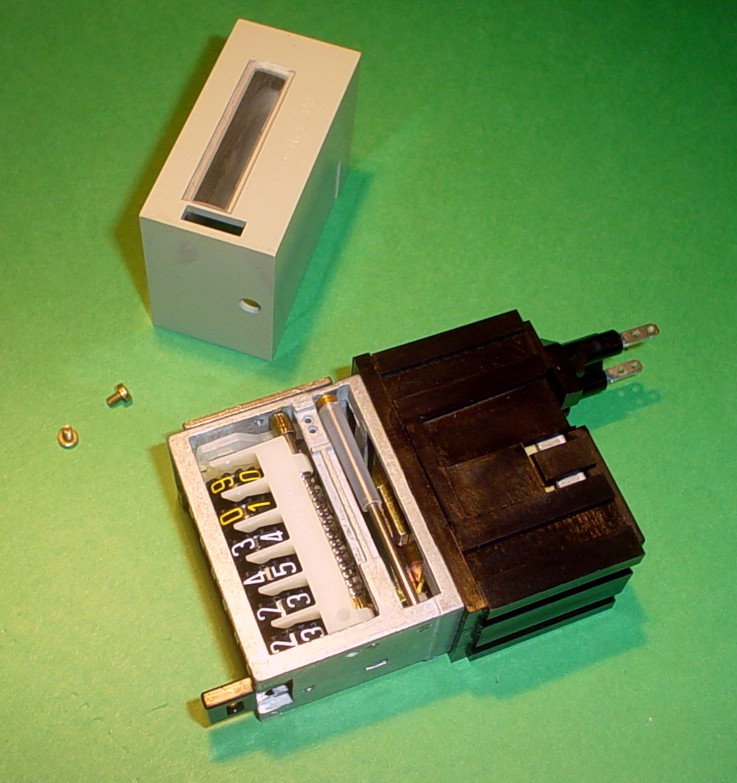
Once you remove the tiny brass screws on both sides, and you slip the plastic housing off, you will see the wheels of numbers exposed. On one side, there is a piece of spring-loaded (at least on mine) white plastic that acts like a brake to keep them incrementing properly.
You can lift this brake piece away from the numbered wheels carefully and roll the dials to whatever number you want...like a combination lock dial.
If you look carefully at the picture above, of the inside mechanism, you can see the white plastic piece I am talking about that you need to gently pull back away from the dials. It should be obvious once you get yours open.
Also, remember to insert a small piece of plastic or wadded up paper or something under the RESET button so it doesn't accidentally reset to 0000000 when hit.
I hope this helps.
Also, depending how you mount it, you should be able to still remove the screws and change it even once mounted.
Good Luck. Let me know how it works out!
My Sterling is in town, but it probably won't delivered until Monday!
-
Where did you get your sterling?? i have tried to get my hands on one with not much success.When i did find one,they wanted way to much cash for it..
I actually picked it up from a fellow Legion member for $395 shipped from CA.
I got very lucky.
I had tried to broker a deal between him and a friend with a sandtrooper pack awhile back which fell through. I remembered his name and email and contacted him to see if it was still available, and it was.
-
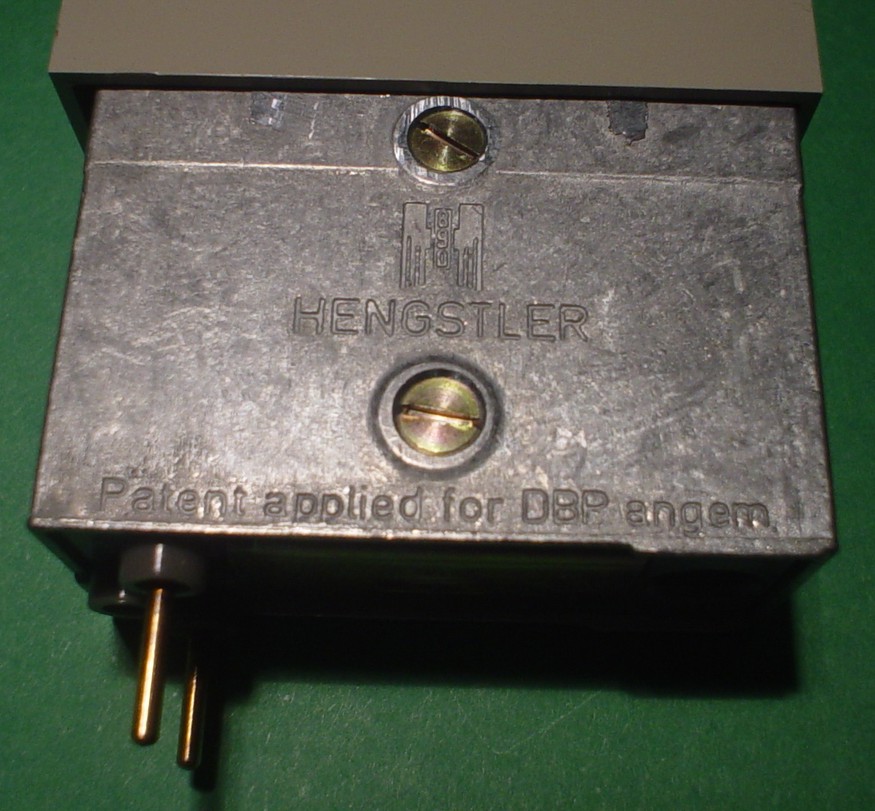
The Hengstler Counter Arrived TODAY!
I set it to my TD#

Here's what the counters look like inside:
The Eagle Logo:
-
Tony emailed me and also posted under the E-11 Cylinder thread here:
http://www.mepd.net/forum/viewtopic.php?t=2280
He said it is unknown what the real-world part is.
On another note, My Hengstler Counter was waiting for me in my office chair when I walked in today!! WOO HOO!
It is truly beautiful. I will post up pics asap. I took some already, but have to get them uploaded.
The Sterling also arrived at the local PO this morning. Perhaps it will be delivered to me today? FUN FOR THE WEEKEND!!
-
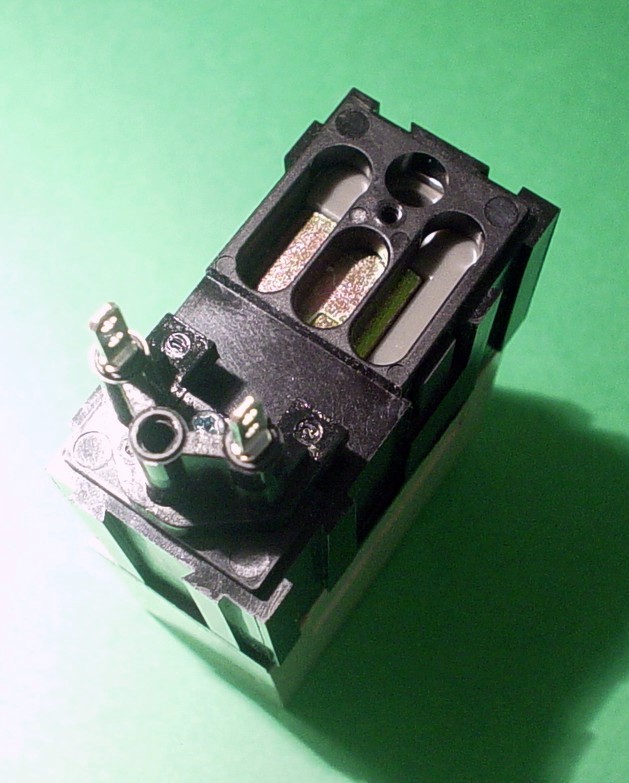
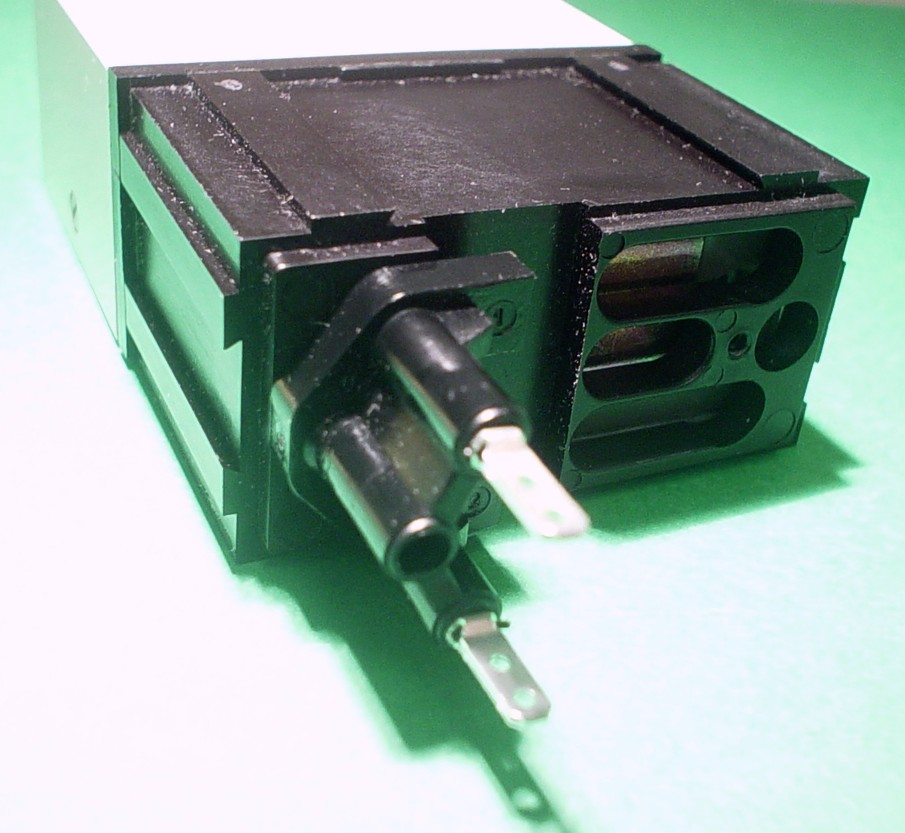
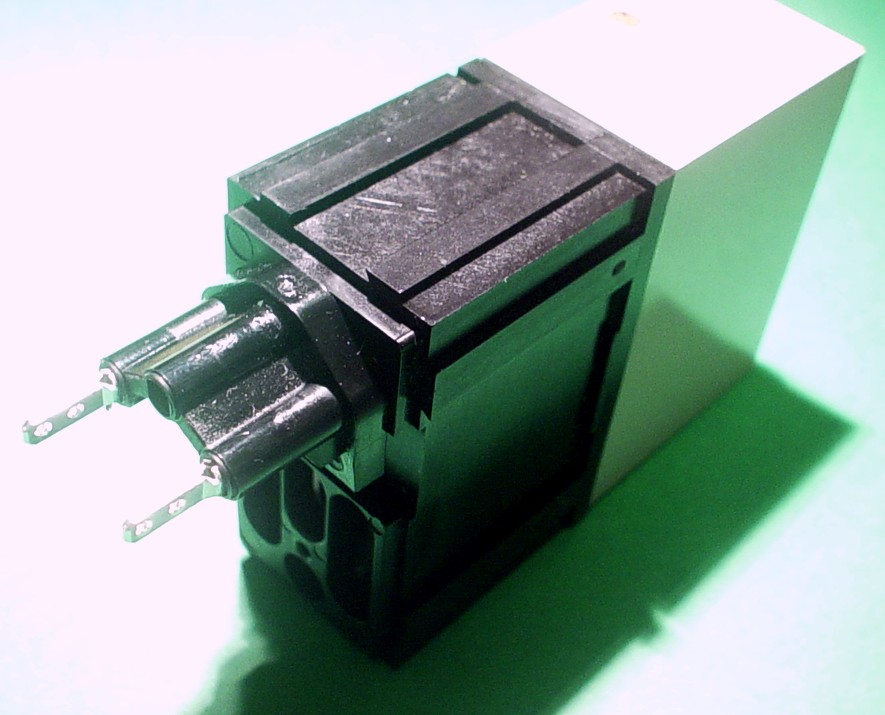
I have sent several emails with these pics to the contact emails I found on Vintage Audio/Radio/Electronics sites, as these look like some type of input strip and perhaps the cylinders are secondary to the function of the smaller, recessed sockets on the bottom of the strip.
I'll let you know what I hear back. If anyone is good with electronics or old radios/audio, or you know someone who is, ask them to take a look at the pics.
Thanks!
-
Approximate size of each cylinder:
Length - 1 7/8"
Diameter - 7/16"
-
Here is a pic I found while searching the web for fuses.
It has a similar cylindrical design with the hex nut on top
This is a K-3984 Slick magneto capacitor:

-
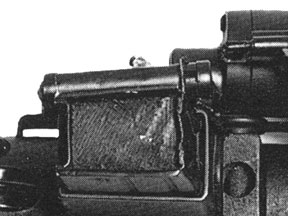
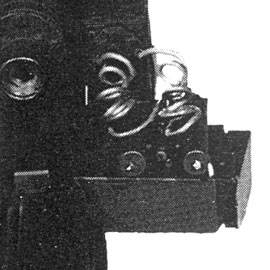
It looks like part of a coupling panel, some kind of input panel of some kind, but I'm not sure the cylinders are part of that original panel
Here are a few pics from the top of the mouse droid:

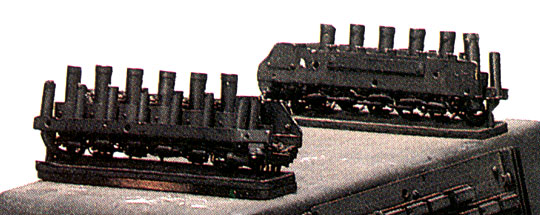

E-11 Mag Housing Cylinders
in E-11 and Bapty Blasters
Posted
The answers I got ranged from:
"I'll have to charge you $36 an hour to investigate that"
to
"I have no idea what it is"
So for now it remains a mystery.