


jimbo890
-
Posts
50 -
Joined
-
Last visited
Content Type
Events
Profiles
Forums
Posts posted by jimbo890
-
-
Add a chinstrap. That will make your bucket ride in the right spot. 1" wide elastic bolted to the anchor screws at the ears, and you are good to go.
-
Looks great!
Thanks for the info!
Jim
-
Can someone post the dimensions? I'd like to take a crack at vac forming one, with the lip, and backing, but need some diameter to work from.
Inches or centemeters it does not matter.
Thanks
Jim
-
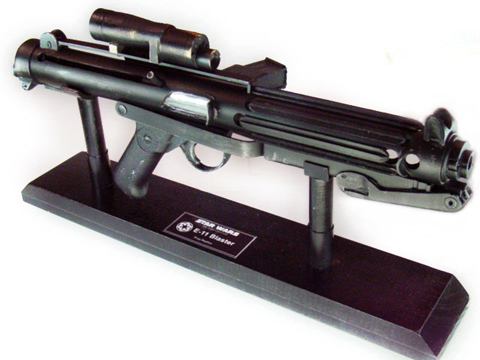
Here is a shot of one of my trooper blaster with a display stand I made:
-
Israel, is that you? Is that your custom made armor?
-
WOW!
Very good looking Bill! Nice looking rig you have there Tony!
Good work guys!
Now, I need a BFG!
-
Thanks for your tips and templates!
Jim
-
also, I'd add some sort of rigid core to that thing. 1.25 inch PVC pipe for strength, right down the center.
-
Hey Paul! Good to see you here in the sand box! Thanks for the kind words!
Ah, the weathering. Hands down my favorite part of the whole build. Don't get me wrong, I dig all aspects of making these things, but the weathering is the part I get the biggest kick from.
First, the paint. I use a coat of Krylon sandable gray primer. I let that dry for a while, then a top coat of krylon Semi-flat Black.
That drys for several hours, then I use Testor's Dull Aluminum scale model paint for the worn metal edges. The brush I use is a really good small acrylic painter's brush, a 'flat' that is about a 1cm in width, pretty soft. I take a paper towel, dip the brush in the paint, and rub off 70% of the paint from the brush with the paper towel. Then I hit the edges and areas that seem to get a lot of wear. As the paint comes off the brush, the silver look gets more and more faint, so I have to add more and more pressure. Finally about 90% of the paint is gone, and I'm working the brush like a mad-man . I try to get all the parts thats suppose to be metal, leaving the grip and T-rails alone. The paint will come off the brush naturally in the high wear areas.
The scope, I use Testor's Model Master's Gold paint. It's suppose to be brass, but the brass look copper to me.
Dry brush it on same as the gun wear. Let this dry for a few minutes. Then, I get a fresh brush, an oil painting brush with really stiff bristles, and dip that into some Testor's air brush thinner. Then lightly scrub the whole scope, lifting the gold paint off just a bit. If all goes well, you can then dab the scope with a paper towel, and flatten out the thinned spots. This gives that really worn brass look.
Thats it.
-
Progress on the blasters:
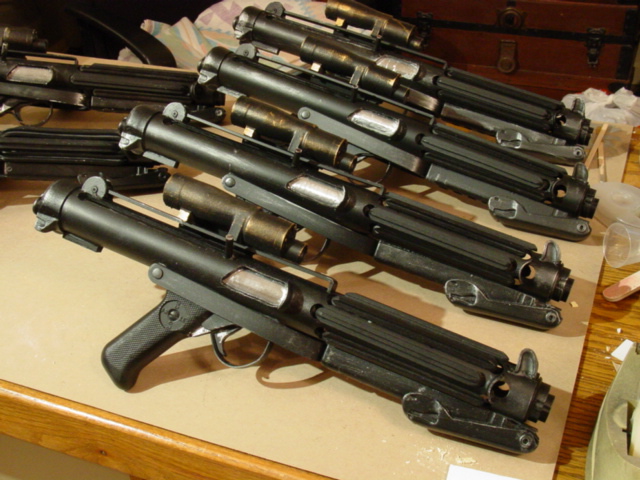
Going for that 'lived-in' look
I'll get some better shots of the individual blasters made in a few days.
-
Thanks guys!
Here are a few more in the works:
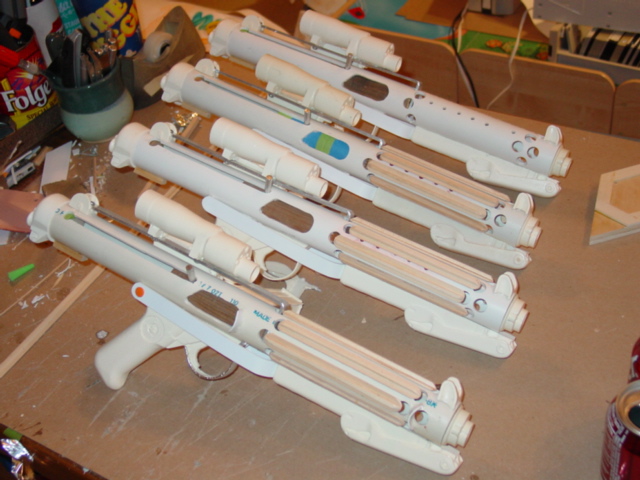
I'll post more as I get these done.
Not really for sale, but PM me about extras I 'might' have.
Jim
-
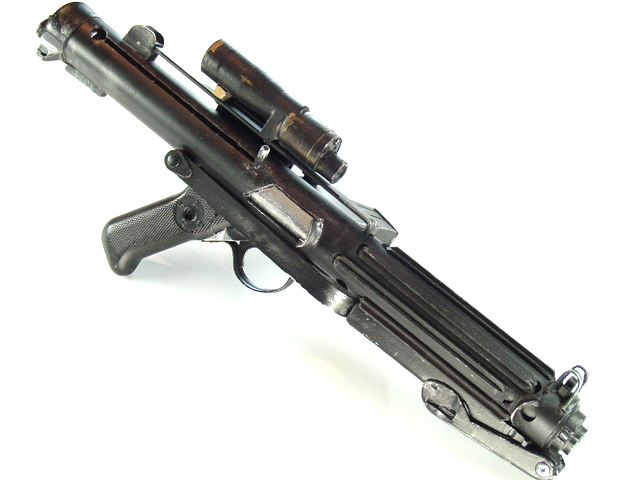
Just wanted to post a pic of one of e-11's done for a fan film I'm working on:
-
Oil soaked is sort of a misnomer. Really it should be soiled, or well used/loved.
The 'newer' pouch was almost 'John Deere' green, where the 'oil soaked' version was a dark, dark green, almost brownish black. One was much older and more used than the other.
Both dyed great!
-
The 1x2 pine are slightly bigger than a real ammo pouch, but so are these pouches, AND the pine fits better in these oversized slots anyways. The "3-and-a-half pouch" looks really good, and unless you have the two pouches side by side, they look the same. Only a detailed inspection reveals the differneces in the 'pebble grain'. They are different, but now they are both black, hey, they look great together.
anyone know how to 'wear' these things?
-
Here are some pics of my MP40 mag pouches, dyed black, and ready to gear up with!
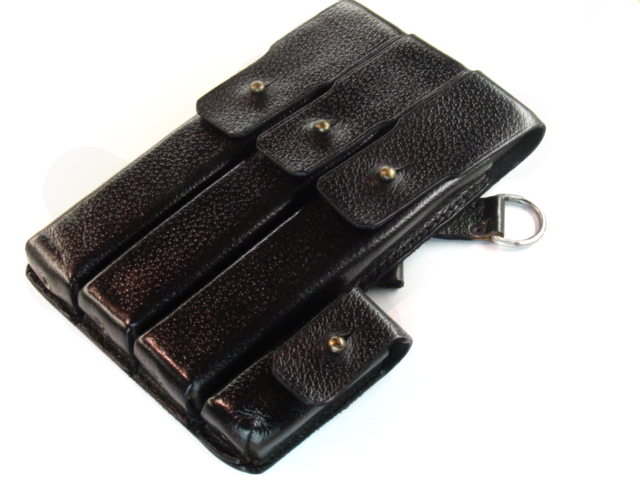

These were part of the magazine order, and when they arrived, they were a mix-matched set. One pouch was used, and had a fair amount of oil soaked. The other was almost new.
Using the Tandy Leather supplies, the deglosser, USMC black leather dye, and the spray sheen, the above are the results.
I cut 1x2 pine strips the lenght of a real MP40 magazine, and left those in there.
Jim
-
I got the same deal as Jim, my 3 1/2-pocket pouch was broke in nicely while the 3-pocket pouch was like new outta the crate still textured and GREEN. I used Kiwi leather dye on the 3 1/2-pocket pouch, it looks FABULOUS, but I'm still debating on putting in wooden blocks and taking a hammer to the "pebble grain" texture and pound some if it out on the 3-pocket pouch.
I just searched online & found a Tandy Leather Store that's pretty local to me, so I'll get some of that "Fiebings Deglazer 4 oz. #2105-01" and save the $8 S&H since a bottle of the stuff only cost $4.99! Thanks for that tip Jim!
The deglosser can be used on the oilsoaked one, and the leather dye will take to that leather as good as the 'new' one does. That deglosser is a real gem. I'll get some pics posted of my pouches up this weekend.
I used 1x2 pine cut to length and inserted them into the pouches, and then painted them black. Really makes the pouches look good, and does not add much weight. Now all I need to do if figure out out to wear them!
Heath, is trying to make some clones of the pouches. He has taken a tracing of the 4 mag pouch, and is working on a pattern. I'll keep you updated on his progress.
Jim
EDIT: here are the pics:
-
Thanks for the warm welcome, guys! I've been lurking for quite some time.
Mel, "HM" will be getting his armor dirty soon enough. We have modded one of the suits, and it's so nasty looking, it looks like it crawled out from a sewer! If we can ever get the rest of the fan film suits done, we will be, hands down, the dirtiest troopers out there!
Hi Tony! Let me know if you need anything!
Now to make the packs, and the BFGs.
Jim
-
Hello, jimbo890 from the RPF, [and JimE2 from the ASAP] here. I've been lurking around these parts for some time. Just wanted to say 'Hi'.
Jim
-
email me. I know a guy that has a reversible version! White to black or orange to black.
-
I took some advice and orderd the leather deglosser, USMC Black leather Dye, and some Spray Sheen from www.tandyleather.com. Not too expensive, really easy to do, and the results are stunning!
The MP-40 mag pouches I got were sort of mis-matches. One being almost new looking, and the other, rather oilsoaked. With the above supplies, they now look like a matched set, and are a beauty!
Jim
Need to clean my pouch before I dirty it up, but need help..
in Pouches, Pauldrons, and other Accessories
Posted
Yes, the deglosser is the way to go. Takes only a minute or two and you are ready to start dying.