

woodman
-
Posts
610 -
Joined
-
Last visited
Content Type
Events
Profiles
Forums
Posts posted by woodman
-
-
I really like the look of it.
-
Very nice Rick, Look forward to finished pics.
-
coming from you Rolf that means alot to me. thanks so much. I would be interested in painting anyones blaster for very cheap if anyones interested. In the states shipping is no problem but certain countries would need to be researched and by cheap I mean it.
-
Congrats bro! I'm still working on mine, be there soon.
-
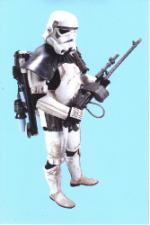
Iconoclasta_88(Juan) asked if I would post a tutorial so here it is.
I first painted the whole blaster with flat black spray paint and let it dry overnight.
Then you use a 1" semi-stiff bristle brush and Rub-N-Buff metallizer
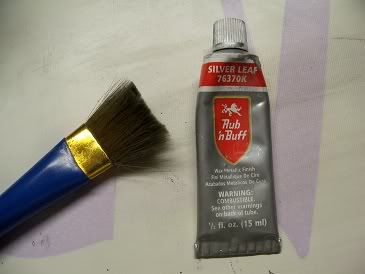
squeeze out a very, very small dab on a paper plate,this stuff dries out fast and alittle goes a LONG way.
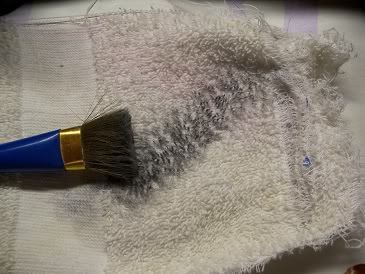
brush it up and then brush it onto a rag until it's almost totally dry
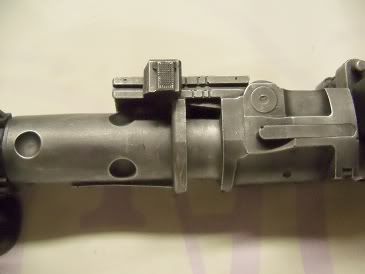
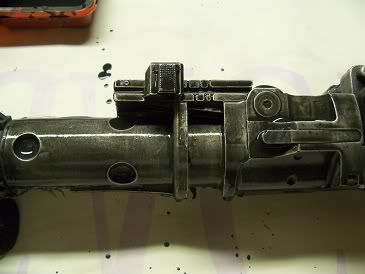
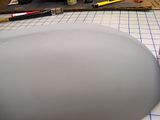
Here before metalizing, well there is some on it but I rubbed most off to demonstrate, it will be totally black to begin with

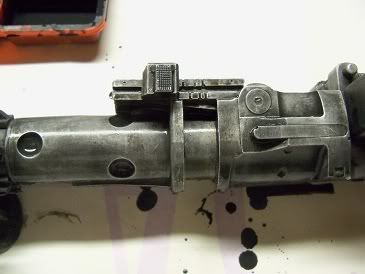
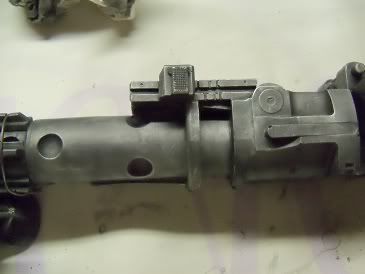
do a test on something else to see how dry the brush is, it will need to be very dry or it will leave way too much on the surface.lightly brush the surface all over being sure to get all the raised details and the broad flat ares too.JUST DONT GO OVERBOARD YOU WANT TO BRING OUT THE FEEL OF THE SURFACE NOT PAINT IT SILVER. after metalizing...
This stuff dries very quickly so no need to wait overnight to move on
You need black acrylic paint,water and a soft brush.
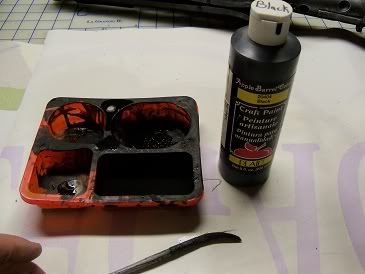
mix about 3/4oz paint with 1 1/2oz water or where you can still read writing on white paper through the paint
any darker you will cover to much and any thinner it will just run off. You just need to brush the black on a section at a time and dab off lightly with a paper towel repeating the process until you like the result be sure to let it dry inbetween coats. you can use a hair dryer to speed the drying.
generous coat of thinned black paint...
after dabbing with towel...
after drying...
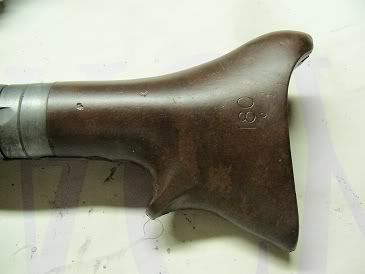
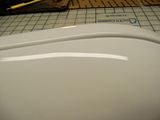
Painting the bakelite finish on the stock I masked off the blaster then I used Rustoleum satin brown.
I sprayed the stock and let it dry overnight. I used the same thinned black acrylic but thinned it 50/50 then brushed it on the stock trying to cover it as quick as I could all over then quickly used a cloth rag to dab at the black to get the mottled look all over. I used the hairdryer to dry it then sealed it with Krylon clearcoat then repeated the process 3 times.It will give a deeper appearance.
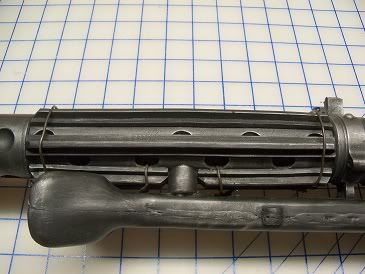
Next I needed to install the wires around the "T" track first I made some very small "V" cuts in the track
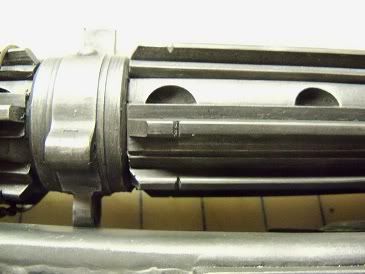
Then I cut the small wires for the bottom track, I have a Hyperfirm so the bi-pod wont come off so it's alittle harder to twist the wires but I used a drill bit and drilled a hole through from one side to the other then stuck the wire through...
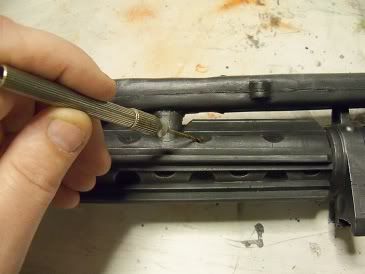
The rest is easy just cut the wires and wrap them around where they go and twist them together on the bottom
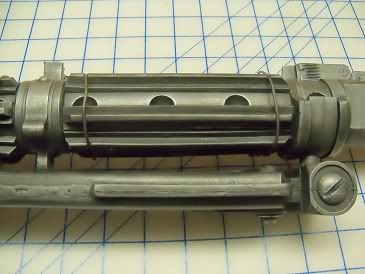
Take your time with the rub-n-buff step it will make or break your paintjob and again test the drybrush technique on a section and if you go too far use a rag and paint thinner to clean it off and start over. It's only paint!
Thanks alot Juan for asking me to do this I am honored to share my work with everyone and humbled by your comments. Woody
-
 1
1
-
-
That is just fantastic! Thanks so much.
-
Thank you sir
-
love the weathering very tastefully done. Nice upgrade.
-
DZ/BH/TS9808 requesting access
-
whoa the empire is invading Chicago or Detroit!
-
Of course you NEED one Jason...We all NEED one!!!!!!!!!!!!
Thanks alot for the compliments from everyone.
I am going to post a tutorial thread tomorrow like Juan asked.
-
Thanks for the thumbs up now I have to do the other one! LOL!
-
Thanks alot guys I need to get a black one so if you got an extra let me know.
-
Thanks Terry I got the original idea to modify them from your thread. The soft ridge was my main focus
-
The shoulder bells that come with the AM kit are really big an I'm only 5'8" so I needed to cut them down anyway so I dedcided to go a bit further and reshape them and bondo in the very pronounced ridge to better match an ANH derived set. I still need to do the spot putty and I am going to do a more defined crook at the bottom of the ridge.
-
I weathered my white and orange pauldrons last night here is the result. I wanted the weathering to be a bit different on each one.
-
I agree! Very nice Gree, Rick!
-
What! Are the mirrored lenses not correct?
-
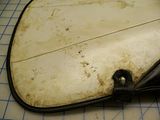
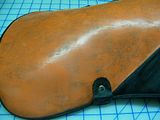
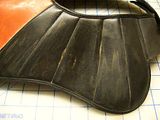
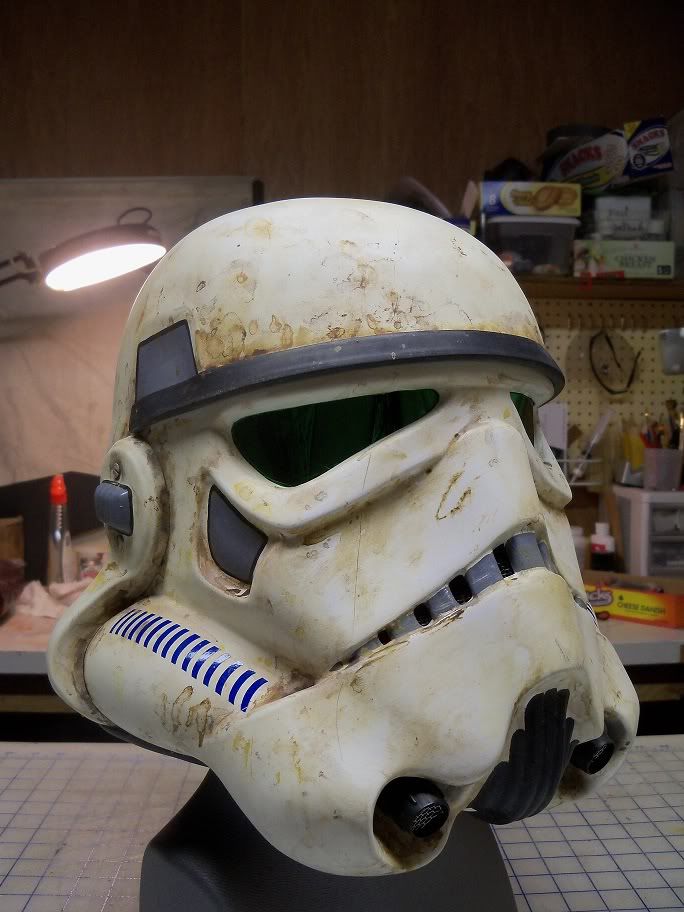
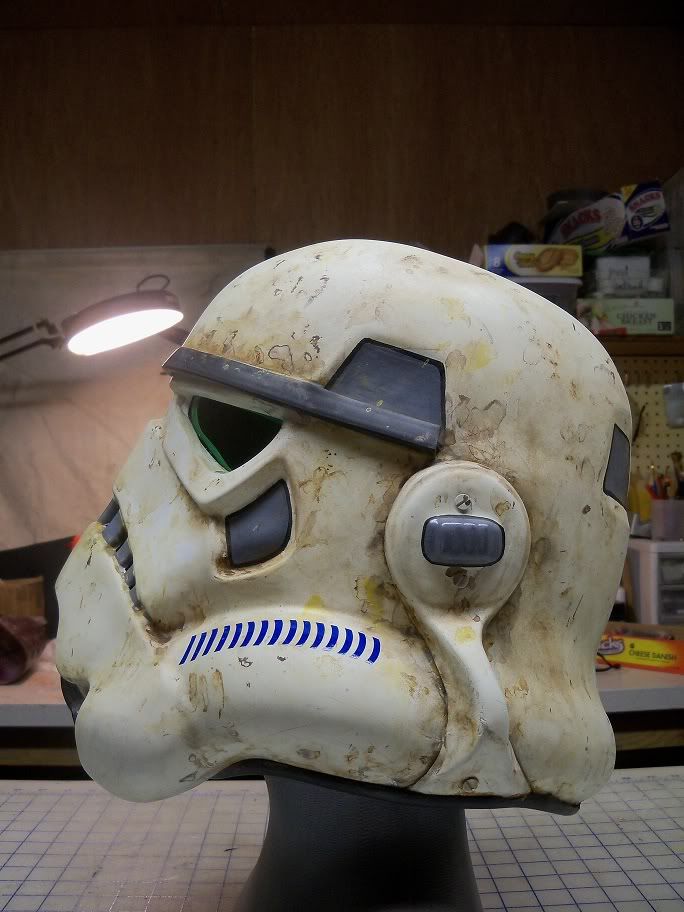
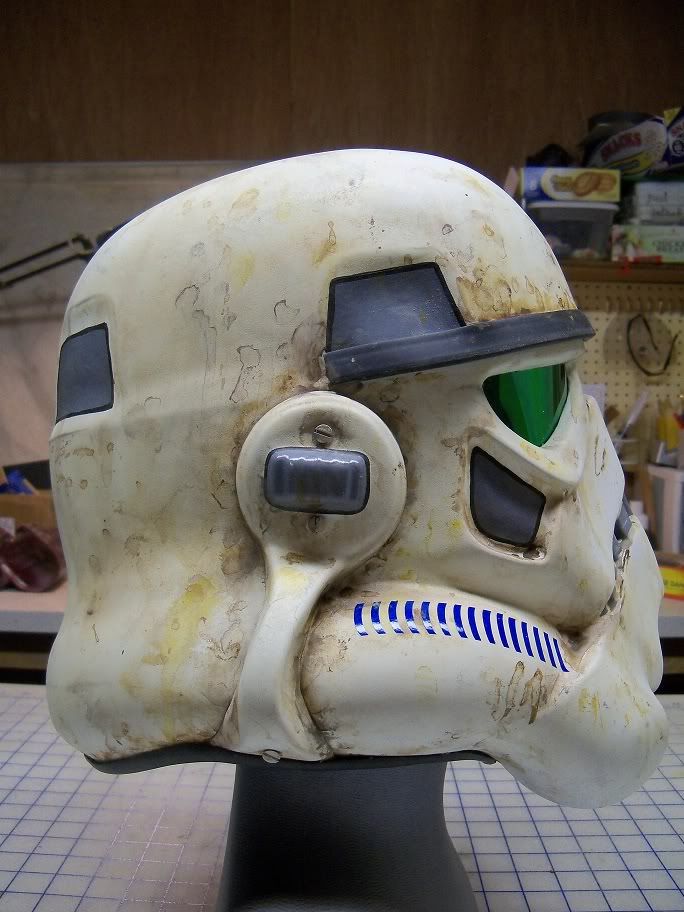
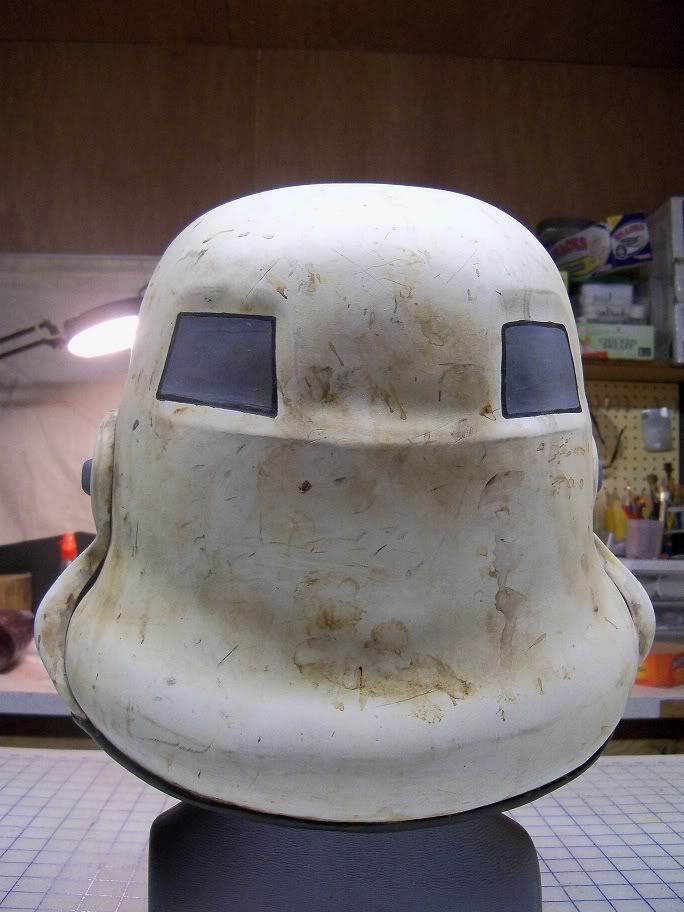
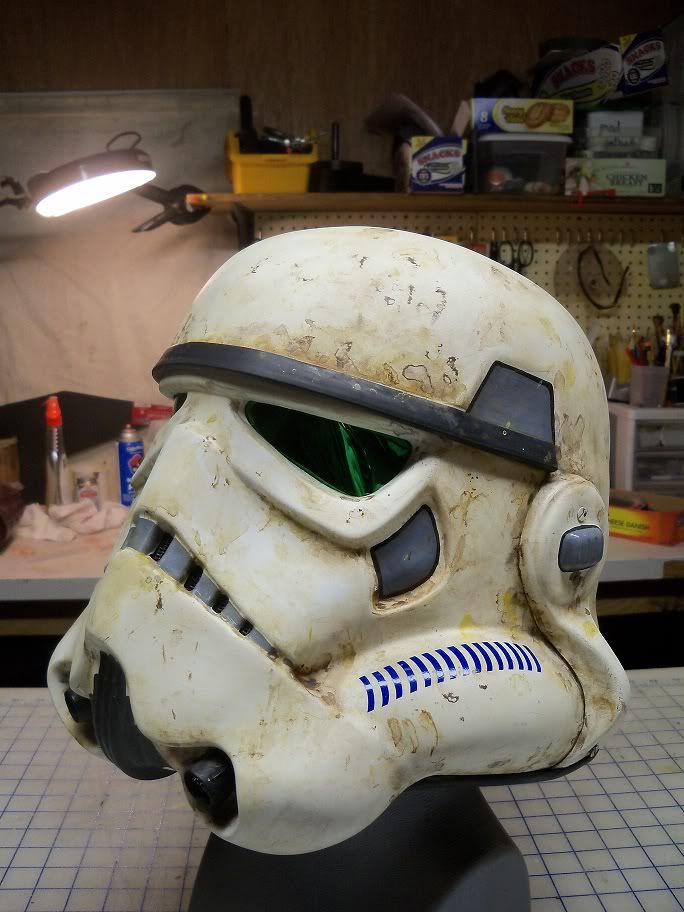
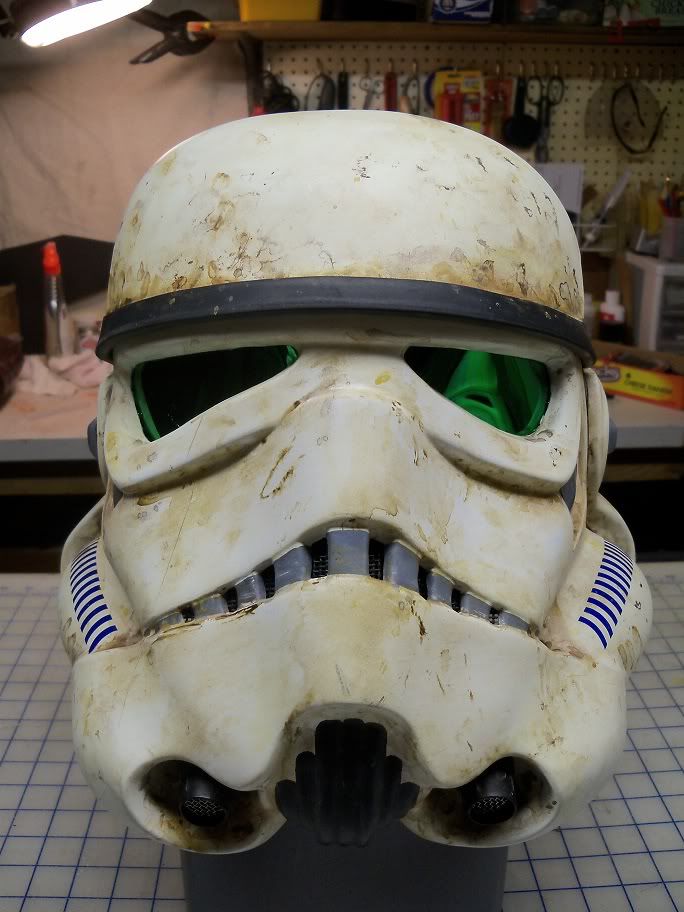
Here's the helmet I got from Peter G. I had to remove the custom red stripes down the front so I scraped them off and sanded the front feathering the weathering out the side so I could reweather the front and have it blend in with the great job he did on the rest.I replaced the dark lenses with the green mirrored too.
-
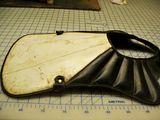
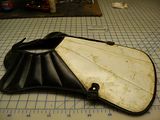
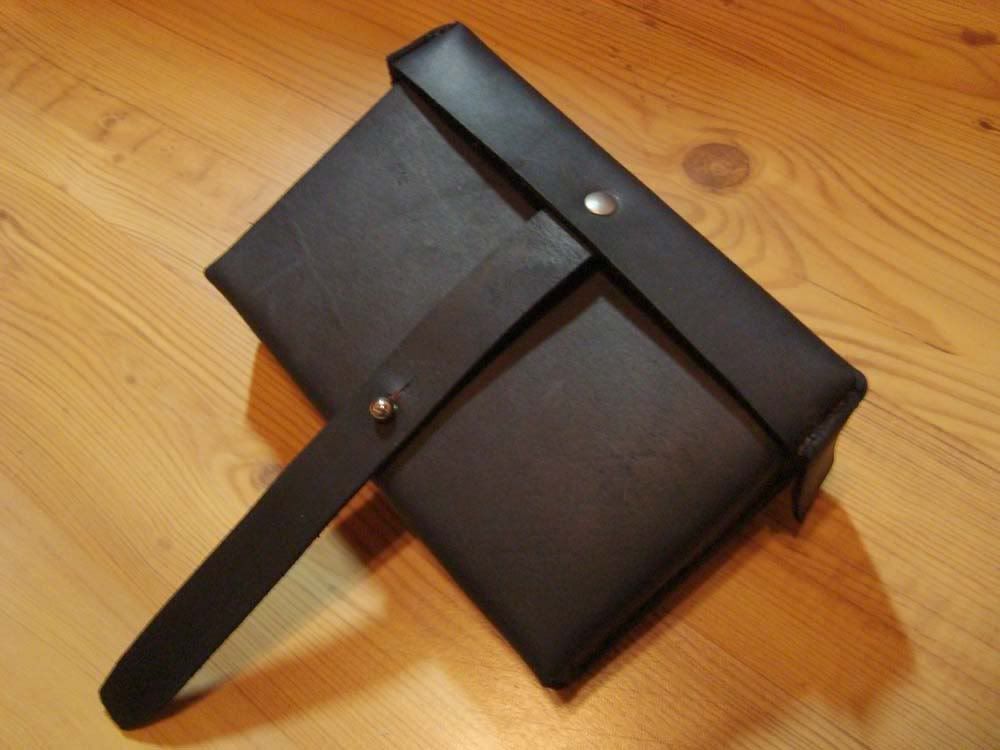
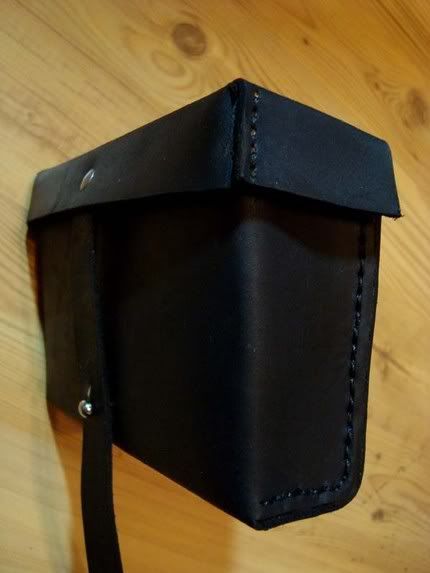
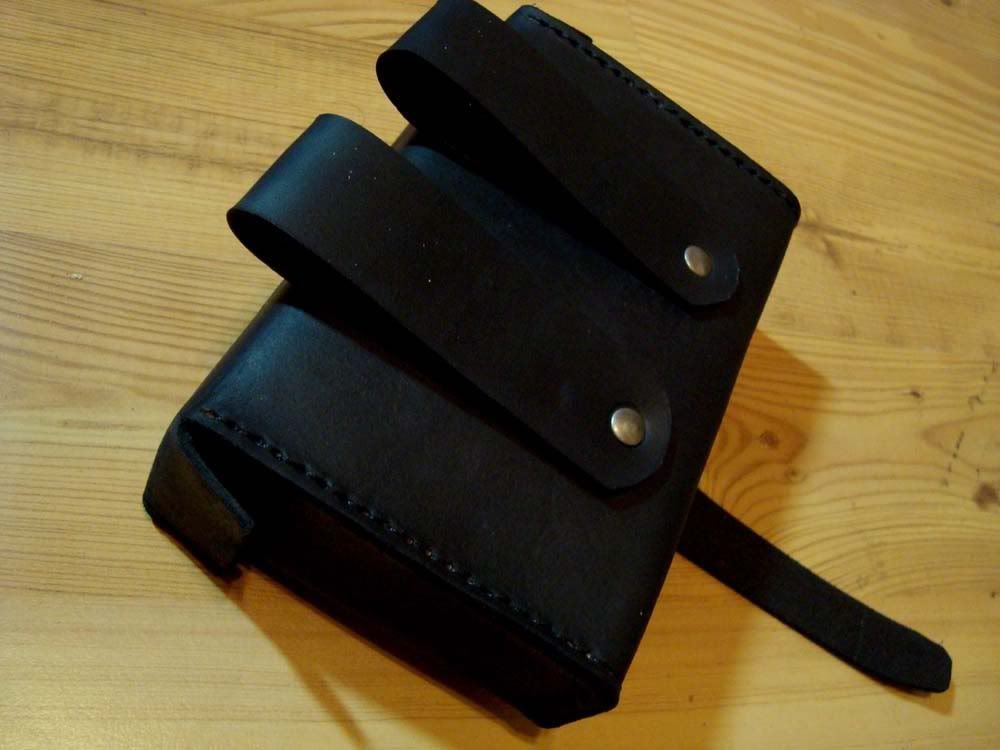
Here's the link to the finished pouch...http://www.etsy.com/listing/54727382/trooper-costume-leather-pouch-4
The closure strap is left long to be trimmed to your personal liking.
And the pics
-
I have a "cheesegrater" but being from an AM kit,which comes with TS plates,standard and cheesegraters, all of the handplates are very large compared to other kits so a comparison is hard there.
He is making my pouch right now so I will have them all soon to see.
-
Thanks for the photo, see the side seems to taper in. I have alot of leather ammo pouches for my tusken and Jawa stuff and most taper in as if to fit pointed bullets better so I applied that thought to the pouch. Anyway I paid for the development of the first pouch and now this one so I am staying with this design for my pouch.
By no means do I hold any dominion over this pouch and any and all are free to take my findings and contact him to alter them any way you see fit to get a pouch to your liking. I was just trying to help get a source for the pouch
out in the open and since JMleather is a friend of mine sending all the work I could his way was a given.
I hope you guys will buy a pouch from him and help him out.
The reference for the pouch is so limited that making a solid be-all-end-all decision on the details is hard.
Thanks for all the comments and help. Woody
-
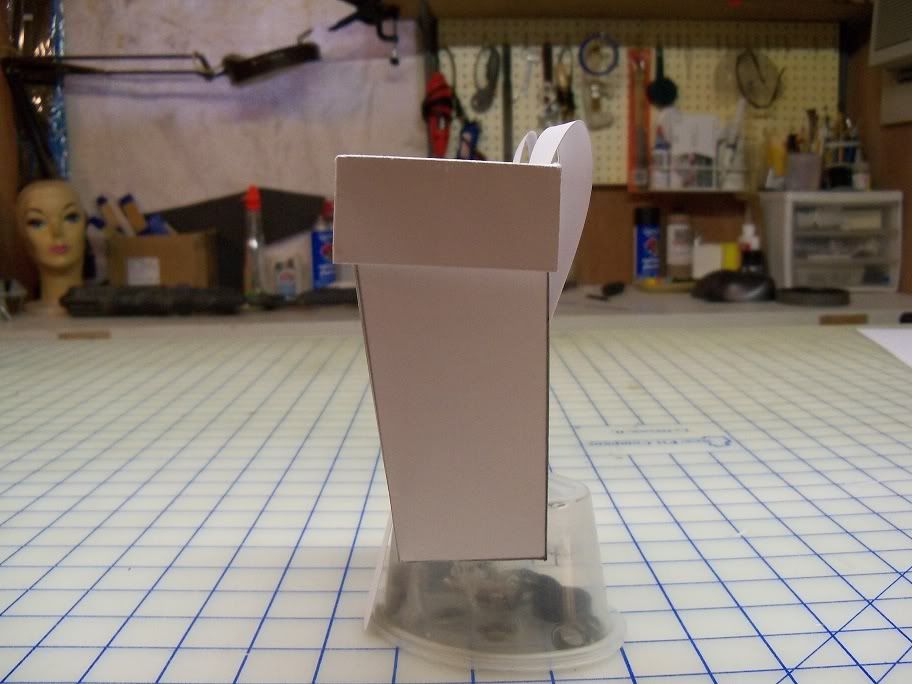
I'm not using this one single pic I am using my frame by frame function on the DVD player and the canvas belt is 3 1/2" wide and we know this and the pouch clearly is wider than the belt so 4 1/8" seems right to me. and as for the tapered side of the pouch sure you cant see it in the pic so go watch the roadblock scene and slow-mo the scene. I see it tapering. The strap was too short before now it's too long, I am leaving it and you can trim it to the length you see fit. Remember I am not making these myself just working on the design then handing it off to the maker.
I would suggest if it looks off to anyone use the info and make a paper mock-up then hold it to your waist and belt. Being made from paper it is just straight and has no character but transposed in leather it will have the bends and look of the real pouch.
Woody
-
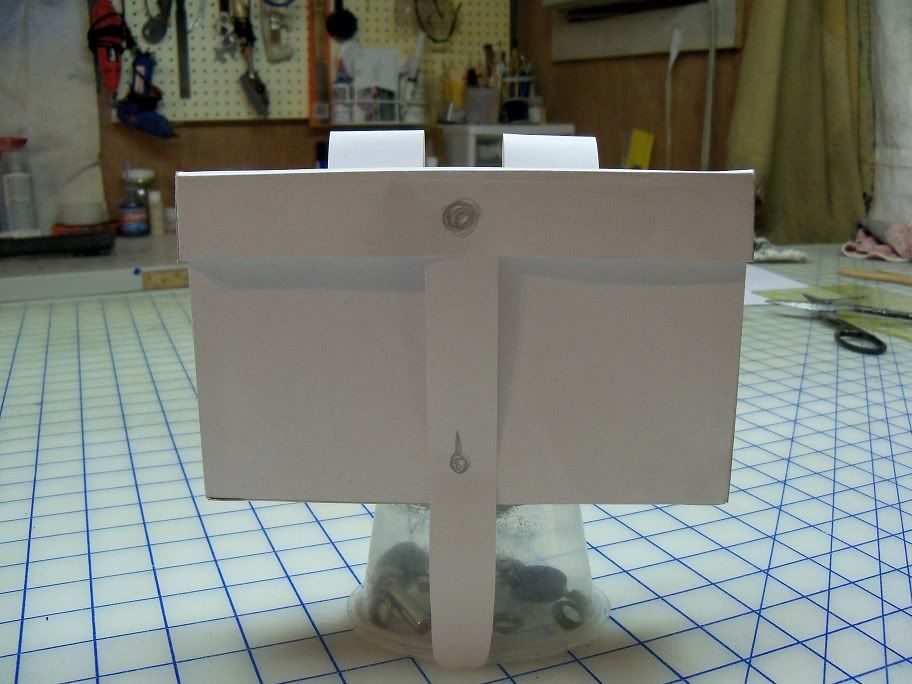
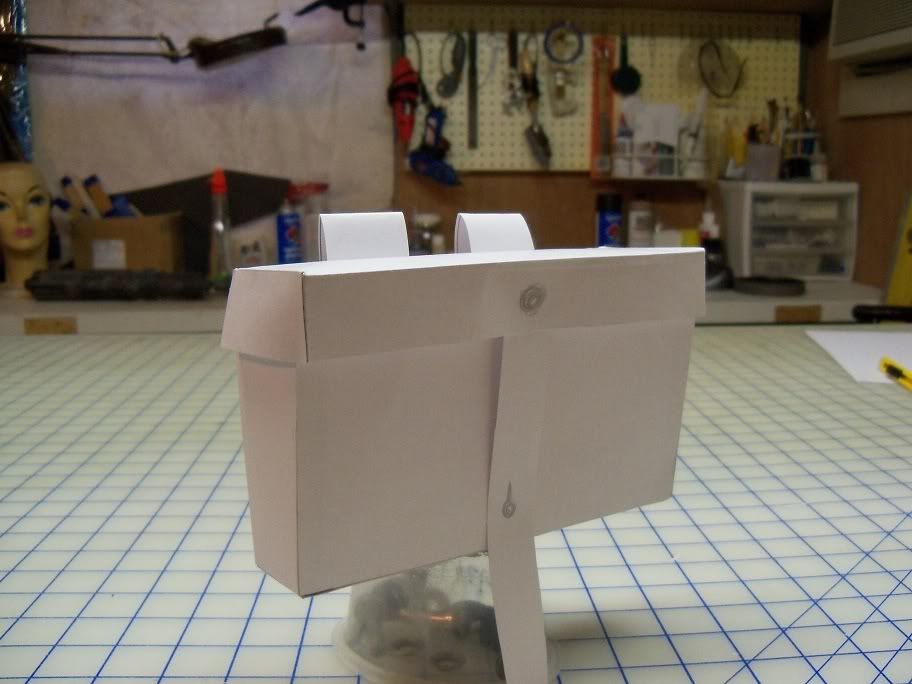
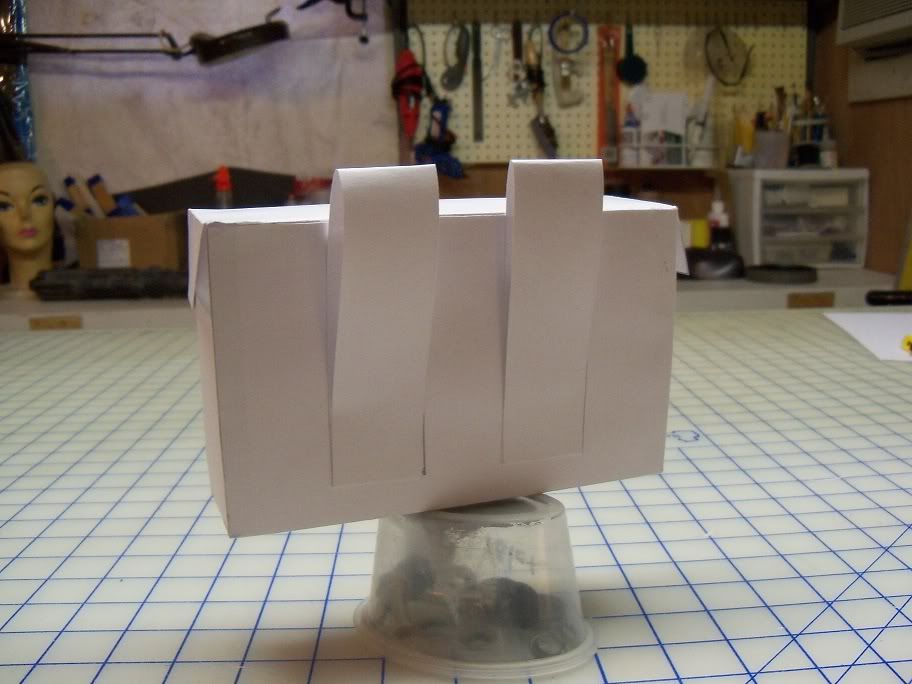
After watching and watching and more watching and then rewatching the roadblock scene here is the mock-up of the box pouch I have come up with.
width 6 1/2"
height 4 1/8"
depth at top 2"
depth at bottom 1 1/2"
lid 1"
closure strap 6 3/8" and only slightly tapered with rounded corners
belt loops will fit a 3 3/4" belt and are 1 1/4" wide
black rivet
Let me know your feelings and comments on the mock-up


Sandeman's DLT-19 in Foam and PVC
in T-21, DLT-19, RT-97c Heavy Blasters
Posted
that's great.