


woodman
-
Posts
610 -
Joined
-
Last visited
Content Type
Events
Profiles
Forums
Posts posted by woodman
-
-
Does anyone have the diagram from Arts TD reference CD?
-
If I found the real radio I would have posted 200000 pics the same day I found it.Agreed....for something of such a significant find not to have any additional images or information. seems odd to me as well. hopefully he is just super busy building a replica

If you go to the 501st thread there's a pic from the TV show "The Avengers" with a guy holding the radio and you can see something on the other side of the radio.
I dont know about RCA jacks either, they would stick out further than the headphone jack would I think.
-
I have a question, has anyone go so far as to recreate the vinyl binding covering the outside of the radio? Also the antenna is plainly visible in post #2 on the screen used packs. I will be using a folded strip of vinyl on mine and an antenna.
My 2 cents on the side connectors is in the 70's headphones were the giant coconut sized ones with 1/4" pin jacks
and the spots just dont look big enough to me. I could be wrong but I have played guitar for 25 years and seen alot of that sized input jack.
Look at the radio in post #4 the front on view shows that nothing sticks out past the side of the radio a headphone or mic jack would have the standard nut that screws on to hold it and it would stick out from the side and be visible from that angle. I think they are just there to hold the vinyl band around the outside on.
-
HOLY SMOKES! That'll give you nightmares! About the R2D2 suit you think they would have used a top heavy model but NOOOOOOOOOOOO. LOL!really??? have you seen this one?
-
I have a white and a black one from them and they are well made, if you are wanting to get all 3 colors you cant beat the price. I have never seen a Trooper1 in person so I cant compare but I hear they are nice but... buying all 3 at once could add up quick. as for being a bit tight I am out of luck there EVERYTHING I wear around my neck is tight with a 20" neck! Darn husky build! I will say I ordered them and they sent me 1 of the wrong color and 2 days later I had the right color and they sent the postage for me to return the wrong one. super fast shipping.
woody
-
I asked him to refund me the cost of the 2 pouches he still owes me from 2 1/2 months ago. I feel very screwed on this whole thing.
-
well if he cant complete peoples orders on a timely basis then he should retire, I have still not gotten my final pouches from the very beginning and it has been quite some time. Zaddok does great 3 slot pouches I'm sure he will continue to make them. I am not happy with the poor service JM has done and it has made me feel very uneasy being connected with this.Sad news, hope he returns

-
looks like I may need to trim the flaps a bit on my 3 slot pouch.
-
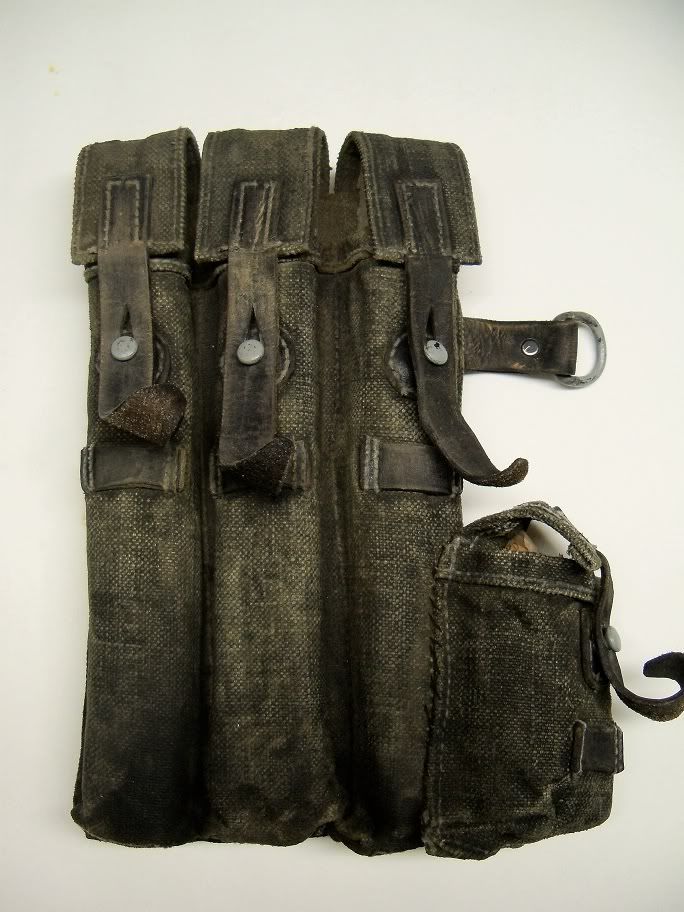
This is my JM Leather roadblock pouch after I did the weathering. I may do some more on the front section.
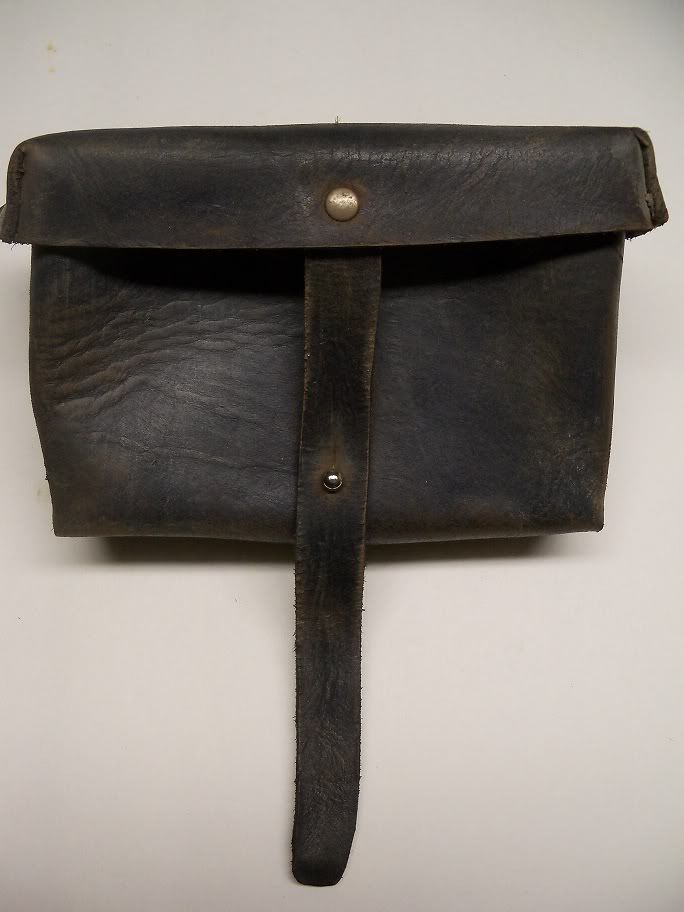
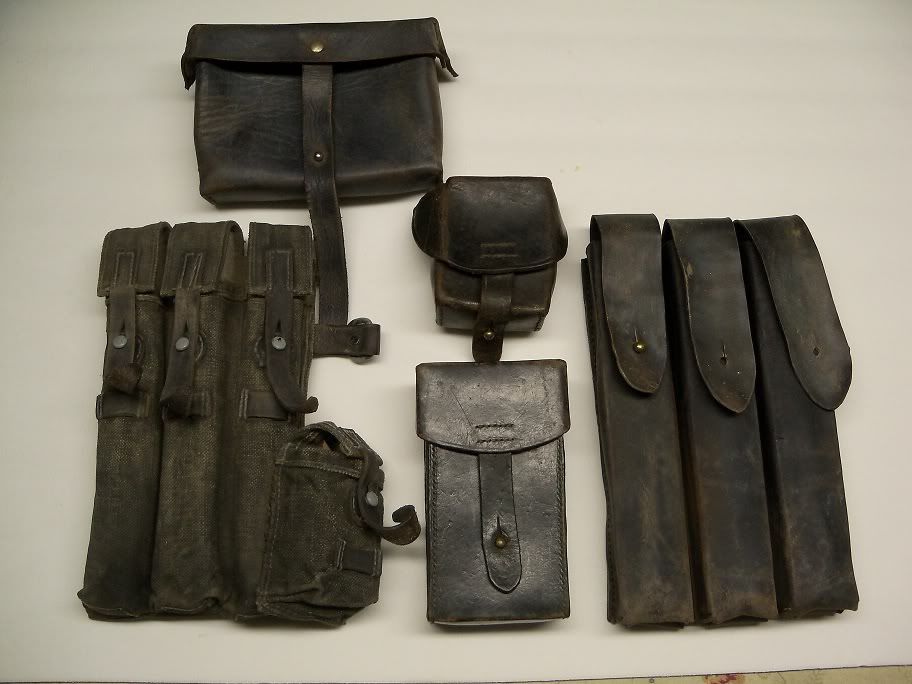
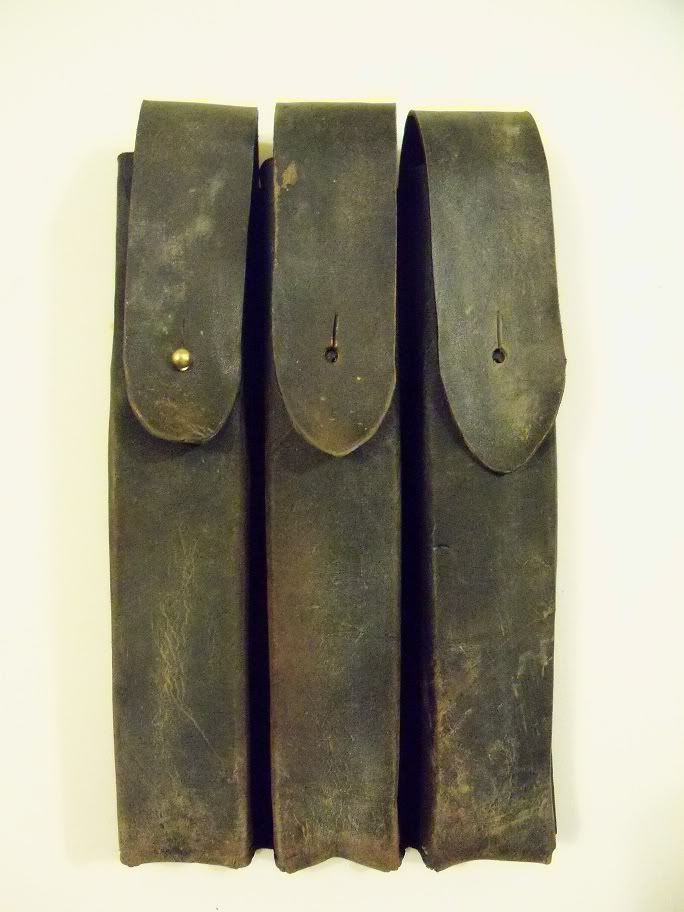
Here are my real pouches with the repros I have weathered so far.
-
I moved the small pouch over and added more black oil staining effects at the bottom and took the picture in better light for an accurate representaion.That looks really cool.
The light is a bit strange, is the yellowish color, actually green? Or is it white-ish yellow-ish?
The aging and weathering looks awesome!
Lots of character!!
Good job bro!
And btw, that pouch is amazing!
Any plans on relocating the small pouch to make it more accurate?
Saludos
-
Yeah they are waaaaaaaaaay crazy asking $600, I have done some searching and a common price is $70-$150 for the several different styles. I guess I am going to buy one of the cheaper ones since I have every other pouch except the large spanish.
-
I have a PDF file of something I want done in aluminum I dont know how hard CAD work is but would anyone be willing to do me a favor and do the file so I can just take it to the machine shop here in town? I doing sewing work and have stuff to trade so give me a shout. I dont know how to post the PDF but I can send it to you.
The file is for my Clone Commander Gree boot discs if you know what I am talking about the discs on each side of the straps on the clone boots. Grees' are done in aluminum in ROTS.
-
I still have another one of these I'm waiting on from JM leather but I went ahead and weathered this one and cut the flaps. I need to get 2 more button studs for the flaps also.
-
I will remove the small pouch and reposition it.
-
I am very tempted to bondo the back seam and really make it look good.
-
Yeah it's greener than the pic makes it look. How far over is the small pouch suppoed to go?
-
I got the pouch from Blastmaster and it was dark green like most but it was pretty heavy canvas and not like some of the thinner ones. I used leather dye in the sink and tinited the water so it would dye it but not be too opaque.
I let it dry overnight then I used sandpaper to bring out the highlights and details. I used an exacto knife blade to scrape away the black from the leather parts and give them some texture. The leather stuff was still a bit wet so I used my heatgun and torched them so they would draw up and shrink and curl up making them look worn and old.
Then I used real dirt to sand it up. I know it's heavily weathered but that's the look I am going for.
-
I wear 11's in my reg shoe and my 11's TKs fit fine. But that just me I dont know about the up sizing if you wear a half-size shoe.
-
That is awesome, real dedication to a build.
-
VIVA LA JUAN! CONGRATS BRO! I wish I had a little girl, I have 3 boys.
-
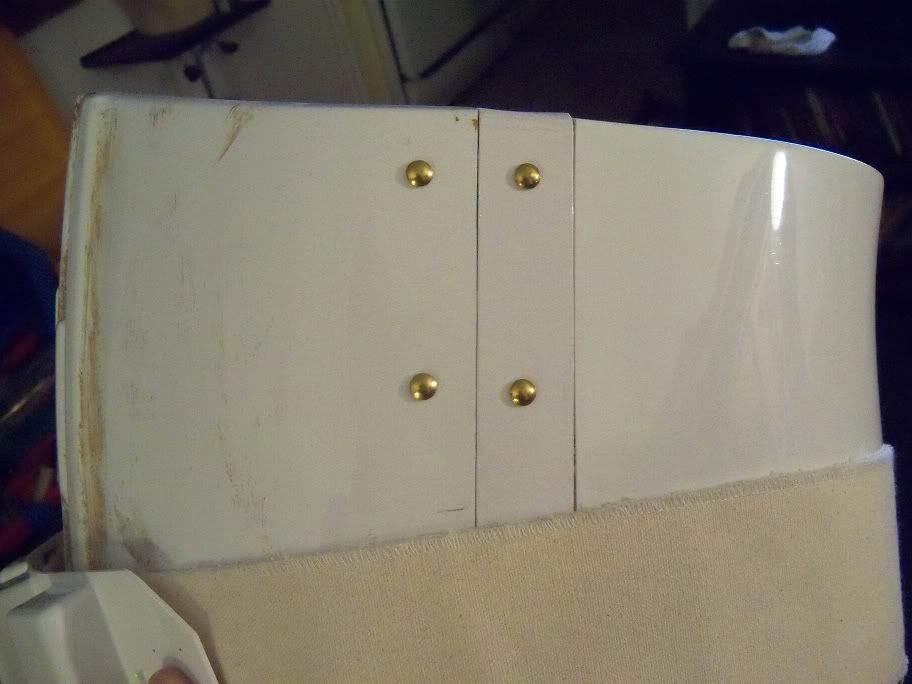
I went ahead and glued both sides and the piece over the shim and it's ok. I will paint the rivets white right now they are just stuck in the holes. Also the belt is just being held there. Thanks alot for all the input guys.Woody
-
either way, They come painted but you can ask for it unpainted if you want to do it yourself. Here's a link to my DLT-19 paint tutorial, http://forum.mepd.net/index.php?showtopic=7258
I will also paint it for you if you want just PM me for info.
Woody
-
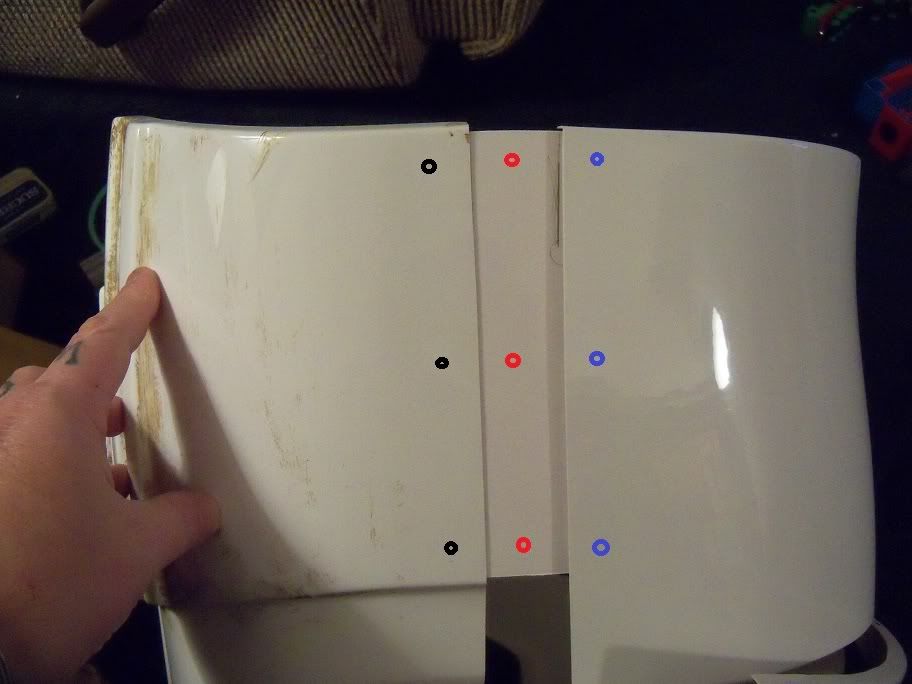
There's actually something else you can do to make it a little more "seamless". Cut another strip of plastic that's the exact size of the gap. Glue that on top of the shim, then drill holes through the red circles. This way:
- you hid the gap with a shim
- there no difference in height
- you can retain the screen used spacing for the rivets
Well they're not the same height the front has the shim glued to it but the back is held with velcro so the velcro raises the back up so they arent at the same level. I didnt want to glue it solid front and back so when I drop a few more pounds and inches in the gut I could move them together. I want to get deployed so before I drill the second set of holes I need more feedback so who will be giving the yes or no for my deployment?
I will cut a quick strip to fill the shim area and see how that looks and what everyone thinks.
-
ok since I have a shim in my side where do you think I should put the rivets. The black circles are a given but the other ones are not so easy should I put them where the red or blue circles are?
shoulderpauldrons.com
in Pouches, Pauldrons, and other Accessories
Posted
Yes the boots are awesome. I feel like a pimp in them! I may wear them out to dinner with some slick polyester pants before I weather them!