

TK6237
-
Posts
133 -
Joined
-
Last visited
Content Type
Events
Profiles
Forums
Posts posted by TK6237
-
-
I've got a Laws TS. It's a beautiful kit, and one of the most accurate sets of TS armor available. However, Laws has a very, very long waiting list at the moment, somewhere around 6-12 months...There are other options though, like MonCal or the Bobamaker (BM) TS armor. The BM is still a work in progress, with some armor parts yet to be formed, but judging from what I've seen so far, it's going to look fantastic once it's ready. Also, BM is in the UK, meaning you could probably save a few bucks on shipping as well.
For more in-depth discussions on all aspects of the TS and TS Commander costumes, I suggest you join us over at Blizzard Force, commonly known as the coolest detachment in the 501st.
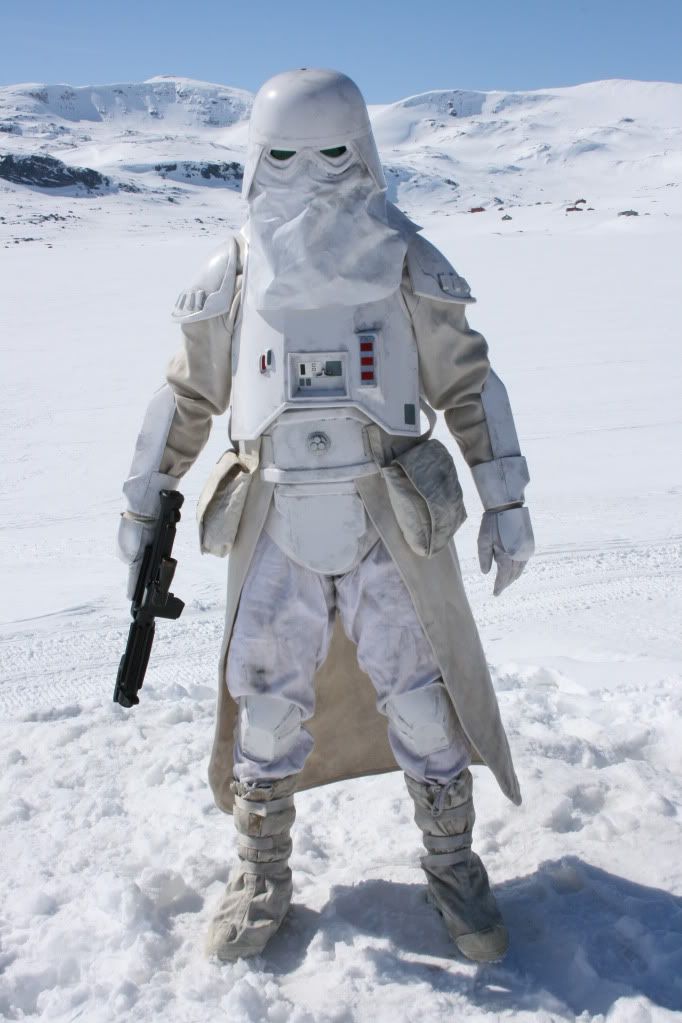
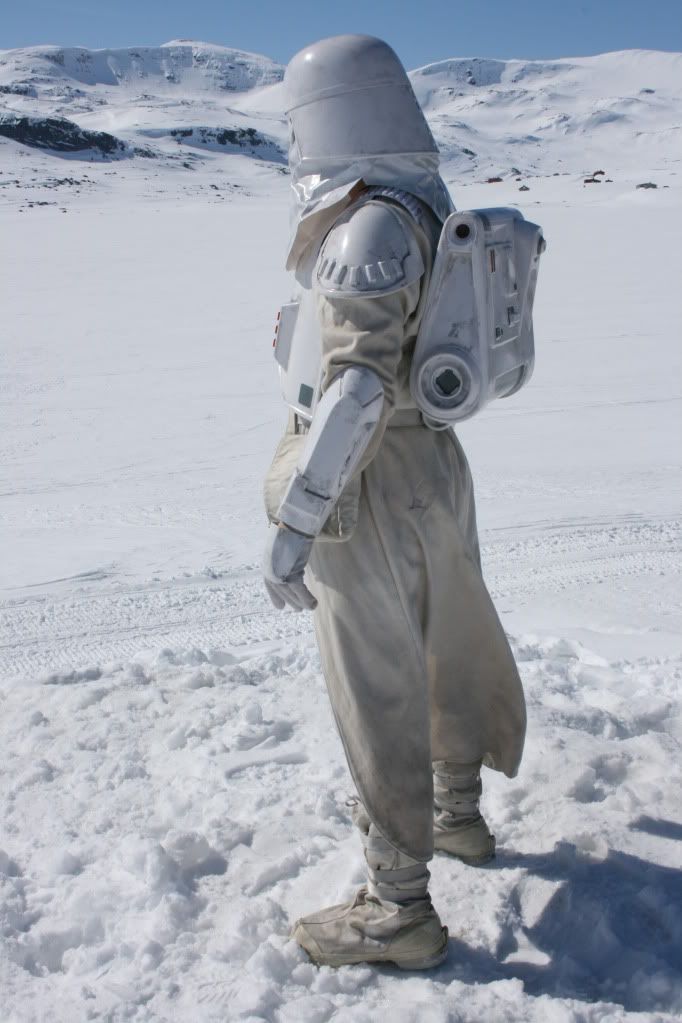
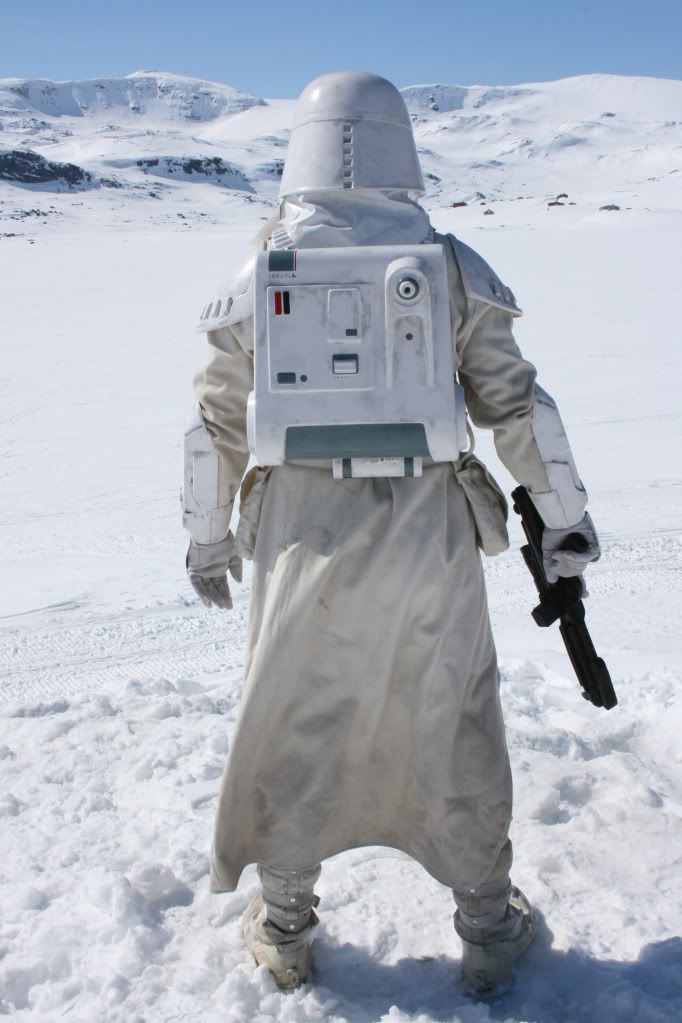
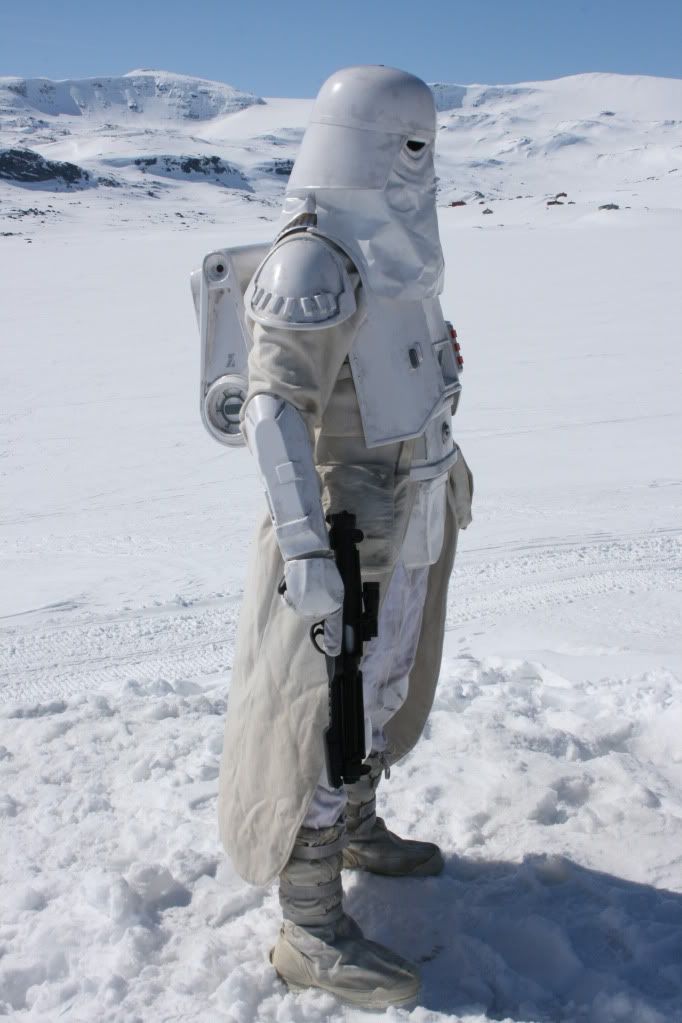
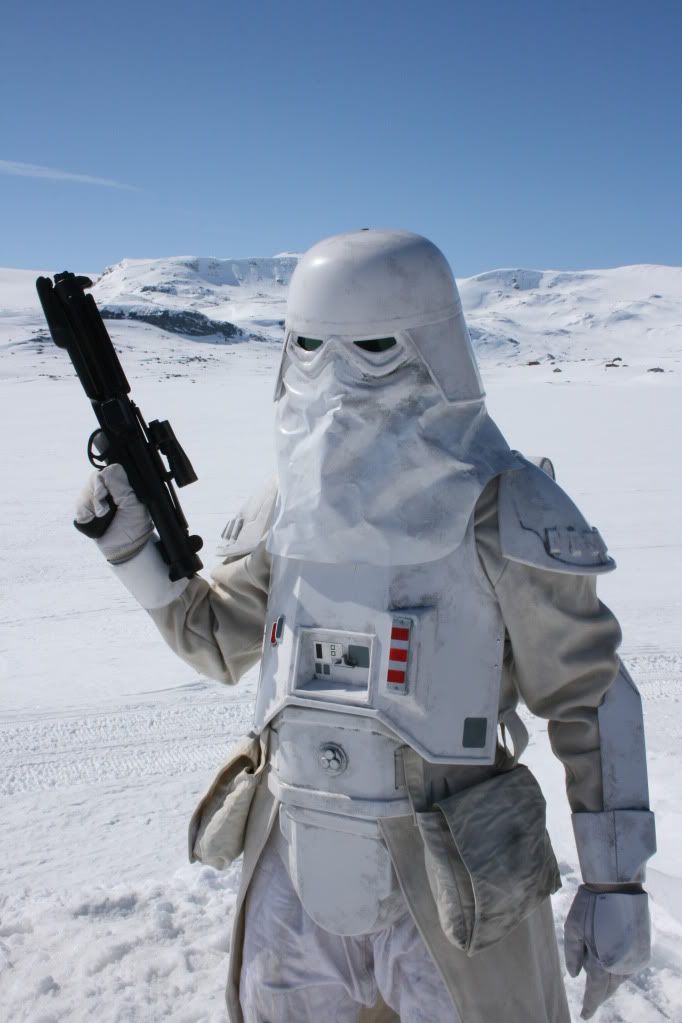
Here's a few snaps of my TS, taken at Hoth during the 30th anniversary celebration of ESB back in 2010.
http://i583.photobuc...cs/IMG_9844.jpg
http://i583.photobuc...cs/IMG_9843.jpg
http://i583.photobuc...cs/IMG_9842.jpg
-
Some of the MP44 pouches seem to have been fitted with a strap, like these ones:

...If they used this strap to secure the pouch to the sandtrooper's belt, that might explain why it's hanging at an angle, away from the TD's body:
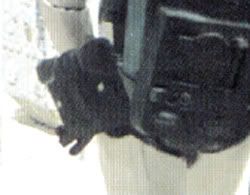
...And, if this is the case, judging by the angle, it's the version with the small tool pouch and the strap on the right we're after (that is, the version on the left in the top picture). But I'm just guessing here, naturally.
-
Thanks for the tip! I actually do have a can of plastic weld here somewhere...But unfortunately, I´m fresh out of ABS scraps. Will other types of plastic do? Like, say, zip-ties? Or am I better off cutting up another white, styrene wash bucket?Rather than use E6000 for the repair i would recommend using plastic weld with some ABS backing strips.
Also, I found some more photos, taken with a decent camera. The photographer is Garrison mate and fellow sandtrooper, TD-7350. The troop was for "Norway´s Got Talent", the same type of talent show known from the UK and the US. Our job was to set the mood for a kid that did a style of dance called "popping". Here´s his performance (we make our entrance around the 01:10 mark) on YOUTUBE. The pictures taken by TD-7350 can be found HERE. I´ve got the T-21, TD-7350 is swinging the DLT-19.
-
Thanks again for your comments! Makes me real happy I decided to roll up my sleeves, wipe all the old weathering off and start fresh.
Only thing I would perhaps do differently next time (and there probably will be a next time, now that I've thought of this...), is to give the suit a coat of really, really thinned down acrylic black paint; just enough to dull the shine of the plastic, and make sure there are no really white spots. And then start with the pigments and the hairspray, once the paint had dried.
Yeah, I glued thin strips of ABS plastic (using scraps I had lying around) to the inside of the return edges with copious amounts of E6000. The chest, back and ab plate, along with the area around the groin and the top of the thighs are the spots with the most cracks on my armor. Fair guess to say those are the parts rubbing and scraping up against each other when I walk.Can I ask what mods you have done to strengthen it?
Also, the ammo pack on the right thigh has broken off in half, twice, and the belt looks like it's just about ready to break as well. I'm thinking of reinforcing these areas with fabric tape (the type you use for sports injuries) soaked in super glue or E6000. It's a tip I picked up from someone, but I've never tried it myself, so I'm gonna do a test on some plastic scraps first. I'll let you know how out goes!
-
Depends on what you mean by "ABS adhesive". If it's E6000, you can remove it with a Stanley knife and a bit of patience. If you used ABS welder however, like it might sound that you have...That's gonna be a bit more tricky. See, ABS welder isn't actually a glue, per se. It's a liquid that reacts chemically with the plastic, melting it ever so slightly, thereby fusing the two parts together. Meaning, you can't usually pry the two parts away from each other afterwards, without causing some damage.
So what kind of adhesive did you use?
-
You're talking about decals, right?
Try filling a small bowl or glass with lukewarm water and just a drop of dishwashing soap (like Zalo). Stir with your finger to make it start foaming, and then apply about a finger tip worth of foam to the spot where you want to place the decal. Now, when you put the decal down, it'll "float" on top the bubbles, making it easier to get the placement just right. When you have the decal where you want it, gently rub the decal with something like a credit card to push the foam out from underneath the decal, and wipe it off with a paper towel.
-
Whoa, that is awesome! I agree with Knokkel, that would make a fantastic photo background for the TDs of NG!
-
Couple of more pictures, taken with a decent camera this time.
Indoor, artificial lighting:


Outdoors, partly cloudy:

...I´m fairly happy with it, although I think I will darken some areas, or give it a top coat of Fuller´s earth to further dull the shine of the plastic.
Also, I need to get rid of the CABoots.
-
Thanks again for the comments!
@DarthChridan: I´ll probably troop with the HIPS TM until it´s beyond repair, which hopefully, considering the repairs and the mods I´ve done to it to strengthen it, will be at least a few more years. I am however, thinking about getting a second, brand new ABS TM to build a TK. We´ve got a few of those in the Garrison, and they look stunning!
@Sandman Tigui: Thanks, I´m getting there! Still need to finish that backpack...
-
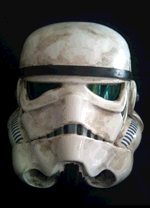
@DarthChridan: Thanks man! The armor is one of the older HIPS TMs, built by Rolf/TD-252, modified by me. Being HIPS, it has received quite a few cracks, which is one of the reasons I can´t use the TM helmet, sadly. The "stalk" on one of the ears is nearly broken off, and there´s a huge split down one of the tubes, in addition to a few minor cracks all over. However, the suit is a beautiful bony white, which works great for a TD, and the weathering helps the whiter AP helmet blend nicely with the suit.
-
Very strange...
He did post some very specific details, though:
...And:all it says on the label inside is MODEL; MT-1809
POWER;220V/240V and theres a number deleted
6volts DC
4watts
BRAND; SOLAR
i know they did a battery only version and a battery & mains with its own mains leads,this is the version i have.the front is injected plastic but all the other sides and rear are some sort of vinyl covered board,the rear panel lifts up to expose the battery compartment and the mains lead its held shut by 2 small pop studs on strips of vinyl
i cant believe out of all the ones made i am one of the first to find one,
i will be looking in to having some casts made from this,i will have to see which way is the best for doing it...........
...But he never did try and sell anyone anything, at least not openly on the 501st forums. Maybe some of the UKG guys here could try and contact him through the UKG message board, or something?i will post pics of the strap mounts,...on the side are jack plug sockets with the word MIC above the top one and EAR above the lower one,the knob on the right the tab is just to give leveredge on the switch as its quite a positive click from one position to the next,
the switches on the front are slide switches ,and regards to the mp3 player i would say it was a simple job to connect the speaker to the mp3
on the right hand side half way down the case is a old fashioned 5pin din socket this would allowed the conection of a tape recorder
-
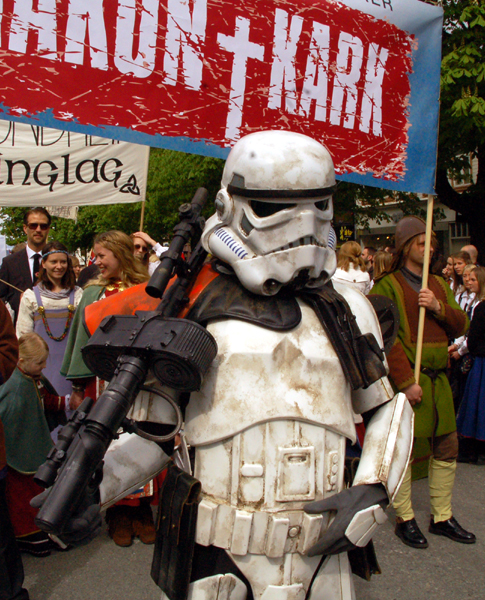
So, I finished my weathering (for now, anyways) and got some pictures taken by a friend of mine with a decent camera. I´m still waiting on the pics, but in the meantime, I found this, taken at the May 17th Norwegian Constitution Day parade by a bystander:

Found some moving pictures from the parade as well,
,, and even a TV spot, HERE.And here´s a closeup of the helmet I shot with my mobile cam (sorry about the red tint, stupid camera light):

...More (and better) pics to follow.
Yeah, next on the list is switching for a better shoulder pouch. I´ll be working on my canvas 3+1 this weekend.
-
@DarthChridan: I usually just seal it with a couple of coats of hairspray. It stays on there pretty good; I haven´t tested it in a solid rainstorm yet, but I have been out in a light drizzle without any damage to the weathering. I had to scrub pretty hard to clean off my previous weathering attempt, which was done using the exact same materials as I´m using now. I´ve also weathered a TS this way, which I trooped in for the better part of a day around the snowy wastes of Hoth (or Finse, as we call it). I spent quite a lot of time running around in the snow, but all the weathering is still there.
I believe "misting" is the word you´re looking for. If you would want to make dead sure that the weathering stayed on there, misting the suit with some clear coat would probably work really well. I would, however, test it on a weathered piece of plastic first, just to make sure.
I use dry pigments from Mig Productions. The hairspray is called Clynol Ultra Strong, but I think any liquid hairspray will do, as long as it´s sticky enough.
I fill a tea plate or a small bowl with about a spoonful or two of hairspray, and then add just a tiny, tiny, tiny pinch of pigment(s). I mix it up with the hairspray, and when I think it has the right color, soak up a small amount with the sponge, and start dabbing the sponge on the armor piece. The important part is to keep dabbing at it until the hairspray starts to dry up and gets sticky; this is how you get a sand-like texture. When the hairspray is all dried up, I wet the sponge again and start with the next area. I only do about 1/2 a bicep or a shoulder bell, or say 1/4 of a thigh in one pass. Once the entire part is covered in hairspray and pigment mix, I let it dry for 15-20 minutes before I hit it with the damp cloth.
...And thanks again for all your comments, much appreciated!
-
Thanks for the comments!
@DarthChridan: Yeah, the hairspray will make the armor slightly glossy right away, but the gloss will wear off quickly. Also, this is a TM HIPS suit, so it´s really not as shiny as it might appear in these pictures. The one spot on the chest is from direct midday sunlight.
The things I really like about this weathering method, is that it´s quick, reasonably clean, and economic on the pigments. Also, it´s a lot easier to control both color and opacity by adjusting the amount of pigment VS hairspray before adding it to the suit, and in addition to that, you can mix different pigments to get just the right color.
Working on the thighs and shins now!
-
After refining my hairspray-and-pigments technique on my TS, I´ve wanted to redo my TD. This weekend, I decided it was time.
Here´s what it used to look like:

...It was just way too "spotty", almost like a camouflage pattern, and the colors were too dark. So I wiped it all off on started fresh on Saturday. Here´s where I´m currently at:


The technique I´m using is dissolving dry pigments in liquid hairspray, applying it with a kitchen sponge, and then wiping it off with a damp cloth. I´m trying to achieve an evenly "dusted" coverage, with a few darker details. This is the result from 2-3 (thin) layers, mostly black and dark umber. I´m thinking maybe 1-2 more layers (light oker/desert sand with a coat of light gray Fuller´s Earth on top) will do the trick. I´m using pigments from MIG Productions, mostly "Russian Earth", "African Earth", "Gulf War Sand", and black from an unknown maker. All the details of the weathering technique I´m using can be found HERE.
Comments and tips are welcome!
-
I attached my lenses pretty much the same way, however, I used a modeling clay called FIMO to form the fixtures. My how-to is posted over at FISD.
-
I've got a wireless transmitter, a TrooperCom and a walkie-talkie, along with a few batteries, microphone and an ear piece I my AP helmet - but then I also have a head the size of a grapefruit..
Before this, I had my ROM/FX, along with the batteries and the speaker that came with the ROM/FX kit tucked away in my 3+1 shoulder pouch (speaker in the small tool pouch). Using a behind-the-neck headset, wire to the ammo pouch hidden behind the neck seal and the chest plate, I was able to take the helmet on and off without having any wires get in the way.
With this setup, you wouldn't be able to use the mic tip speakers, unfortunately. But having the speaker in the tool pouch works great for me; the speaker bundled with the ROM/FX kit is really loud, and the placement is close enough to my head to make it seem like the sound is coming from my helmet.
The problem with wireless receivers/transmitters is they are either huge (my Memorex system consists of two units both being about the size of a deck of cards), or really expensive.
The headset I used I bought off of Ebay, and fairly cheap. Around USD $20 or so. Do a search for "Jensen" and "headset". You would need to get one of those tiny ones, that just has a write behind your neck, and only a single, flat ear piece. It'll be hard to fit the helmet over larger headsets, with larger ear pieces. Even for someone with a tiny head like mine.
-
Ebay´s a good option.
I ended up weathering most of my apartment along with my TD with that superfine clay dust, so I would suggest only using it outside.
-
Here´s a few:


They´re still being made:
http://www.vintageiron.com/chestprotector.cfm
...But sadly:
Special Note #2: If you are a Star Wars nut and want to buy a chest protector for your Storm Trooper outfit we won’t make them in a special color unless you order 100!
-
If by investment you mean resale value, I have no idea - but £400 is a lot less than what I payed for mine; including reshipping via MyUS and import tax. If it´s already fitted with a corrugated tube and a pair of Enfield rifle slings, that´ll save you at least another USD $30-$40.hi i have been offered a hyperfirm t21 for £400 is it worth the investment??
-
So sorry to hear this, Rolf - I can´t even begin to imagine what you´ve been going through. I´m happy you chose to share this though; it´s the kind of stuff that´ll eat you up from the inside if you bottle it up.
I wish you the very best of luck in tomorrows meeting. Sounds like you should have a pretty solid case.
As Shakespeare said: Time and the hour runs through the roughest day. There´ll be better days, man. Stay strong.
-
I had the same problem, until I stuck a couple of pieces of spare ABS under the knee plate, between the back of the plate and the top of the leg piece, tilting the knee plate slightly forwards. Haven´t had any problems with it getting stuck under the thigh armor after that.the sniper knee plate keeps getting stuck under it
-
Thanks Noel! Wish I had time to do more stuff like this, but as professional cartoonist, most of my time spent drawing these days goes towards trying to meet at least some of my deadlines - my favorite Douglas Adams quotes being:
I love deadlines. I like the whooshing sound they make as they fly by.
-
i made this for the Nordic Garrison´s Droid Hunt badge:

...And Jedi Mind Trick card:

(Front and back are side-to-side, as they are supposed to be printed and then folded down the middle before laminating)


Rainy?
in Weathering
Posted
I know some local TDs did just that; first hairspray, dry pigments and Fuller's earth, then clear coat. I haven't seen the result myself yet, but according to them, their suits ended up being somewhat shiny afterwards. But I guess you could work it over with some really, really fine grit sandpaper (like P1200-1500), to dull it down?
I've been using only hairspray and pigments for the last three-four years, and on both my TD and TS costume. The weathering has held up well so far, but I don't think I've ever trooped in anything heavier than a light drizzle.