trooper7753 Posted December 14, 2012 Share Posted December 14, 2012 Some weeks ago I decided that my AM TK was to clean and needed to be dirty. So I did some research on this forum and started the transformation. First thing to do was remove all the pieces from the TK which are not on the TD, knee plate, drop boxes, holster and the decals from the helmet. I then attached the proper diamond knee plate that came with the kit. To do this I attached a piece of abs cut to size to the back of the plate then riveted it to the shin. The weathering process was the next thing to do. I did some more research on this forum on how to do this and proceeded to weather the armour starting from the bottom and working my way up. By starting at the bottom if i applied to much to the shins and boots it wouldn't really matter as these parts are the closest to the ground and expect to be dirtier. The higher up the armour I go the lighter the the weathering should become. Quote Link to comment Share on other sites More sharing options...
opi wan Posted December 14, 2012 Share Posted December 14, 2012 Hallo Shane, I thik it looks good. Go on like this. Greeting Alex Quote Link to comment Share on other sites More sharing options...
Elegance Posted December 14, 2012 Share Posted December 14, 2012 You look really filthy. It looks good to me and I like it. Good work Quote Link to comment Share on other sites More sharing options...
nick.black Posted December 14, 2012 Share Posted December 14, 2012 Awesome to have you aboard Shane. Keep up the good work and remember we're here if you need any help. Nick Quote Link to comment Share on other sites More sharing options...
Sandman Tigui Posted December 14, 2012 Share Posted December 14, 2012 Echo Nick!!! Nice to see how another sandie is earning his dirt Shane!!! Keep it up and any pointers you need we've got your six Quote Link to comment Share on other sites More sharing options...
trooper7753 Posted December 14, 2012 Author Share Posted December 14, 2012 Thanks guys its great knowing there is help around if needed. It should be a pretty easy conversion as the armour is already built. Will post up more pics soon. Quote Link to comment Share on other sites More sharing options...
trooper7753 Posted December 17, 2012 Author Share Posted December 17, 2012 Managed to get a bit more weathering done over the weekend. Hand plates and Forearms done. Thigh's and shoulder bells and biceps done The process I am using is just some acrylic paint from the craft store dabbed on a torn up sponge. Once its dried (approx 5 mins) then use a damp cloth and wipe over it with very light force. To seal it i use a matte clear coat in a spray can which also takes the shine off the armour. Quote Link to comment Share on other sites More sharing options...
SCRIBBLER Posted December 17, 2012 Share Posted December 17, 2012 Excellent progress, Shane! Quote Link to comment Share on other sites More sharing options...
trooper7753 Posted December 24, 2012 Author Share Posted December 24, 2012 Okay i decided to get my **** into gear and get this weathering completed before Xmas got here and here are the pics Front thigh's and shins Rear shot showing thighs and calves, I really need to get the heat gun on the tail piece and fold that up a notch. The strapping is not fully adjusted either hence why my tail is hanging out. Chest , Ab and cod piece Full front shot with black Pauldron. When i originally bought this kit just over 2 years ago the first thing I did was replace the oversized AM helmet with a AP helmet. I have since replaced the decals using Mike's decal's from Trooper bay and added a bit of weathering to it. Front shot Rear shot Right side Left side. I may have gone a bit heavy on the weathering after viewing some of the photo's here on this forum but in saying that i really wanted to go for the dirty, dirty look which I think makes it a unique trade mark. The squad I am apart of is called the "Southern Dewback Squad" so the heavy weathering fits in quiet well. More progress photo's to follow after Xmas. Quote Link to comment Share on other sites More sharing options...
Elegance Posted December 24, 2012 Share Posted December 24, 2012 Looks good to me and looks like the armour fits you really, really well, good job Quote Link to comment Share on other sites More sharing options...
SCORCH Posted December 28, 2012 Share Posted December 28, 2012 Just the right amount of dirt.... Quote Link to comment Share on other sites More sharing options...
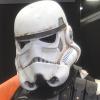
SCRIBBLER Posted December 28, 2012 Share Posted December 28, 2012 Hi, Shane! Very nice work so far, Troop! Looking forward to see your completed gear. It may be the lighting, but is the weathering on your armor lighter in color than the helmet. Is it the same paint scheme and colors for both? The helmet appears to have more of a darker tone. Just curious. Quote Link to comment Share on other sites More sharing options...
trooper7753 Posted December 29, 2012 Author Share Posted December 29, 2012 Thanks guys. I think the lighting has made the helmet and the armour look completely different. The helmet photo's where taken inside and the armour shots where outside. I will get a pic up soon with the complete gear on outside. Quote Link to comment Share on other sites More sharing options...
trooper7753 Posted December 30, 2012 Author Share Posted December 30, 2012 Okay i managed to suit up today and get a few shots done outside. I just need to make some minor adjustments and then I am pretty well done I think. Next stage will be to purchase a Pack or might attempt to make one (time permitting due to 12 hour work shifts) One of our squad members is the main contact and supplier for the TPE MG 34 so that will be must also. Front shot Side shot The pouches i scored from a local squad member who bought these from Epic Militia some time ago but never got around to using them. The top one will be changed later on when I submit my application for Police officer. More to come soon . Quote Link to comment Share on other sites More sharing options...
darthgrace Posted December 30, 2012 Share Posted December 30, 2012 looks great. Quote Link to comment Share on other sites More sharing options...
nick.black Posted December 31, 2012 Share Posted December 31, 2012 That's looking really great Shane well done mate. Nick Quote Link to comment Share on other sites More sharing options...
DirtyBoy Posted December 31, 2012 Share Posted December 31, 2012 Agreed, you look awesome man! Congrats on a great build. LMK if I can help with the pack Quote Link to comment Share on other sites More sharing options...
trooper7753 Posted January 1, 2013 Author Share Posted January 1, 2013 Agreed, you look awesome man! Congrats on a great build. LMK if I can help with the pack Thanks guys. I am pretty happy with the way it turned out. Dirty Boy can you please PM me some info on your packs please with postage to Australia 5010. Quote Link to comment Share on other sites More sharing options...
trooper7753 Posted March 29, 2013 Author Share Posted March 29, 2013 Went to a recent Oz Comic Con in my home town a few weeks ago and took my TD on the main day for a spin as i had gotten 501st approval 2 days prior. I haven't finished my pack yet but not to far off from being completed. Also need to do a few more adjustments then its pic time for Police officer. Enjoy. We have a full size cardback which we use at our conventions etc. Quote Link to comment Share on other sites More sharing options...
trooper7753 Posted May 26, 2013 Author Share Posted May 26, 2013 UPDATE Howdy guys well things have been moving along a bit slow due to over worked but have managed to stick to this project that I started some months ago. Since my last post i have taken delivery of a few more bits and pieces. I have replaced the top shoulder leather pouch with a canvas one which I dyed and then weathered . I also took delivery of a back pack from Dirty Boy which i have been slowly building in my spare time I get. Just want to say thankyou to the boss for the great pack he supplied and the information he provided me when i got stuck and needed help with the build. The radio has had the speaker holes bored out so the sound of radio chatter can be heard via a mp3 player which is also installed behind the radio face. I also installed a led light which operates from a 9v battery and can be turned on and off from one of the toggle swithes. I still have to install the bee stinger the straps and do some weathering then she will be complete. The pics shoulder pouch Radio Quote Link to comment Share on other sites More sharing options...
Vf2112 Posted May 26, 2013 Share Posted May 26, 2013 Hi Shane Good to see another Aussie in da sand bru I'm the next step north mate and I'm guessing you loved supernova ? Your armour looks good mate it fits well all over except your thighs which look like you've never trimmed them at all Which is awesome if you plan on going SWAT so you can shape them to the trooper you want Love the pack build and weathering I reckon you look great So guess I might see you in the sand one day soon ya can't miss me I'm the only sandtrooper in our garrison can you believe that lol Anyway welcome mat and say hi to amro for me Quote Link to comment Share on other sites More sharing options...
trooper7753 Posted November 8, 2013 Author Share Posted November 8, 2013 Howdy folks its been a while since I last posted but normal life and work has slowed this project down. I did manage to get some time off recently and completed my TD with a Dirty Boy pack. I think I have covered everything to be deployed as a police officer and will be posting my pictures up soon. In the mean time here is some pictures of the completed pack that has sound and lights. Thanks dirty Boy for a awesome pack Quote Link to comment Share on other sites More sharing options...

Recommended Posts
Join the conversation
You can post now and register later. If you have an account, sign in now to post with your account.