DKK Hollywood
-
Posts
26 -
Joined
-
Last visited
-
Days Won
7
Content Type
Events
Profiles
Forums
Everything posted by DKK Hollywood
-
3D Files for Field Pack - 3D Printing
DKK Hollywood replied to henselmonster's topic in Field Backpack
Try here: https://drive.google.com/file/d/14dFKqYsYqLxVZJN_HkotqTAb30kHg38D/view?usp=sharing -
*done* TD-19743 Requesting Deployment
DKK Hollywood replied to DKK Hollywood's topic in MEPD Police Officer Program
Thank you, glad to be aboard! -
*done* TD-19743 Requesting Deployment
DKK Hollywood replied to DKK Hollywood's topic in MEPD Police Officer Program
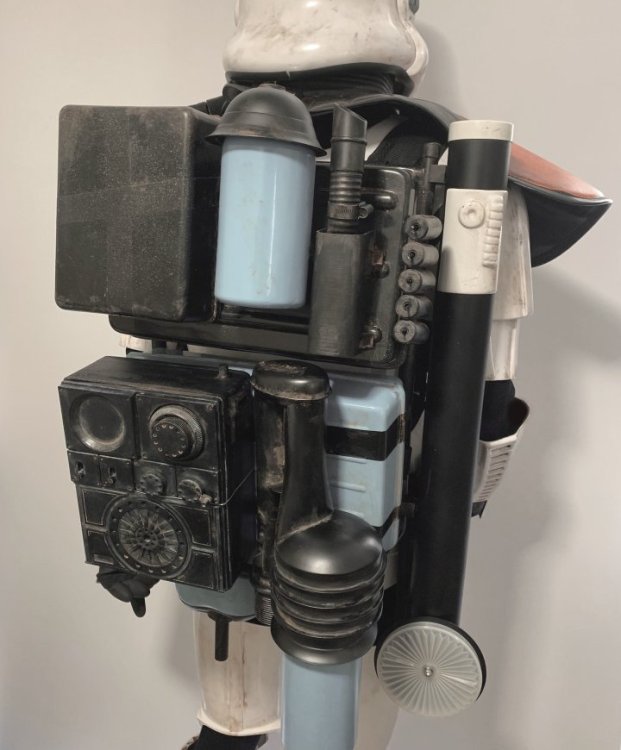
Fixes done: Back Pack First: (Mortar Tube removed to show the other side has been done too). Belt: -
*done* TD-19743 Requesting Deployment
DKK Hollywood replied to DKK Hollywood's topic in MEPD Police Officer Program
Roger that, thanks. Yes, I am rather tall which has made things fun I will get on the backpack and belt now. Thanks, Hollywood -
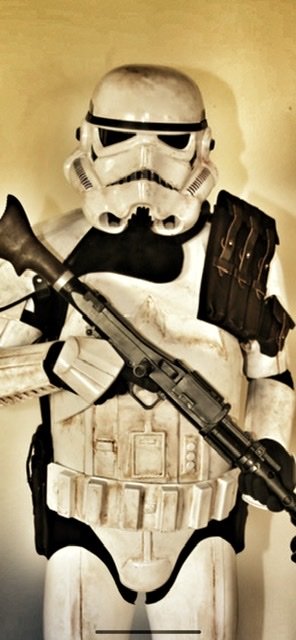
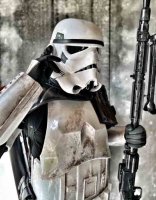
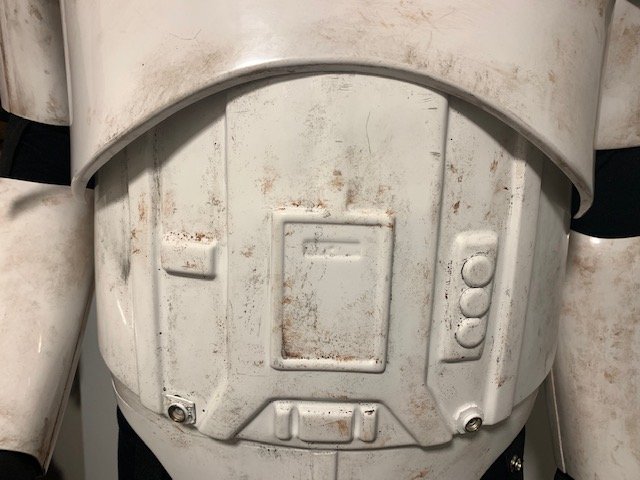
TD-19743 Requesting Deployment Hollywood 501st Profile DKK Hollywood Southern Cross Garrison, Hunter Hornets Squad -One helmet off photo: Submitted separately to mod for privacy reasons. (I'm shy). -One full armour, helmet on, front photo. Show in one picture the whole look of your armour and gear. Also show Sniper Knee Plate clearly enough: -One full armour, helmet on, right side photo. Showing the pouches mounted on sides if you have them and the gap closed -One full armor, helmet on, left side photo. Showing the pouches mounted on sides if you have them and the gap closed: -One full armor, helmet on, back photo. -One full armor, helmet on, back photo without backpack. -Canvas or elastic shoulder straps detail photo. -Canvas belt detail photo with pouches. -Abs details close up photo. Showing the 3 buttons an TD abdominal plate. -Detail photos of the rubber gloves and latex handguards - Detail photos of all snaps, screws and buttons on the armor Bucket (pictures can show details individually or in groups): -A close up photo clearly showing the flat green lenses. -Detail photo showing no stripes on all grey traps and tears. -Detail photo of frown, showing 4 teeth cut out and grey paint. Backpack: The lighting make its look waaaaaaay brighter than it actually is. Weapons: -DLT-19 (Currently working on Tunisian Bapty Stock) Finally: -One (or several) full body action (or attitude poses) good quality picture.
-
3D Files for Field Pack - 3D Printing
DKK Hollywood replied to henselmonster's topic in Field Backpack
Ok, I've uploaded the Antenna and Feet Parts here. Enjoy. https://drive.google.com/drive/folders/1nWKbjgx6tkkQoOfk5ZB4I122IzefUxY3?usp=sharing -
3D Files for Field Pack - 3D Printing
DKK Hollywood replied to henselmonster's topic in Field Backpack
The Sonix Radio I scanned and designed is 1:1 from the original, and the lower bottle and captive neck are as close as I can get without having an original to compare. -
3D Files for Field Pack - 3D Printing
DKK Hollywood replied to henselmonster's topic in Field Backpack
Did I not include them? My apologies if I didn’t. I will check tomorrow and address that oversight! The feet and ‘strap’ are one part, with the end of the strap warmed up a bit to give it a curve, like leather. -
3D Files for Field Pack - 3D Printing
DKK Hollywood replied to henselmonster's topic in Field Backpack
Ok, the Strap Bracket is now in the grouped files on the google drive, and I've also attached it here. Cheers, DKK DKK STRAP .STL -
3D Files for Field Pack - 3D Printing
DKK Hollywood replied to henselmonster's topic in Field Backpack
Hi Don, My apologies, looks like I didn't upload the the part! Give me a few days to access my laptop which is currently offsite, and I will upload and let you know when they are there. Would love to see some photos of your prints and how they turned out. Enjoy, DKK -
3D Files for Field Pack - 3D Printing
DKK Hollywood replied to henselmonster's topic in Field Backpack
Fixed the colour. Quick photo of the final result on the radio I uploaded above.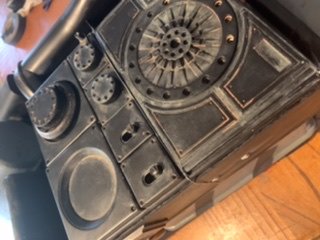
-
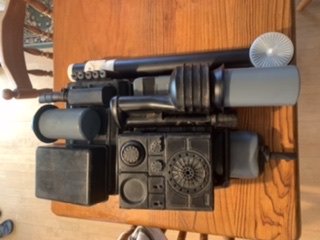
Repaint done. Had to go to a specialist paint supplier to get some RAL 7031 Made up (impossible to source off the shelf here). Field Pack complete.
-
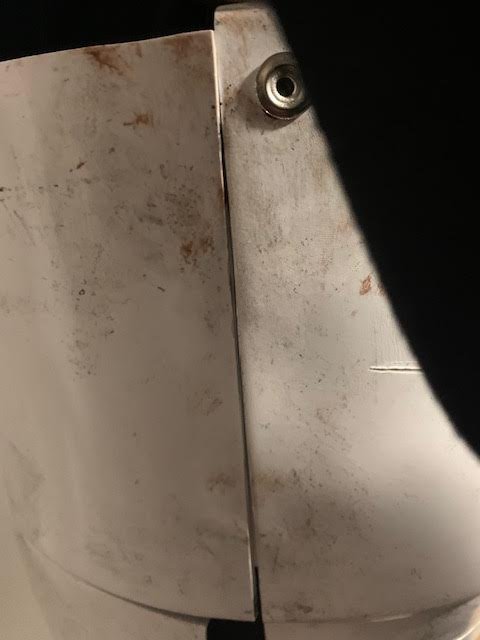
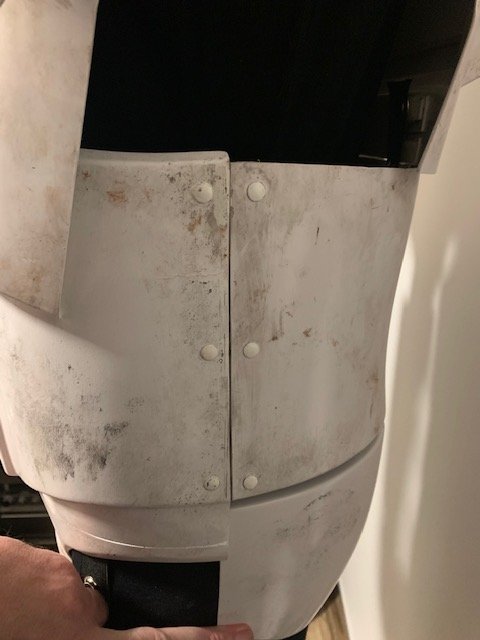
Left, front and side of the torso. Can anyone see anything glaringly wrong? Awaiting some screws to arrive for the return edge of the chestplate, and the armour is on a mannequin if it looks a little stiff.
-
Looks like screen accuracy is the requirement for Police Officer.... *sigh* looks like a strip down and repaint is on the cards.
-
This my pack currently (Humbrol 47) ...
-
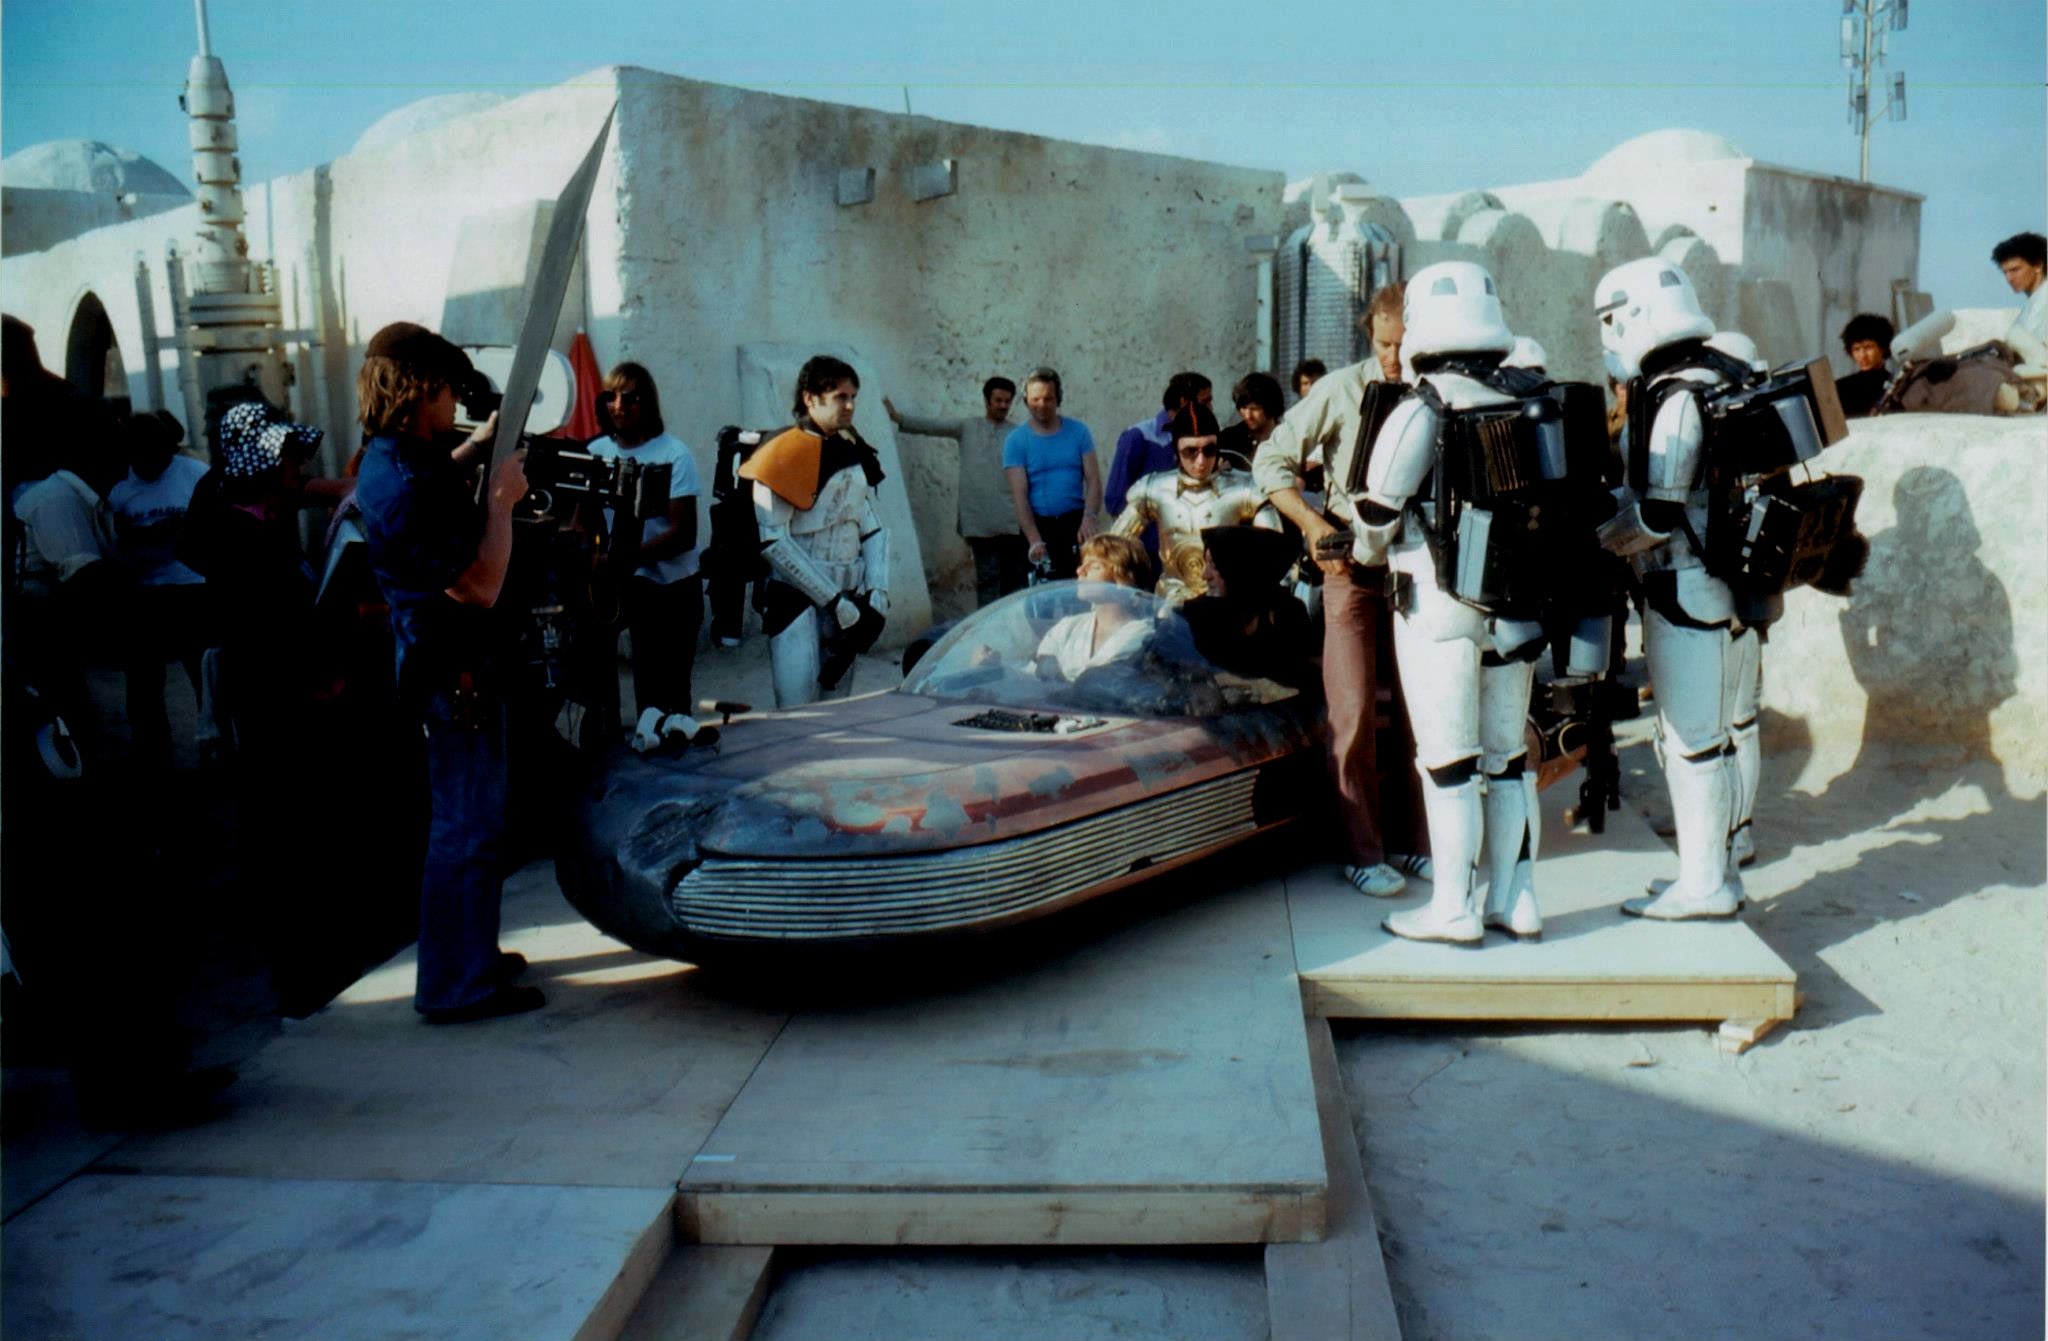
Was there ever a consensus/decision on the definitive colour to be used? I went with Humbrol 47 for the following reason: During production in 1975/76, the Borden Group bought out Humbrol Paints, and merged them into the 'Hobby Products Group.' As part of a marketing push to get their products into the hands of professional model makers, 'Spectrum Packs' of the range of Humbrol enamels were distributed to the biggest studio workshops (Pinewood, Elstree, Shepperton and Bray Studios). The thinking was, the paints could be sold 'to the hobbyist as the 'paints the professionals use.' Now, money was tight on set, and a prop builder would use as much free material as they could (and still do today!). Thats the rationale for my choice as Humbrol 47 is the closest match from the paints available in 1975/76 So the next thing to consider is the actual cameras used, the film stock, and the conditions they were shot under. Despite the 'Roadblock' taking a film time minute to play out, it was shot over two days in varying light conditions as the sun moved across the sky, from fully flooded to angled, more diffused light. The Panavision cameras were using Eastman Colour Negative II 100T Film Stock on location for its all round lighting conditions performance (as opposed to other cameras and stock in the controlled environment of a studio)... the downside is the colours are washed out and lose vibrancy and saturation. So, In summary, in real life, the 'blue' components were a light shade of blue, but on celluloid, after passing through a camera, onto the film stock, in varying light conditions, they appear 'greyblue' on screen. Which leads me to my question... if I am going for accuracy (for Police Officer Deployment) am I going for a replica of the real life item, or the screen version)? Both are technically accurate...

-
3D Files for Field Pack - 3D Printing
DKK Hollywood replied to henselmonster's topic in Field Backpack
Its Humbrol 47, the lighting makes it look a little bluer in the photo than in reality. I thought if I went with the model paint used on set, I could not go wrong? -
3D Files for Field Pack - 3D Printing
DKK Hollywood replied to henselmonster's topic in Field Backpack
Added the smaller Radar Dish backing plate (for the Tupperware 874 Lid..approx 110mm across ). The files above have the Radar Dish Backing Plate for the 800 Tupperware Lid (approx 150mm diameter). There seems to be some conversation around which one is correct... I personally, from my research think they used both. Both backing plates are built with a 70mm Diameter Tube in mind. Radar Dish Backing Plate 874 Size.STL -
3D Files for Field Pack - 3D Printing
DKK Hollywood replied to henselmonster's topic in Field Backpack
...and the results on the backpack...
-
3D Files for Field Pack - 3D Printing
DKK Hollywood replied to henselmonster's topic in Field Backpack
Right, I've added the watermarks, and the .STL files are for all MEPD users to enjoy. My only request is if you do print them for your builds, you mention its the DKK version :-) https://drive.google.com/drive/folders/18XEirIOF7_ko5r1ddABS2FAke36J-P0z?usp=sharing All the parts for the radio, plus a bottle and bottle neck that allows for a captive nut, so it can be screwed in, and finally, a Radar Dish mount for the 15cm/5inch Dish (the 800 Lid, not the 874) Any questions, feel free to ask. Cheers, DKK Hollywood -
3D Files for Field Pack - 3D Printing
DKK Hollywood replied to henselmonster's topic in Field Backpack
Yes, I am still planning to share it, I just need to make a modification to add a built in watermark on the non visible side, because sadly it appears someone is passing the model off as their own and selling it. My model is free, and always will be for our community, but I’m not happy about people charging others for it :-( At least if it has a watermark, it will be obvious the original model was mine. I will upload it this week, along with a few other models, including a radar dish mount and a bottle model (for the two backpack bottles). Cheers, Hollywood -
3D Files for Field Pack - 3D Printing
DKK Hollywood replied to henselmonster's topic in Field Backpack
Just waiting on some accurate 3.5mm sockets to arrive. Holes already built into the 3D print of the main box...just need to pierce the leather wrap and screw in. -
3D Files for Field Pack - 3D Printing
DKK Hollywood replied to henselmonster's topic in Field Backpack
3D printed in PLA at .12mm layer height, then a coat of acrylic primer filler to add a layer of smoothness. A gentle wet rub with 600 grit wet and dry. a coat of flat black and some dry brush weathering (Valejo Dark Flesh) to get in all the nooks and crannies like sand would.
-
3D Files for Field Pack - 3D Printing
DKK Hollywood replied to henselmonster's topic in Field Backpack
Hello all, give me a few days and I will share my digitally scanned model of the Sonix/Northstar, it’s as accurate as one could ever hope for without having an original radio. I’ve broken it down into easier to print pieces. I also made the main box with hex head anchor points and a hollow back to save weight. Cheers, Hollywood
-
TD19743 Saying hello. Picked up an abandoned armour project about a year ago, was a total mess. Would have been easier to buy a new kit, but I’m stubborn. Approved a few months ago. Have a selection of accessories and pauldrons so I can make a decision on the day of a troop about what configuration fits with the rest of the squad (we can’t alllll be Captains).