

Koryu1212(Dan D)
-
Posts
179 -
Joined
-
Last visited
-
Days Won
12
Content Type
Events
Profiles
Forums
Everything posted by Koryu1212(Dan D)
-
Koryu1212(Dan D) Crook Knights Pack #3 build
Koryu1212(Dan D) replied to Koryu1212(Dan D)'s topic in Field Backpack
Yes...Same technique; lay on acrylic (unbleached titanium white is what I used), let it dry and then I hit it with a damp rag. -
Koryu1212(Dan D) Crook Knights Pack #3 build
Koryu1212(Dan D) replied to Koryu1212(Dan D)'s topic in Field Backpack
Radio: It’s going to be a while for my internal stuff for the radio (3w speaker, MP3 board) so I went ahead and added the knobs then weathered the face and added the stickers... Ok, that’s all for now; heading to Phoenix AZ for their Con. When I get back will finish the radio! Sent from my iPhone using Tapatalk -
Koryu1212(Dan D) Crook Knights Pack #3 build
Koryu1212(Dan D) replied to Koryu1212(Dan D)'s topic in Field Backpack
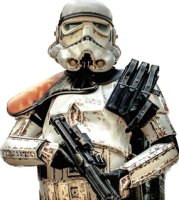
So I’m bored and while waiting on my radio parts... Weathered my pack using same technique as my armor (which is really pandatrooper’s). I only used two colors of Liquitex acrylics... Results: I got it to match my armor perfectly; still have to weather my radio once it’s done, but I’m super happy with the result! Test trooped around my barracks room...I’ve learned pretty much to suit up by myself, just have to be careful not to drop anything. Shoulder straps are hitting right on where my suit shoulder straps are; no pinching or biding anywhere, and it seems to be riding perfectly across my back (I’ll let you all know when I do my next 4+ hour how it feels). Need to secure my shoulder pouch but other than that I am super happy!! “Move along...move along.” Sent from my iPhone using Tapatalk -
Koryu1212(Dan D) Crook Knights Pack #3 build
Koryu1212(Dan D) replied to Koryu1212(Dan D)'s topic in Field Backpack
Oh, wow...thank you! I hope I’m doing your pack justice with my build? If there is anything I missed please let me know and I can elaborate more on my technique... -
Koryu1212(Dan D) Crook Knights Pack #3 build
Koryu1212(Dan D) replied to Koryu1212(Dan D)'s topic in Field Backpack
Well...it’s not light. It has some heft; I would say easily 20+ lbs, of which (no offense Crook Knight) the radio feels like 5lbs! That resin casted face is pretty thick and is the reason I “overbuilt” with the internal brackets and re-enforced the frame with rivets! The lumbar supports actually support the weight and distribute the it across my back, which sorta surprised me. But since I’m one to stay suited up for extreme periods of time (last year at SDCC I think it was 14hrs) the ultimate test is to troop and see how it feels; but remember I am current active military police, so my body is used to wearing approximately 40lbs of arms and armor. I just “pretend” I’m back in-theatre and am hunting “rebel scum” (it’s funny not funny; I’ve posted over in FISD concerning veterans with PTSD and how during troops we find ourselves “back on patrol”)... Sorry, slipped into Chief mode there for a min , long post but I hope I answered your question Hausi, but it’s been extremely rewarding to wear armor and not have someone shooting at you, if that makes sense? Plus I am glad to be part of the best detachment in the 501st and cannot wait to deploy as a PO! This Sandtrooper is standing by, waiting further instructions, sir! -
Koryu1212(Dan D) Crook Knights Pack #3 build
Koryu1212(Dan D) replied to Koryu1212(Dan D)'s topic in Field Backpack
Thank you! Regarding the canteen; is that a “show stopper” for PO status? -
Koryu1212(Dan D) Crook Knights Pack #3 build
Koryu1212(Dan D) replied to Koryu1212(Dan D)'s topic in Field Backpack
Got a lot accomplished today; but not with out help from Vince and all my fellow MEPD officers! I’m glad I am able to contribute! Ok, on with the pictures... Purchased a grinder backing disc and trimmed the lip off my lid; also drilled hole for a carriage bolt... Painted lid white... While I was waiting for my radar to dry I installed my straps using Chicago screws for the top crossbar and zip ties for the bottom... Mortar Tube: glued my control panel and used insert nuts To mount it to my pack frame... Installed my radar dish after... Mounted my shells to the bracket using rivet tool... And after that, I went ahead and mounted everything to the frame and seed trays. I also put together a display stand to show off my pack... Ok, results so far; now I still have to finish the radio and weather it to match my armor, but I’m pleased with how it has turned out! Alright...good enough for government work! Now I’m in the hurry up and wait phase while I’m patiently waiting the internal guts so I can finish my radio... Sent from my iPhone using Tapatalk -
Koryu1212(Dan D) Crook Knights Pack #3 build
Koryu1212(Dan D) replied to Koryu1212(Dan D)'s topic in Field Backpack
Quick update: Received my Tupperware, er I mean my radar dish today! Still awaiting my electronics for my radio...but I did get my switches and other radio items from Sonic World! Will post more pictures soon! Sent from my iPhone using Tapatalk -
Koryu1212(Dan D) Crook Knights Pack #3 build
Koryu1212(Dan D) replied to Koryu1212(Dan D)'s topic in Field Backpack
So while I’m waiting on Imperial Procurement to arrive (read: Amazon/eBay) I worked on the two pieces that would hold the shoulder strap on the radio... Using my drill I slowly made two holes in each of the strap mounts making sure to not bore through the mounts... Again, using brass insert nuts and abs paste I sunk them in... Once I was done with that I put my “stinger” together... Oh, and here are how my “shotgun shells” turned out... That’s all for now. Sent from my iPhone using Tapatalk -
Koryu1212(Dan D) Crook Knights Pack #3 build
Koryu1212(Dan D) replied to Koryu1212(Dan D)'s topic in Field Backpack
Red Canvas Straps: So measured out 8” X 22”, folded in half and stitched along the length using upholstery thread and heavy gauge needle... Turned that inside out and folded ends in 1” and boxed stitched... Both stitched; adding grommets, 2 to each side as well as two for access to the middle mount screws to my seed trays.Used hole-punch to make initial hole and then ran a pen through... Set grommets... Secured with 550 cordage... Attached seed trays and internal brackets... Ok, now to lab pipe or not to lab pipe [emoji4]? I understand that there were two versions of the “Move along” pack? Sent from my iPhone using Tapatalk -
TD15169 (Koryu1212 Dan D) Tour of Duty Log
Koryu1212(Dan D) replied to Koryu1212(Dan D)'s topic in Tours of Duty
Patrol #31 May the Fourth Prom At San Diego Air and Space Museum... That pesky Jedi and I were prom king and queen [emoji23][emoji23] Sent from my iPhone using Tapatalk -
TD15169 (Koryu1212 Dan D) Tour of Duty Log
Koryu1212(Dan D) replied to Koryu1212(Dan D)'s topic in Tours of Duty
Been so busy working on my pack almost forgot to post! Patrol #30 May the Fourth At Brawley Public Library... Sent from my iPhone using Tapatalk -
Koryu1212(Dan D) Crook Knights Pack #3 build
Koryu1212(Dan D) replied to Koryu1212(Dan D)'s topic in Field Backpack
Radio Face and Housing: Crook Knight Pack came with a resin cast Sonix 75 face, as well as all the pieces of wood and fiberboard to assemble. He even put a pleather surround in the kit too! Starting with the back... I’m using 3/4 brass wood screws with superglue...with fiberboard it’s easier to pre-drill your holes... I’m also hand-tightening the screws... Housing is done... Attaching the face using two cabinet magnets as well as friction via two spacers set top and bottom “exactly” between the two wood blocks... Again I used superglue along with brass wood screws into the resin... Fits like a glove...magnets glued and screwed into fiberboard... Metal also was glued prior to screwing into the resin... And done... Did some touch up of the where the slide-switches I ordered from Sonix World are going...I also rounded off the edges of the housing so as to make wrapping the pleather easier... Ok, so everything is painted, housing is done and now I’m waiting on the “guts” for the radio, as well as a vintage 4.5” Tupperware lid to arrive... Hope everyone is enjoying this as much as I am putting it together [emoji4][emoji4] Sent from my iPhone using Tapatalk -
Koryu1212(Dan D) Crook Knights Pack #3 build
Koryu1212(Dan D) replied to Koryu1212(Dan D)'s topic in Field Backpack
Just got back from paint... The results from the RAL 7031 Flat. Newly painted bottle on left, old one on right... Repainted seed tray... So while that is curing I started my radio build...Bored out the speaker grill... Will start on the radio housing next. Ordered some internal stuff from Italy (Sonic World: price was very reasonable) , as well as an mp3 board and 5w speaker to go in it... Sent from my iPhone using Tapatalk -
Koryu1212(Dan D) Crook Knights Pack #3 build
Koryu1212(Dan D) replied to Koryu1212(Dan D)'s topic in Field Backpack
FYI I found these off eBay for those that might be looking... https://www.ebay.com/itm/808-810-812-1205-VTG-Tupperware-Round-Servalier-Replacement-Lid-Seal-CHOICE/382851090935?_trkparms=aid%3D111001%26algo%3DREC.SEED%26ao%3D1%26asc%3D20160908105057%26meid%3D8300bd0e2b824705a487a7ebf195dcbe%26pid%3D100675%26rk%3D1%26rkt%3D15%26sd%3D382851090935%26itm%3D382851090935&_trksid=p2481888.c100675.m4236&_trkparms=pageci%3A231e67ac-740e-11e9-a2a9-74dbd1801f77%7Cparentrq%3Aa7d5ccf616a0a688c22a1c38ffde61b1%7Ciid%3A1 Just thought I would share [emoji4] Sent from my iPhone using Tapatalk -
Koryu1212(Dan D) Crook Knights Pack #3 build
Koryu1212(Dan D) replied to Koryu1212(Dan D)'s topic in Field Backpack
It doesn’t weigh as much as it looks (I’m active duty and used to wearing 40+ lbs of body armor, so it still “seems” light to me )... After looking at various screen grabs I’ve decided to change out the bottles. -
Koryu1212(Dan D) Crook Knights Pack #3 build
Koryu1212(Dan D) replied to Koryu1212(Dan D)'s topic in Field Backpack
Mounting radio and siphon to bottom seed tray... Laid in where holes will go... Drilled through seed tray and internal brace... Holes drilled on radio back, and siphon... Brass insert nuts screwed into siphon ( I added a drop of superglue around the threads )... Radio back mounted... Siphon mounted... Ok, top and bottom completely mounted... Will disassemble tomorrow for paint... Note: I ordered a can of RAL 7031, Flat 10%... ...so I will take pictures of the difference between the 7031 Gloss from Crook Knight, and how well the 7031 Flat does. Sent from my iPhone using Tapatalk -
Koryu1212(Dan D) Crook Knights Pack #3 build
Koryu1212(Dan D) replied to Koryu1212(Dan D)'s topic in Field Backpack
Shotgun shells: Edit: originally I used the ones Crook Knight sent me but upon looking at the pictures from here (i.e, screen grabs and other builds) I decided to go with 2 & 3/4” length... So I dug five dried up dry erase markers out of the trash and when I cut the ends off, much to my surprise I got this... Looks pretty good to me...superglue and pressed in... Beveled the edge and cut out a bracket to mount them on... Using ABS Paste to seal the ends... I’ll let those set overnight to cure... Sent from my iPhone using Tapatalk -
Koryu1212(Dan D) Crook Knights Pack #3 build
Koryu1212(Dan D) replied to Koryu1212(Dan D)'s topic in Field Backpack
Forgot to show internal mounting... Sent from my iPhone using Tapatalk -
Koryu1212(Dan D) Crook Knights Pack #3 build
Koryu1212(Dan D) replied to Koryu1212(Dan D)'s topic in Field Backpack
Oh...I also placed zip ties around the siphon... The lock goes towards the back of the siphon ( since that faces the lower seed tray and is hidden )...it will take two 14” zip ties each, to completely wrap around...just only hook the first two and tighten down the other end as tight as you can get it... Clip the excess and there you go... Sent from my iPhone using Tapatalk -
Koryu1212(Dan D) Crook Knights Pack #3 build
Koryu1212(Dan D) replied to Koryu1212(Dan D)'s topic in Field Backpack
Ok...time to assemble and place equipment onto top seed tray: Exhaust pipe... Used rubber “O” rings to simulate ribbed hose around pipe with one at the top... Wrapped it up and added hose clamp...It slides into base and locks into place without glue... Top bottle: sometimes the simplest things work the best... I cut a water bottle and glued the cap in the middle of my mushroom... Cut and placed insert nuts for internal brace of bottle... Coated outside of water bottle with superglue and stuffed inside... Quickly screwed cap on... ...and pushed down on cap to have the mushroom cap sit flush with bottle... Brexton Box: Trimmed down the edges... Made an internal mount plate... Drilled holes for screws...glued internal plate to lid (not shown)... Everything laid out... Starting with the exhaust pipe I laid it out and drilled all my mounting holes through seed tray and internal bracket (white abs paste for filling some incorrectly measured mounting holes [emoji849])... Mounted exhaust, then Brexton box lid and finished with the bottle minus the mushroom cap... ...then I mounted to bottom seed tray... And there we go... Mortar tube and siphon just laid on for inspiration [emoji16]... Once I get everything mounted it’s going to come apart and get painted.... Sent from my iPhone using Tapatalk -
Koryu1212(Dan D) Crook Knights Pack #3 build
Koryu1212(Dan D) replied to Koryu1212(Dan D)'s topic in Field Backpack
Ok...so I trimmed and rounded off the corners of my seed trays. Again, I am overbuilding this, that being said I don’t want to glue my trays together, so I built up the insides... Fiberboard cut to fit inside of bottom trays...mounting holes through frame braces, tray and board. Two additional holes through tray and board for internal mounts... ...3&7/8’s length...wood insert nuts set in both ends... To loose some weight, I cut down the bottom trays fiberboard... Tray mounted and secured with “well nuts”... Internal fiberboard screwed down to braces... Repeat for “bottom” tray... Shown from the back...trays are just temp blue taped... The “internal” shelf, for lack of a better term, will allow me to mount the rest of the equipment and if need be I can unmount the top tray should I need to. Shires Siphon Mushroom Cap and Bottle... Used the siphon to make my cut lines around the caps... Bandsaw to trim them... So, instead of just glueing the bottle to the cap, I cut out a circular piece of wood... ...wood insert nuts on three sides, big one in the middle... Used my hole punch to make hole through lip of bottle... Screwed the piece in place... Back at the shop; drill press the holes for the top of the siphon and cap... Insert and tighten down the long bolt supplied, along with lock washers and nuts... Place cap... And screw in the bottle... And there you go... Still need to get the zip ties (what size?) to go around the siphon... Coming along rather nicely[emoji4] Sent from my iPhone using Tapatalk -
Koryu1212(Dan D) Crook Knights Pack #3 build
Koryu1212(Dan D) replied to Koryu1212(Dan D)'s topic in Field Backpack
Once I weather it to match my armor it should knock down the “glossy” look of the grey. -
Koryu1212(Dan D) Crook Knights Pack #3 build
Koryu1212(Dan D) replied to Koryu1212(Dan D)'s topic in Field Backpack
Thanks for the quick response! Is it ok to use a matte or flat black paint, and is there a preference? -
Koryu1212(Dan D) Crook Knights Pack #3 build
Koryu1212(Dan D) replied to Koryu1212(Dan D)'s topic in Field Backpack
Picked up some 2” pipe; cut to 28” and started on the frame... Sanded everything flush... Glued and riveted the joints... Cut some metal strapping and riveted to frame to mount my “seed trays” to. I also allowed approximately 4” between them for the red canvas “lumbar” supports, which I’ll work on tomorrow... Results so far... Still have to trim the edges of my trays; are the corners squared, or rounded? Sent from my iPhone using Tapatalk
