


Hausi
-
Posts
1,509 -
Joined
-
Last visited
-
Days Won
120
Content Type
Events
Profiles
Forums
Posts posted by Hausi
-
-
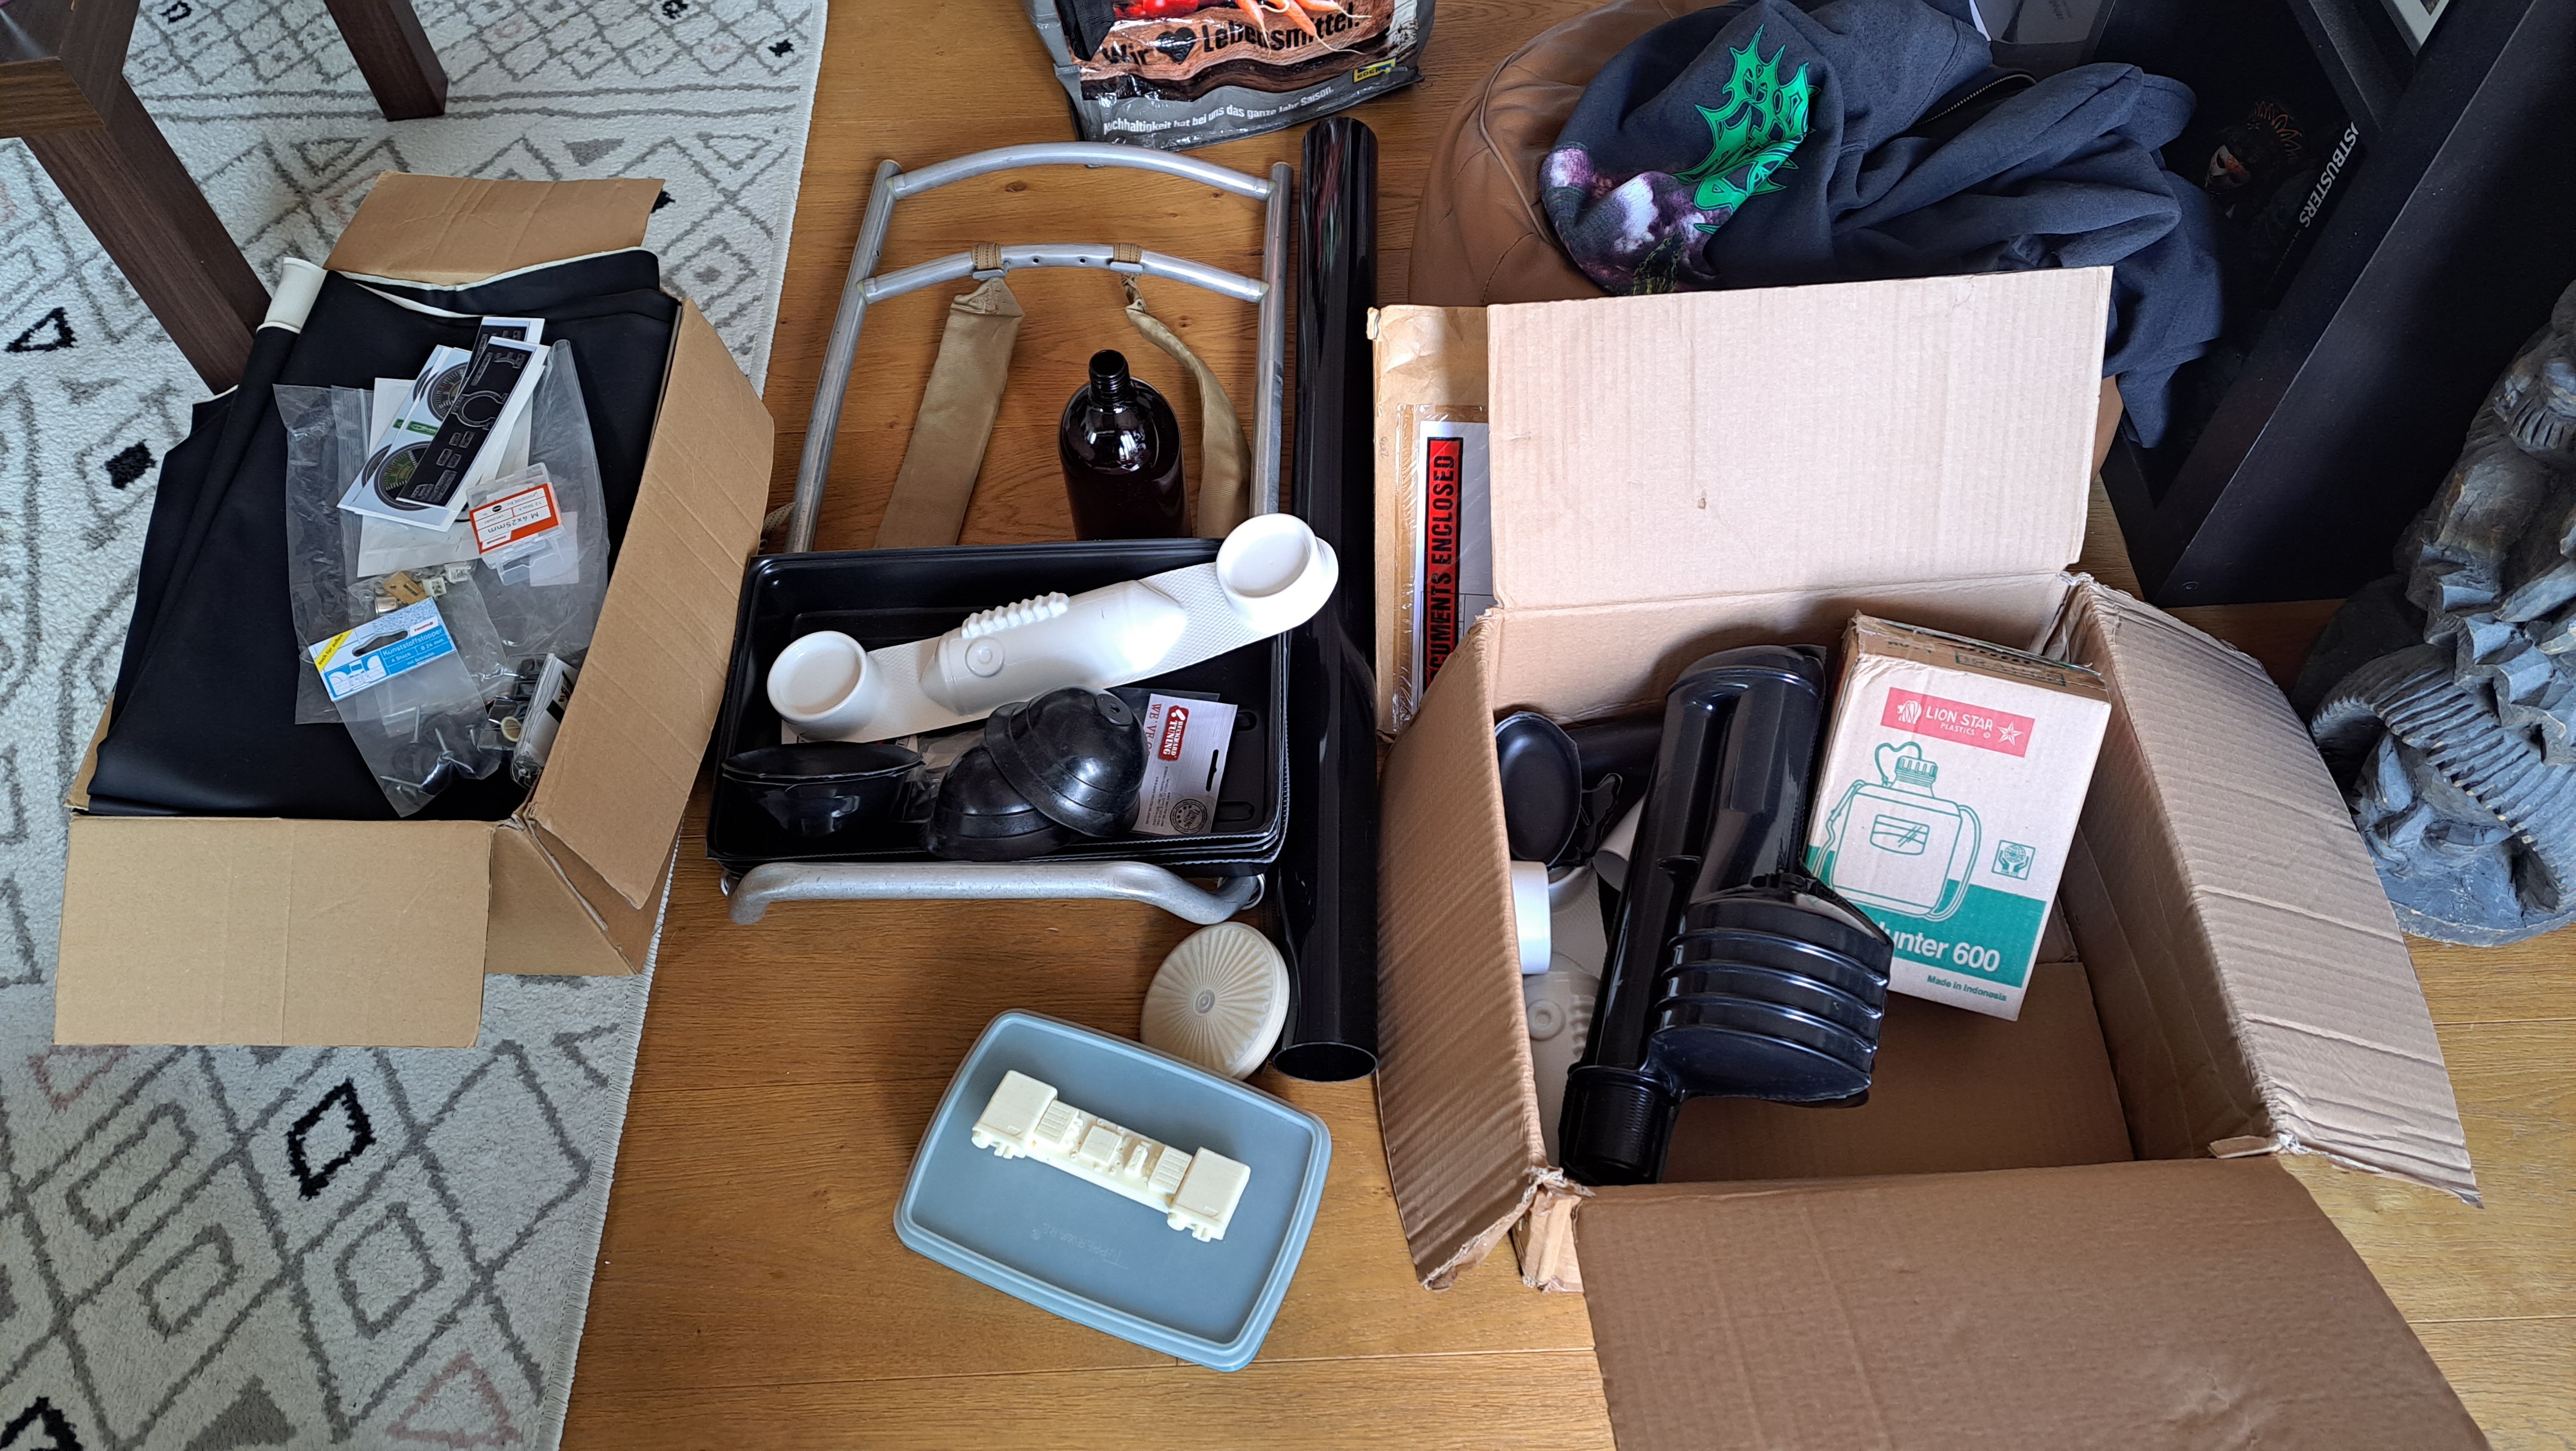
Hi everyone,
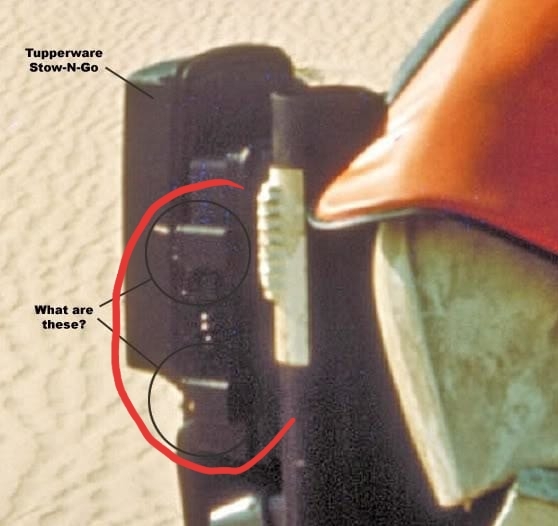
I really like the layout of pack#5 with the Tupperware Stow´n Go box, the little greeblie on the right side and the overall look of this pack, so I have built myself one.
You can find more information about this pack in the following thread to which I have just added some more useful reference pictures:
So I gathered all necessary ingredients to get this project started
On the screenused pack there is a Shires UP90, but I have come to own a genuine Shires UP85 courtesy of a friend who was able to purchase a bunch of Syphons. When compared to my fake Sonix (it´s a radio I have built using a Sonixworld kit as the base but even incorporated a battery compartment and such - however, I wasn´t planning to use it for this build) one can see that it is slightly too short.
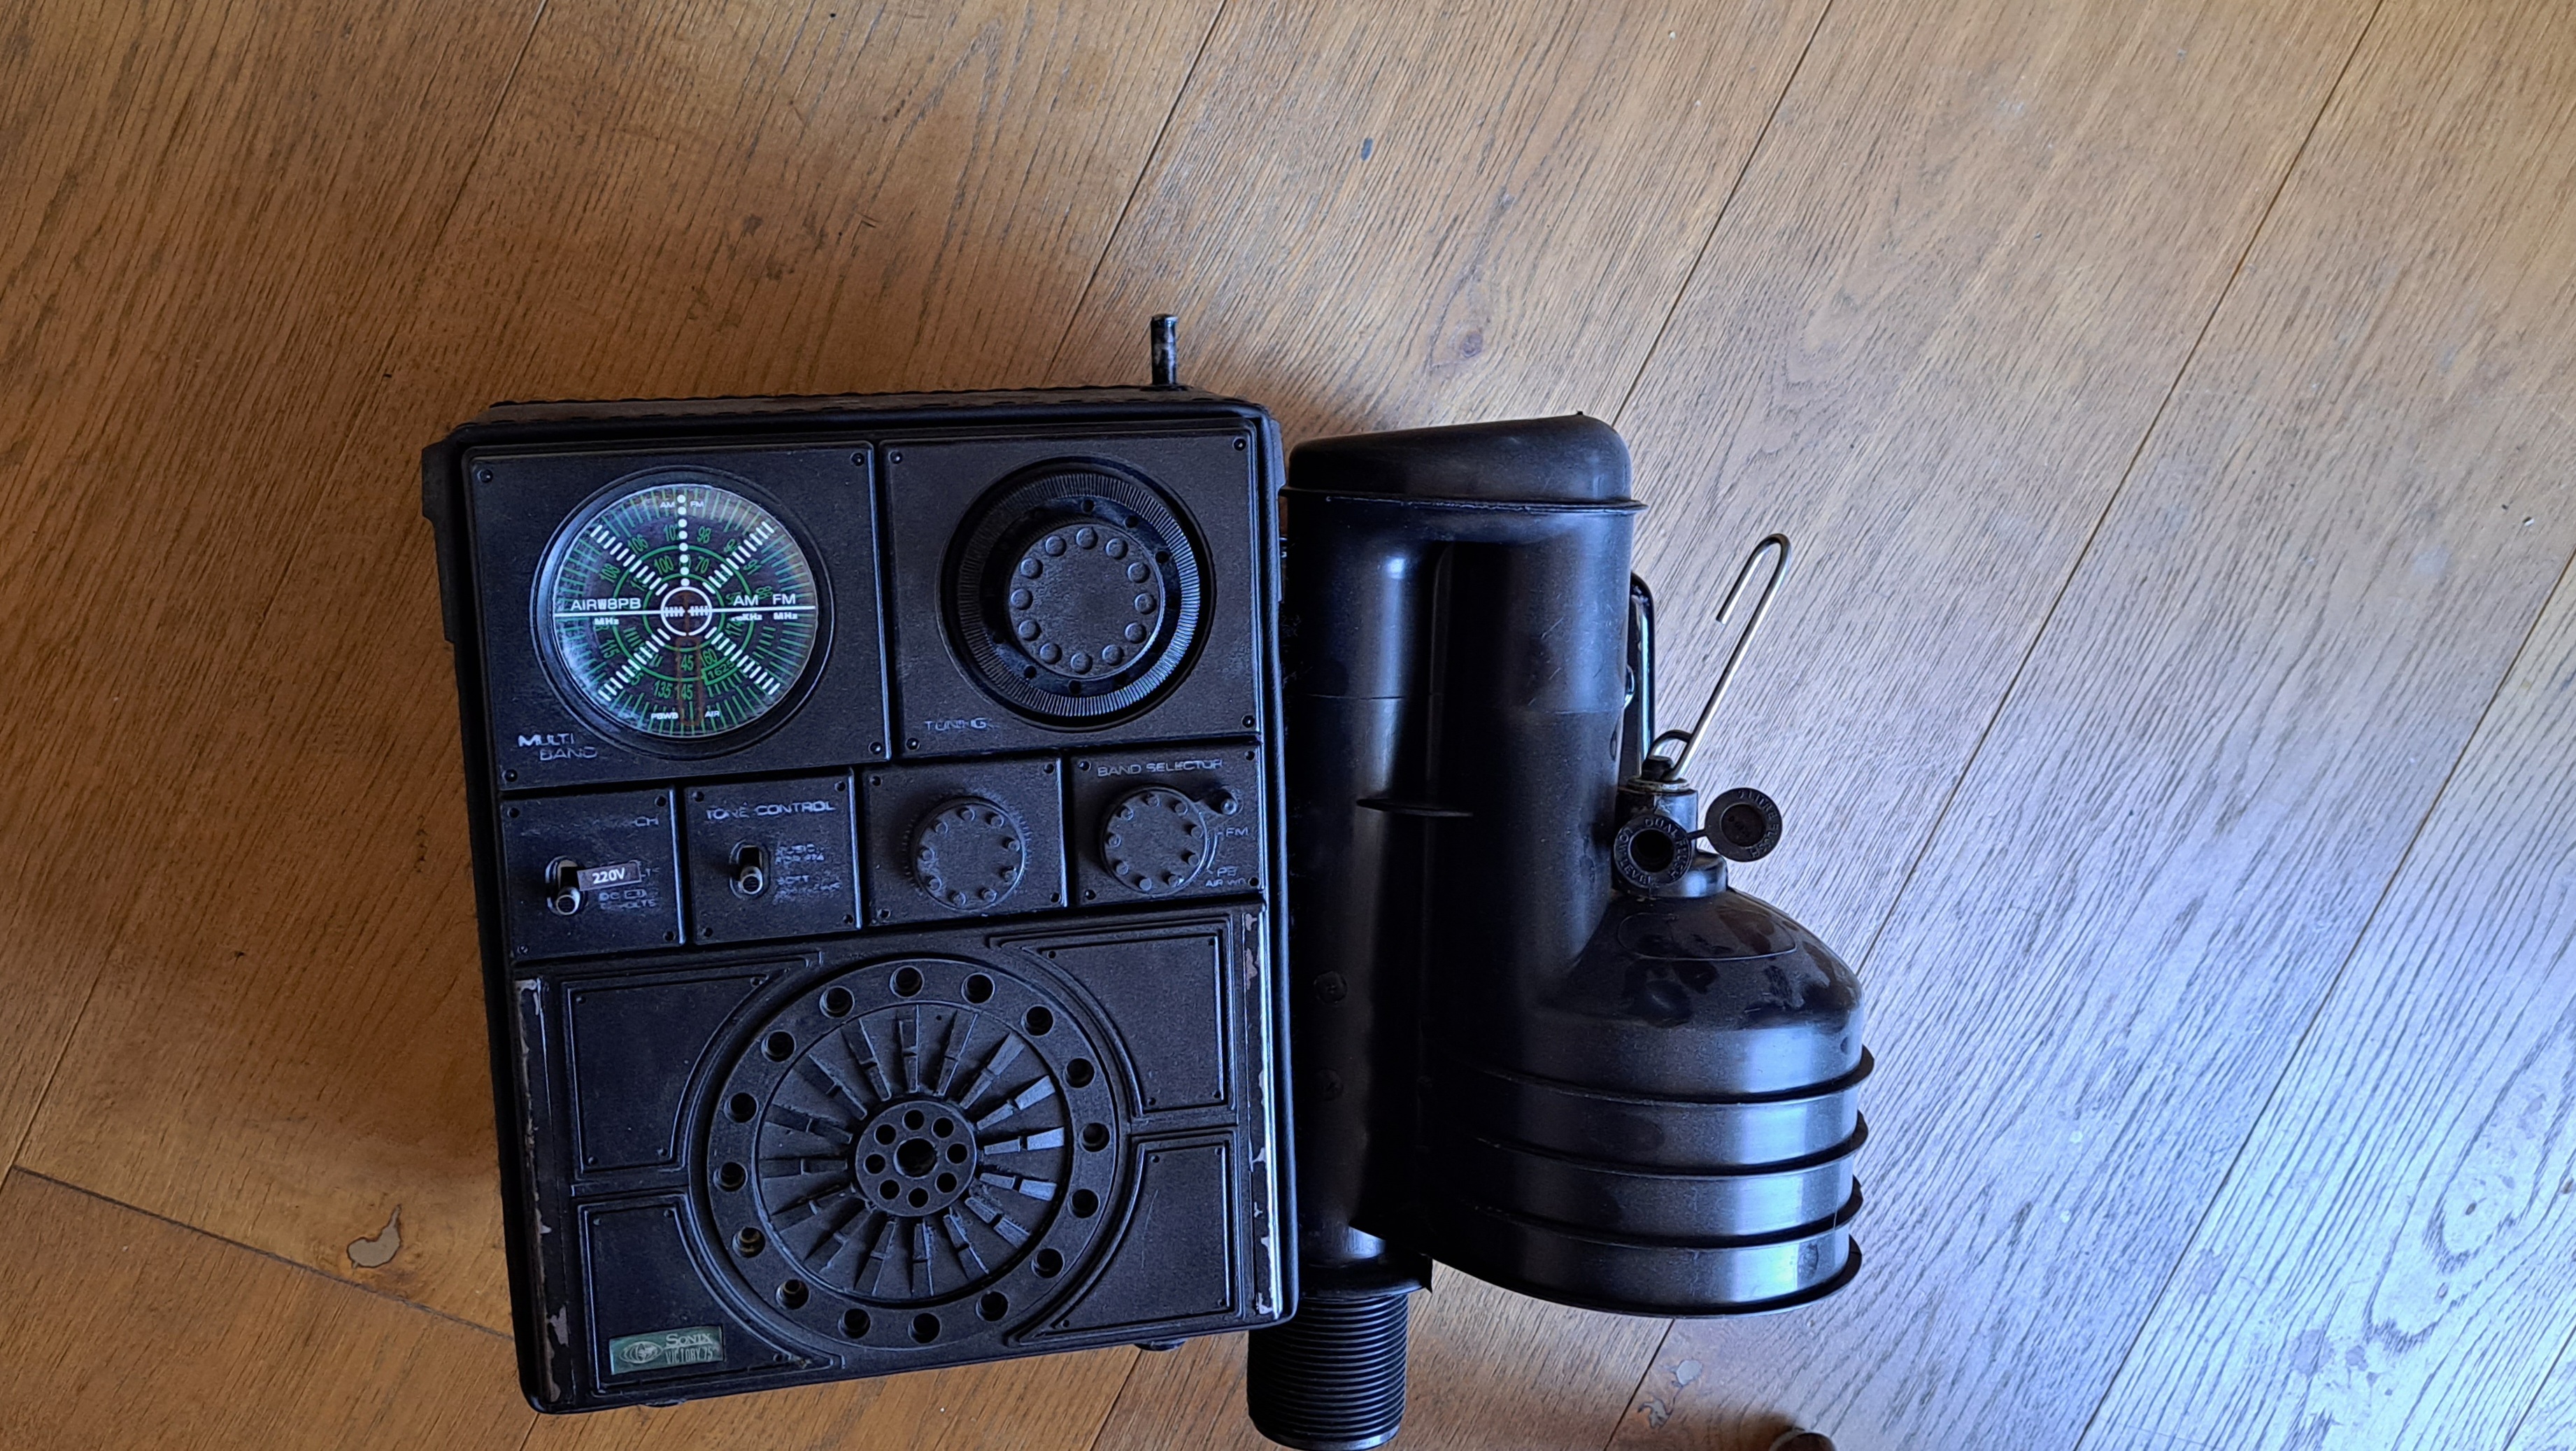
I was aiming for accuracy with this build but at the same time I was also looking forward to using a real Shires Syphon on a pack, so it´s like a compromise.
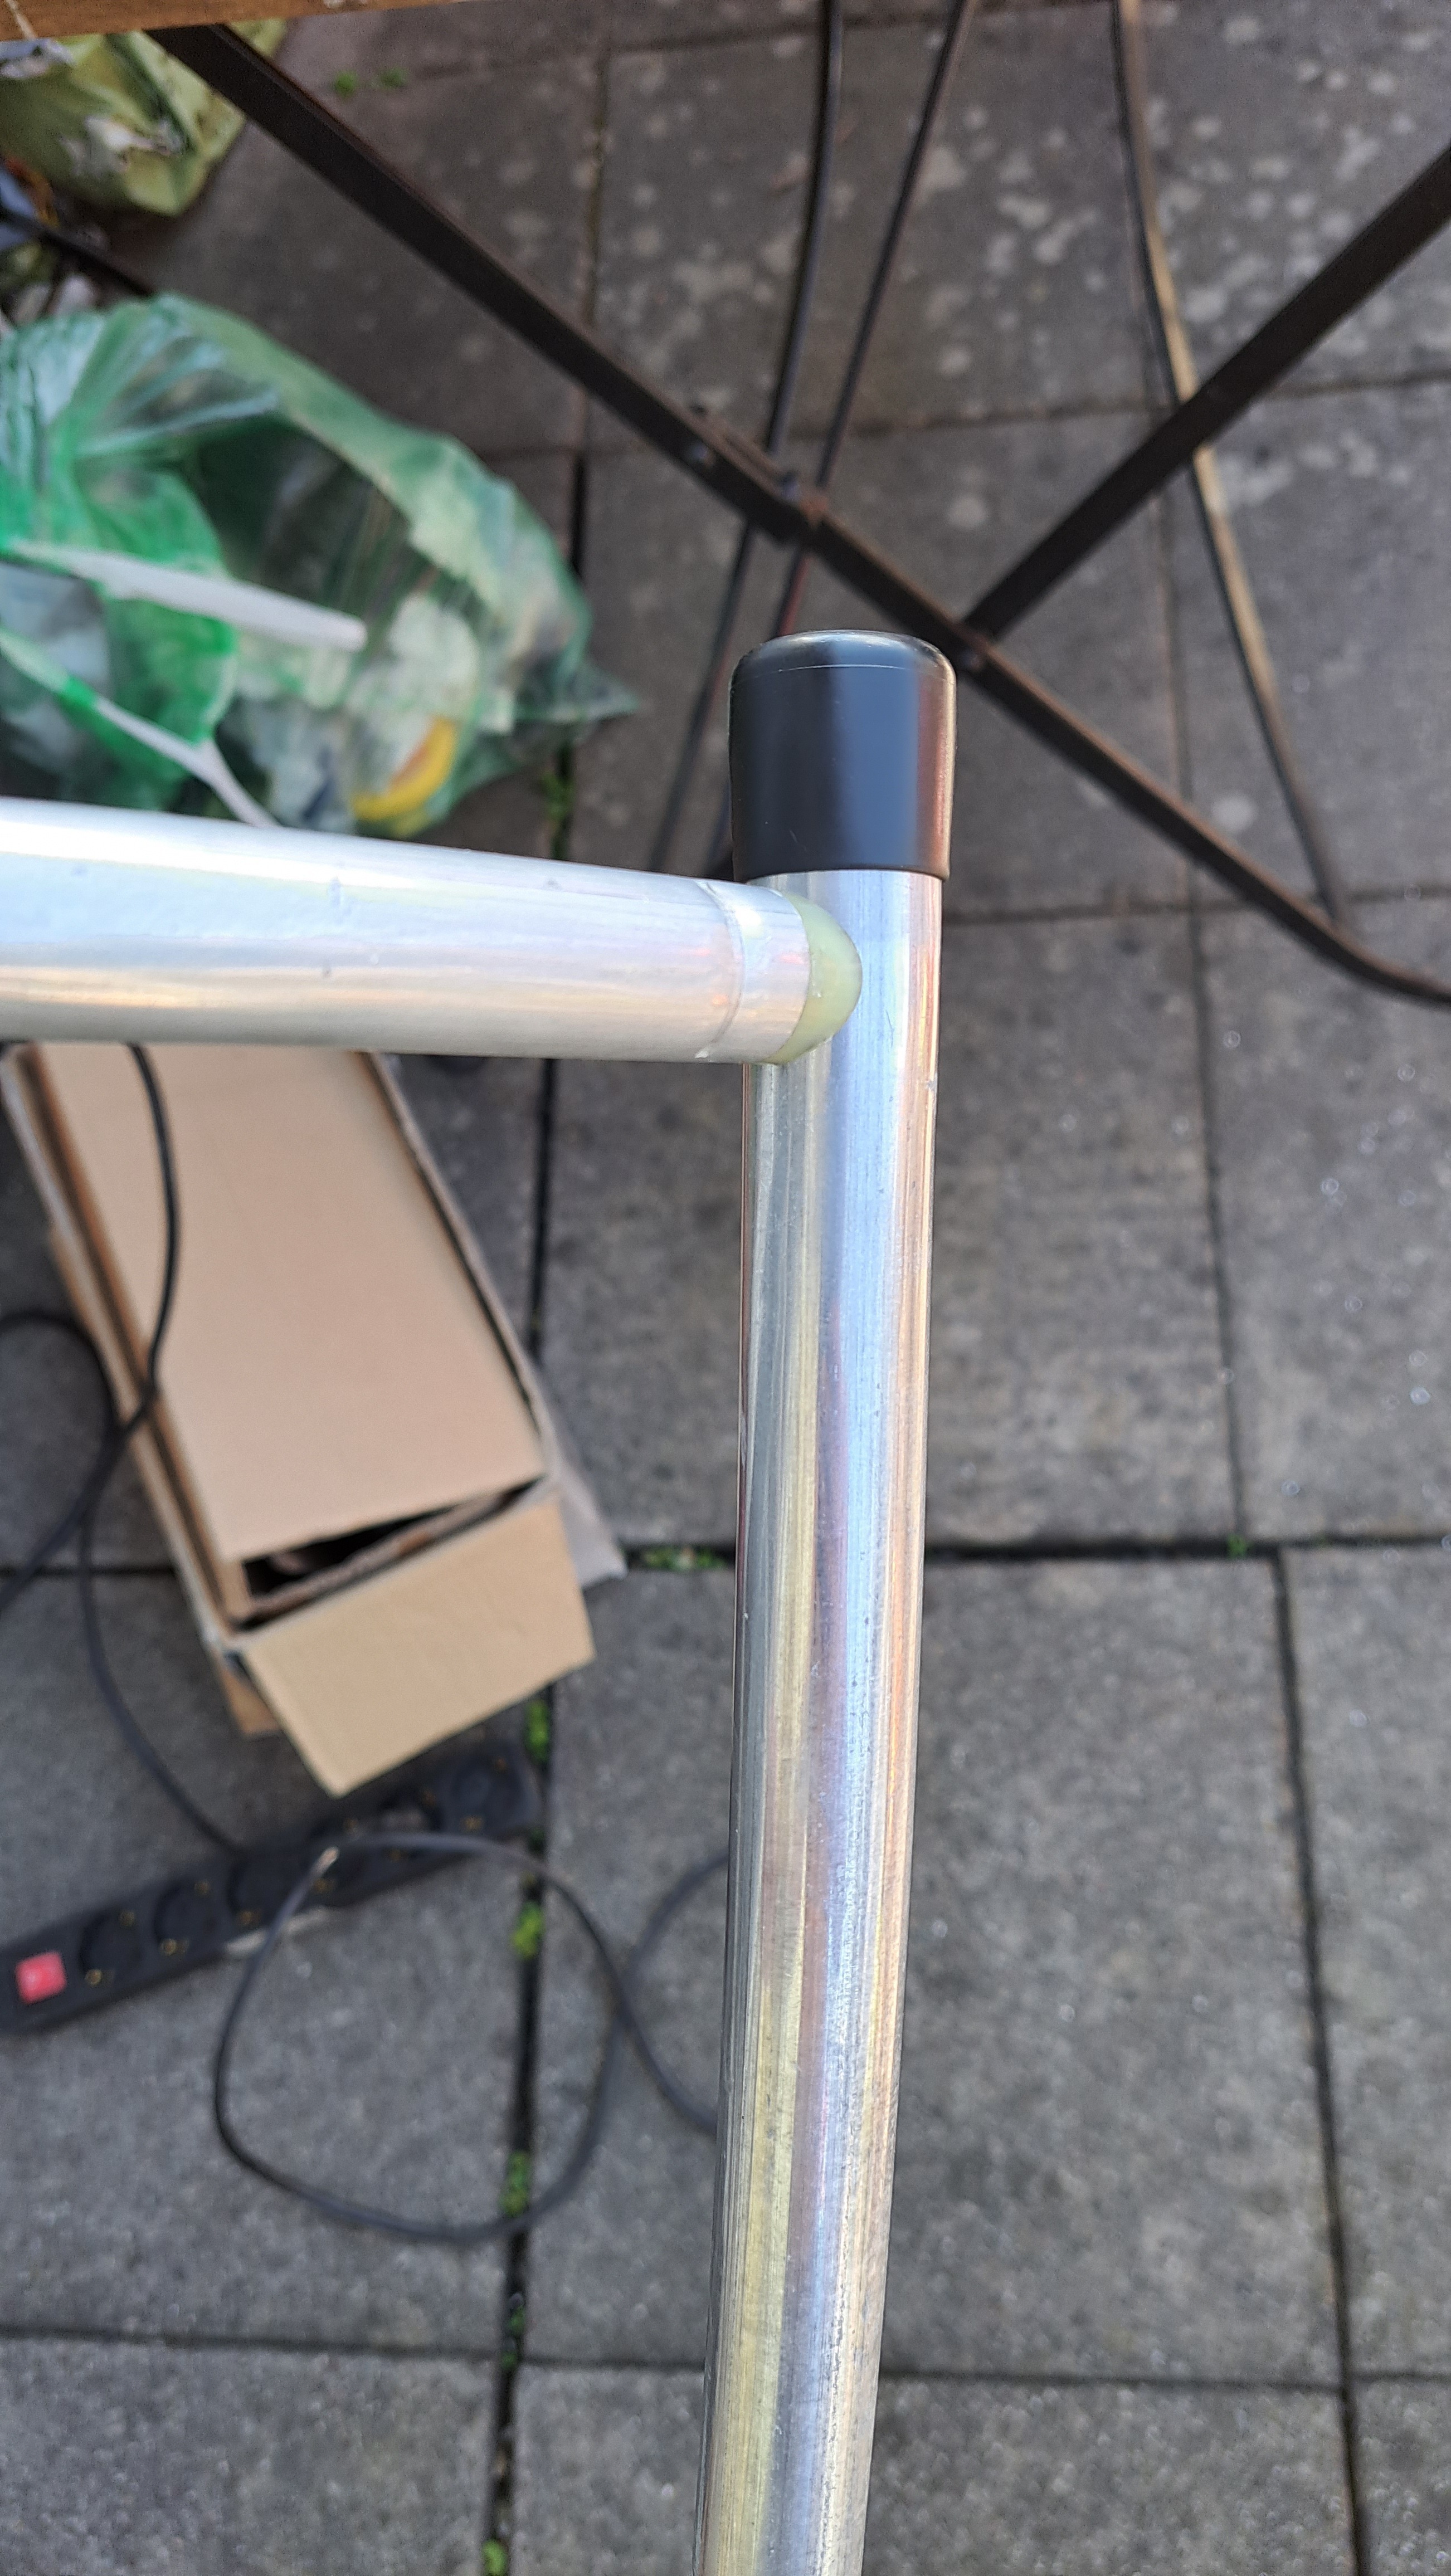
The frame is a genuine Karrimor which I cut down and bent to match the shape seen on screen.Trays were purchased from RWA Creations.
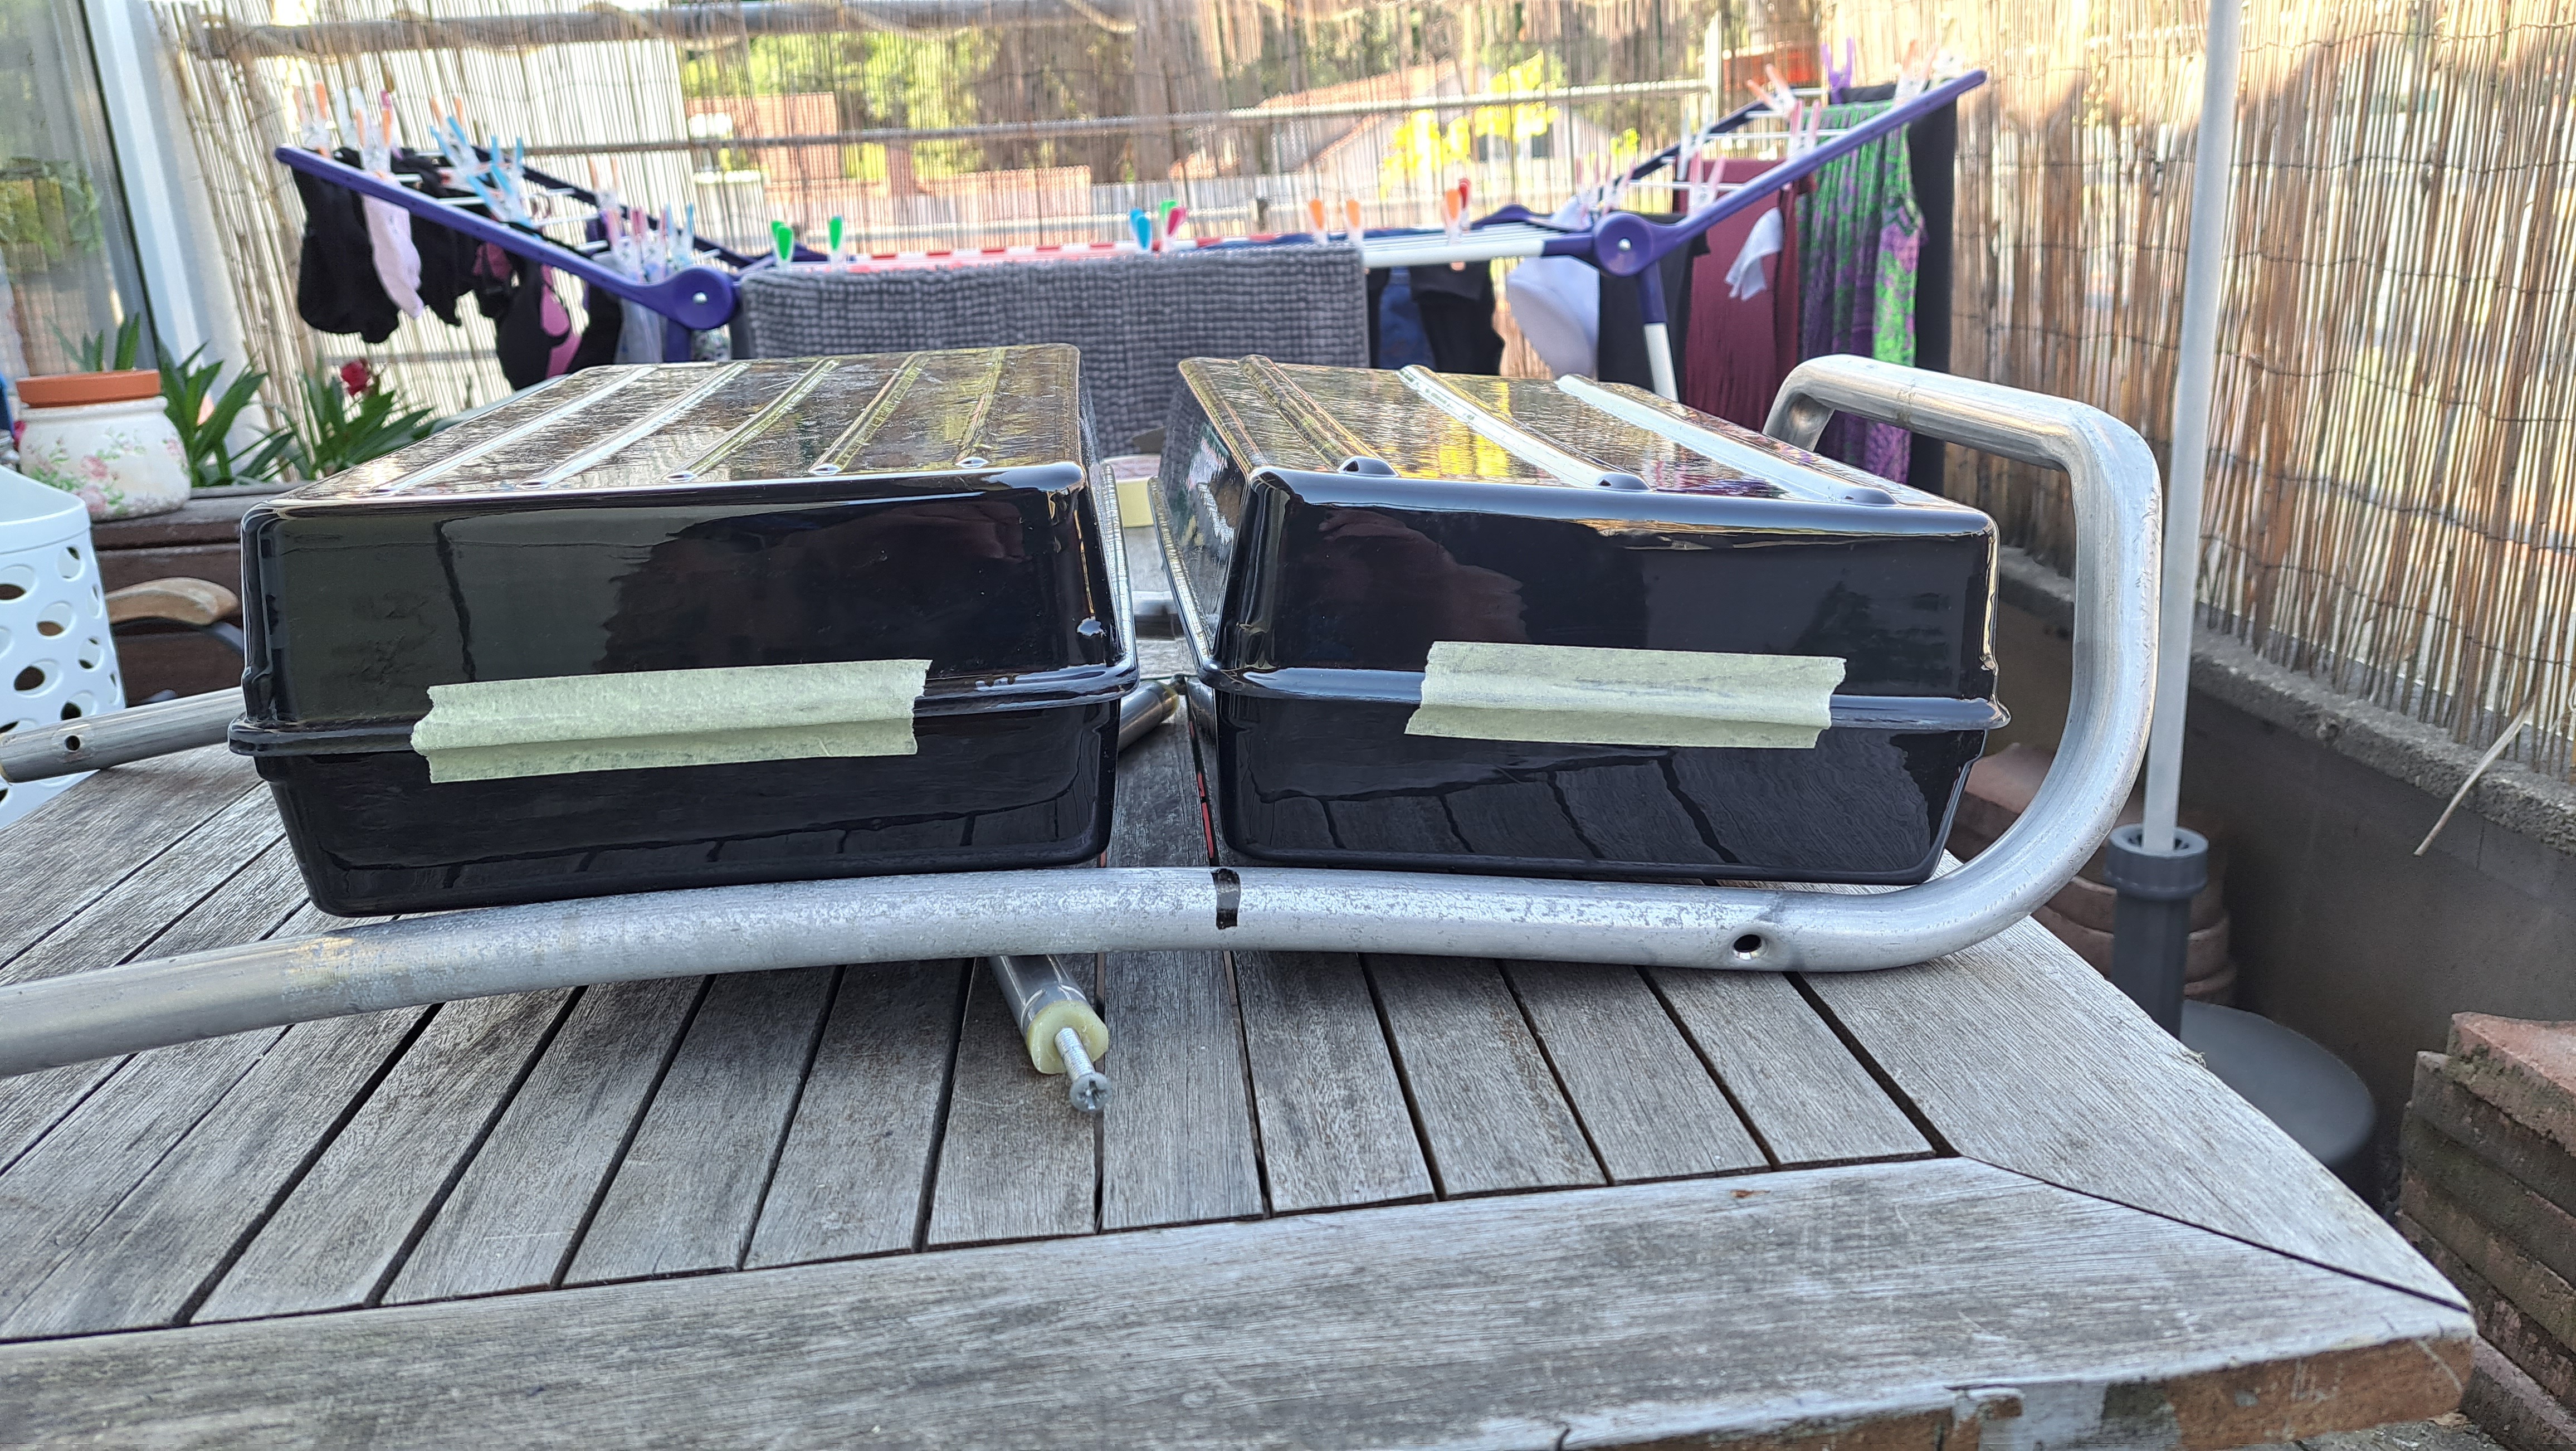
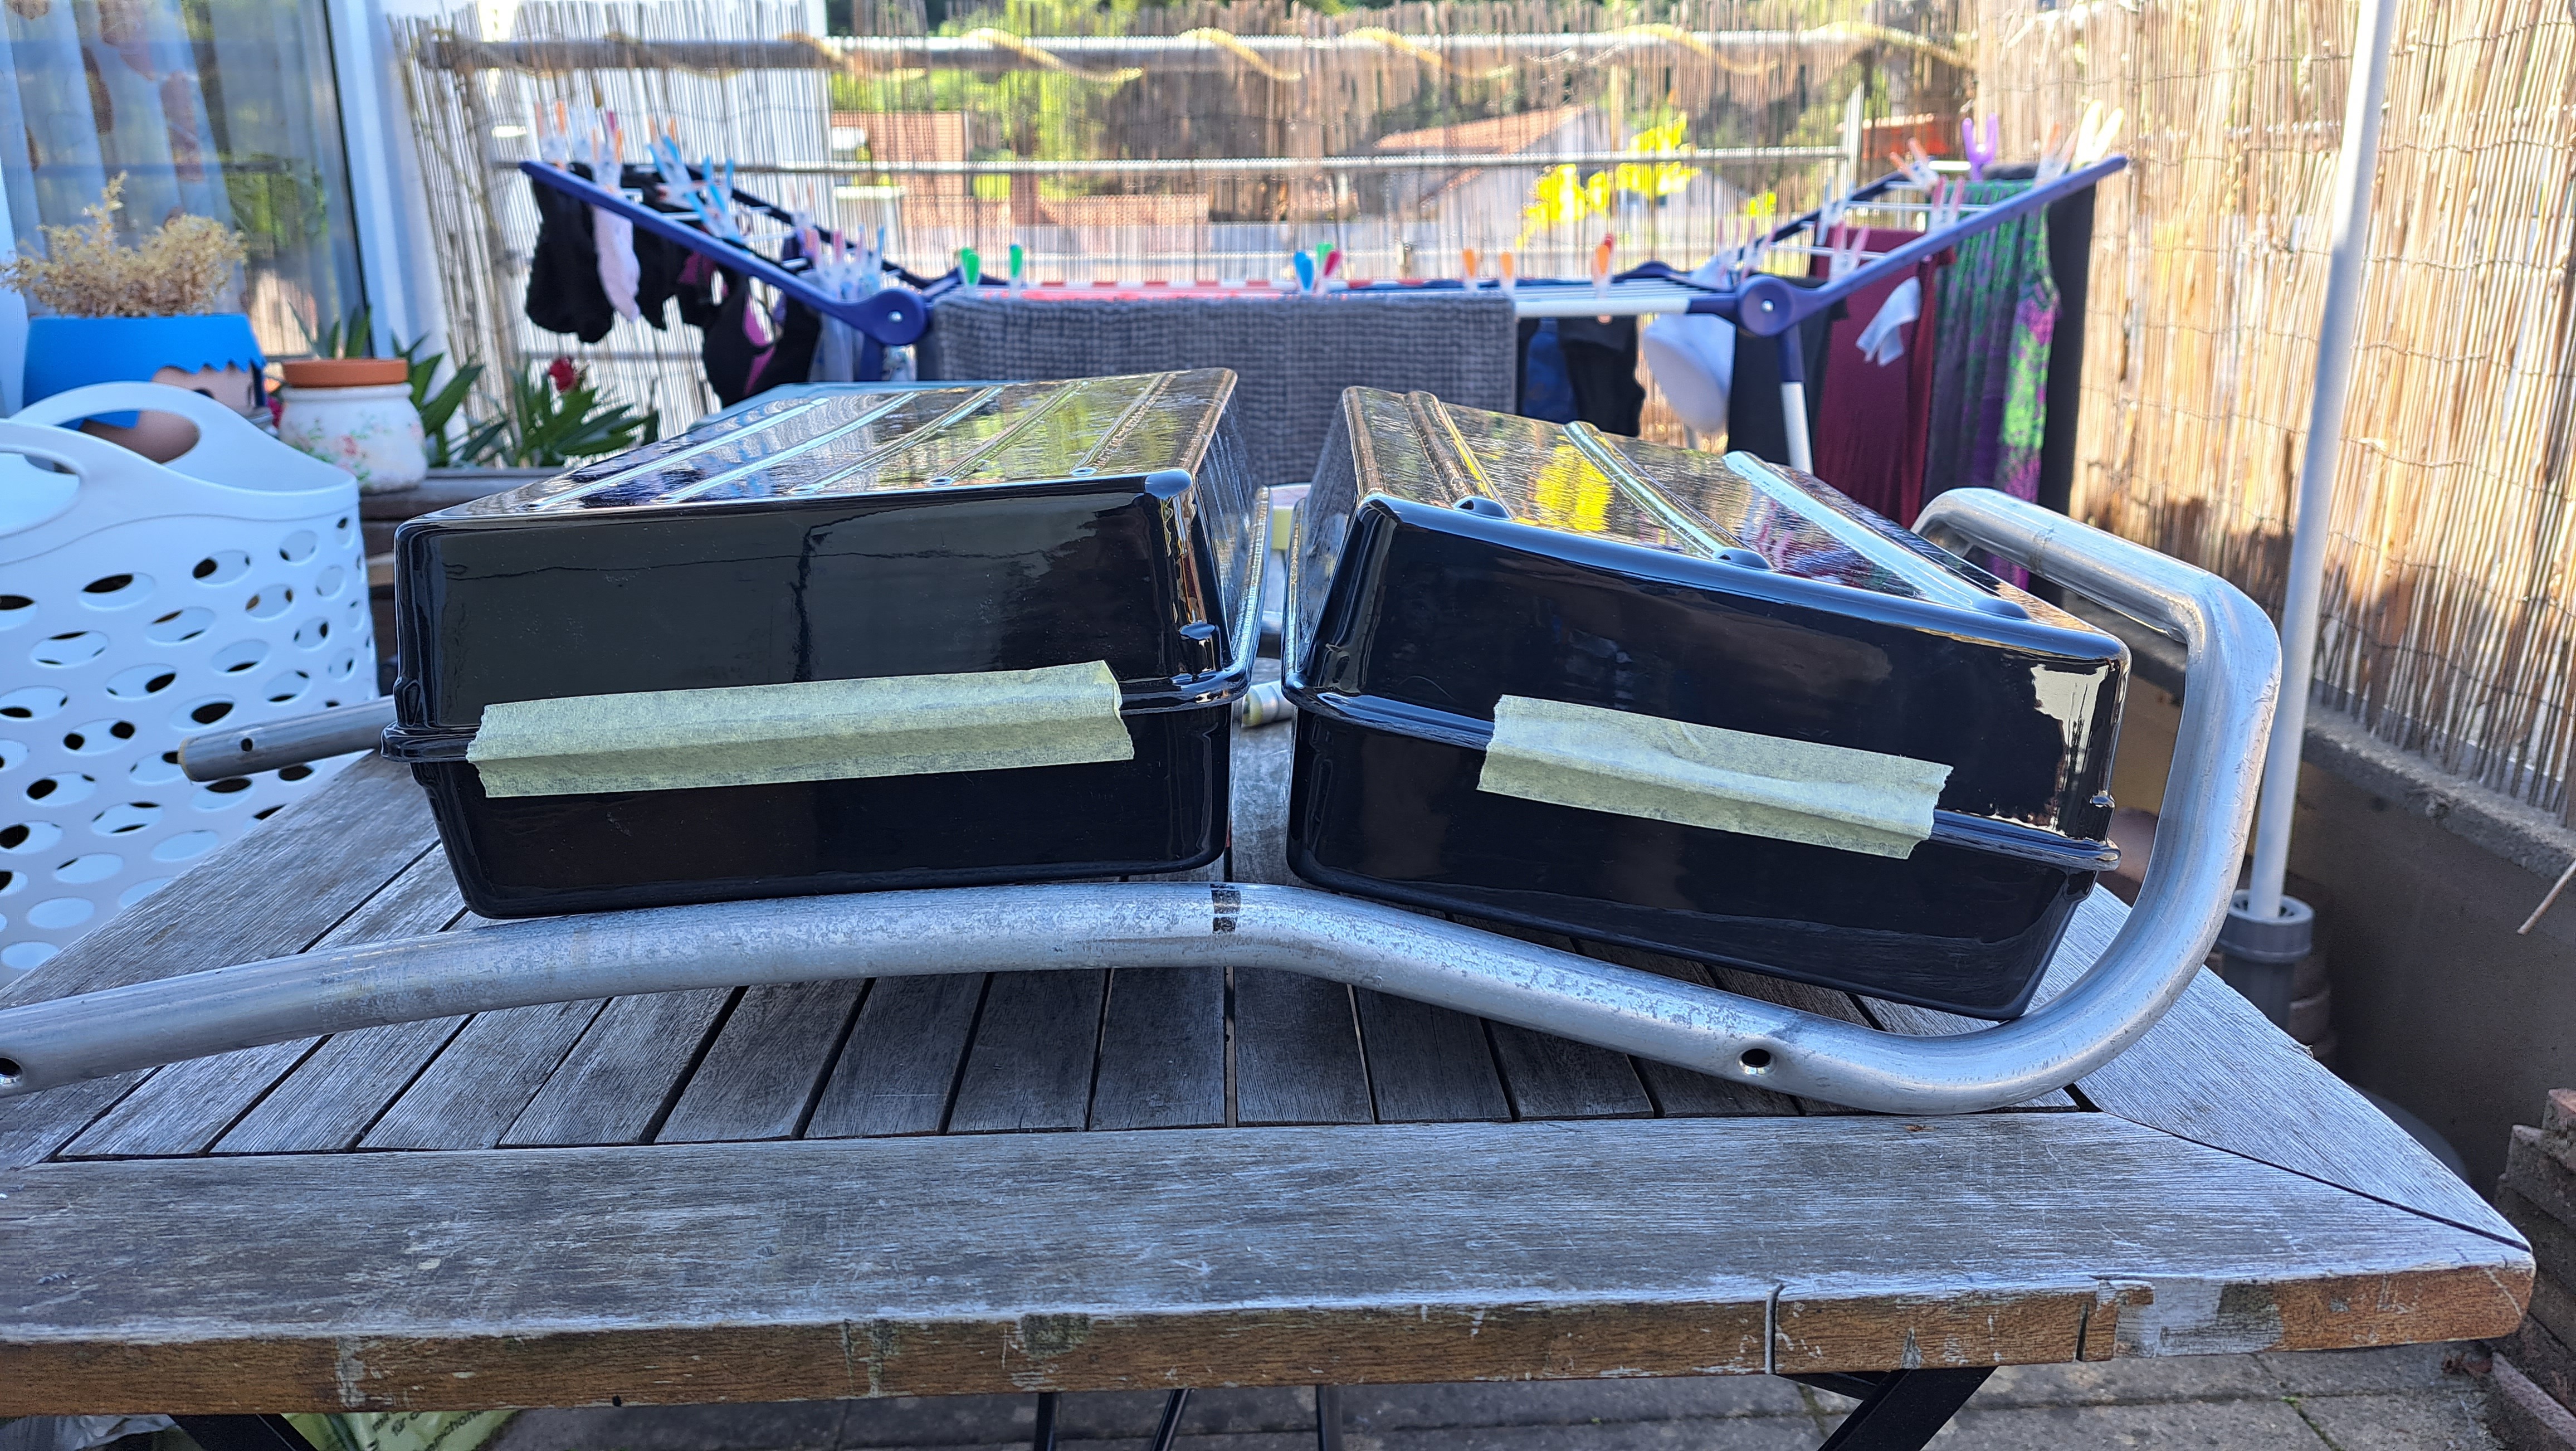
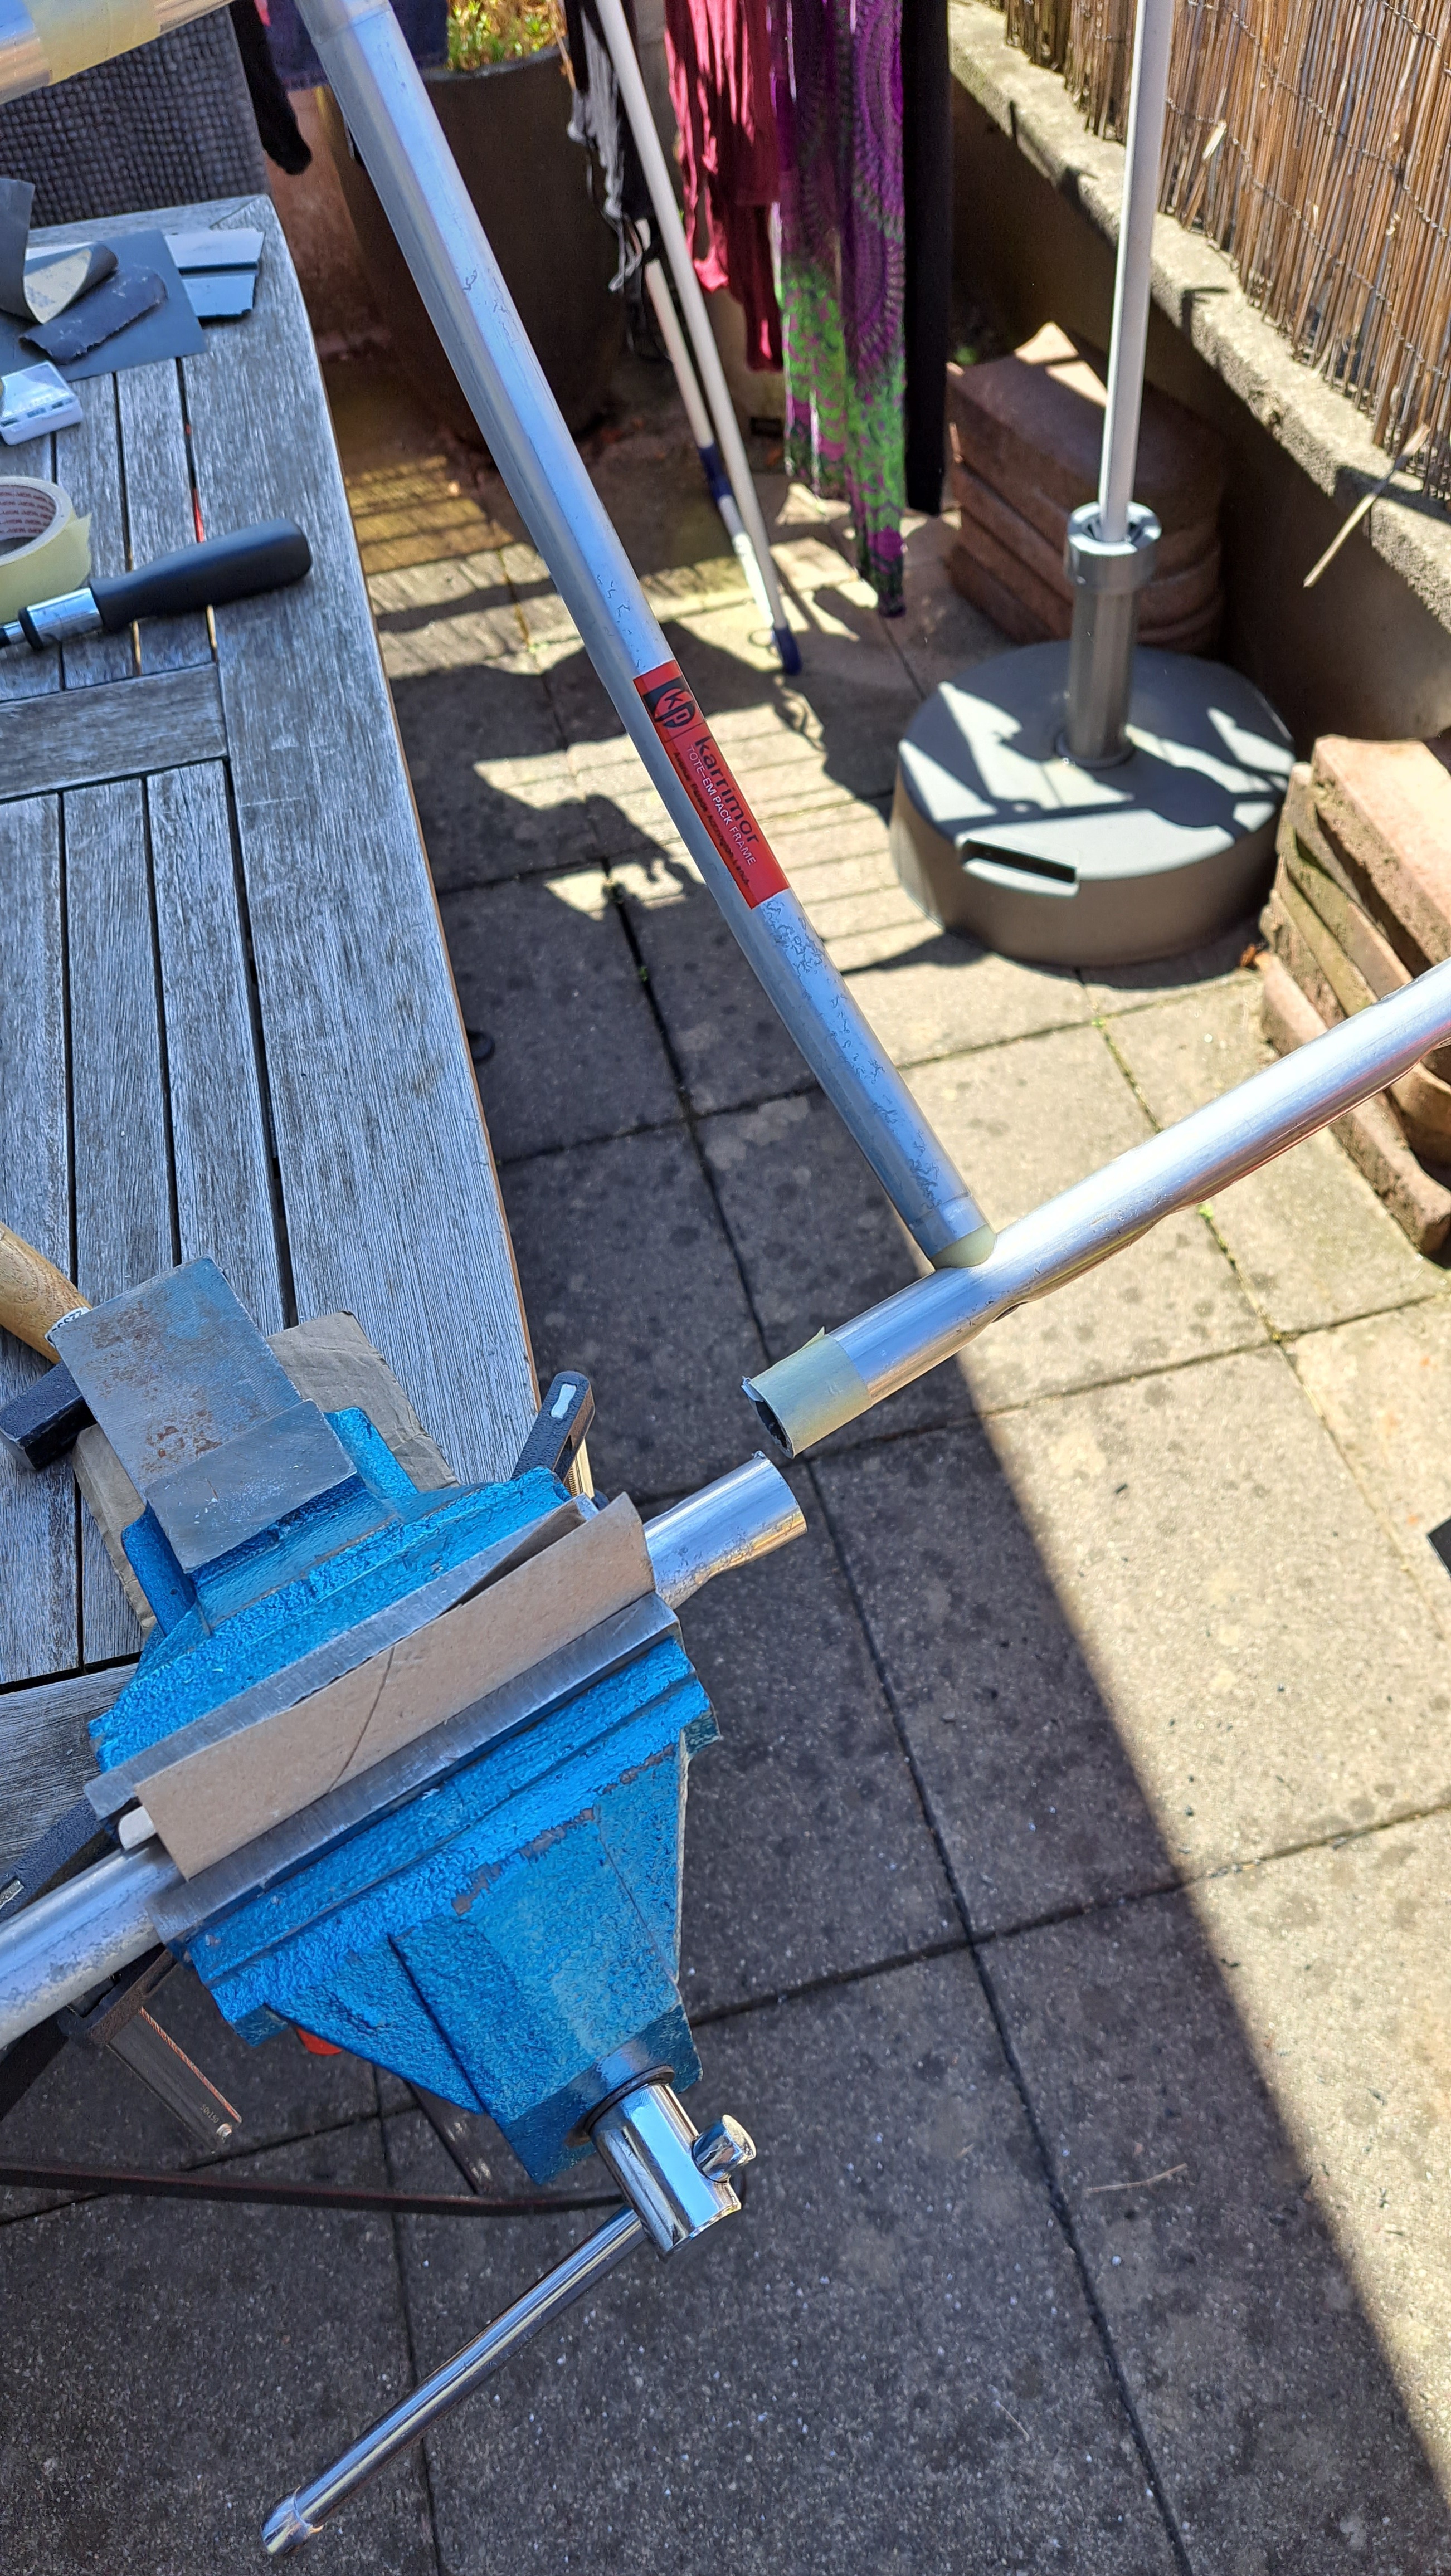
I also added a different endcap to match those from the movie.
-
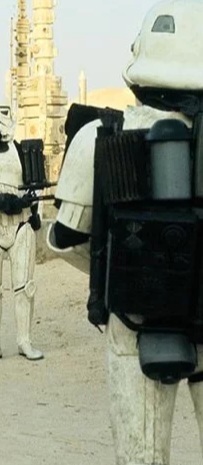
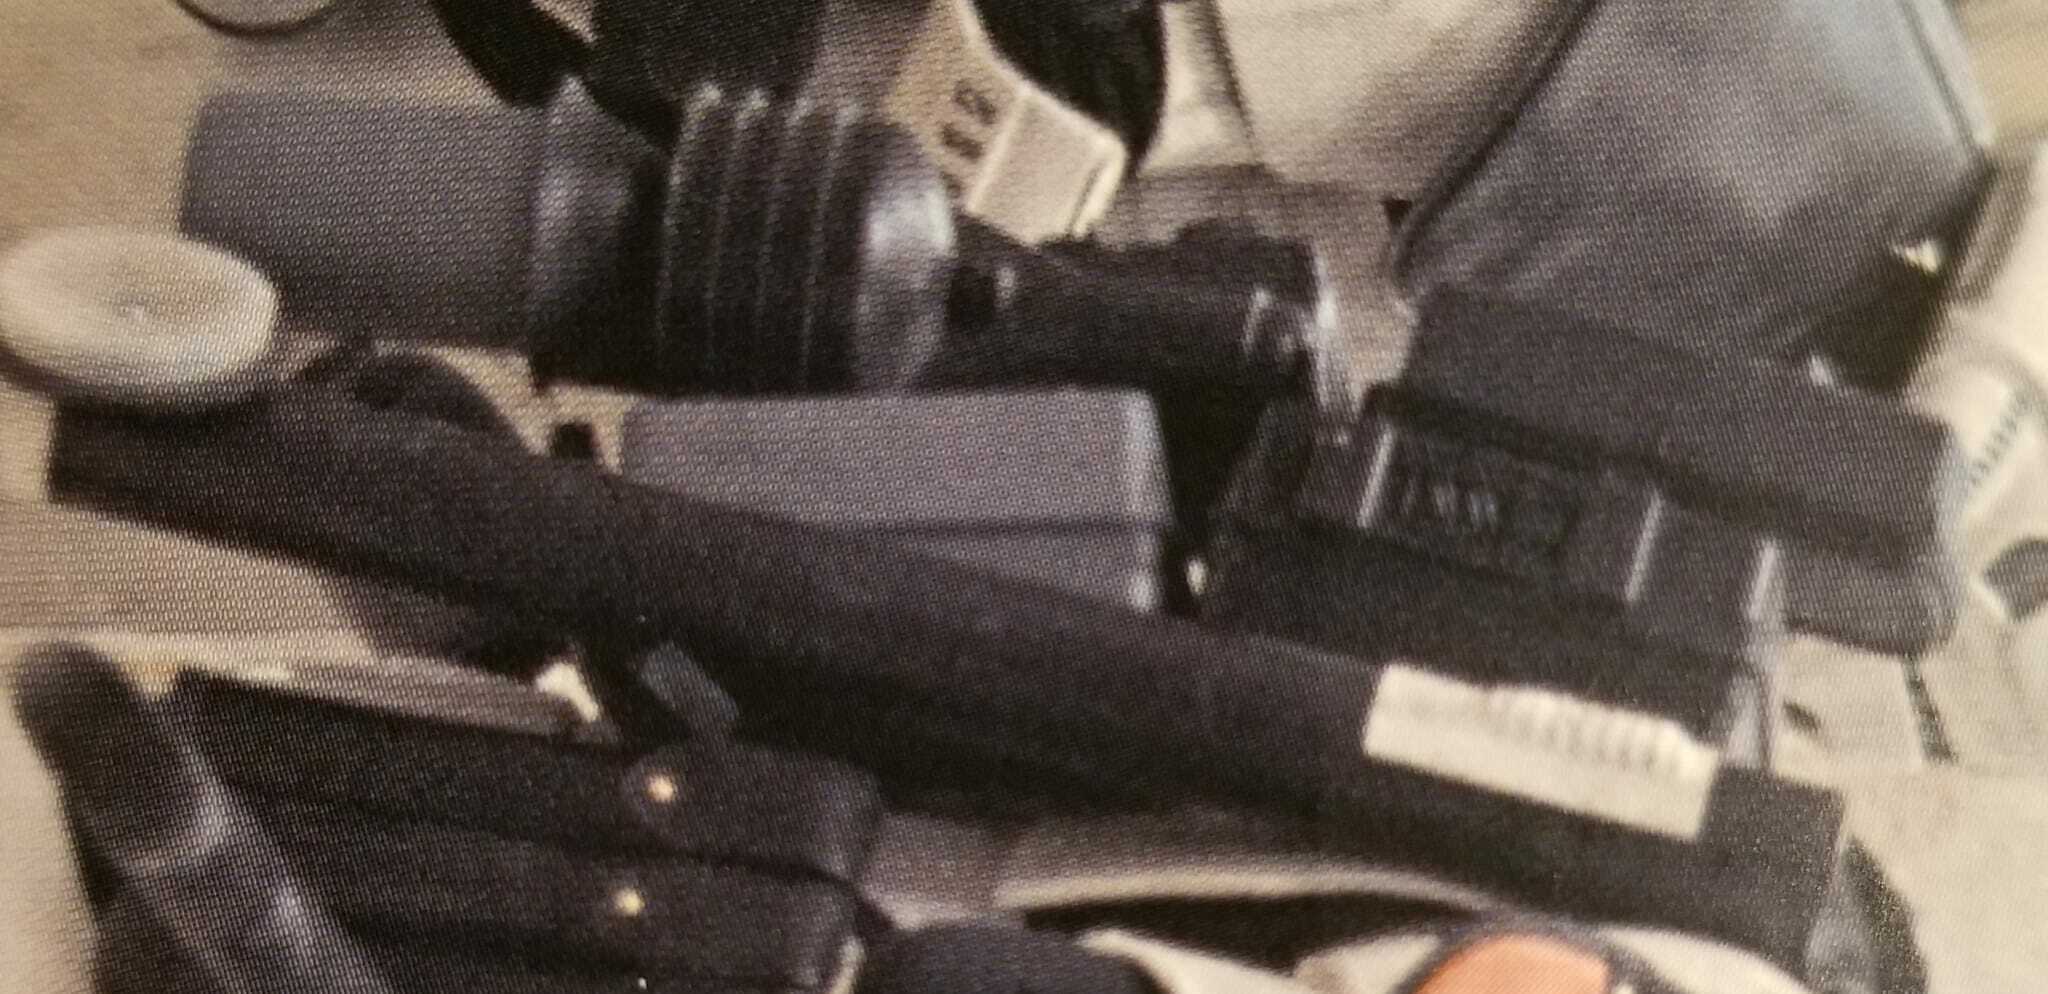
Here are some more pictures that I found useful when building my pack, many show the pack´s right side and the greeblie.

Cheers
-
Gerne
")
-
 1
1
-
-
For t-tracks, you may search for Super6props on Facebook. I think he's also on etsy and ebay. His tracks are great, have them on several of my blasters.
-
1
-
-
Great job, so that's already off the list. Way to go!
But for god's sake
 trim down those return edges. It's not even screenaccurate to have them there, so you really don't need them. I haven't had a single crack in the butt plate and it's still the first one, but I already have the second chest as it keeps cracking because of the return edges.
-
1
-
-
Hi Doug,
these are good.

-
Hey Doug, that was a quick fix on the syphon, good work.
As far as the snaps are concerned, the ones on the right in your picture are still not the correct ones, probably also too small. You will want to find something more like the ones in the following picture with a diameter of about 15mm: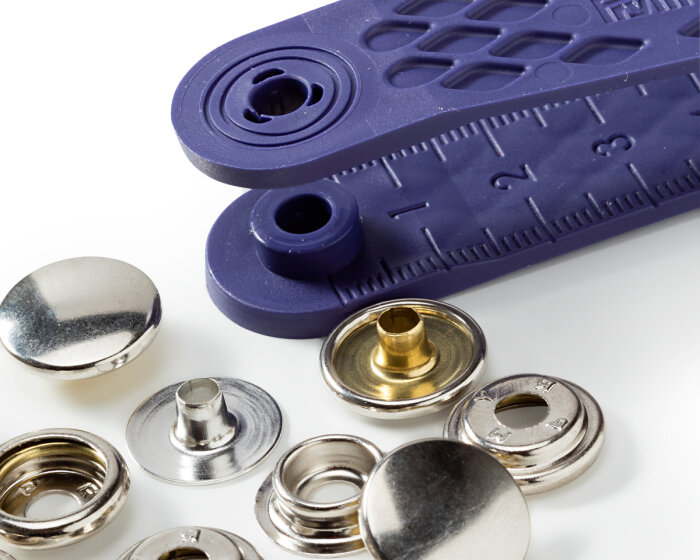
You do not need a big pouch for the hip, original small Spanish pouches are for example way easier to find than the bigger ones like the Stolla which are really becoming rare. Replicas are also allowed.
Cheers mate -
Hi Doug,
first of all welcome and thank you for your interest in joining the MEPD´s finest and becoming a deployed officer.
Thank you for providing such a neat and tidy application, your armor fits and suits you well, you look great and your pack#5 is really nice, what a coincidence as I am also building this pack right now, you have done an amazing job and I like your attention to detail, the pack is ticking all the right boxes but there will also be some aspects to address.
Okay, enough of the small talk and pleasantries
") , let´s get your review going.
, let´s get your review going.
Application Review: Part 1
Name: Doug Phillips
Legion ID: TD-69170
Forum Name: HugeBadWolf
Garrison: UK Garrison
Helmet
a. Green lenses: check
b. Paint color of traps / tears: check
c. Correct number of teeth: check
d. Mic tips: check
e. Vocoder color: check
f. Tube stripes: check
g. Rank bar on ears: check
h. Brow: check
i. Side screws (ears): check
j. Weathering: check
k. no mesh behind teeth: check
*additional comments*
Nice helmet! Nothing to hinder your application but just as a side note: I like your weathering but I would suggest adding a sand-coloured wash to all of your armor as there is a very noticeable contrast of the dirt spots to the very white clean parts. Adding a wash would probably make it look more consistent.
RESULT ON HELMET
Checked & Cleared
Armor details
a. elastic straps shoulders: check
b. neck seal: check
c. black undersuit: check
d. shoulder bells: check
e. biceps: check
f. forearms: check
g. pauldron: check
h. chest / back plate: check
i. kidney / butt plate: see comments
j. ab plate / side rivets / cod: see comments
k. strapping system: check
l. thighs: check
m. shins / calves: check
n. sniper plate: check
o. boots: check
p. gloves: check
q. hand plates / guards: check
r. ammo belt (waist): check
s. ammo belt (right knee): check
t. canvas belt: check
u. pouches: see comments
v. weathering: check
*additional comments*
As I have said before, your armor really suits you well but there are some points to address:This first part is simply a piece of advice: I would suggest trimming the return edges some more, especially on the butt plate. The larger the return edge, the more prone it will be to crack… as has already happened with yours obviously and I see cracks all over your armor, take care of those before it gets worse.
I was also thinking about your boots as the paint has really already worn off your right boot in particular and make it stick out, however, this is also nothing that demands immediate action to become deployed.
But the following will have to be changed:
Snaps: In our detailed CRL, which you have quoted in many parts of your application, it clearly says the following:
“Abdomen Armor
One snap on the top right hand side of the Abdomen Armor:
Back of male side of snap shows on outside of Abdomen Armor
Posterior Armor (Buttplate):
Visible fasteners under lower Buttpiece center includes two (or 3) male snaps in the back (snap part on the inside of the buttpiece). Fasteners need not be functional.
“
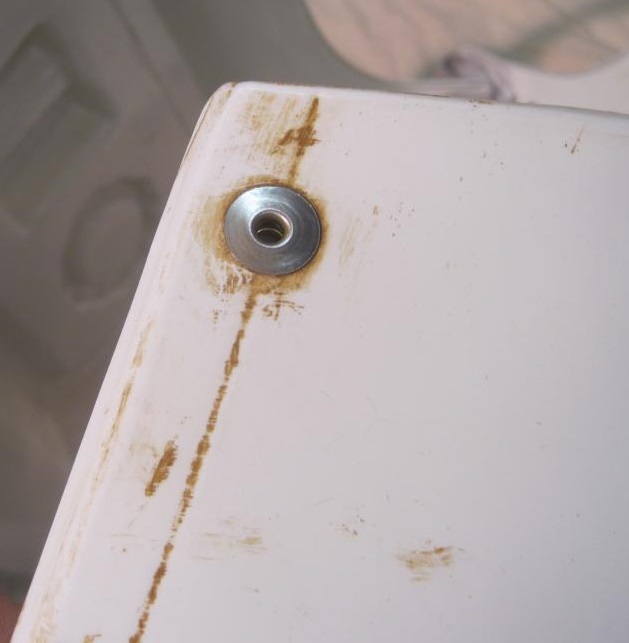
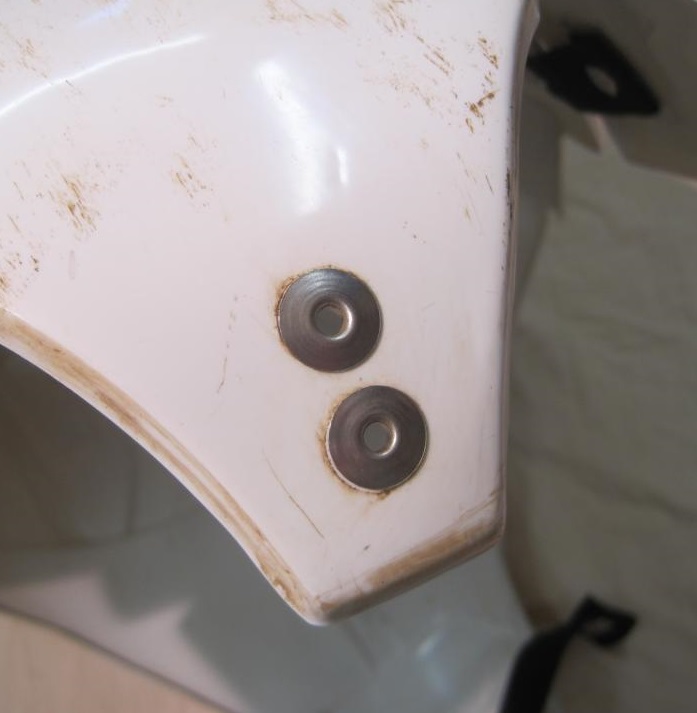
Yours do not look like the backside of male snaps but rather like some rivets, so please change these for more accurate snaps.
Pouches: The pouch you are wearing on your ammo belt doesn´t really meet the requirements. The problem is that this is a style of pouch that was worn by the Sandtroopers in ANH only as an option for the shoulder and originally was made of canvas. Your leather pouch is a style of pouch which may be correct for a Deathtrooper but not a Sandtrooper.
Please replace it with one of the following pouches: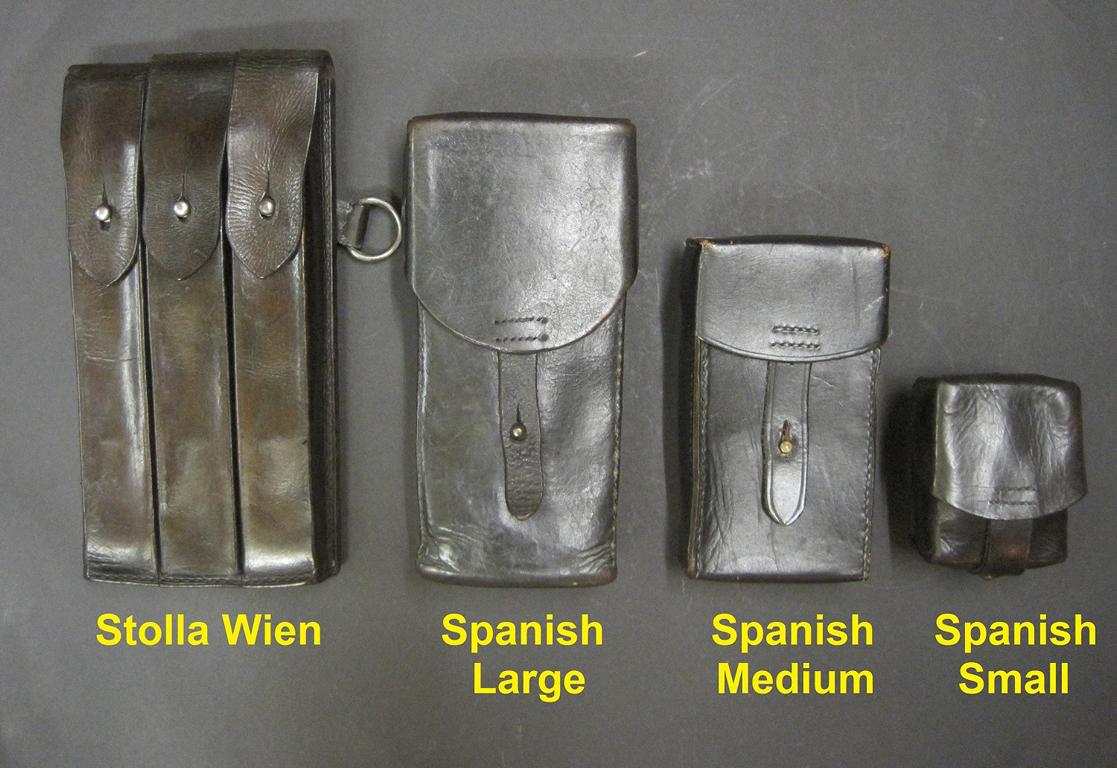
RESULT ON ARMOR
pending
Backpack
a. details: see comments
b. weathering: check
*additional comments*
As stated above, great pack and I love it that you have gone the extra bit of adding the red support straps. If I see it correctly, the seedtrays are attached to the straps with cable ties? Wow, that´s cool.
This isn´t by any chance one of Trevor´s packs?I assume that you have built yourself one of RWA´s great and light syphon kits but there´s a large gap at the top where it says “Made in England”, please repair this.
RESULT ON BACKPACK
pending
Weapon: RTC
a. details: check but please have a look at my comments too.
b. weathering: check
*additional comments*
That´s a nice RTC but please adjust the “Tabby” a wee bit (so it doesn´t point upwards that much).
RESULT ON WEAPON
Checked & Cleared
Doug, this was your first review!
Your gear looks great and you will be a worthy addition to the ranks of the MEPD´s finest.
These are only little and rather easy fixes and I am looking forward to seeing some new pics of your improved gear soon.Cheers mate!
Hausi - MEPD Deployment Officer
-
Great pictures, now that's an art gallery exhibition I would enjoy visiting.
-
Hi Jonathan, welcome to the MEPD!

-
Hi Cormac, welcome to the sandpit!
Are you ready to leave your AT-ST behind and get down and dirty? We haven't got those evil little teddybears on Tattoine but Jawas can also be quite pesky and the heat is deadly.
Jokes aside, great choice to become a sandtrooper, in my opinion, we are the most badass troops around.
Good to have you hear with us, have fun roaming the forums, tons of information here.
Looking forward to seeing your build progress.
-
Well done Colin, thanks for sharing those pics! Only one Sandtrooper... but looks most badass.
-
Welcome Raúl, good to have you here with us. Have fun roaming the forums.
-
Welcome Julius, always good to have more troopers reinforcing the growing group of German Sandtroopers.
Have fun roaming the MEPD forums, I look forward to seeing your PO application soon.
-
Cool pic
-
14 hours ago, SCRIBBLER said:
229 Officers have now received their requested Certificates.

*** Take care and Stay Safe out there, Troops! ***
Nice work!
-
Wow, great attention to detail, keep up the great work!

Cheers mate
-
It looks really good and thanks for sharing!
The only thing I would change is the angle of the main body/box where the actual pipe of the exhaust is attached, you can see it in the following picture:
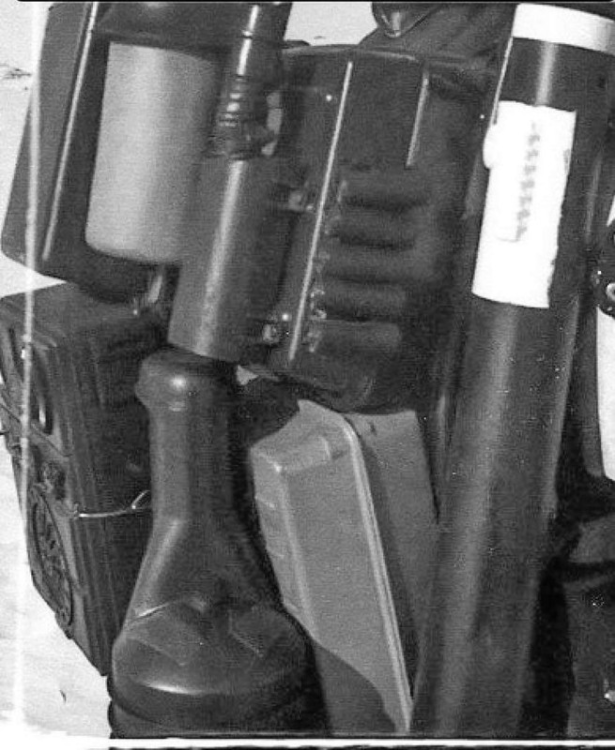
Can you see what I mean?
-
Welcome Marcel, good to have more Sandtroopers in the German Garrison. Have fun roaming the forums.
-
Indeed, he is.
-
If you edit your very first post, you can also change the title, which I assume is what you want.
-
1
-
-
Those are some cool pics, incredible that you were the only Sandtrooper but you look good.
You're also standing next to my favourite Jawa.
-
1
-
-
Hi Marcel, have you tried Etsy? I have just checked and there are several makers who offer 3D-printed T-21s. You may also just keep your eyes open for Hyperfirm rubber foam blasters, they are amazing but not available any more but maybe you are lucky and able to find one second hand.
Building one also isn't that difficult, it actually was the first blaster I have tried building and I was successful although I didn't really have an idea what I was doing at that time. This Thread by Pandatrooper was extremely helpful to me.
Cheers mate
-
Congrats on joining the ranks of the deployed officers, Sean, good job.
-
2
-


Hausi´s Pack#5 build
in Field Backpack
Posted
After taking a closer look at the side greeblie, how it looks in proportion to the seed trays and comparing it to my reference pictures, I knew, I would have to shorten it.
please excuse my feet in flip flops in the picture
I also added some wires to match what can be seen in the reference: