

TriumphTrooper8
-
Posts
33 -
Joined
-
Last visited
Content Type
Events
Profiles
Forums
Everything posted by TriumphTrooper8
-
Suited up and the pack will need to get used to for walking around! Inside: Outside:
-
Ok so the ab and butt plates are done with the switch to the 3 button plate and it loos good! Put the personal mark of the all mighty move along trooper....beside the electrical tape and duck tape on the shoulder bell. Yeah I did the duck tape.... Weathered the back pack too.......brown and gray no tan. Then attached the 1" black poly webbing using rivets on the frame and wrapped the aluminum straps for the botton seed tray and used abs plates. Put some fuzzy loop side of industrial Velcro over the top straps to keep the chaffing down. Fits nicely! Not as heavy as I thought it would be....
-
I put the three button strip on the ab. Removed the screen from the frown on the helmet. Adding gray and tan to the weathering on the armor.........lighting is not that great!
-
Took another 1" off. Put on the 2" wide and 3/4" wide electrical tape.
-
I got some very helpful info on what really needed to be moved, trimmed, etc. Took 2.5" off the stinger........ Moved the TD Control Panel and shortened it per the movie still! All back together!
-
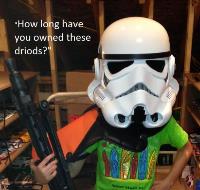
Ok so let the opinions fly! 1-the control panel on the mortar tube/thermal detonator......too long? 2-lab tube does it mount more so level versus the gram when sitting face up flat? Like half way down each have of the side bent part of the pack frame? 3-for move along so I have the lab tube? 4-is it preferred to have the bottom tray cover drooped down and taped for the move along or tapped up back in place? 5-someone change the CRL for swat on the move along pack! The bell on the top cannister/bottle is not gold! It's driving me nuts! Be gentle Here are the pictures before weathering and shoulder straps.....
-
I have a set of the 3 buttons from ATA. Once I do the gray and tan over the brown I will swap them out. Home stretch for the Pack! I measured 2.25" and made the capacitors and used a rubber grommet for the front and a plastic plug for the rear and shaved the lip off the plastic plug so it would site recessed. Threw some CA glue and then used a piece of 3/16 wood dowel for the tip. For mounting until I get some stand-offs I went and used wall anchor sleeves which I used on the Thermal Detonator and the Lab Tube. Mounted them to the top seed tray in a disorganized fashion! Painted and ready to go back on the seed tray! Put some decals on the radio which I may take off and use the official language of the empire set of decals..... I used magnets to mount the radio face and then Velcro for the tool box cover. Both work very well. The optional Lab Tube was mounted and painted so when it dries I can put everything together and all that is left are the shoulder straps!
-
Ok all that is left is to finish the radio, the lid attachment for the tool box and the shoulder straps. The blue AS19 Intermediate Blue goes on really well and is a flat finish. I used a light gray primer so it would not darken up.
-
It was a small troop with two cadets and two sandtroopers. We started this thing about wearing the fro-wigs and mustaches like Britannia did and well over on this side of the pond its a blast and I love explaining it! There were about 50 people present and the times got messed up so we only covered an hour. Having fun!
-
Another "quickie" in the afternoon on this build. On my way running around Frederick Maryland I went to a local Hobby store and there it was.........Zap-A-Gap, Zip Kicker and my Intermediate Blue Paint! SCORE! I finished painting the upper bottle/canister. Then just for the **** of it mounted the cistern. I figured out from pictures of all the inconsistent back packs that there really is no one place for it to go. I used thru bolting and for the top inner tube area put a screw with a nut on the other side of a plastic strip so I could feed the bolt thru the hole. After all that I added a screw from the underside of the seed tray to keep it stable. Here is the cheaper version of the "wet ones" you can buy from Target Thru bolting of the cistern The added safety screw..... Getting there......... This is the paint I will be using for all the black parts Radio Decals?????
-
Ok love so how many threads should I have hanging out there? Rick I replaced the bottles because they were not proportionally correct from the reference pictures I have looked at especially the top bottle next to the tool box and exhaust. Also someone chime in on if the top of the hanging canteen get painted black like the bottom?
-
The small black hose/tube from the canteen? Or the cistern?
-
Made some more headway today. Started mounting things on the seed trays. The Intermediate Blue looks really nice! Found the Wet Ones bottles I needed to replace the ones in the kit. Got to try out the Intermediate Blue paint. It goes on nice with a light followed by a heavy coat and its dry in 20 minutes. Outside it looks blue and inside it looks gray......If you go this route get a minimum of 3 cans. I ran out after spraying 1.5 bottles and the canteen with one can. Finished with an aluminum bracket mounted to the seed tray! Looking good so far! A little fun! Finally after looking over a bunch of pictures and asking around the cistern mounts above the seed tray. This should be fun to do!
-
Well it was time to get the backpack going..... Kit is from Charlie Mann Frame Opted for some aluminum strapping in lieu of the abs....and then attached the Back of the seed tray boxes to the straps Tool/Utility Box built Canteen Ready for paint! Radio......built storage bins and mounting for the MP3 player and Aker amp Exhaust Port is finished and just need the holes drilled and mounted to the seed tray/box cover Cistern assembled and it needs mounting then paint! Upper bottle finished and it too needs mounting and paint I found this paint that has a blue-gray tint so I will post pics of how it looks. With all this excitement on the back pack where I will have the radio chatter I needed to upgrade my amp/voice setup. My ast troop the cable going from the iComm to the amp decided to die. I gave it some thought and figured I would try out the speaker mic tips from TK10116.....fellow graduate of the academy. I had only one issue and it was 100% my fault. I dropped the mic tip and it broke. I found all the pieces and was able to put it back together! I mounted the amp and iComm using 3/4" black elastic webbing and then used zip ties on the extra wires. It works flawlessly and fit perfectly!
-
And so I made my and one other TD conversion's debut! Yeah we got a little carried away but what the heck! Just something about being dirty that feels sooooooo goooooooood!
-
Request 501st or Sandtrooper Section Access
TriumphTrooper8 replied to SethB6025's topic in The Barracks
Michael Perkins.......TD-10114 Requesting Sandtrooper Section access..... http://www.501st.com/members/displaymemberdetails.php?userID=17923 -
Well I suited up with help from my Jawa...........
-
and then there was a pile of stuff................
-
More and more and enough! Its all been touched!
-
Well the Acrylic fun has begun! I'm happy so far but I think it will need some grey or lighter sand color and the Fullers Earth to add that extra. All that is left are the biceps & forearms then weather the cloth parts, pouches and reassemble.
-
Well did some messing around with weathering on some spare parts. Not too happy unless I use the acrylics but I need to get a lighter tan/sand, light gray and a light brown and that should do it. This looks better but need the corrects shades Got the diamond sniper plate installed! And all the paint off the ab buttons! I do have the Fullers Earth and after I do the Acryic try it out with the hair spray method to add texture.
-
Helmet was broken down and painting and trimming began!
-
Well it has happened! I unpacked the TK for the last time. I laid everything out on m temporary work bench. I removed the shoulder bridges, white 1/4" elastic that holds the bridges down, drop boxes, holster, TD, sniper plate and then ground off the ab button cover. Remove the paint on the left side button strip. Put the diamond plate on. Remove the stripes on the helmet traps. Move the brow trim up and more curved "move along" look! Swap out the white elastic shoulder straps for the cloth ones. Then weather away!
-
Ok guys where or is there a certain point where the diamond knee plate lines up on the shin? I'm getting ready to take my TK one off and put the new correct one on.
-
Is it possible to shave down the bottom button on the 4 button strip? I know the CRL for both levels indicates a minimum of 3 and a max of 4. I have whire shoulder elastic under the bridges.